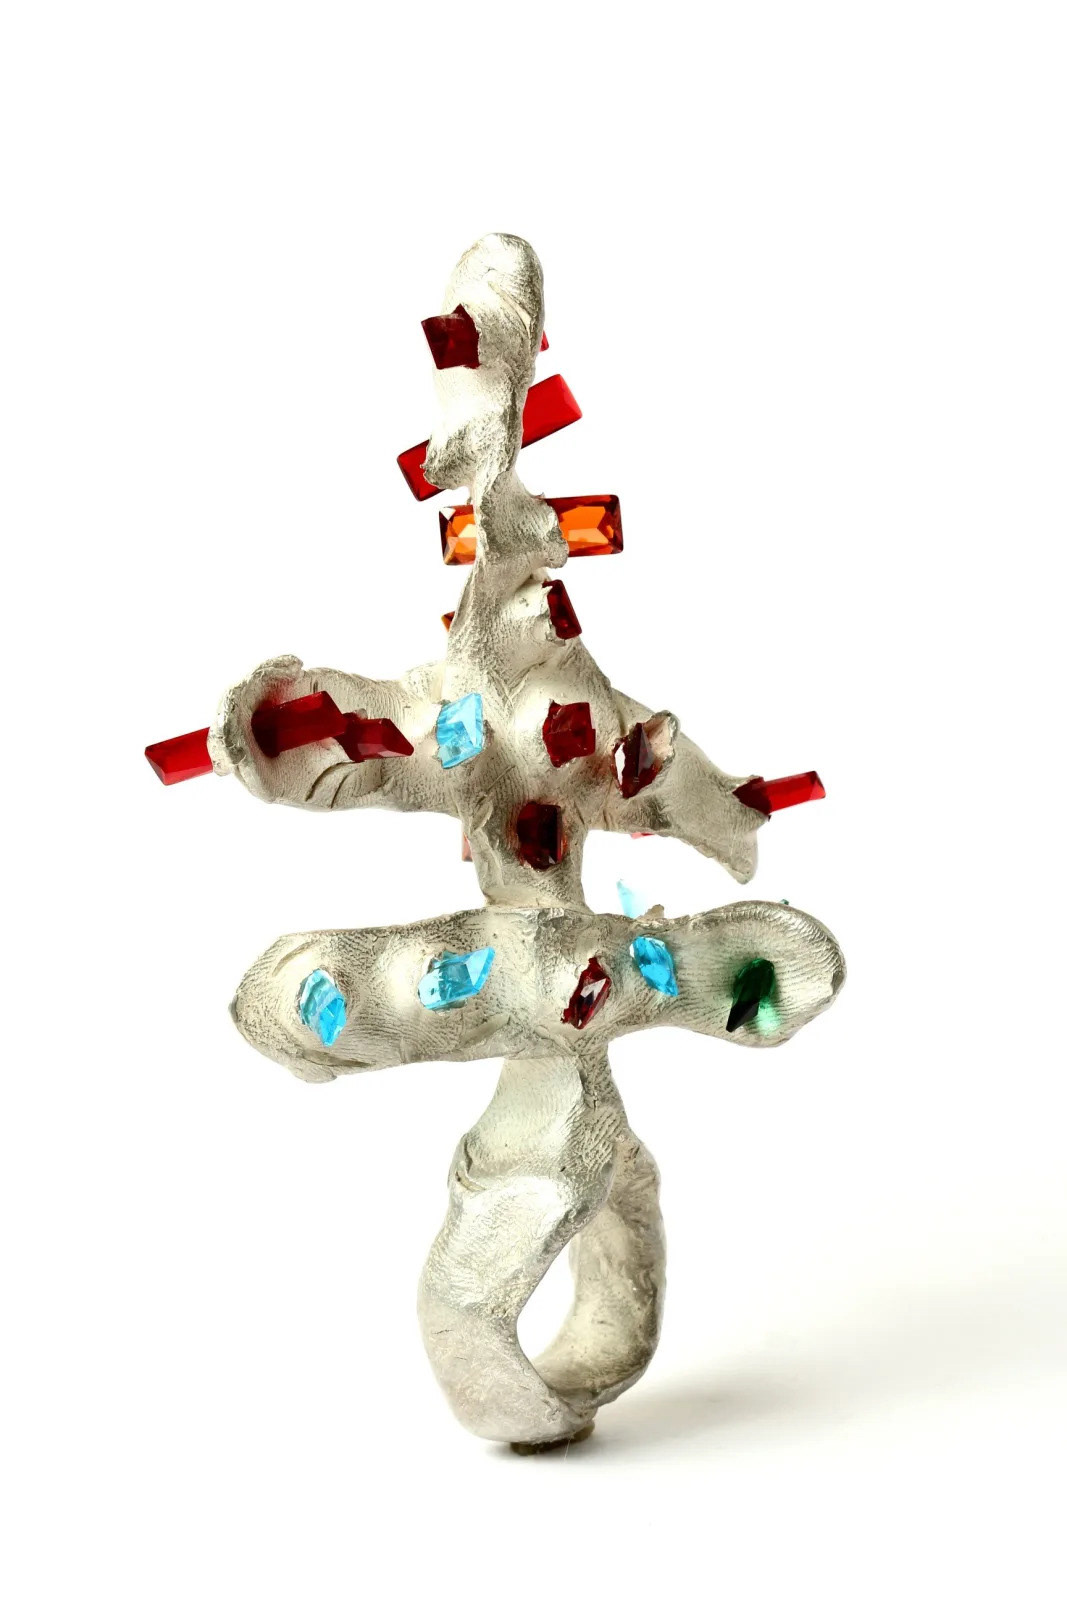
Living Memories: Sentimental Jewellery Reimagined with Bacteria
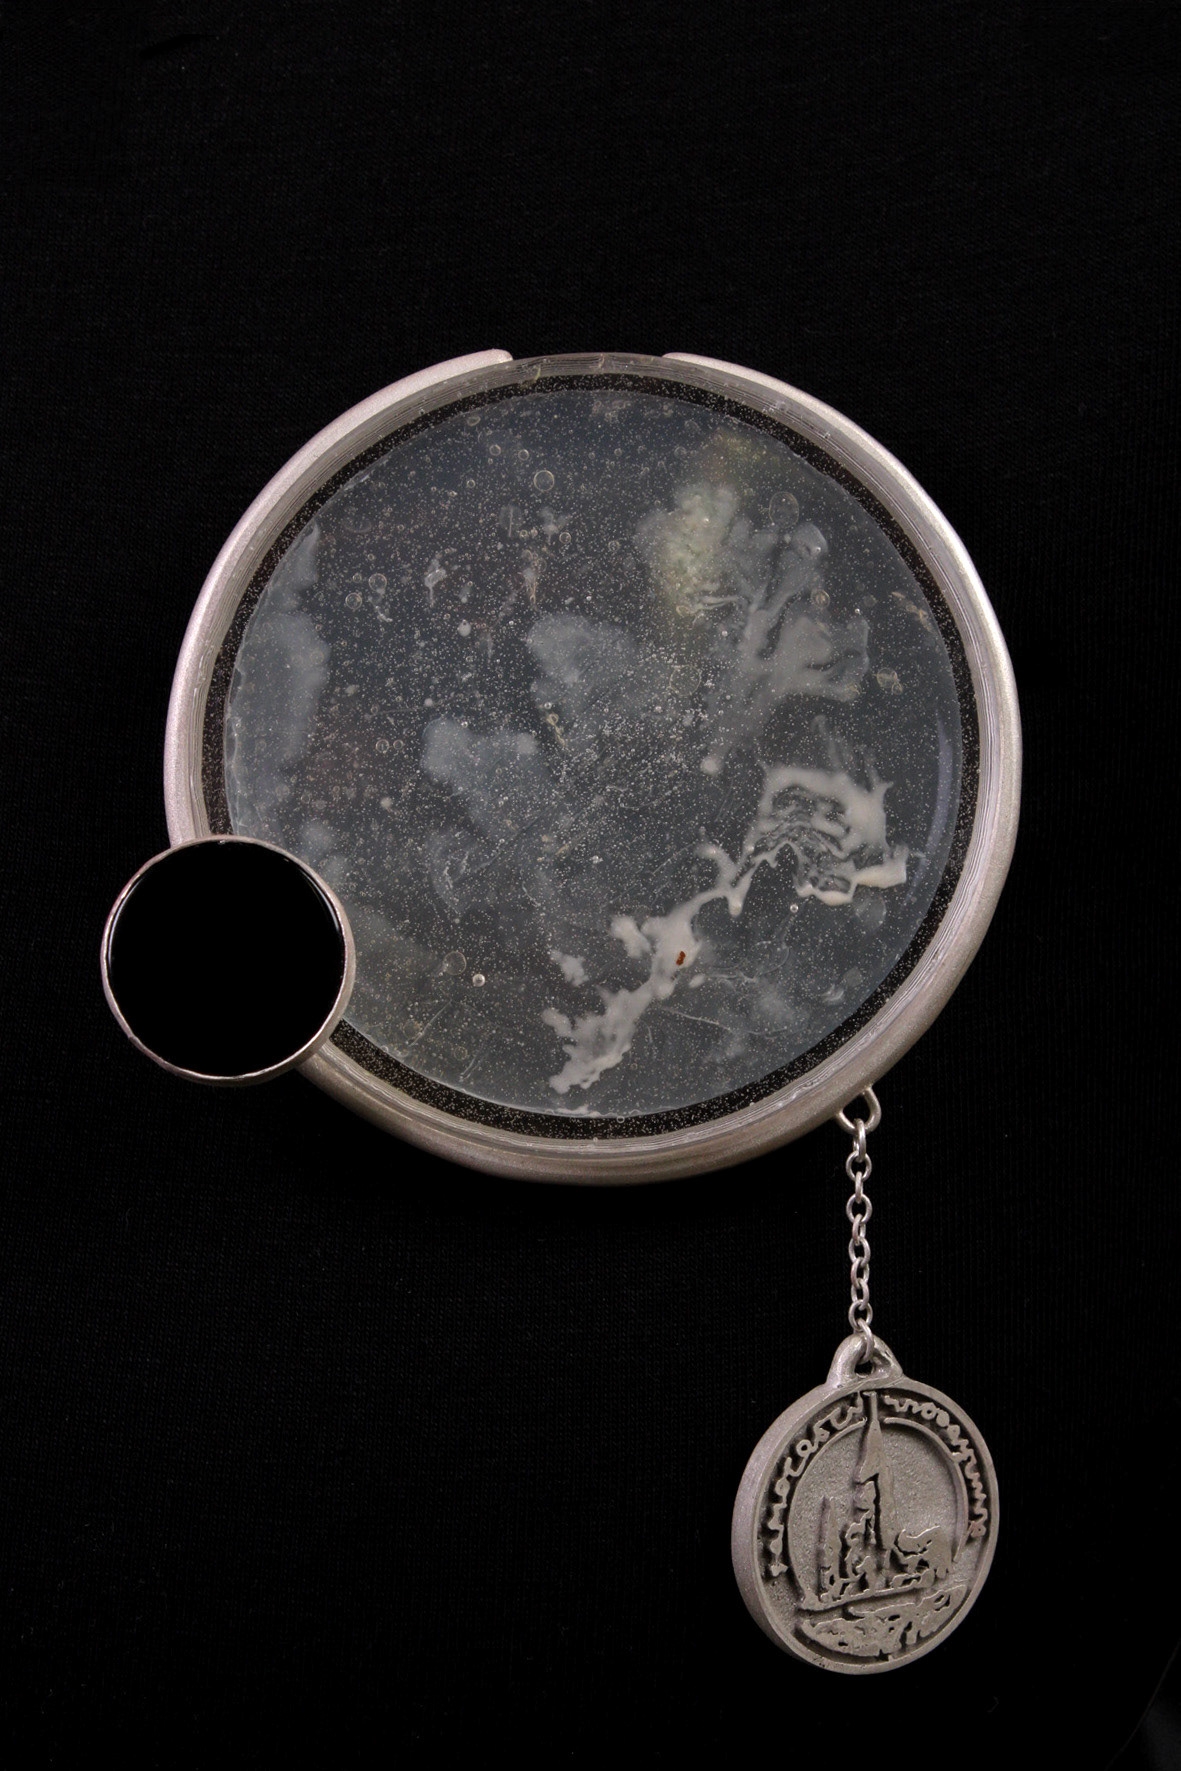
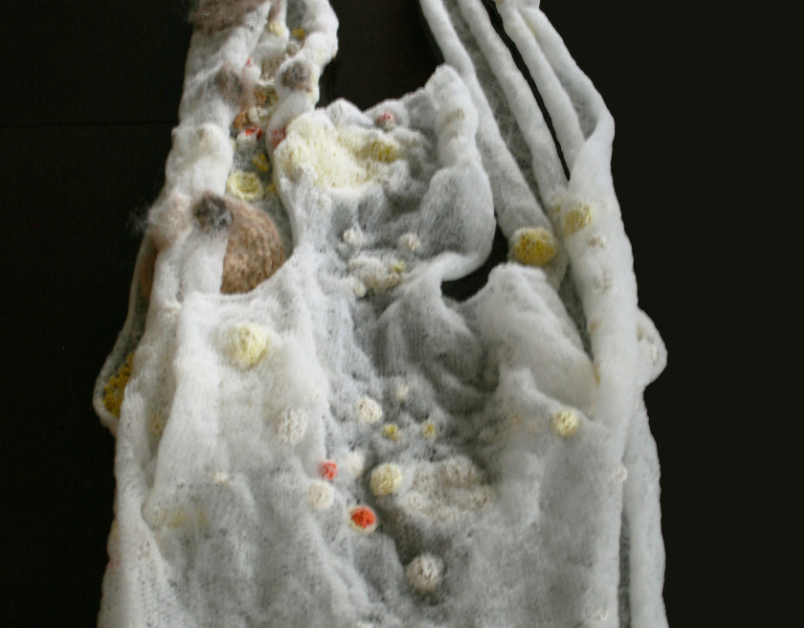
Photo Credit: Oonah Illingworth
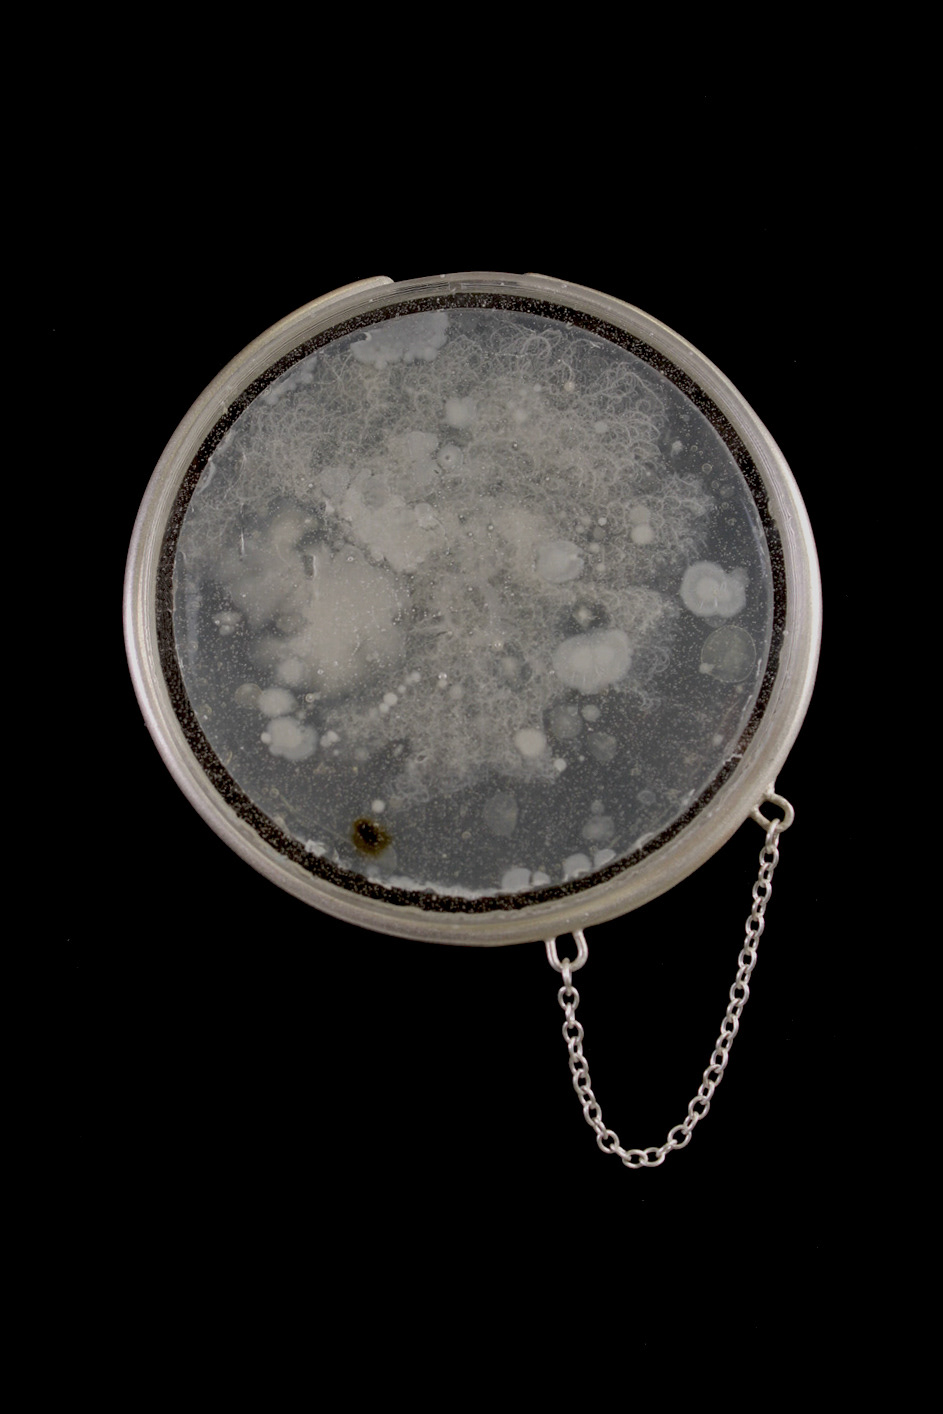
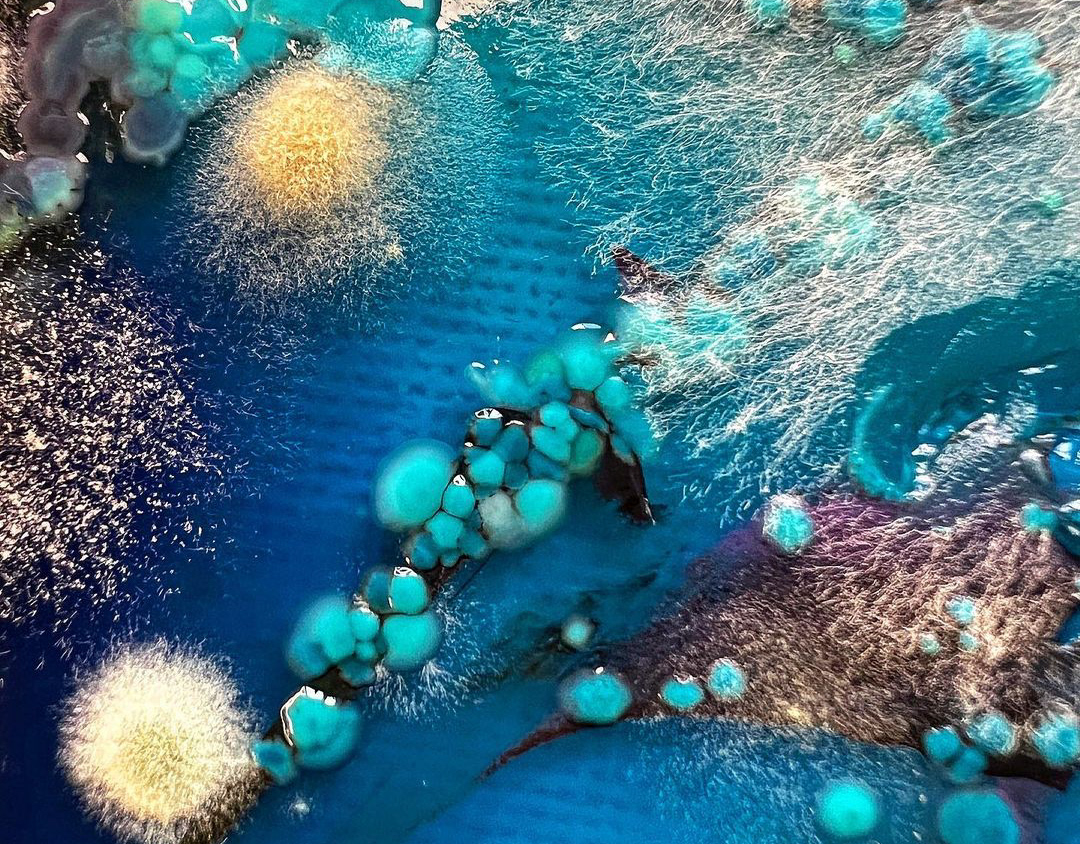
Photo Credit: Oonah Illingworth
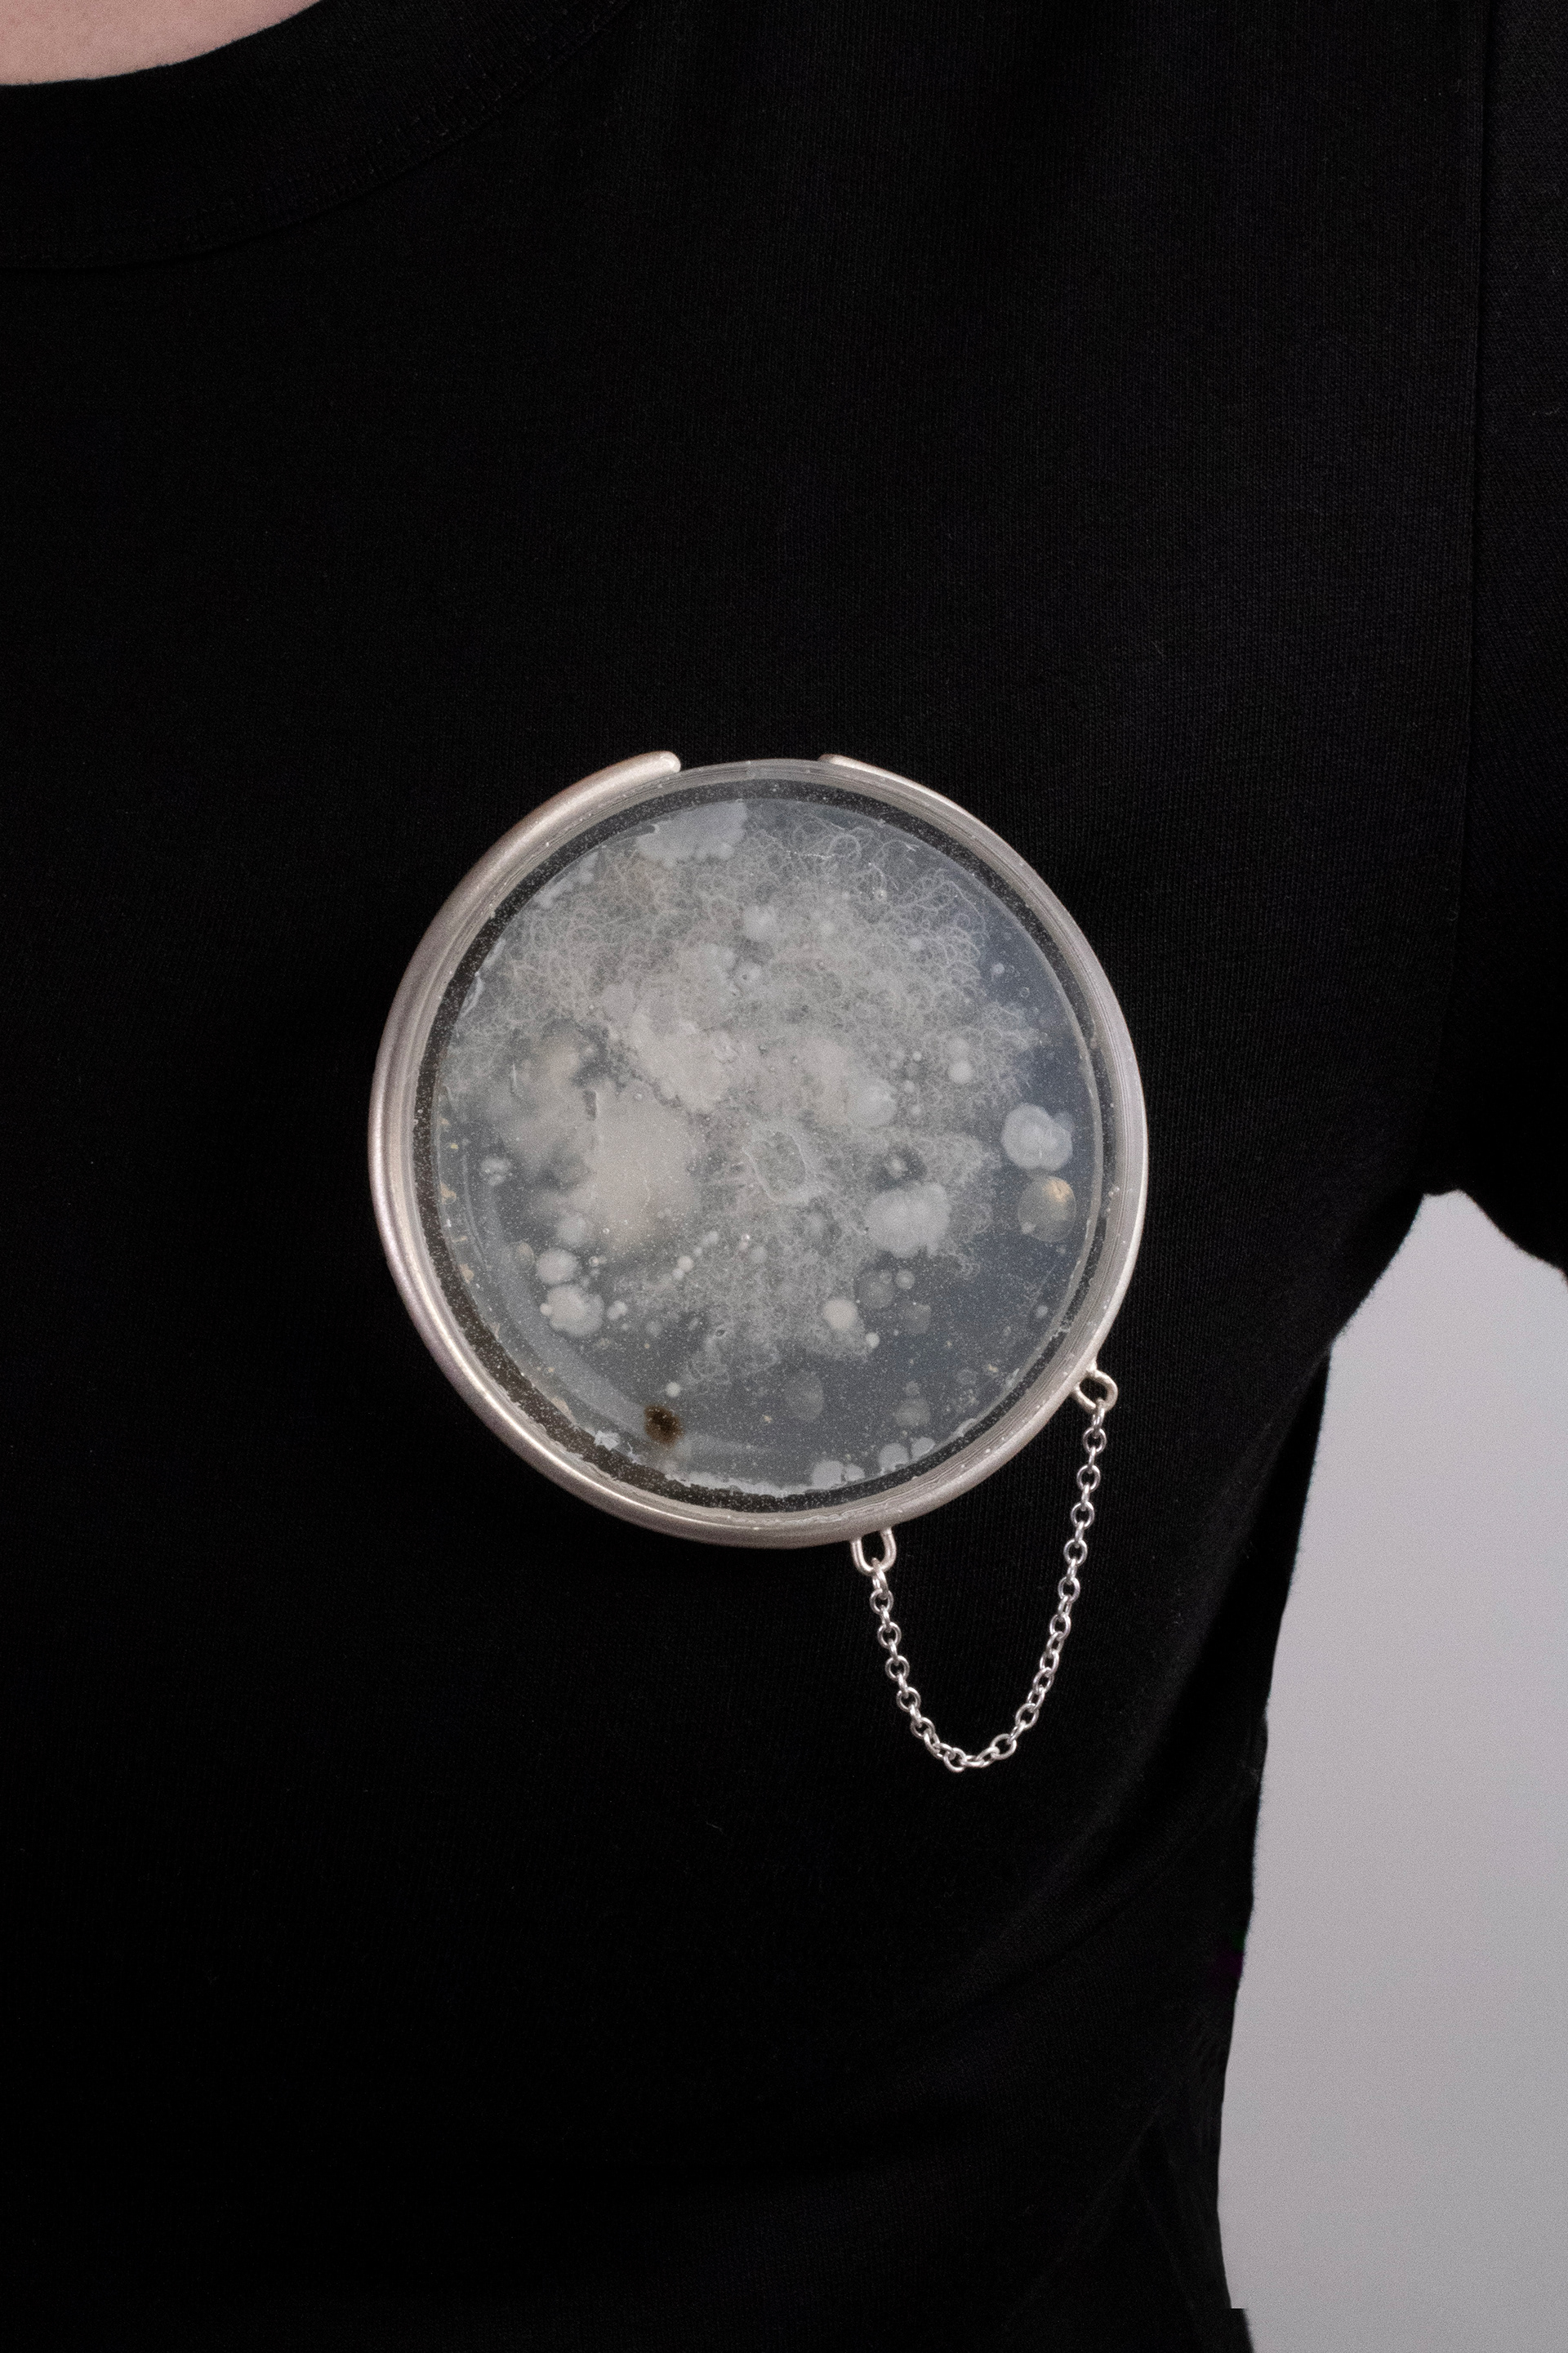
Photo Credit: Oonah Illingworth
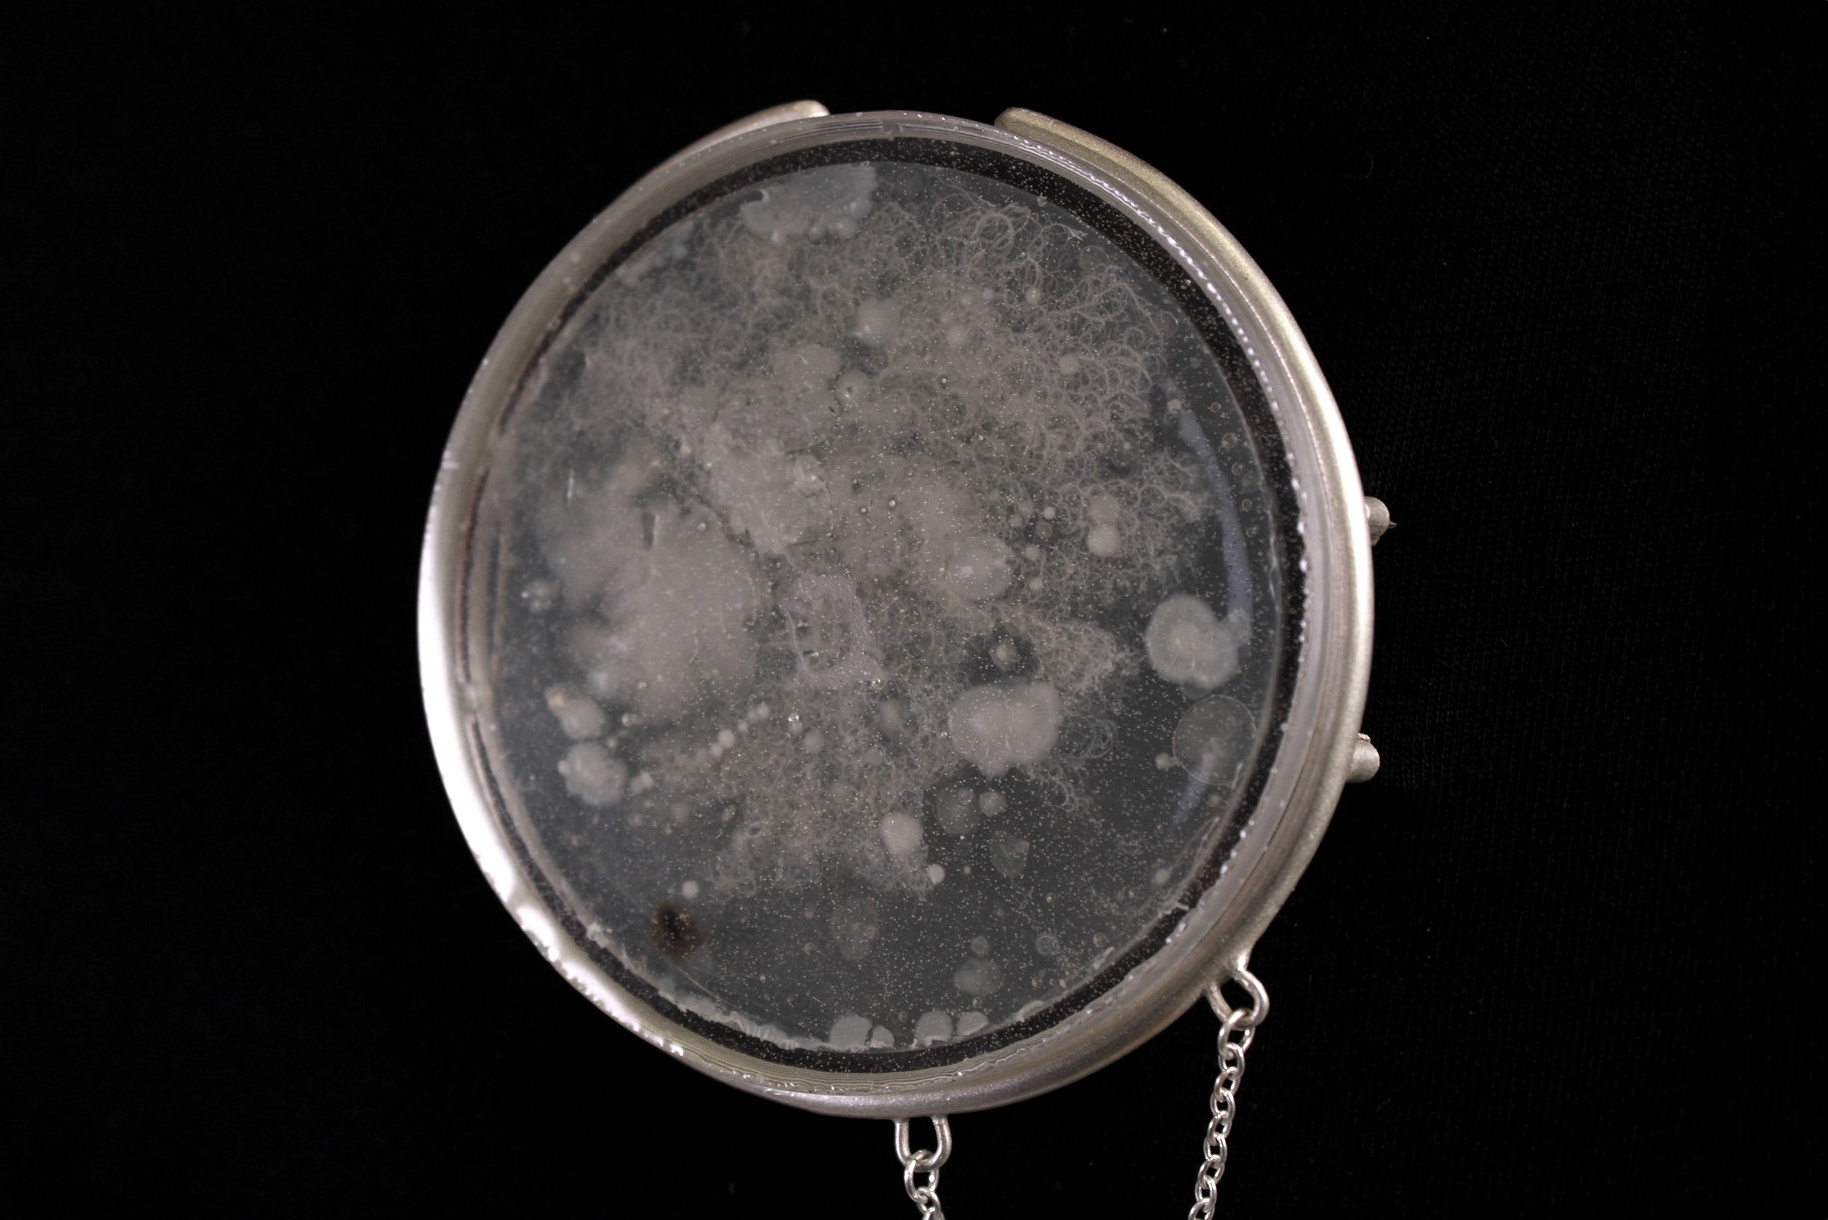
Photo Credit: Oonah Illingworth

Recycled Solid 925 Silver, Nutrient Agar, Bacteria, Black Onyx, Stainless Steel Pins
Artist Statement
My work explores the intimate narratives embedded within sentimental jewellery, using bacteria as a central material to capture the unseen past of precious heirlooms. This series of brooches is inspired by objects passed down from my grandparents—a silver bangle belonging to my grandmother and a pair of silver and black onyx cufflinks worn by my grandfather. These objects carry personal significance, representing the milestones in their lives.
The bangle, a graduation gift that symbolised a move in my grandmother's career, taking her from Finland to Merseyside, indirectly leading to her meeting and later marrying my grandfather. The cufflinks were an engagement present from her to him, given before their wedding in Pälkäne, Finland, in 1959. These pieces are more than physical objects; they represent shared family histories.
By cultivating and showcasing the bacteria collected from these heirlooms, I aim to highlight the invisible traces of human interaction—microbial echoes left behind by touch. This unconventional material becomes a way of documenting the life and stories of these objects, offering a new perspective on preservation and memory.
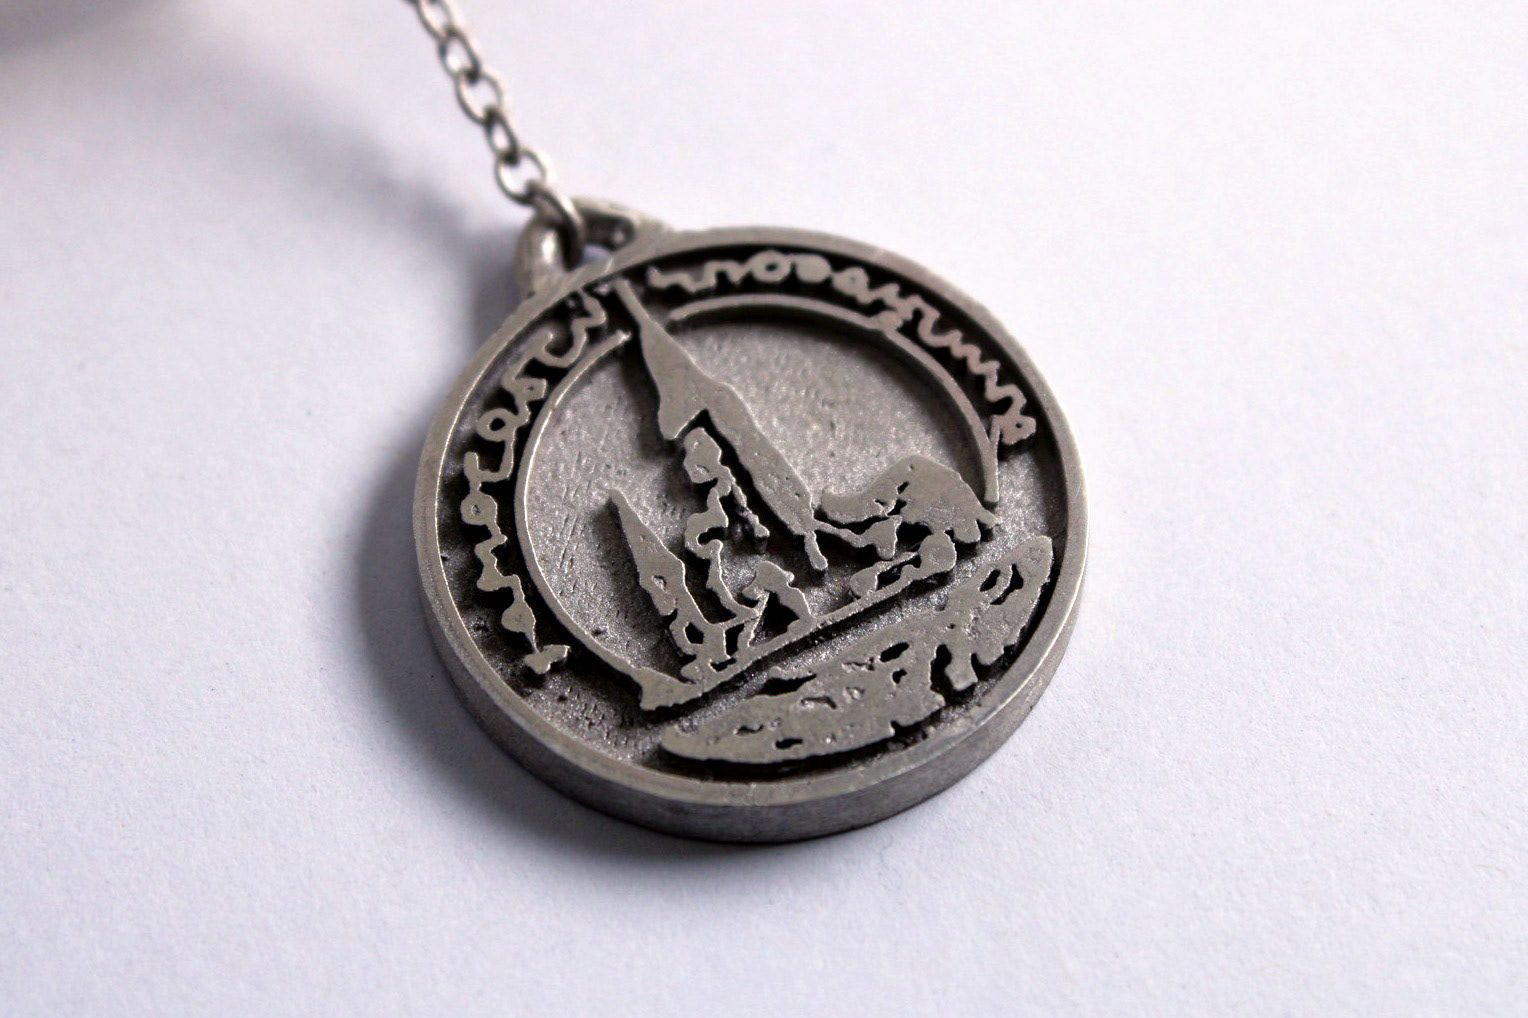
To complement the brooches, I have included hanging elements with motifs taken from the original designs and official documents, contextualising their sentimental significance. For instance, a silver cast of a stamp from my Grandparents' wedding certificate. This depiction of the church in the stamp where my grandparents were married provides a tangible link to their history.
Through this work, I aim to challenge conventional notions of value and memory in jewellery, integrating science and sentiment to transform familiar materials into carriers of personal and collective histories, serving as a contemporary approach to storytelling.
Reflection
Summary:
Project Goals and Challenges:
- Aimed to create a refined piece of jewellery incorporating bacteria.
- Focused on learning, adapting, and identifying areas for improvement.
Skills Developed:
- Learned the basics of CAD, enabling me to create tools for my work (e.g. silicone mould cottle).
- Gained experience working with silicone for custom resin moulds, opening possibilities for experimenting with forms, shapes, and textures in S&R.
- Developed an understanding of 3D printing and casting using castable wax resin.
- Have found a way to remove the agar from the dish
- Have worked on a larger scale than I am used to
Experimentation and Outcomes:
- Experimented with CAD designs printed in castable wax resin. Although the outcome did not go to plan, the process improved my understanding of 3D printing possibilities and limitations.
- Explored metal finishing techniques, moving away from default high-polish finishes to sandblasting for a contemporary and medical effect.
Reflections on Final Outcome:
- Recognised flaws in the resin plate containing bacteria due to inadequate sanding and filing of 3D prints.
- Addressed visible grooves by polishing resin, a technique previously not used.
- I am actively working to address these flaws in refinement, and I am treating resin like a new material specialism.
- Recognised problems with the brooch mechanism, and now know how to fix these problems in future designs.
- Should have changed my CAD design to allow for a more seamless design - removing the space for the bezel at the top of the brooch where the opening is, allowing for a more custom and refined fit.
- Found photography difficult, so with S&R I might collaborate with a photographer to help me produce professional photos
Overall Takeaways:
- The project wasn’t as refined as I had hoped, but provided essential learning experiences and helped me address knowledge gaps.
- Broadened perspectives on design, materials, and finishes for future projects.
- Has shown me that using CAD can be part of the making process, and help me design the tools and features that I want.
Throughout this project, I have challenged myself with new techniques and materials. I knew from the beginning I wanted to create a highly refined piece of jewellery incorporating bacteria. While I don’t feel I’ve achieved this yet, I believe the workflow I’ve developed and the foundational steps I’ve taken are crucial for eventually reaching that goal. This project for me has become all about learning, adapting, and identifying areas for improvement.
One of the most valuable skills I’ve gained is the basics of CAD, which has enabled me to design the essential components for my final piece. CAD gave me the ability to think more systematically about the making process, including creating tools such as a cottle for silicone moulds. Exploring silicone for custom resin moulds has been another valuable skill developed. Despite never having worked with silicone before, I’m glad I took on the challenge, as it has opened up possibilities for experimenting with new forms, shapes, and textures. The process has shown me that there’s significant potential to refine and push these designs further in future projects, however, I am glad that I found a way to remove the agar I made from the petri dish while keeping it still intact.
As well as that, I had the opportunity to experiment with having my CAD designs 3D printed in castable wax resin by Print City. Although the outcome of the casting did not turn out as I had hoped, I’ve learned about the process itself— the possibilities and limitations, especially with the time it takes to print these. This understanding will definitely be useful for Synthesis and Resolution, as well as for projects after graduation. These experiments have helped me address gaps in my knowledge and skill set, whether in CAD design, working with silicone and resin, or understanding mechanisms. While I do not think that the outcome was as refined or perfect as I would have liked, I know that am in a better position than I was at the start of the year, when I had never tried these techniques before.
Another area I have experimented with has been metal finishing. Previously, I always defaulted to high-polish finishes in my work, as it felt safe and familiar and I knew how to do this. However, this time I chose to experiment with sandblasting, which I found gave my piece a contemporary and medical effect that fits well. While it was different from what I normally so, it has broadened my perspective on how finishes can communicate narrative in a piece.
Looking at my final outcome, there are many aspects of my piece that I would change as I am unsurprisingly, not happy with my final outcome.
The Resin
To start, the resin plate containing the bacteria was scratched. I had made the mould for the epoxy resin using a 3D printed object and silicone. On my first attempt at this, I realised that I had not filed my 3D prints enough, and so I went back and remade these moulds using another print that I had filed down significantly more. While I am glad that I did this, and was a step in the right direction, I clearly still did not file the piece enough, and had several grooves still visible on the resin. This forced me to polish the resin—a process I had never attempted before. During UC2, the silicone moulds I was using for my bacteria stones were already manufactured and had that perfect smooth finish. As well as that, the back was not going to be on show, and fit perfectly into the wax cast, therefore any sort of polishing was not necessary.
After my final tutorial with Geoff and showing him the scratches on the back of the resin from polishing, he suggested that revisit the polishing process on an excess piece of resin that I had. This time I took even more care with the sanding process and used different tools for polishing. As seen at the bottom of the ‘Making my Final Piece’ page, I managed to get a better result, without the harsh scratches like the ones seen on the final outcomes. However, I was still very reluctant to touch my final outcomes, as I was not confident enough in myself to not accidentally scratch it during the polishing process.
If I were to polish these pieces again, I would go back to the start and make sure to polish the 3D prints before using the silicone, using sandpaper all the way up to 3000 grit, as I had only used up to 1000 grit. This would minimise the time and effort needed for polishing the resin later and make the process less daunting and more manageable.
Another issue with the resin was that the pieces had lots of small air bubbles on the surface. As mentioned in my ‘Making my Final Piece’ page, I had attempted to remove as many air bubbles as possible, however, a vacuum would be the best way to remove the air bubbles after mixing the epoxy together. From my experience with resin during this project, I am reluctant to use resin again on these ‘large scale’ pieces. However, I know that using the actual bacteria is an incredibly important part of my practice, and this is currently the only way I know how to encapsulate it, and so I do just have to get better at polishing resin. I essentially need to treat resin as a new material specialism.
I need to think about my time working with metal as a material specialism, which I have been using for 3 years now, and compare this to working with resin. Every year I produce better results with the time, effort, and practice I put into each piece. This is my first time using resin on this scale, so and I need to approach it with the same persistence and patience as I have with metal. While it’s frustrating as a perfectionist to see such visible flaws in my work, I also understand that failure and learning from mistakes are an integral part of the process. By looking at these setbacks as opportunities for improvement, I can continue refining my techniques and move closer to achieving the high standards I set for myself.
Soldering and Sandblasting
Another key issue with this project was my soldering. I had many issues with soldering the loops for the chain to attach to. Initially, I had attempted to do this without asking for help as I thought I would be able to simply solder the two pieces together. After the many failed attempts, I am glad that I got feedback from the tutors about how to do this correctly, rather than continuing to go in blind, which was making me increasingly more frustrated. While I usually like to work out issues on my own as I feel as if I can learn well this was, this particular situation highlighted the importance of asking for help rather than persevering on my own when something isn’t working.
While most of the prongs coming off the outer bezel went ok, I noticed inconsistencies in the overall quality of my soldering. This was my first time soldering pieces of silver wire together, and while I had measured and filed all of the pieces accurately, the prong that held the black onyx was not correctly soldered. Before sandblasting the solder that had look as if it had run correctly, however, it clearly had not, and the force of the sandblasting exposed the weak join. Once again, mistakes like this are fixed by practice and precision, something I will have the chance to do further in Synthesis and Resolution and over Christmas.
The setting for the black onyx was also ruined by the sandblaster. As seen in my ‘Making my Final Piece’ page, the filing was inconsistent and was too thin on one edge of the bezel, causing it to be pushed and ‘ripped’ by the sandblasting. Initially, I had tried to use the small sandblasting gun to create the surface effect, however, I found that it was much harder to use, and I could not easily press the button with the thick gloves on, hence why I used the foot pedal and the larger gun. In hindsight, this may have been what caused the tear in the bezel. I may have tried to use the smaller gun first on that part, which was then sandblasted again with the larger gun, exerting more pressure on the part that had already been sandblasted.
Reflecting on this, I realise that these issues could have been avoided with more careful clean-up. In the future, I will pay more attention to filing the bezel wire consistently, especially since it’s already only 0.3mm thick, and will focus on refining my sandblasting technique to minimise pressure on delicate parts. Despite these setbacks, I believe the sandblasted finish complements the polished black onyx, adding a contemporary contrast that helps with the overall aesthetic.
This experience reinforced how critical precision and technique are in making my pieces. While the flaws in my final outcome are frustrating, they also serve as valuable learning opportunities. Each mistake has highlighted areas where I can improve, from soldering techniques to filing and surface finishing. By acknowledging these challenges and actively working to address them outside of uni, I feel better prepared for making in S&R.
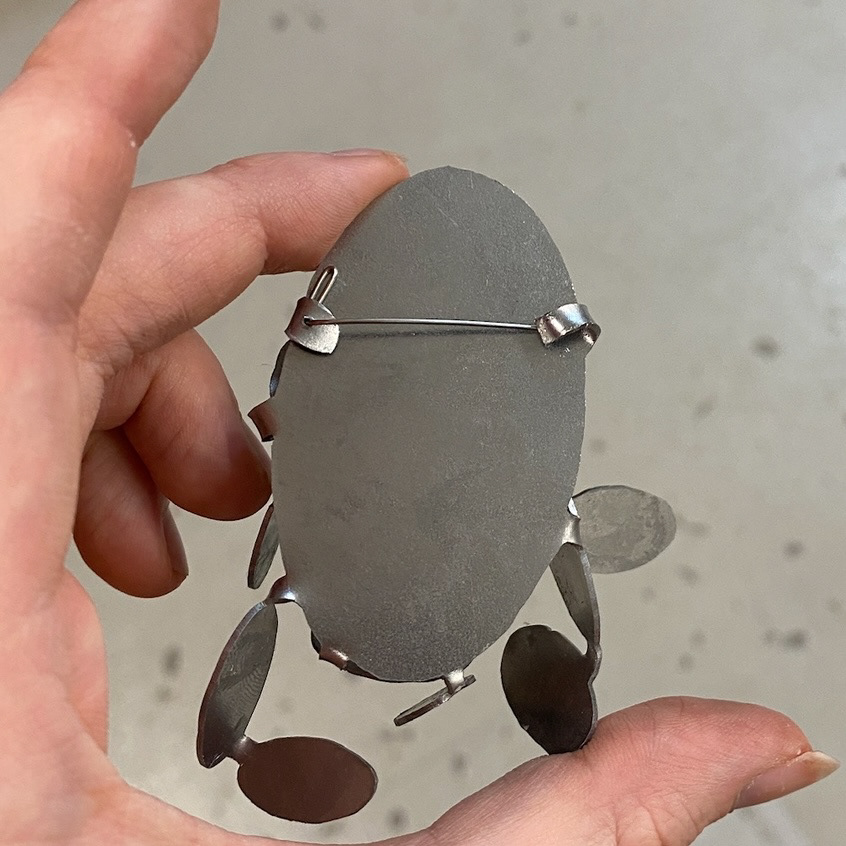
The Brooch Mechanism
When it came to the brooch mechanism, I am glad I decided to use the same mechanism that I used in UC2, as it is secure, adds tension and the long steel pins compliment the soft silver bezel. However, upon reflection, I recognise that the way I executed the mechanism could have been more refined. While functional, it lacked the seamless integration and refinement I was aiming for.
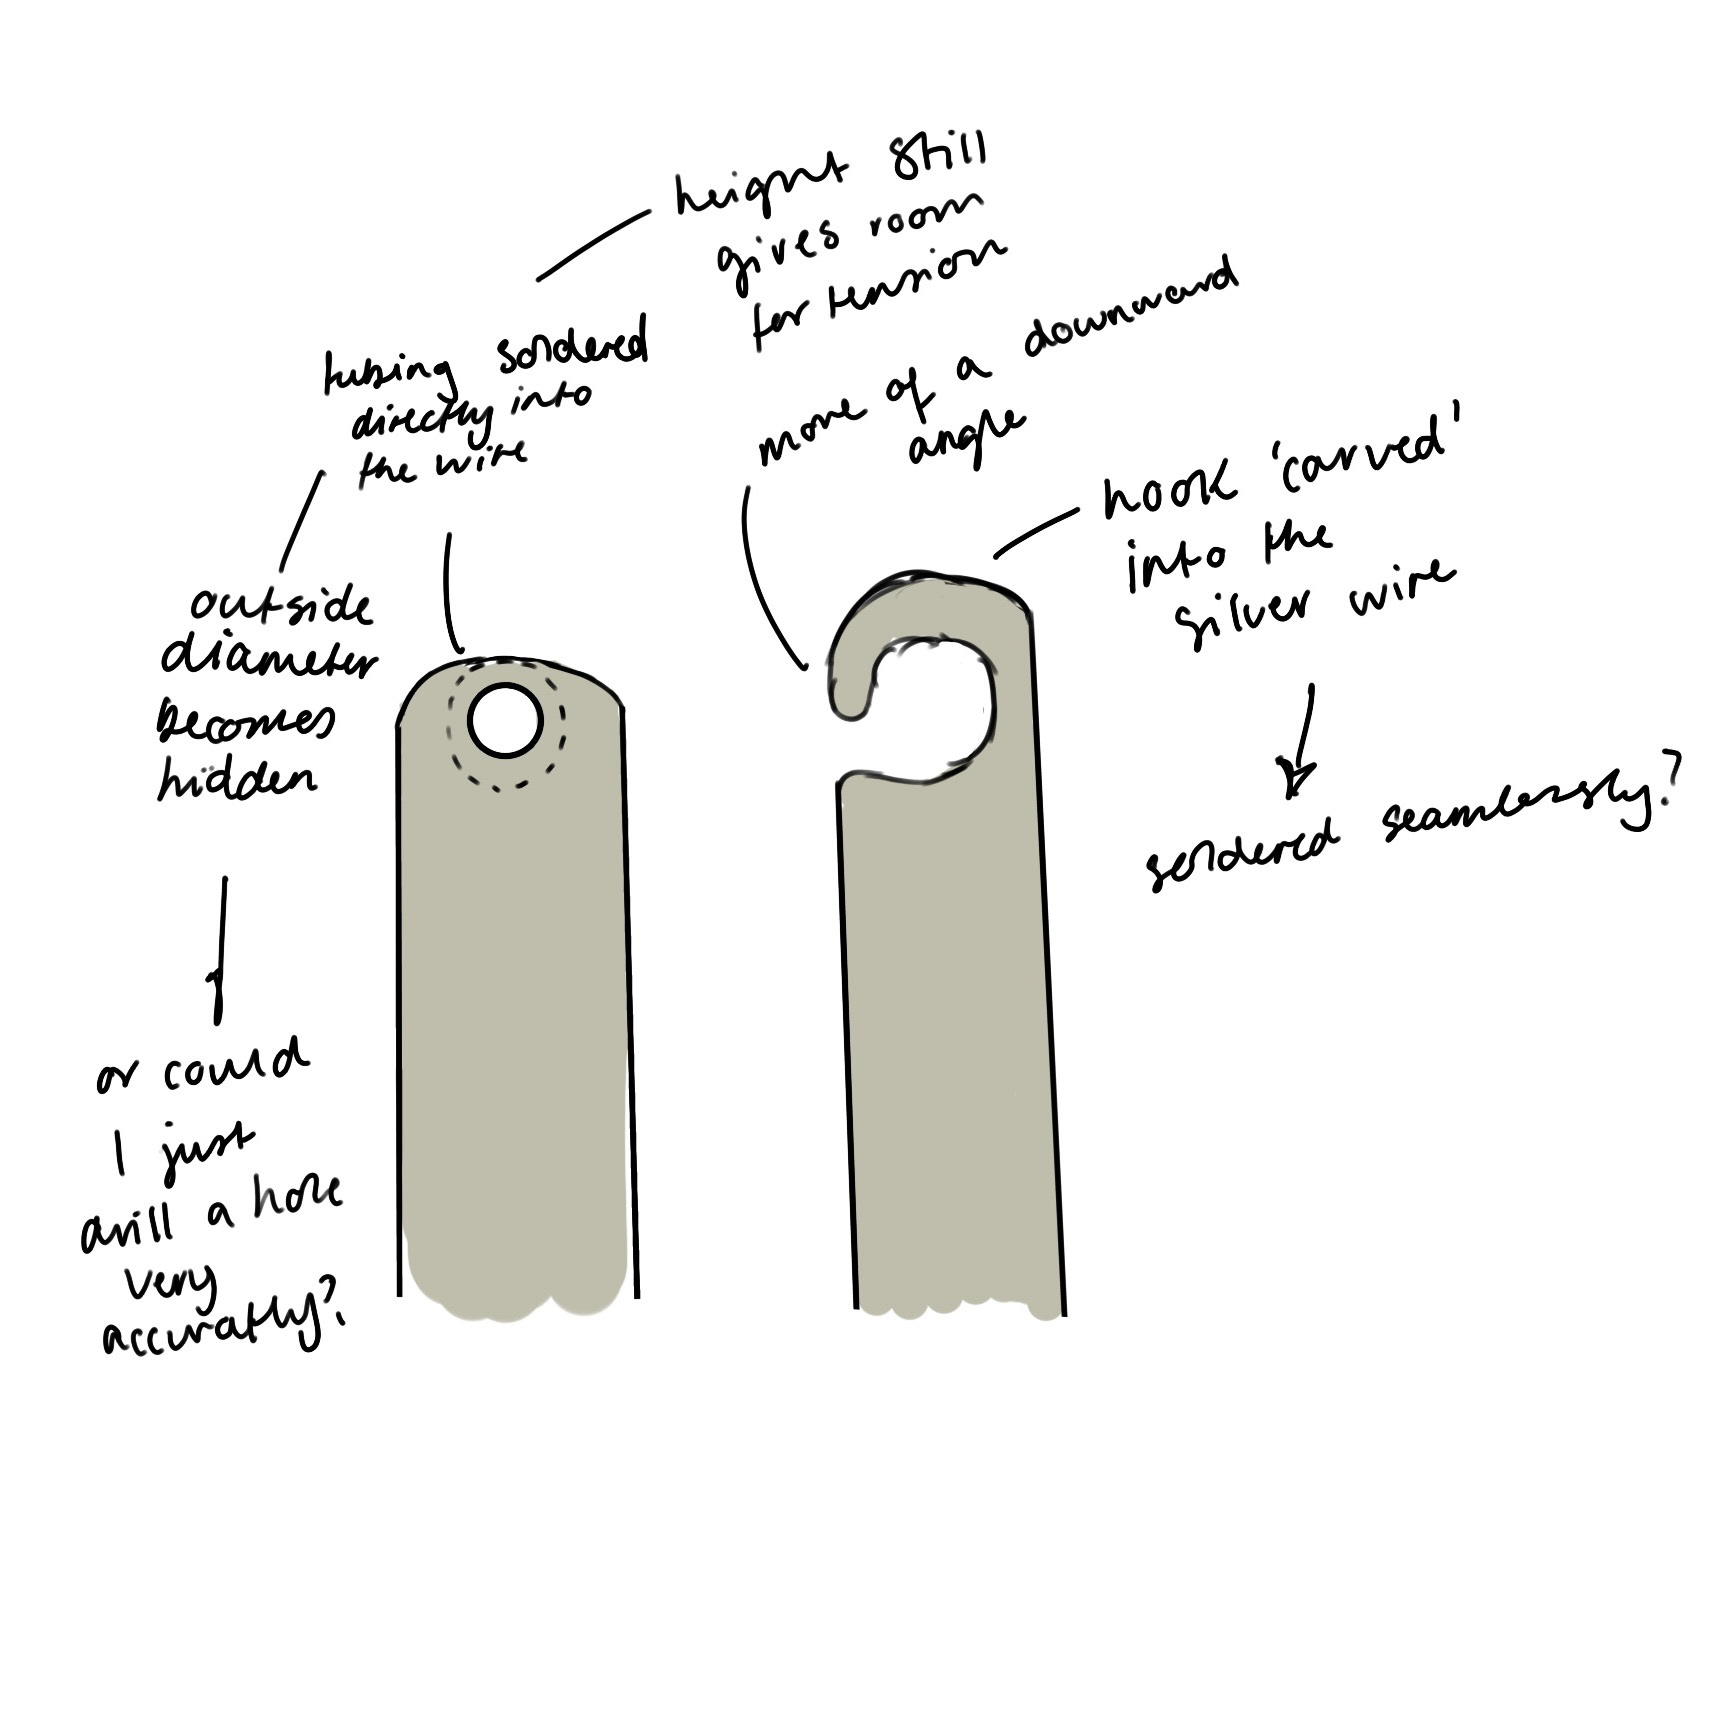
Instead of designing the mechanism as a cohesive part of the piece, I simply soldered the tubing and hooks directly onto the silver prongs extending from the bezel. While the hooks appear reasonably well-placed (aside from some problems with alignment shown in my ‘Making My Final Piece’ page), the tubing feels very visually disconnected. Ideally, the tubing should have been set further into the silver prong, blending in with the surrounding silver. This change would have created a more polished and integrated design.
However, altering the placement of the tube on one side would have created an imbalance in the overall design, in both aesthetic and functional ways. To keep the design functional and match, the hooks on the opposite side would also have needed redesigning. I created a simple sketch to visualise what this redesigned mechanism might have looked like, and to me, it looks far more streamlined and refined compared to my final outcome. As well as that, the hooks themselves could have been improved. They were too short and therefore were not able to curve downward as much as they should have, which compromised it’s ability to securely hold the wire in place. While still functional, I think these small changes could have significantly elevated the overall quality of my piece.
Looking forward, I plan to experiment further with mechanisms, exploring ways to integrate them more seamlessly into the design while still being functional.
I also need to think about the placement of my brooch mechanisms. As I decided to include a mechanism that I have used before, I followed the same steps as I had in UC2, and modified the scale to fit these brooches. However, after receiving feedback on my mechanism by Patrícia, I was made aware of some changes I could make to make sure that the brooch functioned as well as possible.
To start, I had designed the hooks at the end of the brooch to be slightly closer together than the tubing at the other end. I did this based on feedback from UC2, and knowing that it had worked for those brooches, I did not see a reason to change this. However, I was then made aware that with double-pin brooches, the hooks should be entirely parallel to the tubing. The change in width can affect the steel pins over time, and therefore reduce the tension in the pins.
Another adjustment would be to have the pins facing downwards rather than across, as this makes it easier to attach the brooch to clothing and reduces the risk of having the pins crossing, rather than hooking into place. Patrícia also suggested that if I was to continue with a circular shape in future designs, then a circular pin might be a better design choice. The pin would have been hidden in the surrounding bezel, removing the need for adjustments to make the pins even while wearing the brooches. While I do like how the straight steel pins contrast the circular bezel, I can appreciate that a circular mechanism would have worked very well within the design.
Thankfully these changes are all cosmetic, and now that I know this, I can take this into Synthesis and Resolution to help refine these mechanisms.
Karl Fritsch, Ring, 2024
I find brooch mechanisms hard to make, yet I continually gravitate towards designing brooches. I feel as if this is because of a couple of reasons. By the end of this course, I want to be confident in making brooches, as they are a staple in the work of many art jewellery practitioners—a career path I am considering. Making a design into a brooch does make it more wearable than say, an art jewellery ring, for example, like the rings made by Karl Fritsch.
For me, the idea of creating something that is realistically wearable is important to me. Not only does it help prepare me for life after graduation if I were to go down a traditional jeweller route as well as an art jewellery route, but it is important in terms of the concept of my work. My work revolves around the idea that I am transforming something perceived as gross and disgusting, into something of beauty and complexity. I want the pieces to be physically worn and interacted with, encouraging the wearer to confront and reconsider their emotions towards bacteria. I feel as if this is far more likely to happen if someone is physically wearing these pieces and interacting with them on a daily basis, rather than creating a sculptural jewellery piece that remains static, for example, in an exhibition setting.
I am also drawn to the technical challenge of creating something wearable and functional. Making brooches requires thinking about multiple factors at once, the aesthetics of the brooch, the practicality of the mechanism, and the overall comfort and security for the wearer. I find this technical challenge rewarding, even though it often leaves me feeling frustrated. Each brooch mechanism I design teaches me something new, whether it's about soldering, proportions, or alignment. These lessons, which are often frustrating in the moment, are crucial for development and creating a flawless brooch. Comparing the first brooch I made in L4 with my most recent, just reiterates that practice is key.
First brooch made

Most recent brooch
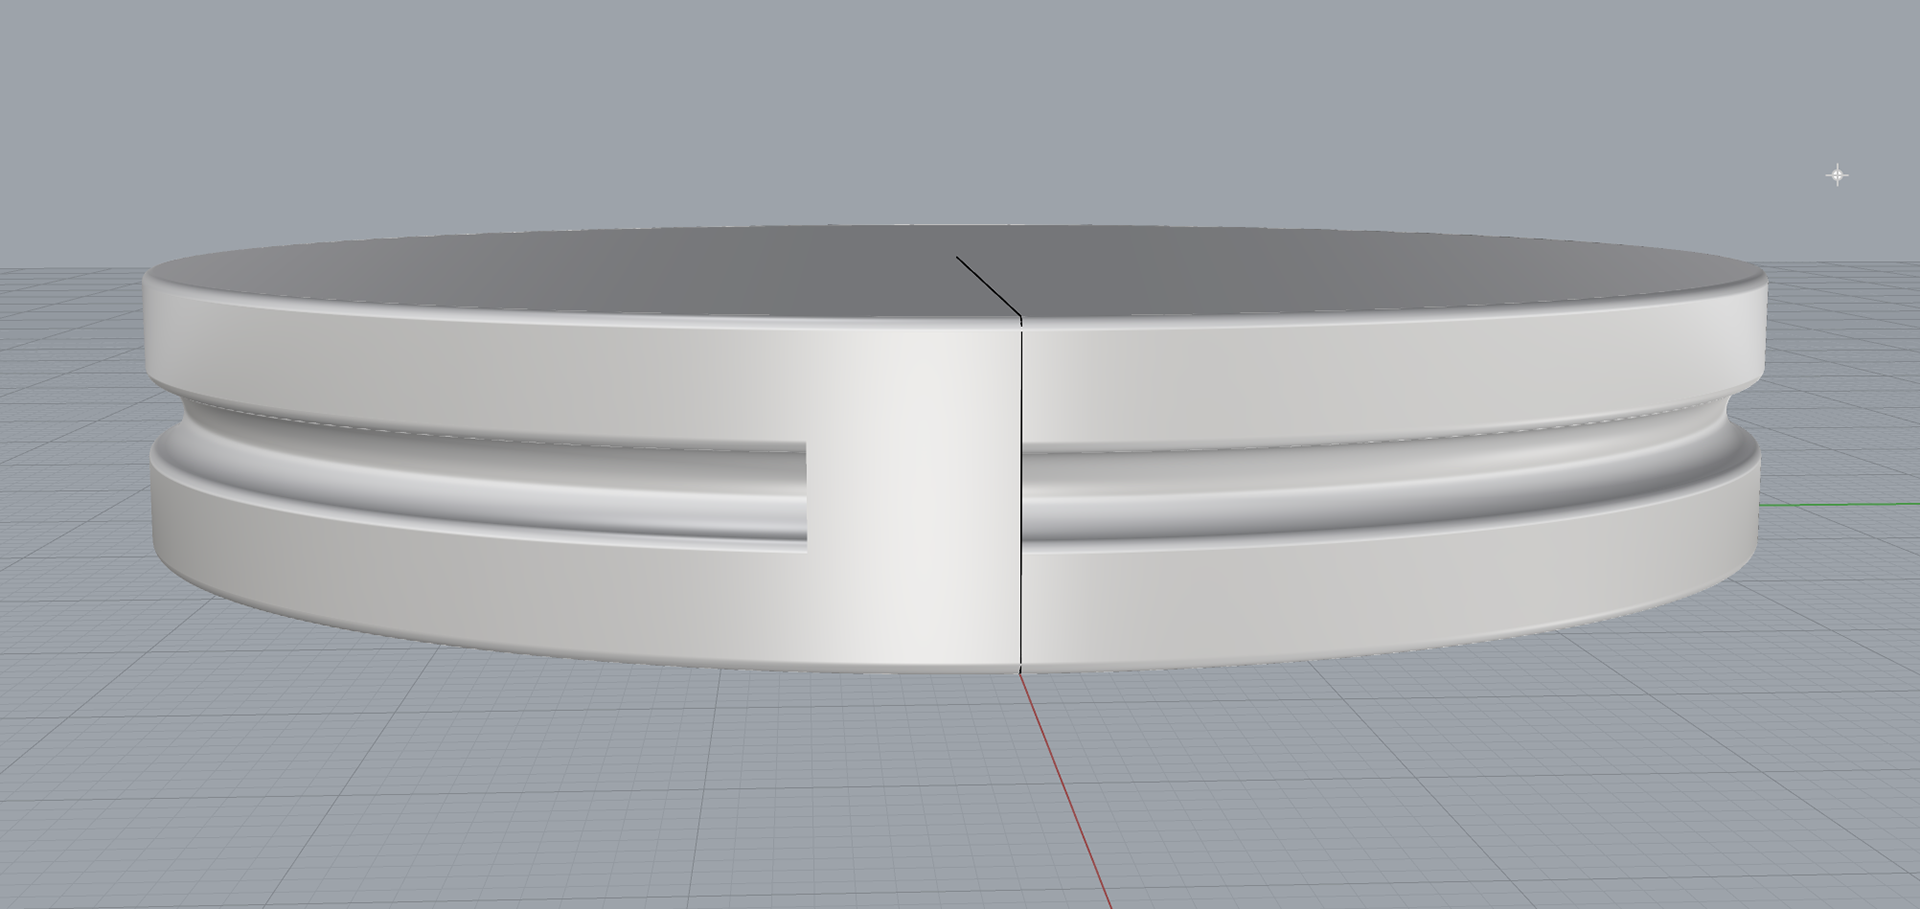
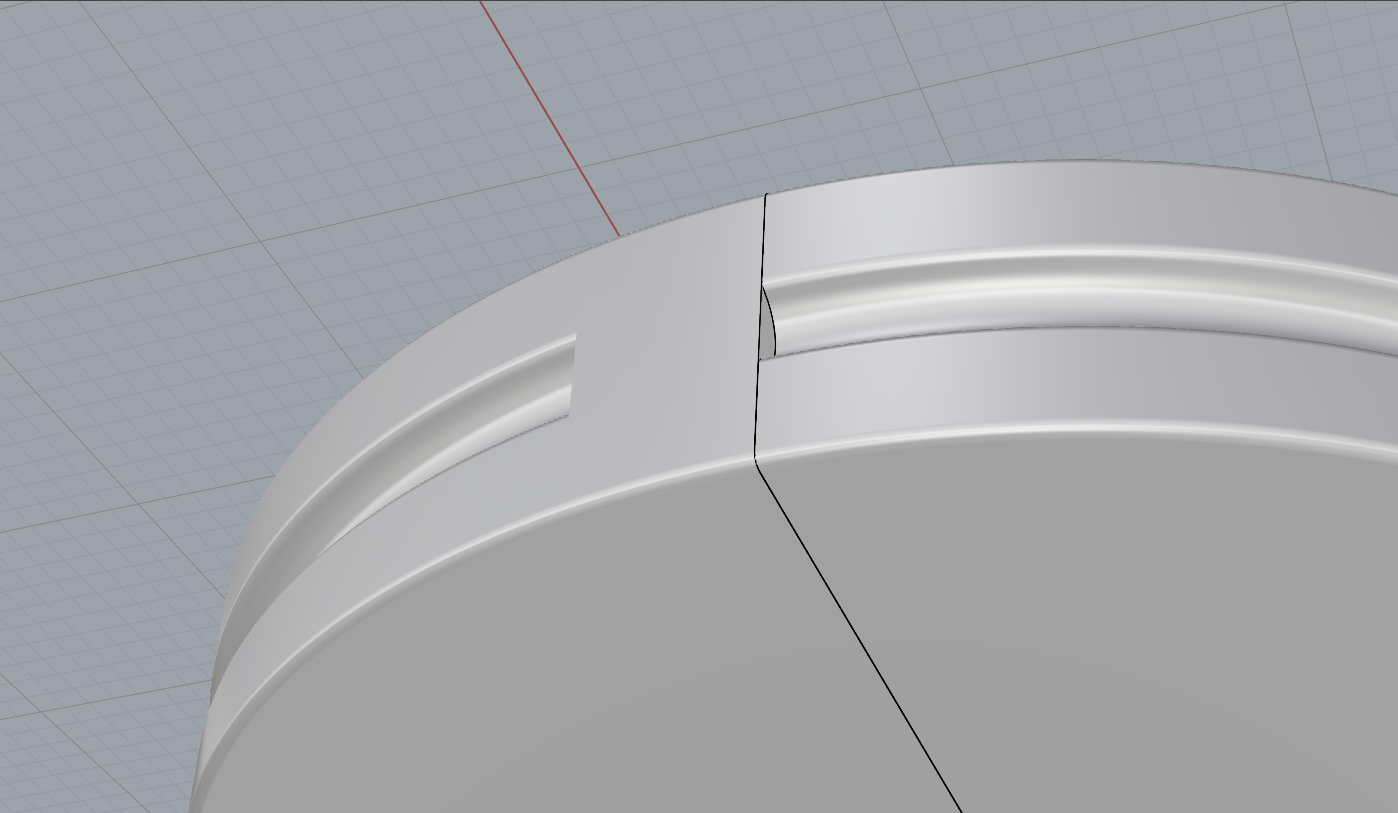
3D Prints and Bezel Design
Lastly, I think the shape of the outer bezel and the 3D prints should have been changed. At the top of my brooch, there is an intentional opening designed so I would be able to open the bezel and slide my bacteria into the space. However, I had originally designed it so this opening would be about 1cm wide. I wanted the opening to look intentional rather than something I had to have, however, I feel as if the gap looks too big now that the piece is assembled.
I could have addressed this issue in a couple of ways. I could have remade the silver bezel and made the opening smaller. However, this would have cost money as I did not have enough silver wire left to make two new bezels. I believe that soldering a piece onto the end would not have looked clean enough, knowing my soldering capabilities and knowing that even a 0.5mm change in the thickness after filing and clean-up of the wire would have been glaringly obvious to me. Another potential solution could have been changing my silicone moulds, and having a flat surface at the top instead of the space for the wire bezel going all the way around. I personally feel as if the latter would have been the best option as it would have allowed me to develop my CAD skills, as well as practising the silicone mould-making and refinement process. This is definitely something I’d like to explore more in Synthesis and Resolution, particularly how I can utilise CAD to address design challenges more effectively.
Very quick mock up of design idea
Very quick mock up of design idea
While I do not think that this piece is up to the standards I set myself as a maker, and is not nearly as refined as what I had wanted to make, I have learnt an extensive list of valuable lessons throughout this project. Utilising CAD and other techniques to create custom components has been a significant part of this project, pushing me to rely less on readily available parts in the workshop and online. I want to continue using precious metal materials, as I have enjoyed working with silver throughout this project. I have never used silver for an entire piece before and I do think it helps elevate the design I have created. This will also help me in S&R and after graduation, where I intend to primarily use silver.
This project has taught me about developing a workflow that can work for me and has prepared me for creating pieces that are up to standards in Synthesis and Resolution. I know that I need to focus on my refinement techniques, for example, polishing the resin and CAD, however, I do believe that I have used this project as a crucial stepping stone to help me achieve this.
I am also glad that I went with the theme of documenting sentimental jewellery. I have enjoyed looking at jewellery from a new perspective, and exploring how I can communicate the history of pieces using bacteria and other traditional jewellery elements. I think that making two pieces for my final outcome was also a good idea, as this way I have been able to explore two different themes and designs in my final outcome. While I changed my final design quite late in the project, removing the enamelled pieces was definitely the right choice, and I think the minimalistic aesthetic works well.
Great Northern
Finally, being part of Great Northern was also a valuable experience. It gave me an insight into what the preparation for an exhibition is like, from both a maker and a more curatorial perspective. I enjoyed helping organise the collection of samples, and making the components for the display, while also speaking to visitors about the Craft stand and explaining the work that was on show. While the deadlines were tight, I think it was a good way to start experiencing what opportunities like this would be like in the future.
Synthesis and Resolution Proposal
For Synthesis and Resolution, I want to push the boundaries of contemporary jewellery by continuing to include bacteria as both a conceptual and material element.
I want to continue exploring how my designs can change the societal preconceptions of bacteria, potentially even highlighting the good bacteria alongside the bad and harmless. I want to show the beauty in the cultures that I grow, making the invisible visible, and show that bacteria is not always something to be afraid of.
I also want to explore different ways of showcasing the bacteria, for example, dyeing the bacteria different colours or manipulating the way it grows. This could be through altering the nutrient agar recipe or disrupting the agar as it solidifies to experiment with textures, and potentially collaborating with a microbiologist to do this. This outcome could be more visually appealing than the very distinct flat petri-dish shape that I have been currently using and may be more inviting for people to question their feelings about bacteria. I want to engage with themes of transformation in my work, and how to make the bacteria more inviting.
By making the invisible visible, I want to explore how I can include the bacteria in my designs, but potentially not using it in the same way I have during Unit X and UC2, possibly moving away from using the bacteria as a means of documenting specific people, places, and objects.
Now I am becoming familiar with CAD, I want to use this to make custom moulds for both the nutrient agar for the bacteria to grow in, as well as the mould for encapsulating it in resin. While I have started to do this during Unit X, I have kept the familiar dish shape. I want to explore how different shapes and forms can be included in jewellery. This could even be expanded onto creating 3D curved surfaces that extrude from a piece of jewellery.
I also want to explore a medical theme within my designs. While I have started to explore this with the sandblasted silver, I want to see how a minimalistic approach might help showcase the bacteria in a new light, especially if the growths have been manipulated. Could this work well with coloured bacteria? Or will an untouched bacteria growth look better? Essentially, I will be using the bacteria as more of a collaborator in my designs, rather than simply incorporating it into my designs.