Bacteria Samples
Finland Samples
While visiting Finland, I decided to explore the concept of cultivating bacteria from a place that holds personal significance. Previously, I had experimented with this idea in Manchester, with samples from the metal workshops. This time, I wanted to see how the bacteria might differ when collected from an international location, specifically one which holds such a personal significance.
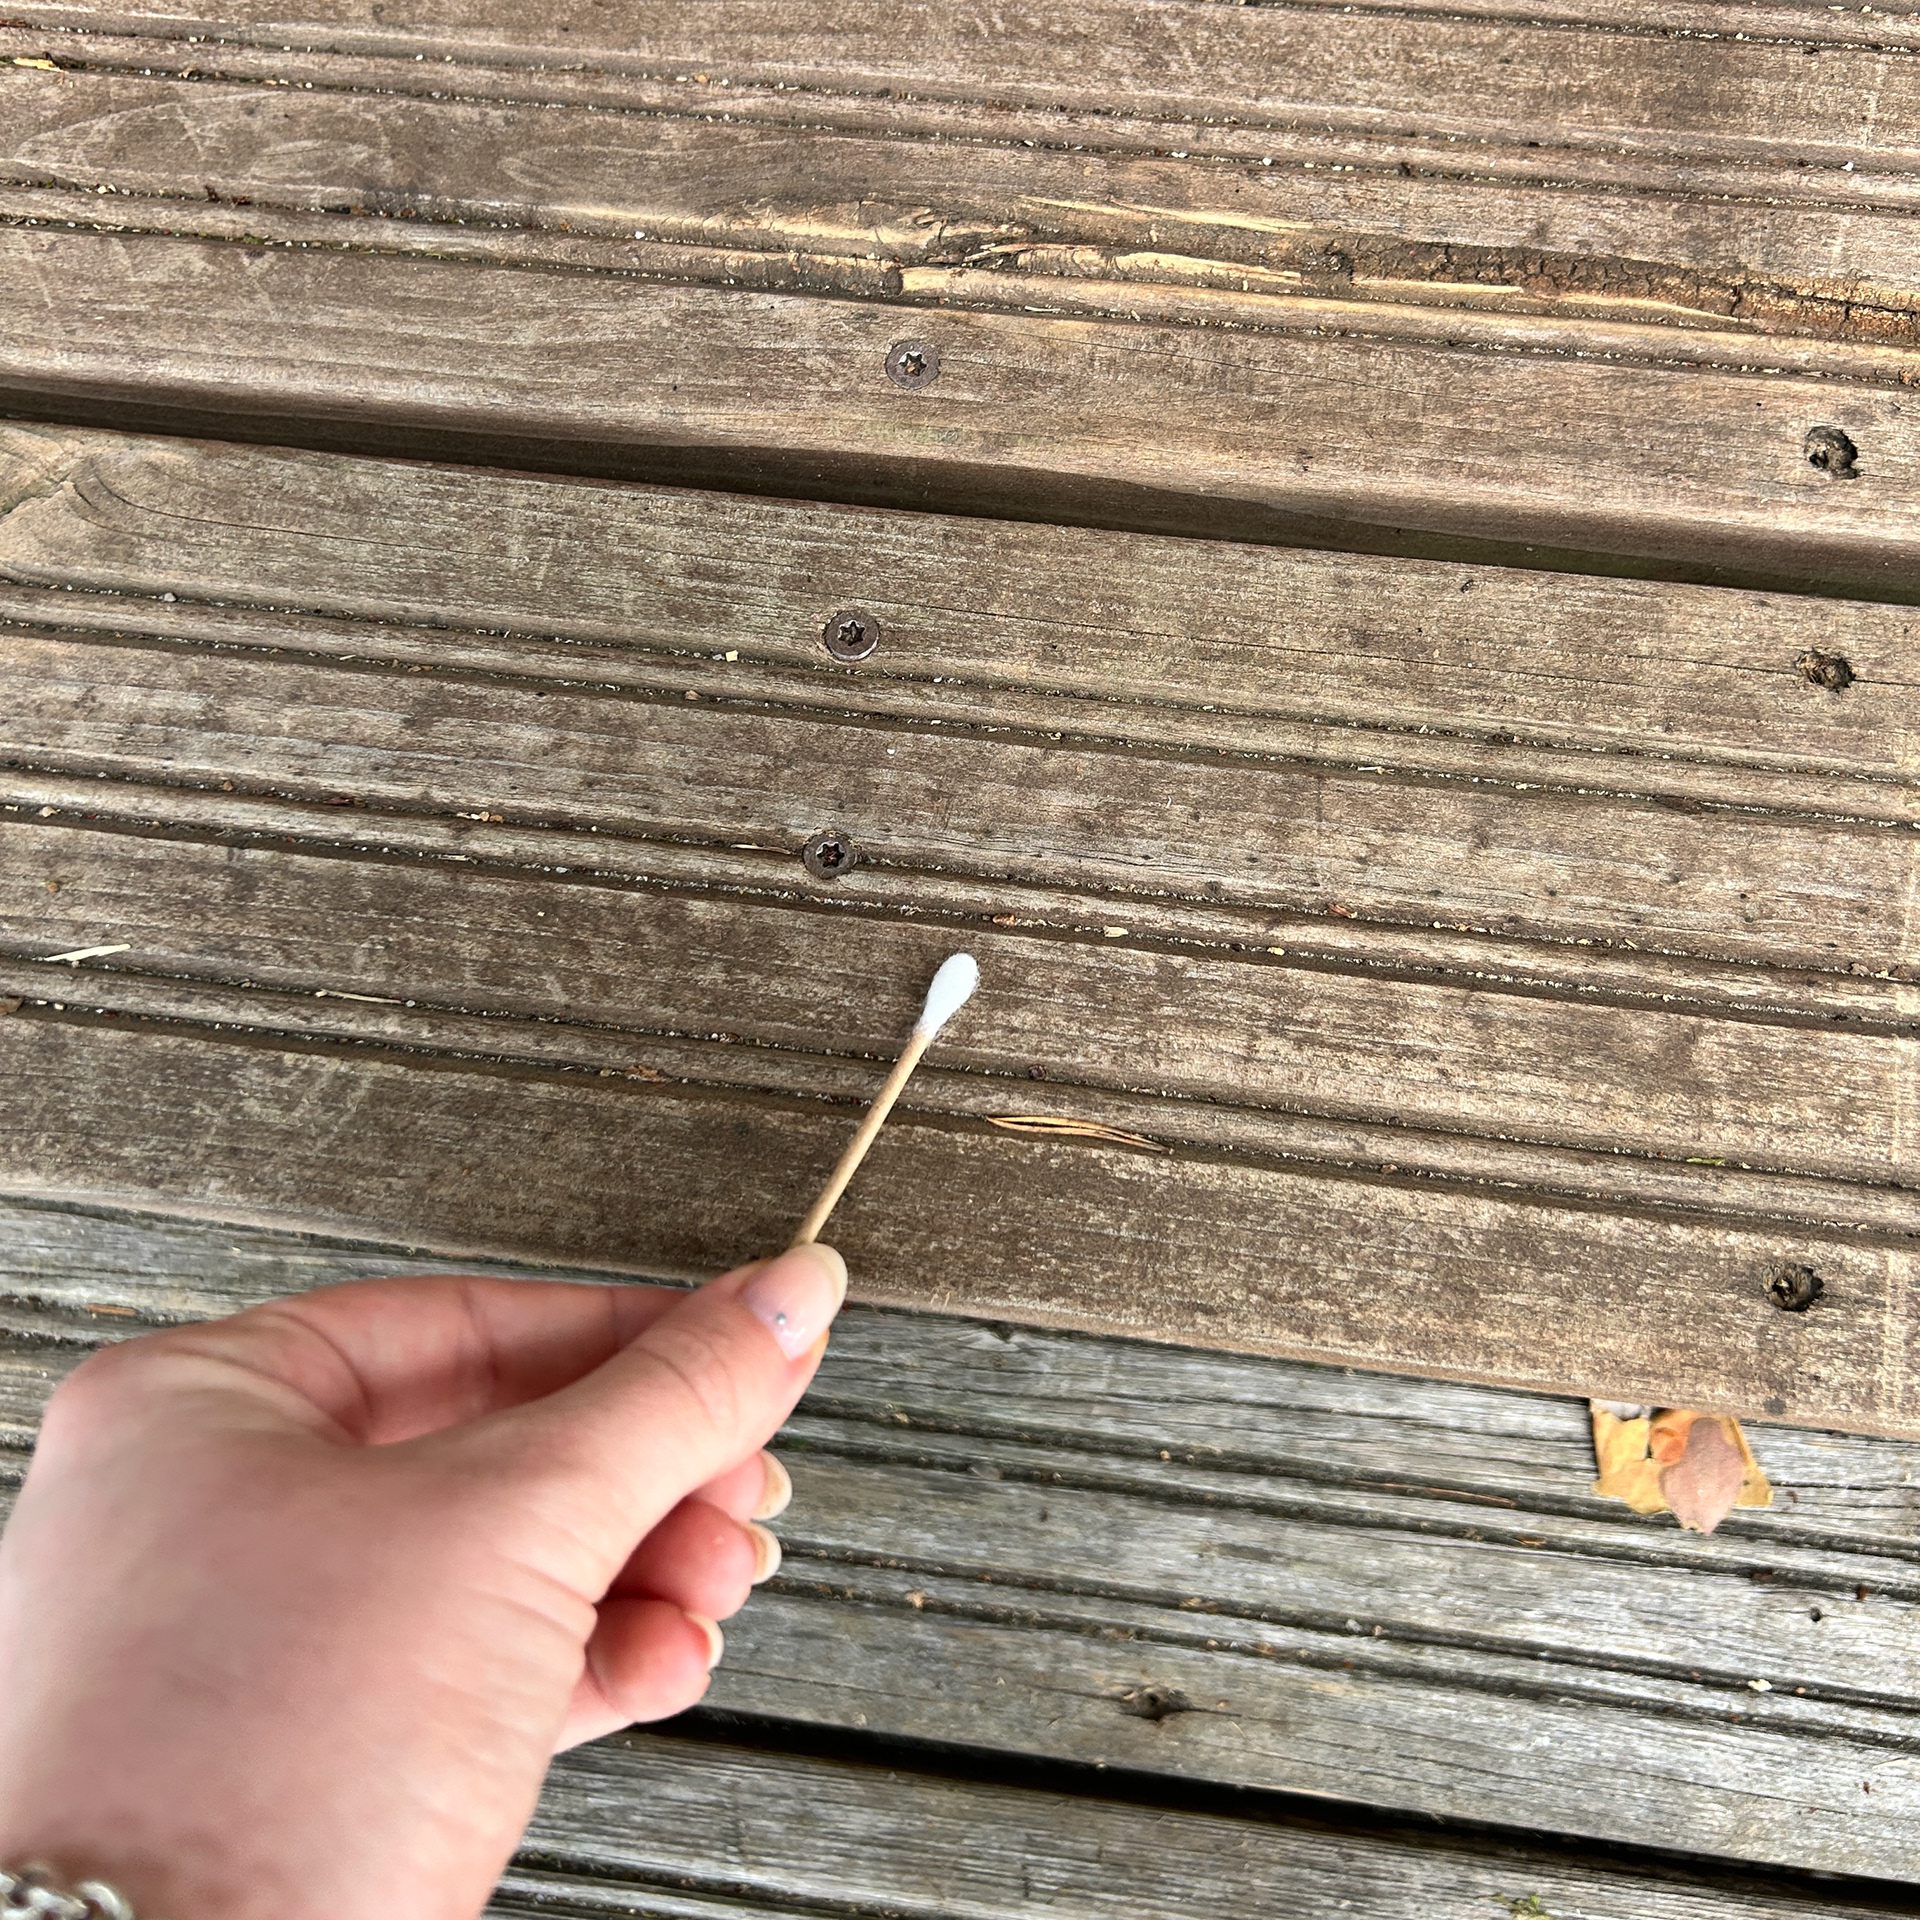
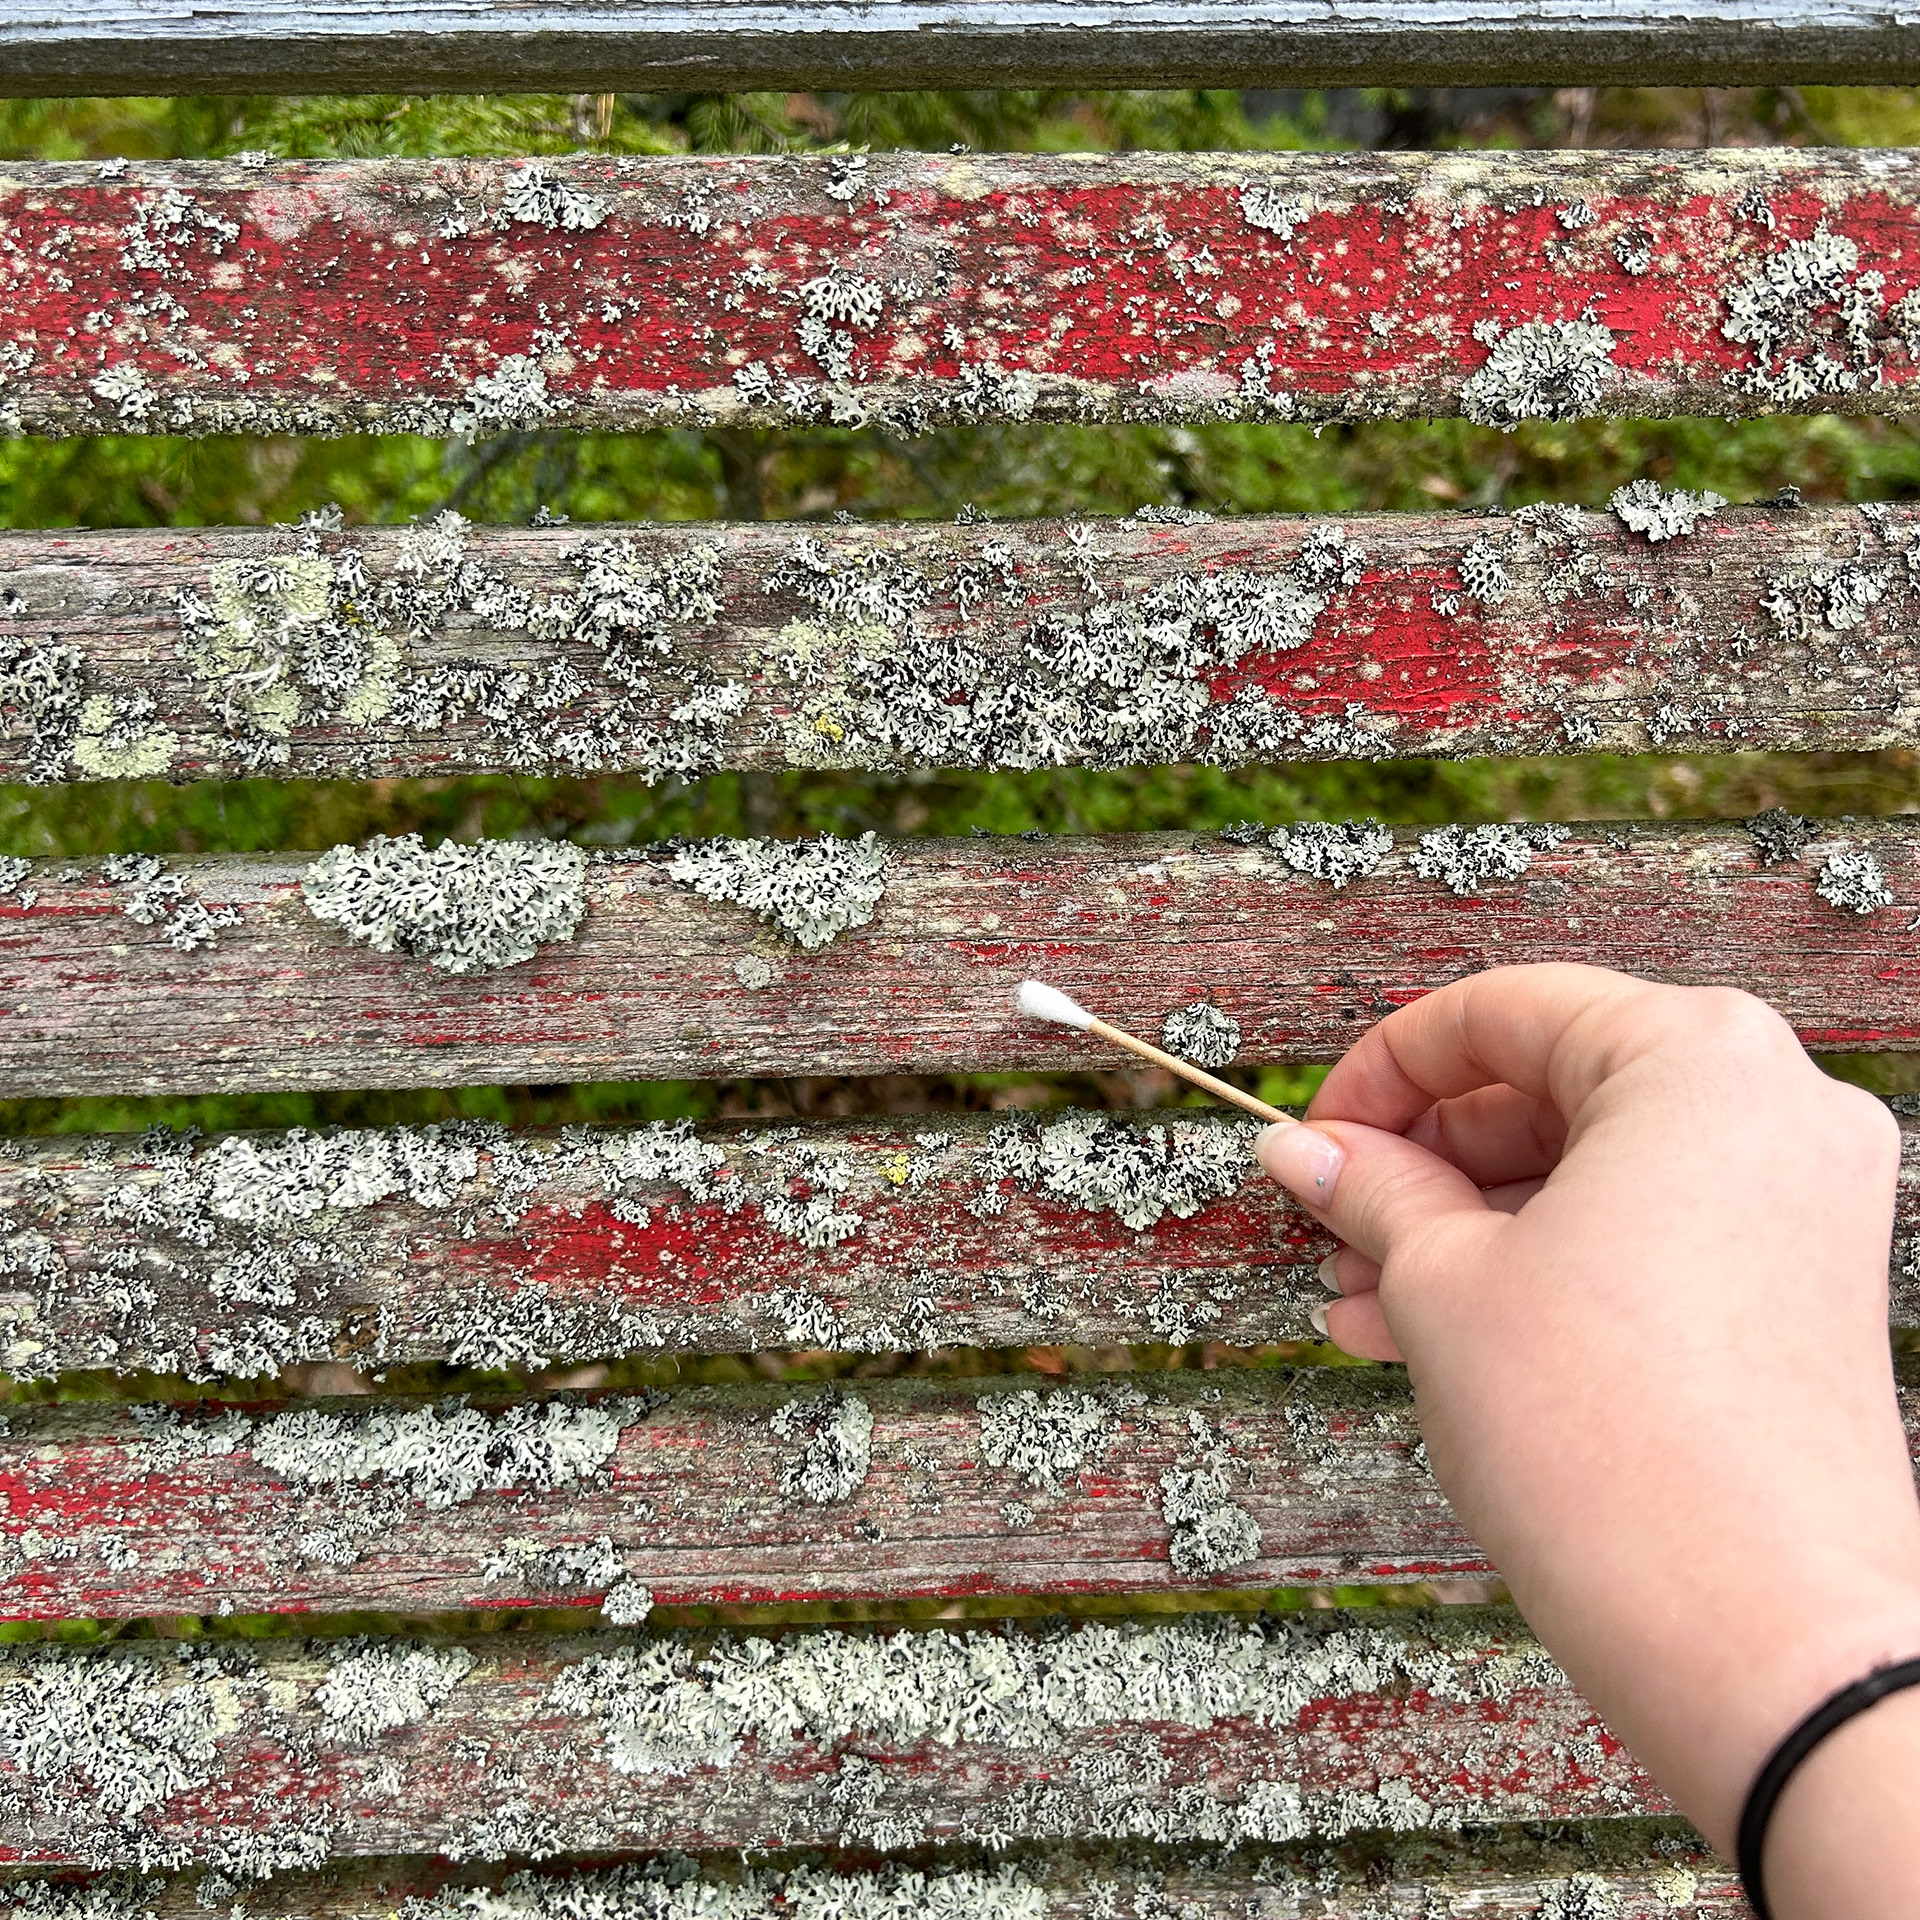
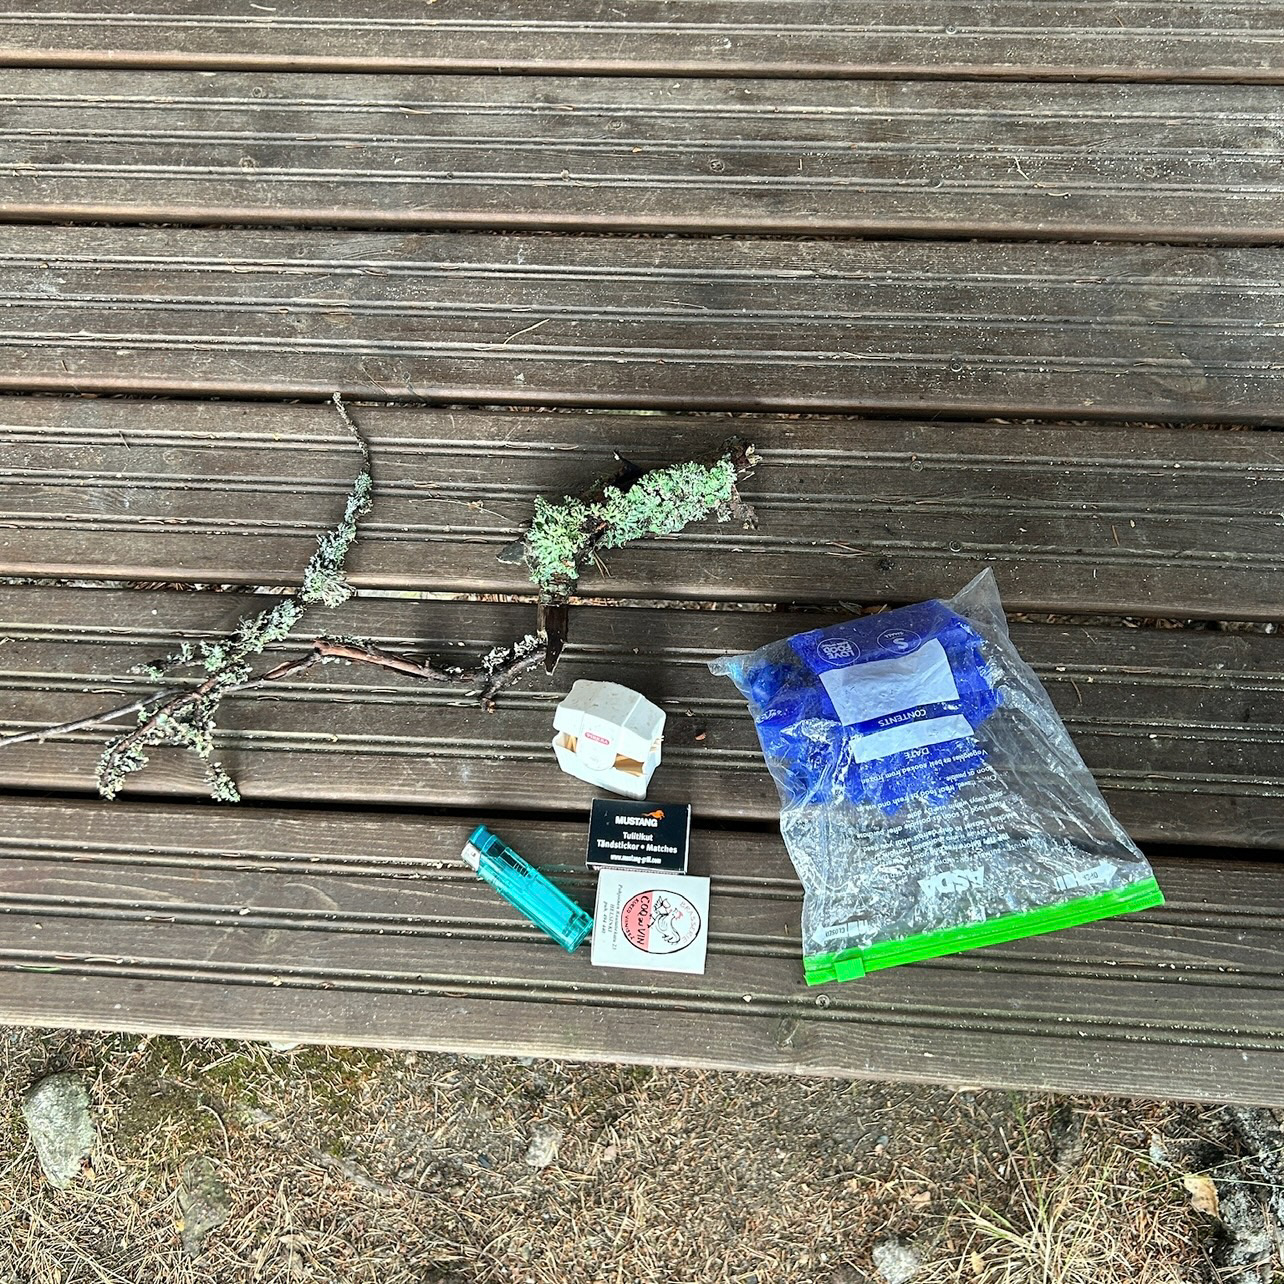
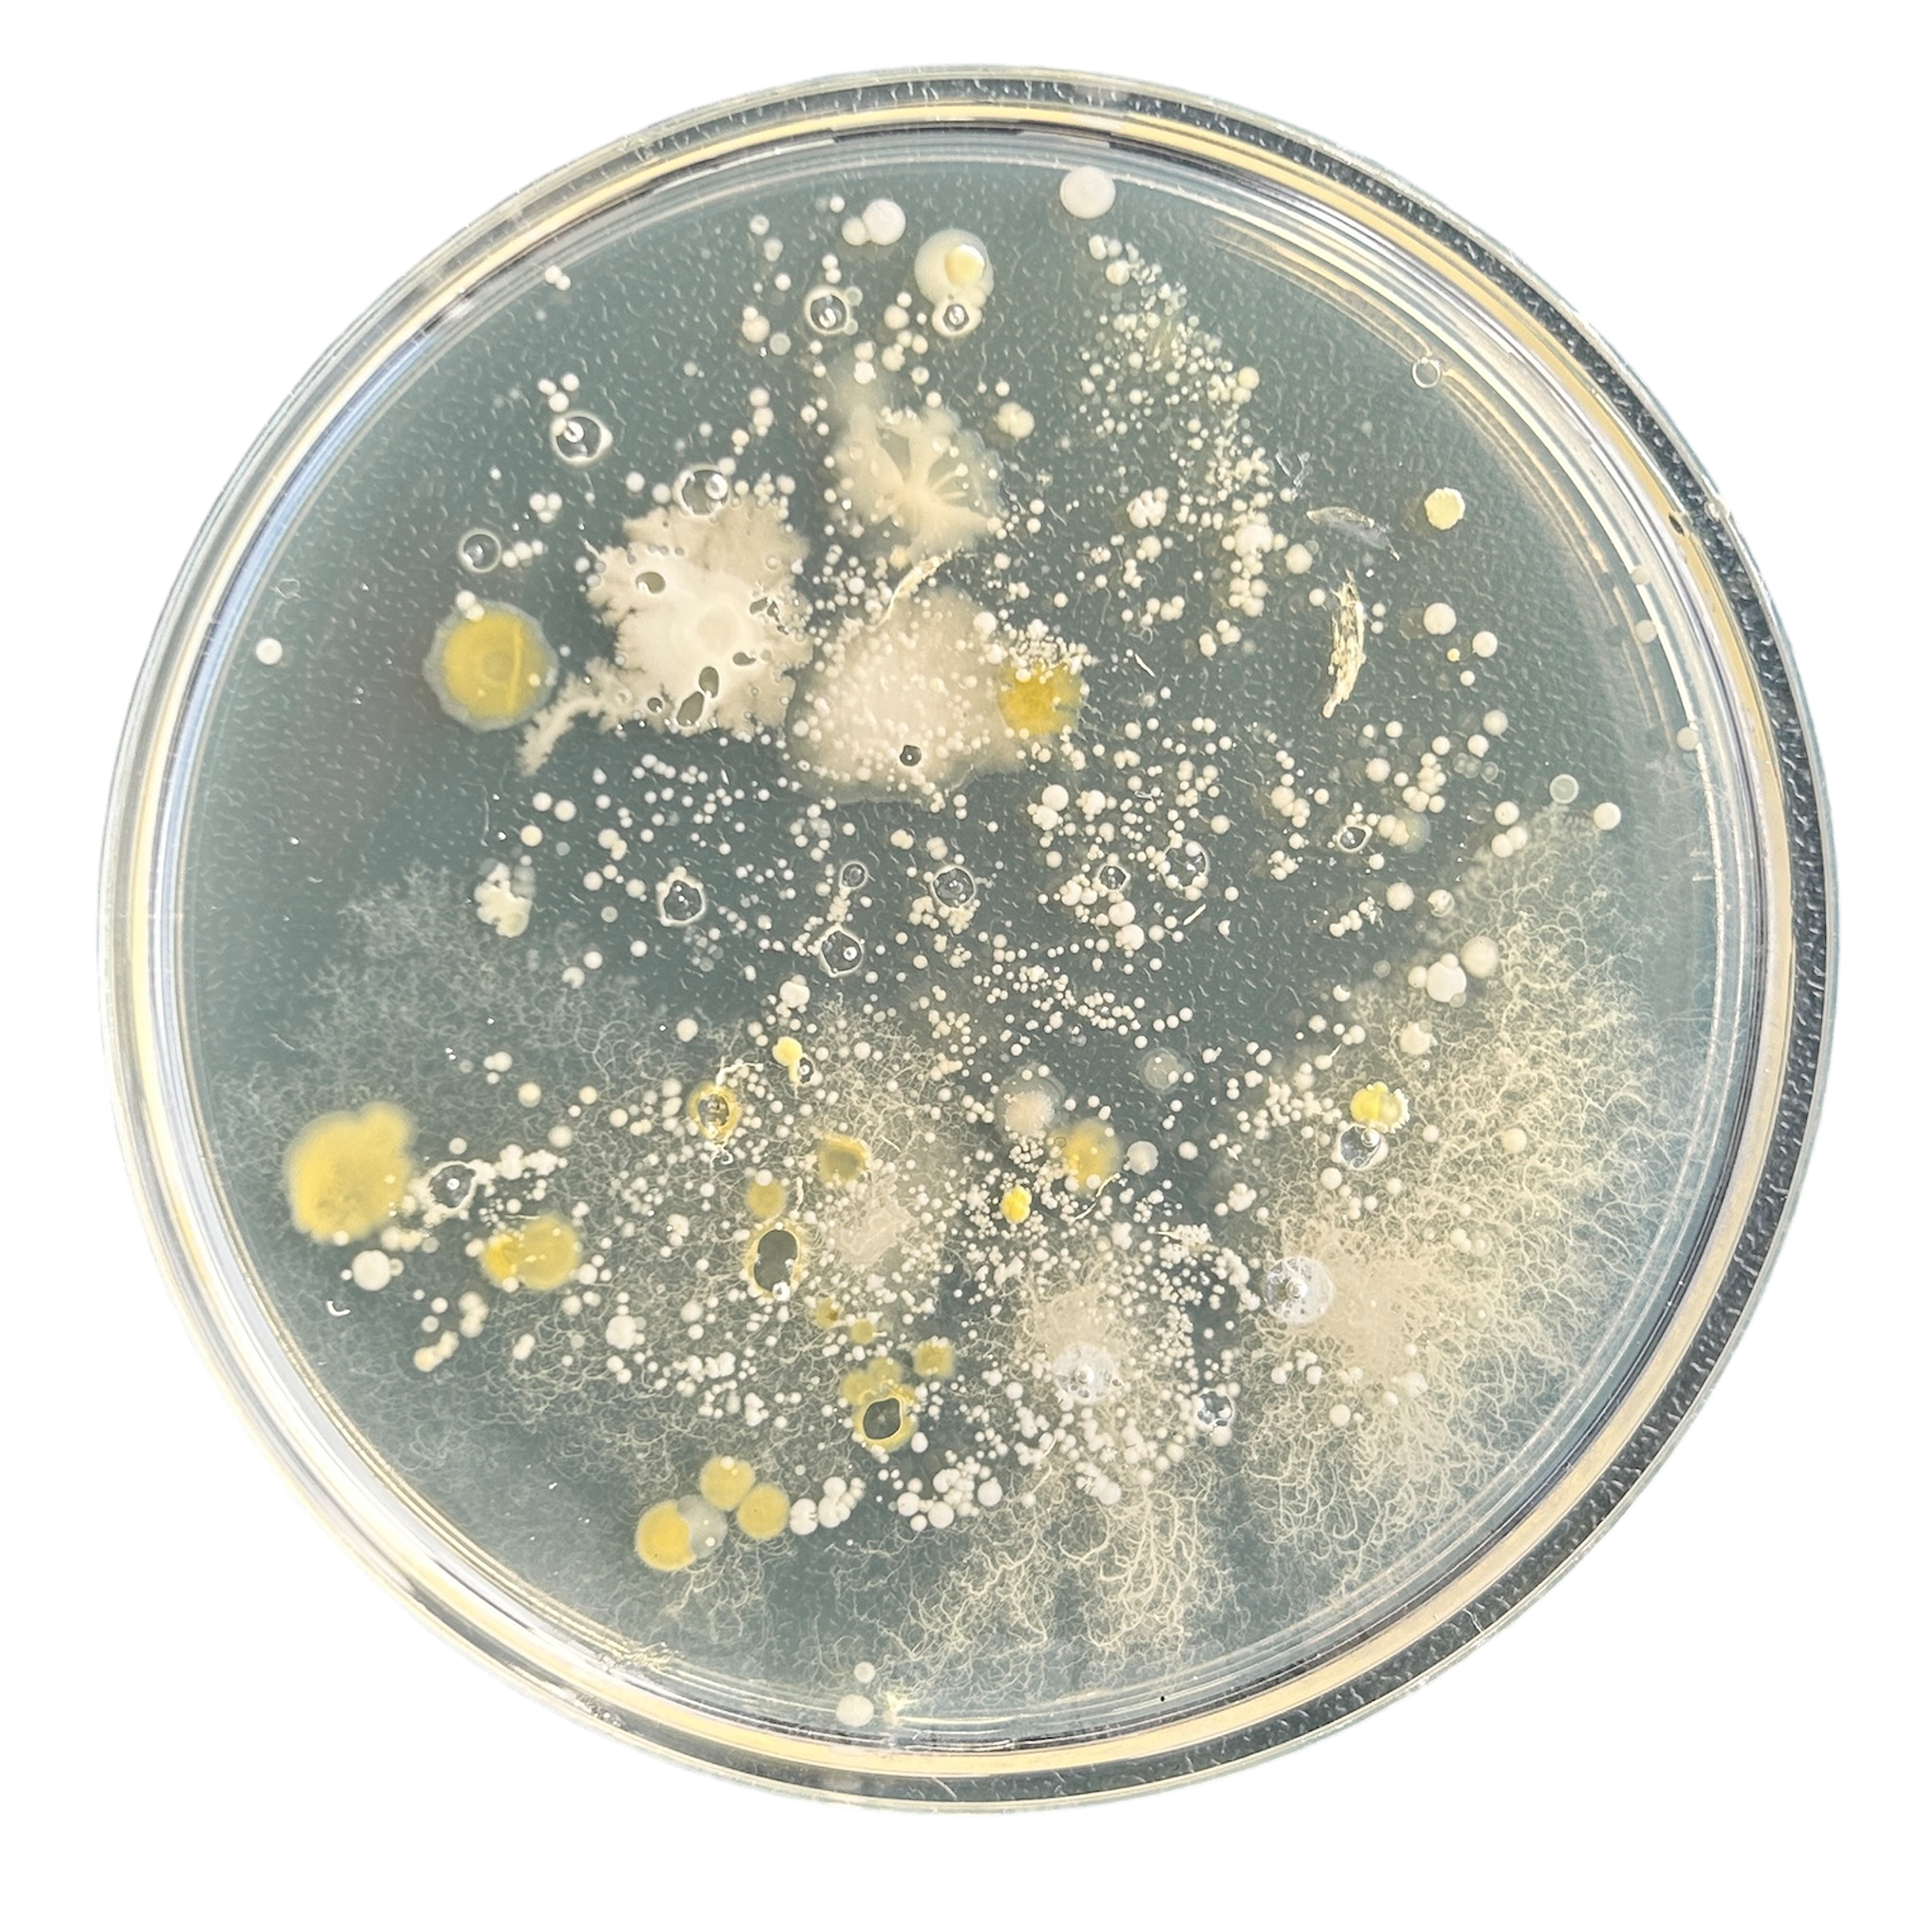
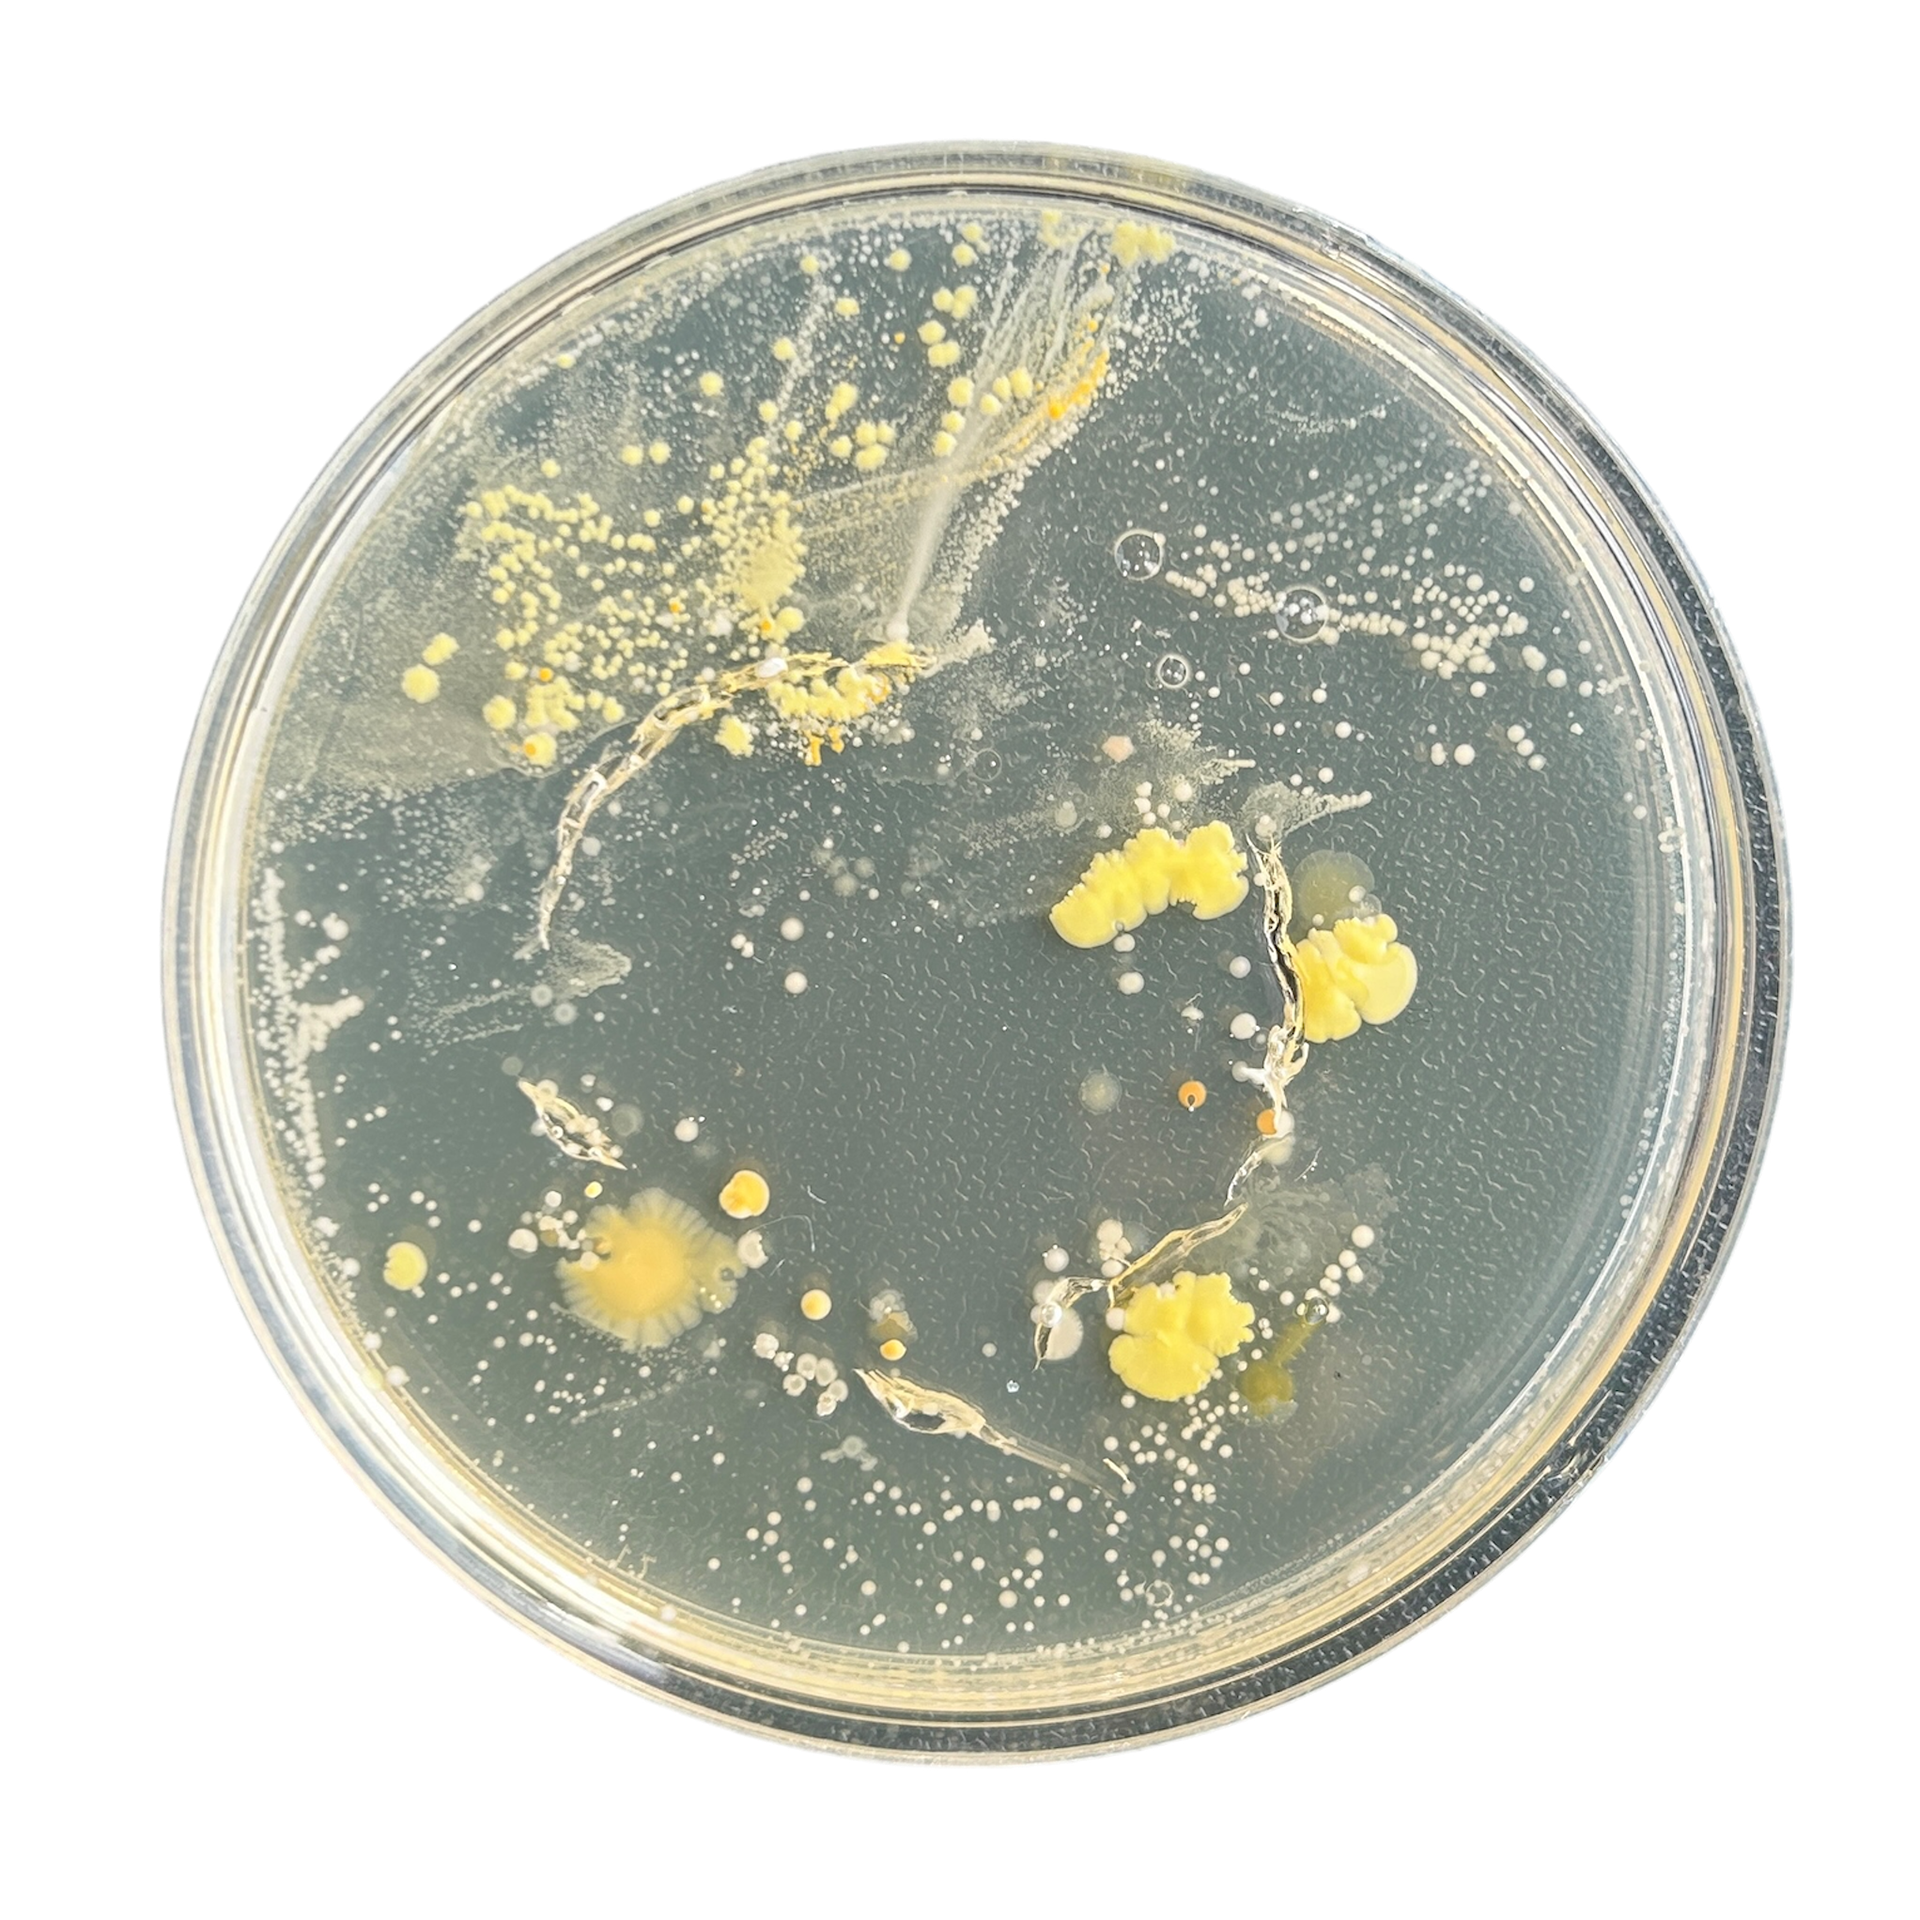
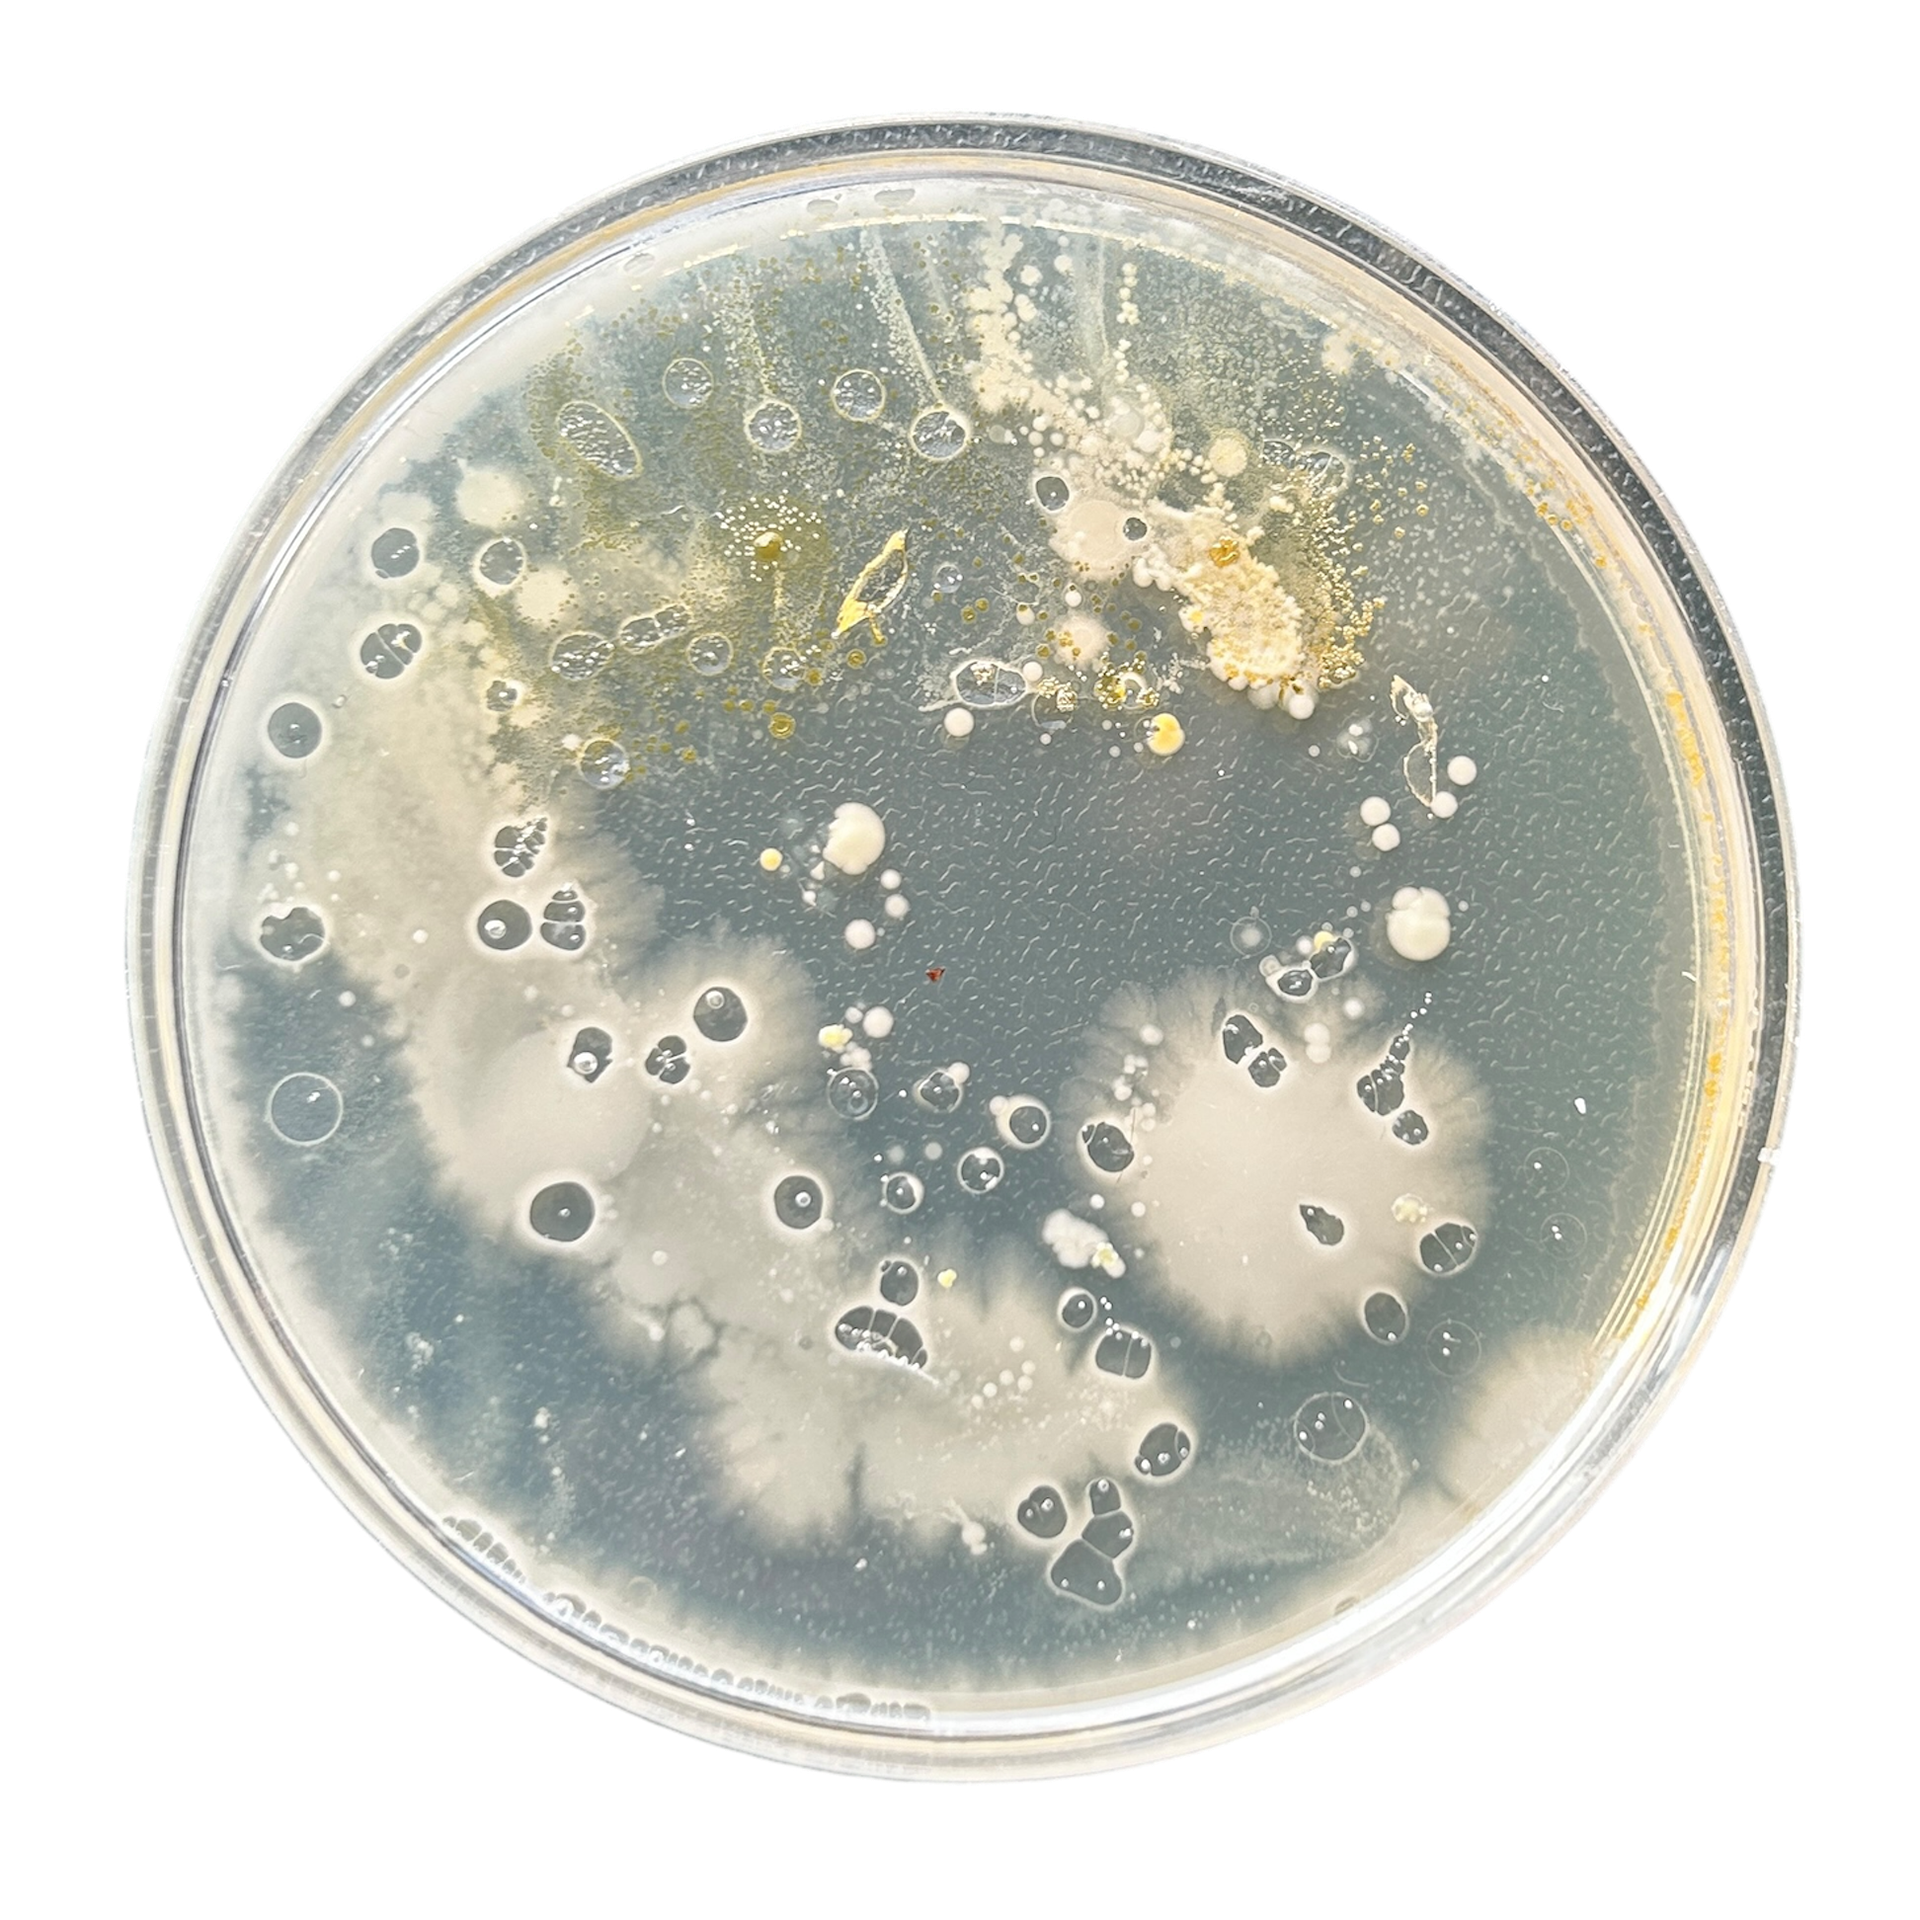
I tested this idea by collecting four distinct samples from around the rantasauna. These included a tree standing next to the rantasauna, a rock next to the lake, where I have a childhood photo standing next to, the steps leading up to the rantasauna, and the swinging bench next to the building, where my mum, uncle and I have many childhood memories from. Each of these places carries personal meaning, and I was curious to see how the unique bacteria from each surface might differ from the samples that had been taken from Manchester.


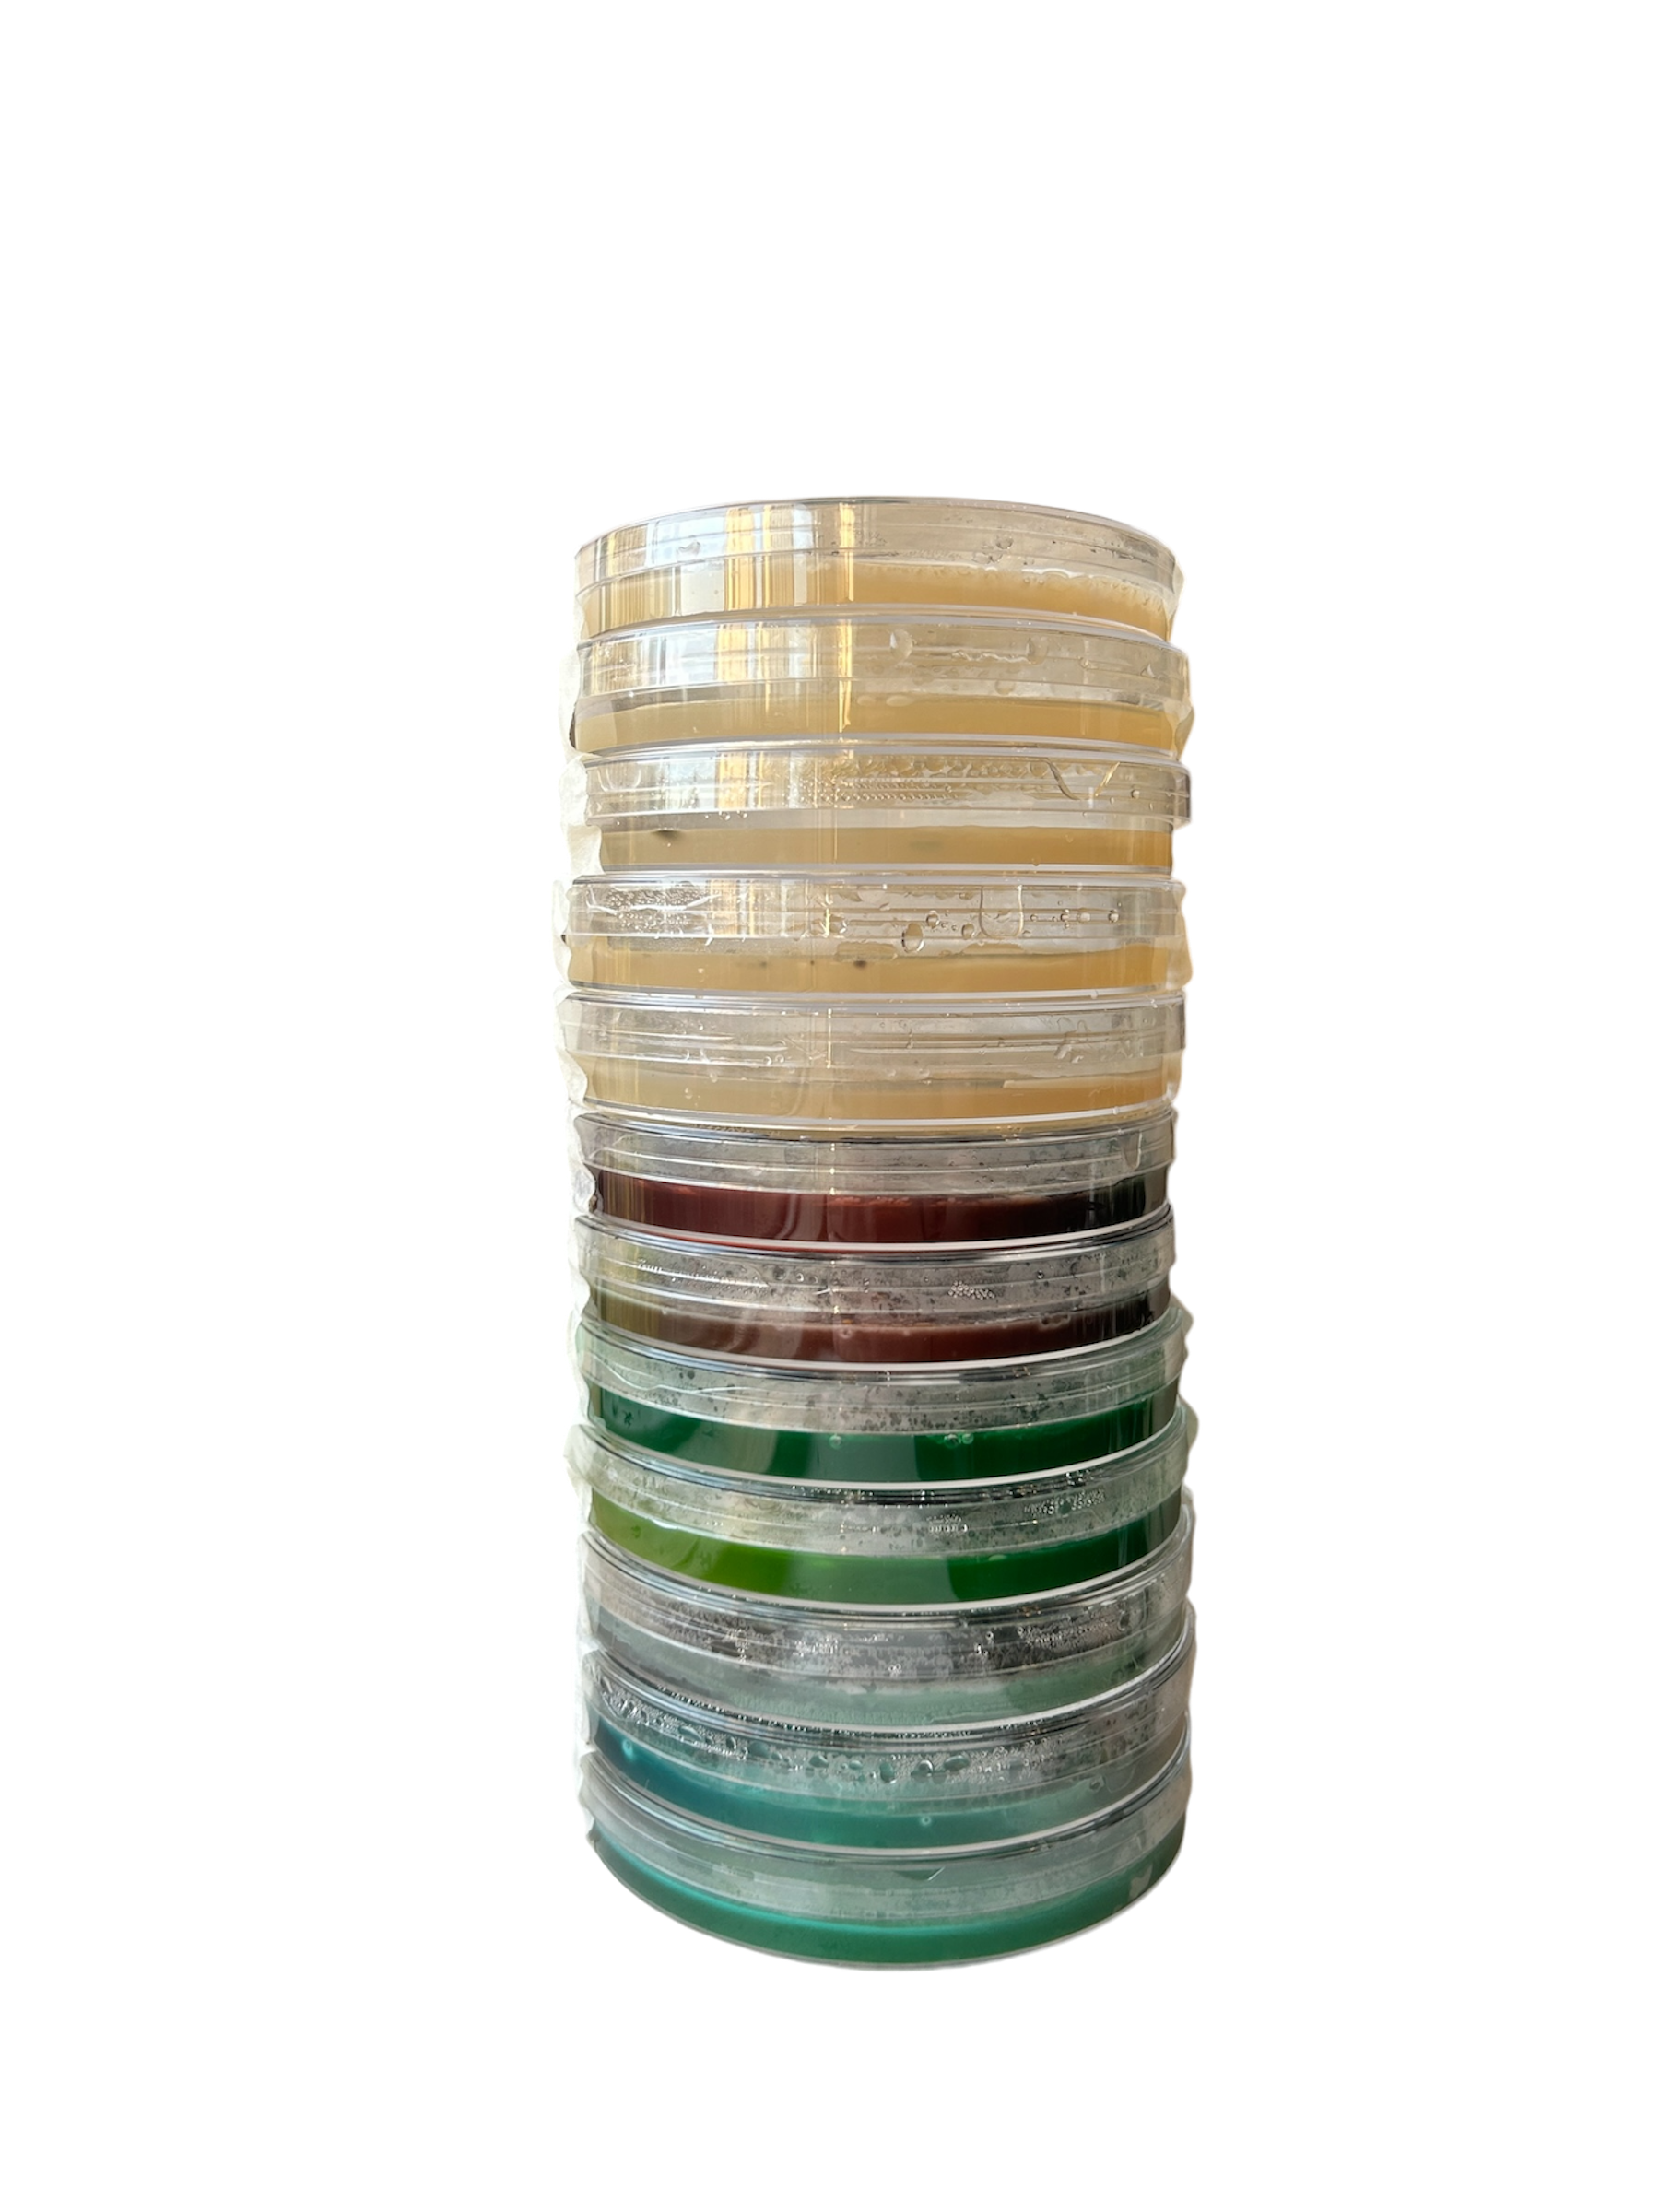
These were the results from these samples:

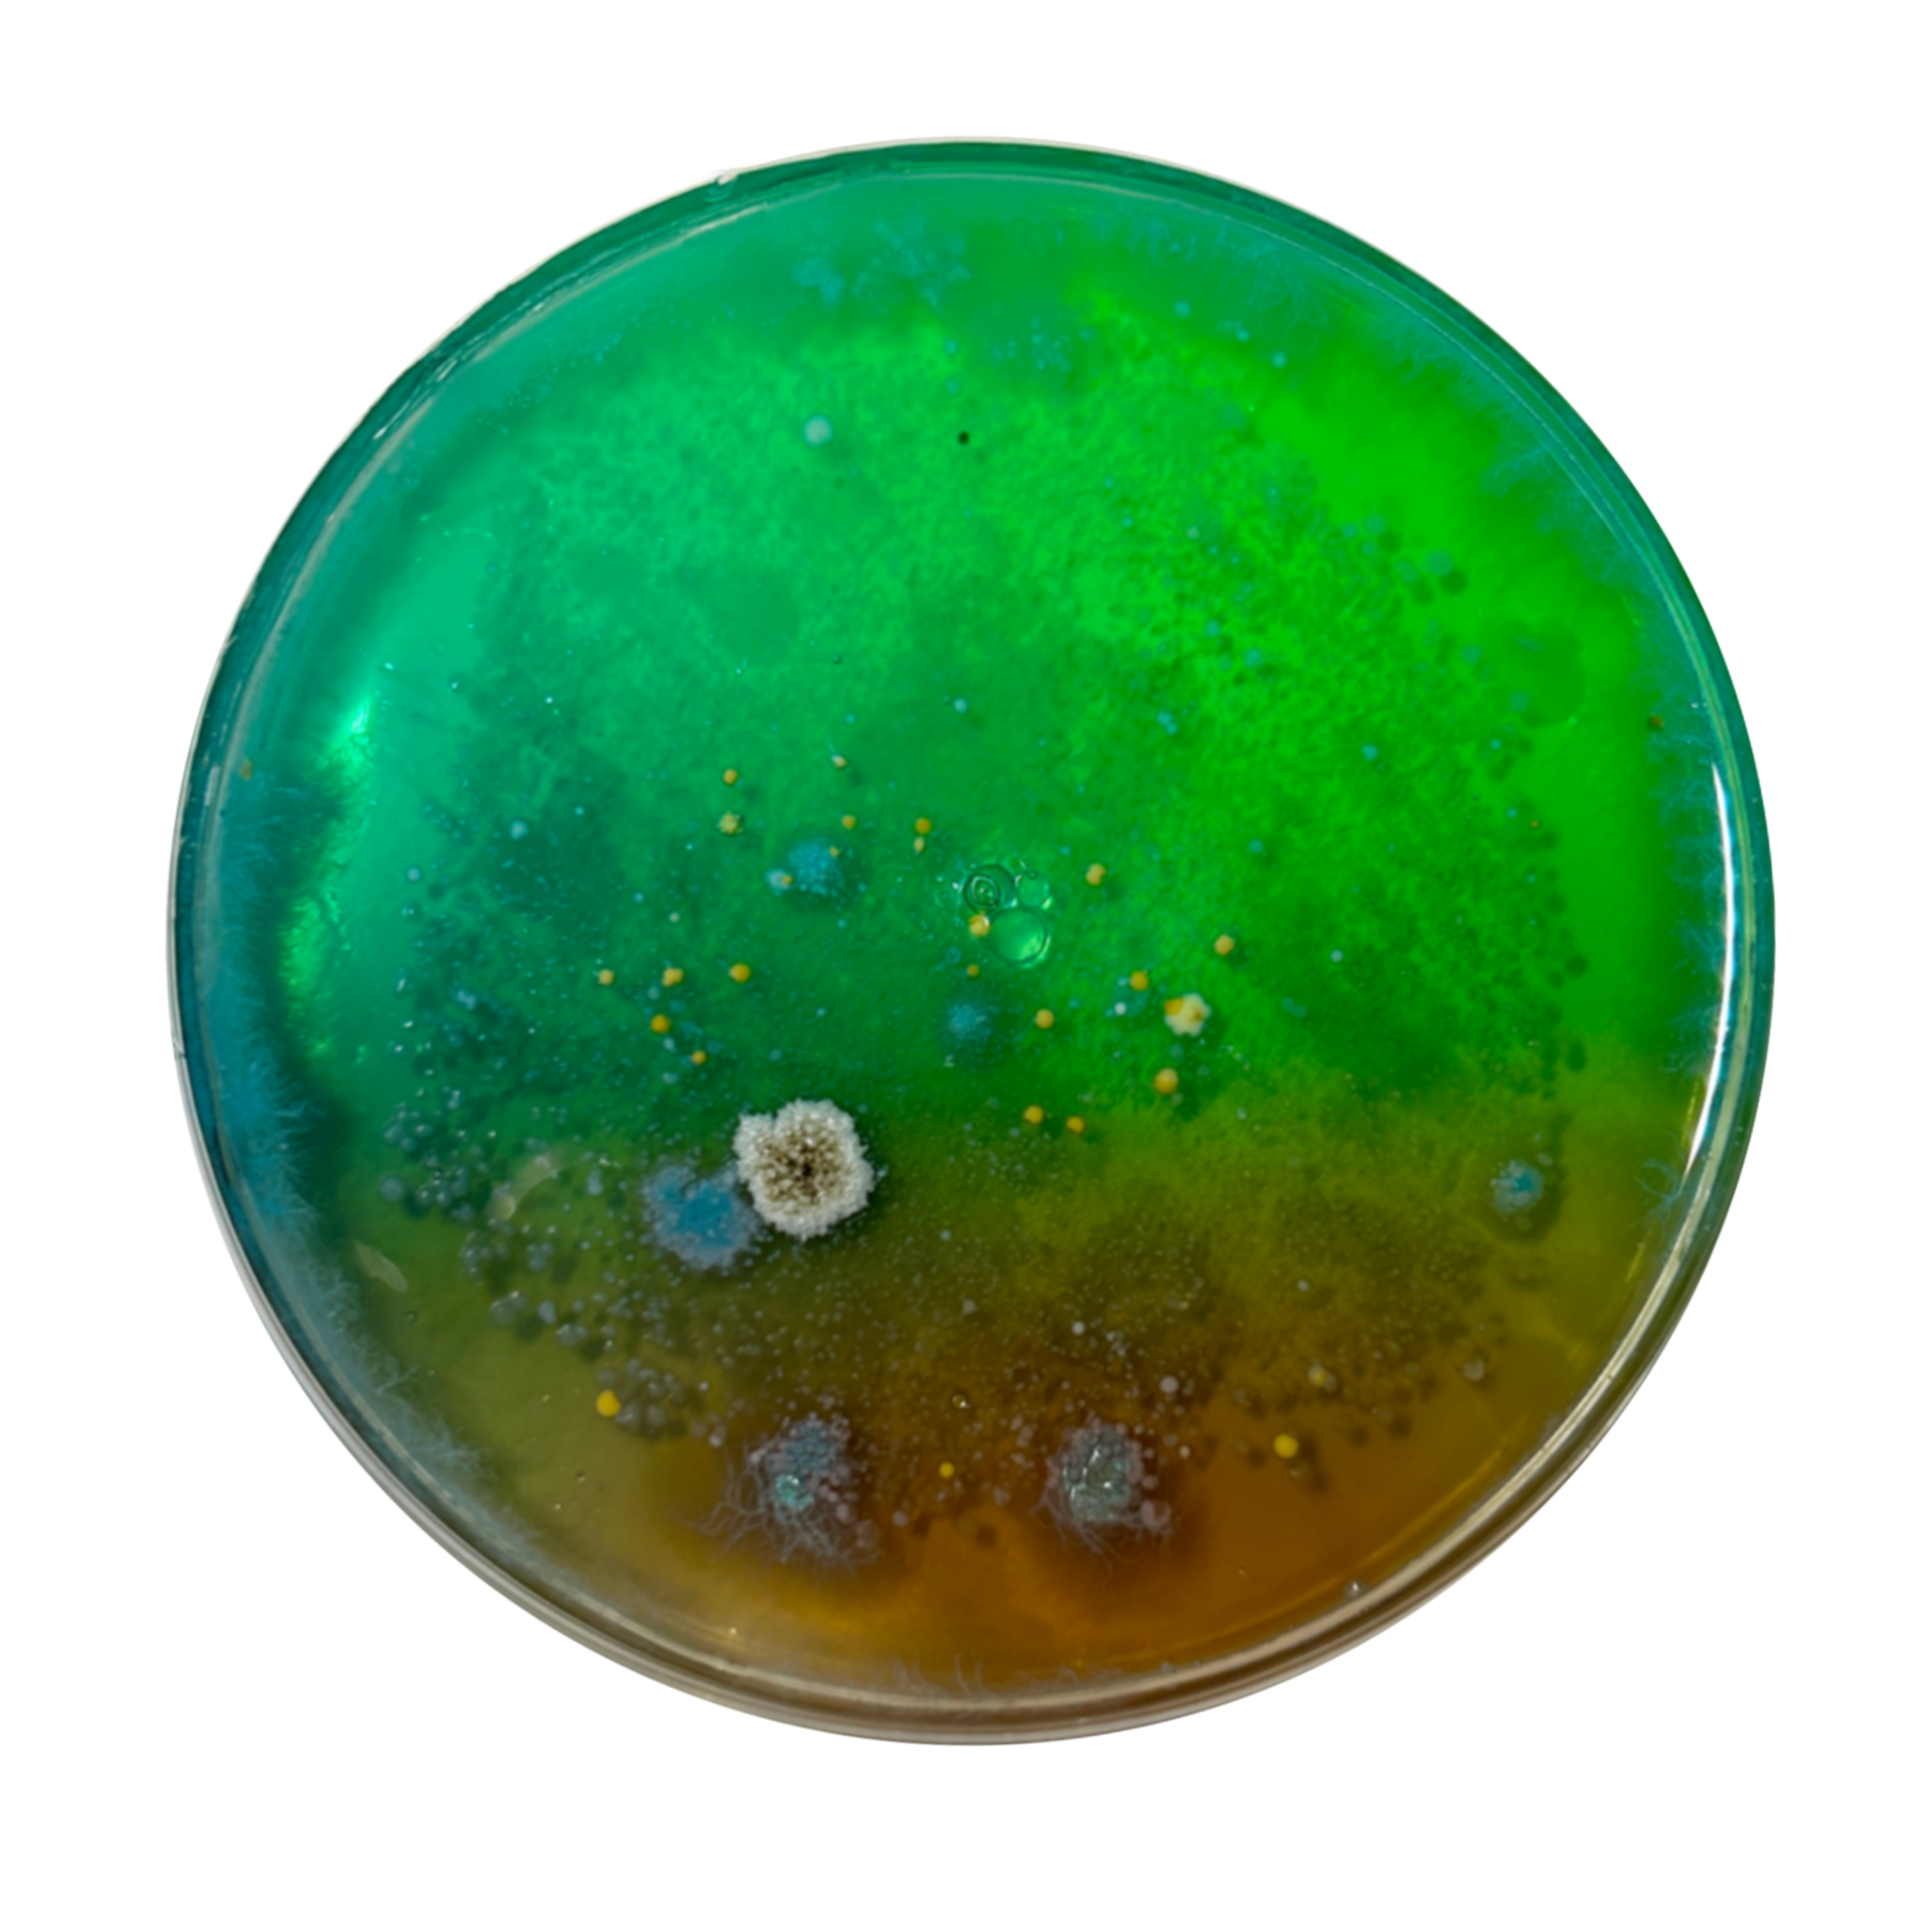
Tree Lichen

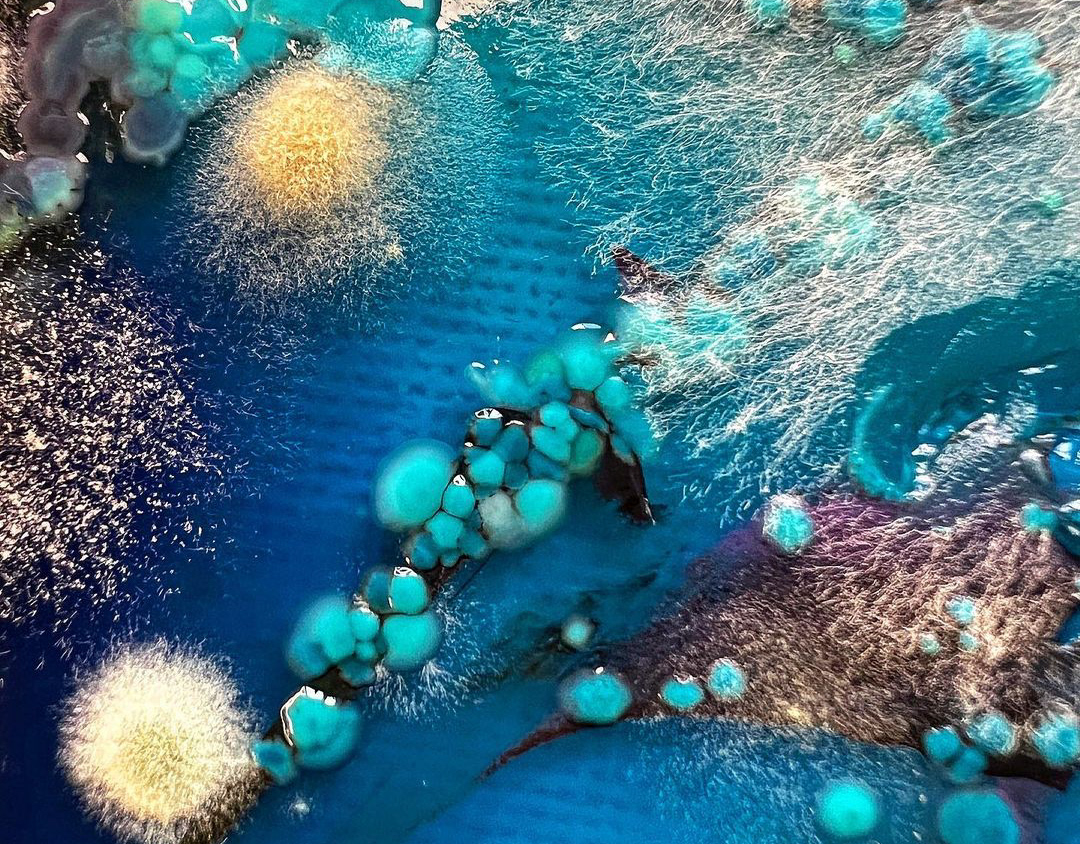
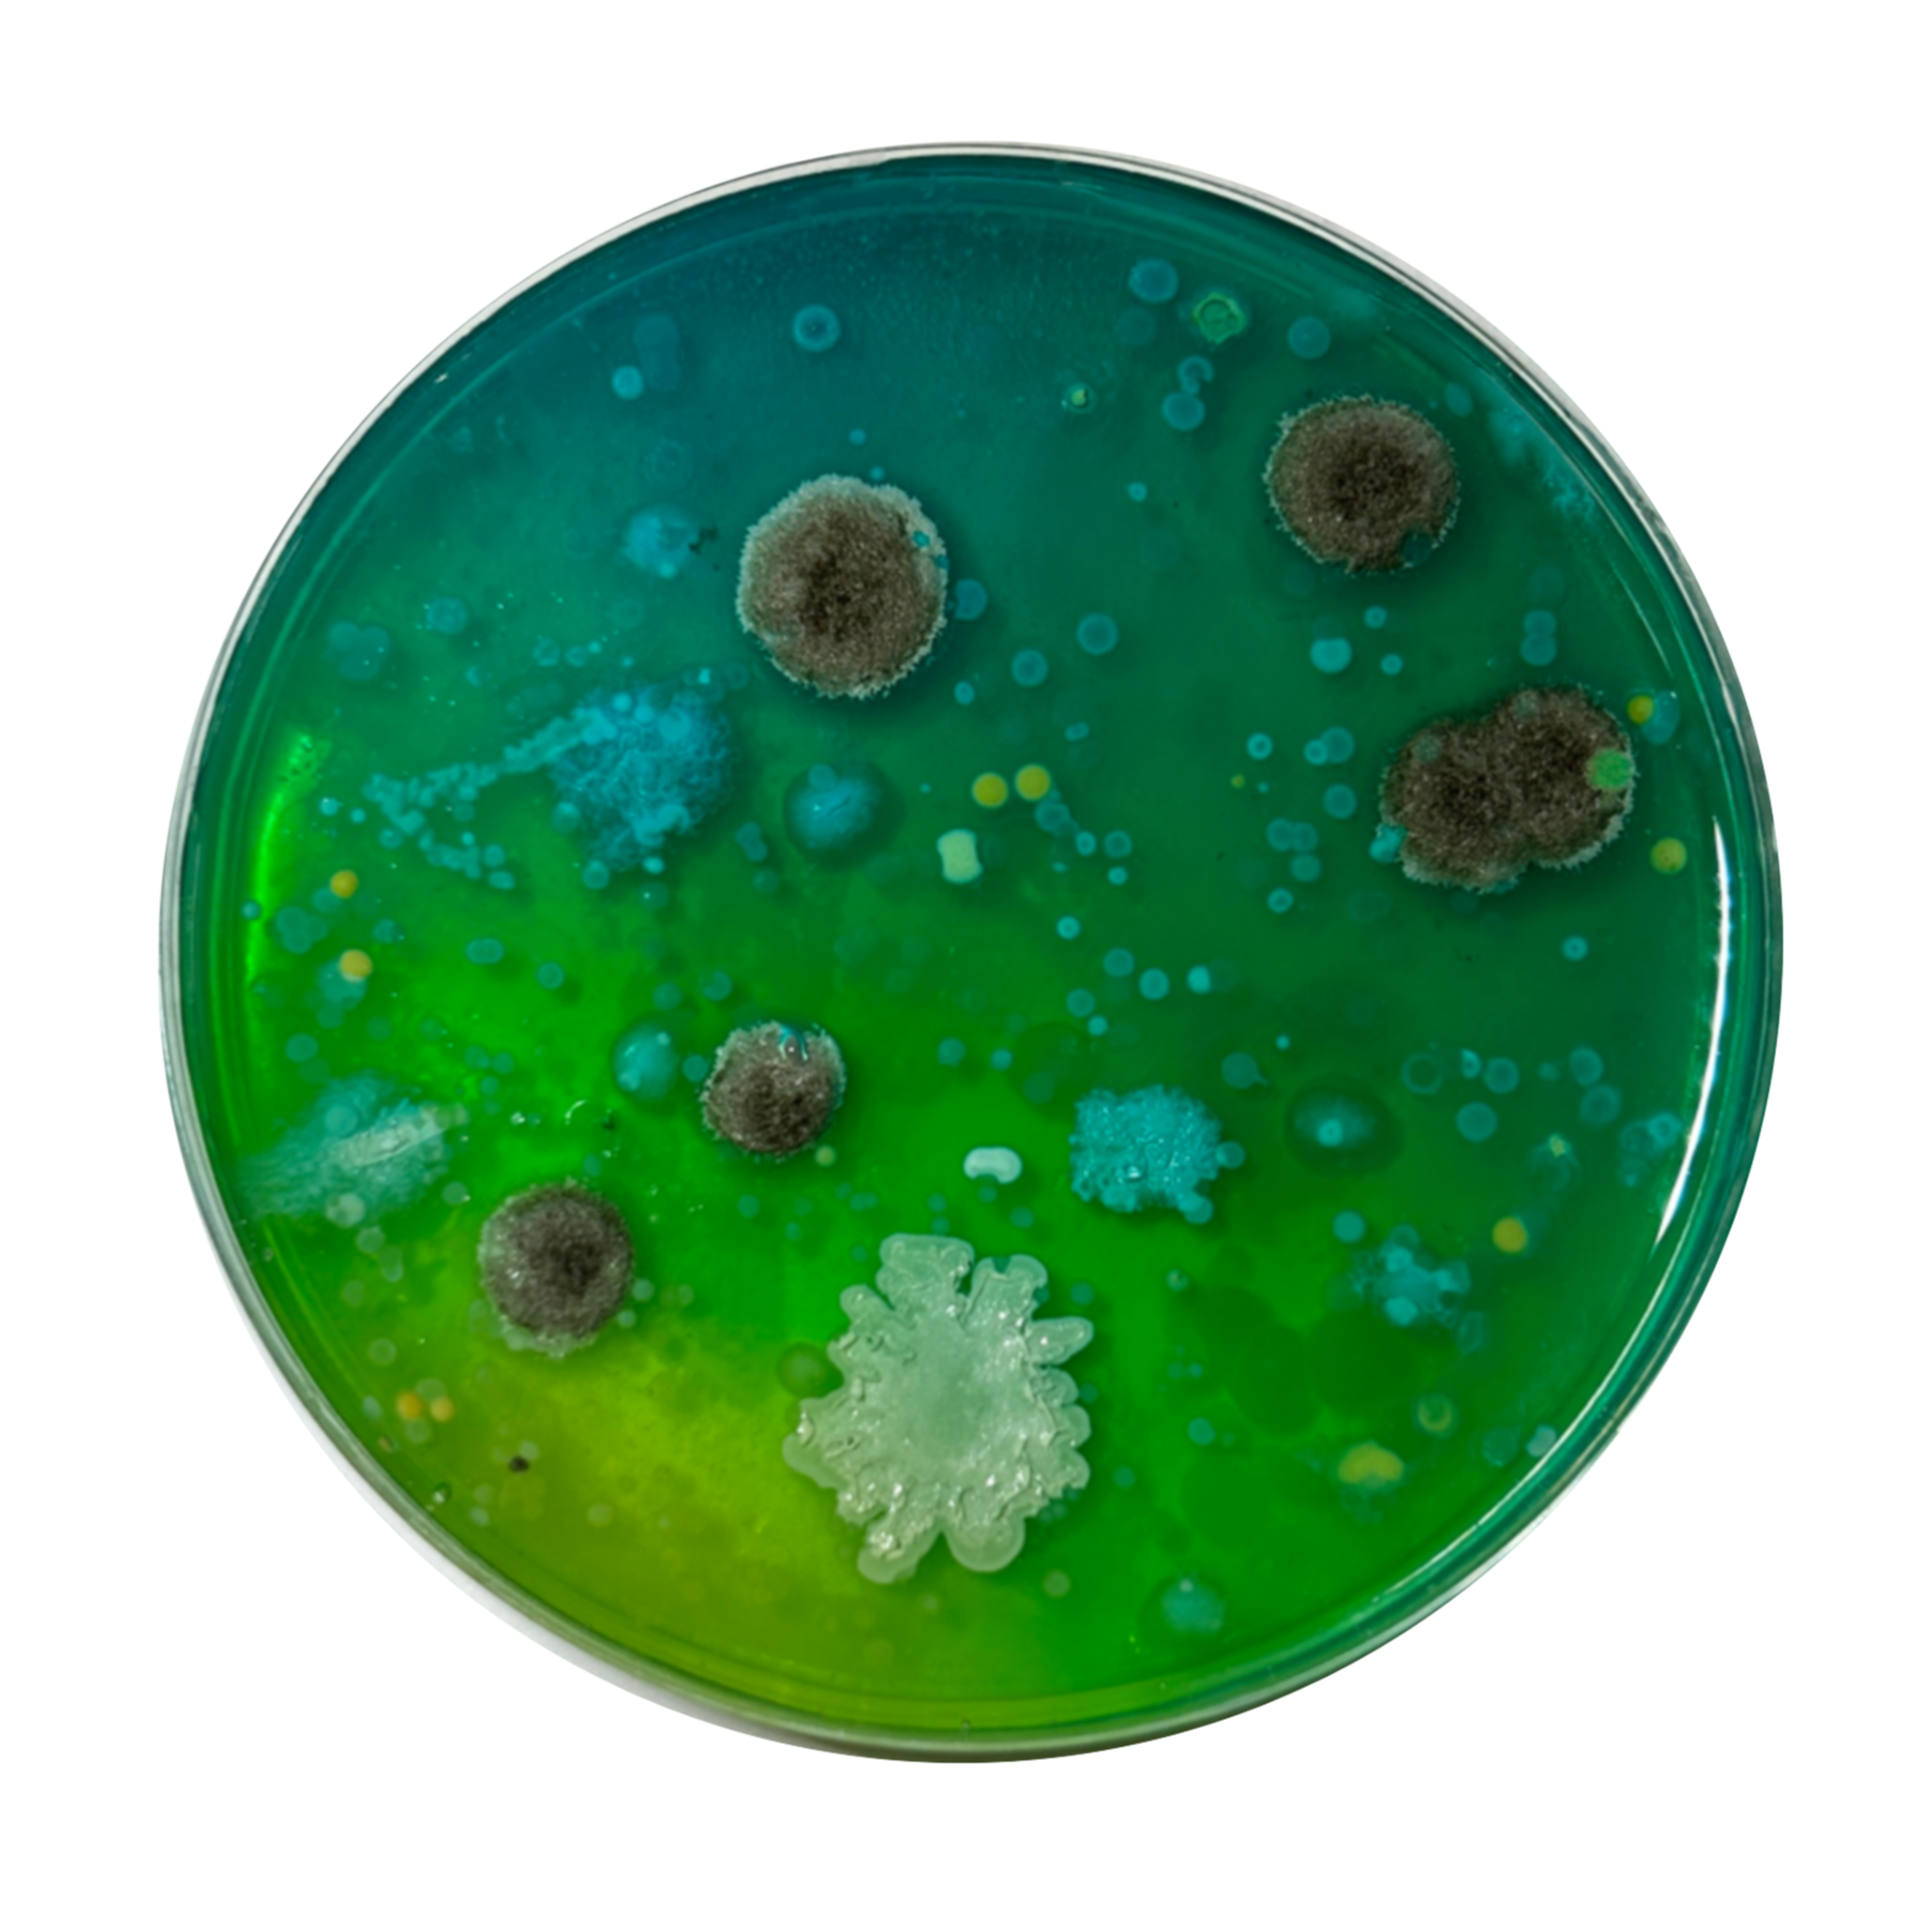
Rock

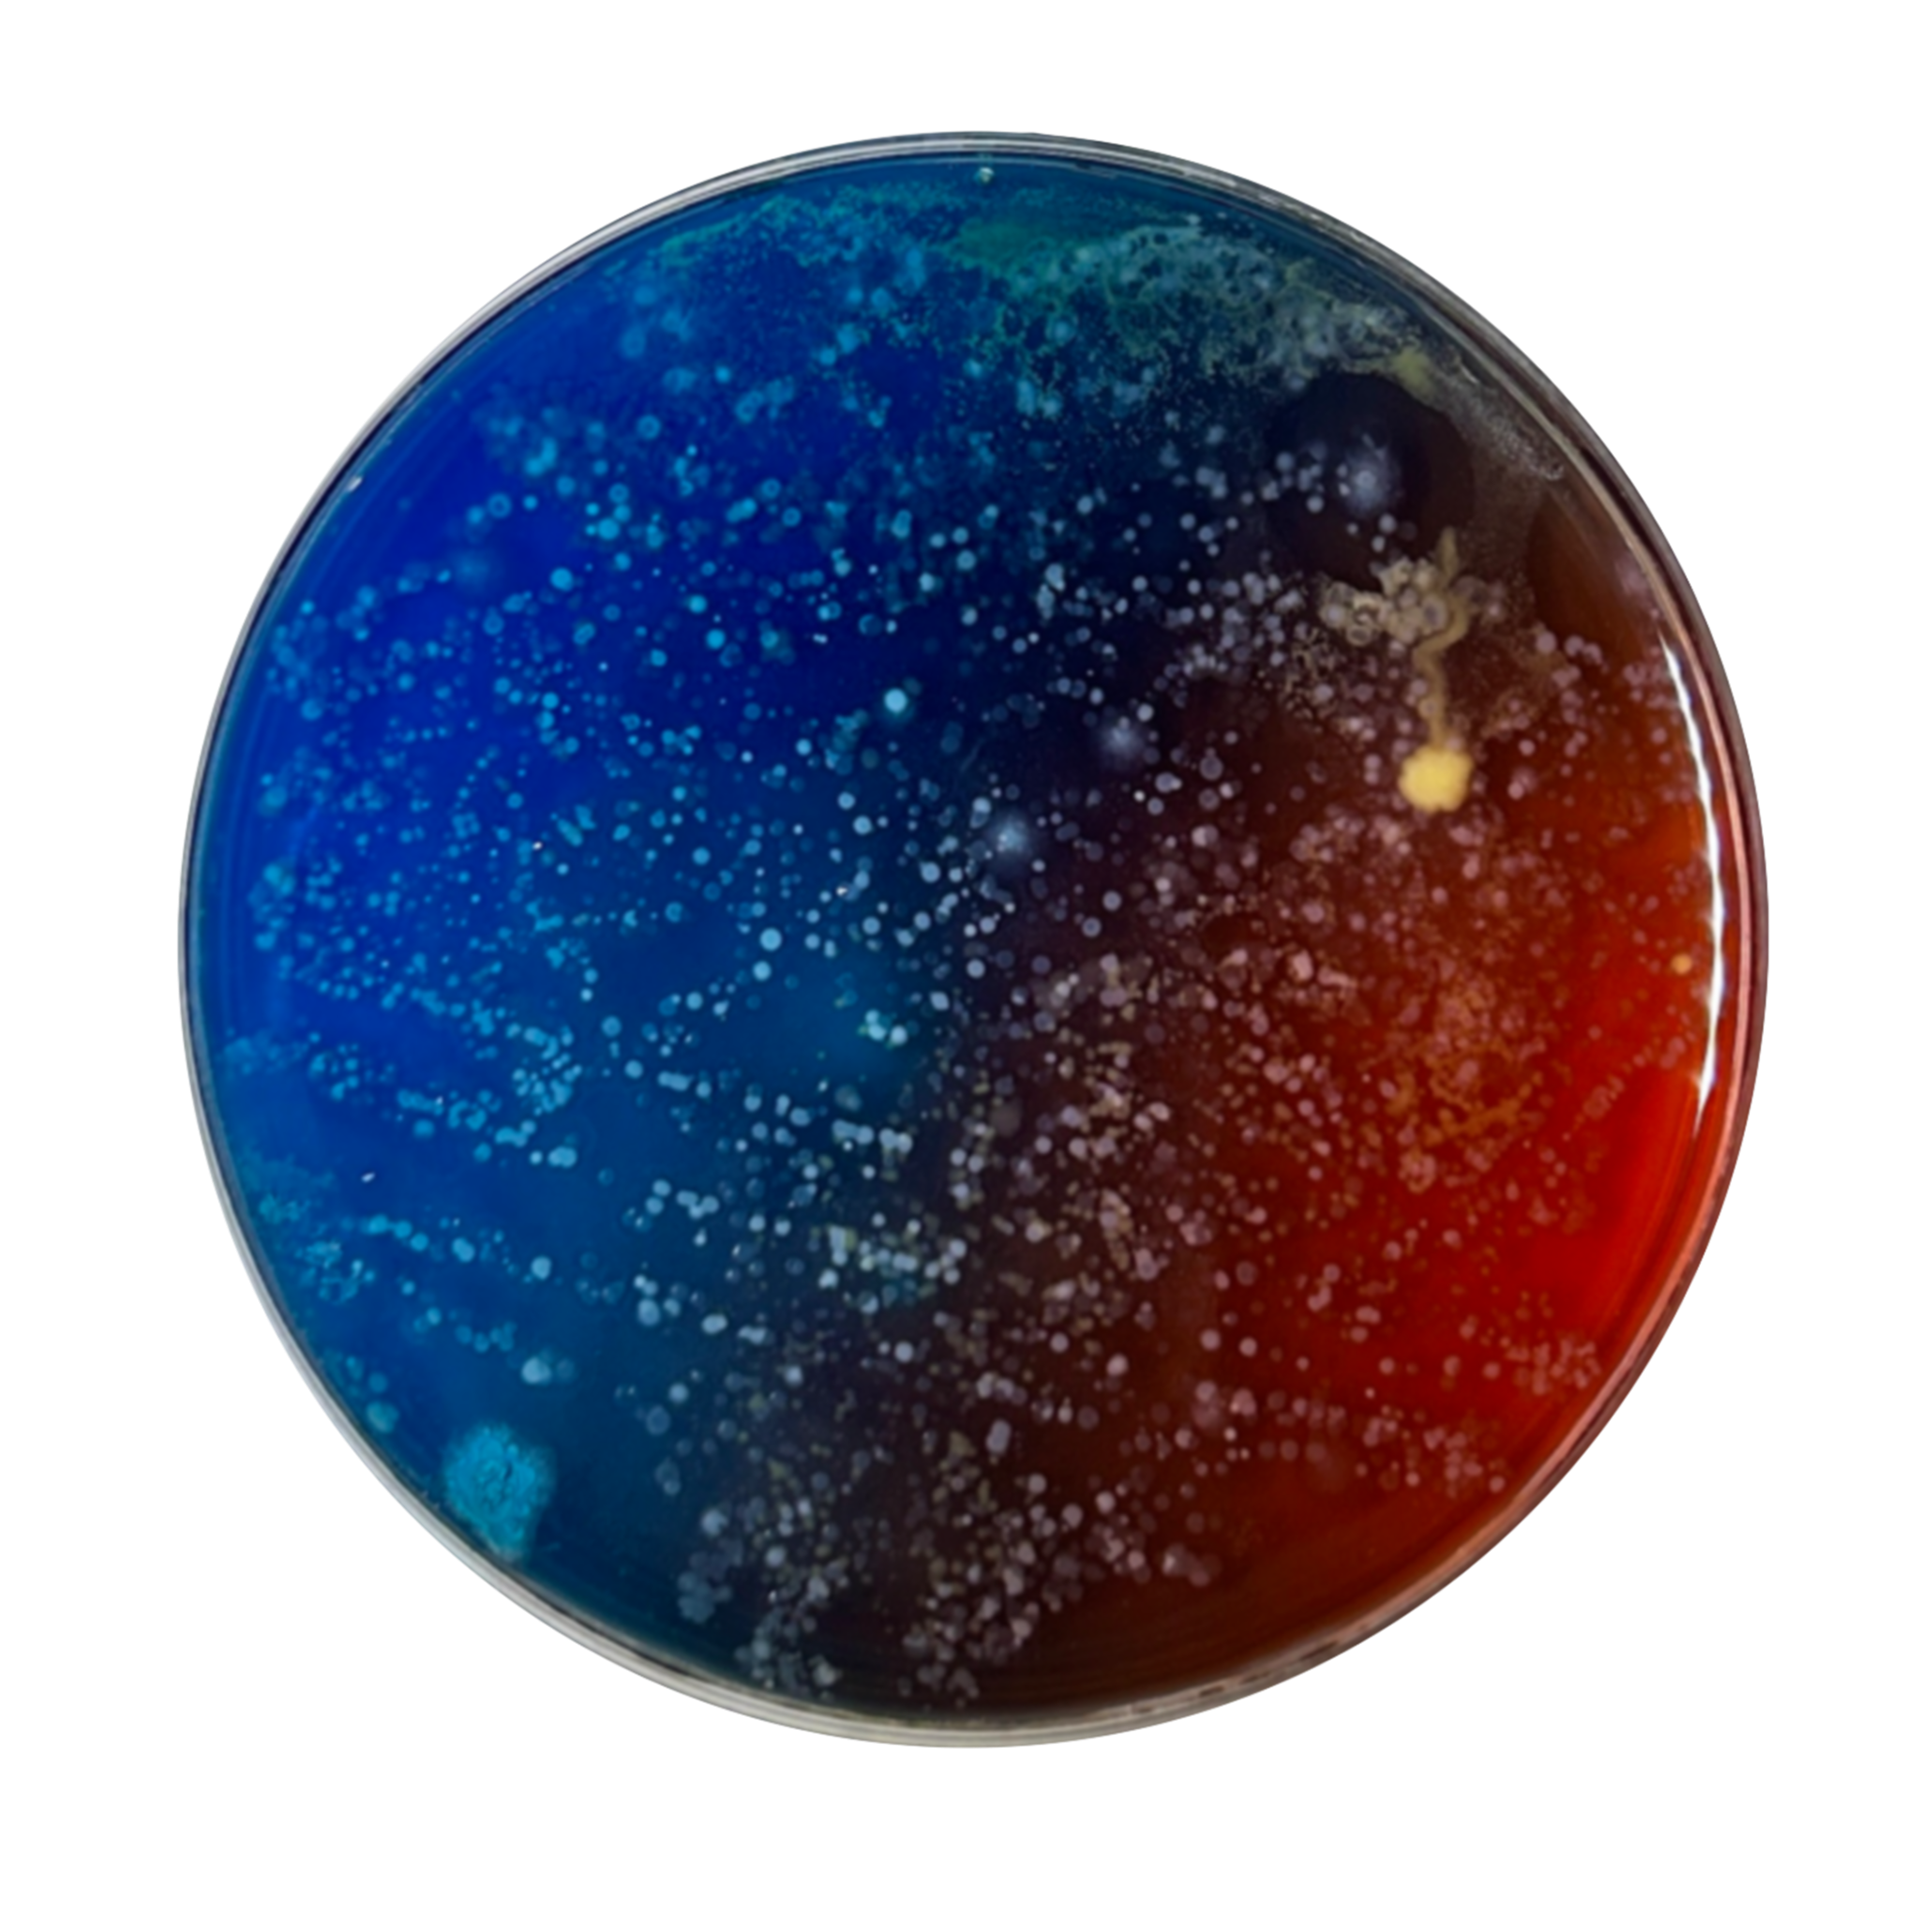
Steps

Swinging Bench
Colour Experiments
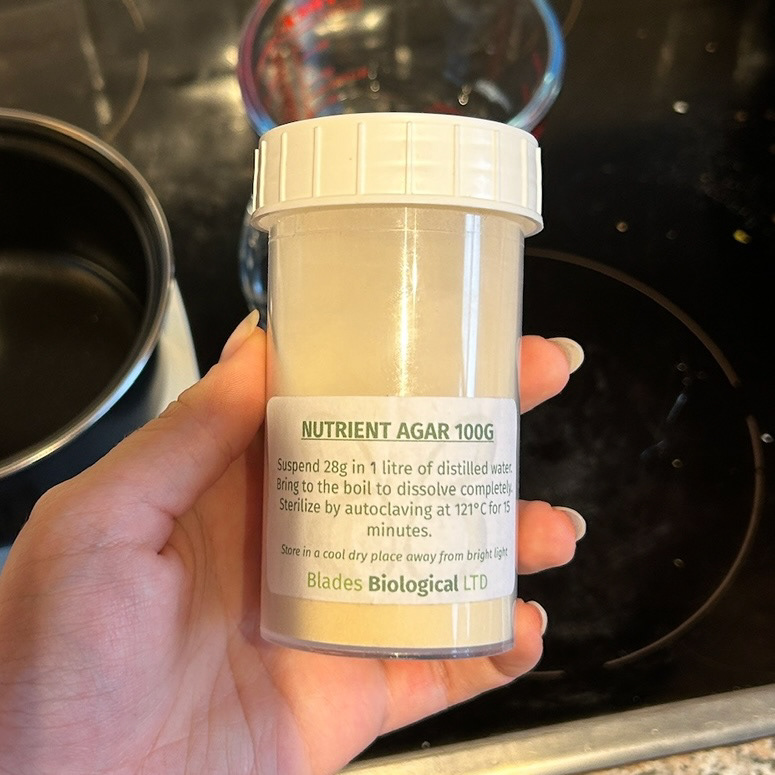
Inspired by the work of Dasha Plesen, I wanted to experiment with incorporating colour into my bacteria samples. To do this, I created my own agar plates and infused them with food dyes.
The process of making the agar mixture is straightforward, as it comes in a pre-mixed powder that just needs to be combined with water and heated until it dissolves completely.
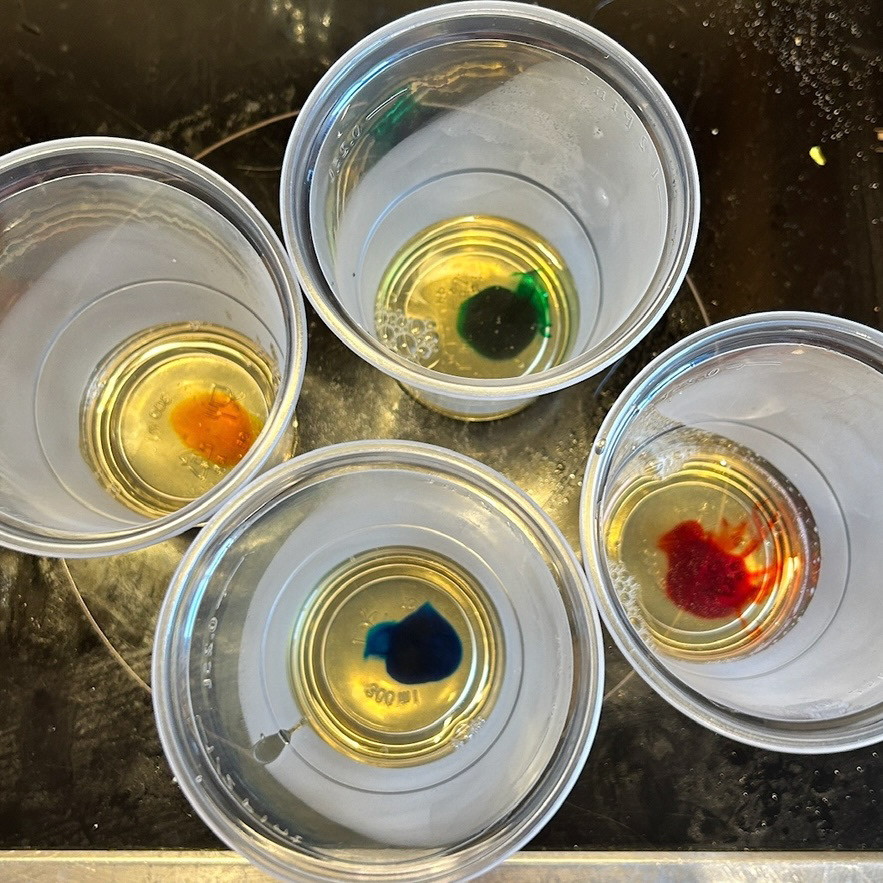
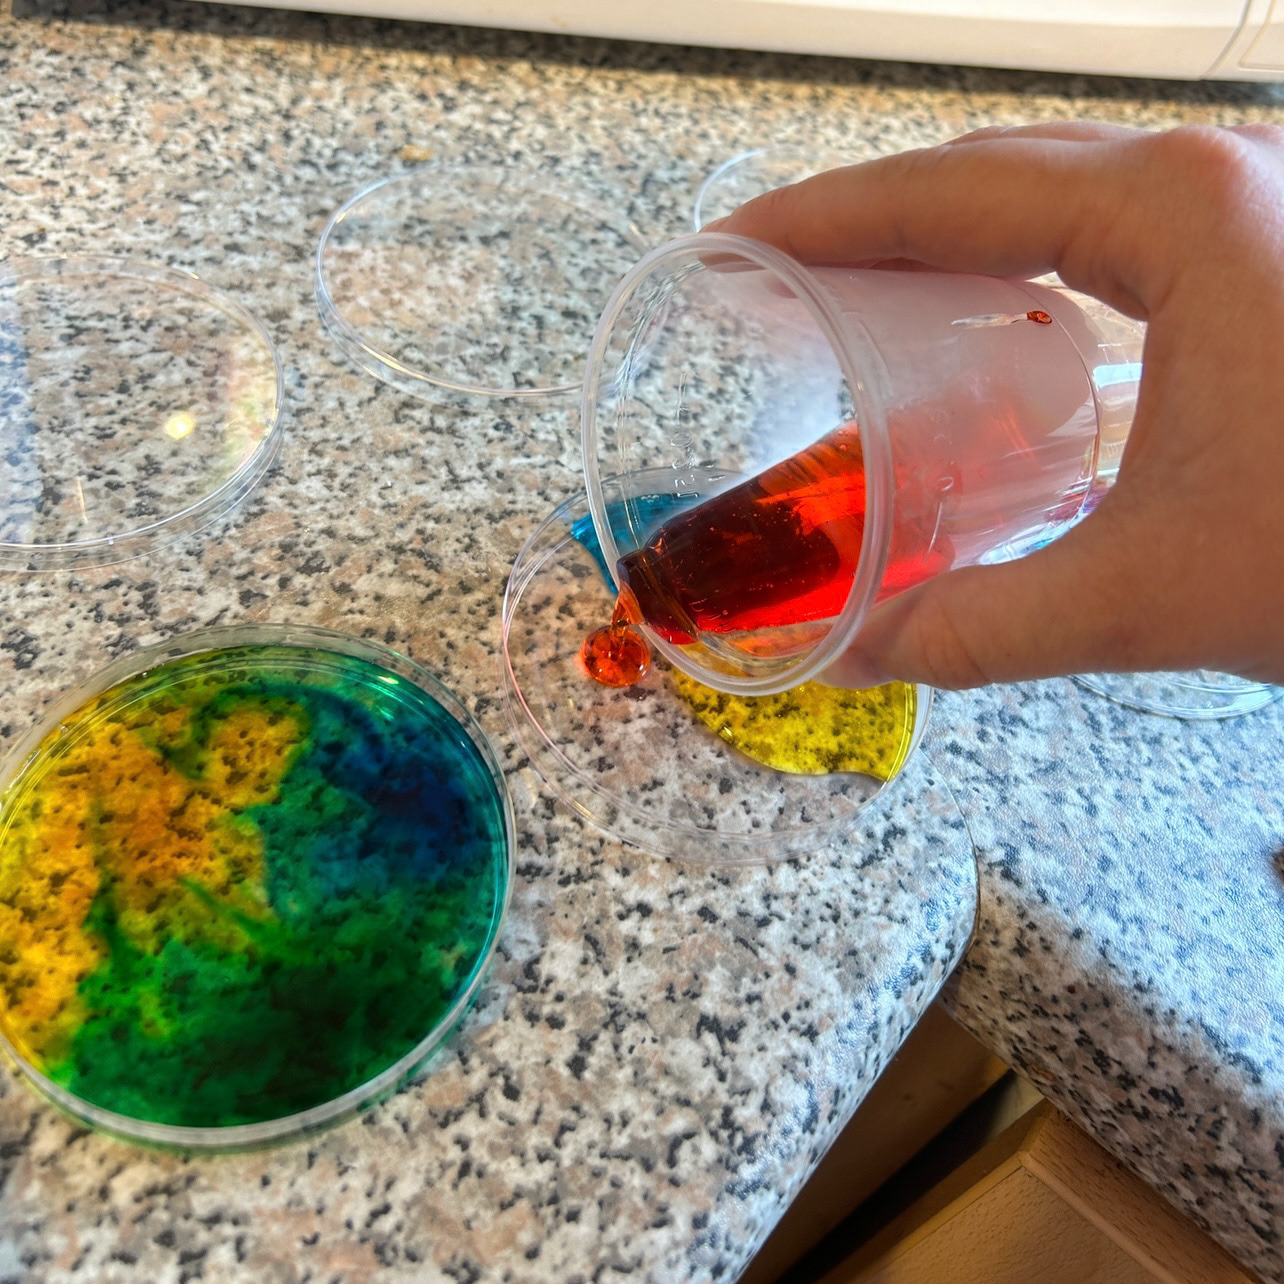
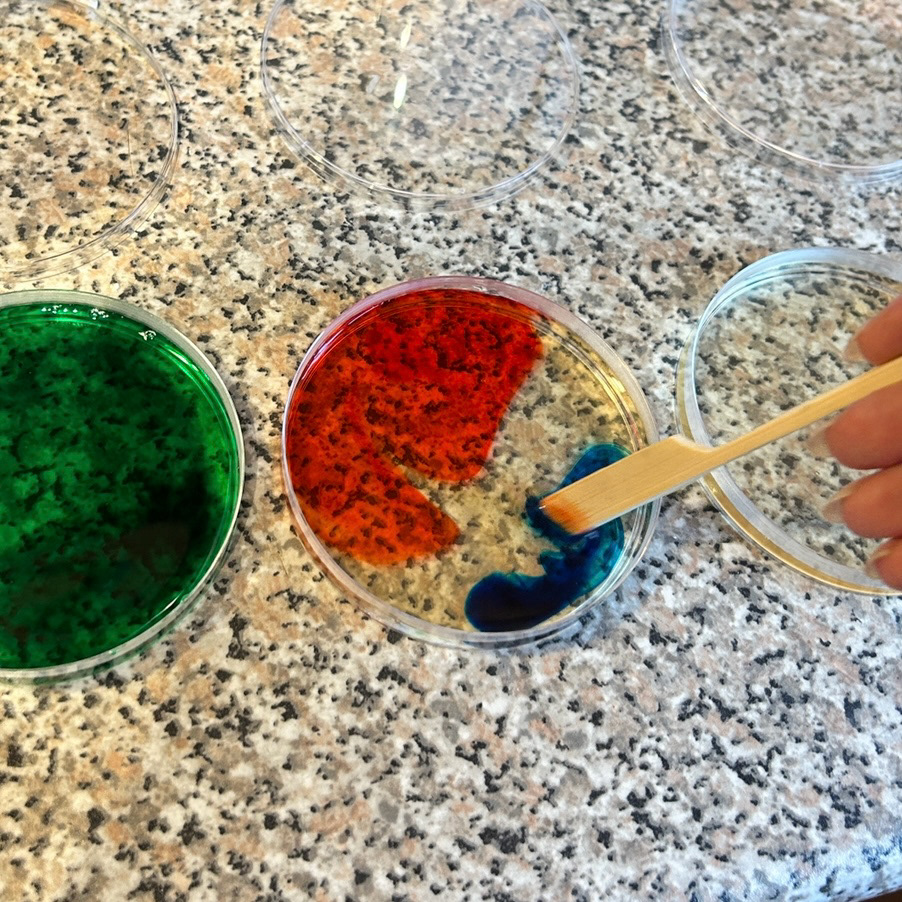
I decided to test two methods for adding colour. First, I divided the agar mixture into separate, sterilized cups, adding a different dye to each one before pouring them into the Petri dishes. For the second method, I poured the plain agar mixture directly into the dishes and then added drops of food dye, stirring in the colour.
Since I wasn't sure about how the addition of the food dyes would impact the growth of the bacteria, I experimented with different concentrations of dye in the samples that were coloured after pouring. This way allowed me to see any variations in the bacteria's response to the presence of the dye, which I believe did not affect the growth.
Method of Making the Agar Plates:
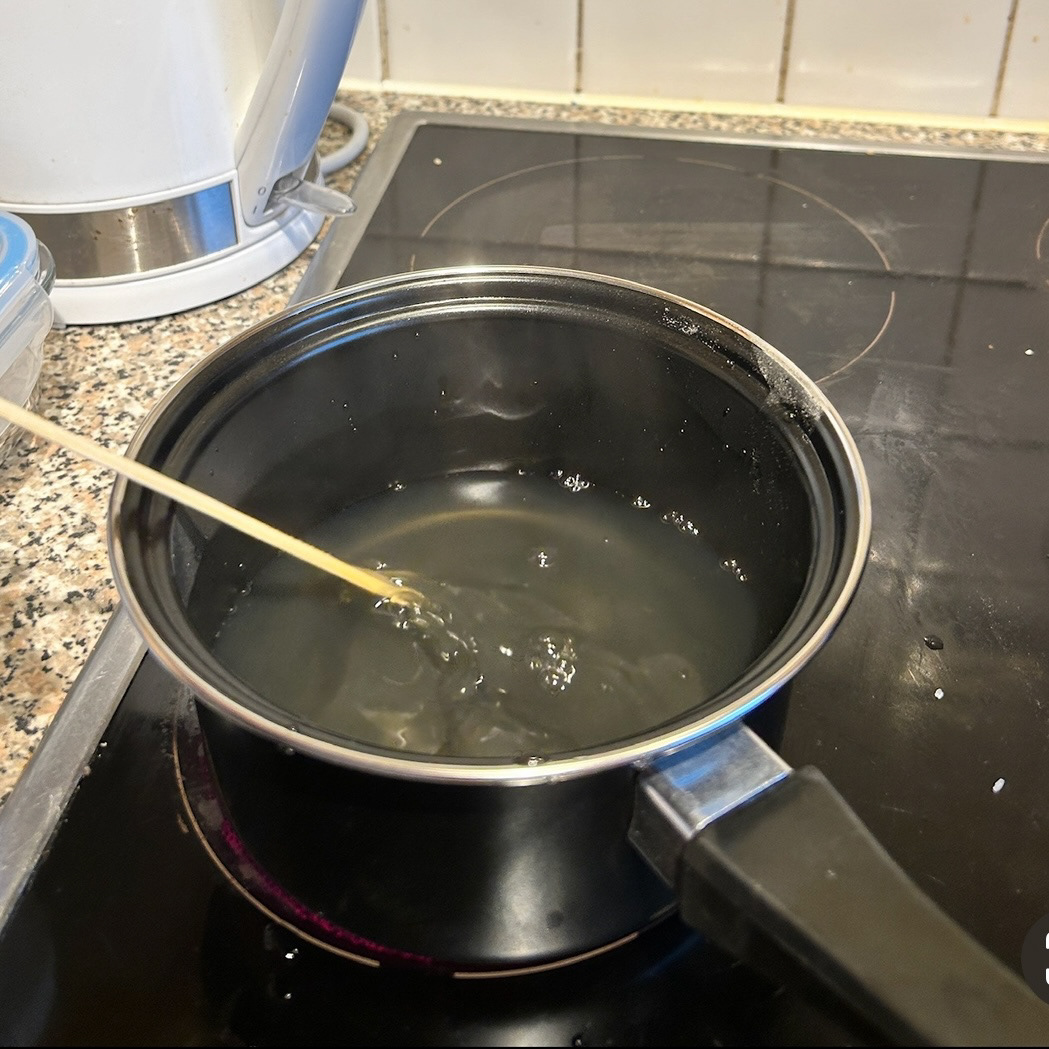
As the agar began to set as soon as it was removed from the heat, I only had a narrow window to make my samples. However, I belive this worked in my favour.
For the samples where I had mixed the colours separately, it meant that they had set more than the other samples. This meant that when I was pouring the agar, the colours had more defined boundaries, rather than mixing all together.
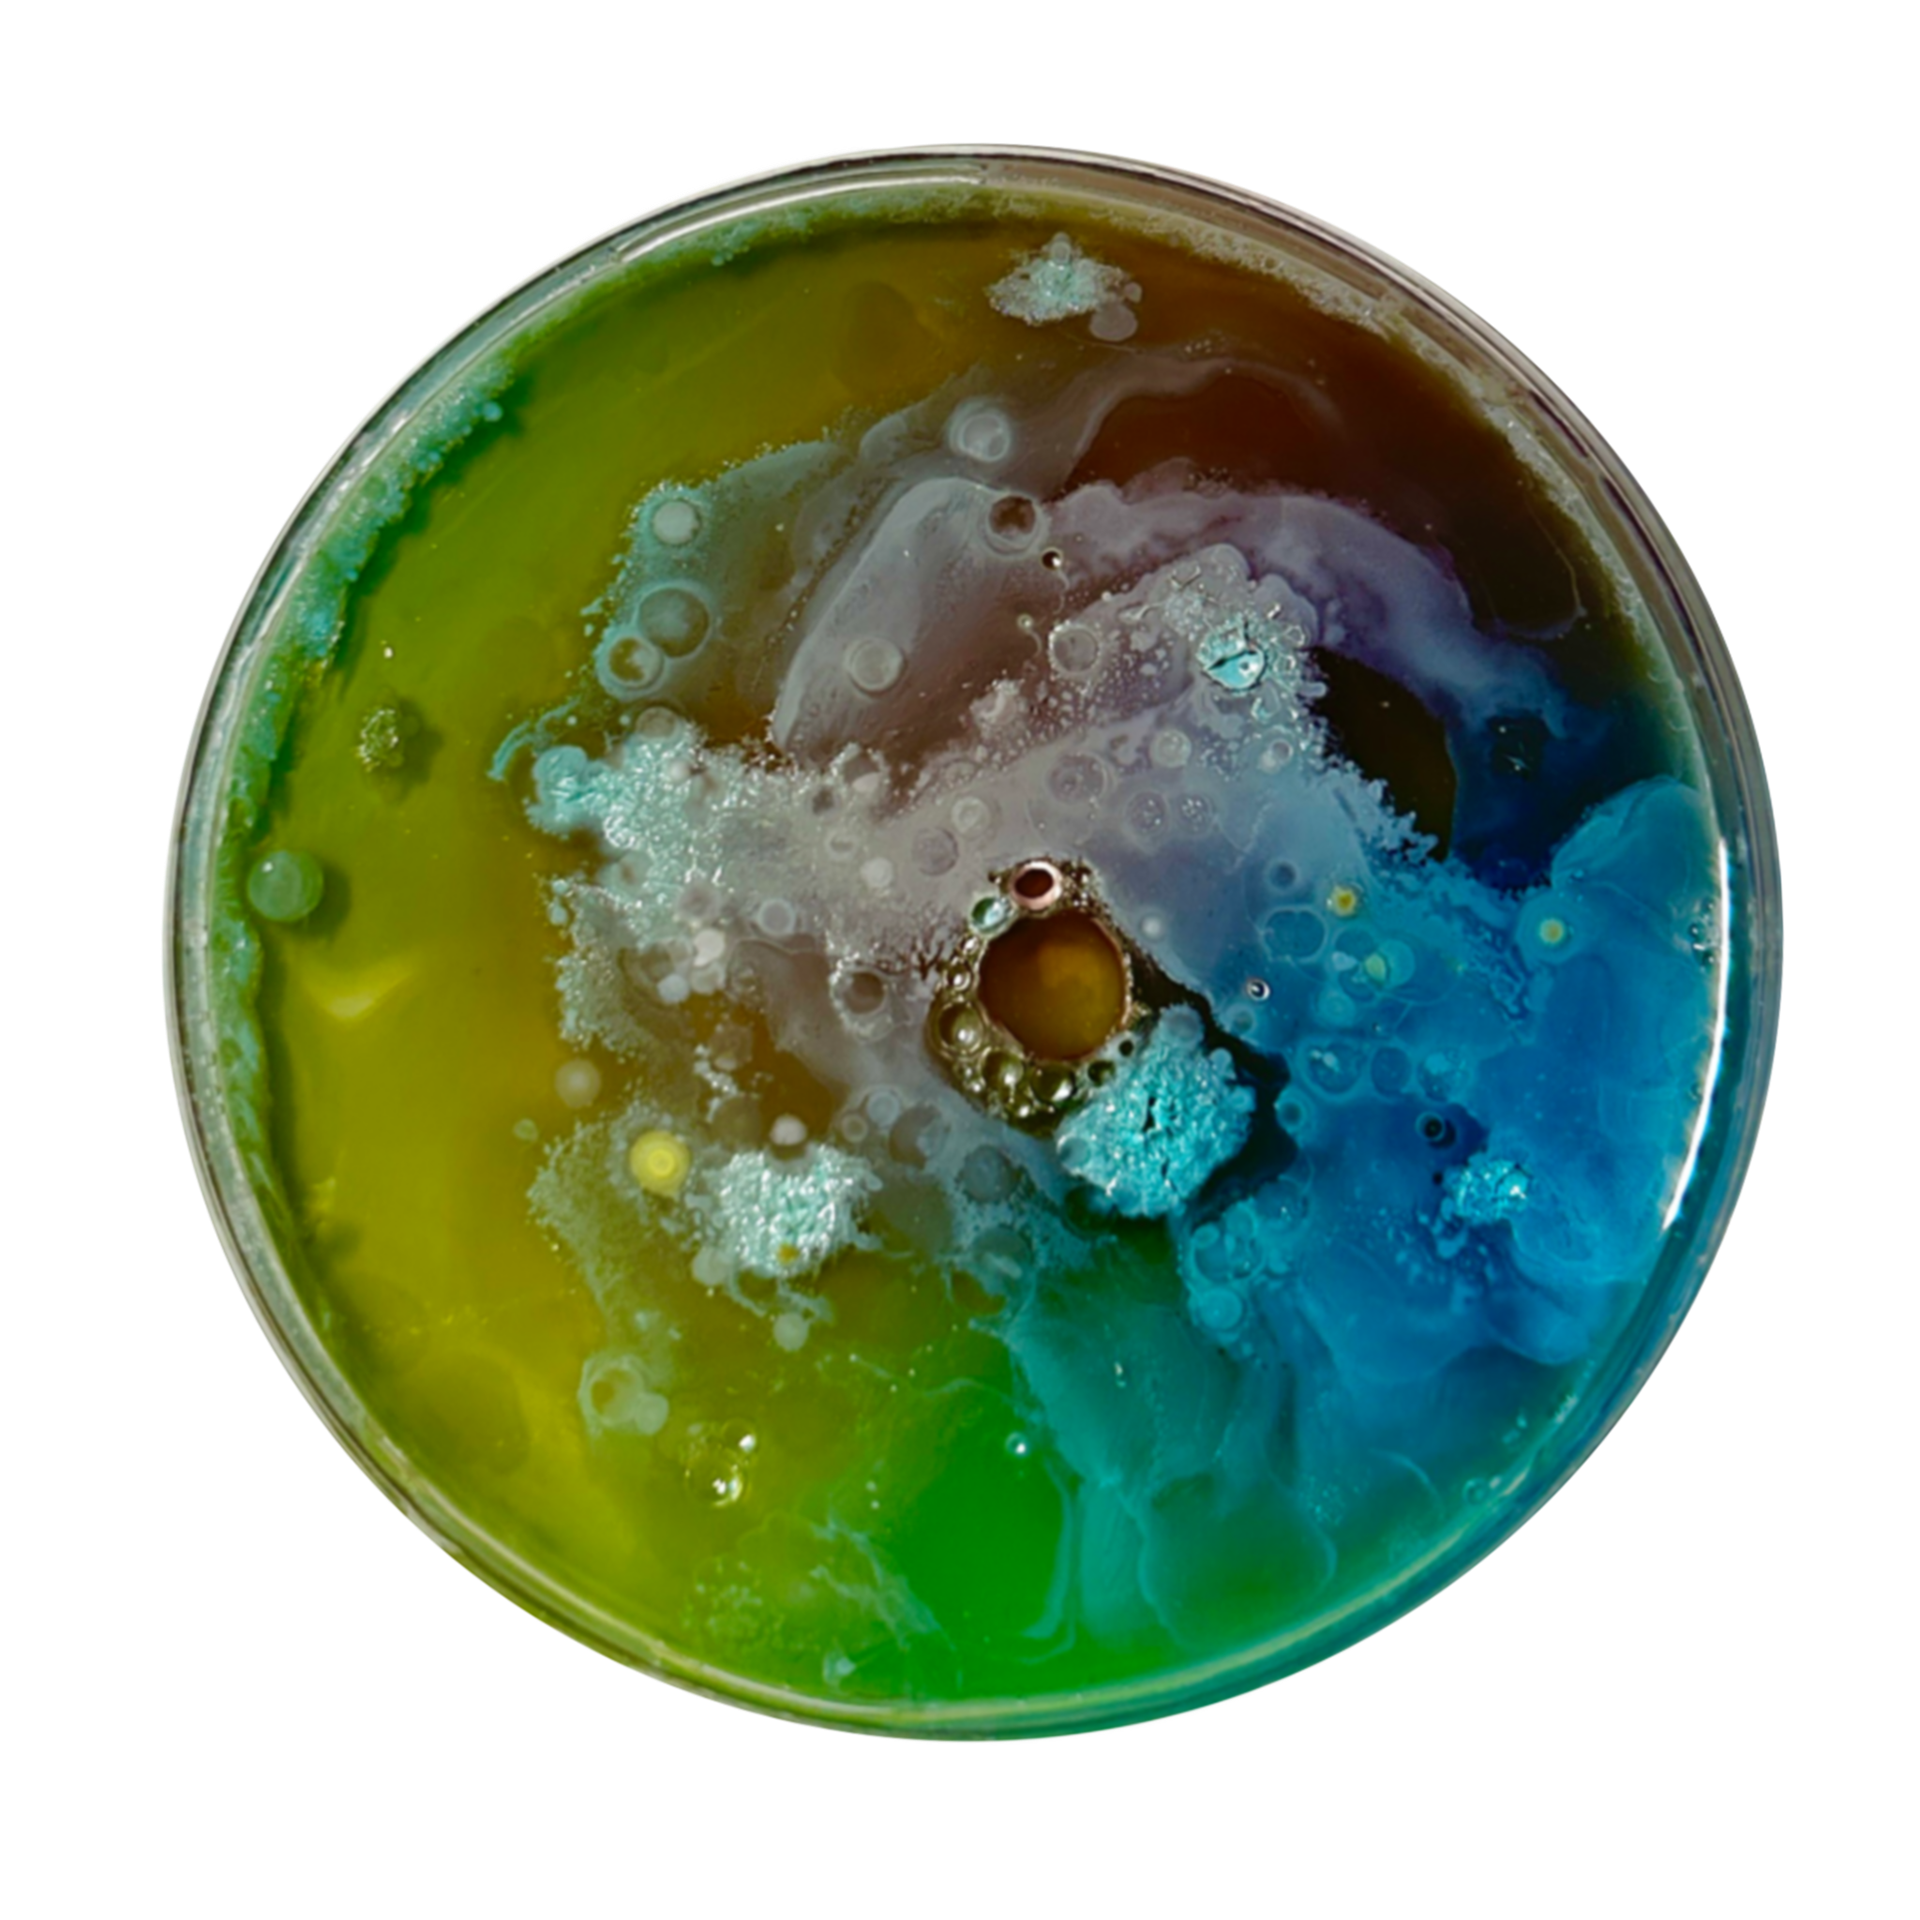
Coloured Experiment Results:
Mixed then Poured

Hand - Swab
Arm - Press

Hand - Press
Face - Press
Poured then Mixed
Face - Swab

Arm - Swab
Flat Building - Swab
Although I'm pleased with the results of these samples, I believe there is still room for improvement. I plan to experiment with using pigments instead of food dyes, as I noticed that the colours began to fade after just a few days. As well as that, I want to explore the idea of using natural dyes sourced directly from the location where the bacteria were swabbed. This approach would allow me to create a more cohesive piece, with the entire sample curated from a specific place, tying the colour and the bacteria back to their origin.
I also liked how clear the lines were with the face and hand swabs - and I am planning on experimenting with how I can manipulate those lines. One idea I have is to try and distort the agar, and see if I can create an uneven surface texture, and how that could interfere with these clear lines, and add more texture while still being structured.
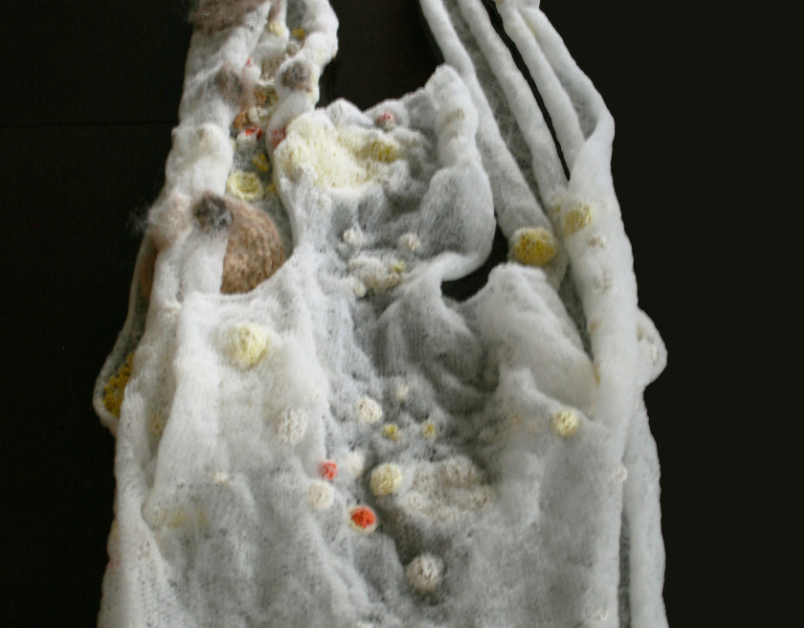
Wax Models
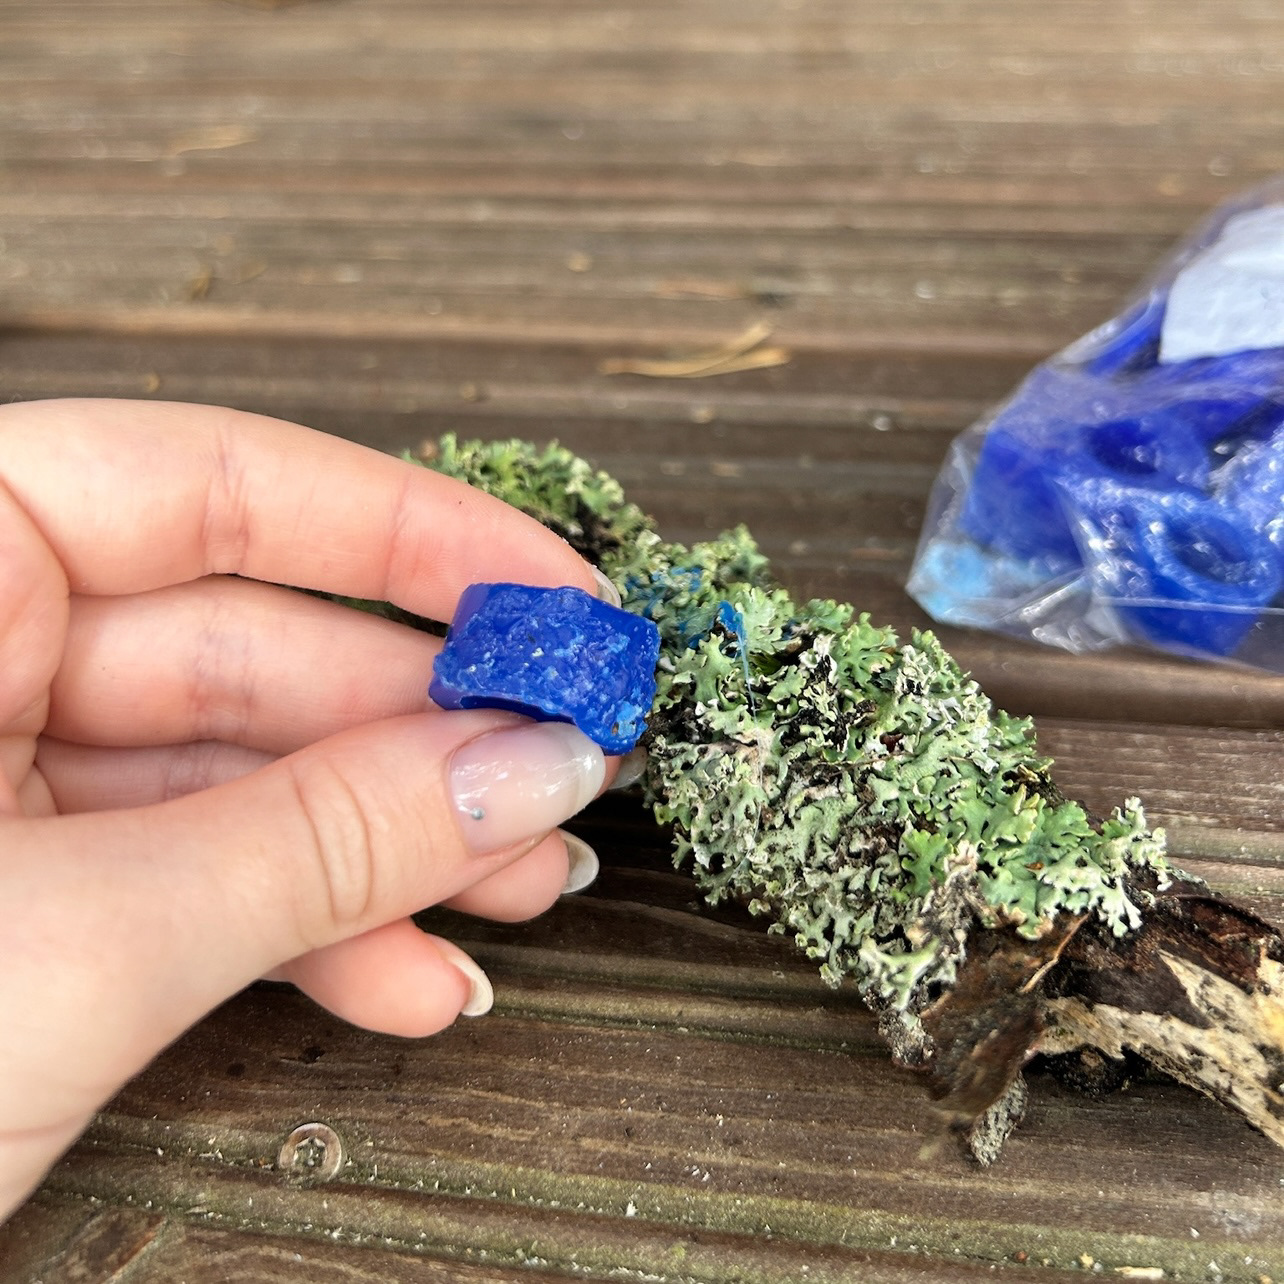
While in Finland, I decided to create wax samples inspired directly by the surrounding textures and where I had sampled the bacteria from. I focused primarily on capturing the intricate details of the lichen and the rocks nearby. I used a lighter to melt the wax and press the textures directly into it. If I were to do this again I would use a much softer wax, as the lighter was not enough heat to melt the wax as much as I had hoped. Being outside in the rain also meant that the wax cooled down much quicker than I was used to, which meant that pressing the textures was much harder than I thought it would be.
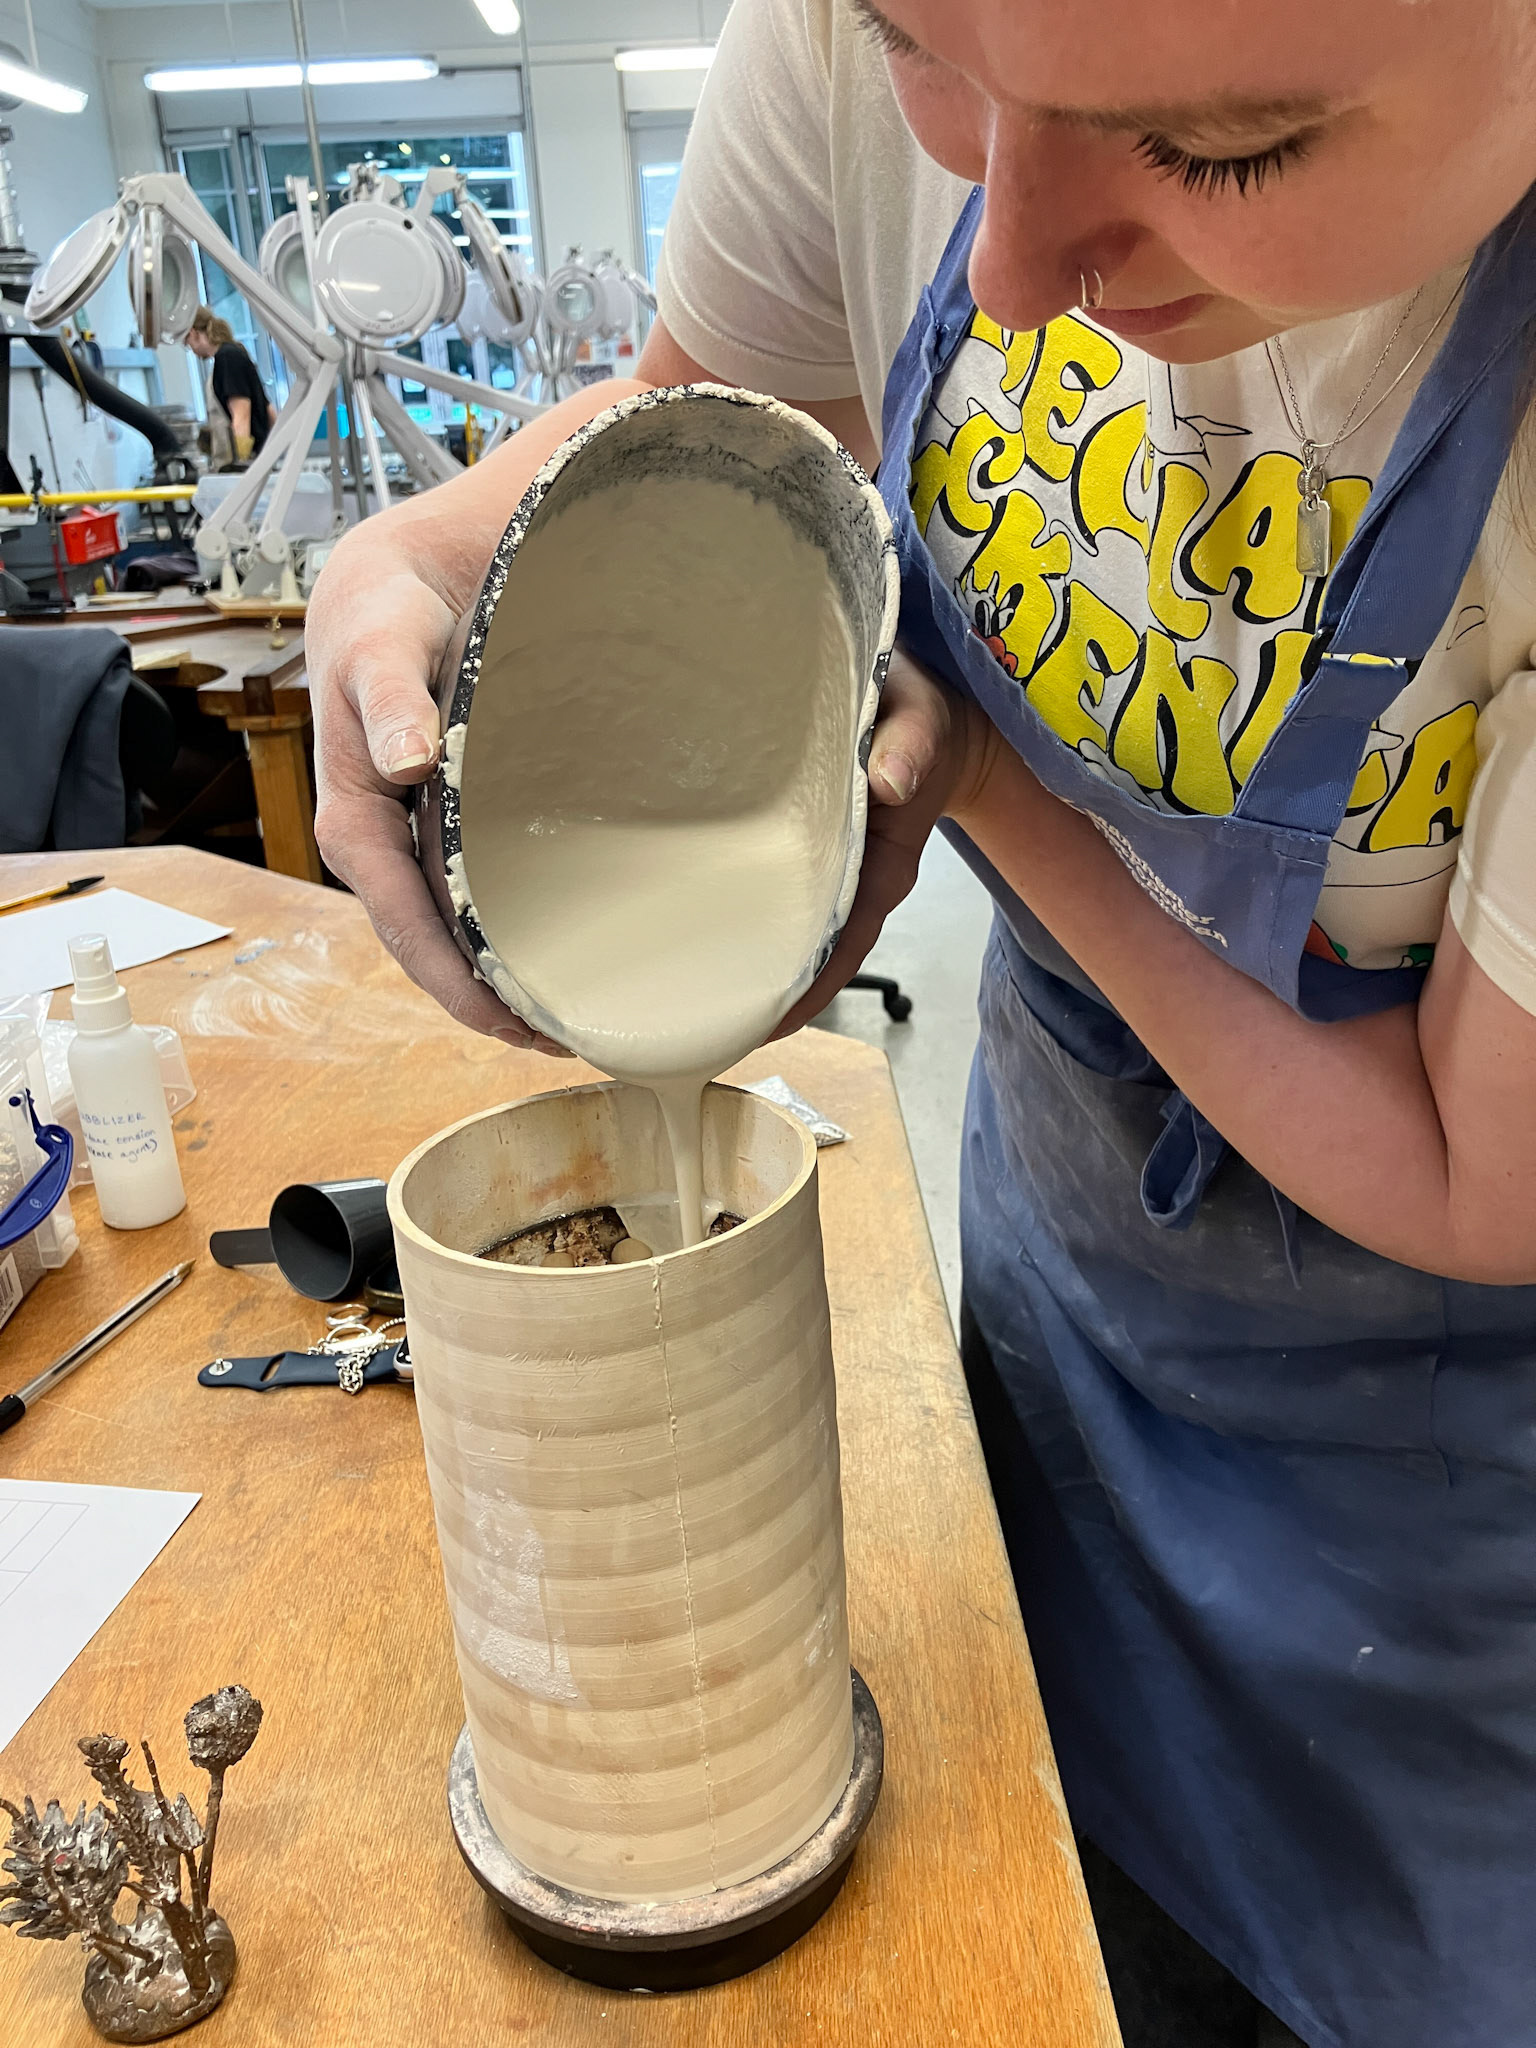
Pouring the plaster, Photo by Oonah Illingworth
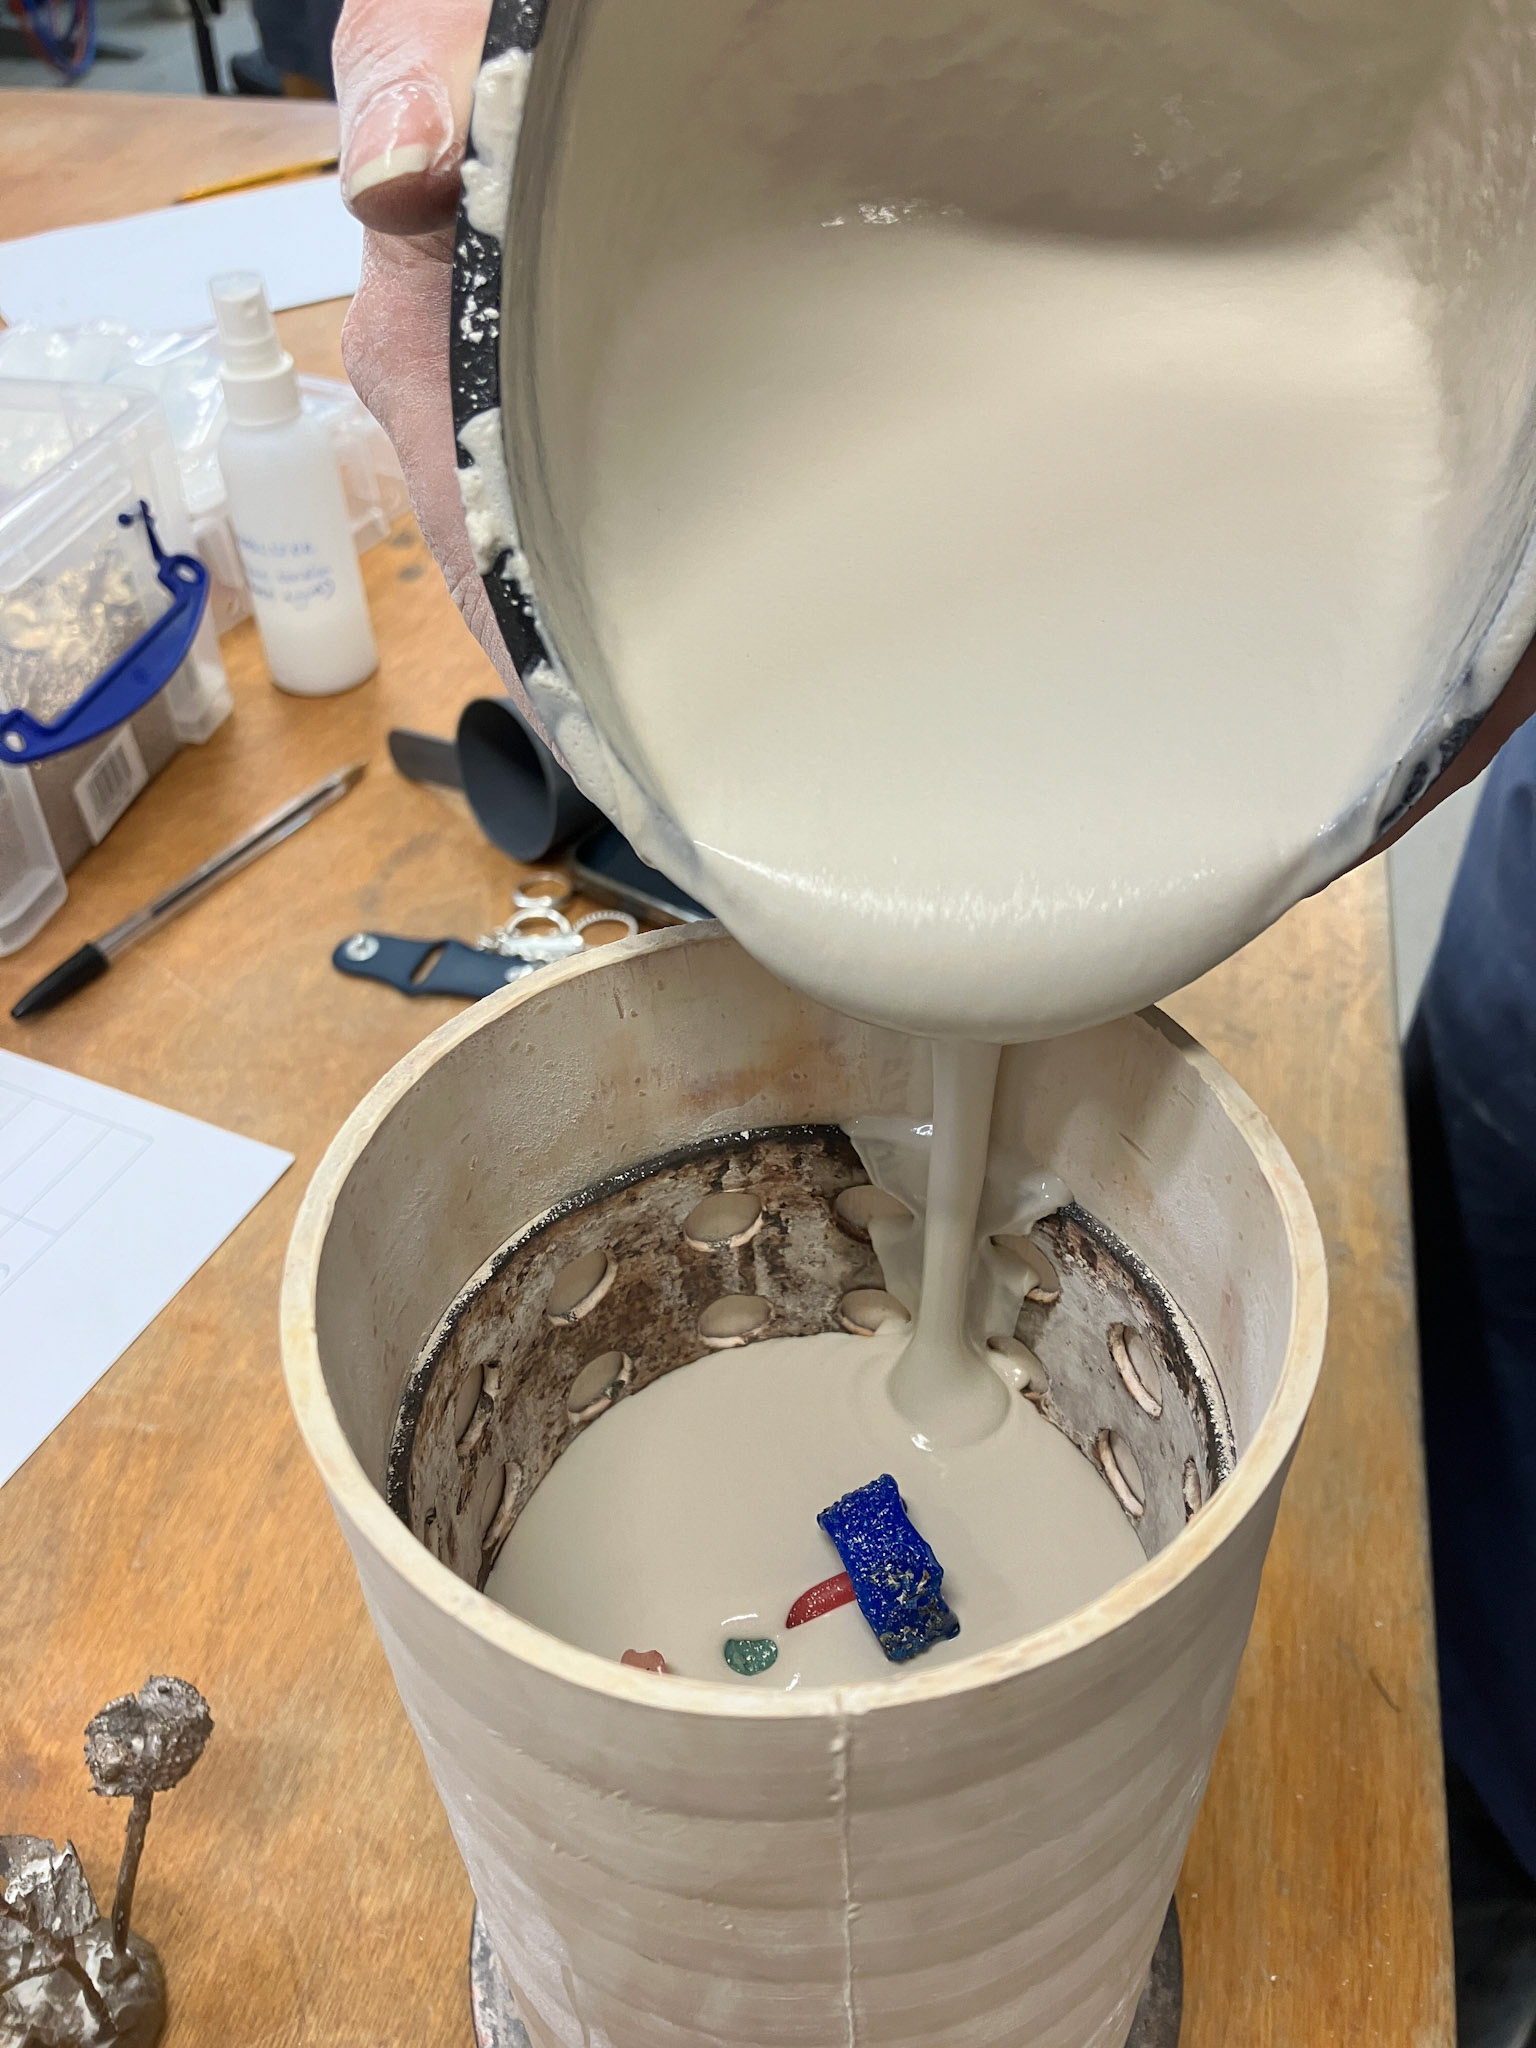
Pouring the plaster, Photo by Oonah Illingworth
I then cast these pieces in brass when the workshops reopened.

Here are the finished wax casts, before polishing. I decided not to polish these pieces purely because of how time-consuming it would be, and as I did not like these pieces very much, this seemed like a waste. The wax did not capture the textures as I had hoped and did not look refined enough for me. While making these, I only had a wooden toothpick to use as a tool, and so I found that making small, minor, adjustments was very difficult.
Silver Clay
During the sampling stage I also tried a new material, sterling silver clay. This clay is made from tiny silver particles, mixed with a binding agent to form a clay texture. This clay can then be fired in a kiln or with a hand torch, which burns off the binding agents and leaves behind the silver particles / solid 925 sterling silver.
I chose to experiment with this material as it allowed me to take textures directly from the places that I had sampled for my bacteria cultures. In these examples, I focused on capturing the texture of lichen from Finland. I also tested setting stones directly into the clay to see how this would look.
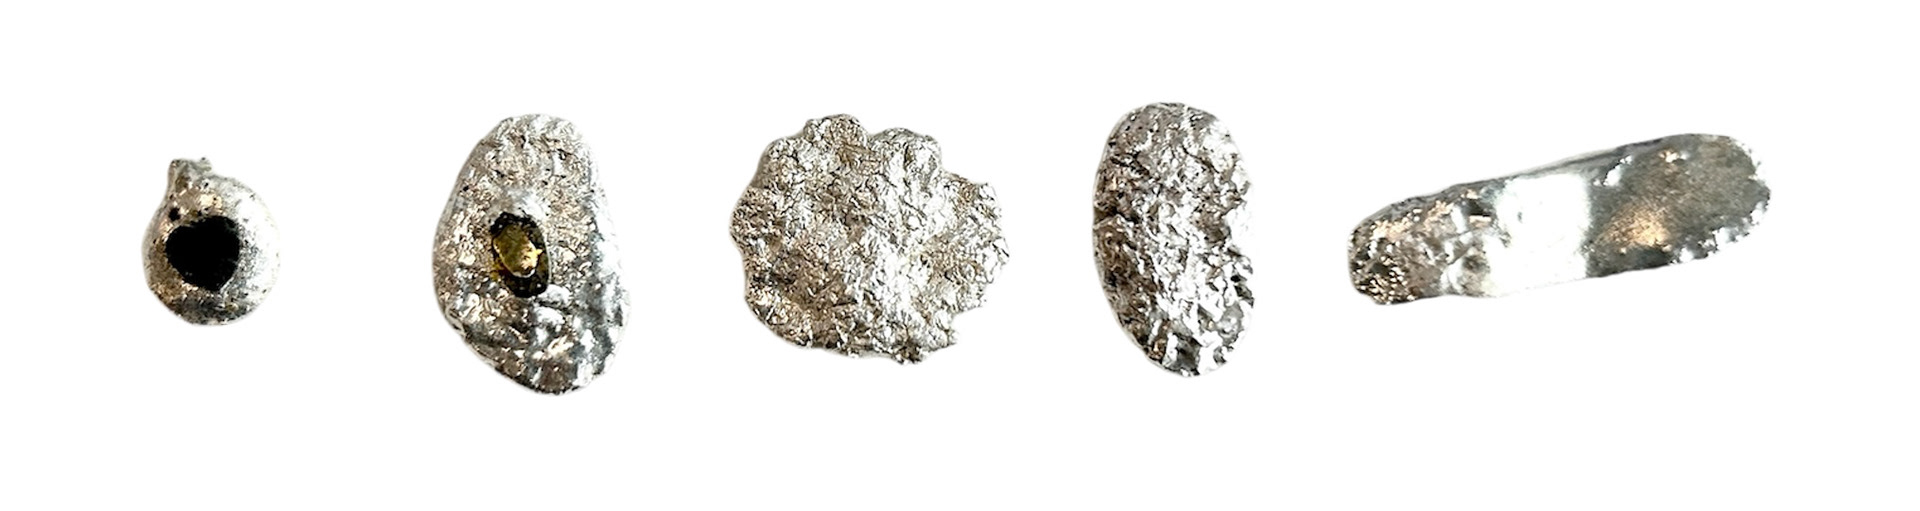
As my first attempt, I decided to create a long and thin piece of silver, in the hopes that I could manipulate a 3D shape once it was fired (piece on the right). However, during the firing process, I ended up heating the silver for too long, and melted away most of the lichen texture. Because the binding agents set on fire when heated, I found It hard to see when the silver was cherry red, and when it was just reflecting the glow of the flame. This meant that I had to keep stopping and starting the firing process as at times I had not heated it enough, though, on my last attempt, I ended up heating it for too long just as the binding agents had burnt off, therefore melting the surface texture.
After this setback, I created 2 more samples using the lichen texture again, however this time I was much more gentle with the heat, which worked well. The surface kept the texture and kept the organic shaped sides that I had hoped to include.
As a first test of stone setting, I decided to use a small heart-shaped emerald Cubic Zirconia, as I knew I would not use this in my practice. I made a small ball from the clay and gently pressed it into the stone, making sure to try and cover the edges with some clay. I then fired the clay using my hand torch, making sure to take my time and use low heat as to not melt the silver. However, my stone completely changed colour due to the heat. While I felt that I had only used a 'low and slow' method to heat the silver, it still changed the stone completely. In addition to that, I did not account for as much shrinkage as it had. The directions on the silver clay that approximately 25% needs to be accounted for shrinkage, which I thought I had done, however, the stone ended up not being flush with the silver and ended up protruding slightly.
I then repeated these steps with another stone, a light blue oval Cubic Zirconia, using one of the textured pieces of lichen. This time I made sure to add more silver for bezels at the top and bottom of the stone, which helped massively. While my stone did still change colour, it was not as drastic as my first attempt.
If I were to do this again in the future, I think that using a kiln to fire the pieces would be better than a hand torch, as it would heat the samples more evenly, and the temperature control would be more consistent.
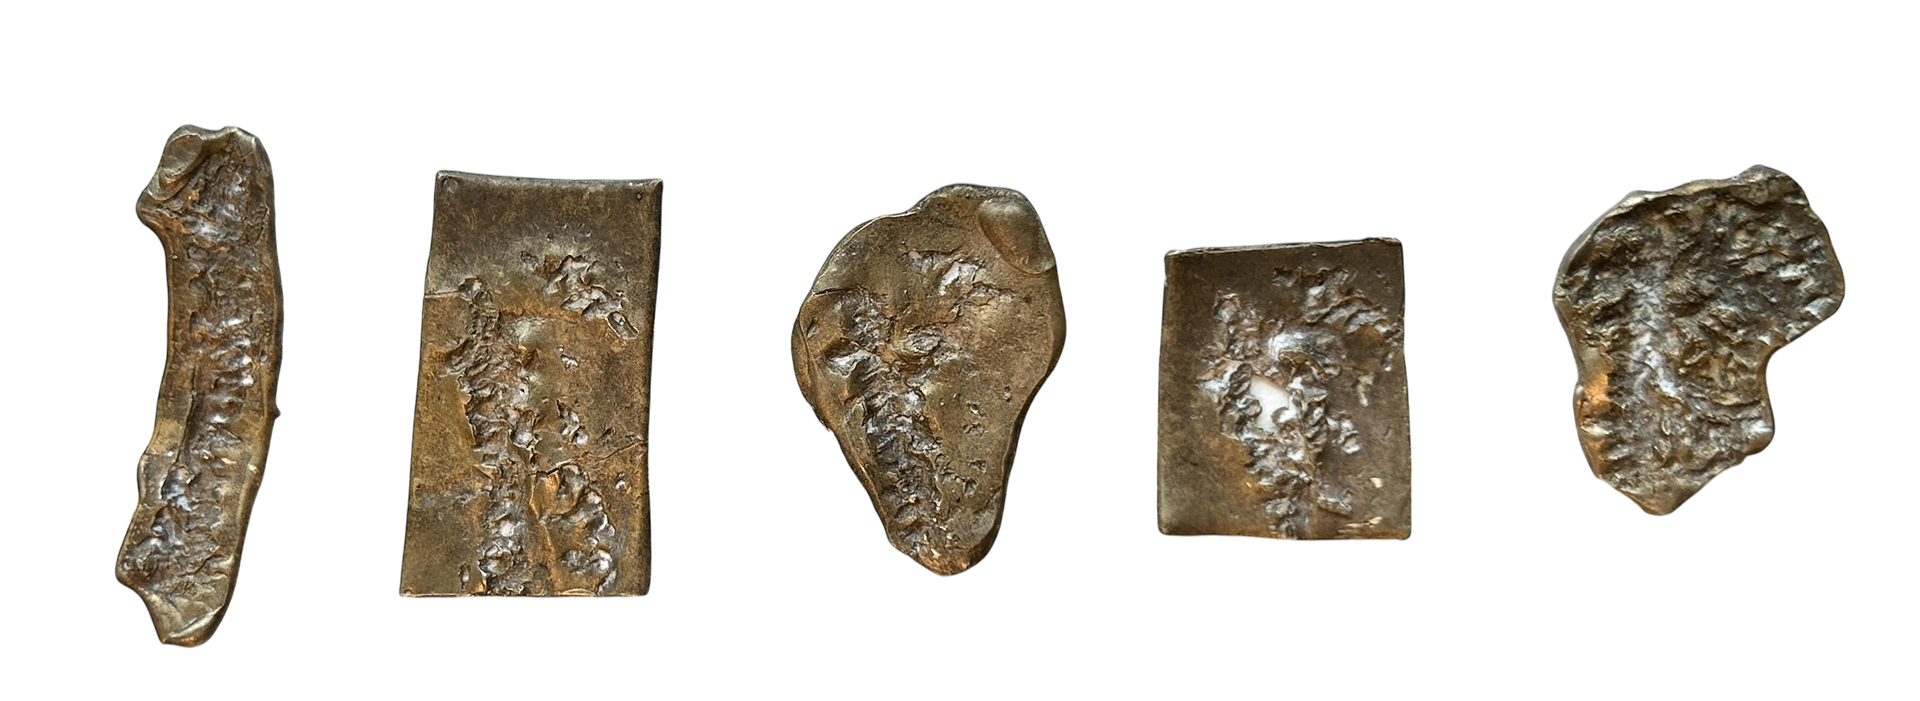
Enamelling
After researching various enamelling artists, I decided to explore different enamelling techniques. Instead of using the traditional sifting method to create a 'collage' of different colours, I experimented with a wet enamelling approach.
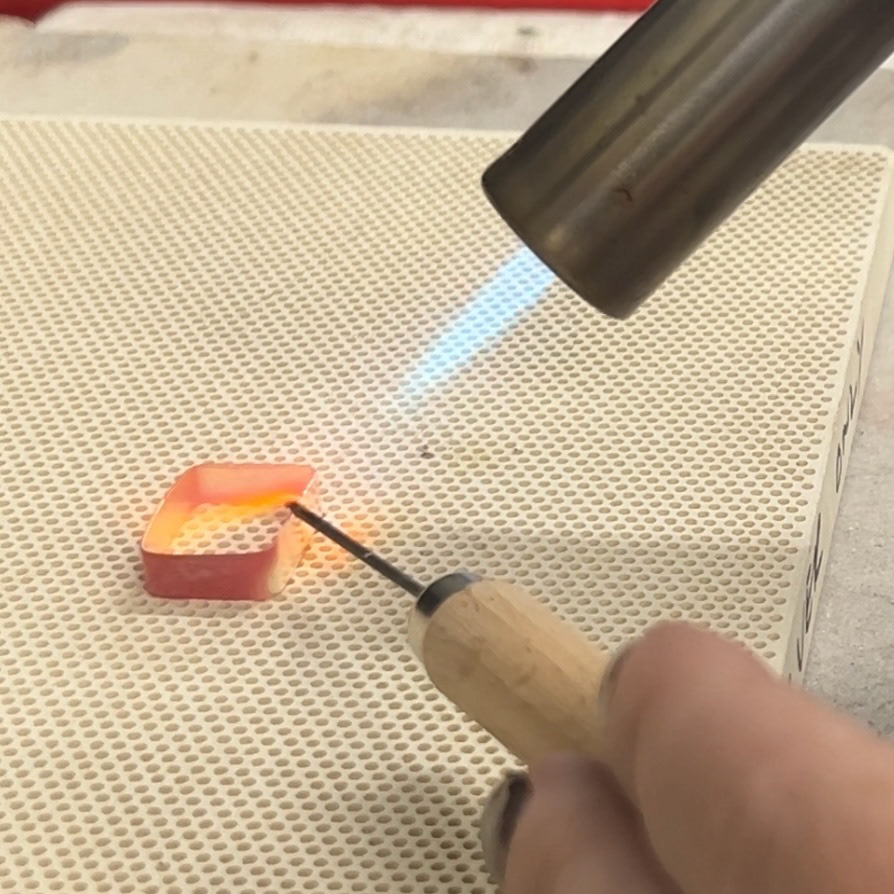
I mixed the powdered enamel with water and applied a layer onto a 1.2mm copper sheet, gently blending the colours with a wet brush. After allowing the enamel to dry for about an hour, I torch-fired it using my hand torch.
As the enamel melted, the colours began to blend and form an interesting surface texture. I realised that this kind of texture was something I wanted to incorporate into my work. While I don't often use texture, I've decided that this year I want to experiment more with it. To start, I plan to use techniques that I'm already comfortable with to gradually introduce it into my designs.
Although most of my samples cracked or had the enamel flake off, three pieces survived. I believe there were two main reasons for the cracking: the enamel layer was too thick, and the pieces cooled down too quickly. In the workshops, I usually use an electric kiln, which retains heat well on the top of the kiln. After removing a piece from the kiln, I place it on top to cool down slowly. Since I was using a hand torch for this experiment, I improvised by heating a honeycomb block to help with a slower cooling process.
As I'll be repeating these enamelling techniques in the workshop, I'm not too concerned about the cooling speed, and I believe this method will have better results in the future.
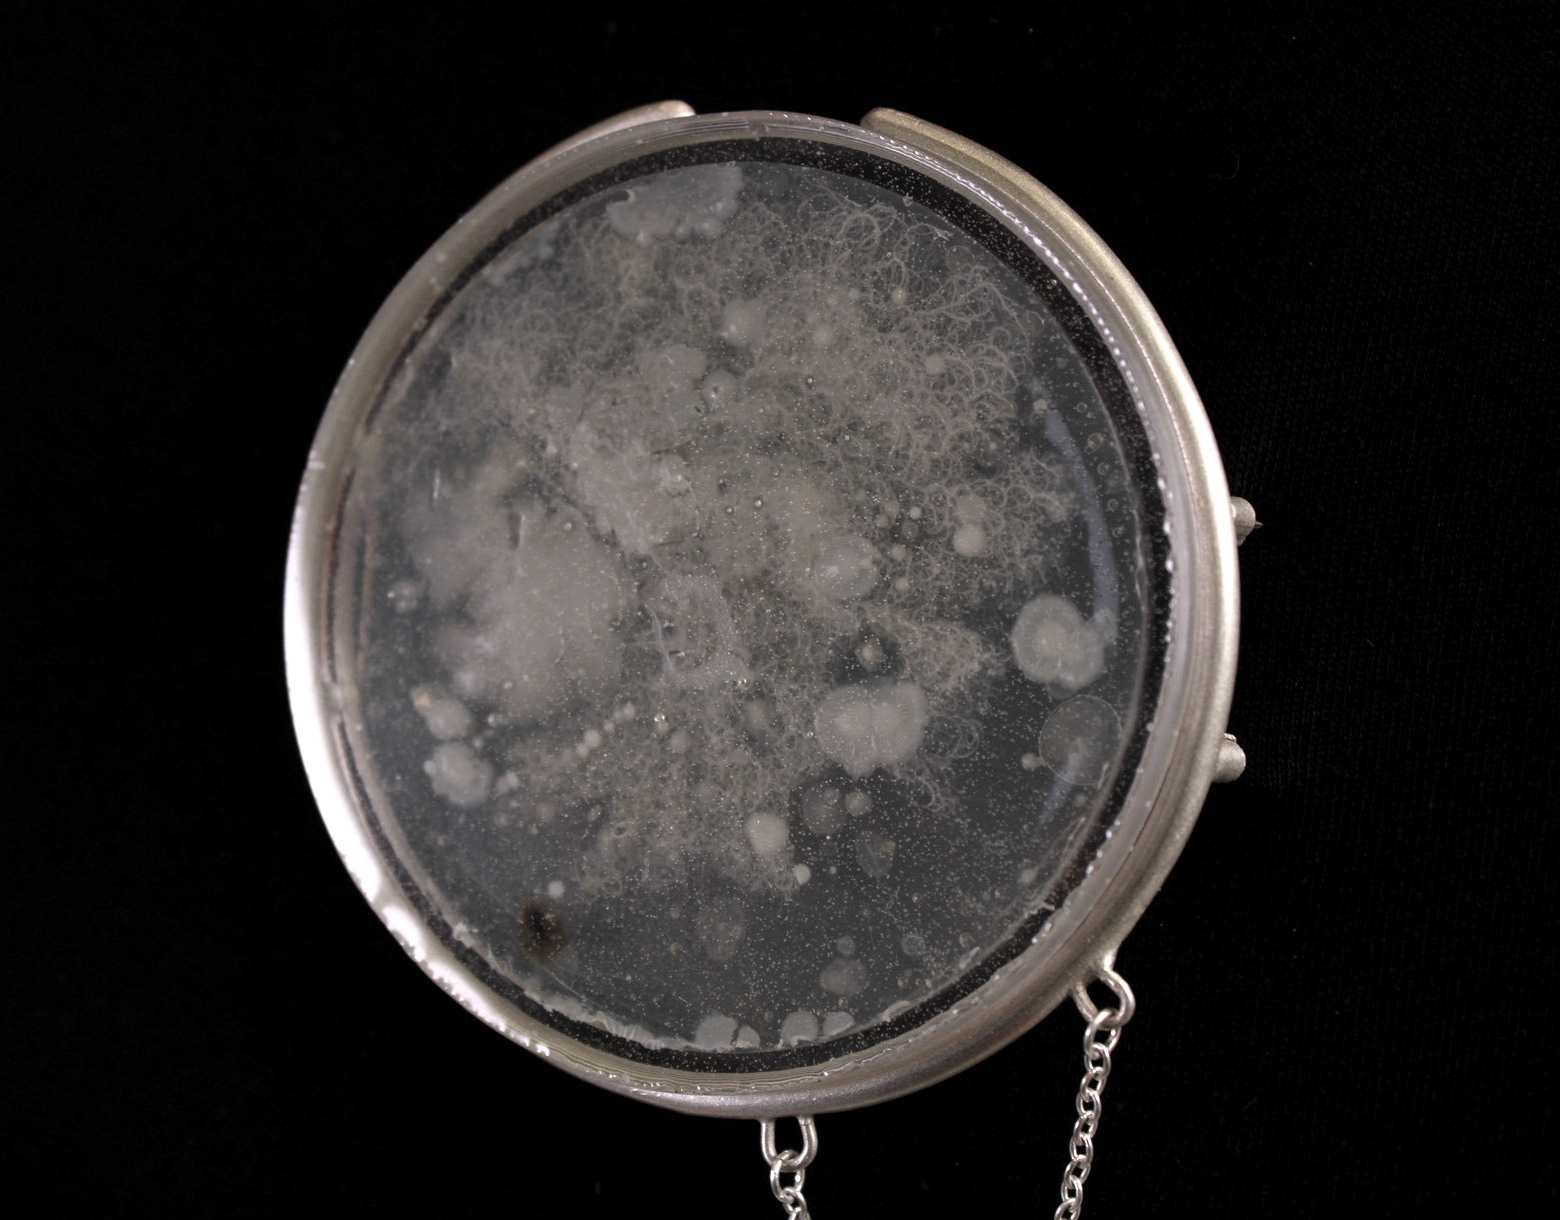
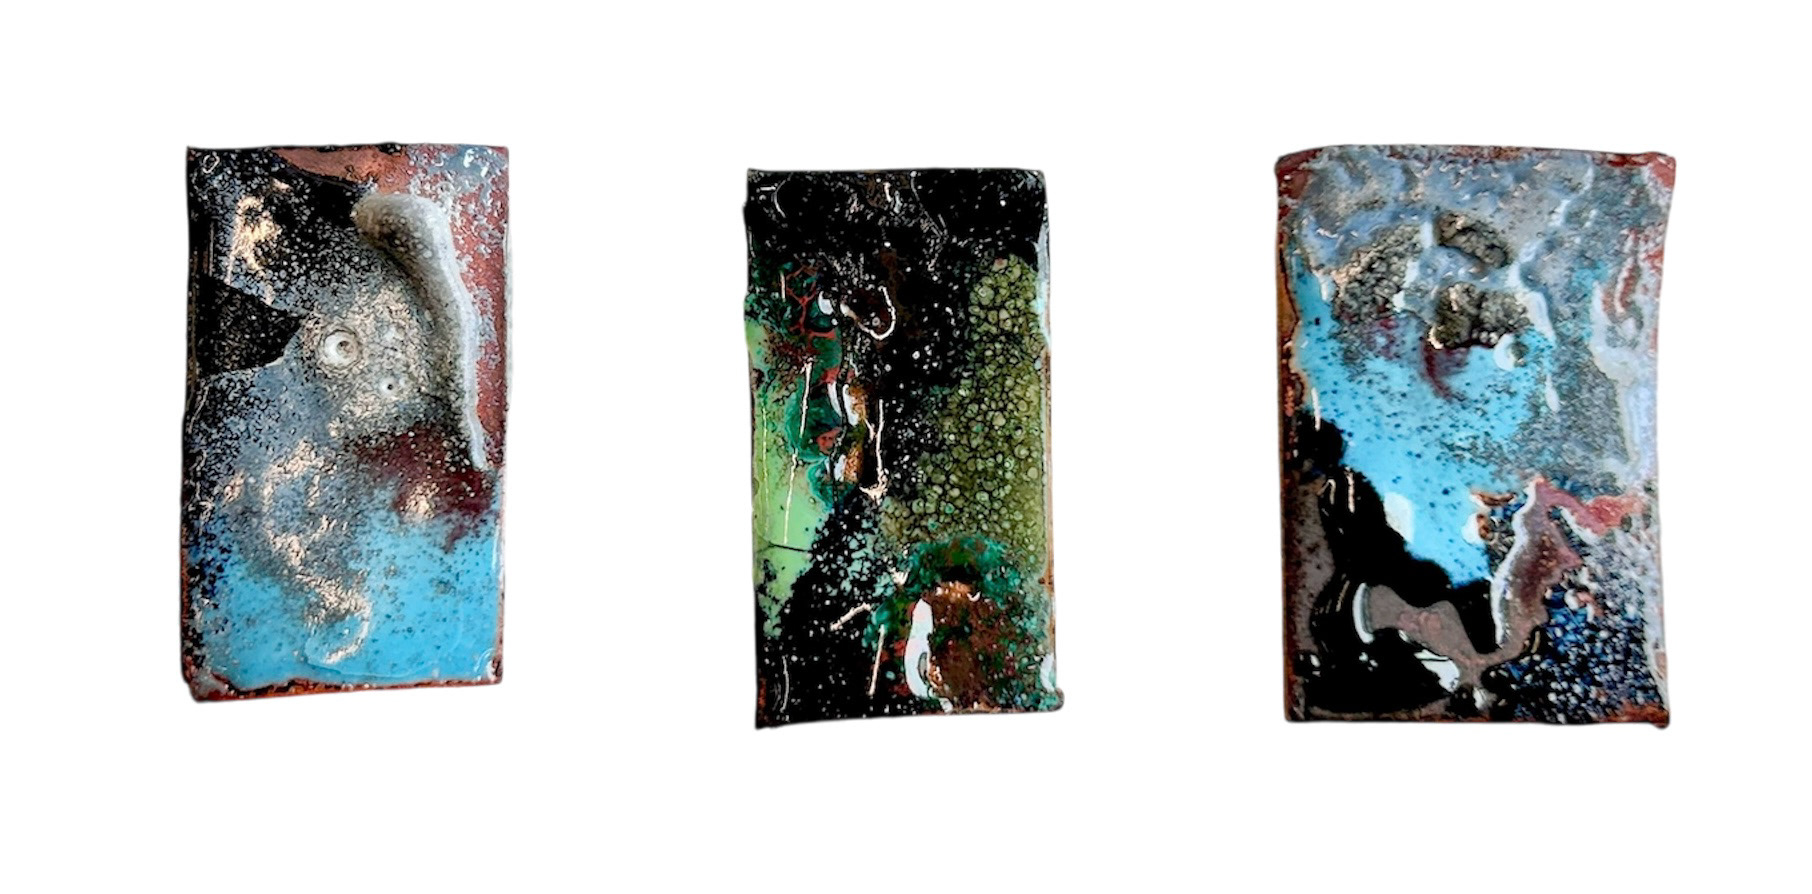
Jewellery Bacteria Experiments
As my project developed, I thought of new ways to document significance. I decided that jewellery as a whole has a lot of significance in itself.
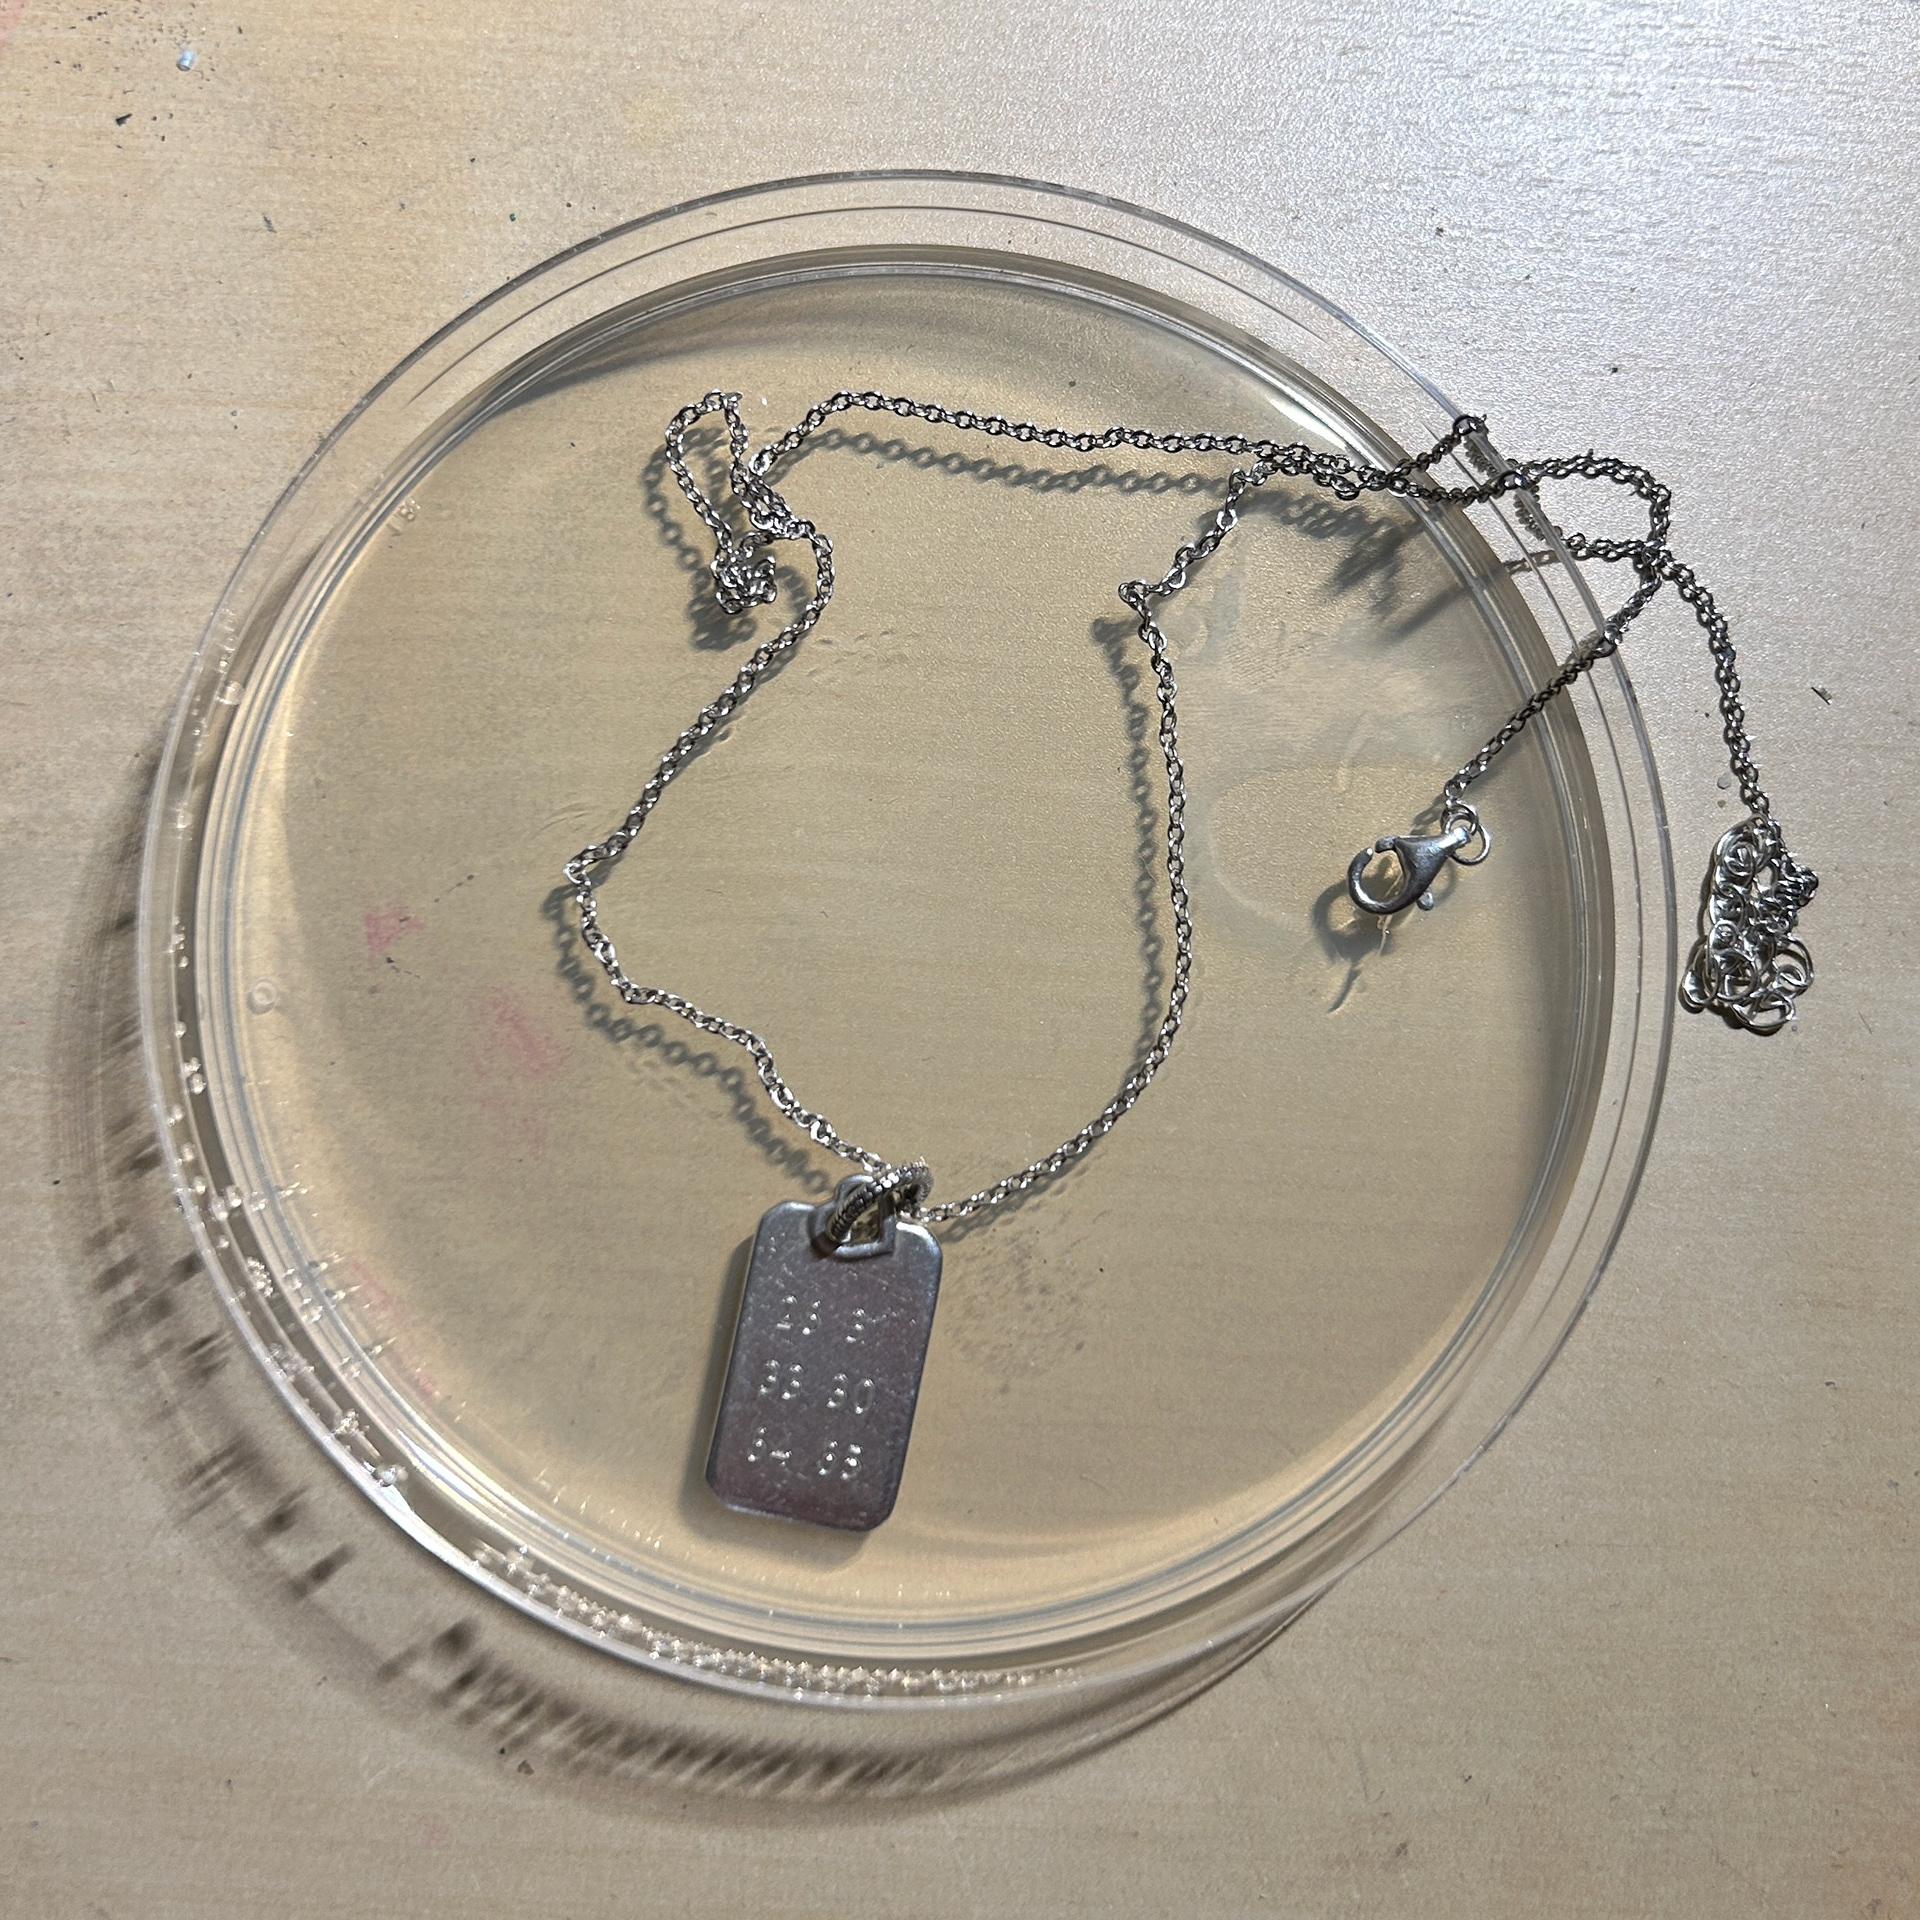
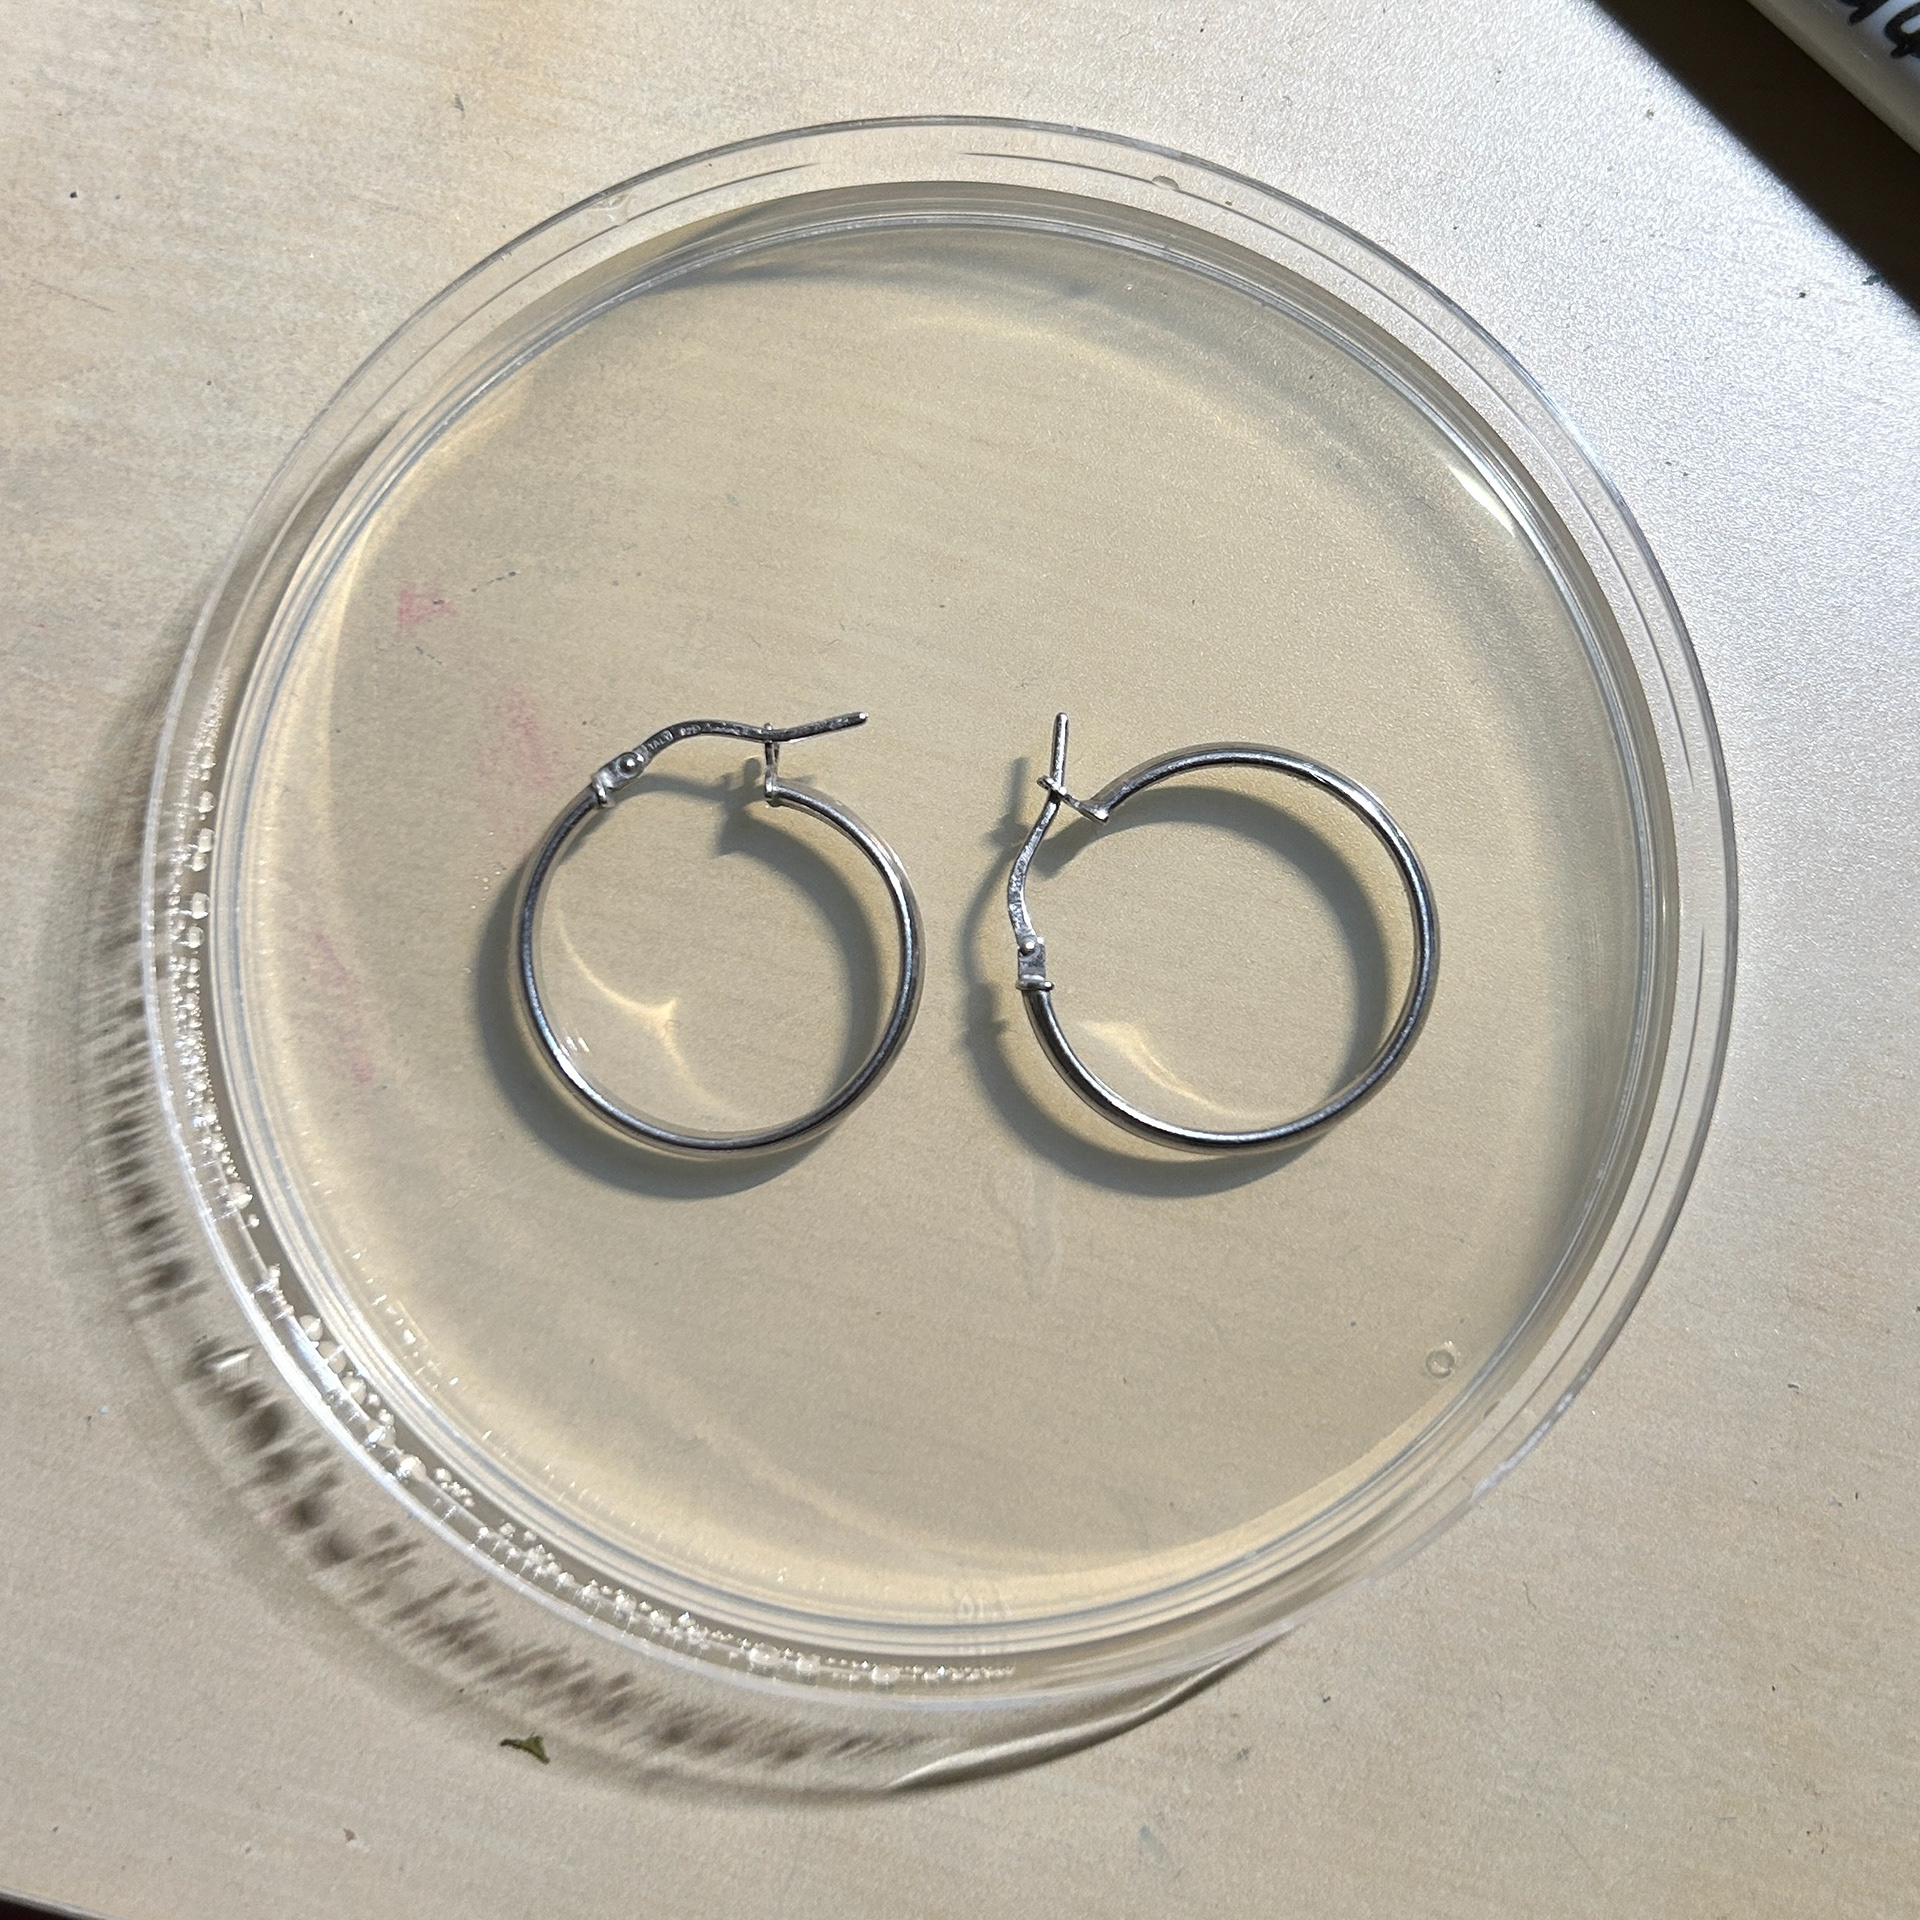
I decided to grow bacteria from the jewellery that I wear every day, that hold significance to me. For example, the engraved necklace with my parents and grandparents' birth years, and the earrings I bought when I first moved the Manchester.
I questioned whether I could document significance through bacteria, and how I could make 'jewellery from jewellery'
These were the results of these cultures. When I added the resin to seal the plates, I decided not to use heat to remove the air bubbles for a couple of reasons. Firstly, I wanted to see how the air bubbles might interact with the cultures. Secondly, when I previously used a heat gun, it caused the surface to turn matte rather than shiny, which wasn't the effect I was aiming for—it made the cultures look cloudy, the opposite of what I wanted.
What I found fascinating was that the air bubbles created holes in the cultures, disrupting their delicate structures. Interestingly, since I have trypophobia—a fear of small, repetitive holes—this was the first time I felt genuinely repulsed by the outcome of my bacterial experiments. It gave me a firsthand understanding of how unsettling it might seem to others as the bacterial growth has not phased me in the past.


Ring
Necklace

Earrings
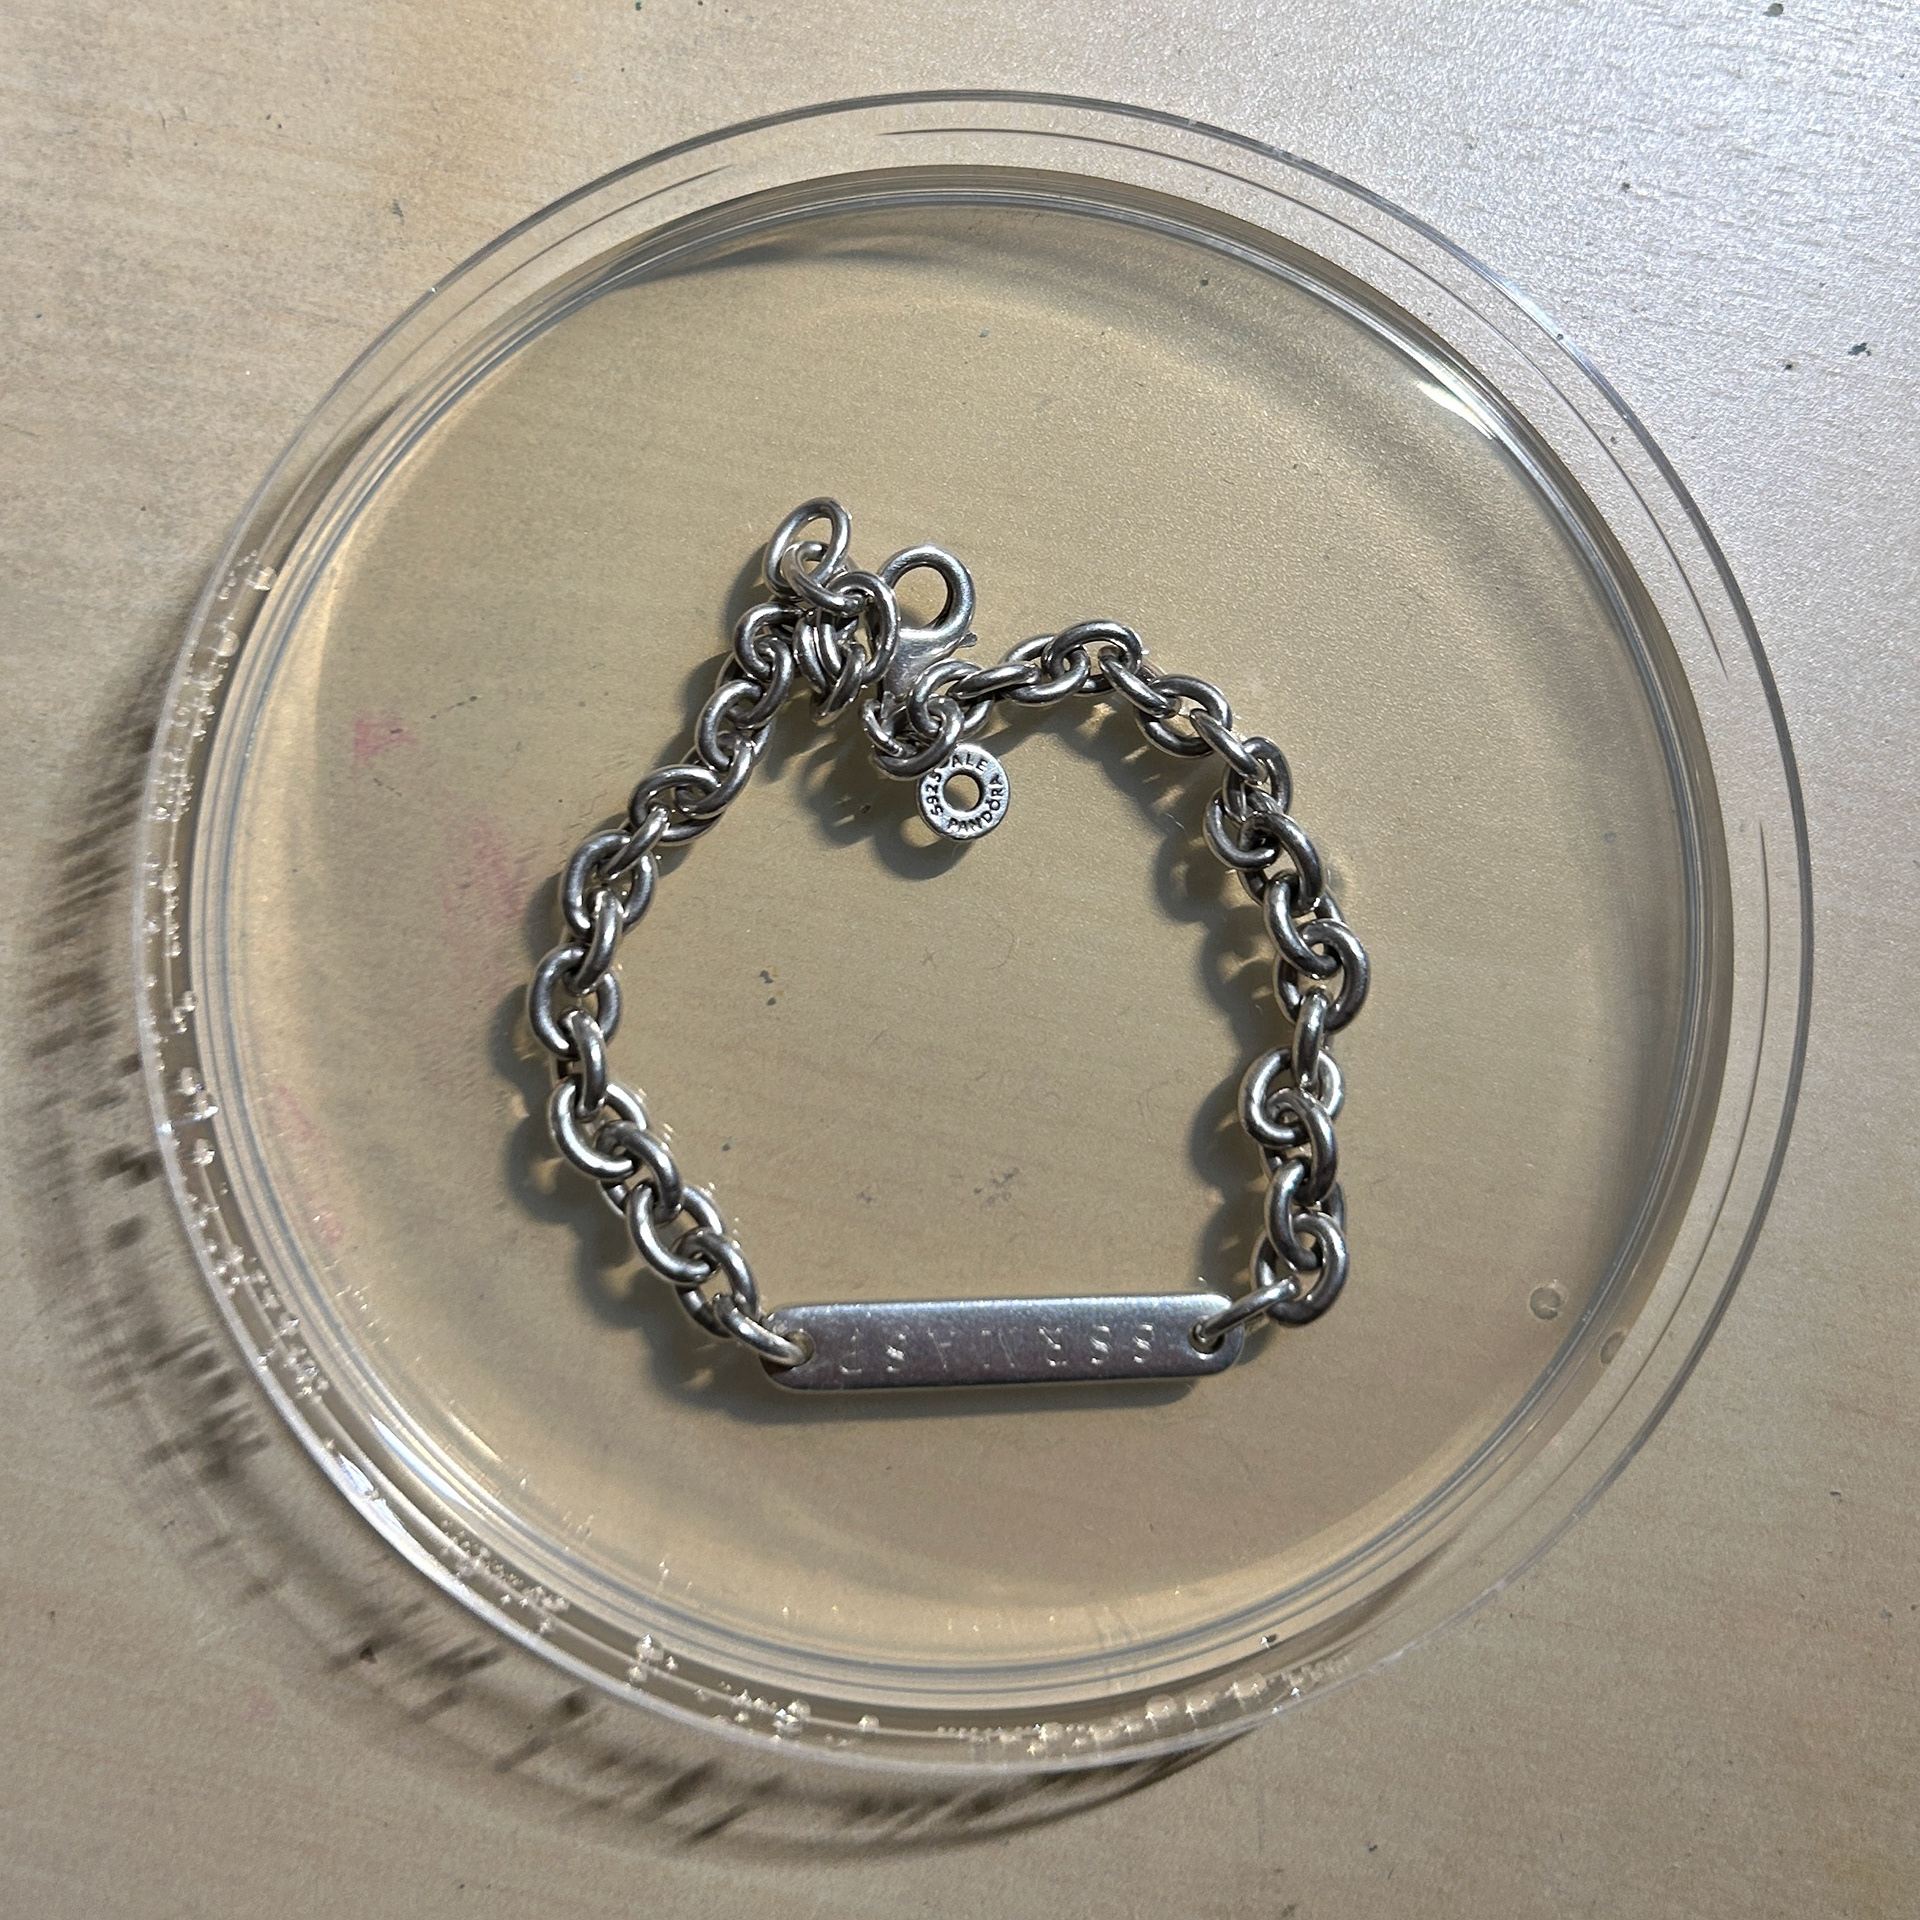
Engraved Bracelet
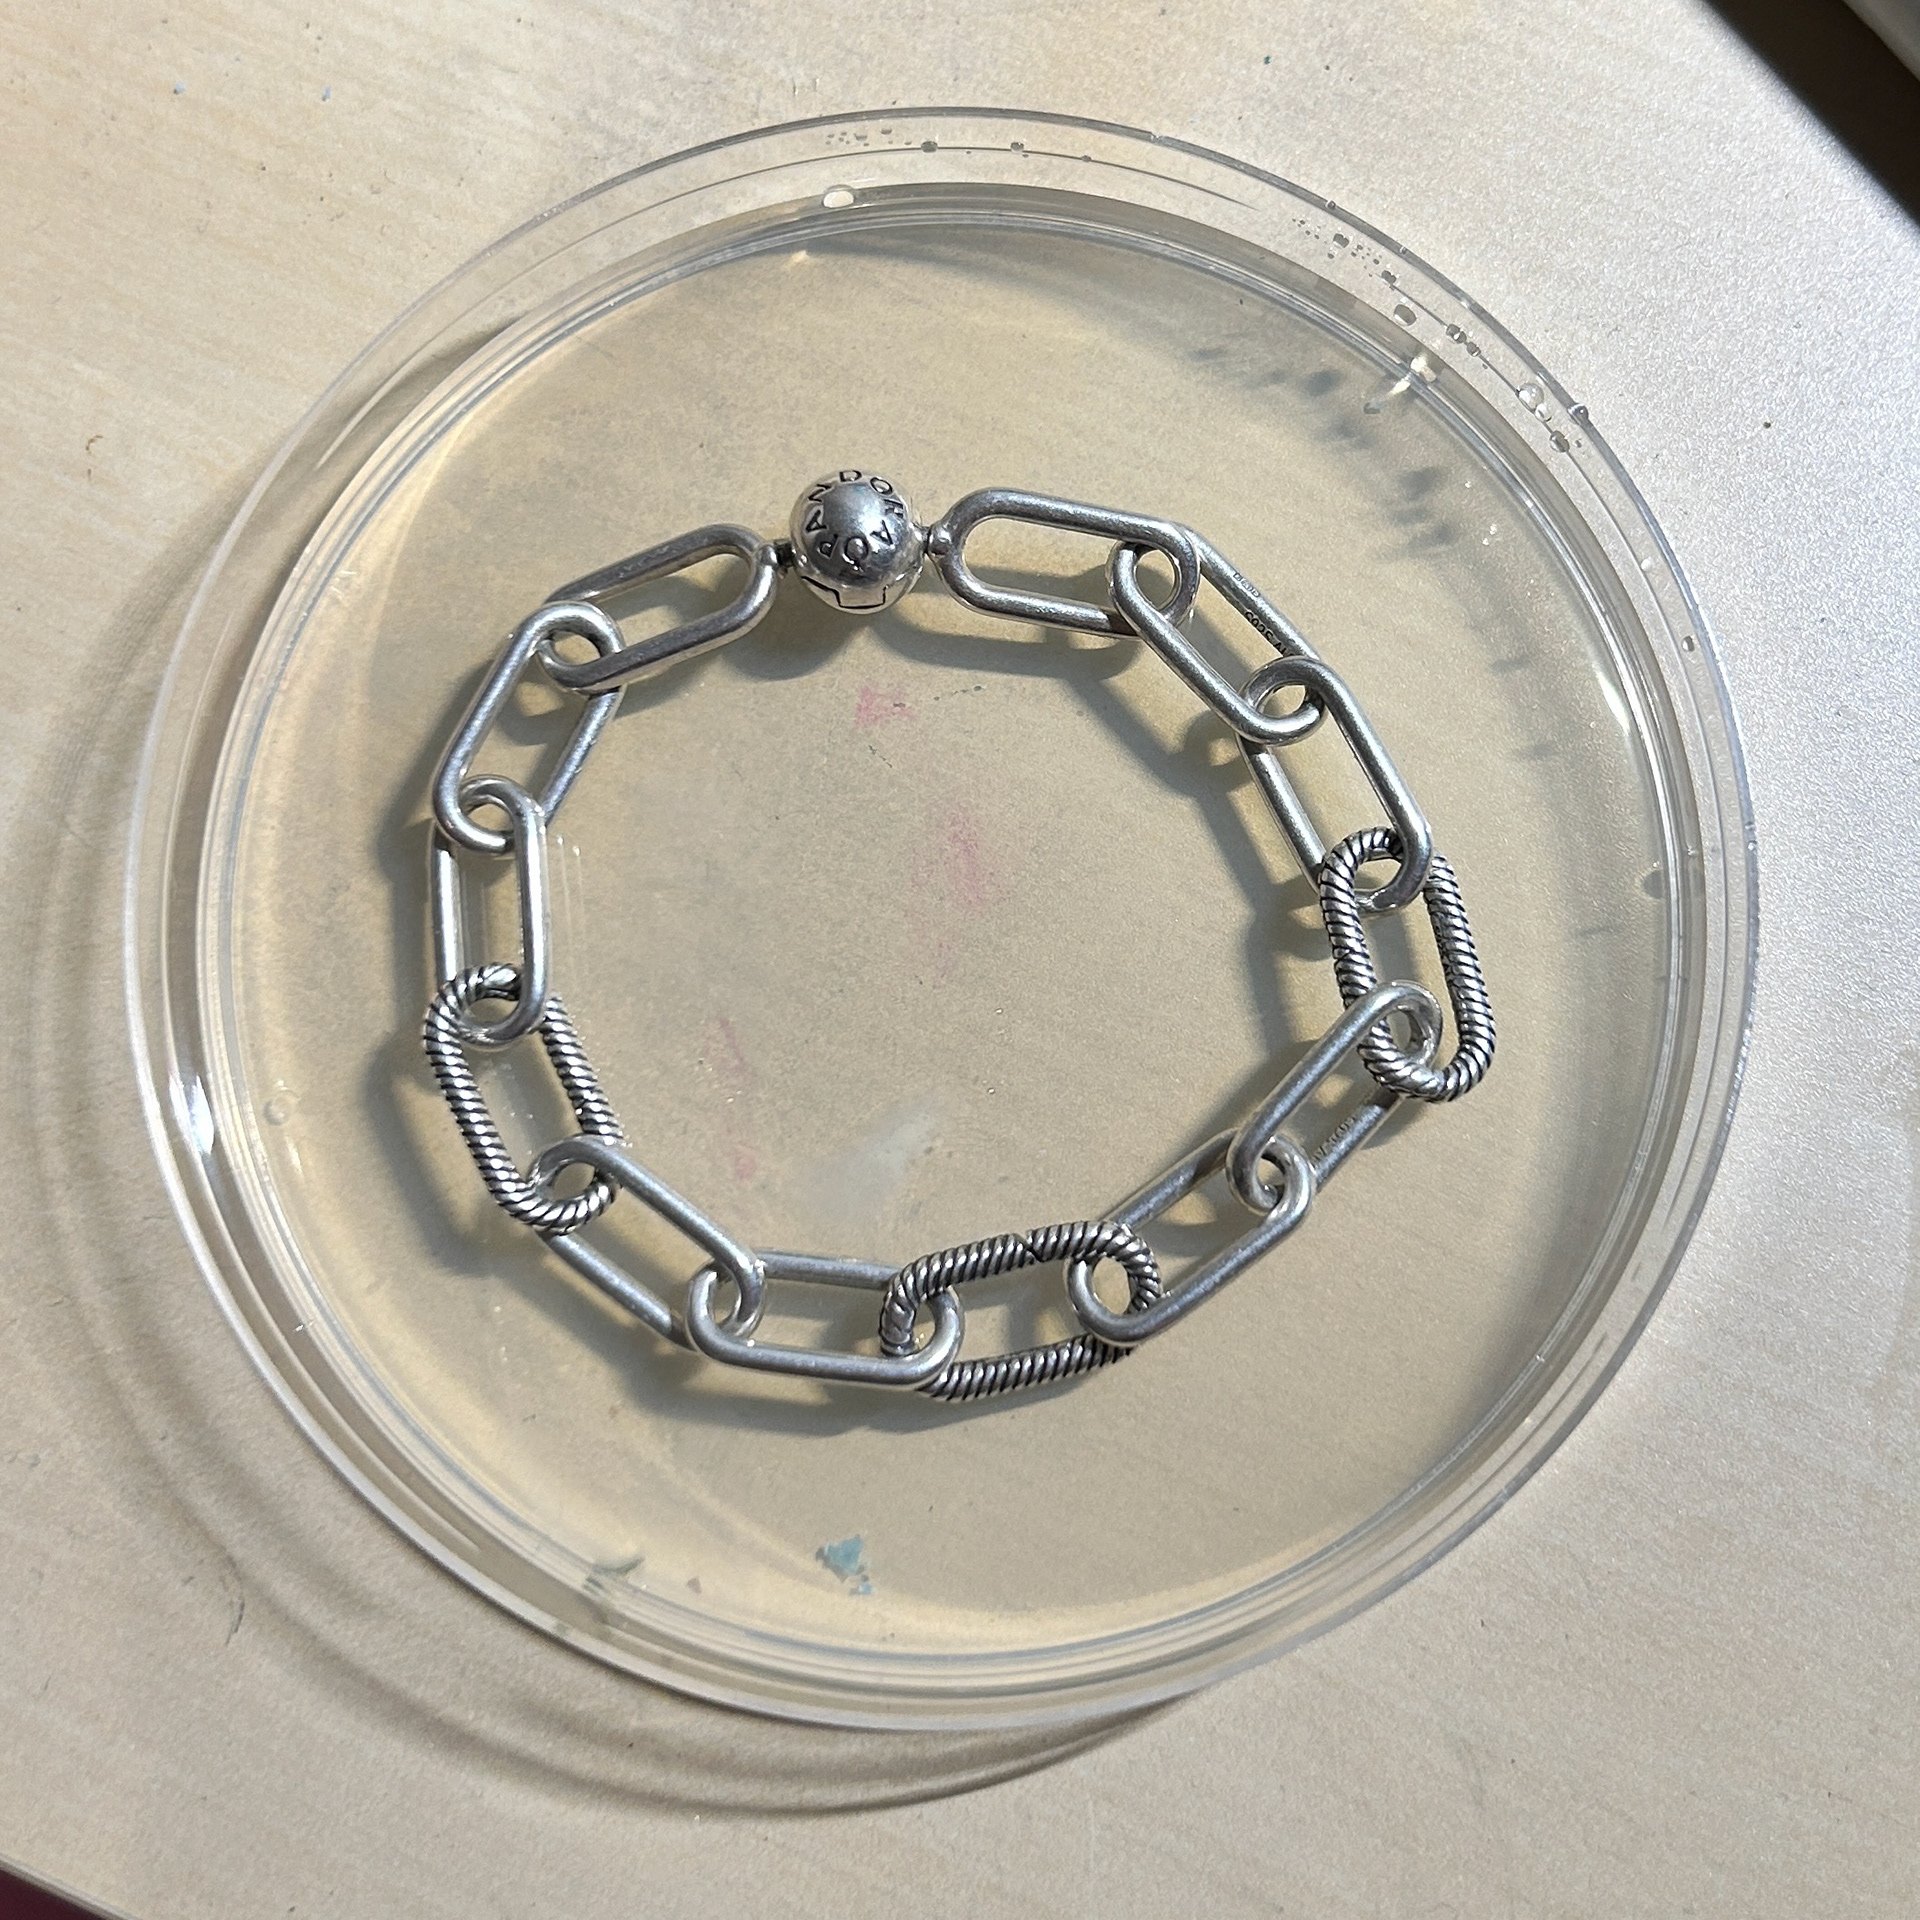
Link Bracelet
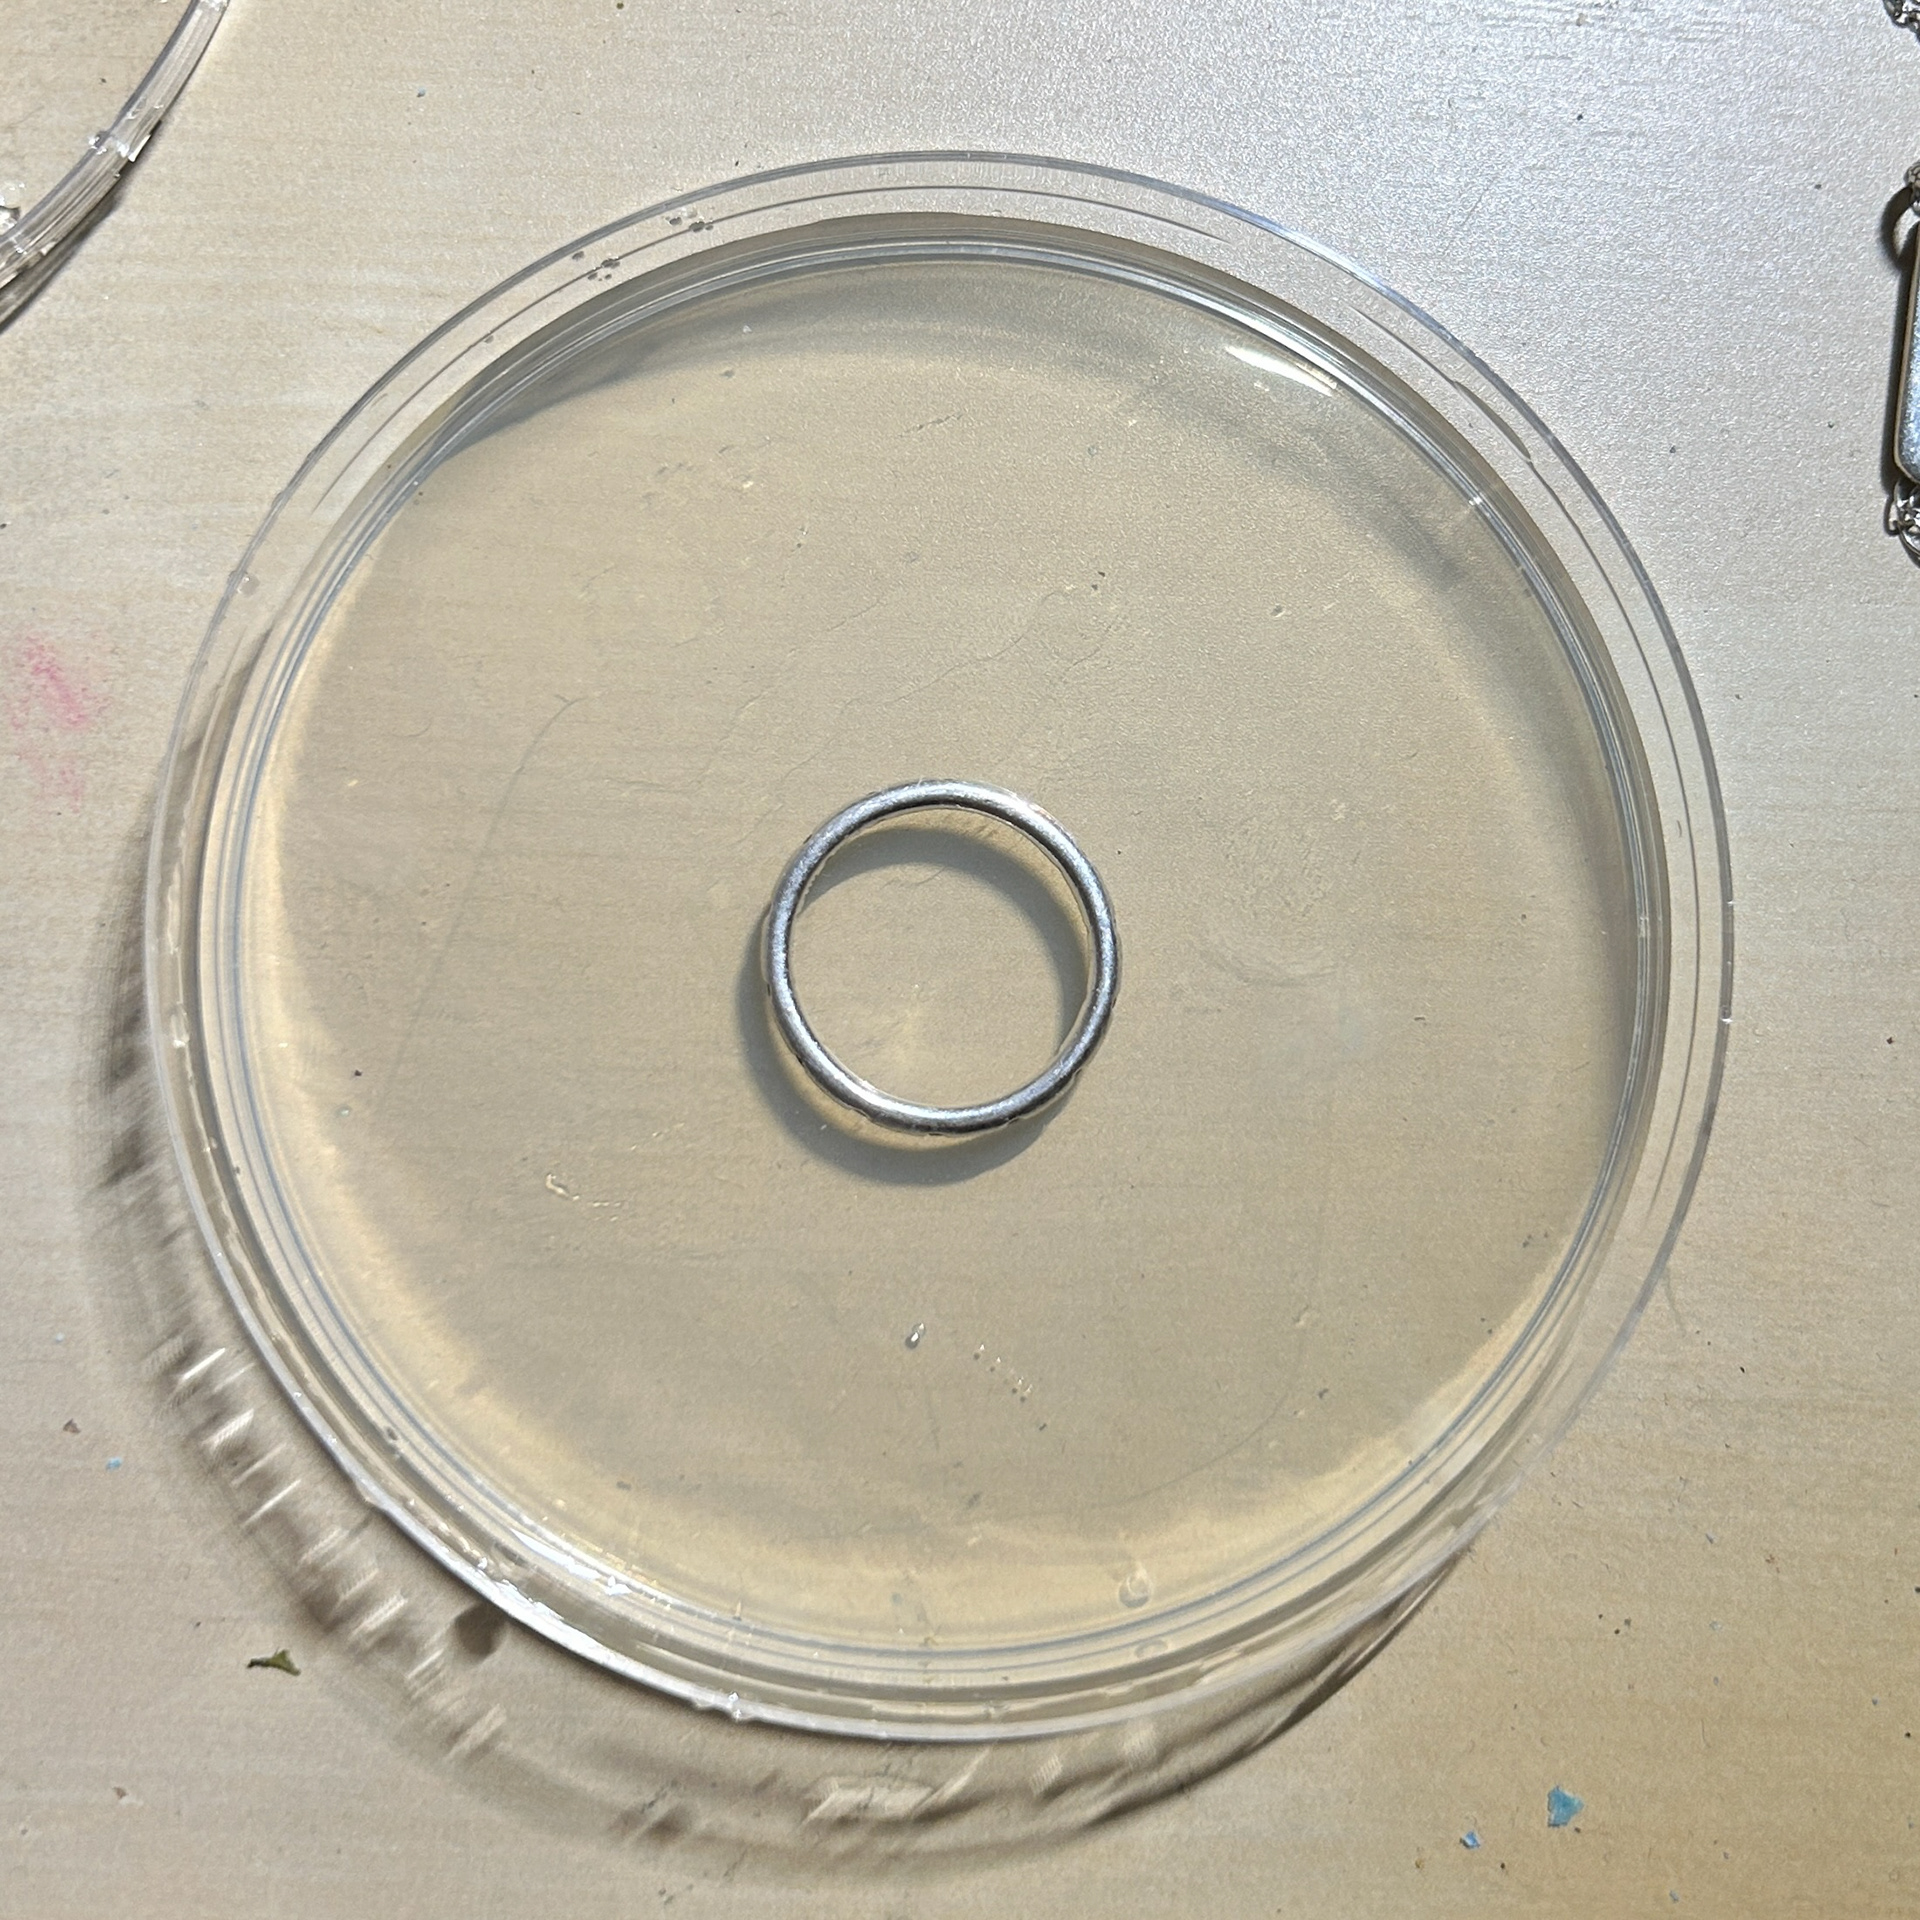
I decided that I wanted to try and remake my necklace from bacteria, and how this change in materials could play with the idea of significance. If my jewellery no longer contained the piece that I found significant, ie. the engraving, but was made from it, then was it still significant?
Process Reel
We were tasked by Geoff to make an Instagram reel, showing our making process. These reels can be incredibly beneficial to our online presence and are a great way to introduce more people to our work.
I decided to make mine about the process of how I make bacteria stones. I knew that using bacteria needed to be more prevalent on my social media, as that is the main driving force in my practice, and is not a common material to use.
I decided to try and line up parts of my reel with the beat of the music, as well as cuts where the beat changes. This is very common with reels, and I personally feel as if it fits well with my video in the parts where I have done it well.
While there are aspects of my reel that I like, for example, the tapping of the resin when the music goes quiet, I do think that parts of it are too long. We were asked to make a 60s reel, and mine ended up being 85 seconds long. I tried to remove parts of my reel to combat this, however, I felt as if it did not make sense to someone who would be seeing my work for the first time. Looking back, I could have sped up parts of it, for example, the resin being poured and the mixing of the silicone. However, I feel as if keeping it all in real-time helps with the flow of the video.
As this is only part 1, I will be making a part 2 where I show myself in the metal workshop adding the silver bezel to the stone. This is to enforce the idea that I have recreated my silver necklace, and by adding familiar jewellery techniques, it helps the viewer 'accept' this work as a piece of jewellery.
Workshop videos are also more interesting to watch. There is more going on, and it is an environment that not everyone is familiar with, making them want to watch more. For that reel, I will try and make the length shorter and include more dynamic and visually interesting shots, and potentially add sped up parts, depending on how it flows with the rest of the video.
This was the first reel I had ever made, and also the first time I have ever recorded myself working like this. Previously I have used time lapses to show myself working, which is what I had planned to do with this one. I had planned to include a timelapse of the bacteria growing, which could have added more visual interest at the start, however, there was many problems with this.
I had to have a camera that could record a time-lapse for 4-7 days straight without running out of storage, or running out of charge. I went to the AV store to speak with the technicians to see what they think could work. We agreed that a Nikon D300s and a 6mm micro lens would be the best way, as the camera could be plugged into the mains, and the 6mm lens could capture the bacteria growing with lots of detail. I could set up this camera to take a picture every 5 minutes, and up to 999 photos in total. This translates to bring able to capture 4495 minutes of growth, or 3.47 days. While this still may not have been enough time to capture the growth of the bacteria, I decided to book the camera, lens, and tripod and test this.
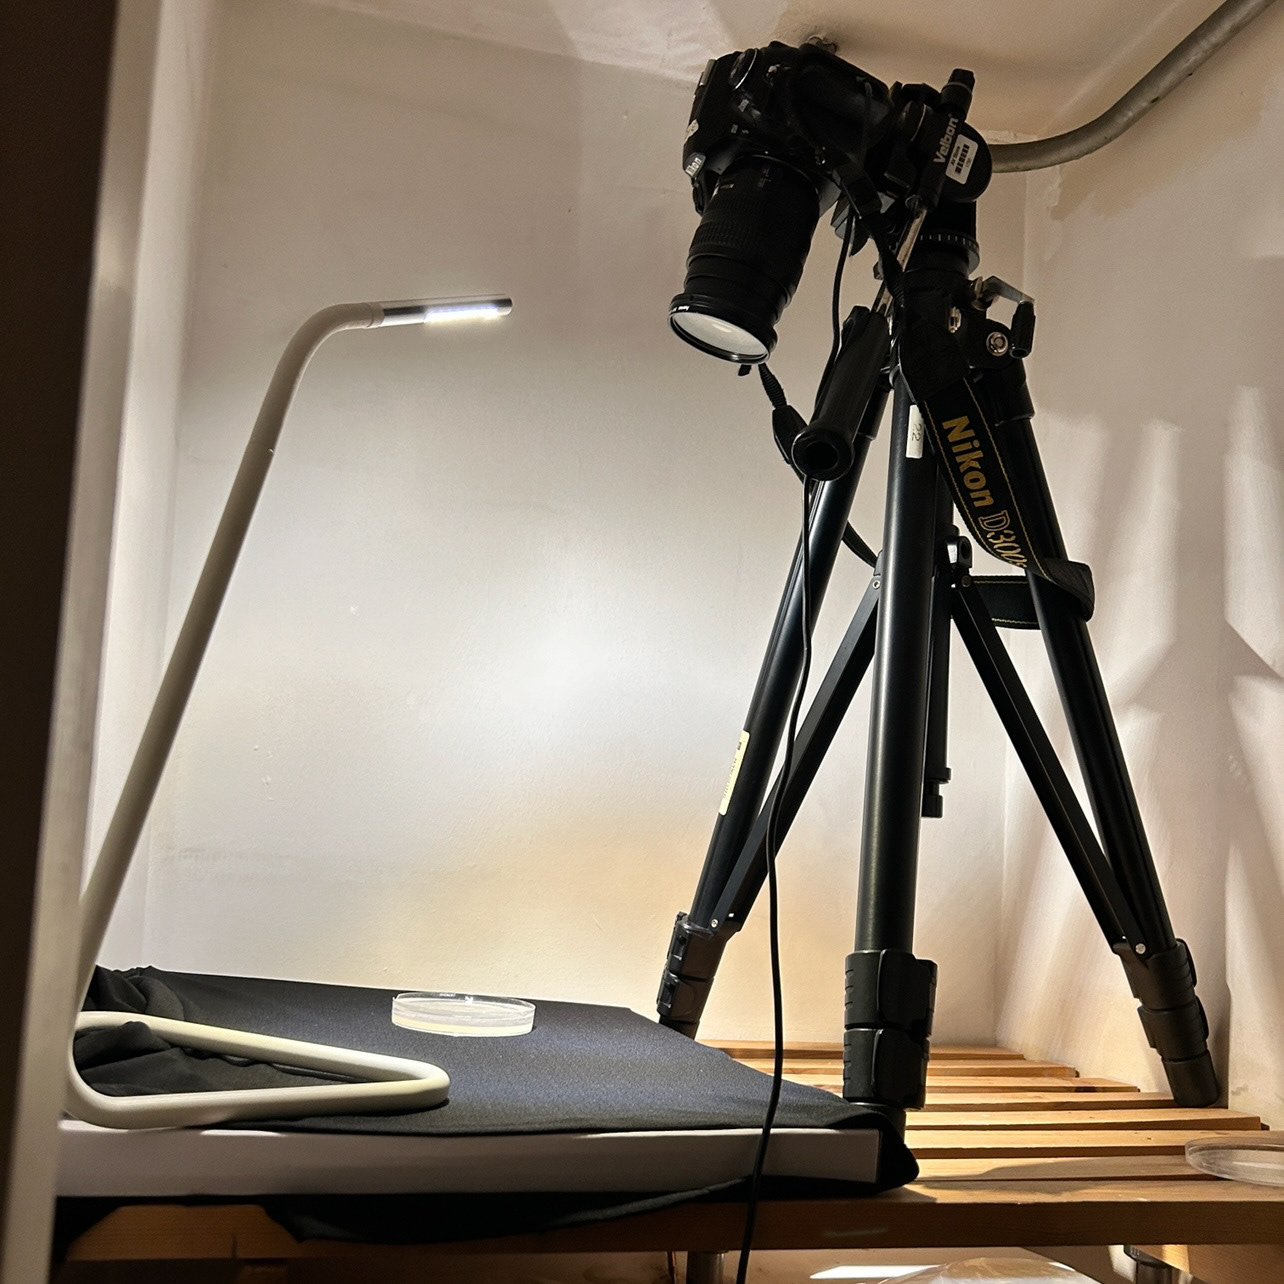
My next issue was the set-up. As the bacteria needed a warm place to grow, I needed to put it in the place where I have been growing it previously.
This place was unfortunately my airing cupboard.
I had to run an extension lead through the hallway, balance the tripod on the wooden slats, add lighting, and add a black background without creating too much space between the petri dish and the heat source underneath.
After testing some setting for the aperture and the manual focus (which was very difficult to do as there was virtually no space for me too look through the viewfinder), I decided to run the time lapse for just over an hour.
Unfortunately, the quality of the photos was not as good as I had hoped. As the boiler heats up, the wooden slats expand slightly. This meant that the tripod was moving slightly and was not staying in focus. The lighting was also changing as the door to the airing cupboard had to be opened slightly to allow for the cables to run from the hallway into the airing cupboard. This meant that as the lighting changed outside, and lights were turned on inside, it changed the lighting inside the airing cupboard.
I also felt uncomfortable leaving university equipment in this set-up, as I was not completely sure that the movement of the wooden slats wouldn't cause the whole thing to tip over. Therefore I decided to take down the equipment and return it to the AV store.
I have not completely abandoned this idea though. I definitely want to include a time-lapse of the bacteria growing, and now I know what equipment I need, I can now try and find a better, more appropriate, set-up. As well as that, a time-lapse of the bacteria growing may be more appropriate for a context video, rather than a process reel.
Making the Necklace
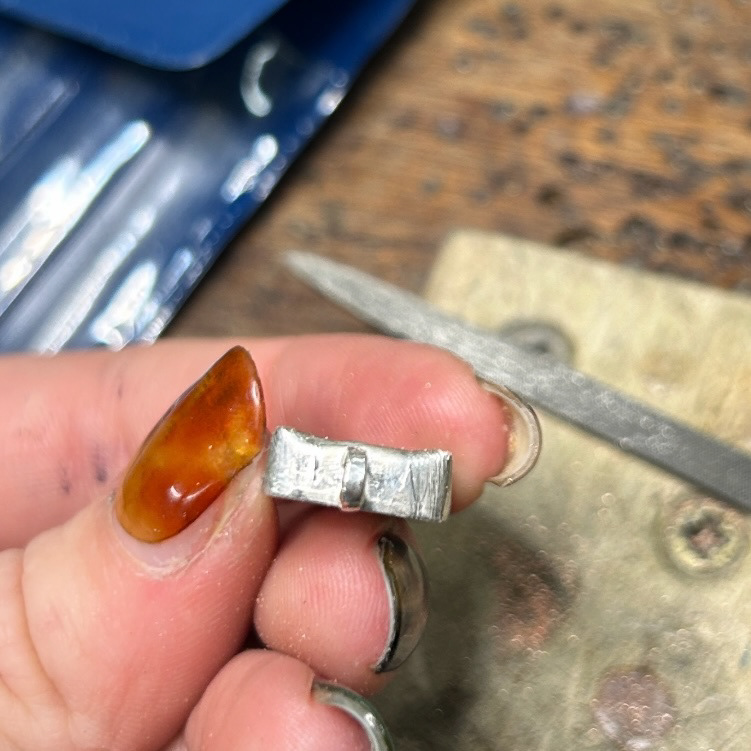
To start remaking the necklace, I first rolled out my silver sheet to the correct thickness. I started with 1.5mm silver sheet, which was far too thick. I needed to have the bezel thickness at approximately 0.2mm, and the base at 0.8mm thick. I could have kept the base at 1.5mm thick, however, with the bezel being so thin I did not want to risk melting the bezel when soldering it to the base, especially since this was my first time properly working with silver.
I then measured out the size of the bezel needed and soldered it with hard solder. I used medium solder to attach this to the base, so as to not risk melting my previous solder.
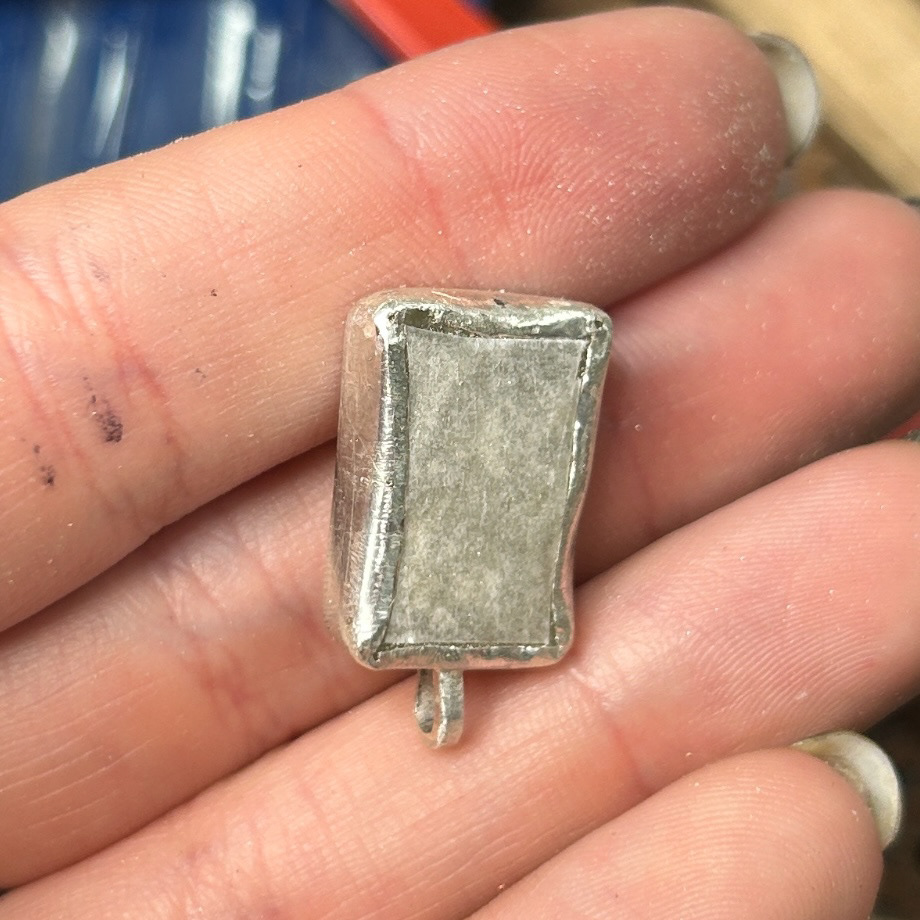
After removing any excess silver, I then attempted to attach a pre-made silver jump ring as a bail. Unfortunately, this did not work, even after thoroughly cleaning both parts. I thought that this might have been because of the small surface area. I decided to redesign this bail and instead use a small piece of silver sheet to create the bail. I think that this thickness and style of bail worked better and complimented the setting I had chosen.
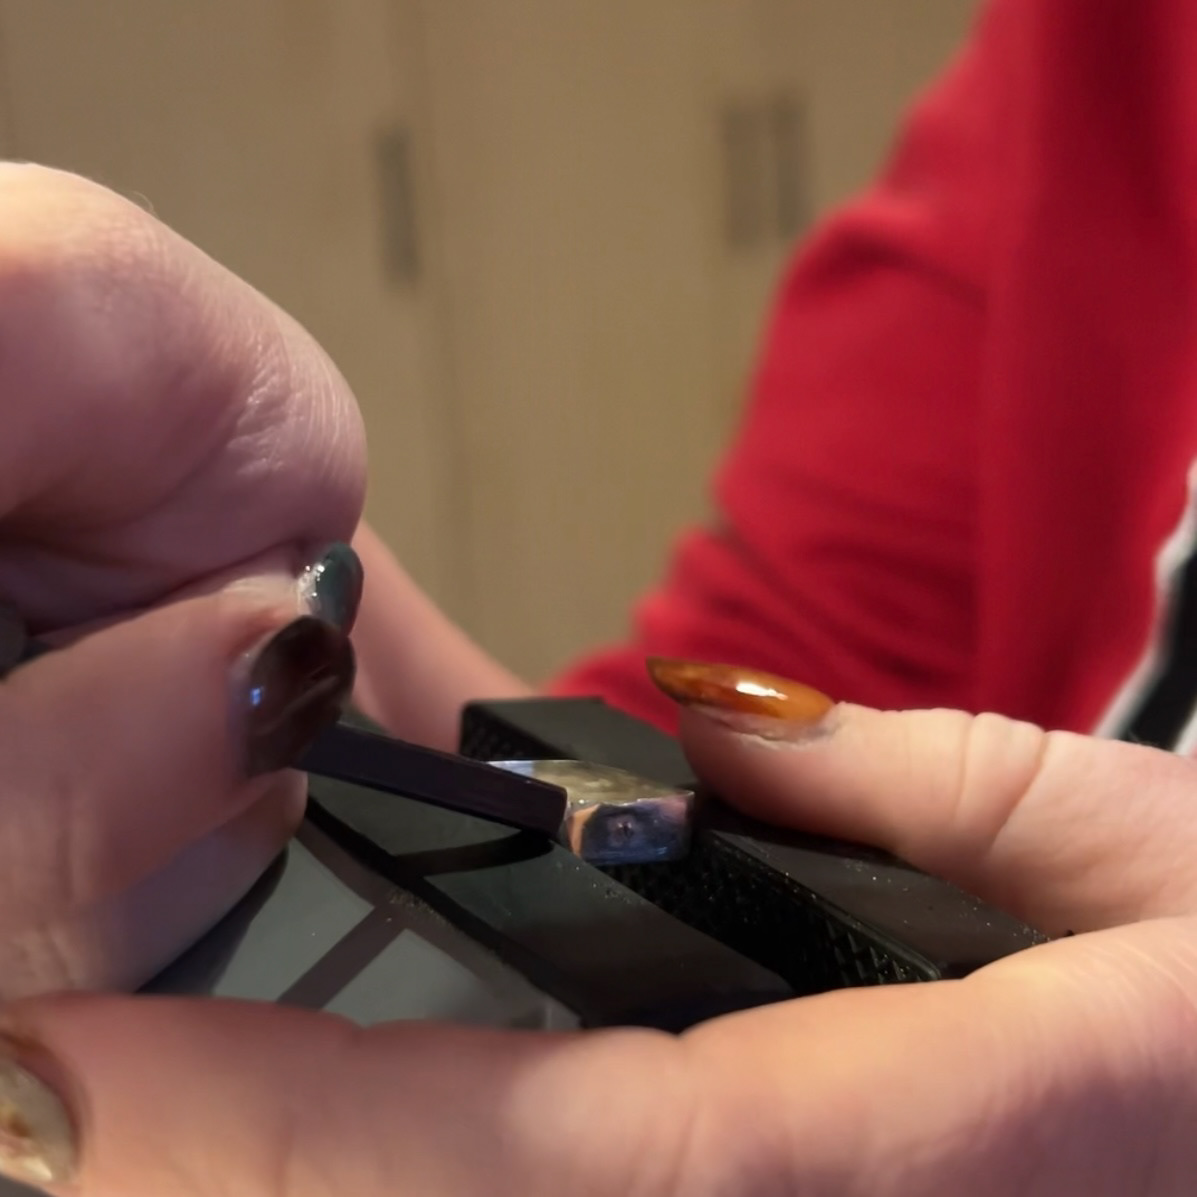
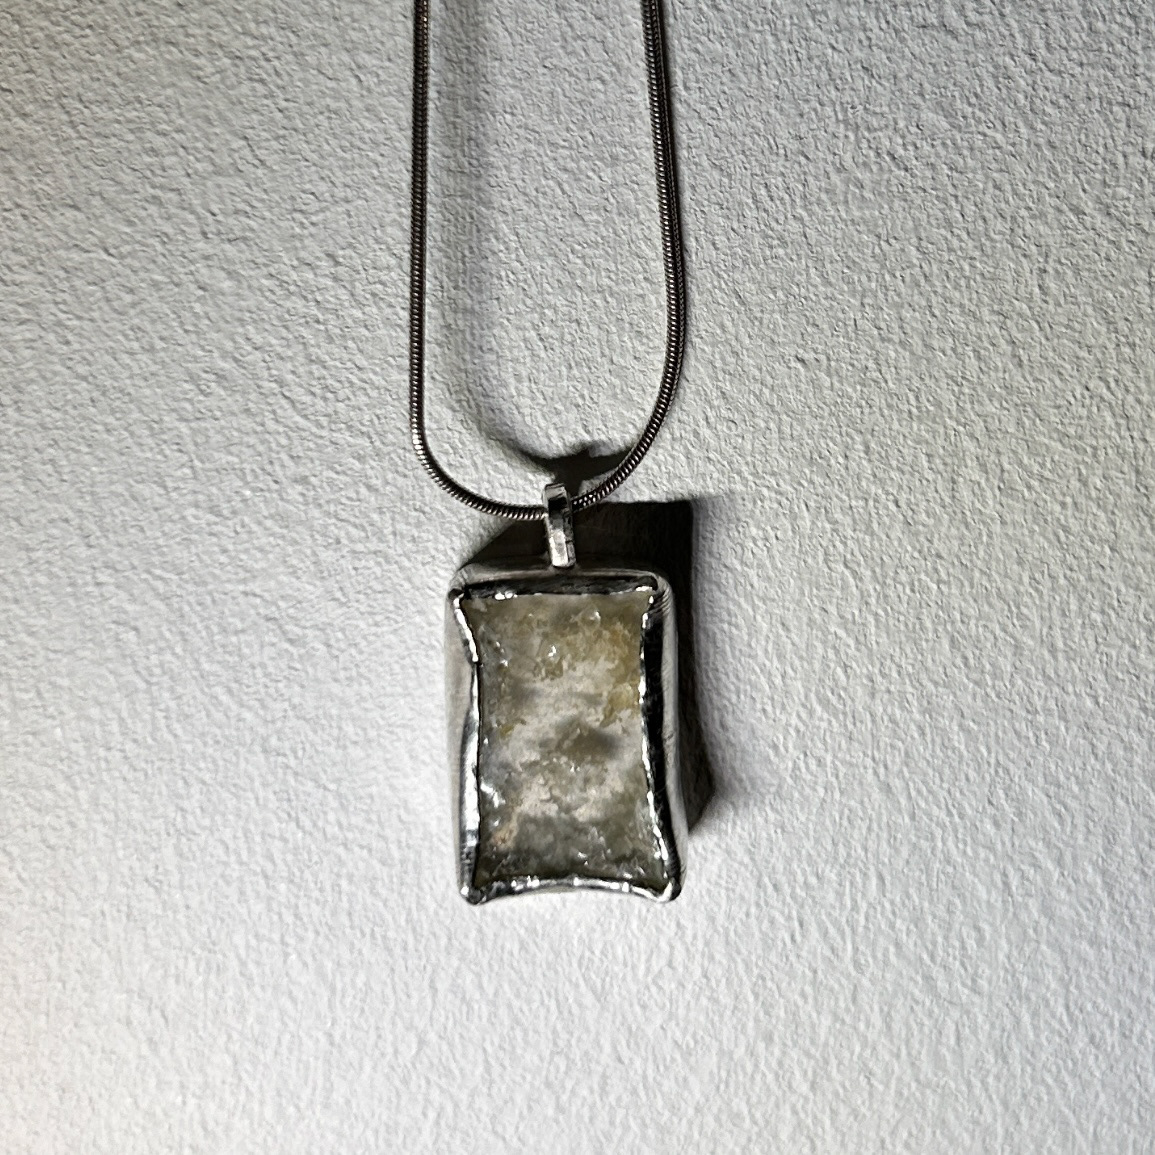
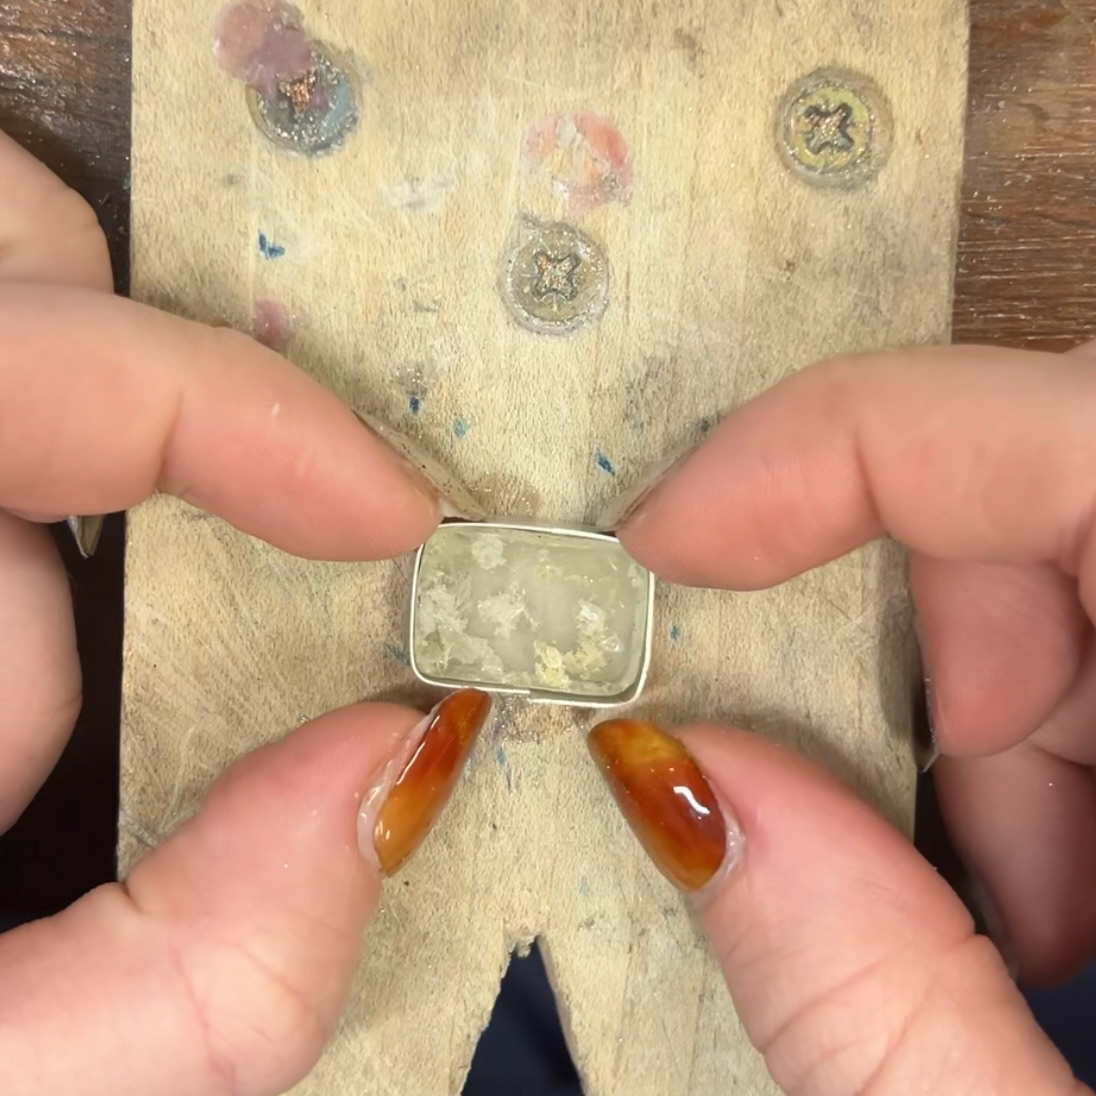
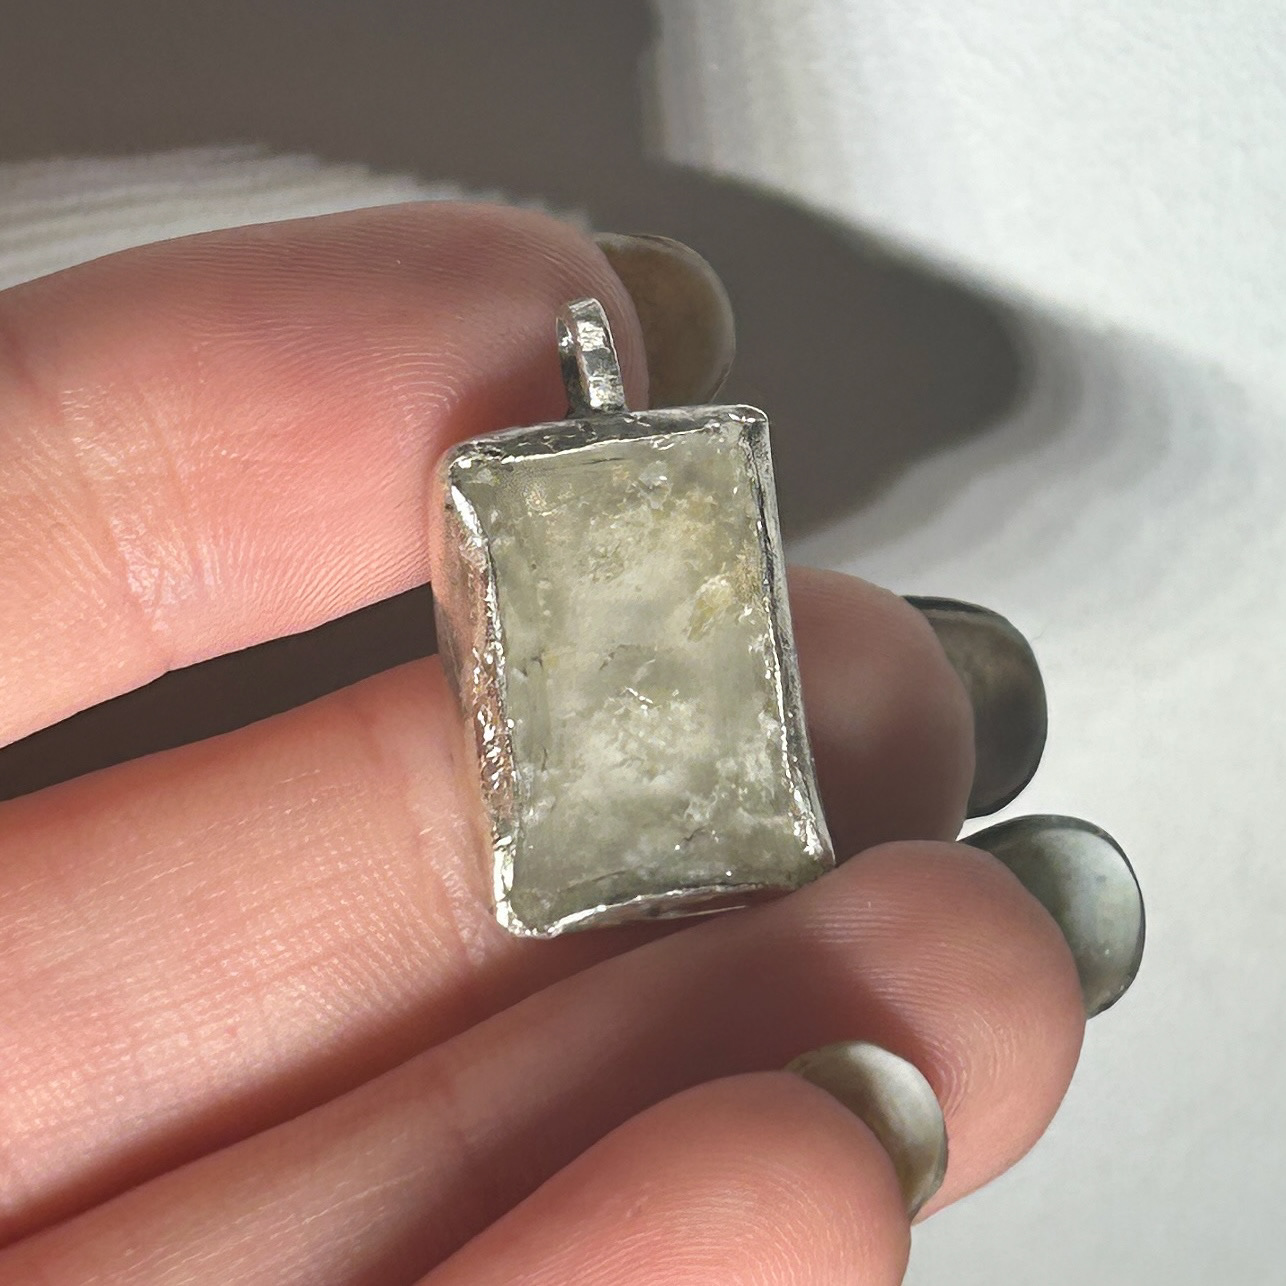
Then it was time to start setting my bacteria stone, which is when everything started to go wrong. I initially wanted quite a thick bezel as I wanted to show the silver next to the bacteria. Because of this, I made the walls of the bezel slightly higher.
When using a pusher to move the silver over the stone I realised that the silver was stretching much more than I had anticipated. This left me with lots of buckling and inconsistencies around the entire bezel.
Another challenge was that the bacteria stone turned out to be slightly spongy. I suspect this was due to inaccuracies in the mixing ratios or possibly because I used a different type of resin, and I wasn't certain if this brand was softer than the ones I'd used before. However, since I had just used the same resin to set my other jewellery bacteria plates and they didn't have a softer texture, I concluded that the issue was likely due to my mixing rather than the resin itself.
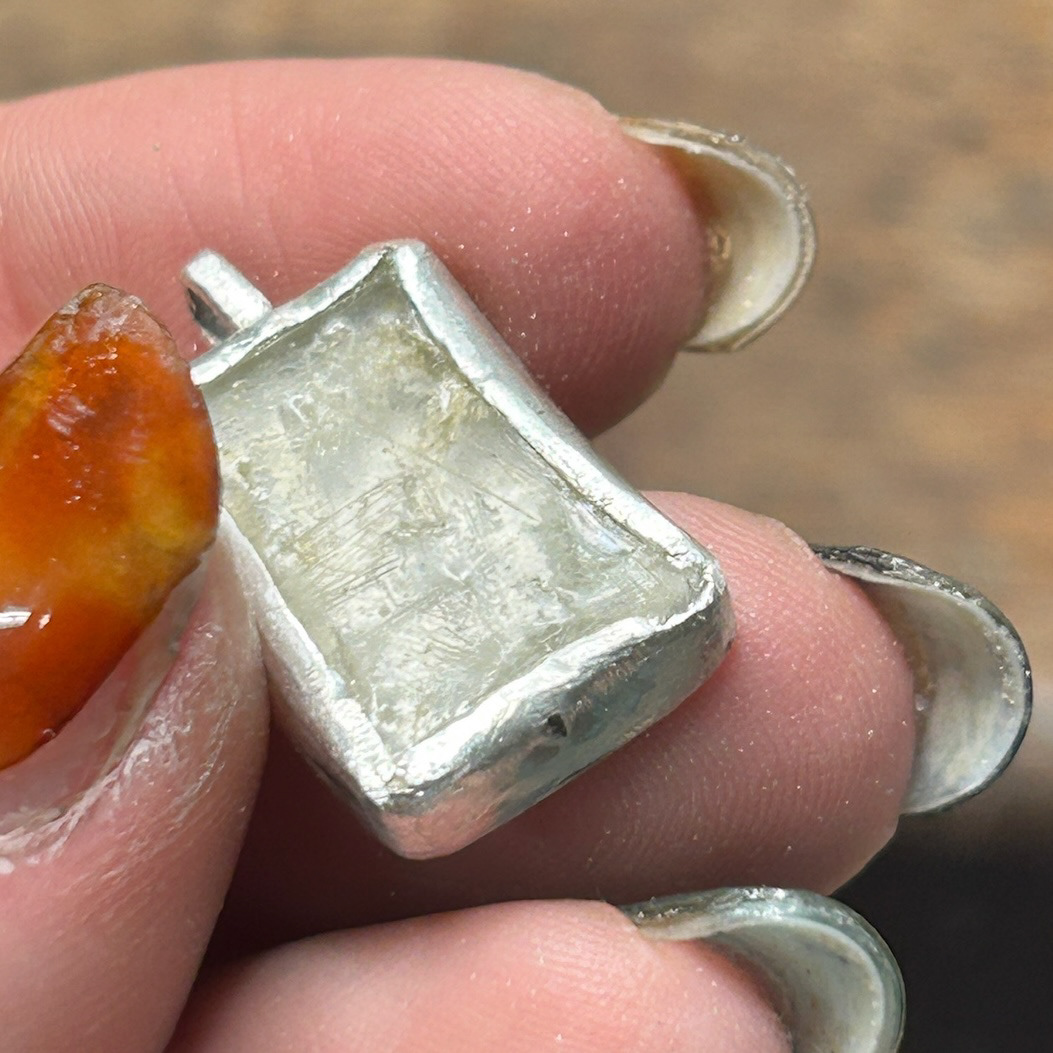

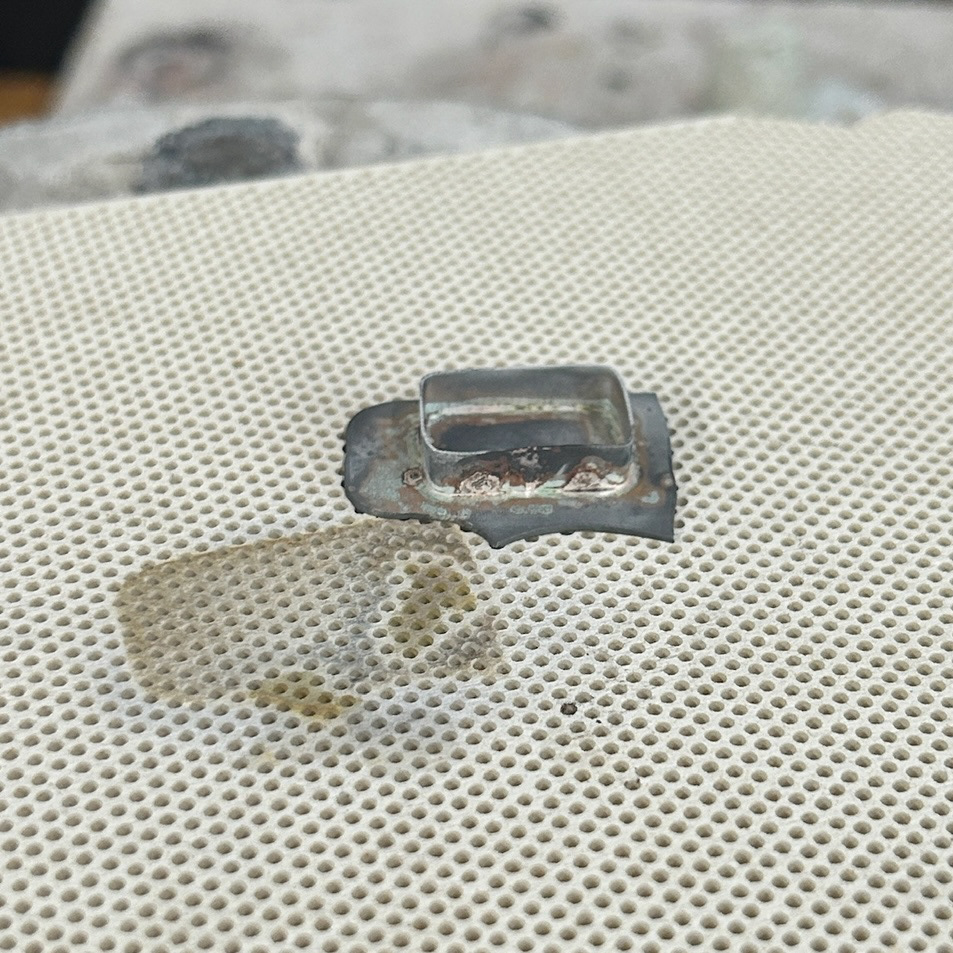
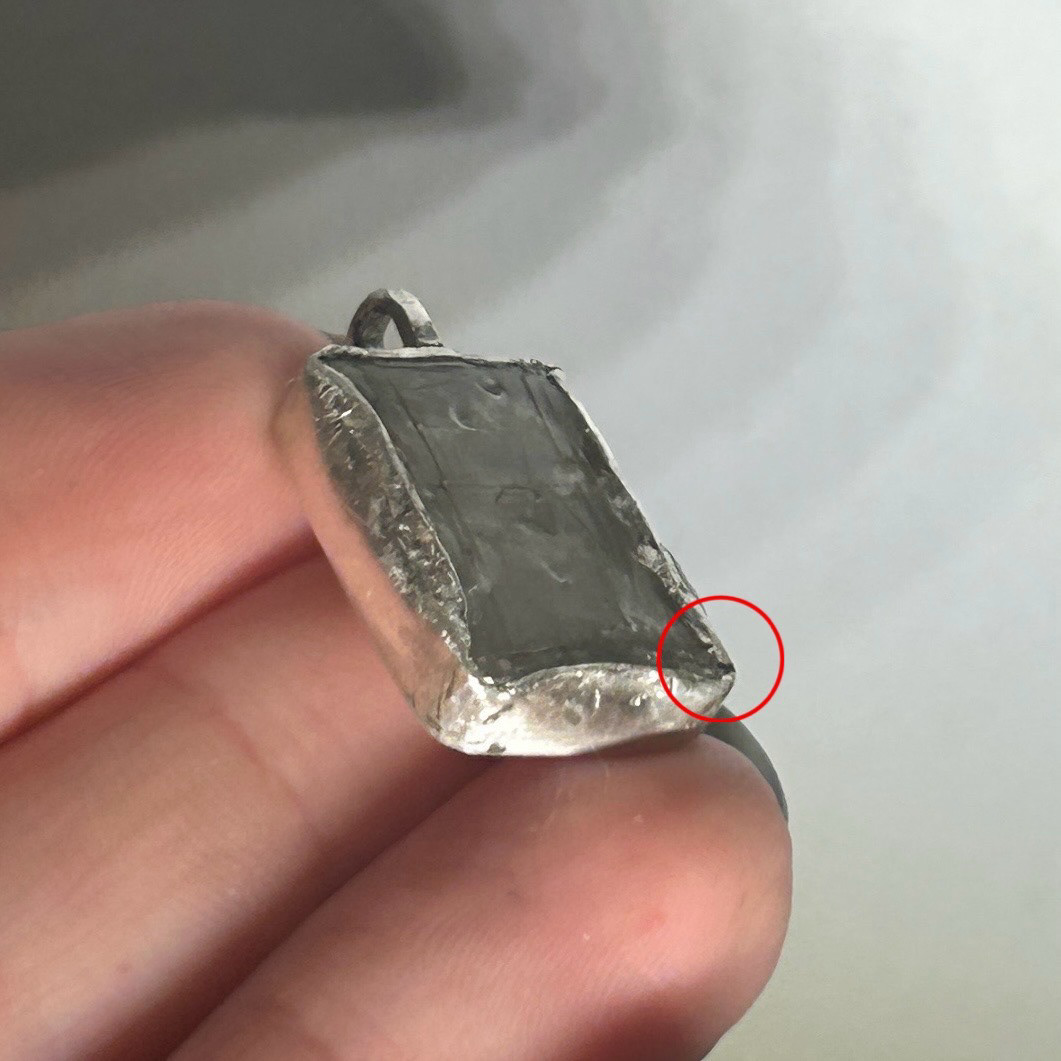
The next day, I went into the workshop to correct my mistakes by filing down the bezel to make the edges more even. This approach worked to some extent, but as soon as the silver caught the light, the inconsistencies and buckling became quite noticeable. I focused on one of the more problematic areas and filed it down further, but unfortunately, I went too far, resulting in a breakage, as shown in picture 3.
In an attempt to fix this, I tried drilling around the bezel to make it thinner, but this only made the situation worse. I also used masking tape to protect my resin stone, but it didn’t work as well as I’d hoped, and I ended up scratching the stone in the process.
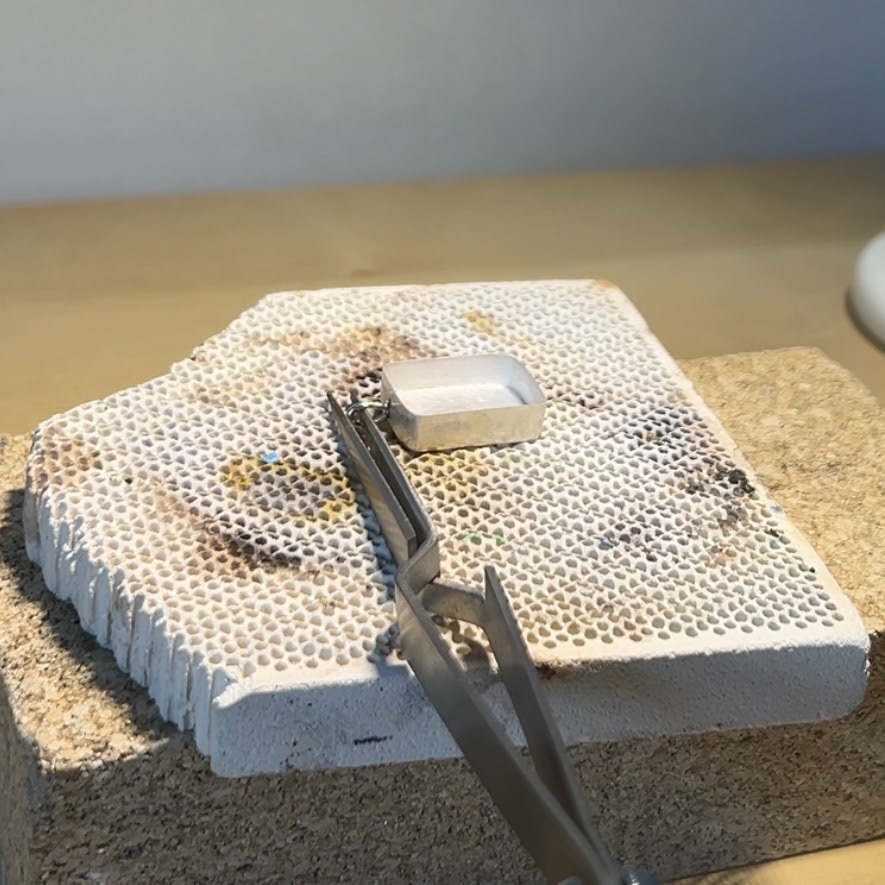
As a last ditch attempt to try and save the pendant, I used pliers to pull back the bezel, file down, and then re-set.
While I was not happy with the outcome whatsoever, I did learn an incredible amount throughout this process. I learnt to be incredibly careful when measuring out the resin, as the improper formula was a huge reason why the bezel did not work. If the ratio had been correct, then I could have potentially been able to salvage the bezel before all 4 sides were set as it would have been much harder to try and push the bezel over, and therefore I would have noticed this problem, rather than the stone just being squished down and misshapen.
I also learnt the hard way about the correct height for bezels on a rectangular-shaped stone, and how much silver stretches when setting, as well as how the right thickness of a bail compliments the setting as a whole.