Unit X Feedback

At the start of this unit, I reviewed the video feedback from Unit X and organised it into two columns: "What Went Well" and "Feedforward/Improvements". This structured approach allows me to clearly identify areas for improvement and track my progress more effectively. I find these clear layouts helpful, as they make it easy to refer back to the feedback and ensure I am addressing key points and consistently trying to improve.
For this project, my main focus is to maintain ongoing reflection and to challenge my reflections more critically. While I have started incorporating this, I need to be more consistent.
Additionally, I need to improve my visual language by incorporating more sketches or even time-lapse videos of my CAD work. Geoff pointed out that my work tends to highlight only the main steps rather than the entire process. To address this, I will ensure that I document and present a more comprehensive view of my workflow.
Lastly, I need to shout about my time management skills more effectively. I plan to achieve this by sharing the timetable I create for myself, making my planning process more visible, and showing how I always allow myself more time than I think I need, and adding 2 weeks contingency to any project I do.

In my first tutorial with Patricia, I explained how my concept for Synthesis and Resolution (S&R) had evolved slightly since my DC3 report. In that report, I explored the idea of extensions, discussing how both bacteria and jewellery function as extensions of the body. Initially, my proposal focused on the different classifications of bacteria—good, bad, and harmless—to create a series of brooches containing these bacteria. However, after writing my essay, I became more intrigued by the broader concept of extensions. Looking back at Unit X, I realised I had been using this idea without even realising it.
When I shared my ideas with Patricia, she pointed out that my ideas could be split into two distinct projects, and I agreed. I was told that I could pursue both, but I felt that in order to do my final project justice, I needed to choose one.
I took a few days to reflect on my direction, and although my idea remains somewhat connected to my Unit X project, I ultimately decided to focus on the relationship between bacteria and jewellery as extensions of the body. To do this well, I knew that I needed to be fully obsessed with my project. While I was still drawn to the idea of categorising bacteria, the practical challenges of working with harmful bacteria made it a risky choice. I had not received responses from the microbiologists I contacted, and convincing them to allow me to use hazardous materials within my limited timeframe seemed unrealistic.
Project Development
27th January 2025
Ring
Necklace

Earrings
Engraved Bracelet

Link Bracelet

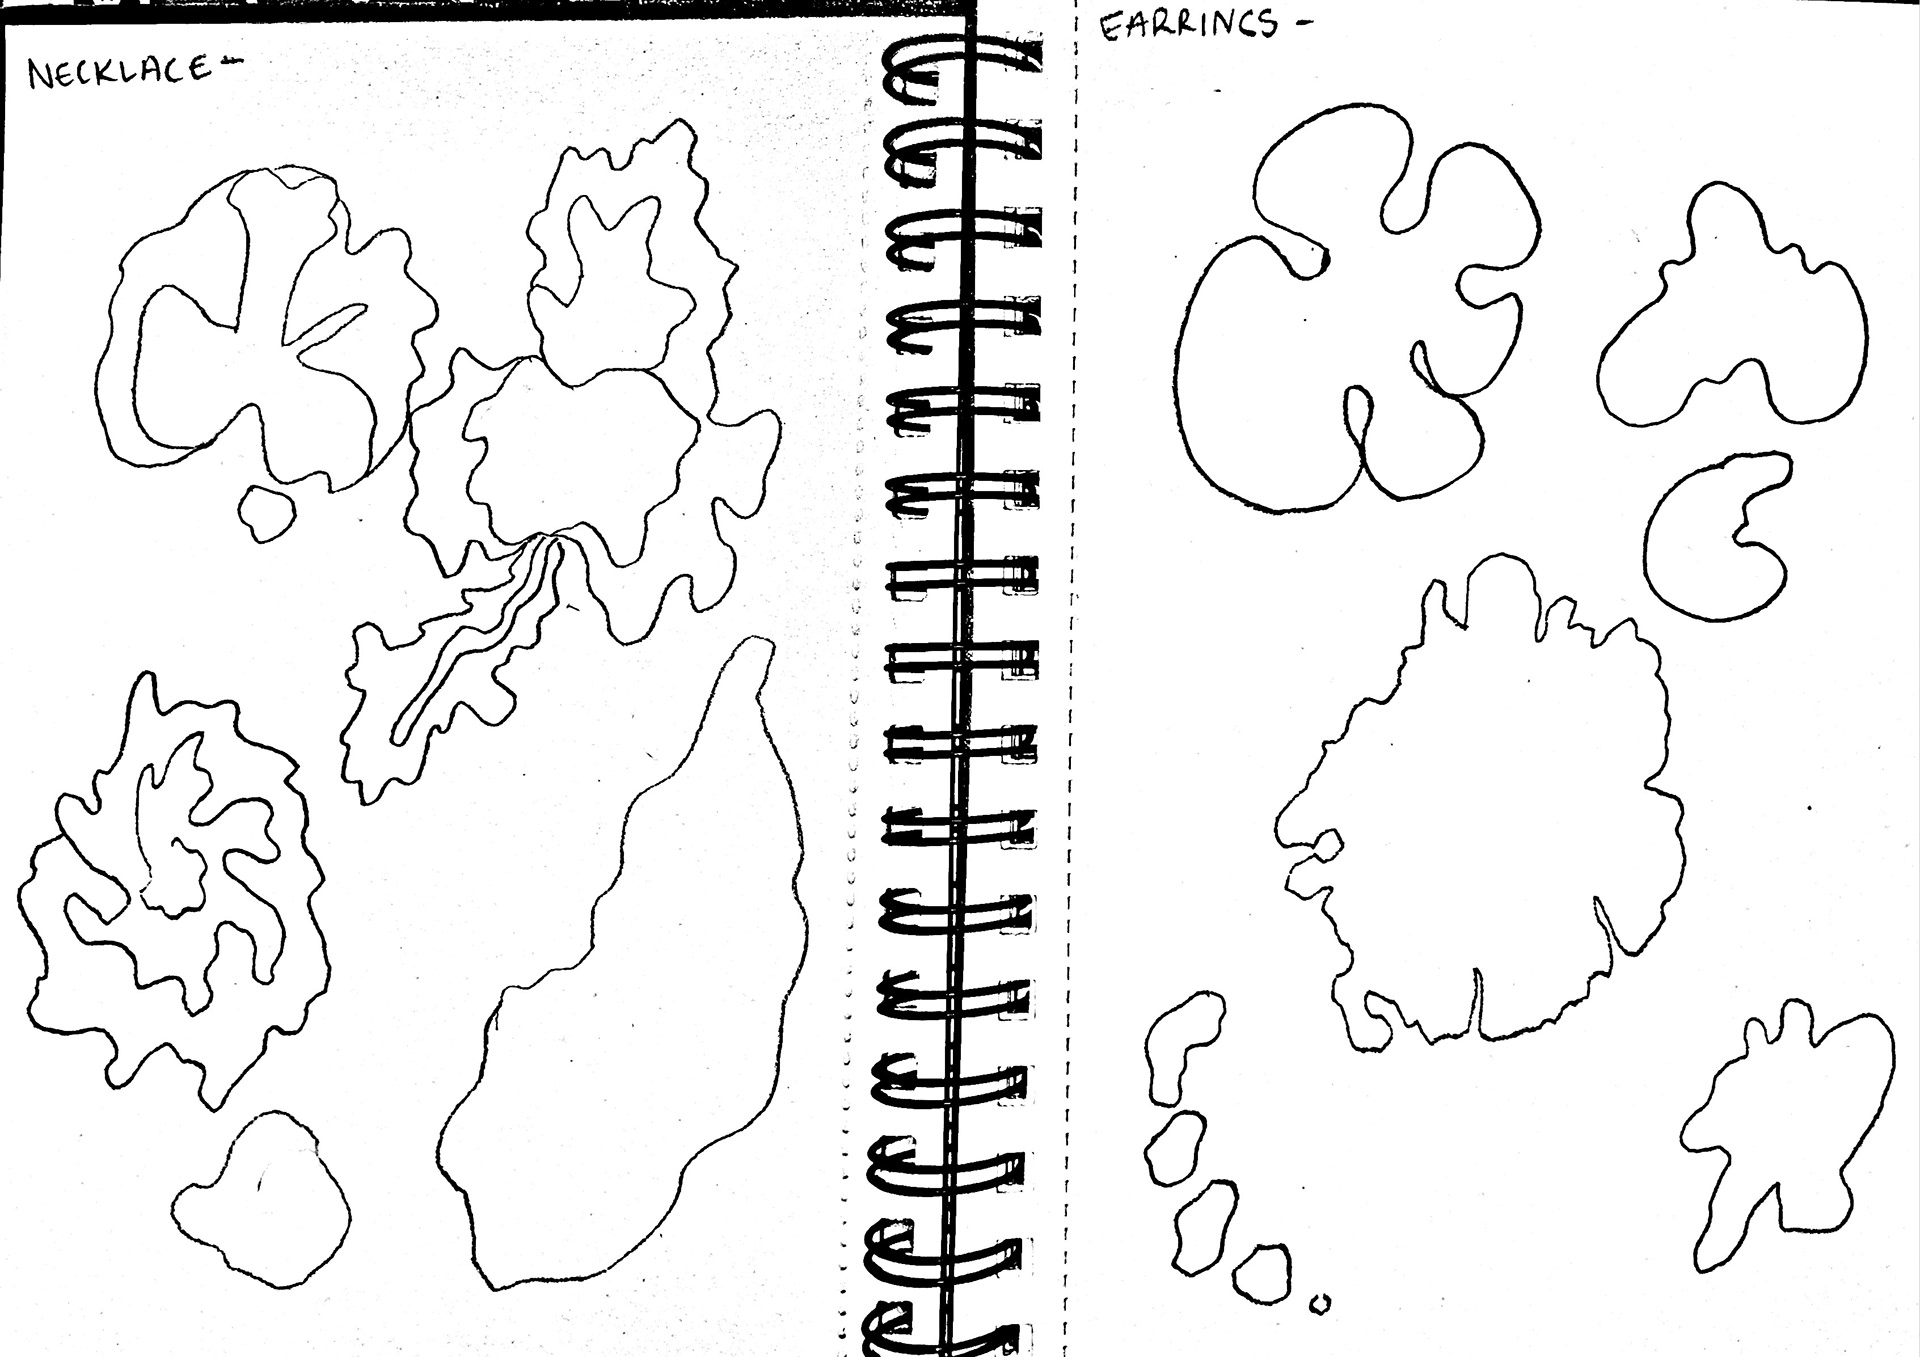
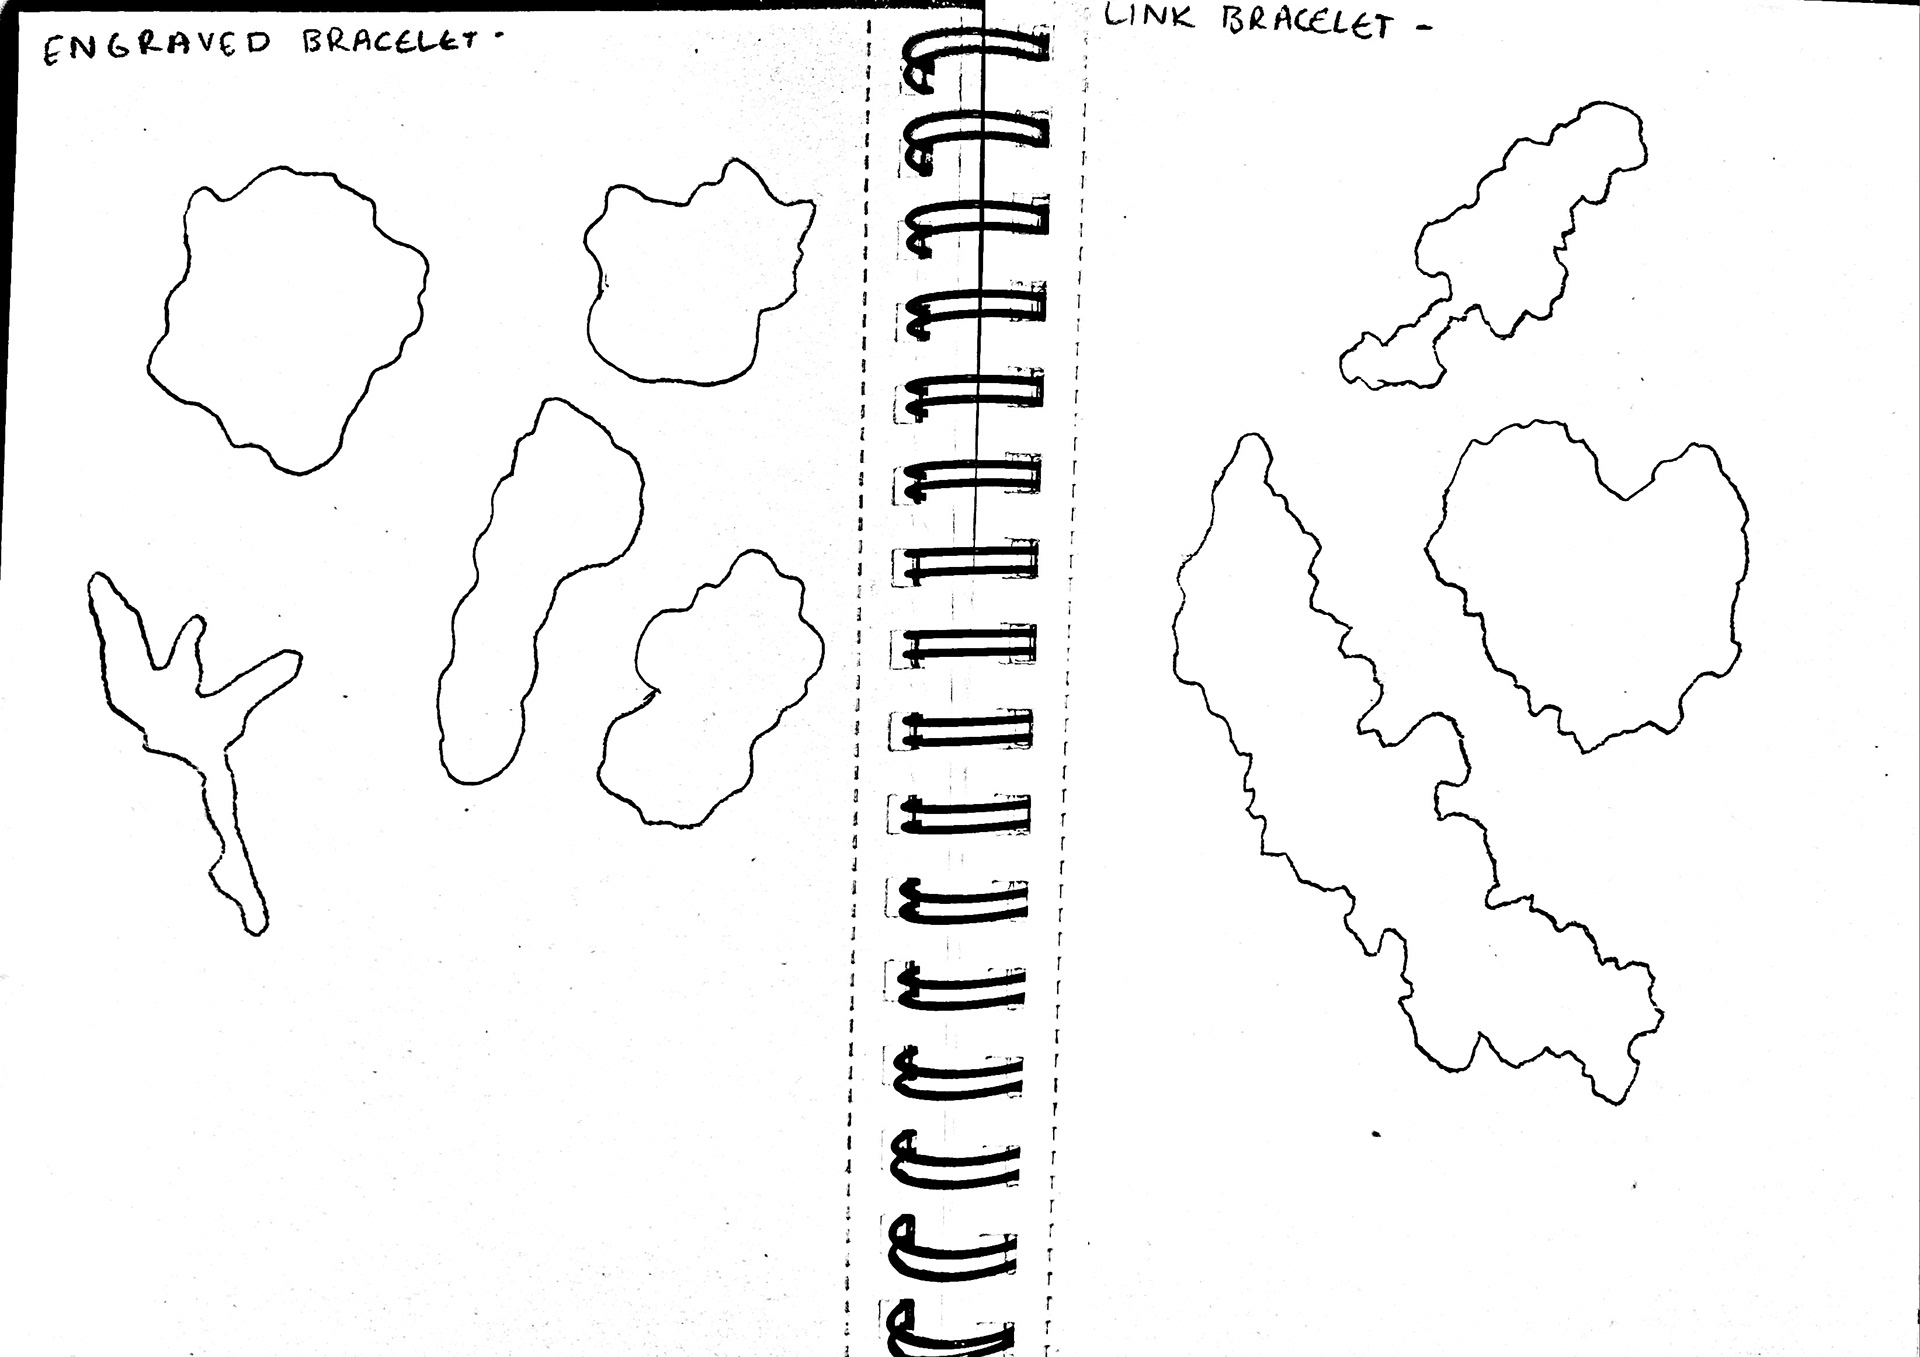
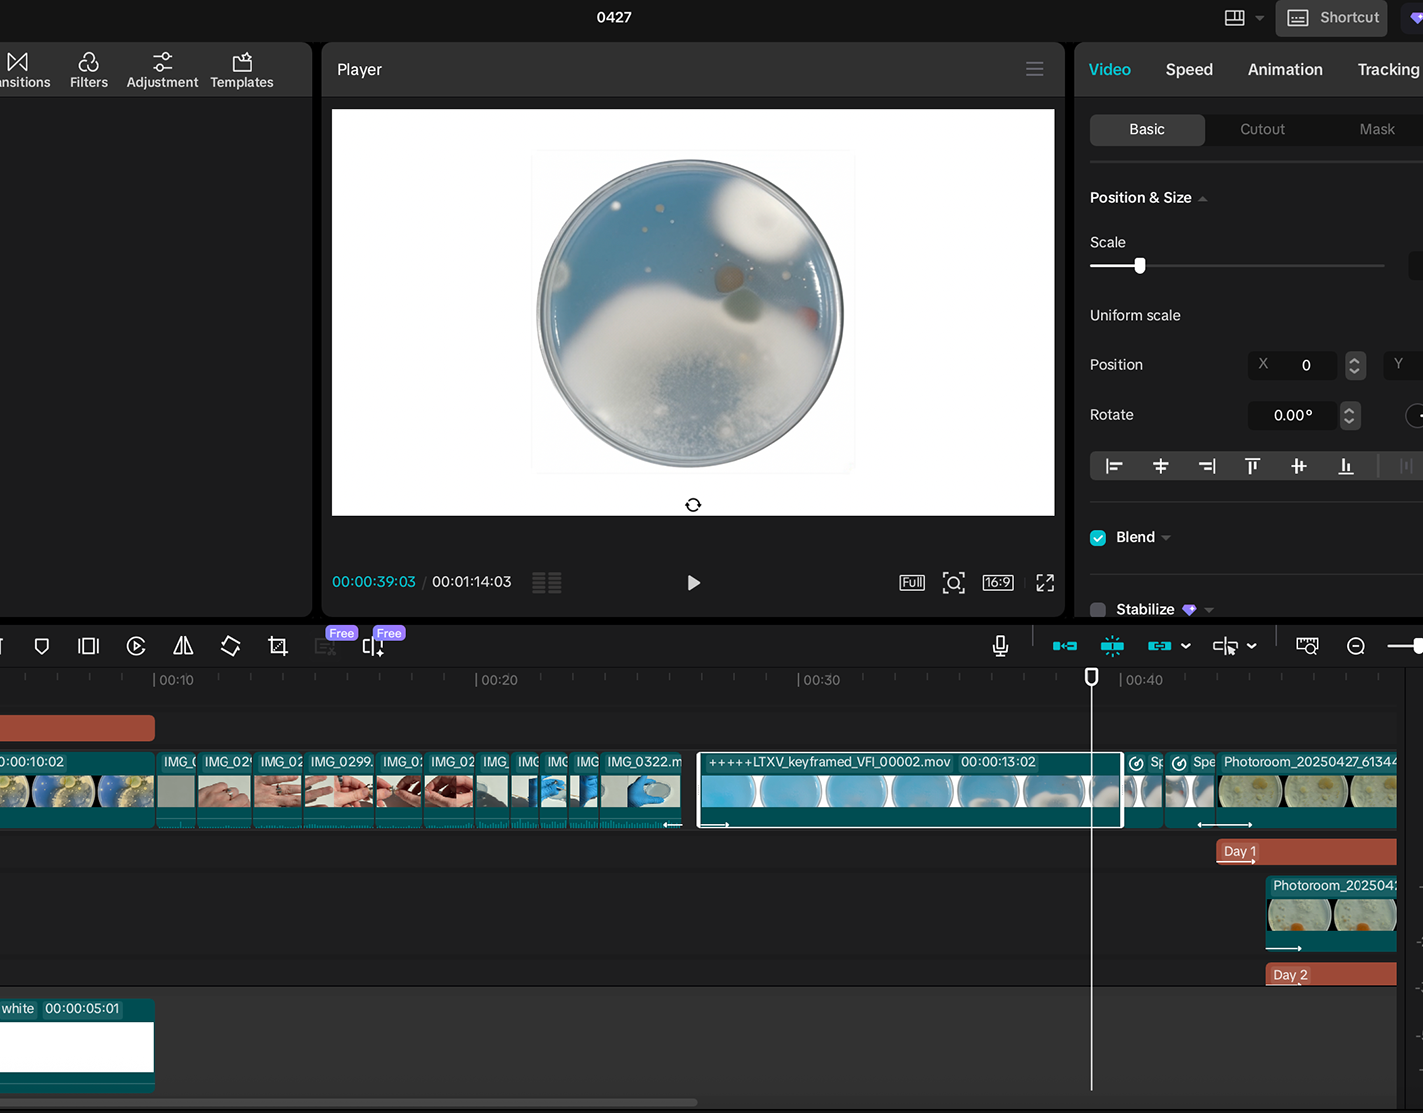
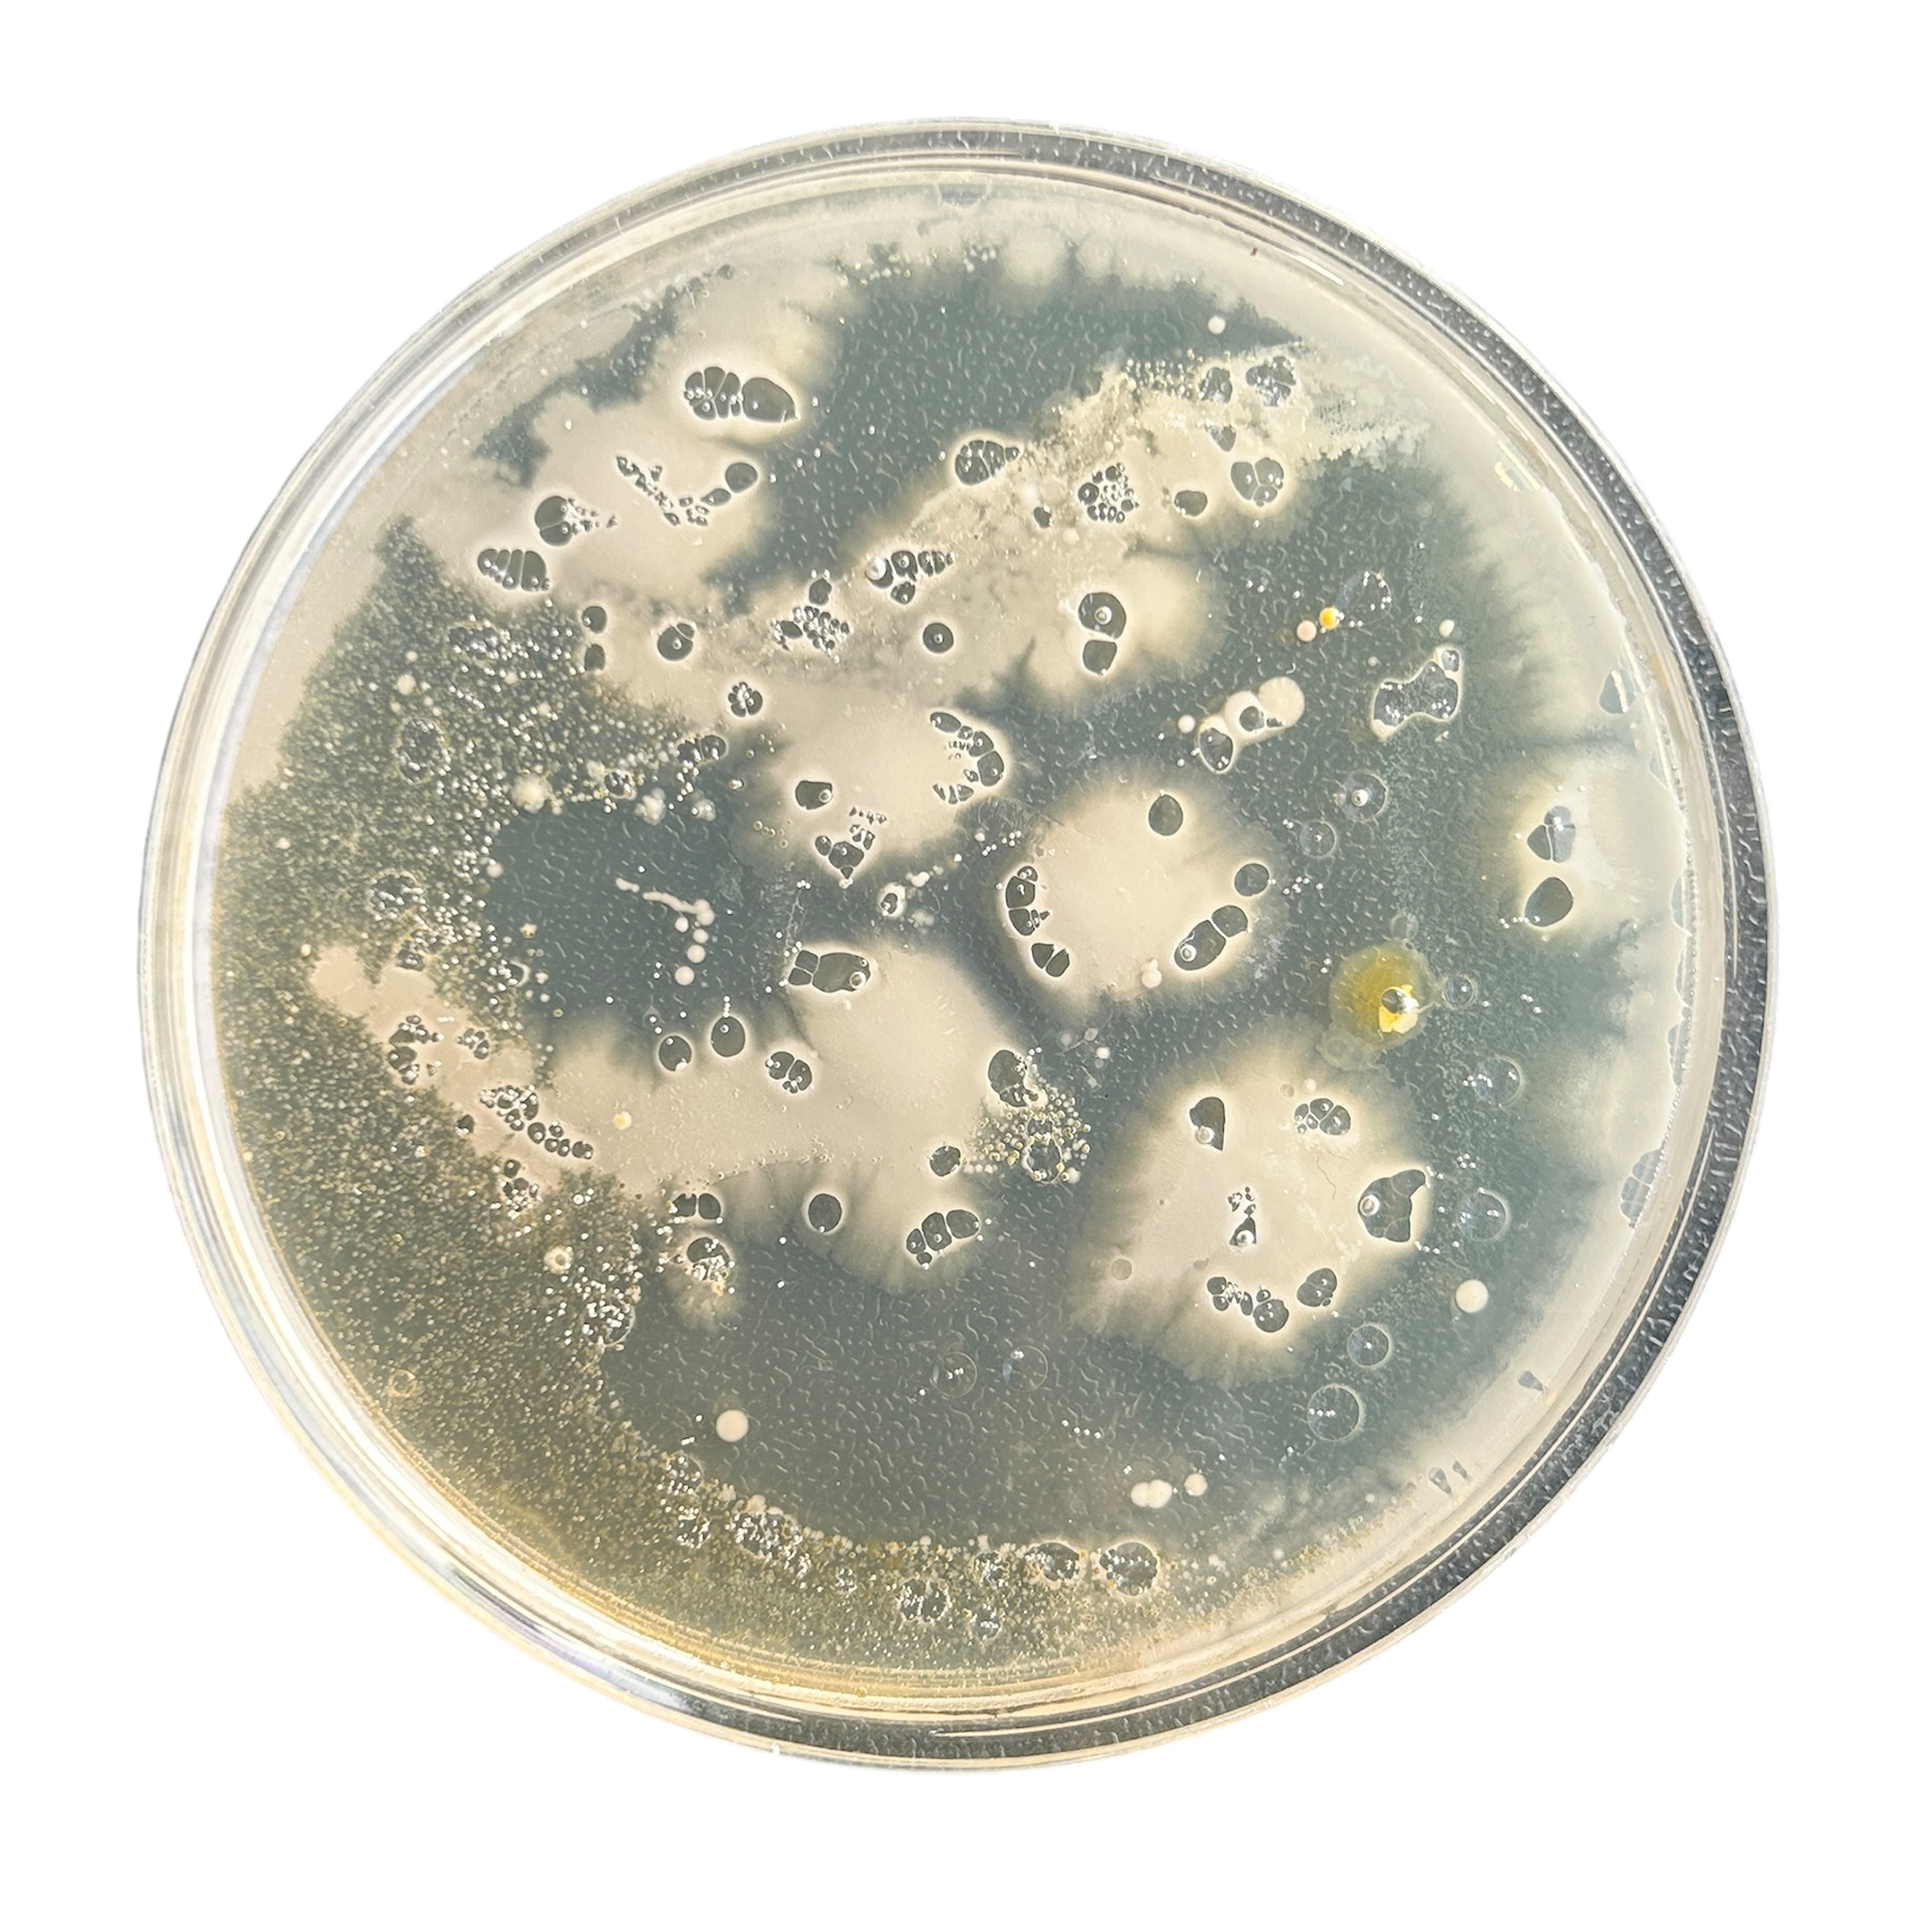
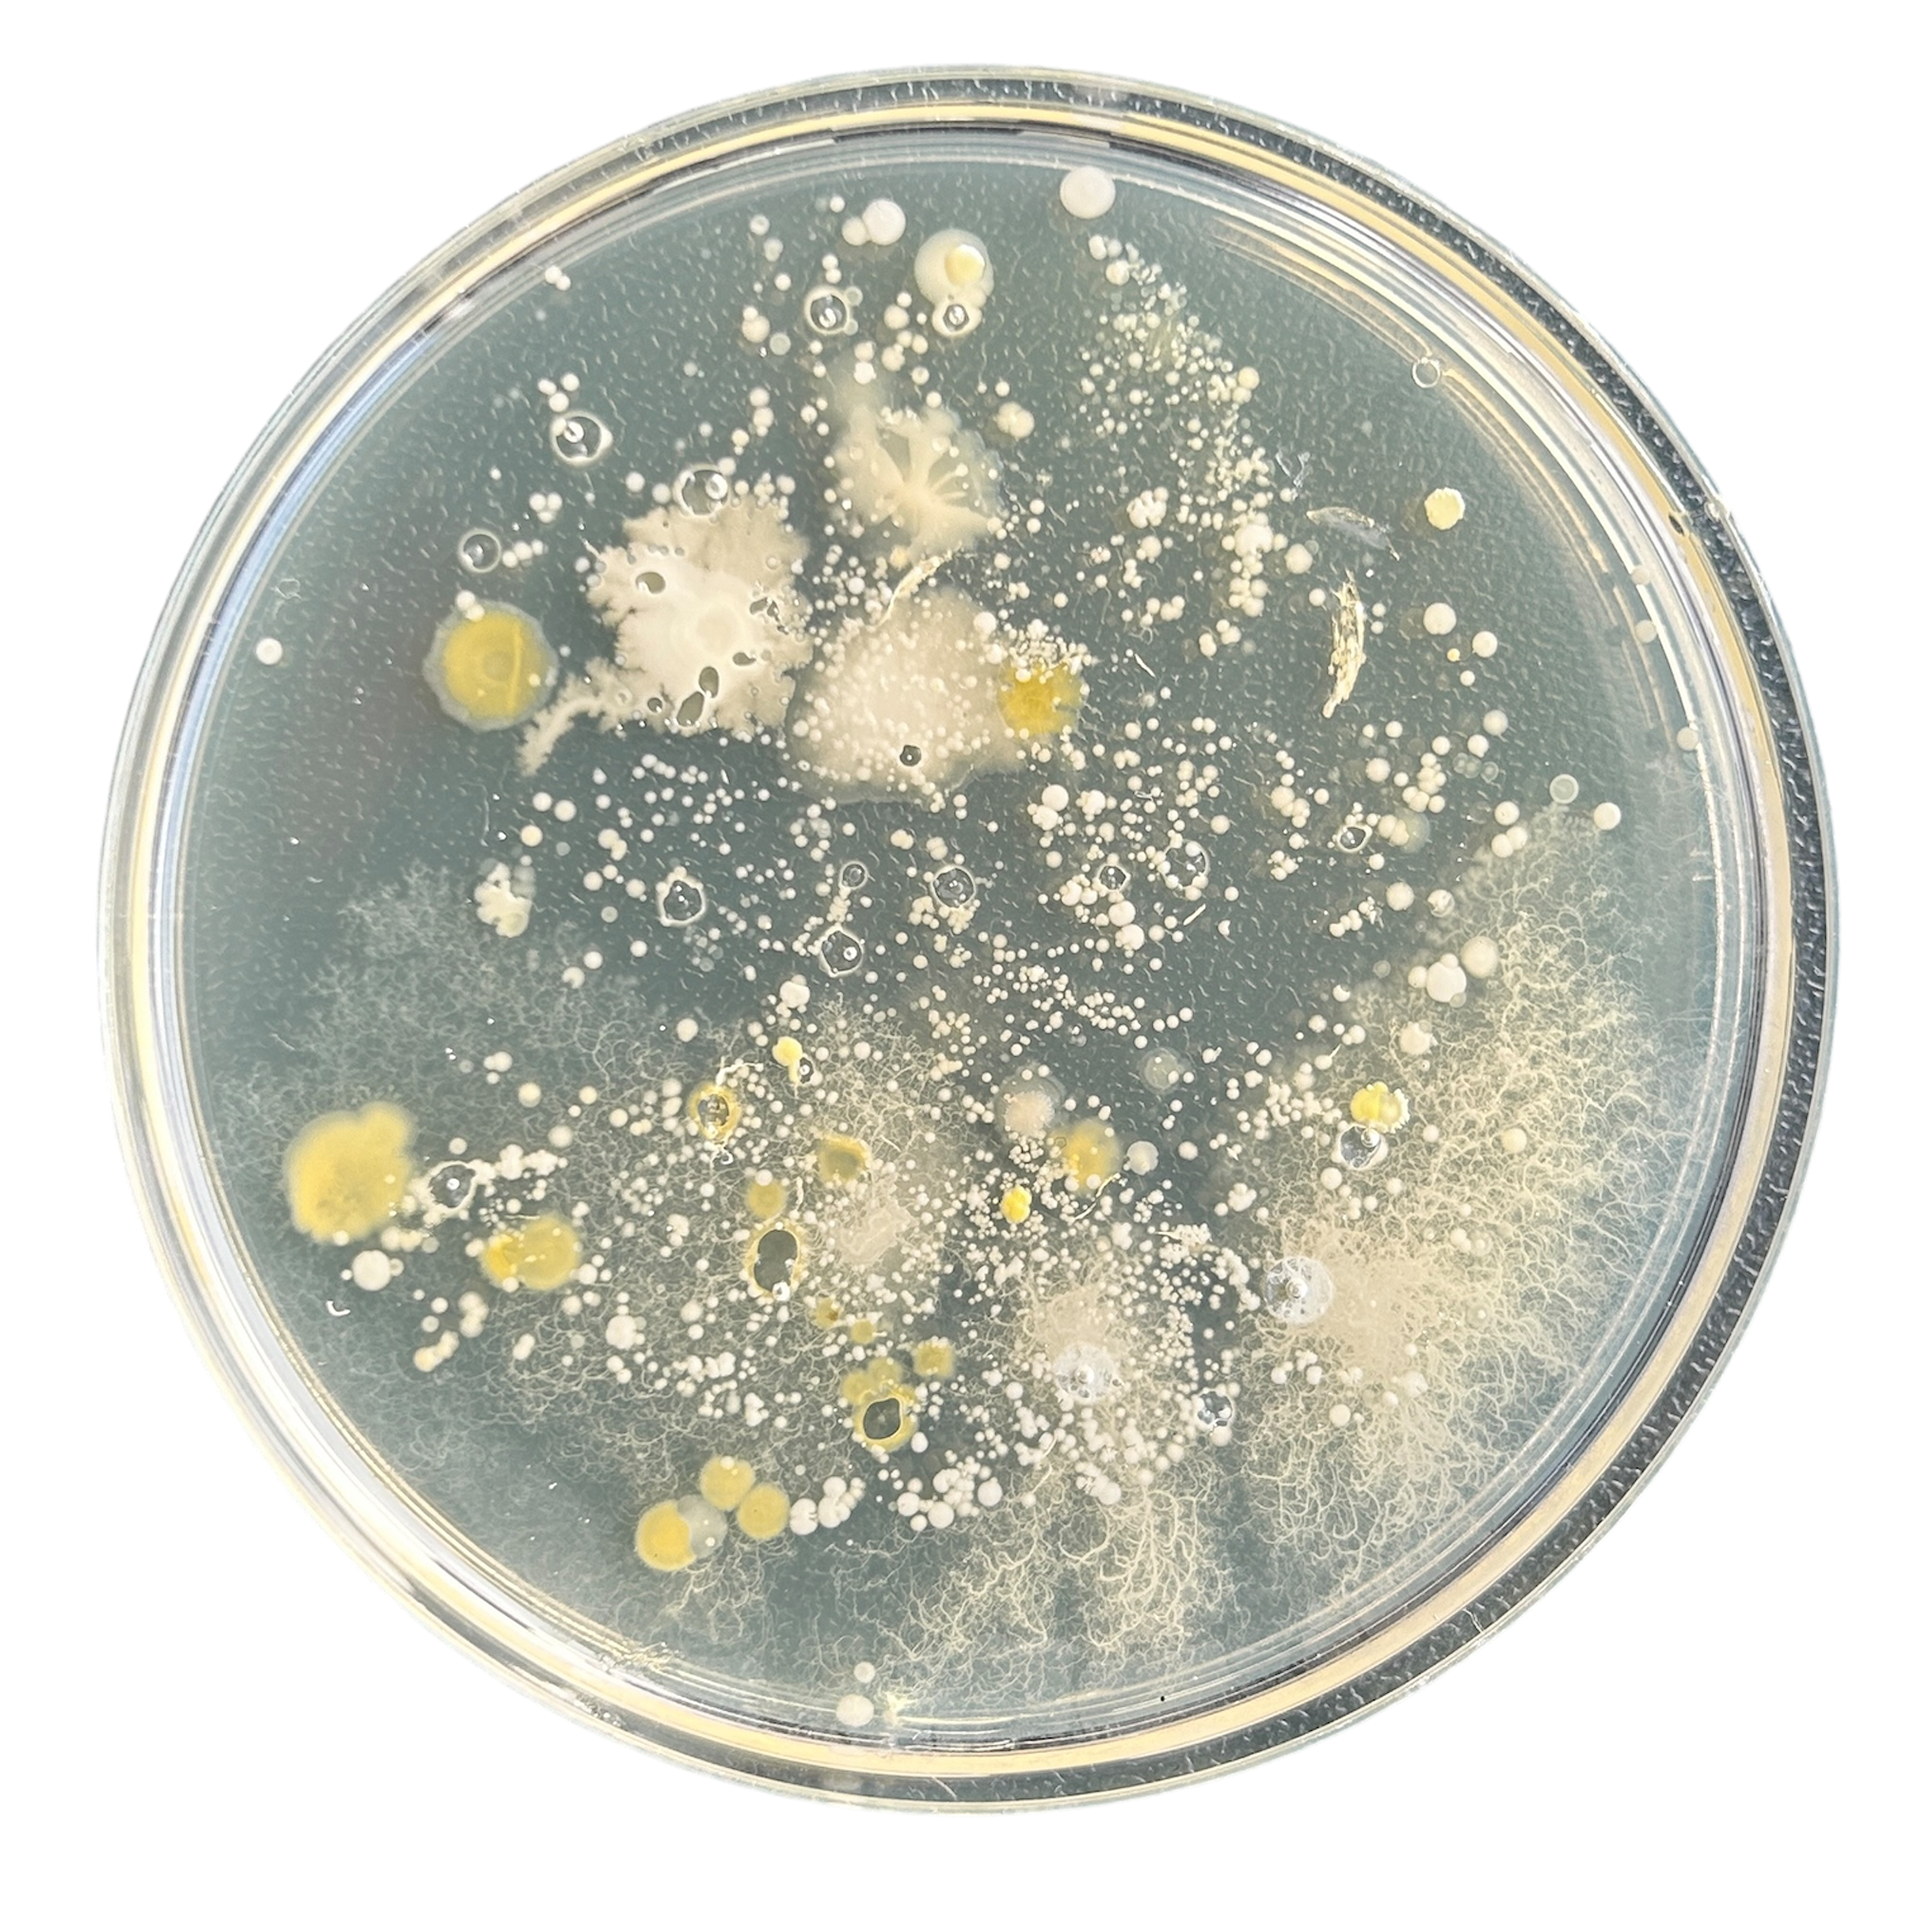
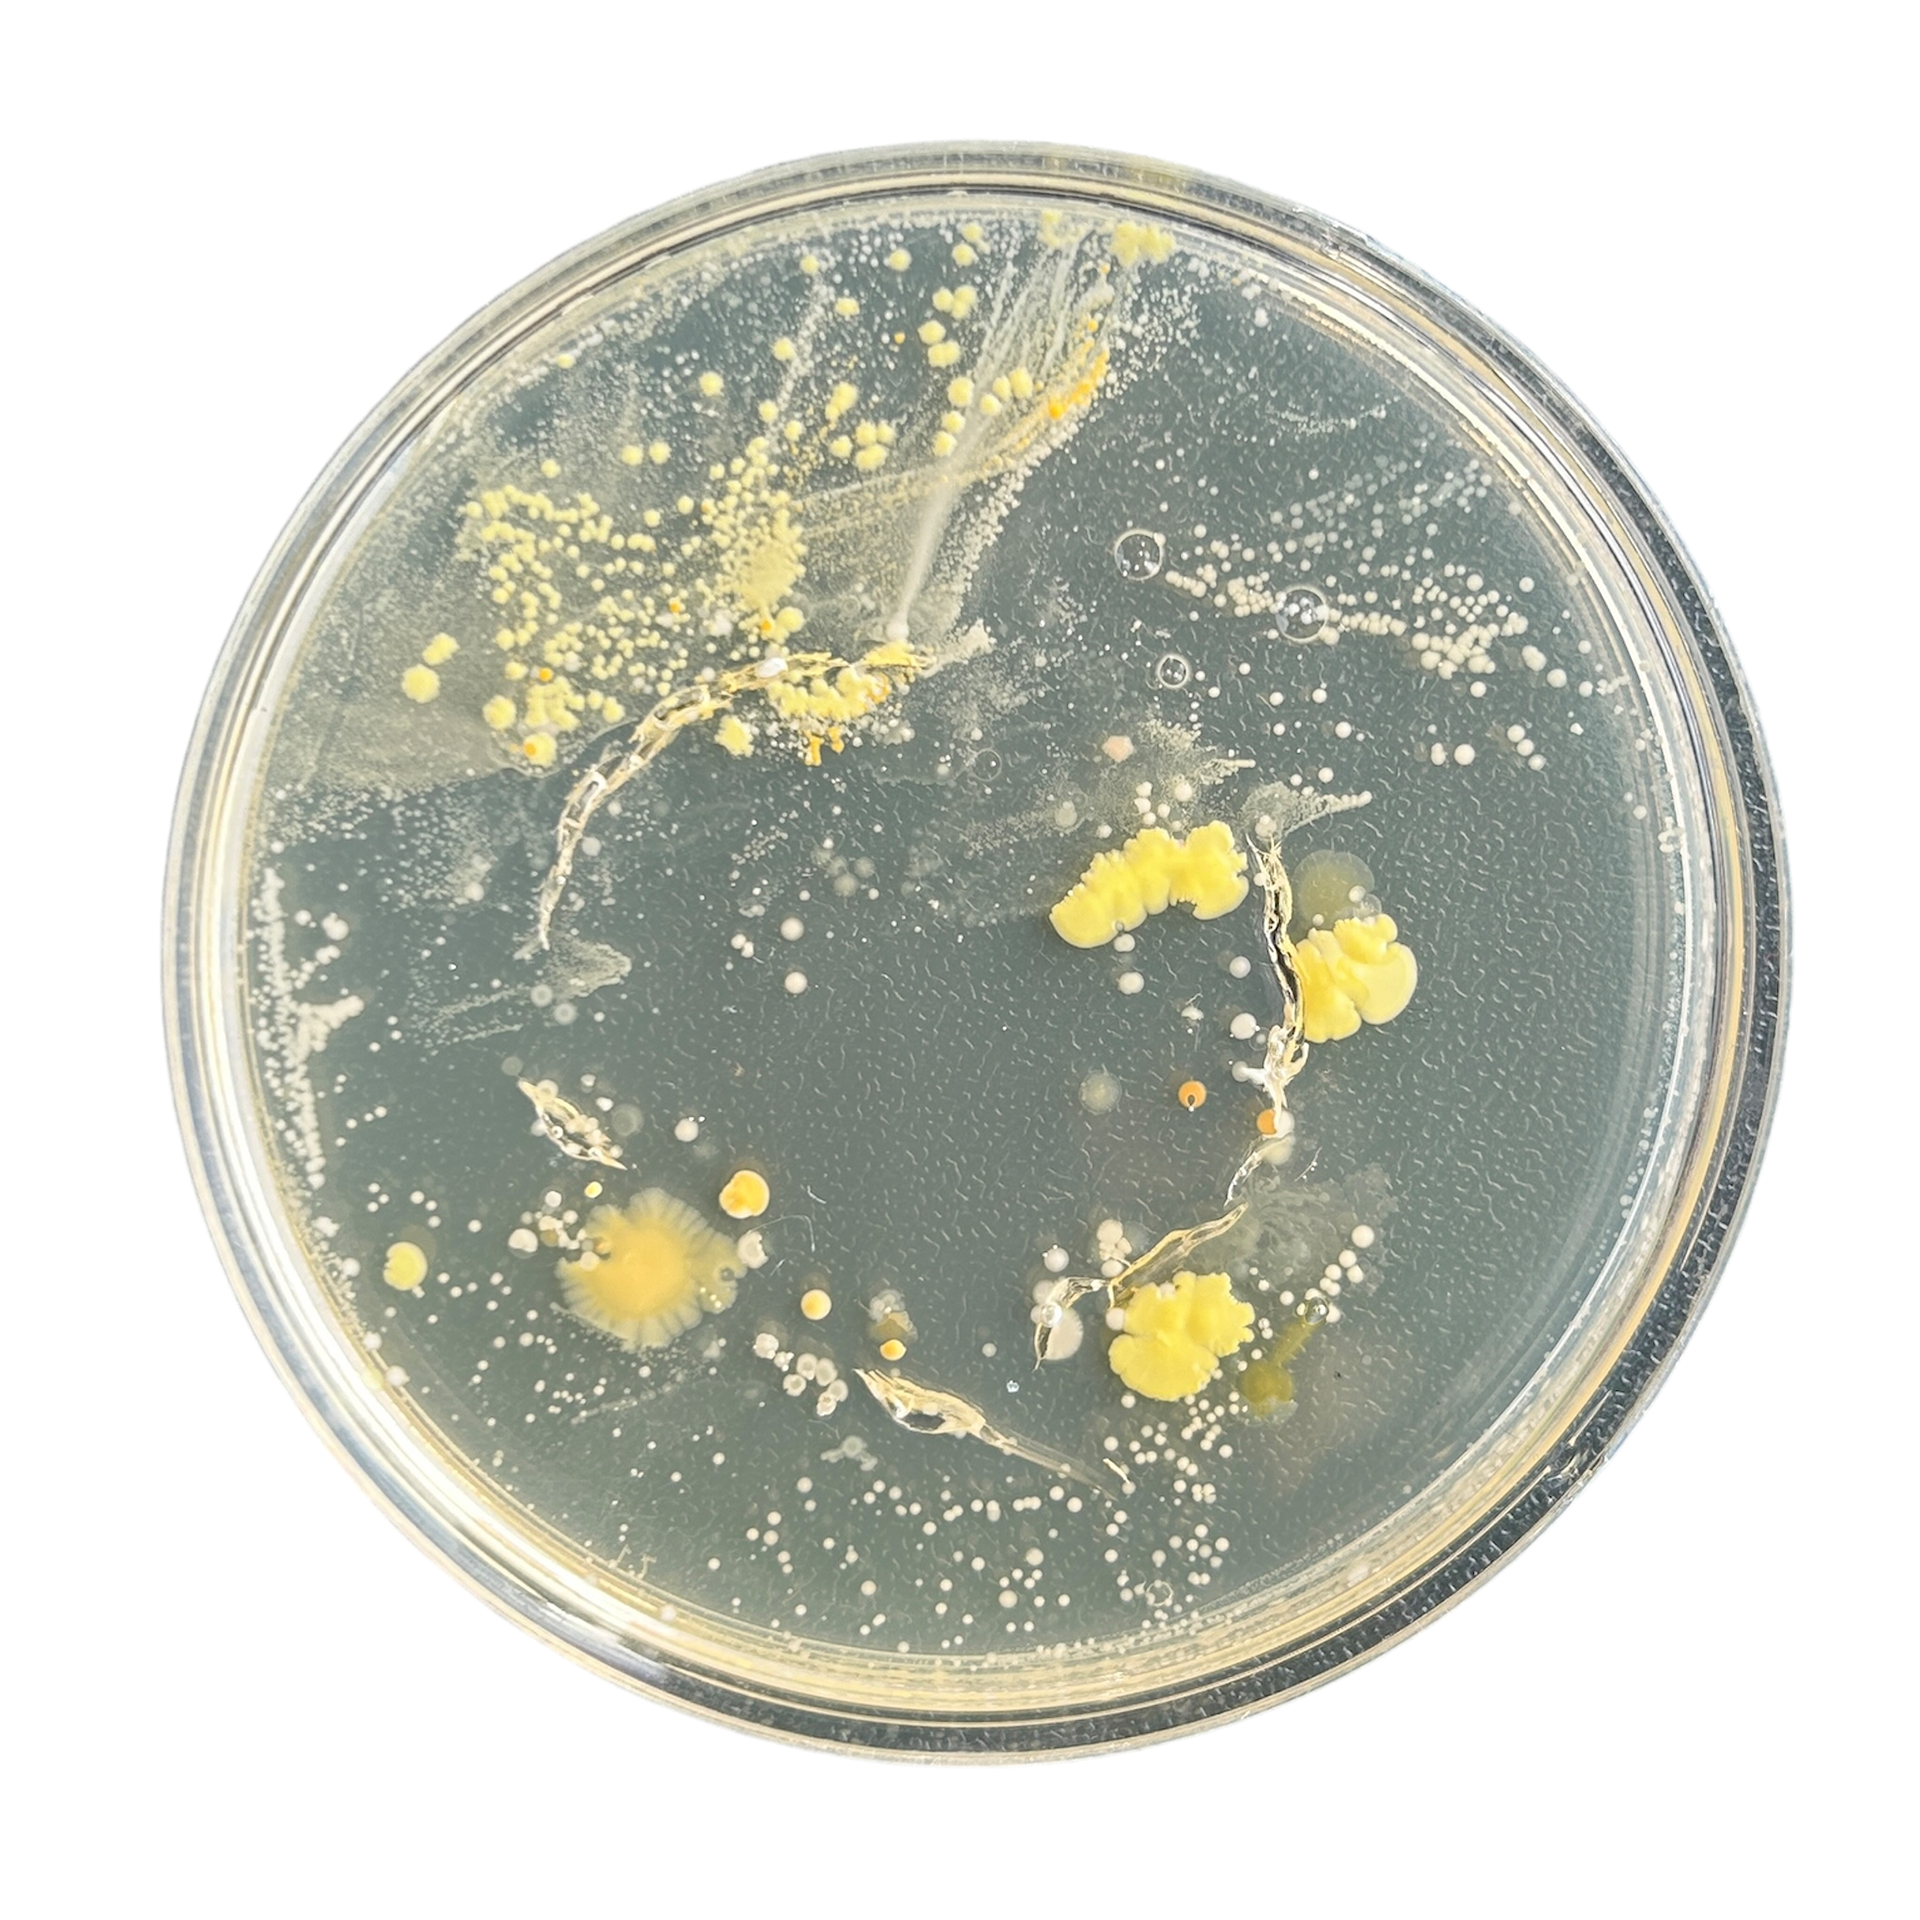
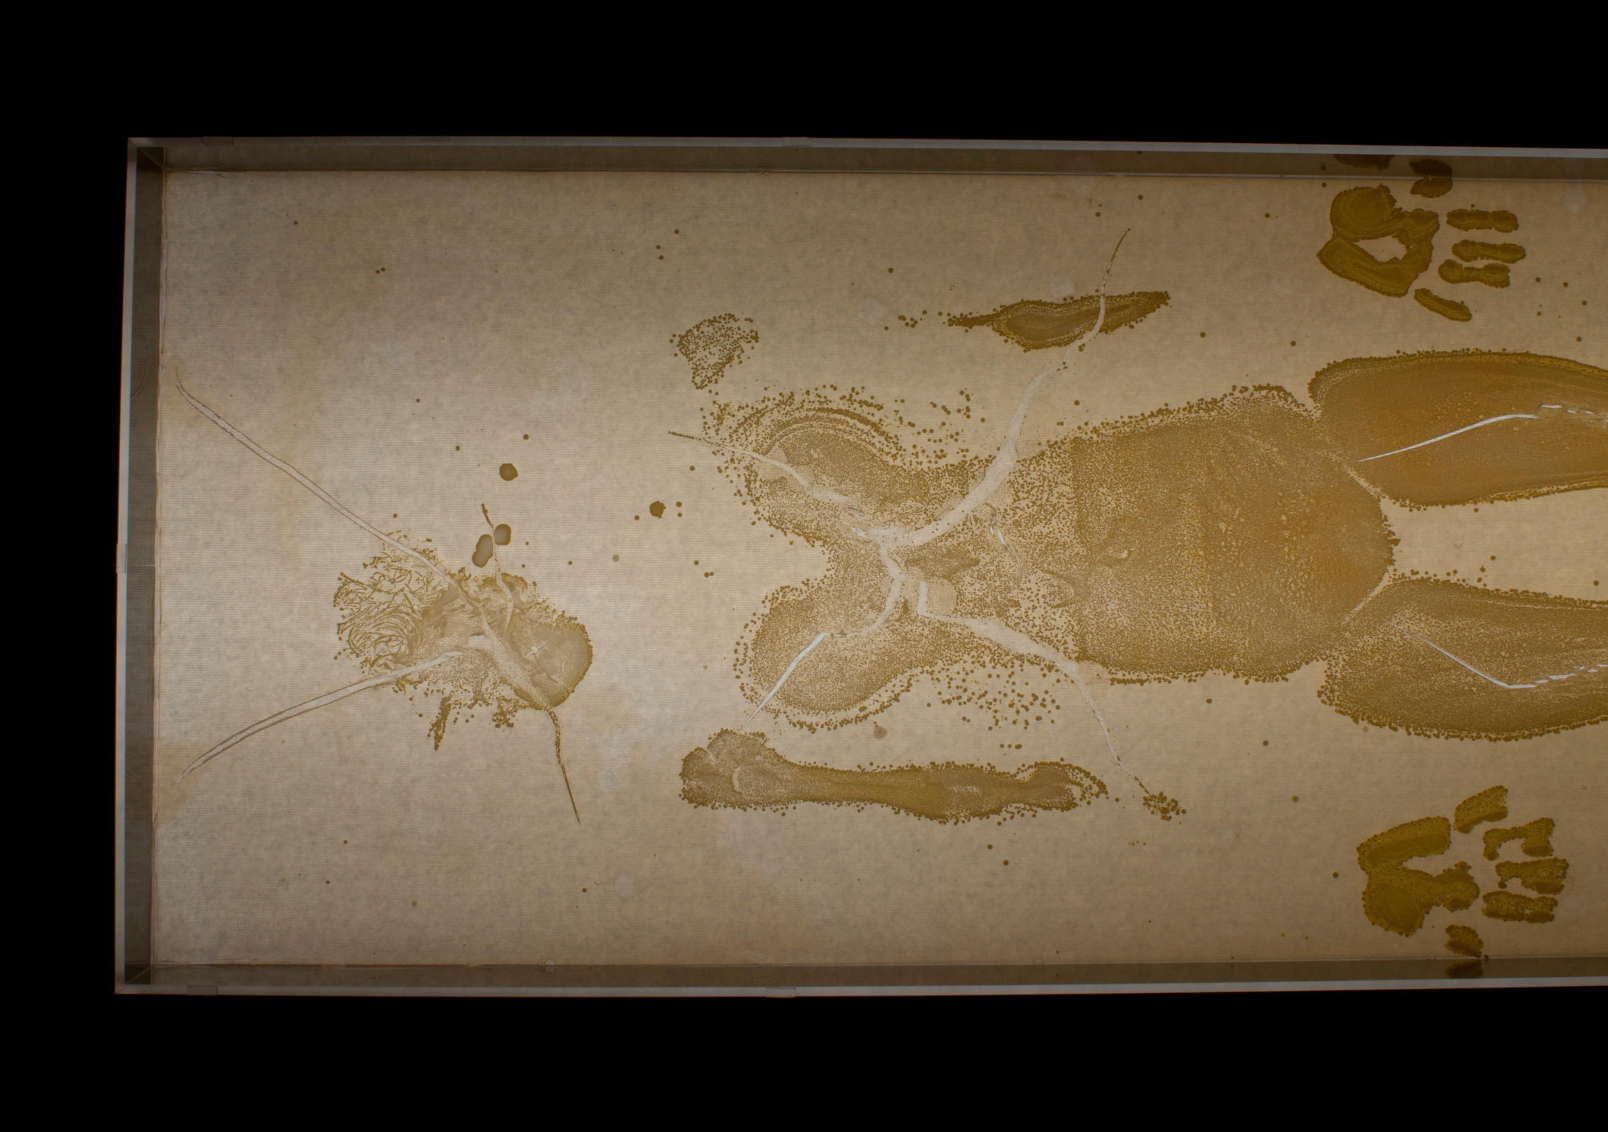
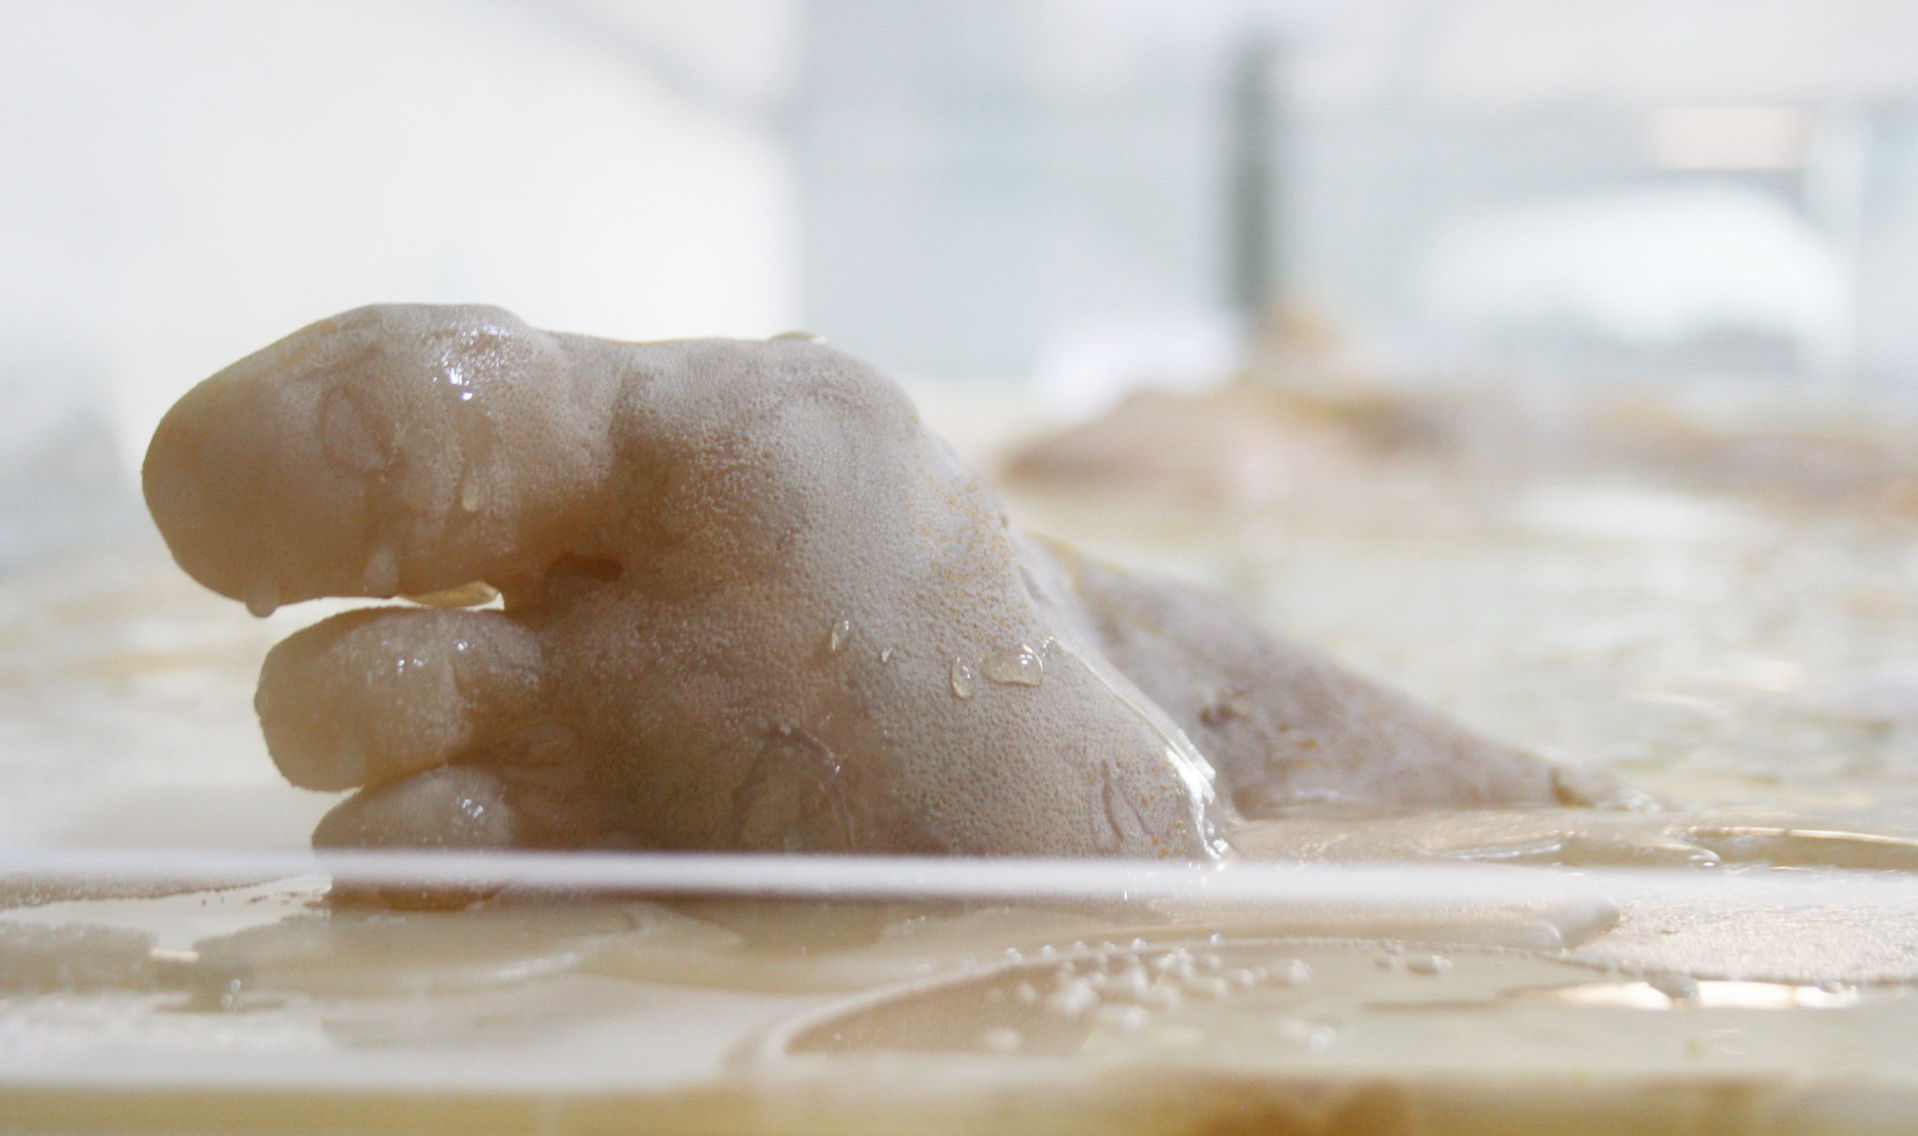
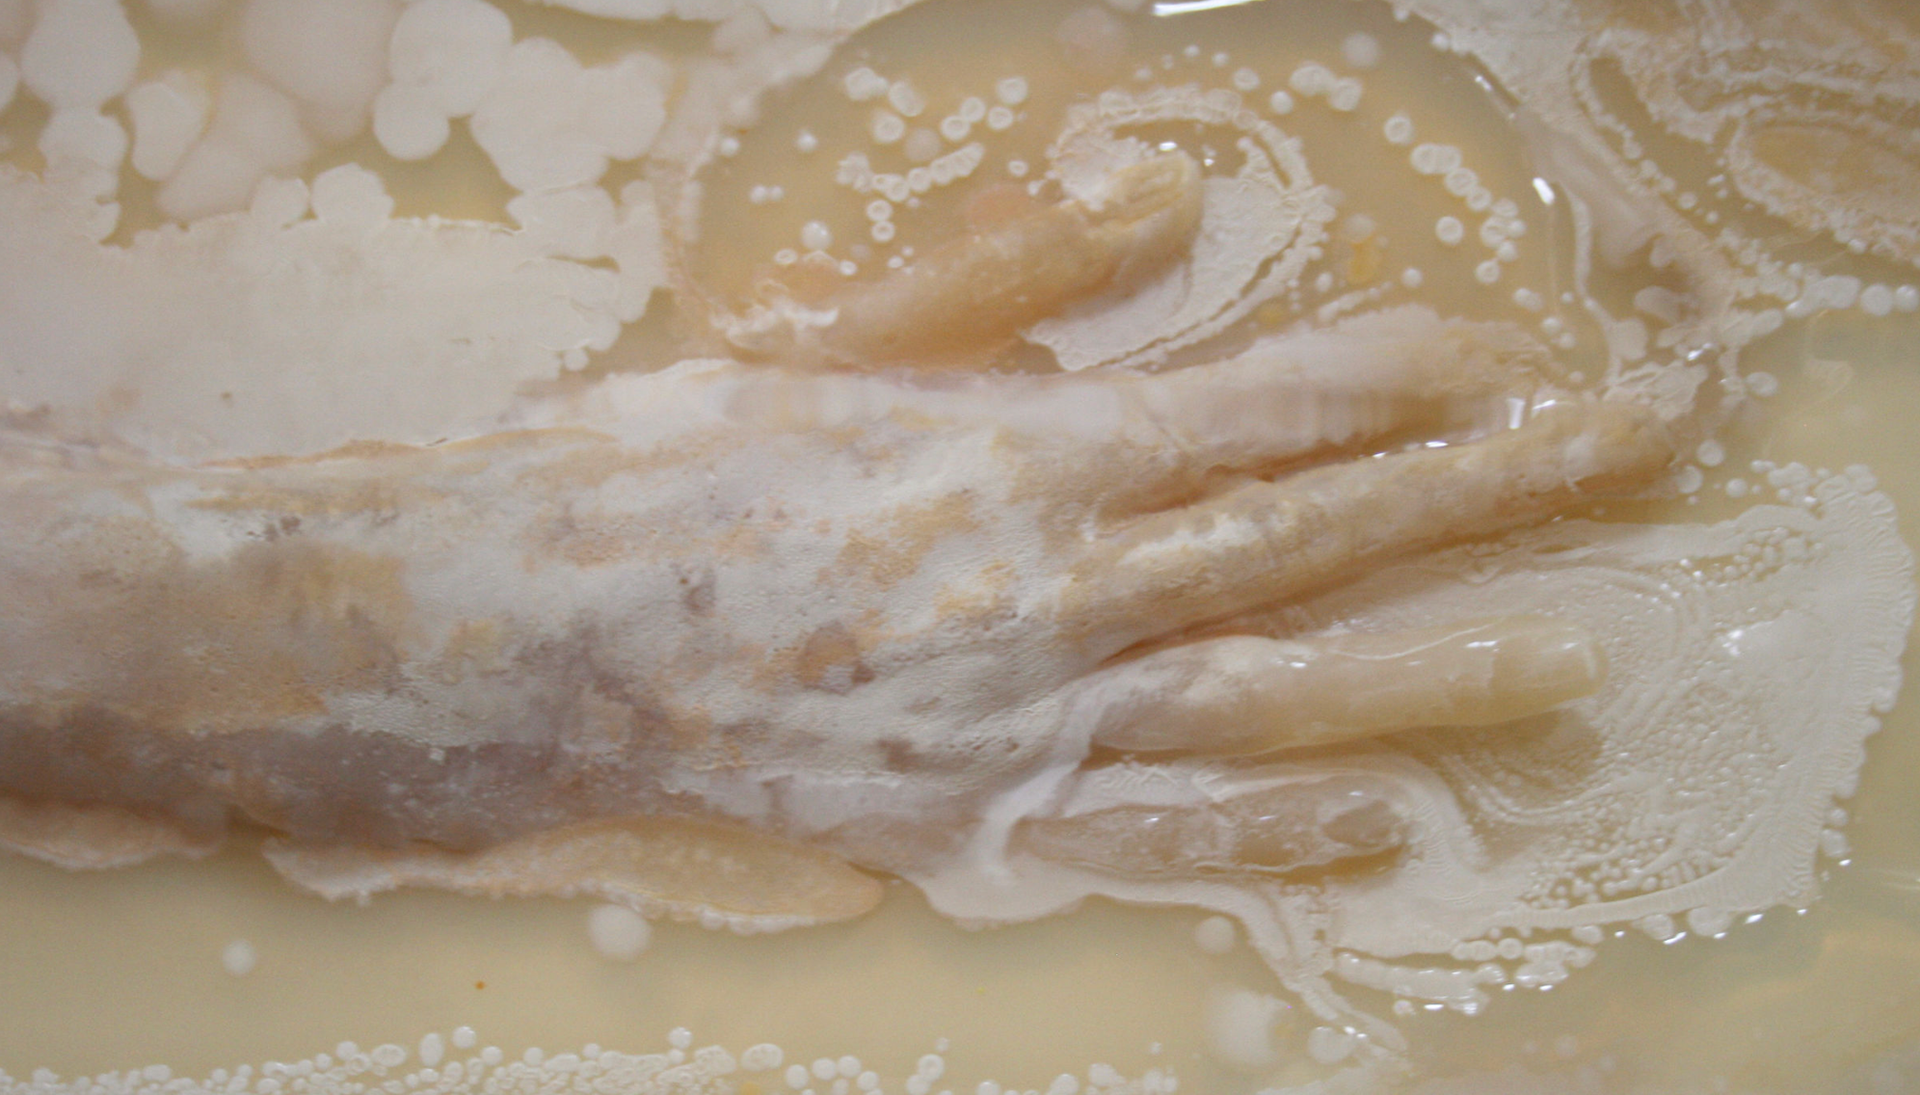
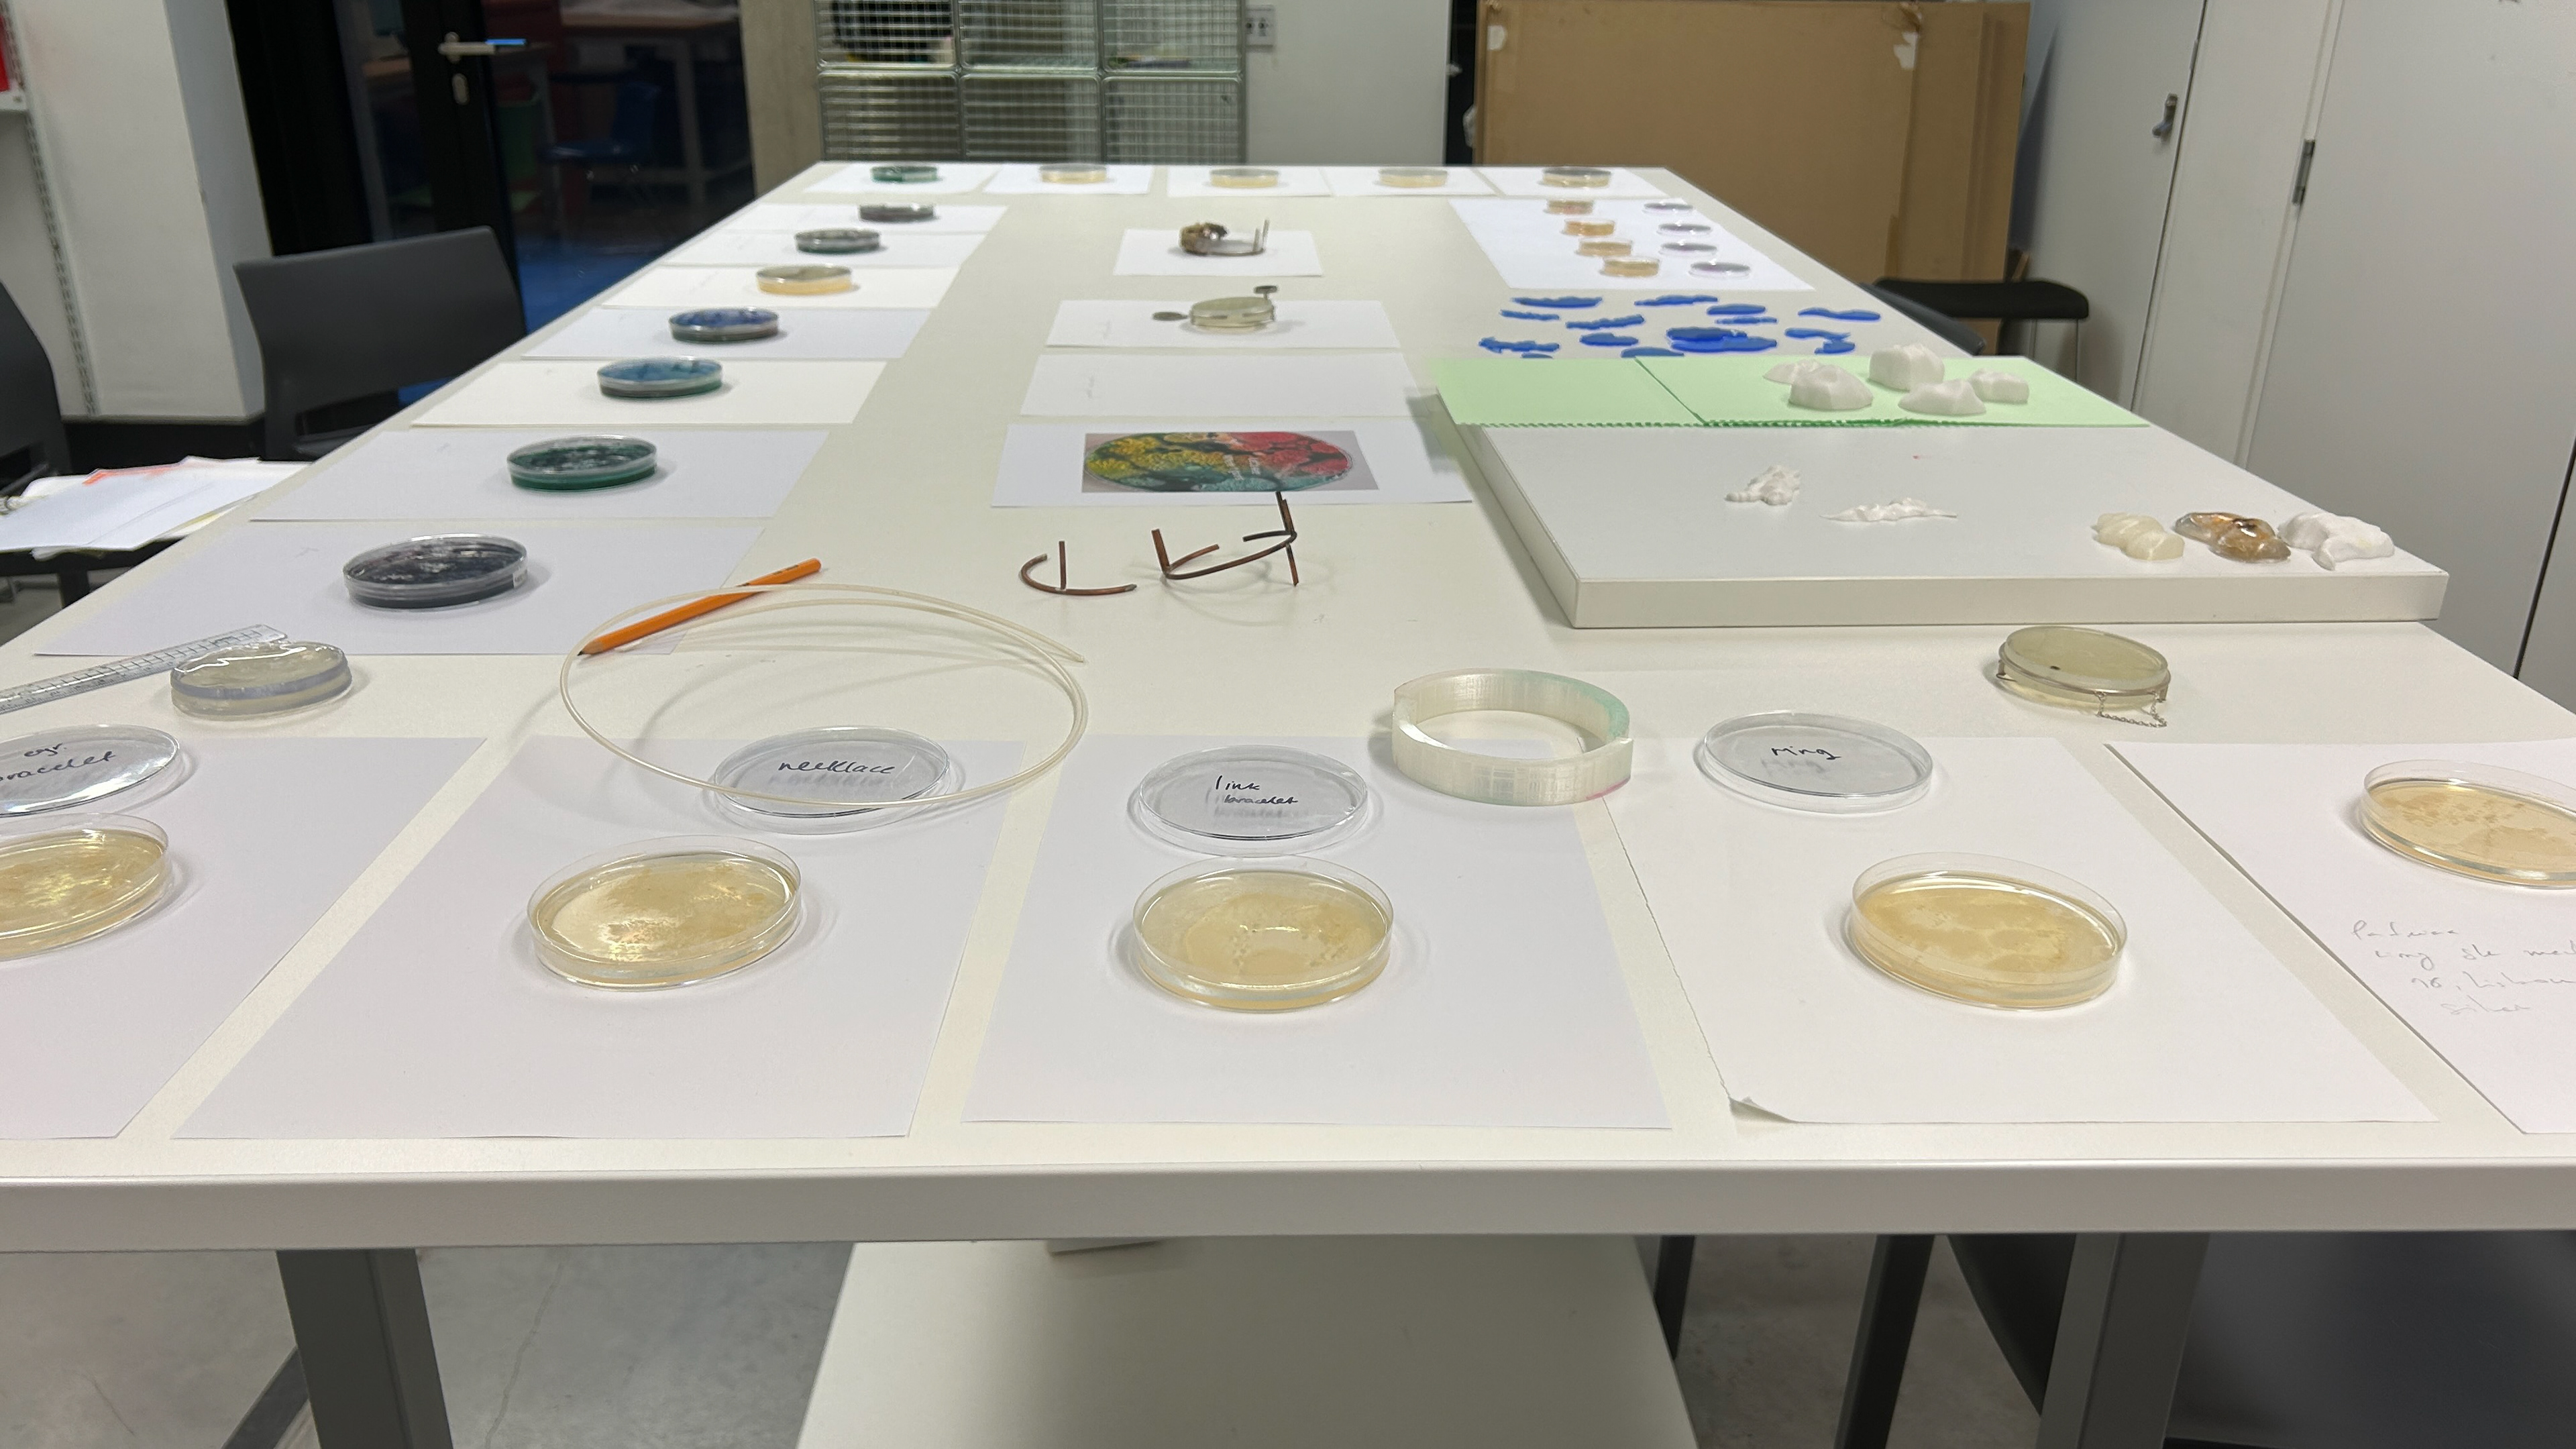
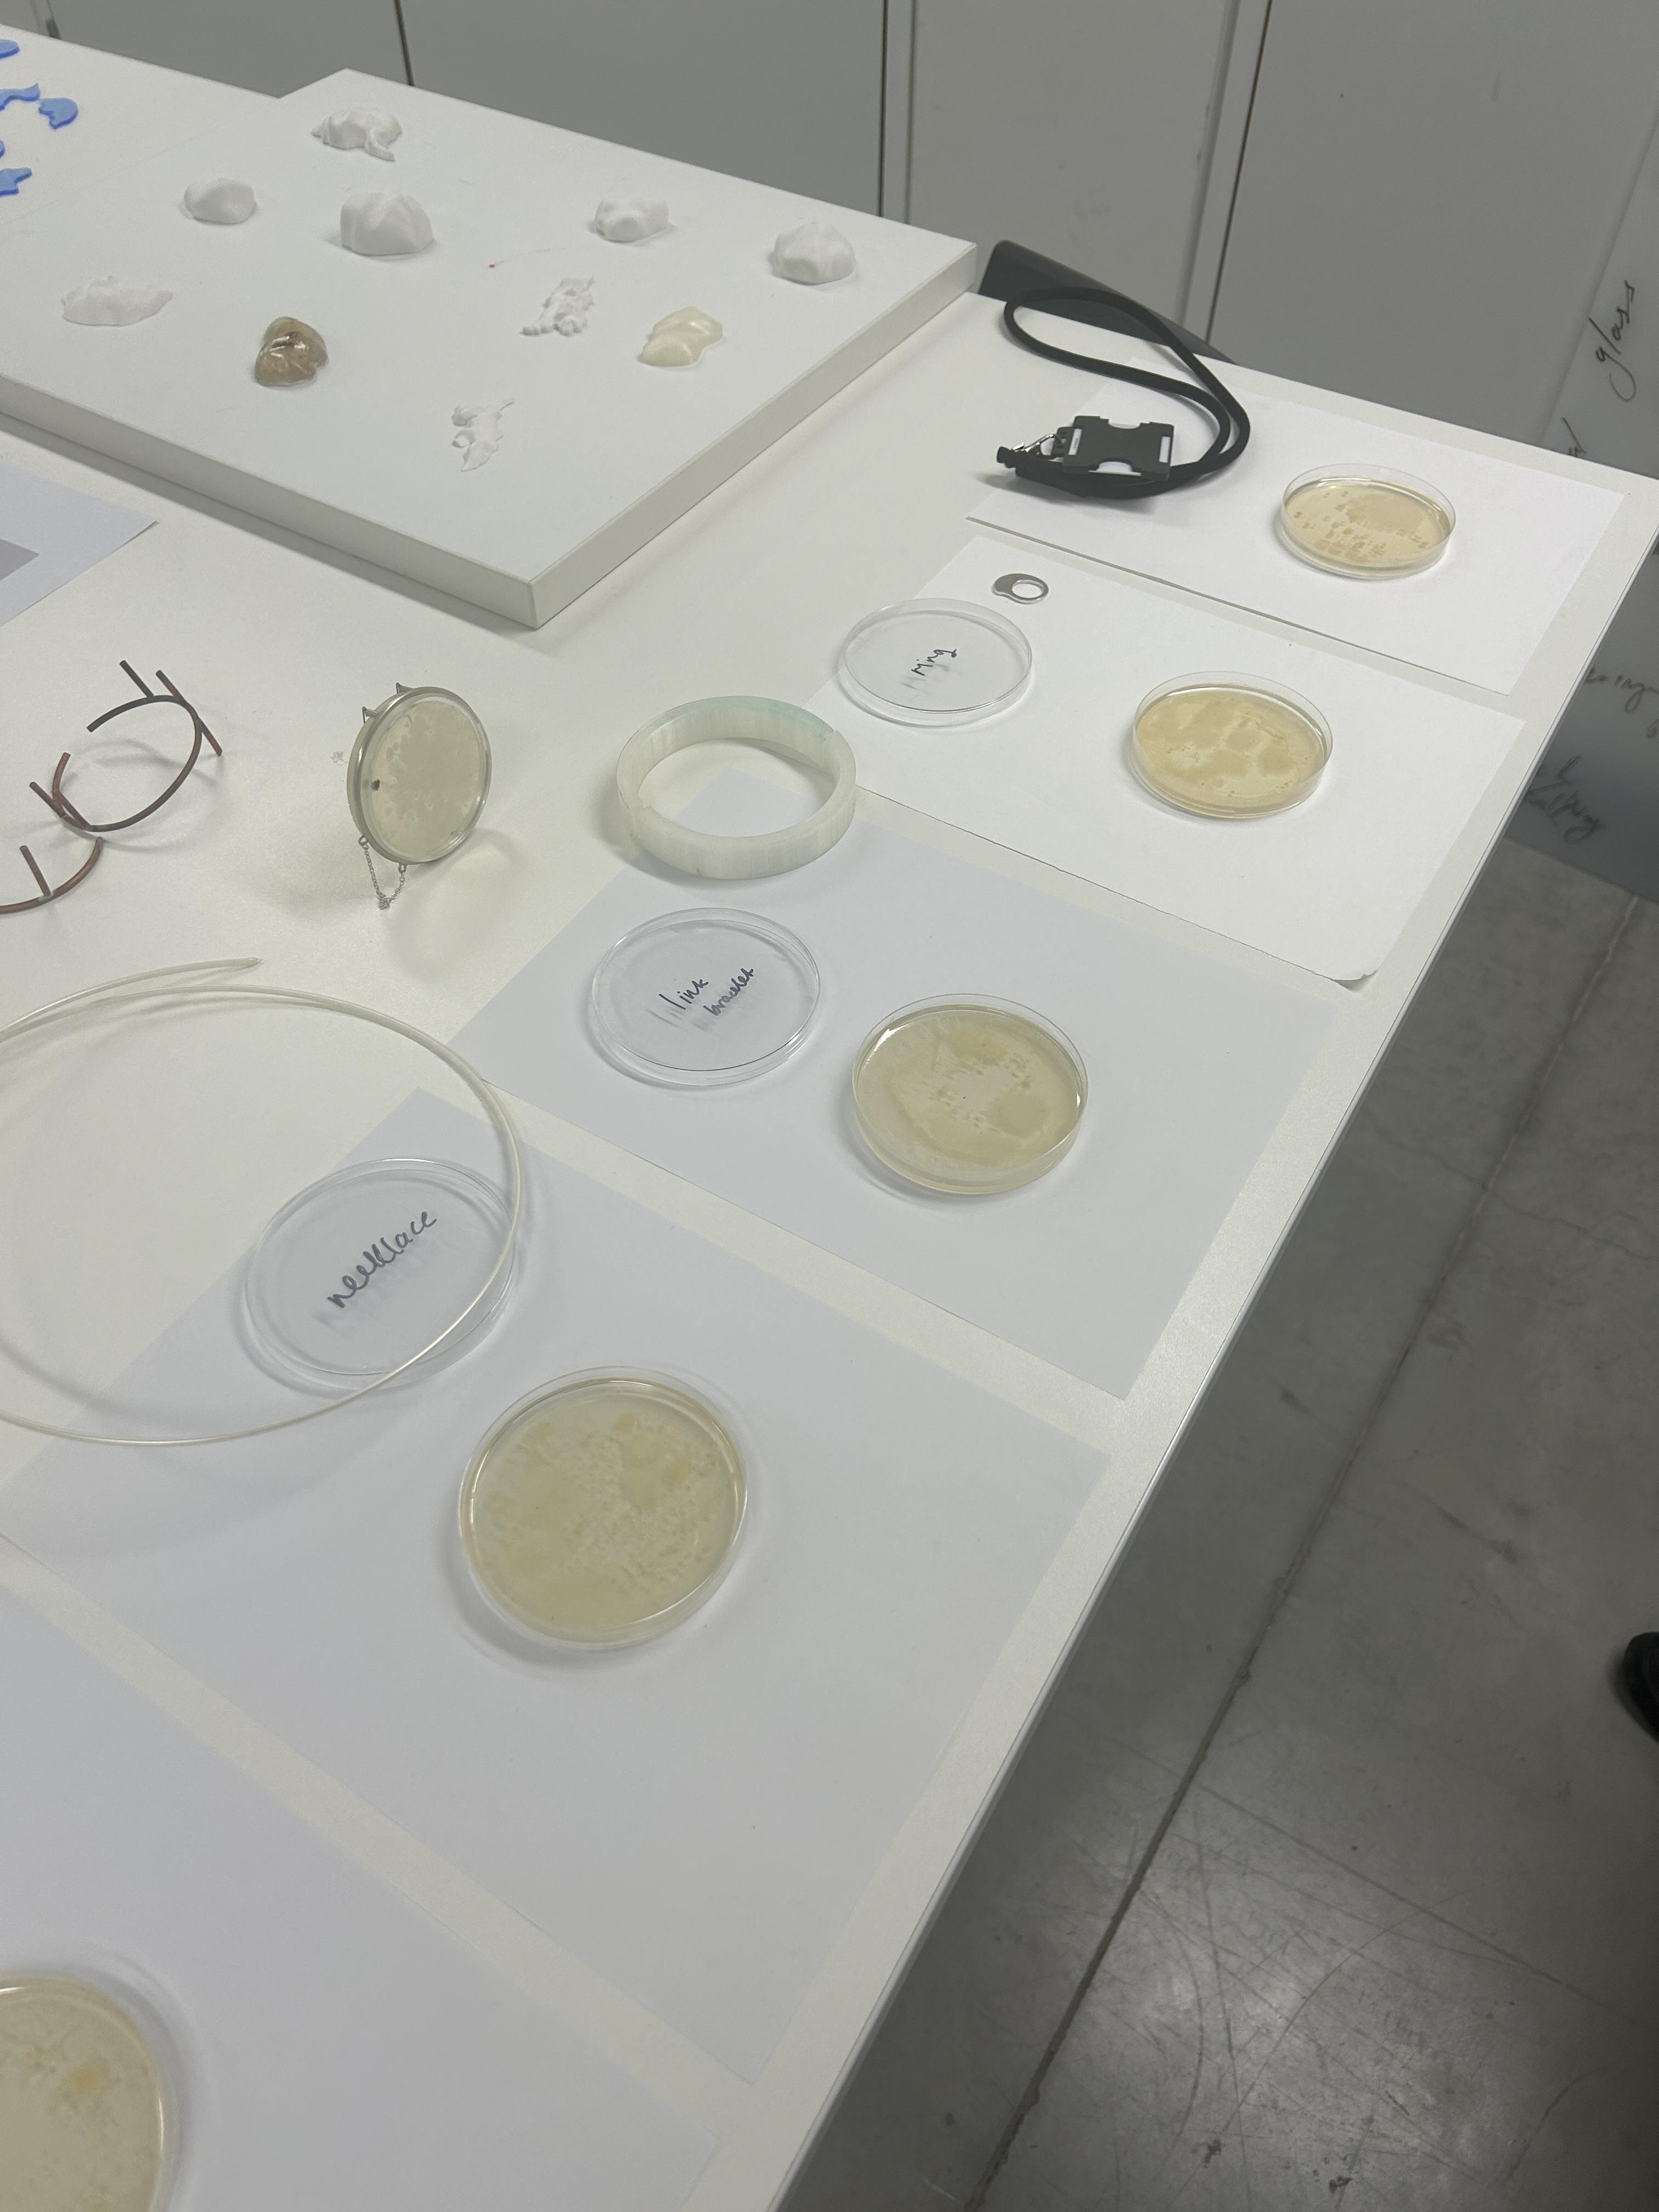
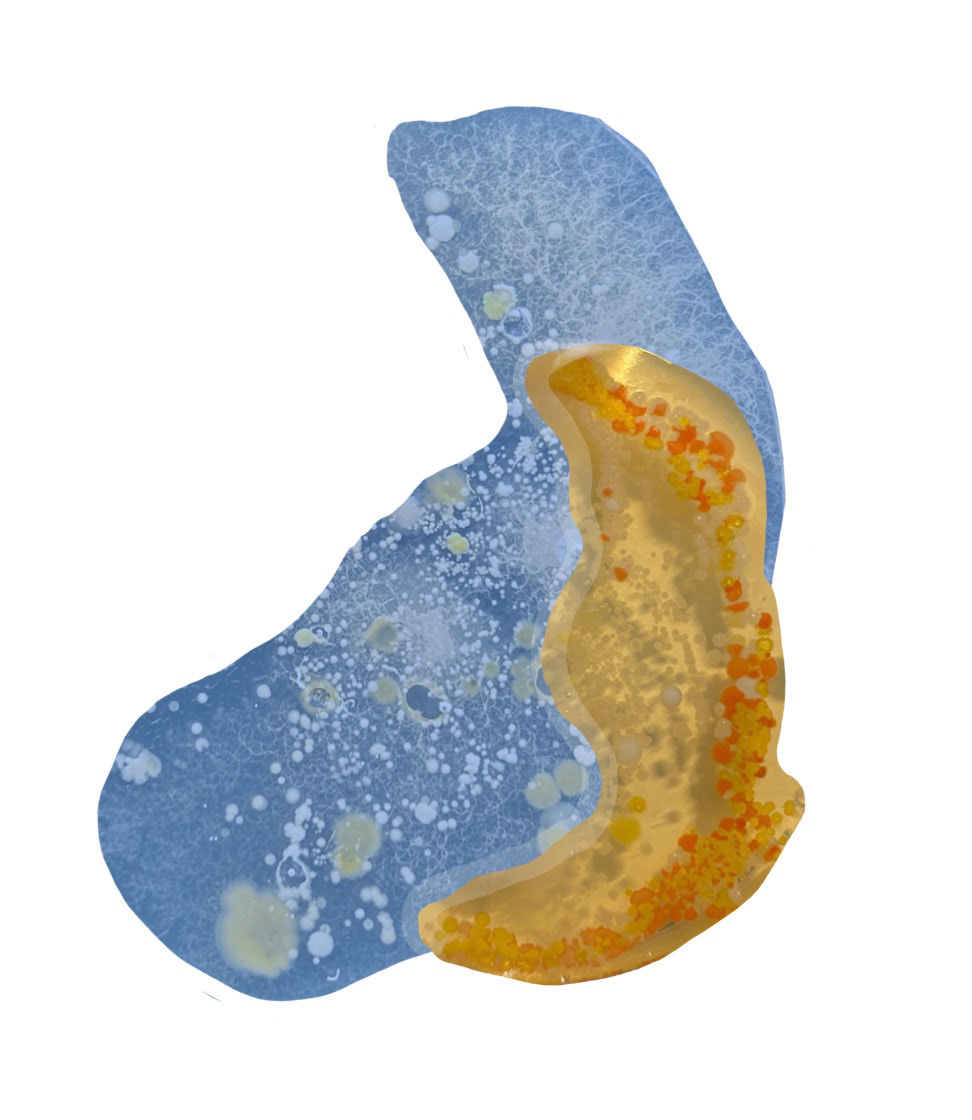
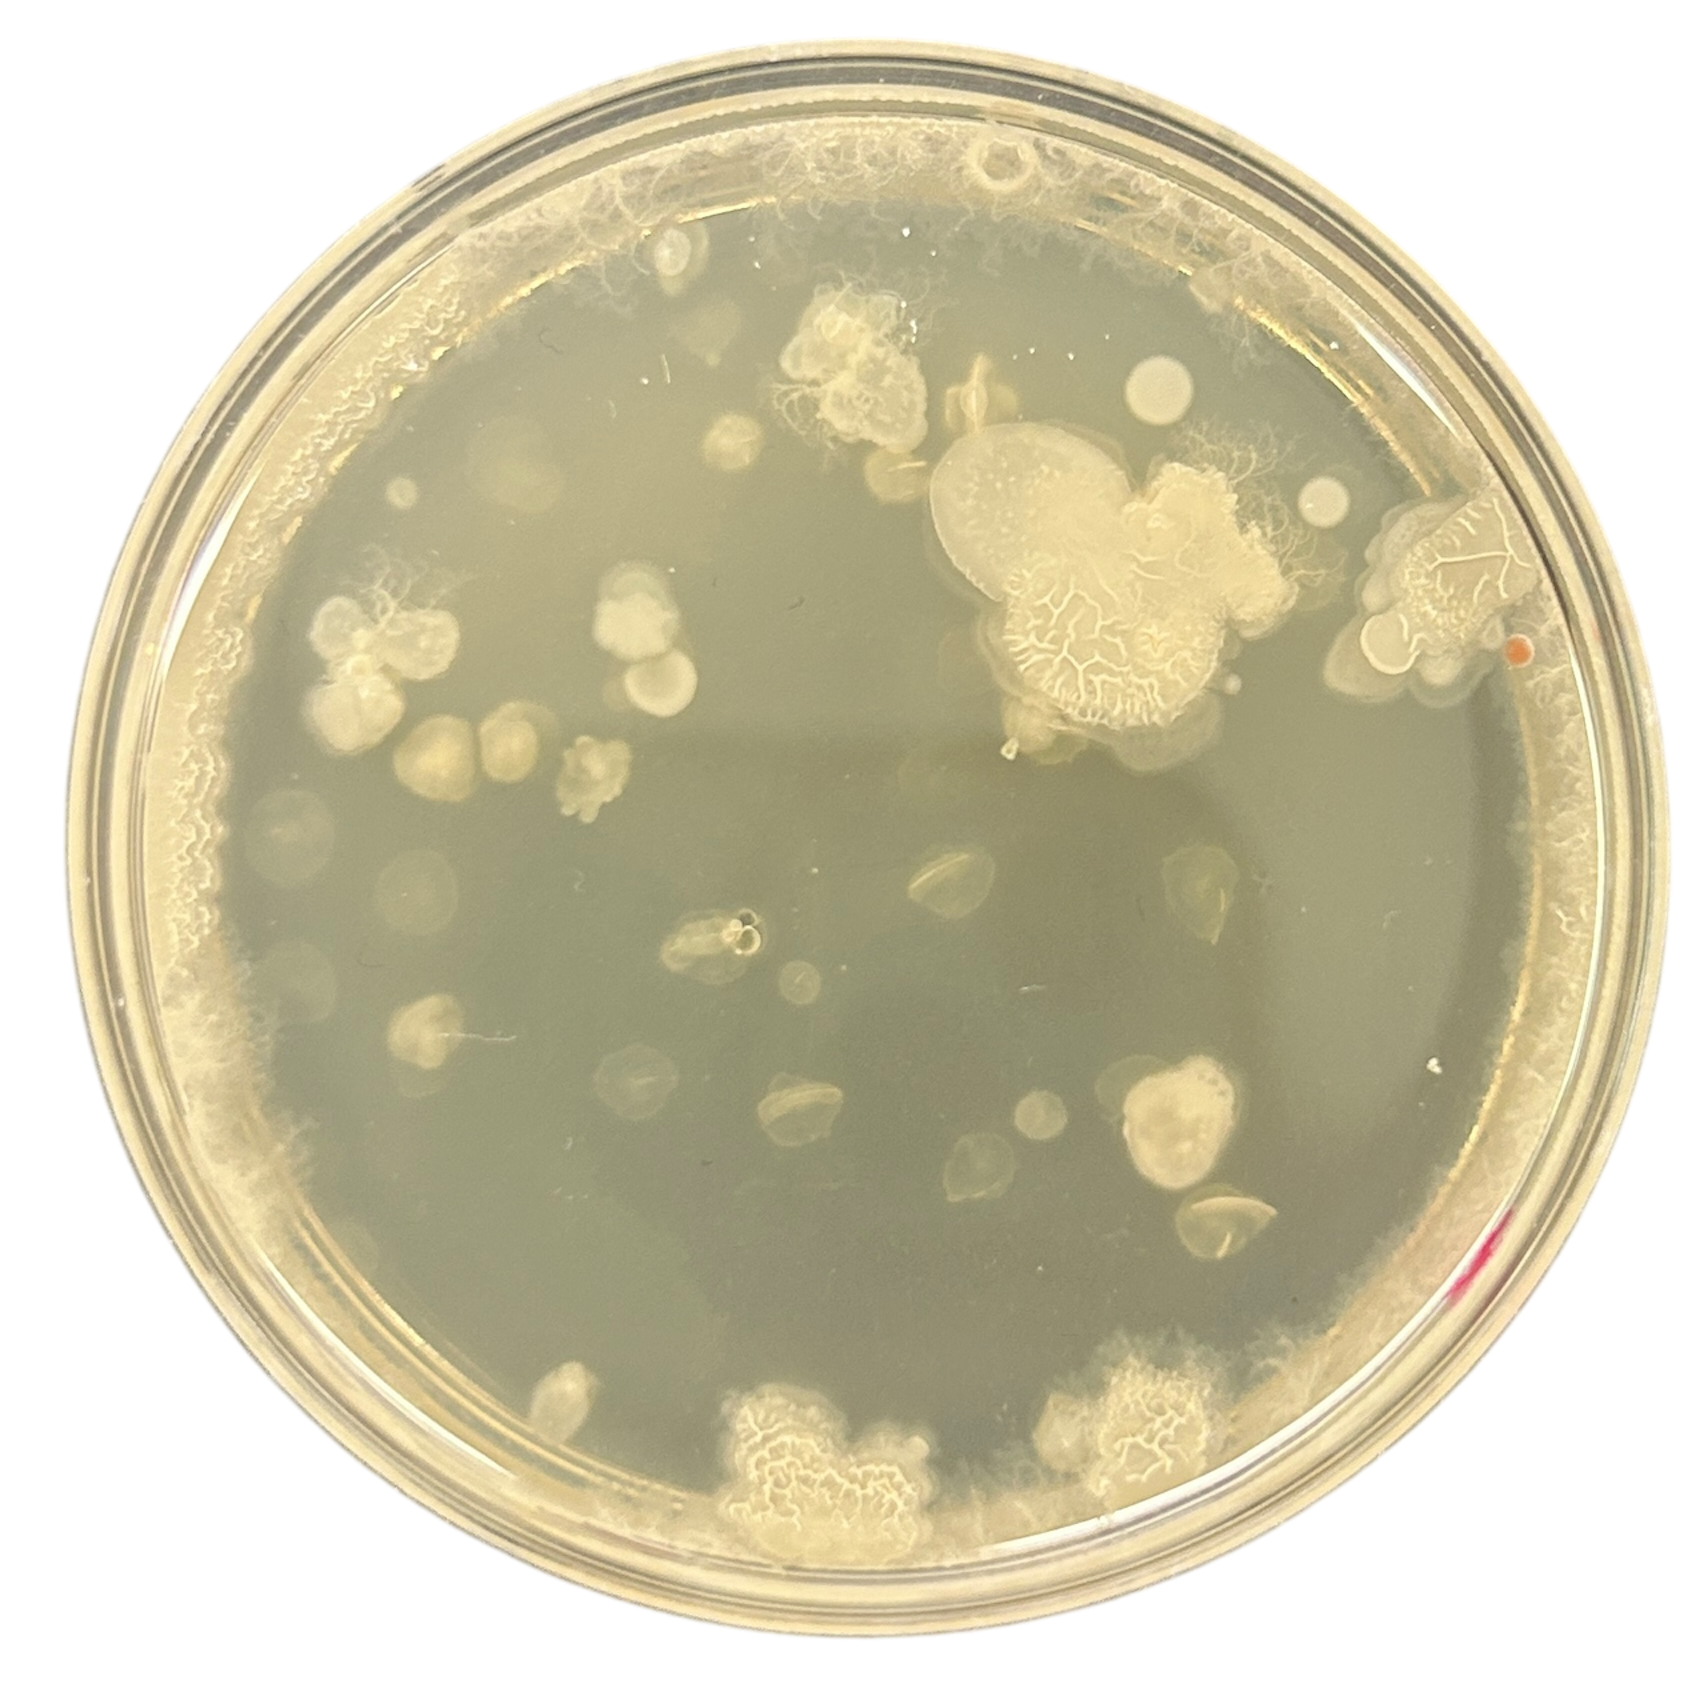
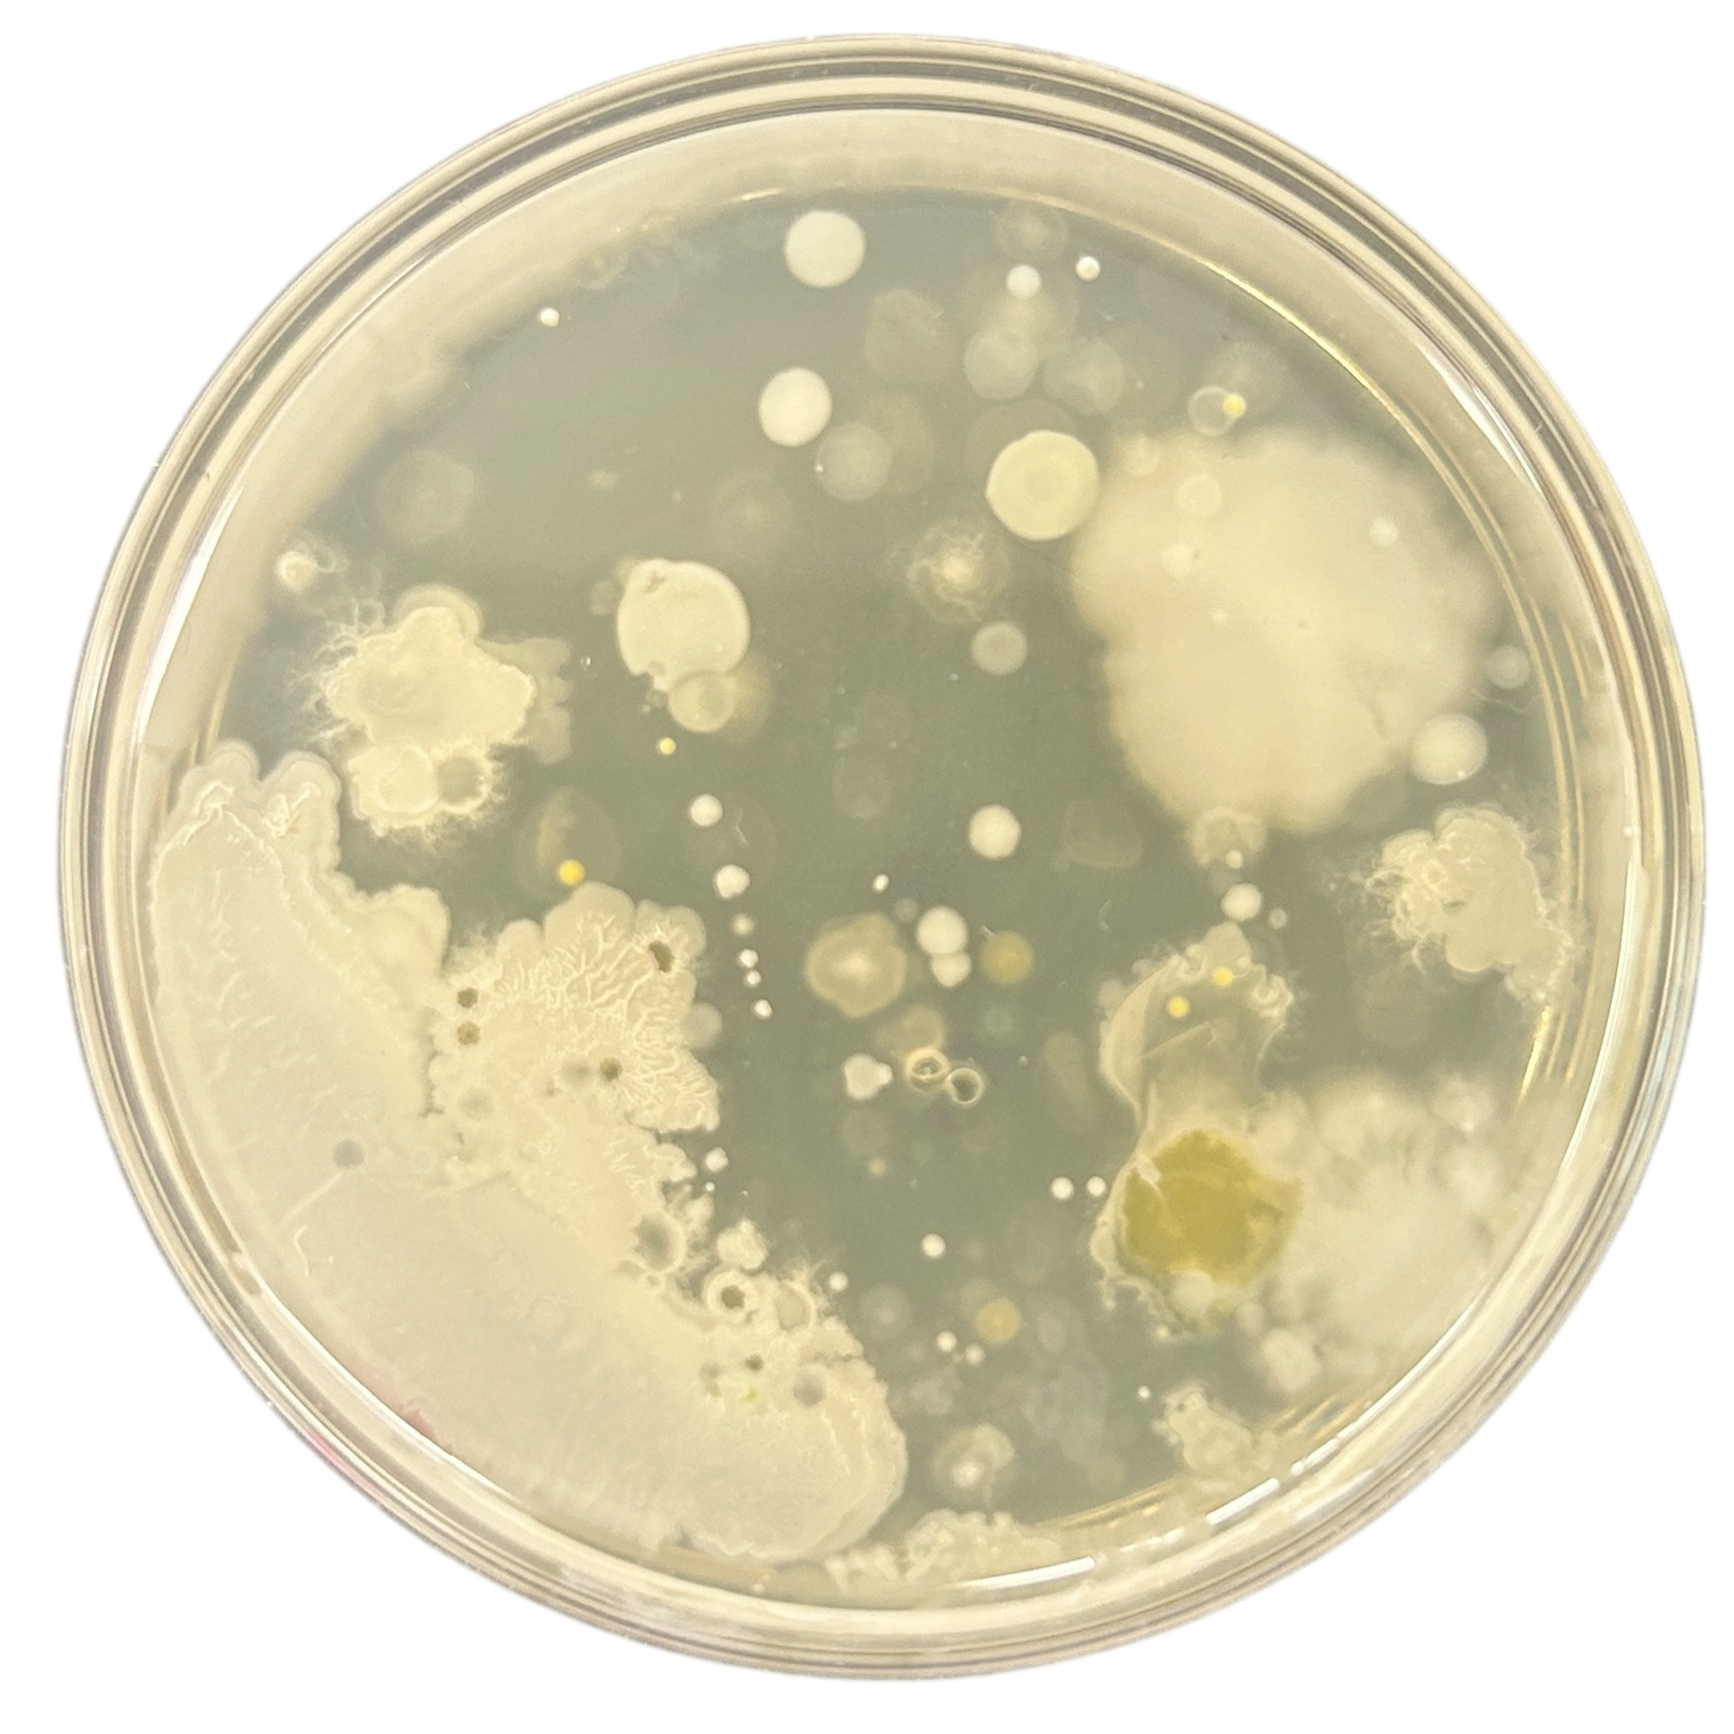
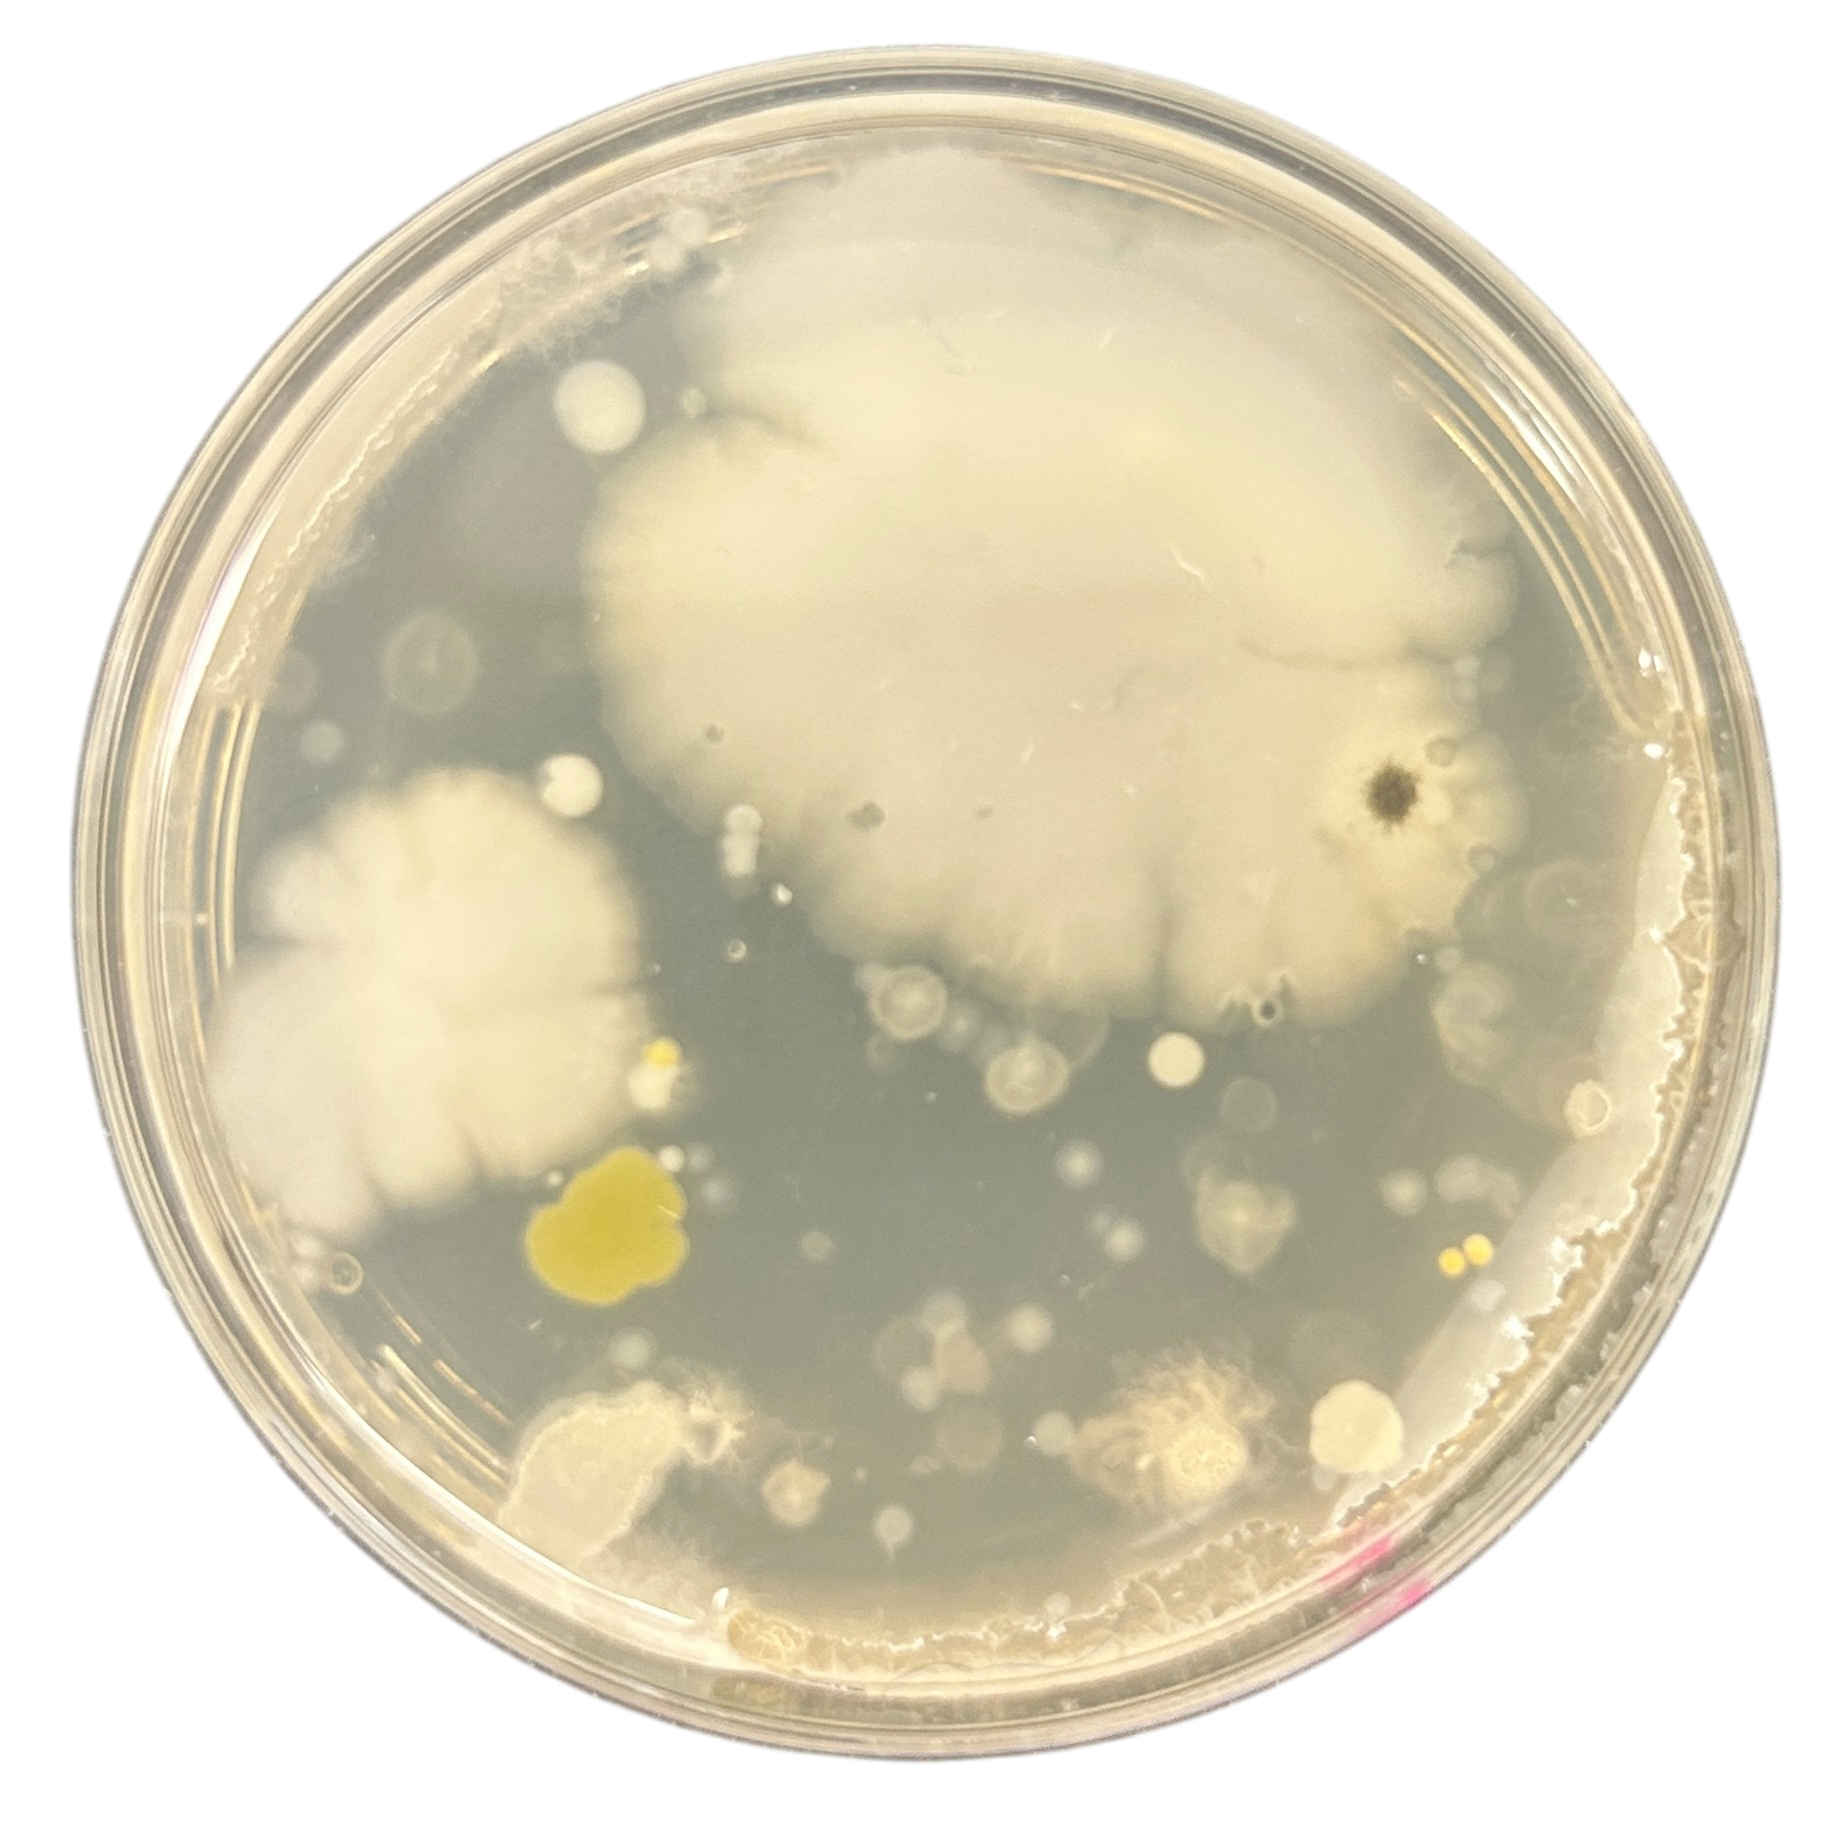
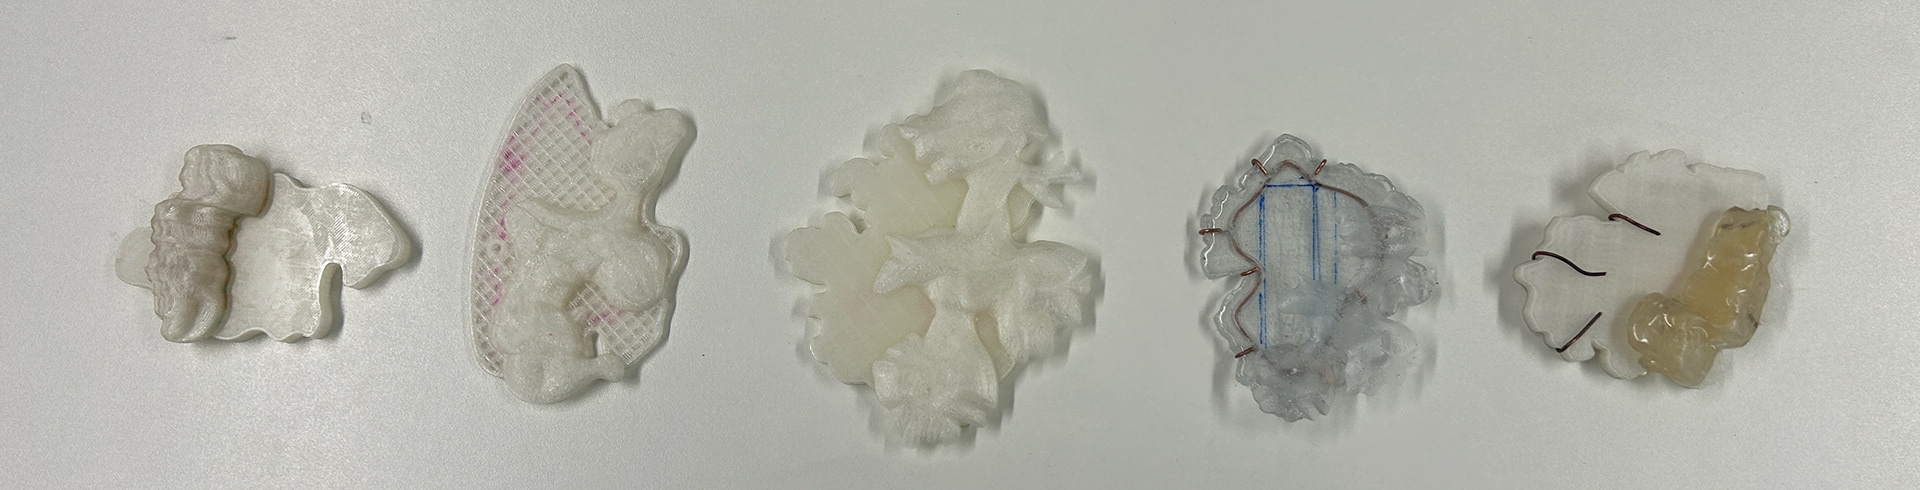
To begin my sampling, I needed to use cultures from jewellery again. Since I had been advised against growing bacteria in my flat by a microbiologist, I decided to use samples from Unit X. These were still relevant and would help me establish a workflow and explore ideas. I examined the cultures, focusing on the diverse shapes that had formed. I then translated these shapes into my sketchbook, exploring how bacterial growth varied significantly, both within the same sample (e.g. my ring) and across different samples (e.g. my ring compared to my necklace).
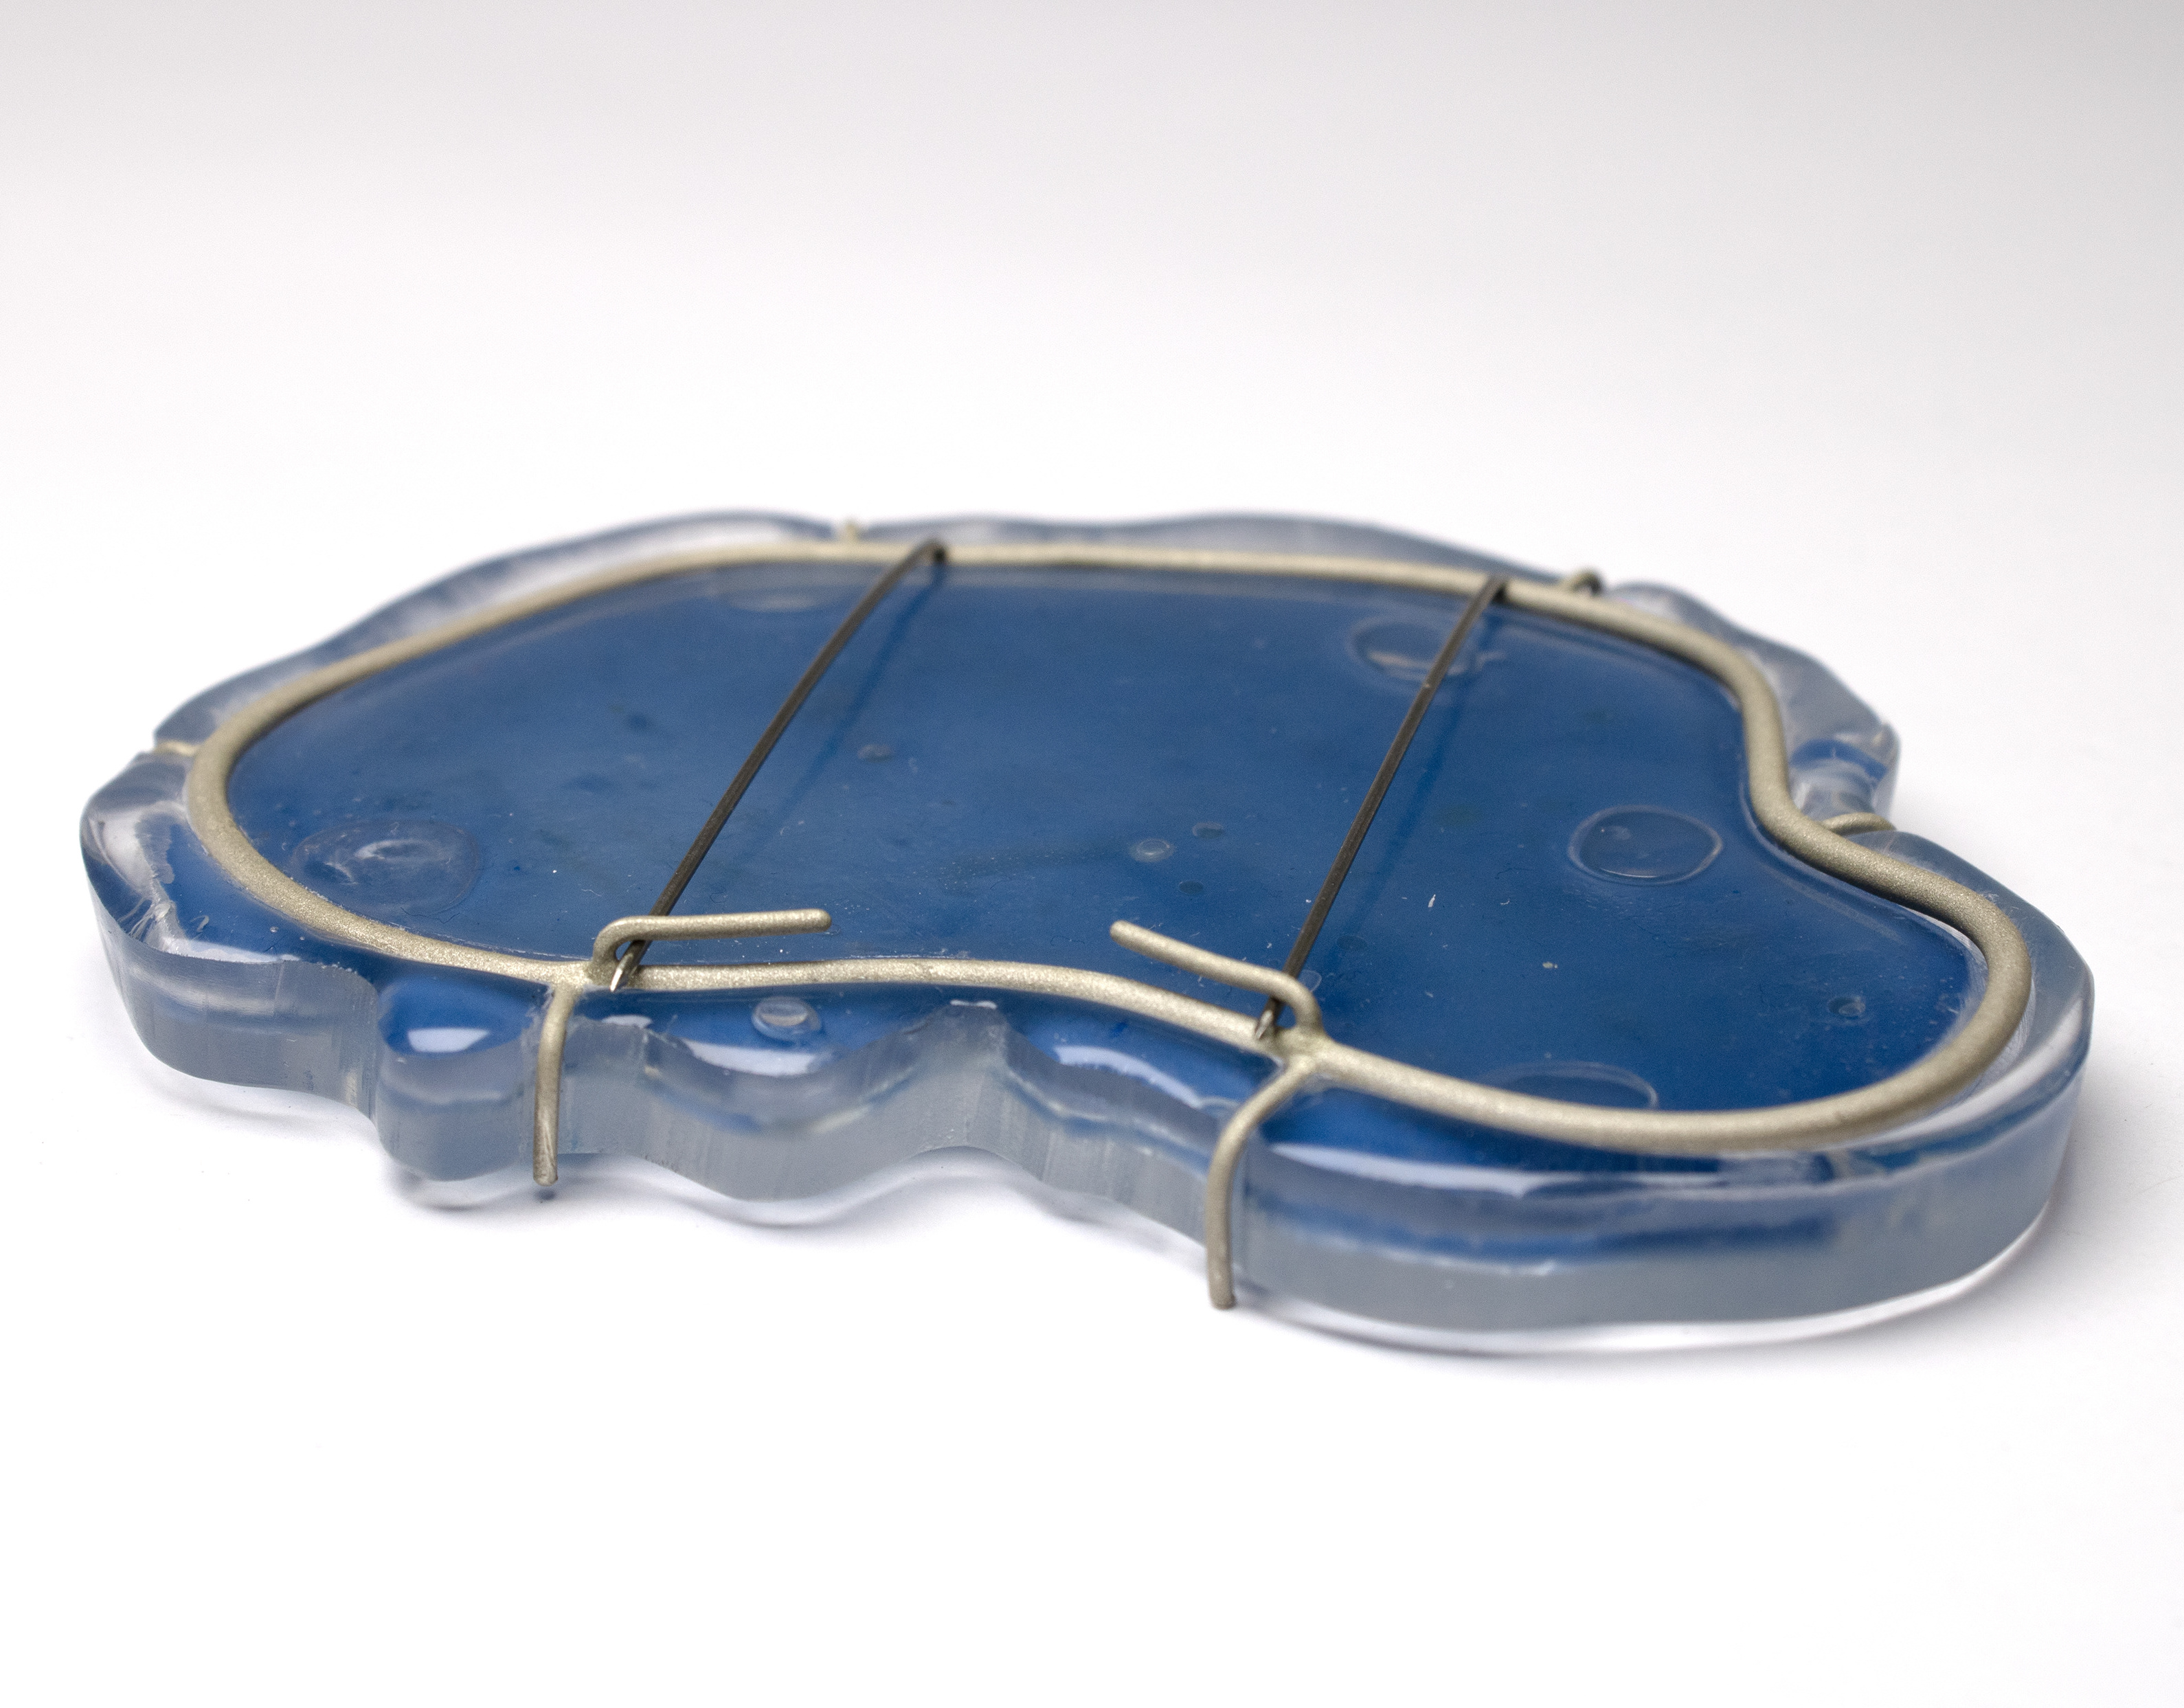
I knew I wanted to incorporate these shapes into my work while moving beyond the petri dish and the flat forms I had previously used. With this in mind, I decided to transform the bacterial shapes into 3D prints, which I could then use to create silicone moulds for both agar and epoxy resin.
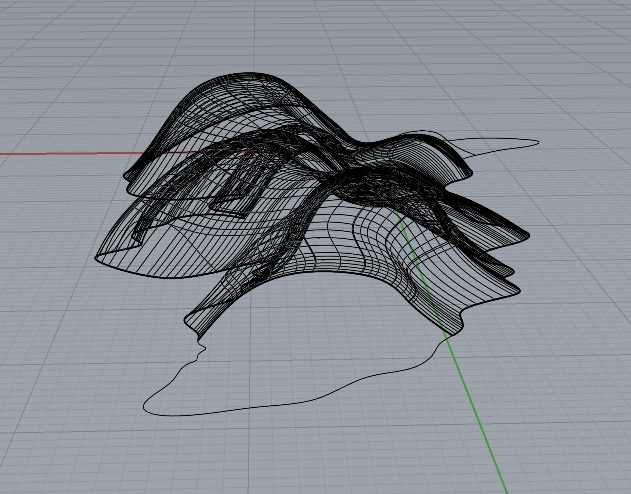
Although I had never modelled these types of shapes in Rhino before, I enjoyed pushing my CAD skills in Unit X. While the process can be frustrating, especially when I struggle to figure something out, I felt proud at the end of Unit X for successfully using CAD to create custom components for my jewellery designs.
This new approach was ambitious for me, as I had never attempted to grow bacteria on a curved 3D surface or pour resin around it. However, I believe that if I can make it work, then I think that there is potential for some really interesting jewellery pieces.
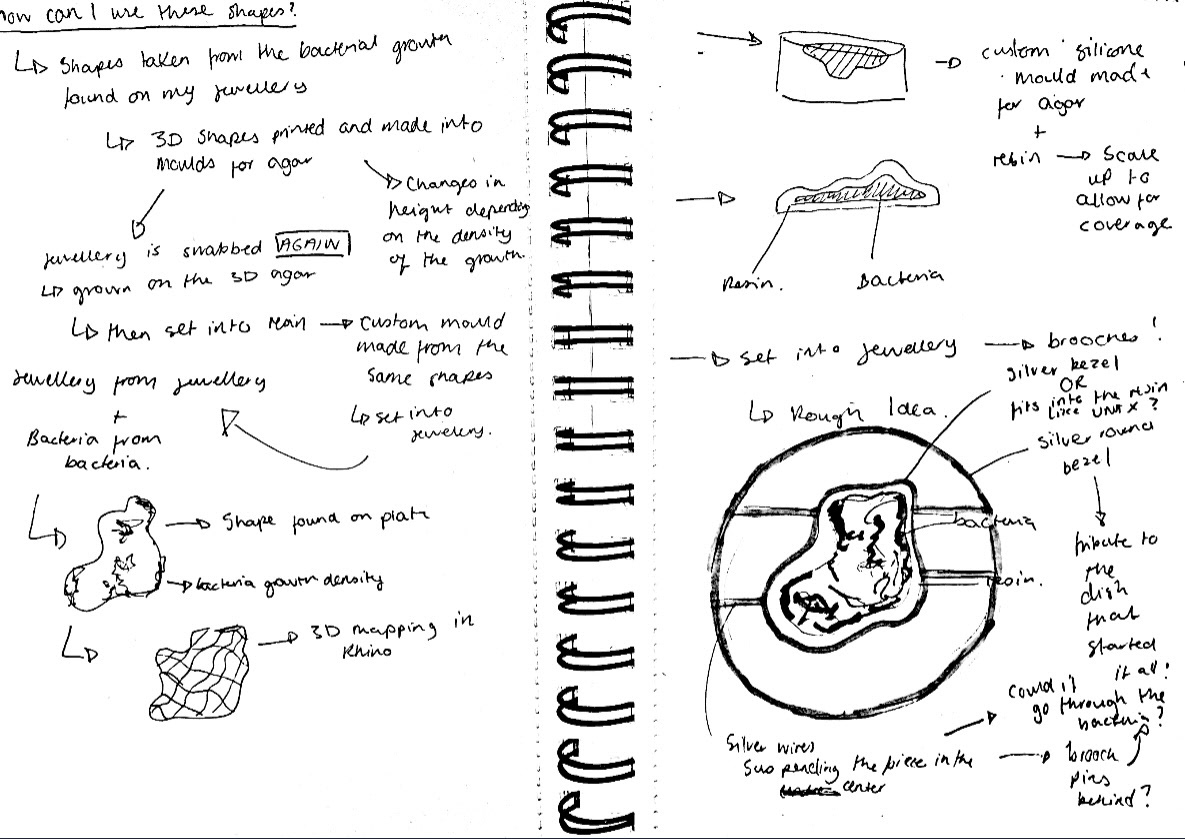
Sketchbook page outlining my rough idea
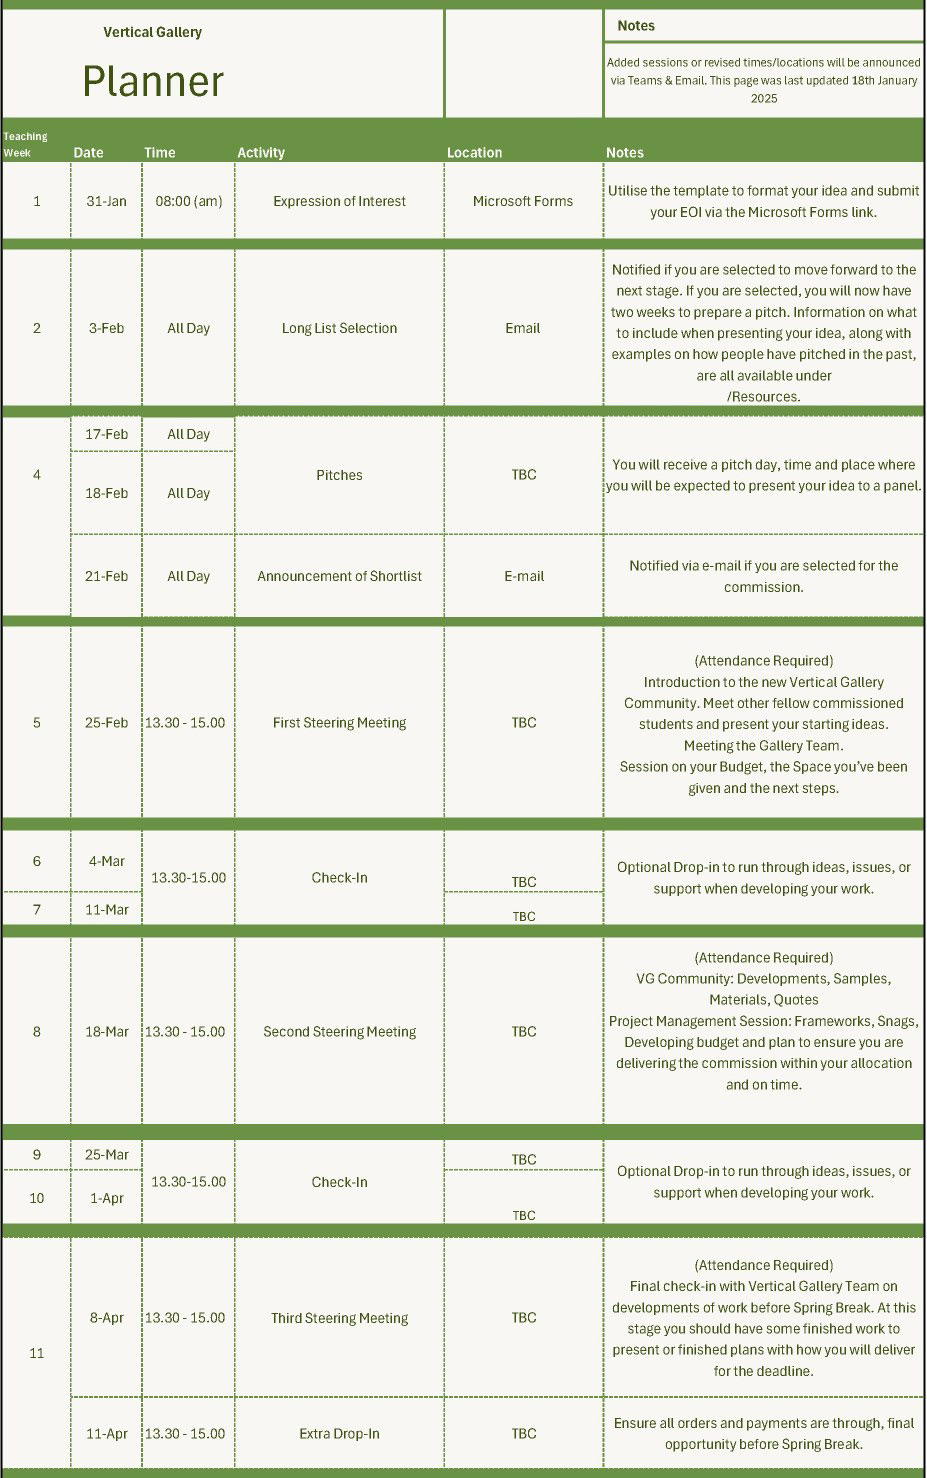
Vertical Gallery
As part of Future Me Week, I attended the Vertical Gallery briefing, where we were told about what the Vertical Gallery is and the application process to have commissioned work shown there. I knew that I wanted to apply for this, as it would give me a platform to show bacteria in a new light to more people

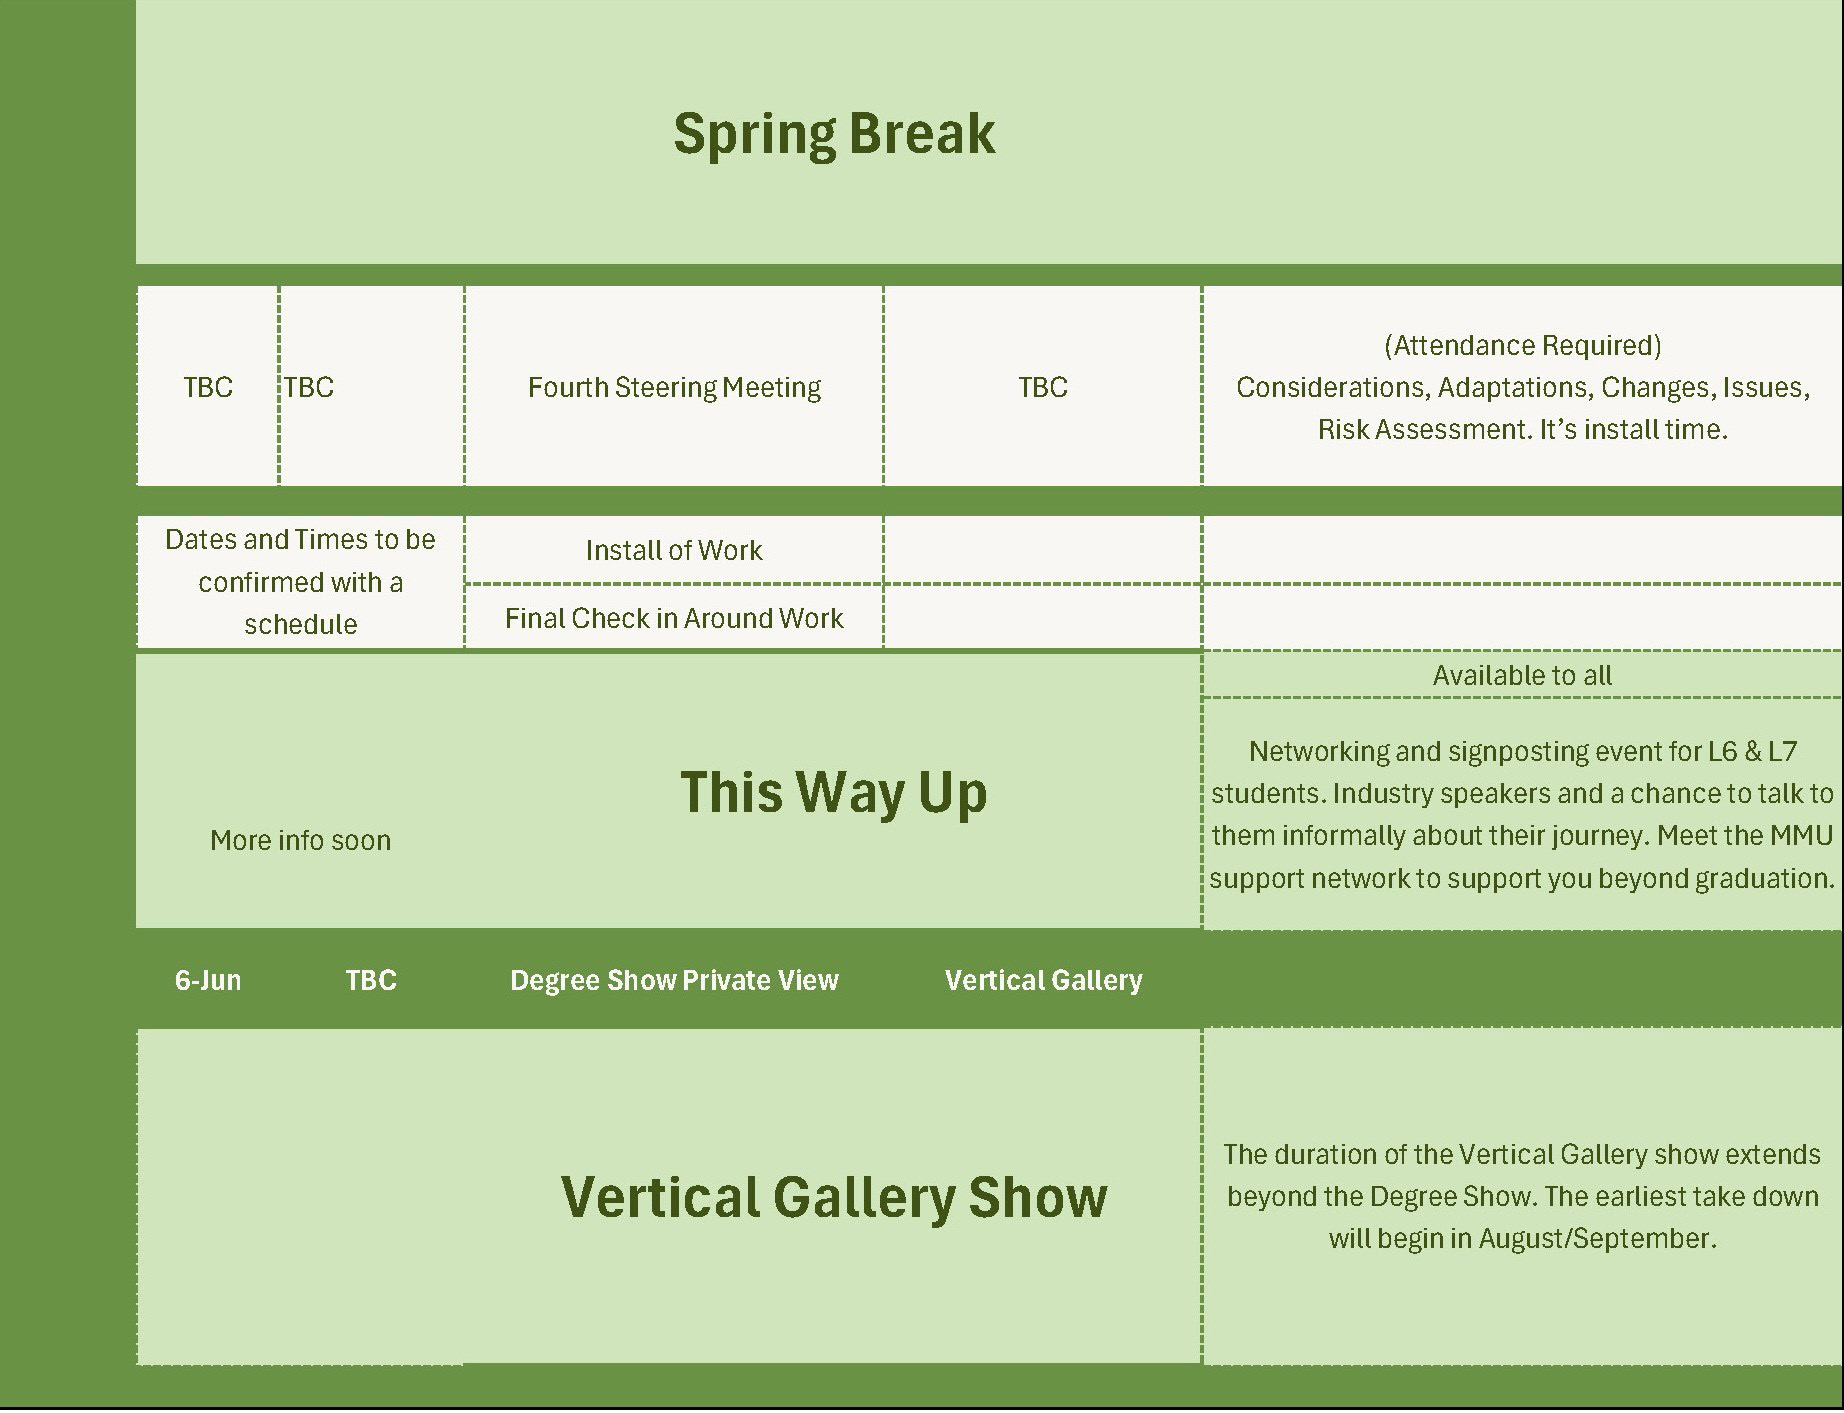
Vertical Gallery Timetable
My Submission
30th January 2025
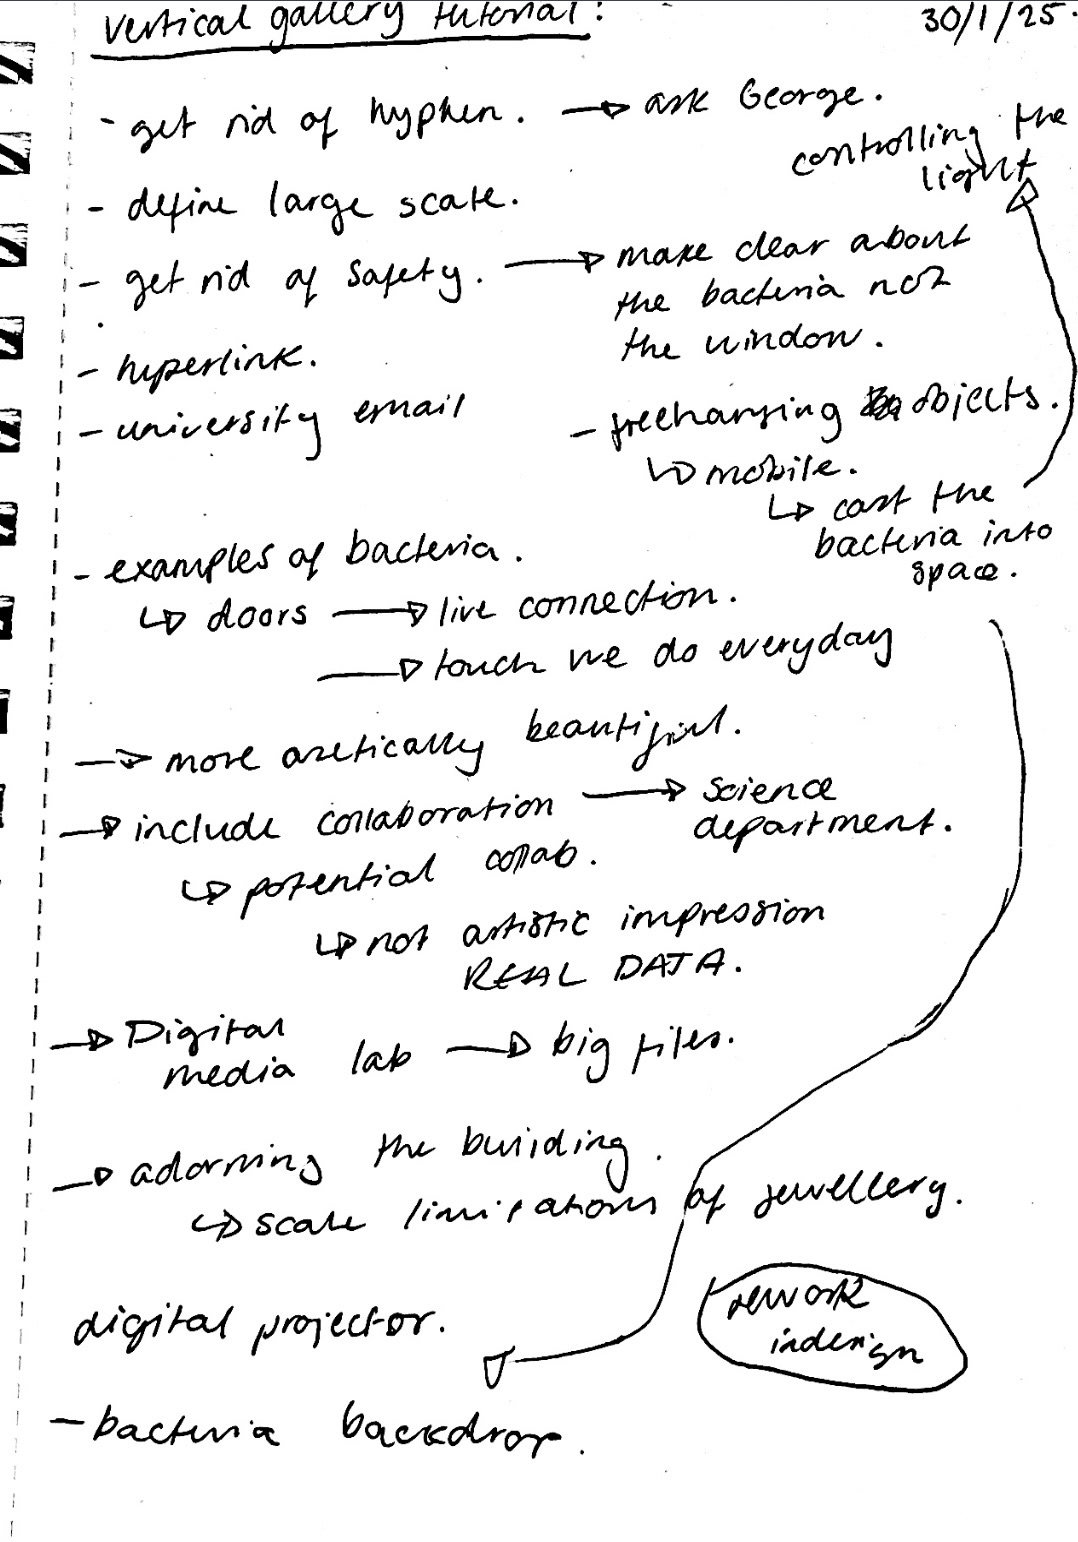
For my submission, I knew that I wanted to do something slightly different to my jewellery practice. Being surrounded by jewellery is great, however, I knew that this commission could be a really good opportunity to explore different avenues.
My original plan was to still use bacteria, but instead of setting it into jewellery, I wanted to create a window vinyl. I thought that there could be a really interesting investigation into using light with the bacteria, casting shadows and looking at how the changes in light can change the bacteria.
I knew that using actual bacteria for this could be rather difficult with health and safety, which is why I proposed using blown-up high definition images which would be manipulated slightly in order to create the window vinyl.
I showed my idea to Geoff, who agreed that doing something different could be really interested, and gave me advice on my application. This included mentioning the potential for collaboration with the MMU Science Department as well as tweaks to my layout.
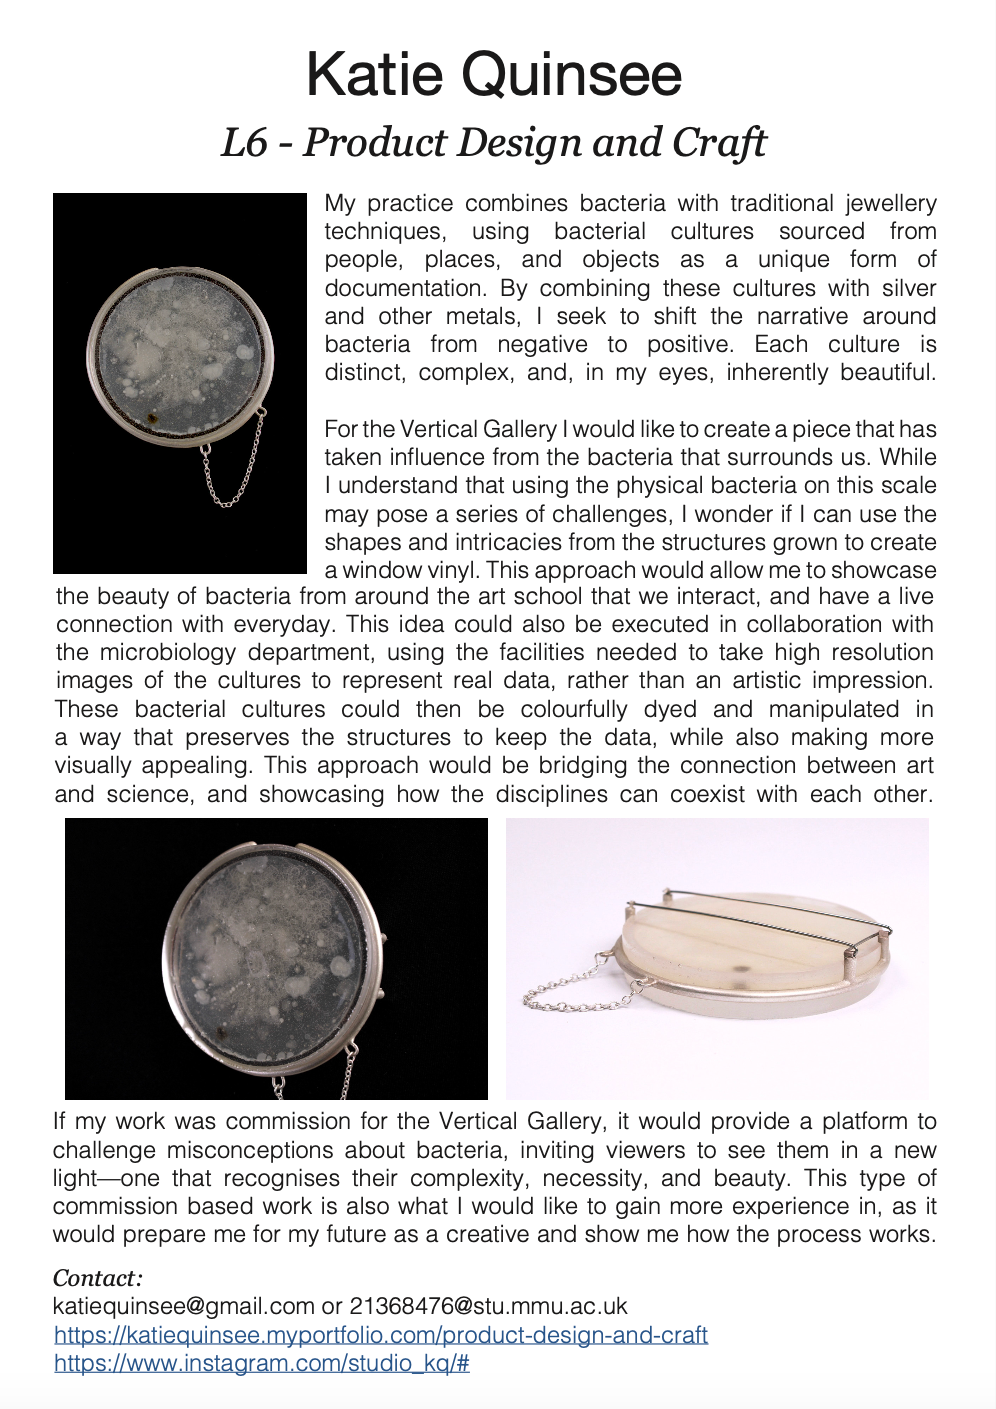
Unfortunately, my idea was not long-listed, however, I did learn a lot about the application process and enjoyed thinking about the other ways I can showcase bacteria from a new perspective. Now reading my application again, I think I should have explained more about my idea and the idea of using the bacteria as an extension and adorning the building with something that is already there. I will use this information with any further applications to commission-based work, making sure to clarify my idea to others who do not know about my current practice.
Bentley Advanced Materials
3rd February 2025
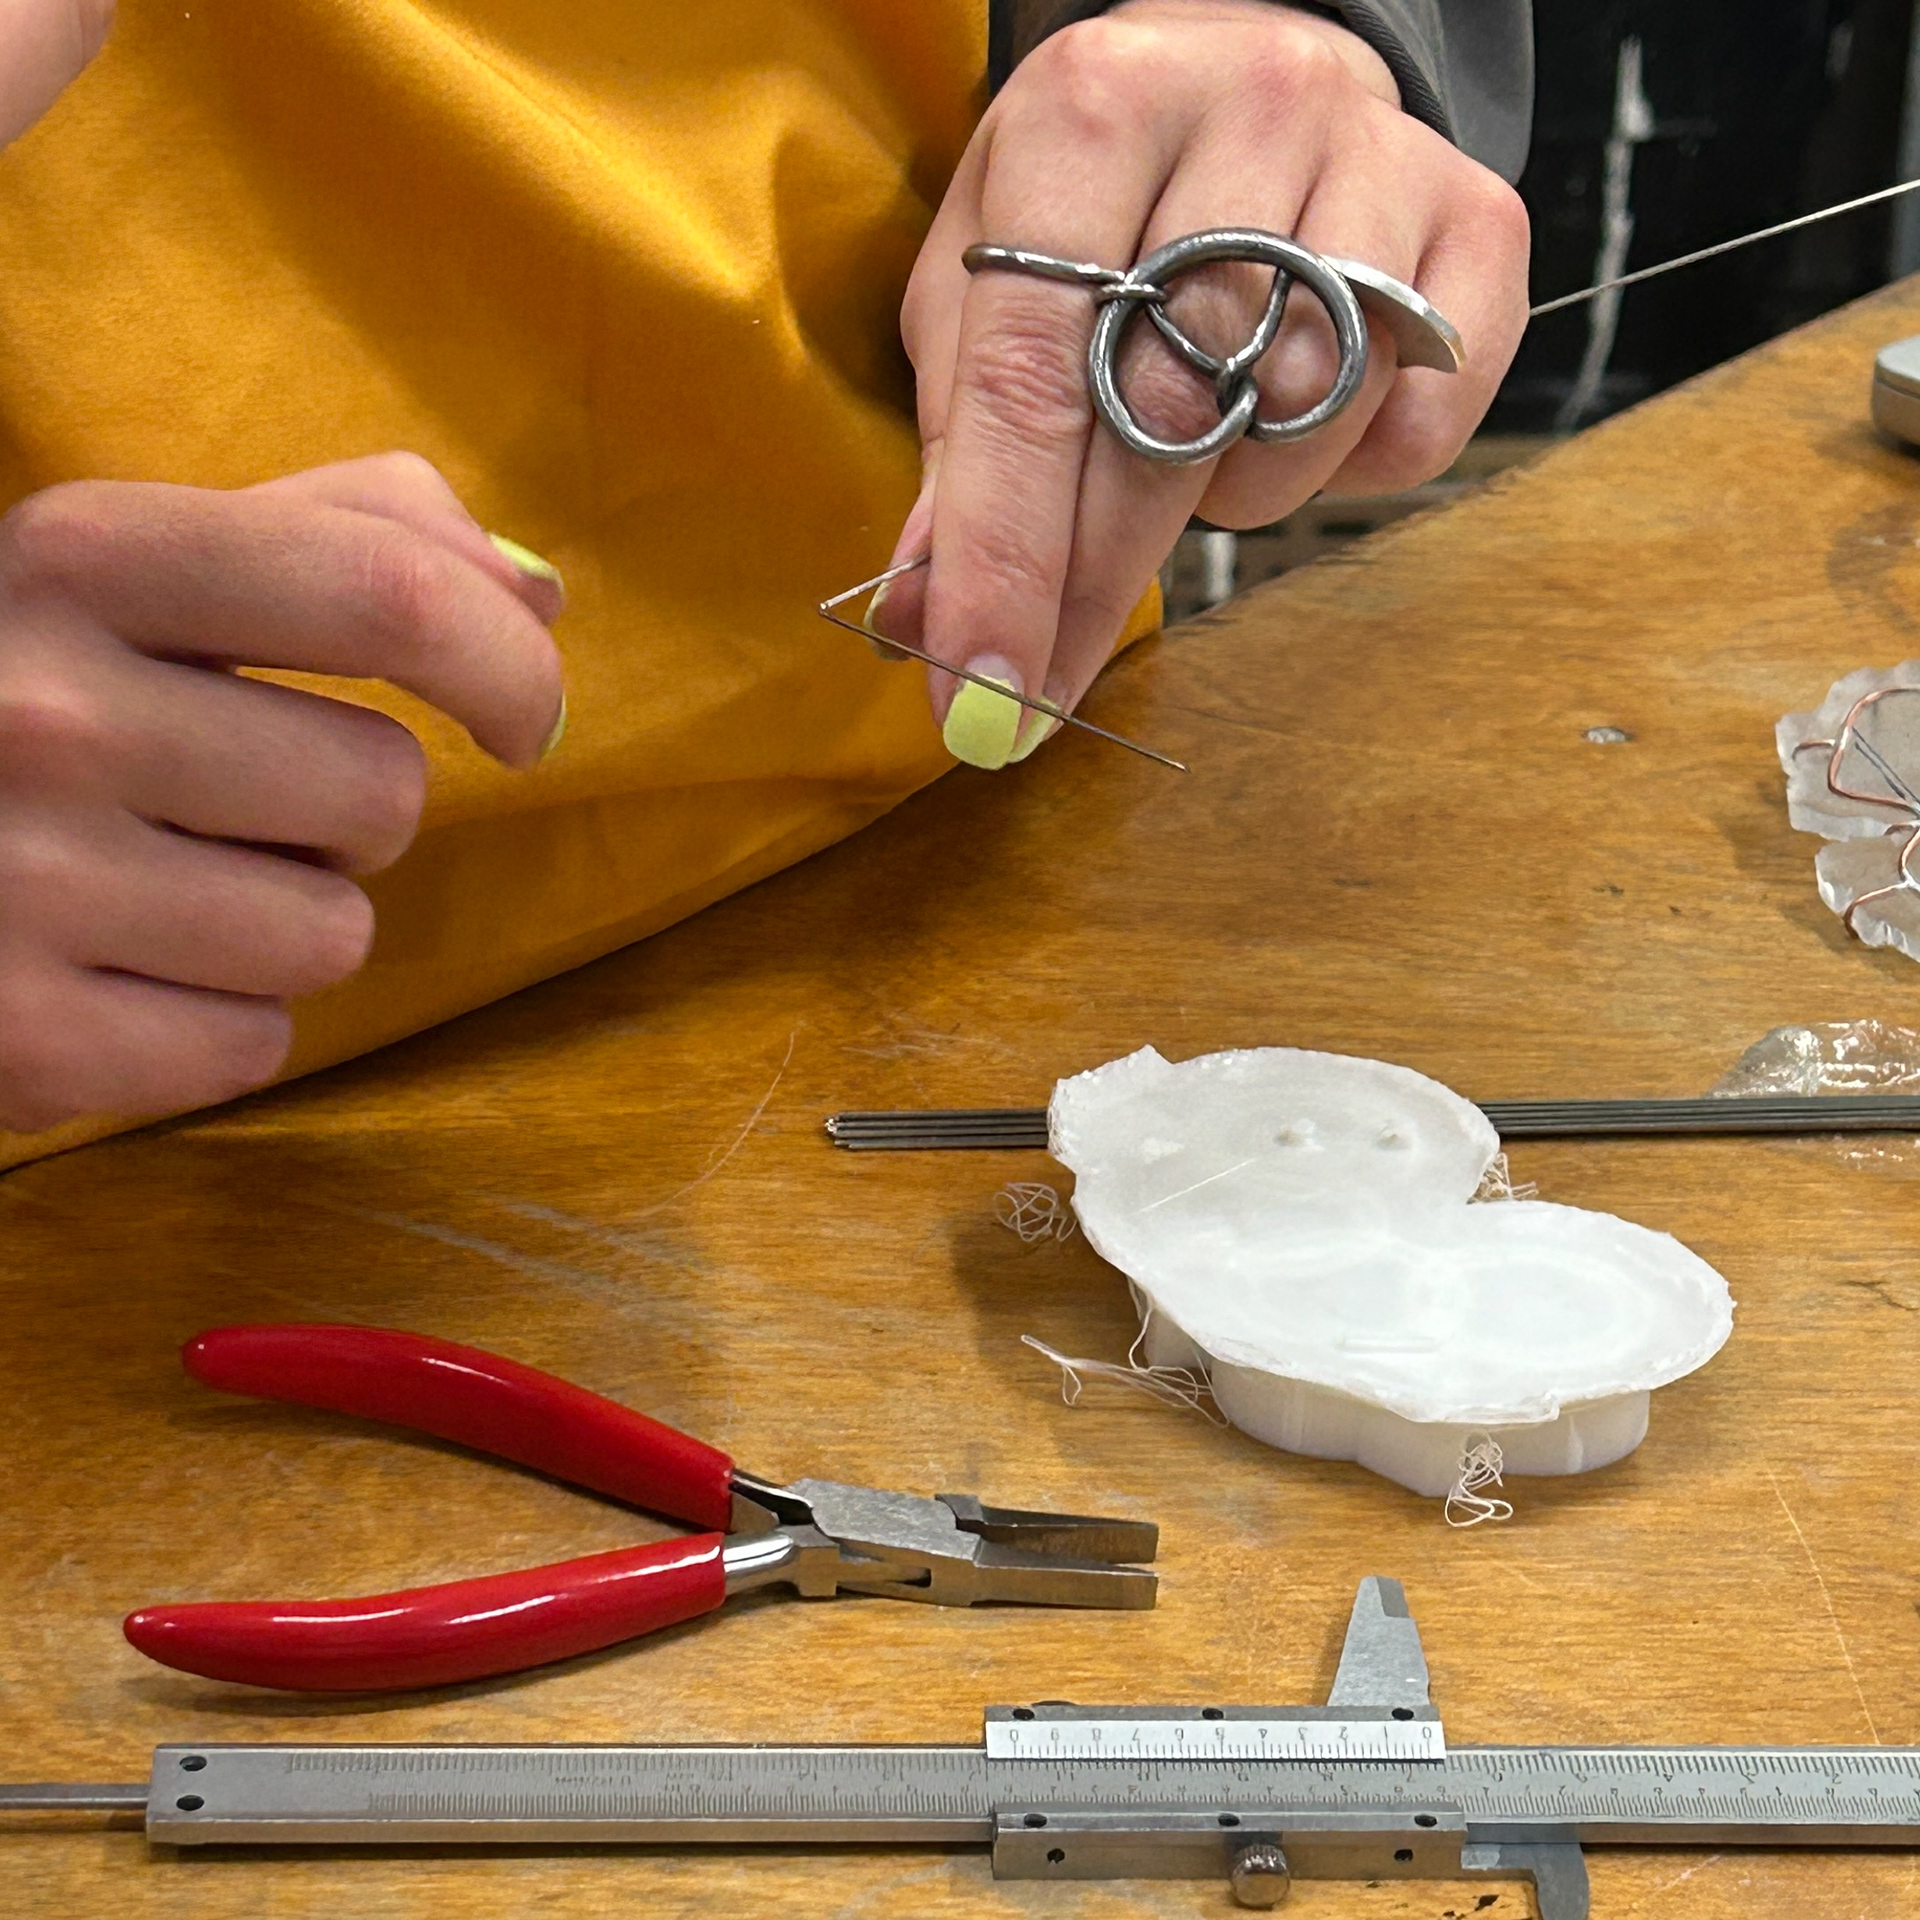
After working with silicone during Unit X, I knew that I wanted to use 3D-printed parts to make custom silicone moulds for the resin and bacteria. I have previously been using a 2-part silicone from Amazon, which, while it did the job, had quite a long de-moulding time. The demolding time said 5 hours in the instructions, however, I found that approximately 8 hours worked much better. Then after the demoulding, I had to let the silicone sit for 24 hours before using. While this was manageable in the past, the current project has a much tighter timeframe, and I cannot afford to wait two days before using a silicone mould.
To improve my process, I spoke to Bentley Advanced Materials for advice on different types of silicone suitable for use with SLA-printed parts. I also spoke to them about non-vacuum silicones, as I did not have access to a vacuum chamber.
I also spoke to them about different epoxy resins. When I had previously spoken to them about resins, I found that I had to use epoxy resin, as the moisture from the nutrient agar jelly would disrupt the curing process and introduce bubbles, which I did not want. I asked if they had any faster-curing clear epoxy resins that I could use however, I was told that these faster-curing resins get very hot. Knowing this, any sort of heat could disrupt the bacteria that has grown and potentially kill it. This means I’ll need to continue using the current epoxy resin, which isn’t an issue—as long as I carefully plan my time around it.
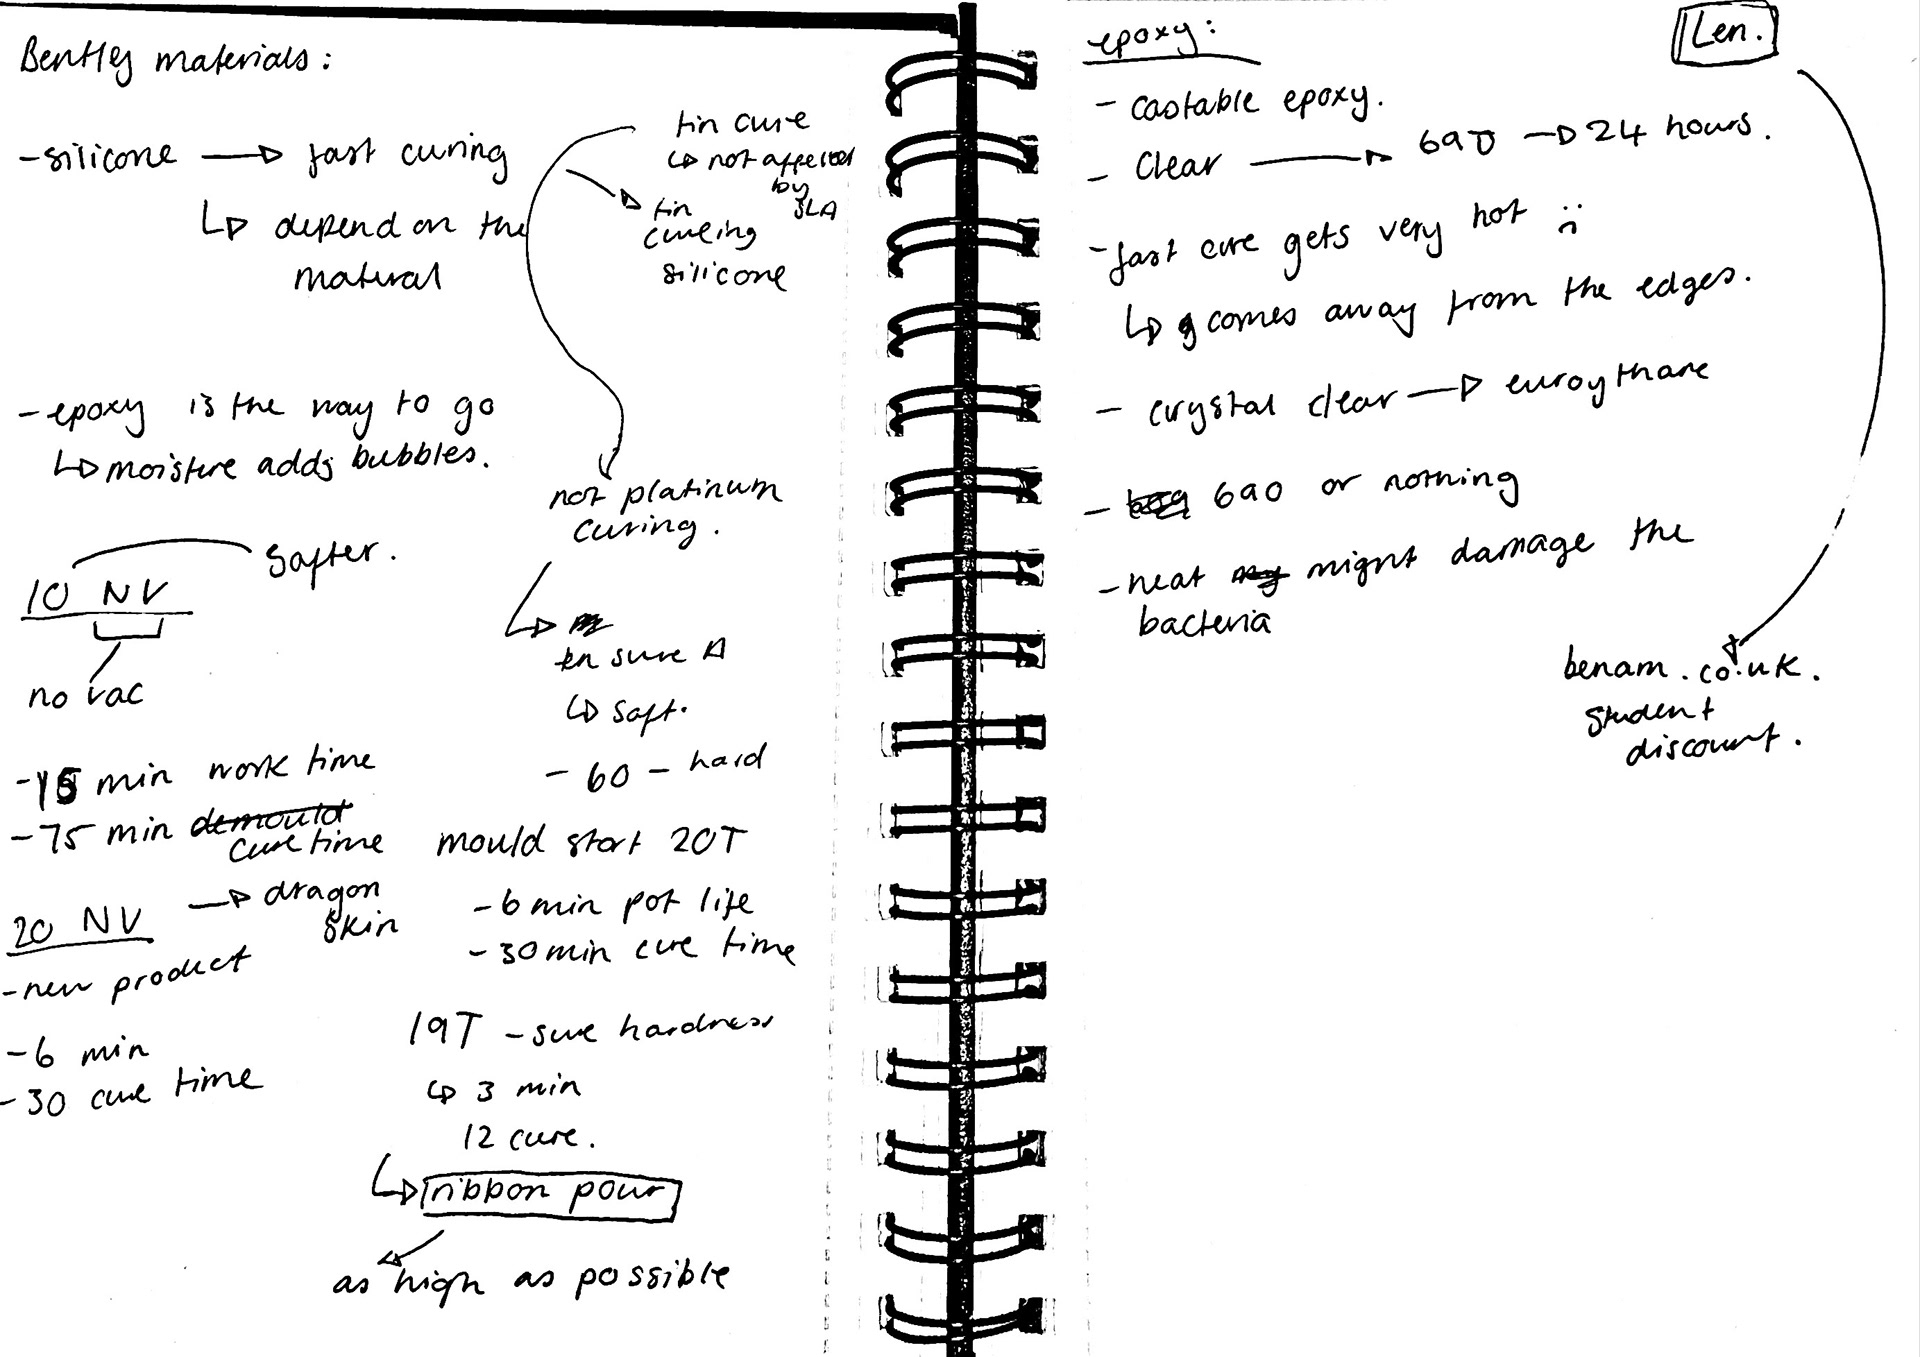
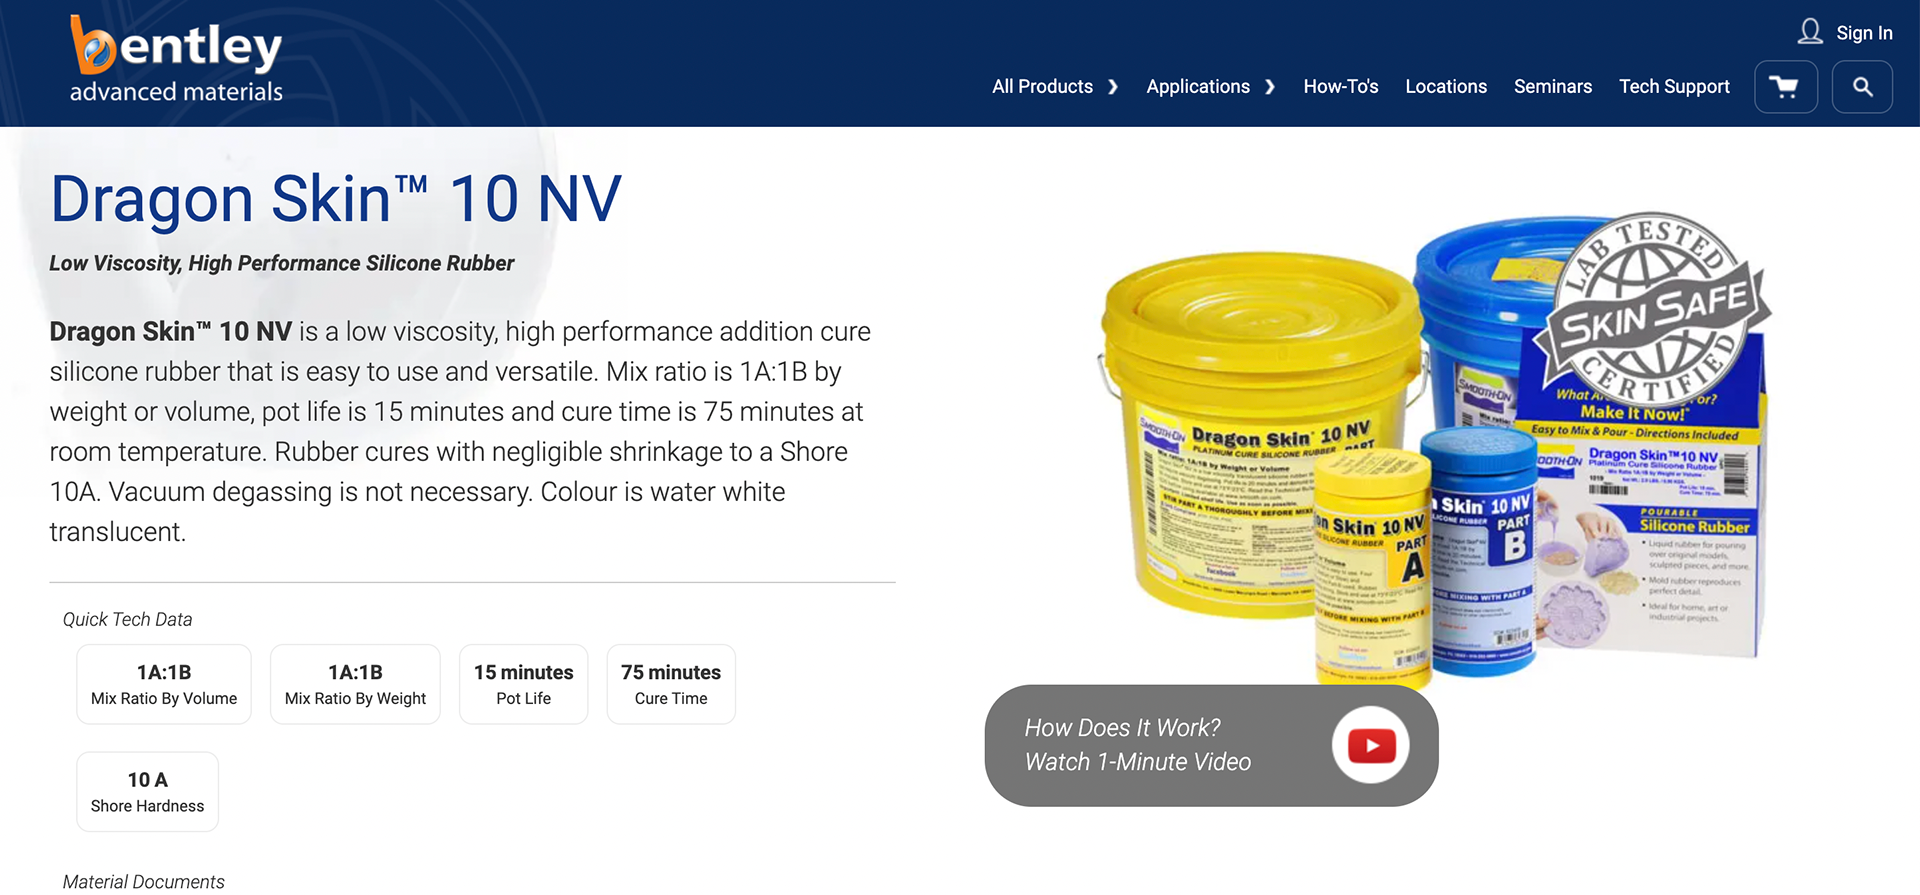
They recommended two different types of silicone that they believed would work well for my project. Both are 'Dragon Skin' silicones, which are non-vacuum. The main difference between them is their pot life and curing times. The 20NV has a 6-minute pot life and a 30-minute cure time, whereas the 10NV has a 15-minute pot life and a 75-minute cure time. Either option would be a significant improvement in speed compared to the silicone I’ve used before.
I’m leaning towards the 10NV, as its longer pot life provides more flexibility. While it has a slightly longer cure time, the extra working time could be beneficial if I need to make adjustments while pouring. In the past, I’ve had issues with my 3D-printed cottle leaking due to poorly sealed edges. Though it only took a few minutes to fix, using silicone with a very short pot life could make similar situations more challenging. With that in mind, I’ve decided to go with the Dragon Skin 10NV.
Patricia Tutorial
3rd February 2025

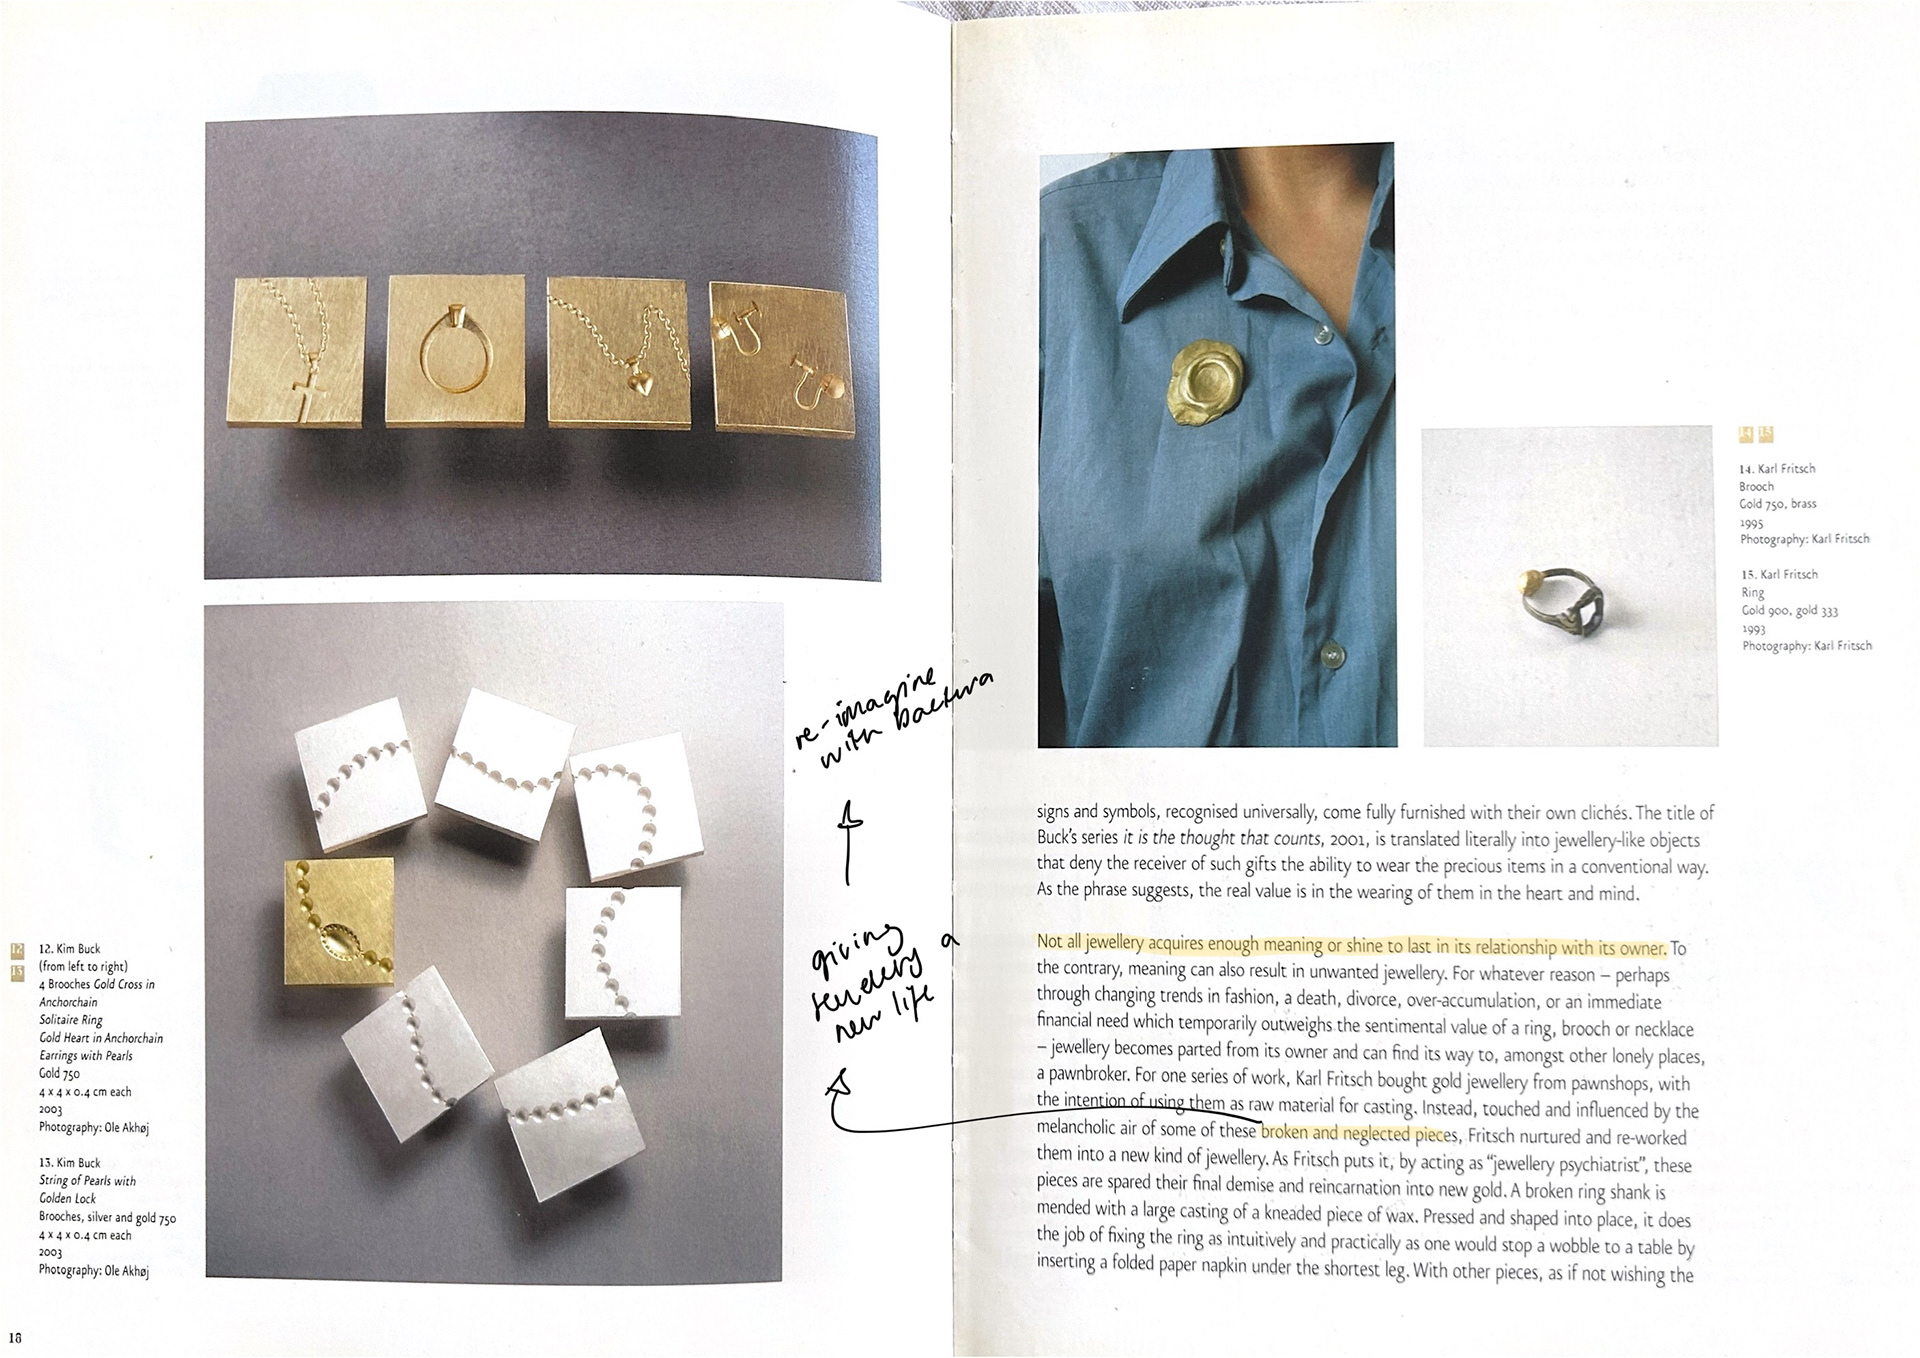
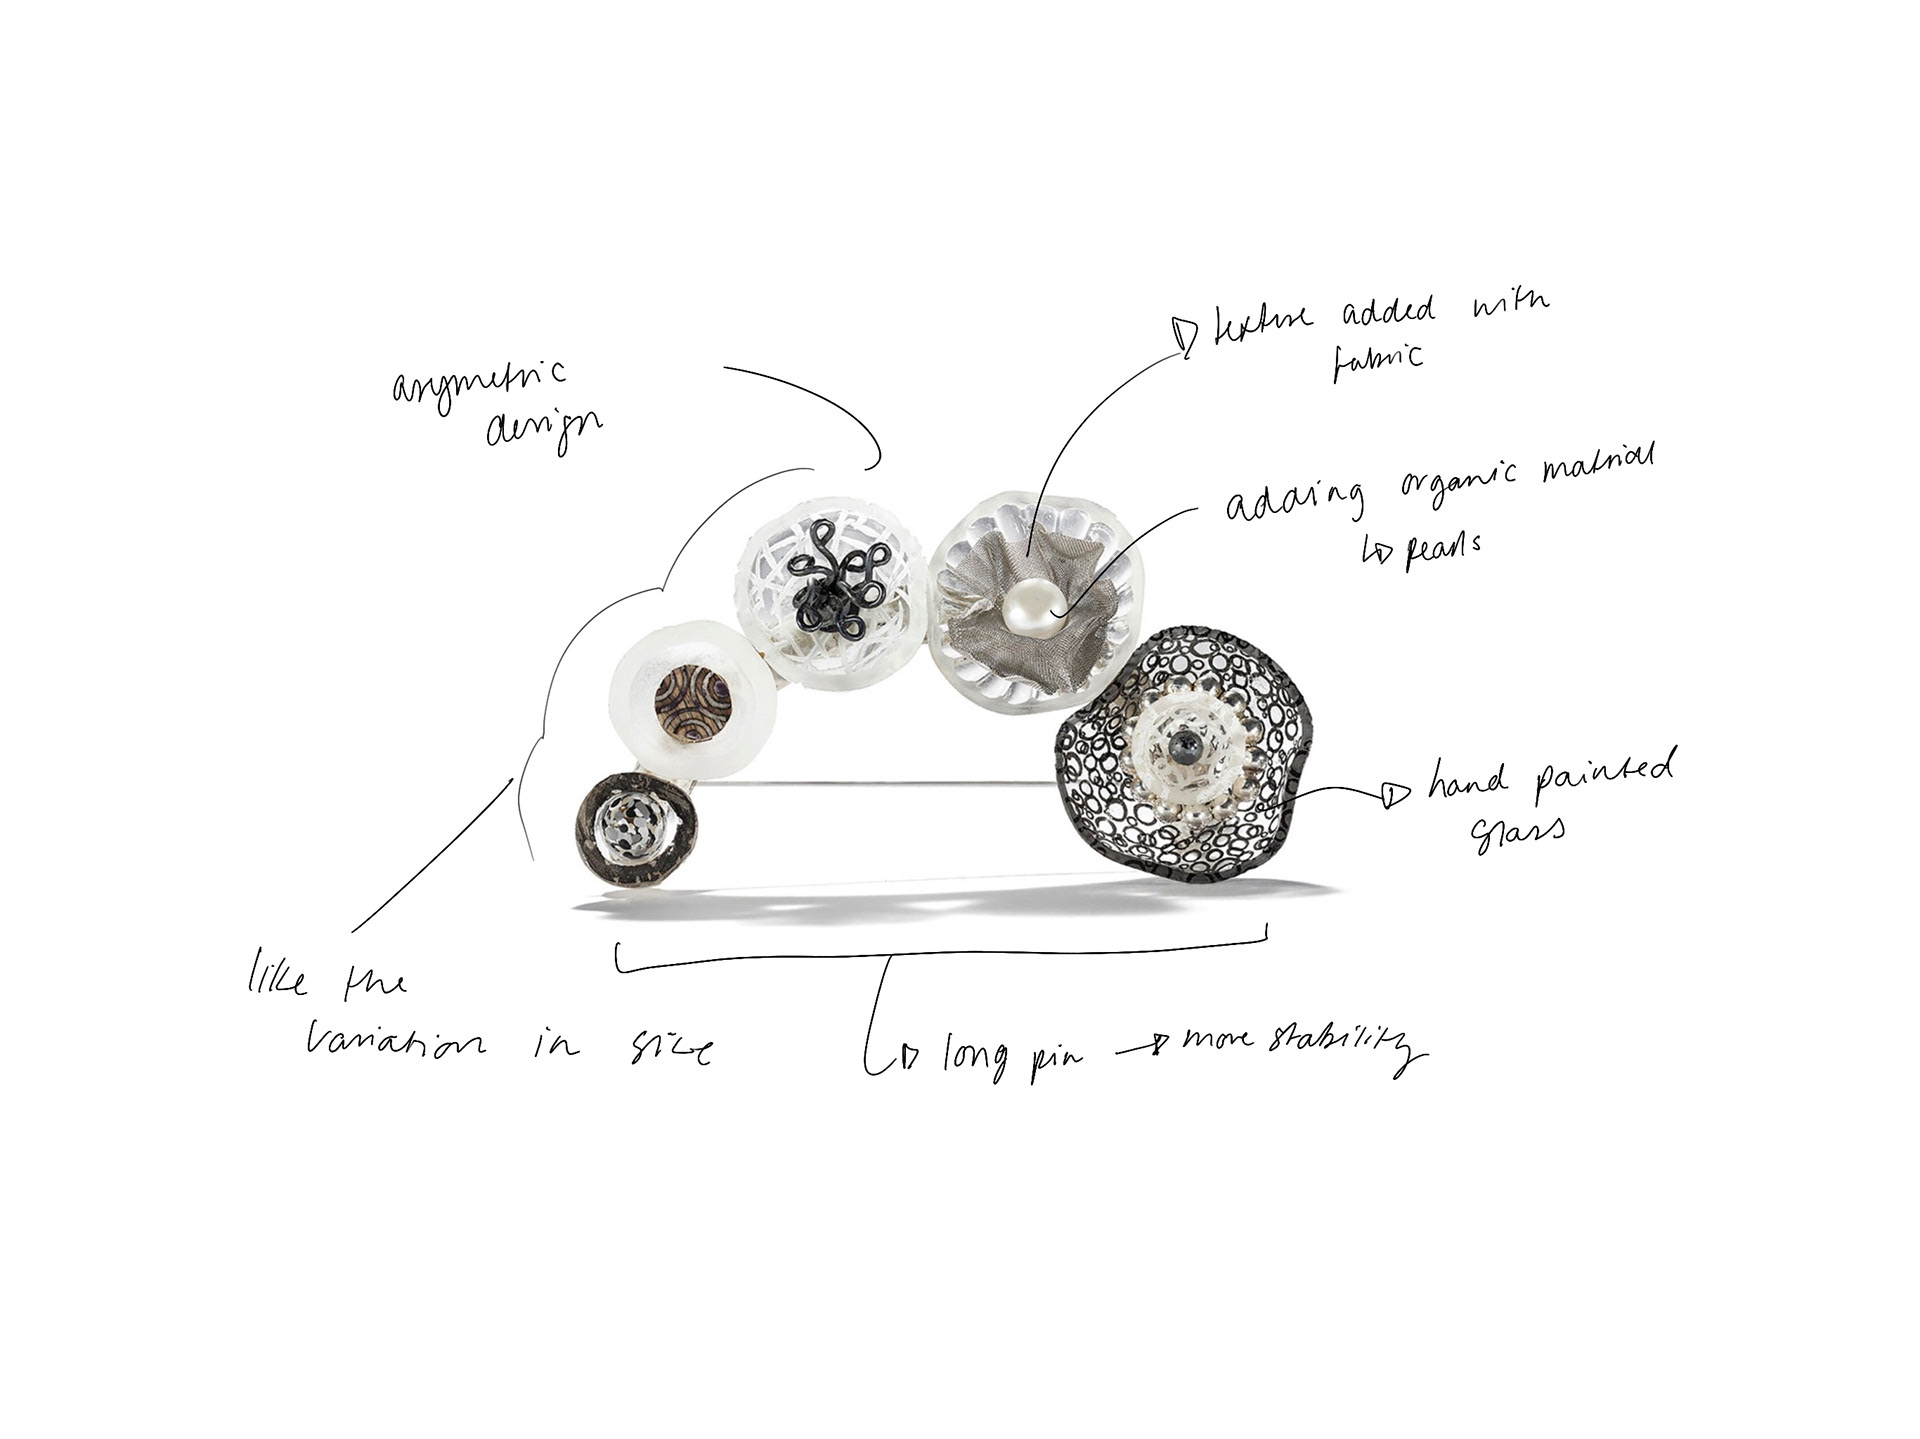
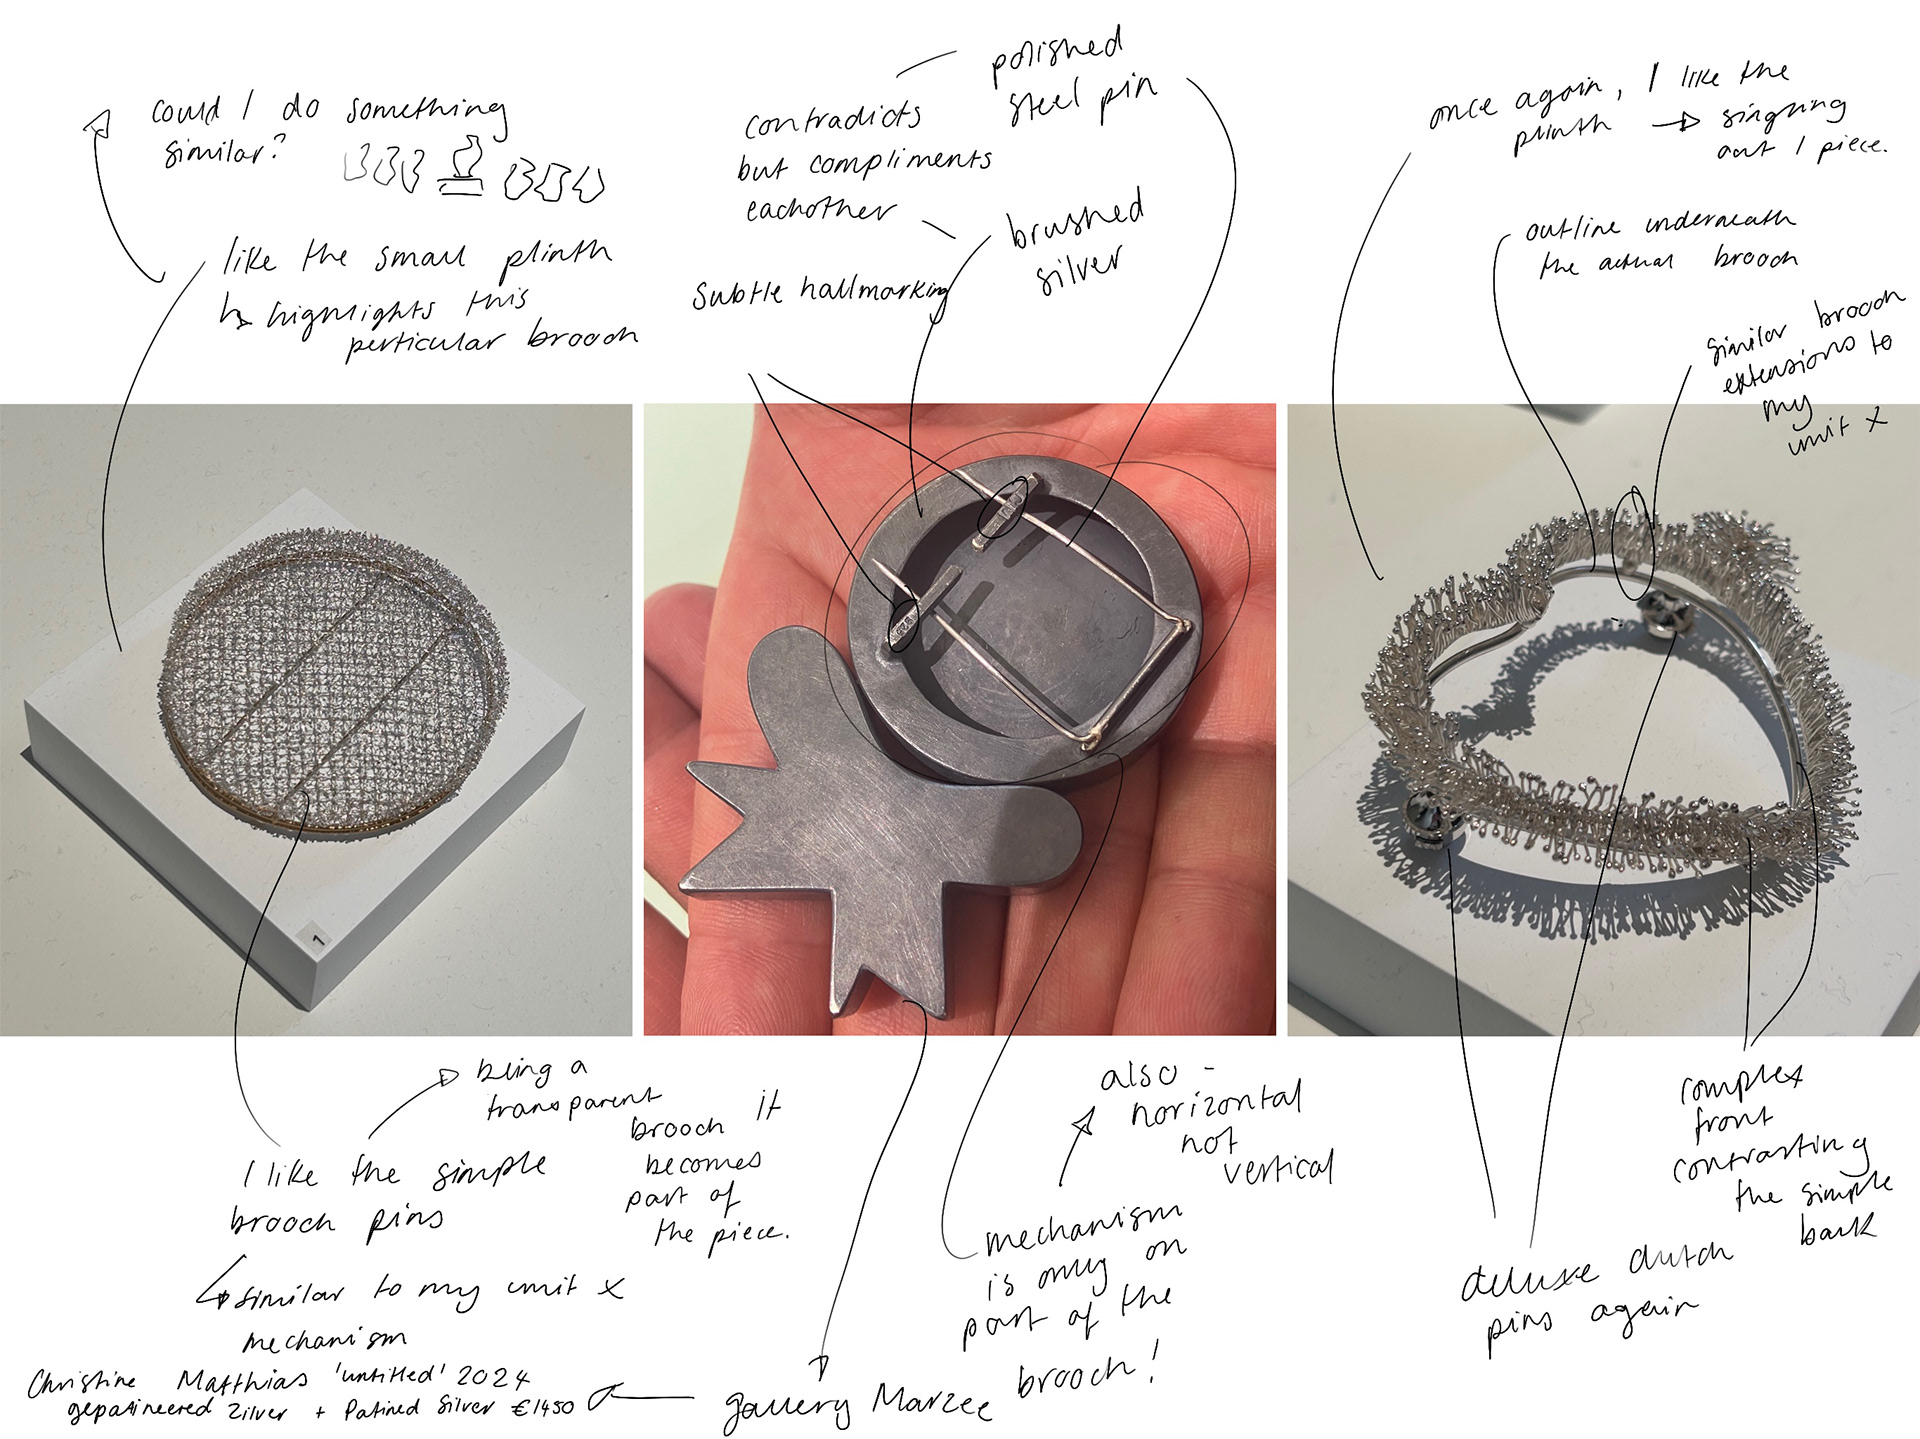
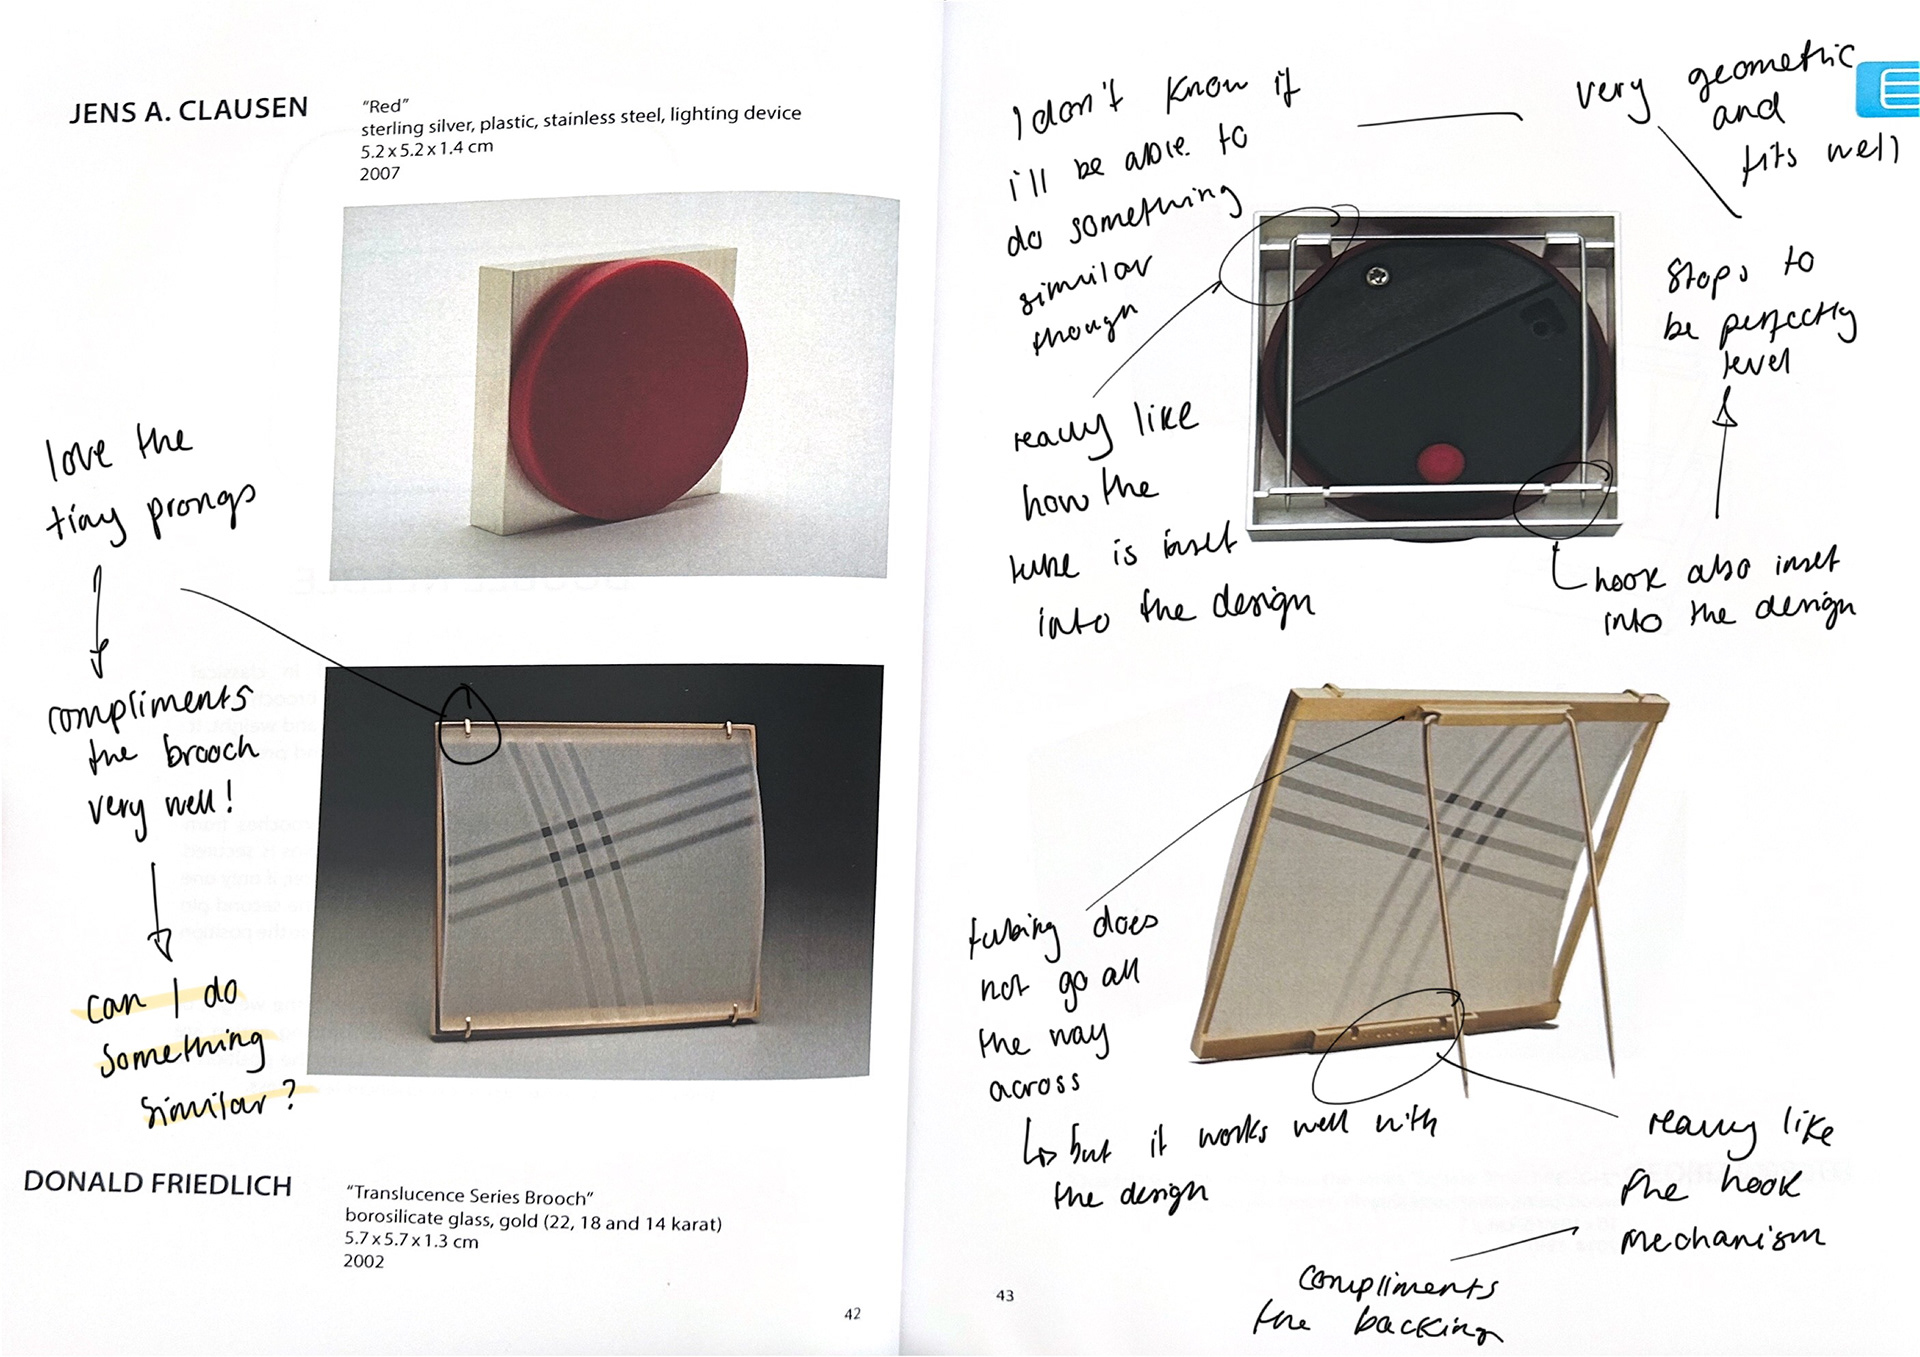
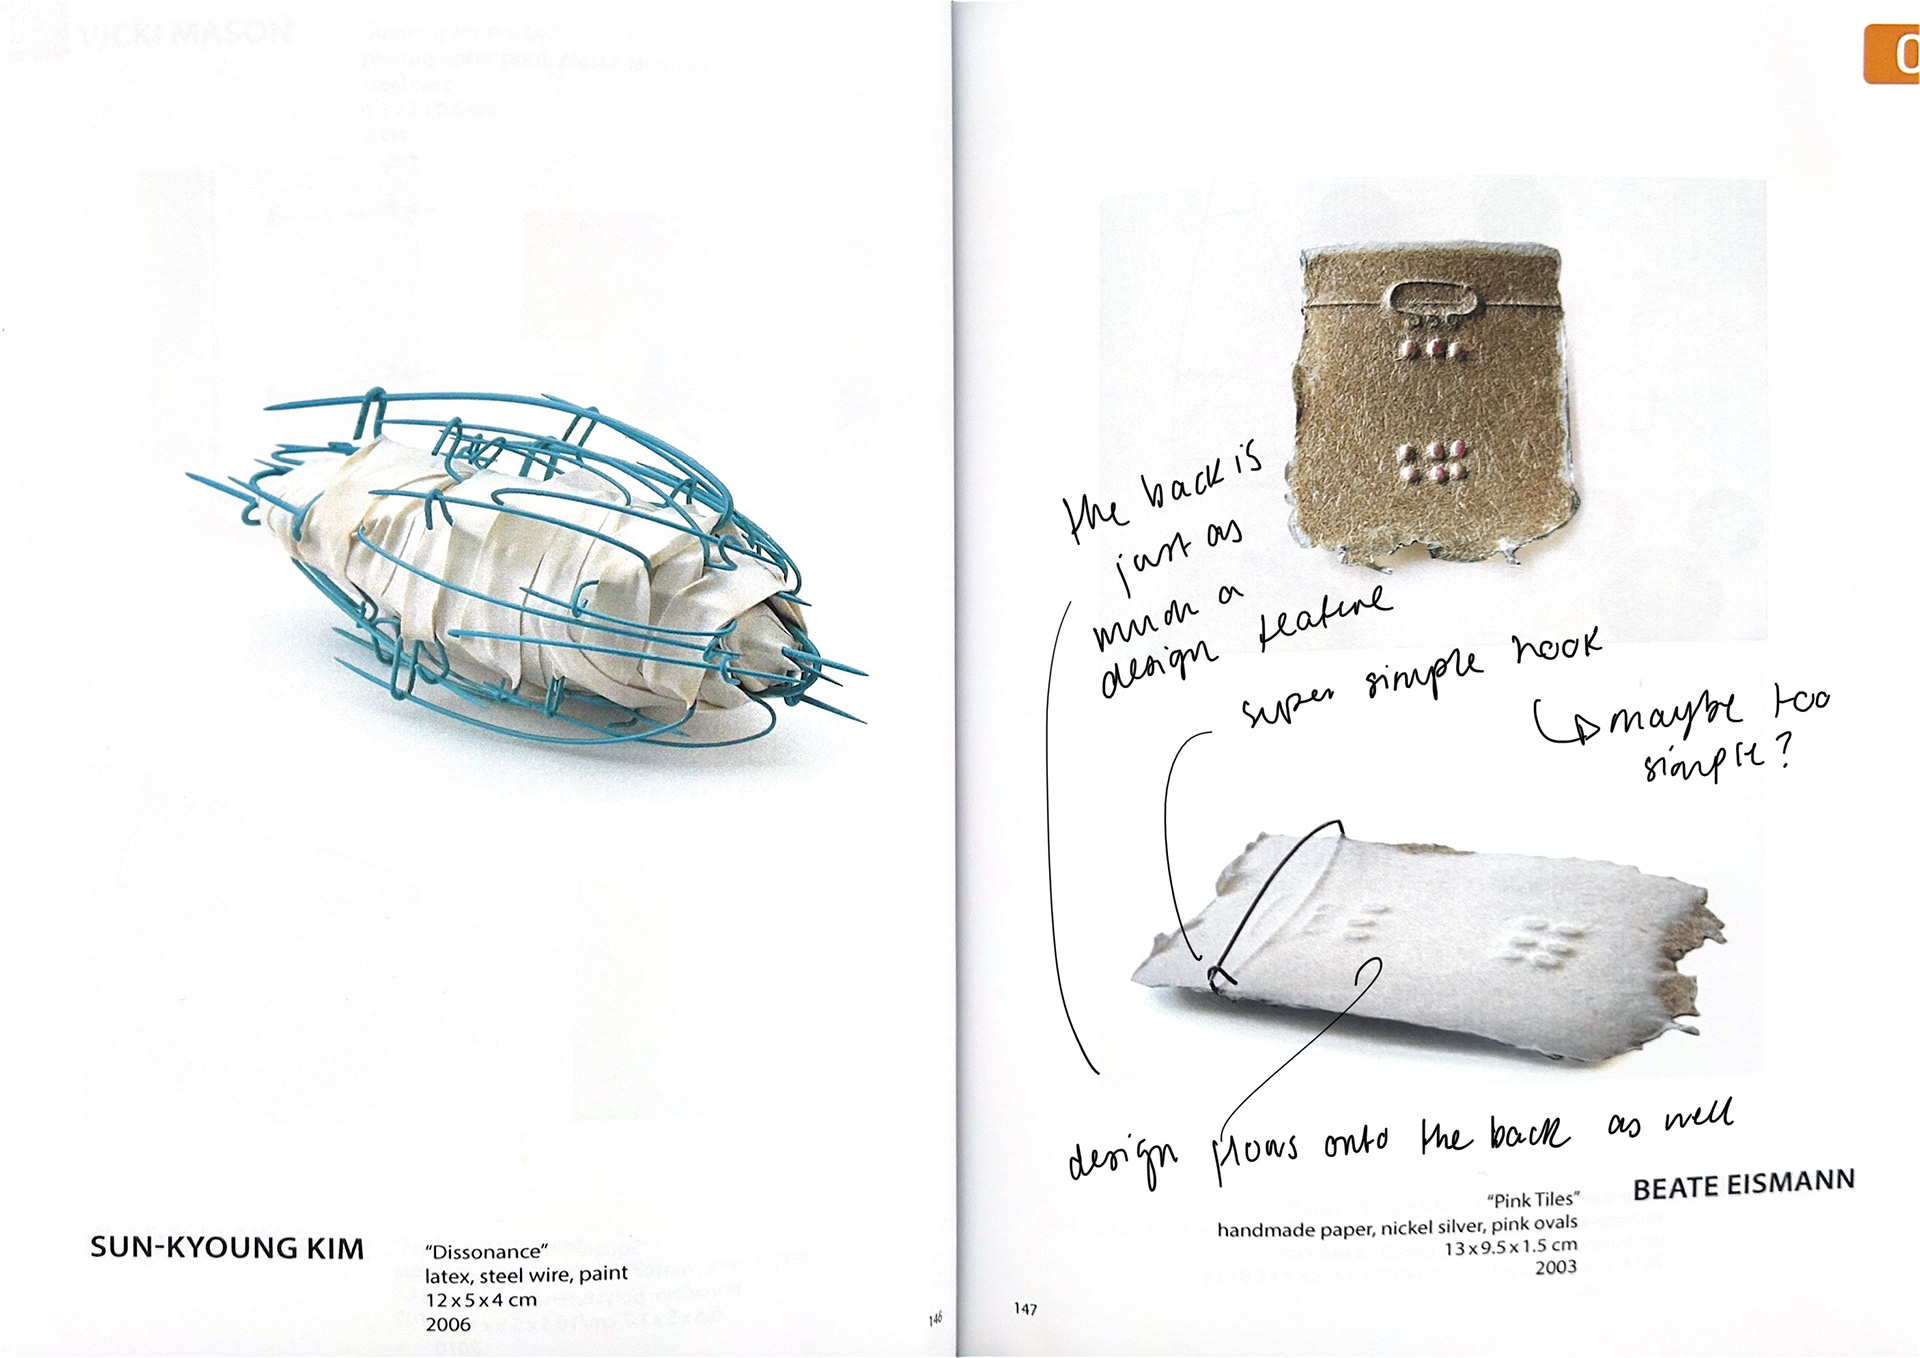
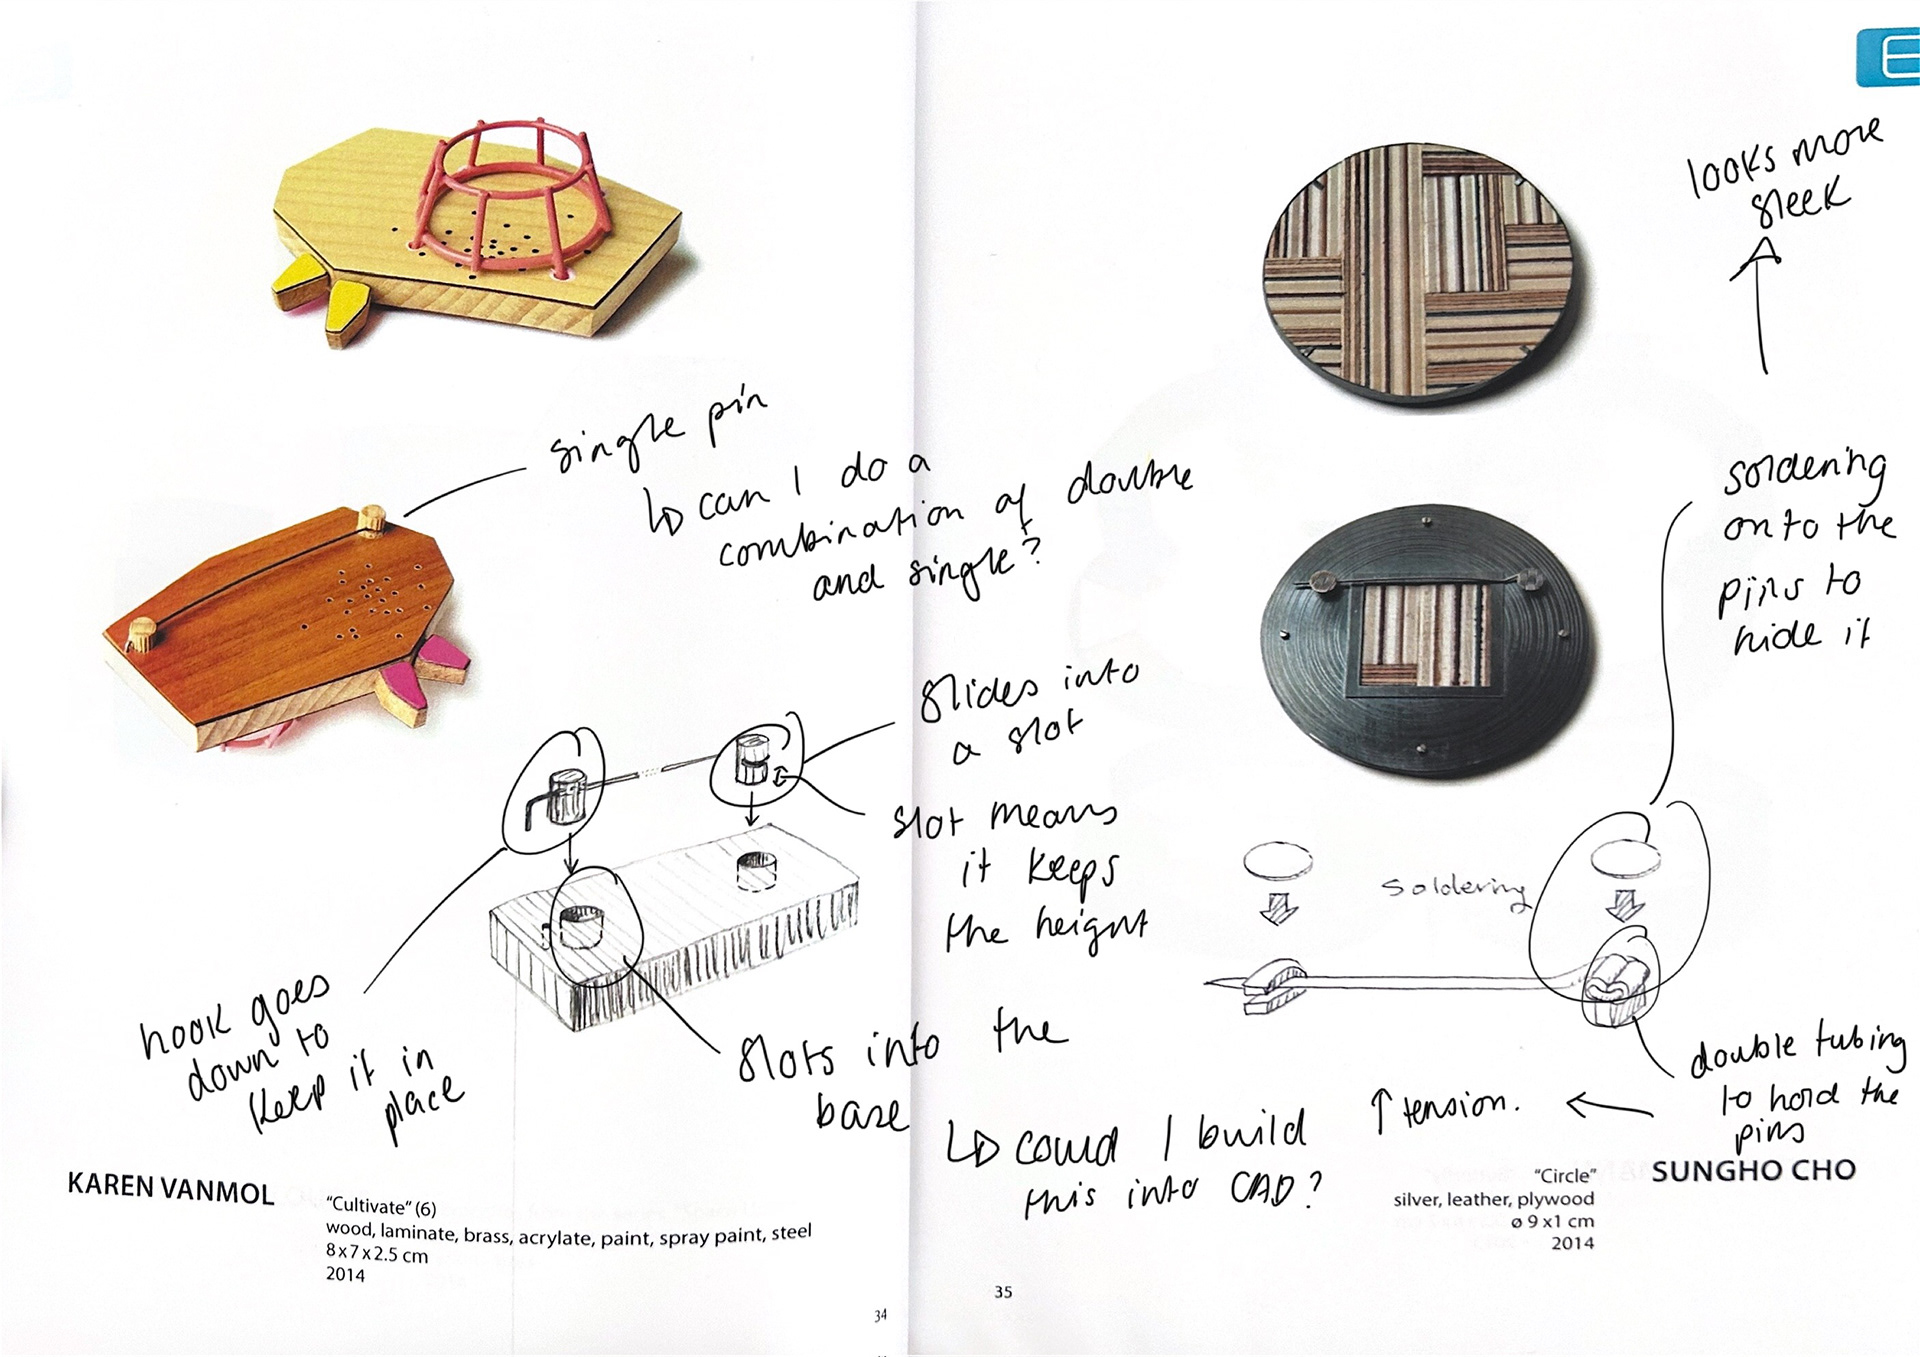
During my tutorial with Patricia, we examined my final pieces from Unit X. We both agreed that the simple brooch with the chain worked a lot better and that was because of how simple it was. We spoke about how I should continue to use simplistic designs in my work, and let the bacteria speak for itself.
Patricia also asked me to make more of the 3D-printed samples while we wait to hear back from the microbiology lab. This time, she wanted more variety in the size and shape of them.
I decided to do some larger samples and make them a softer form to help with sanding later down the line.
We spoke about how the bacteria is freezing an moment in time, which has lead me to think more about the concept of time in my project. While I am not quite sure what this means yet, it is definitely something I am open to exploring more.
Artist Research
Sonja Bäumel
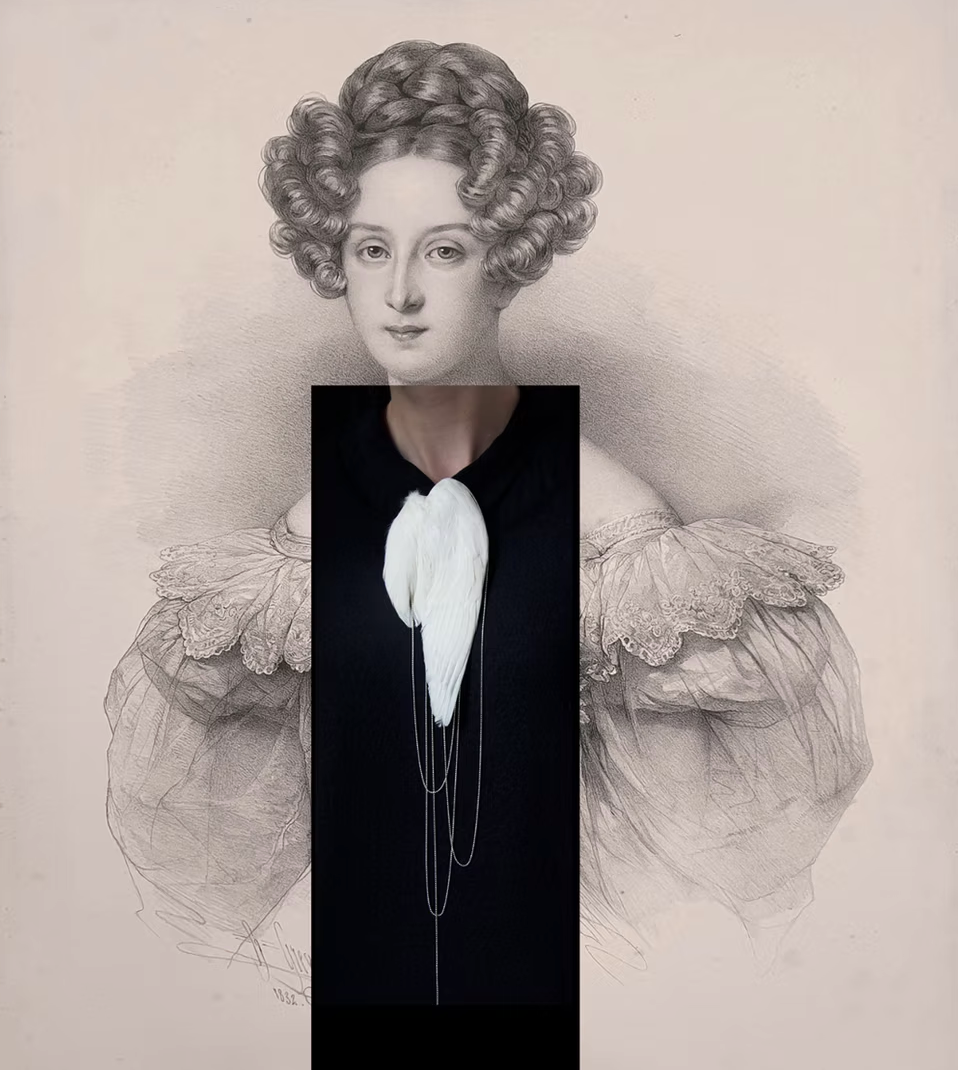
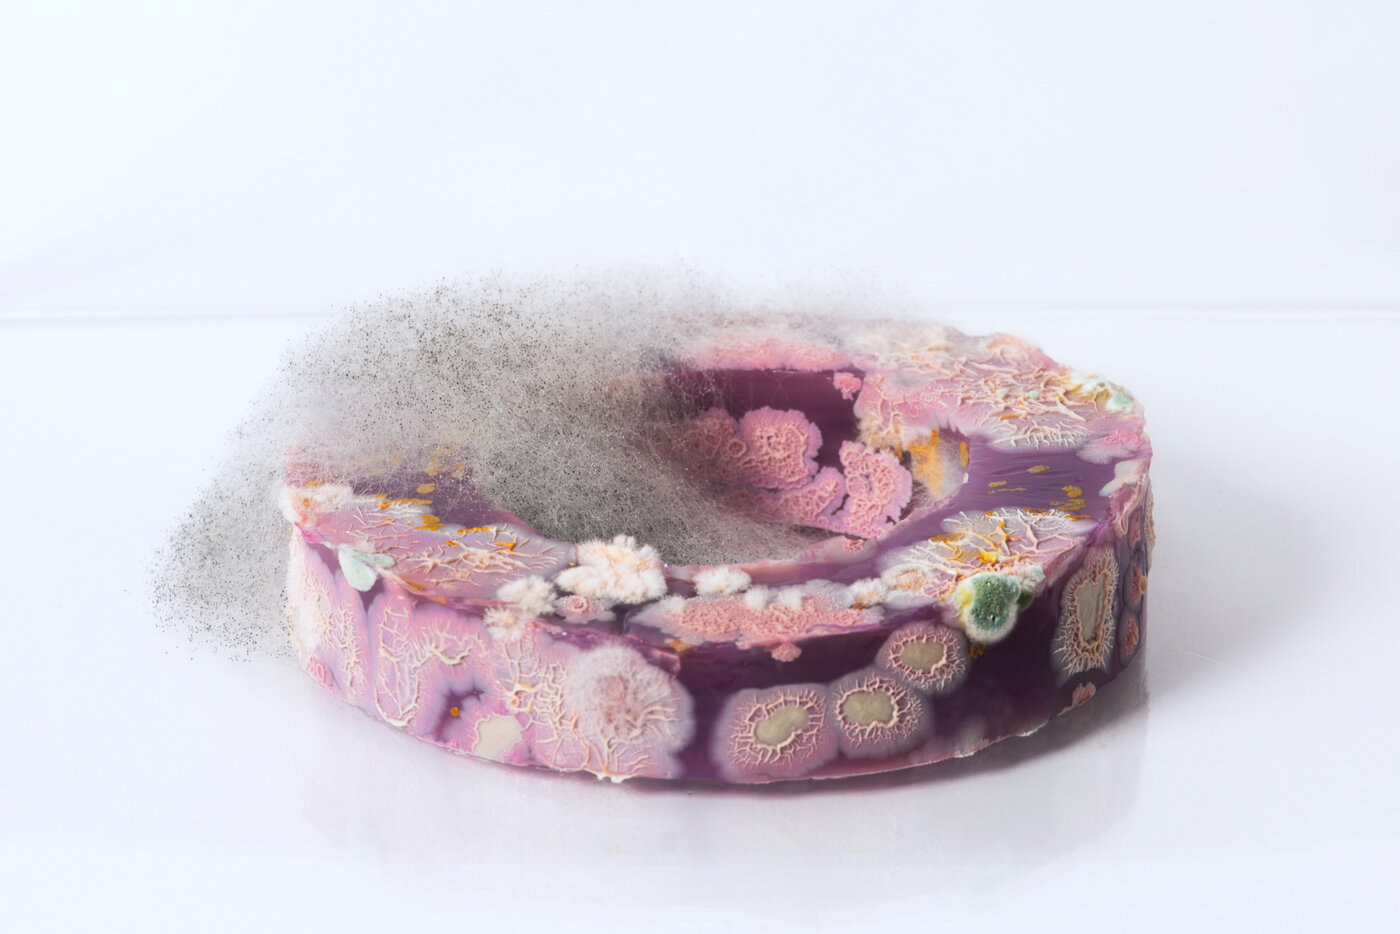
I have spoken about Sonja Bäumel in my Unit X work, as well as DC3, however her work is still relevant. The pieces Expanded Self I and II show the invisible extension of the human body. I used these ideas in Unit X to show the extension of sentimental jewellery and will continue to use and develop these ideas during Synthesis and Resolution. What I really like about the Expanded Self II was the use of a 3D agar plate in the shape of the body.
Expanded Self I

Expanded Self I
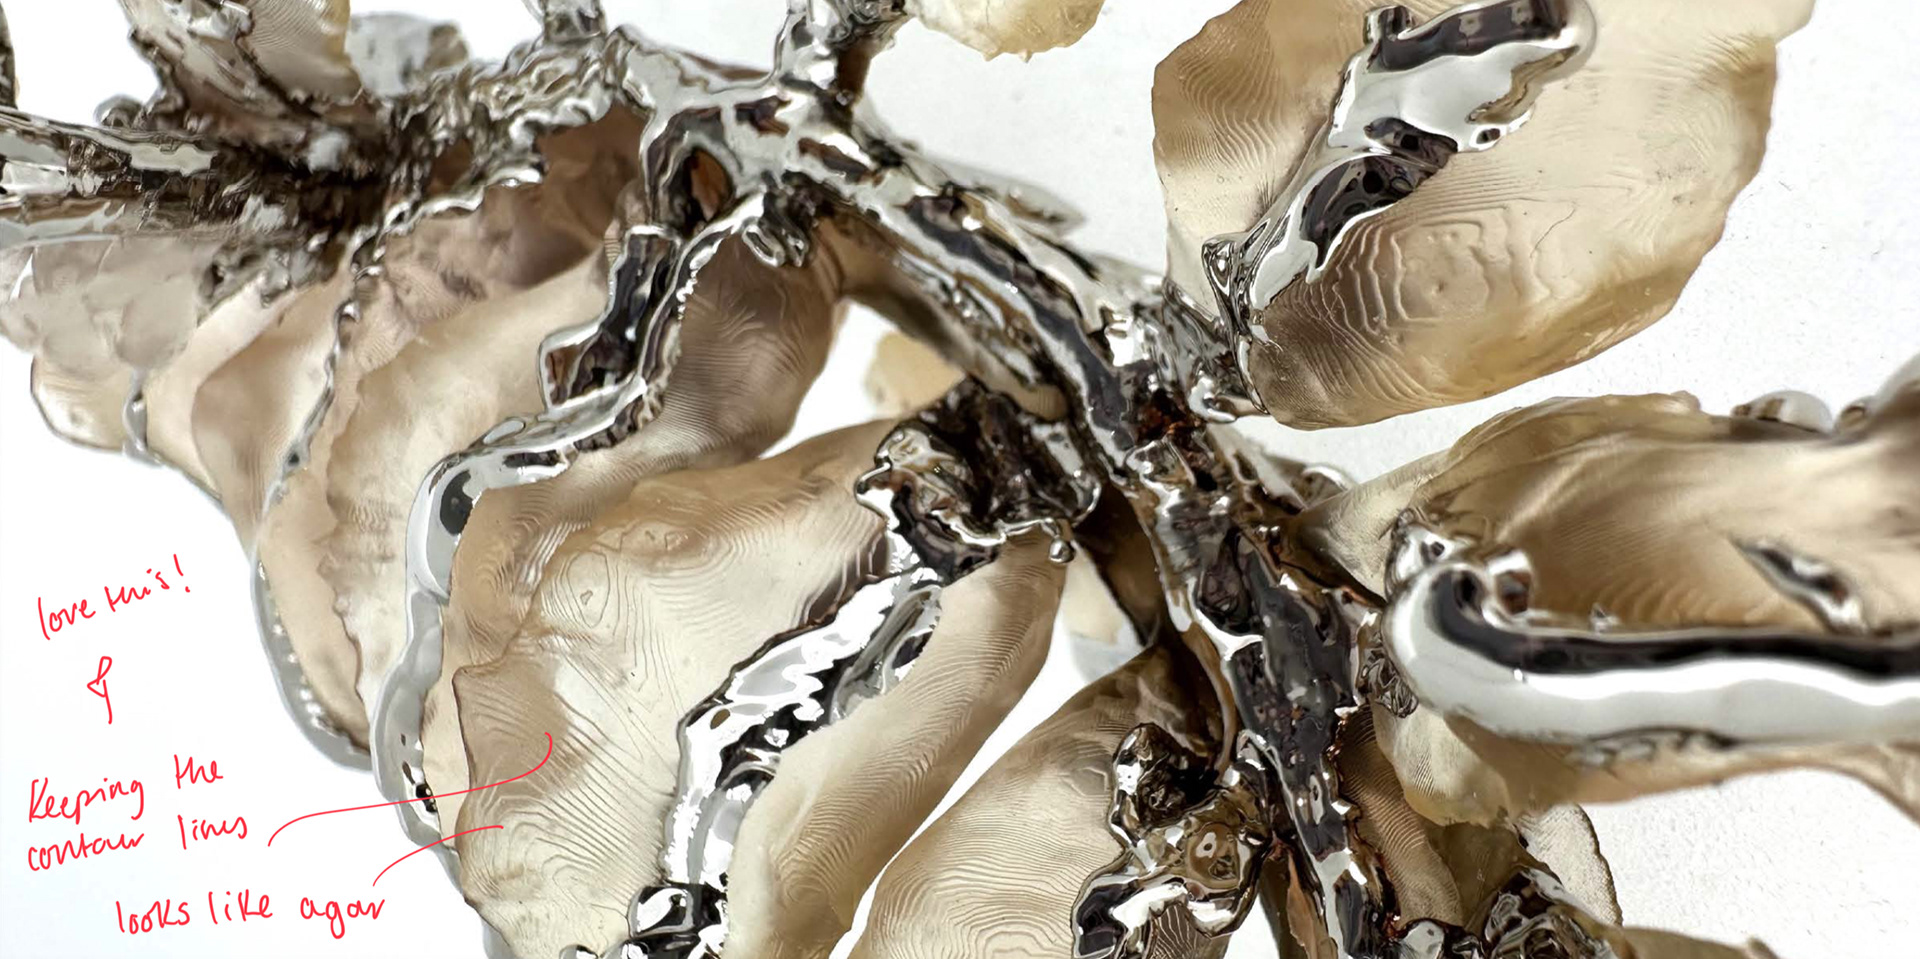
This idea of using agar in more of a 3D form than previously has been influential in my ideas, and a driving force for this practice. I knew I wanted to break out of the flat petri dish shape and this became a massive inspiration for that idea.
While I knew that I would not be using the body as the mould for this agar, it had given me an idea. The cultures on this shape were from the body, therefore shape of the agar = the bacteria grown. Could I use the shapes from bacteria plates grown from jewellery to create the 3D agar moulds to then swab more jewellery? I needed to test this idea but this seems like a good starting point to me.
Expanded Self II
Expanded Self II
Expanded Self II
Expanded Self II
Lin Cheung Jewellery Essay
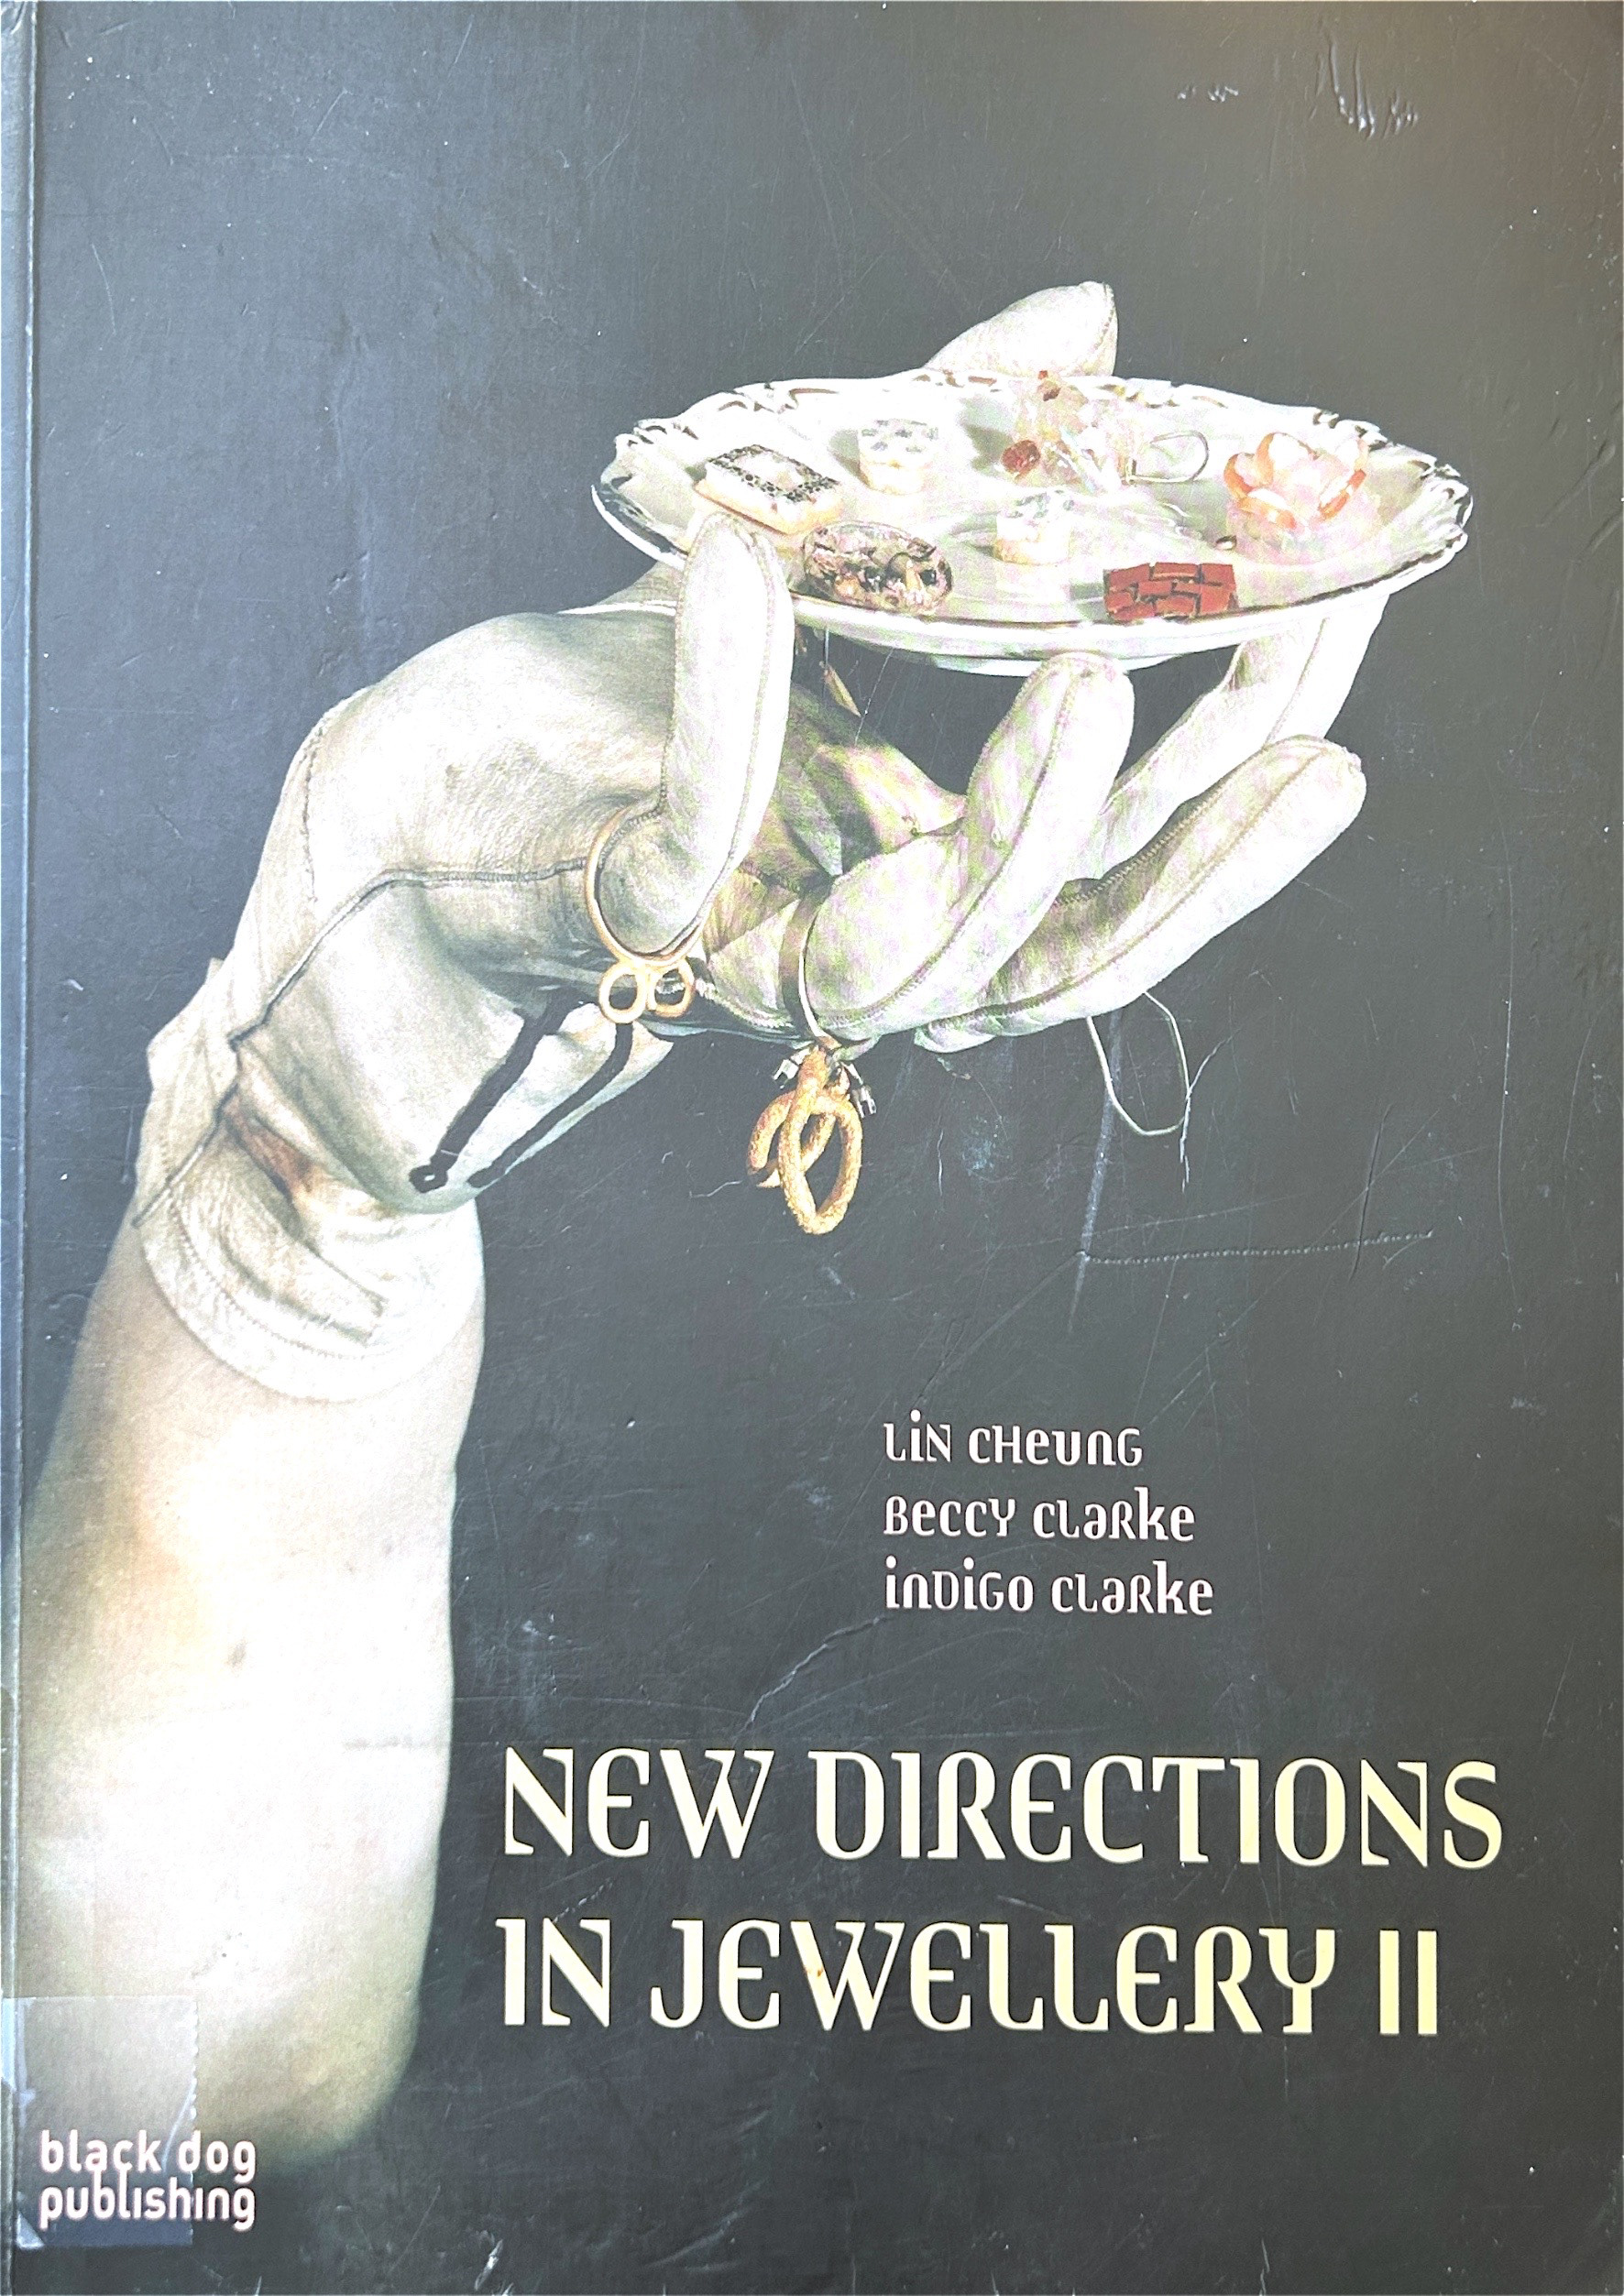
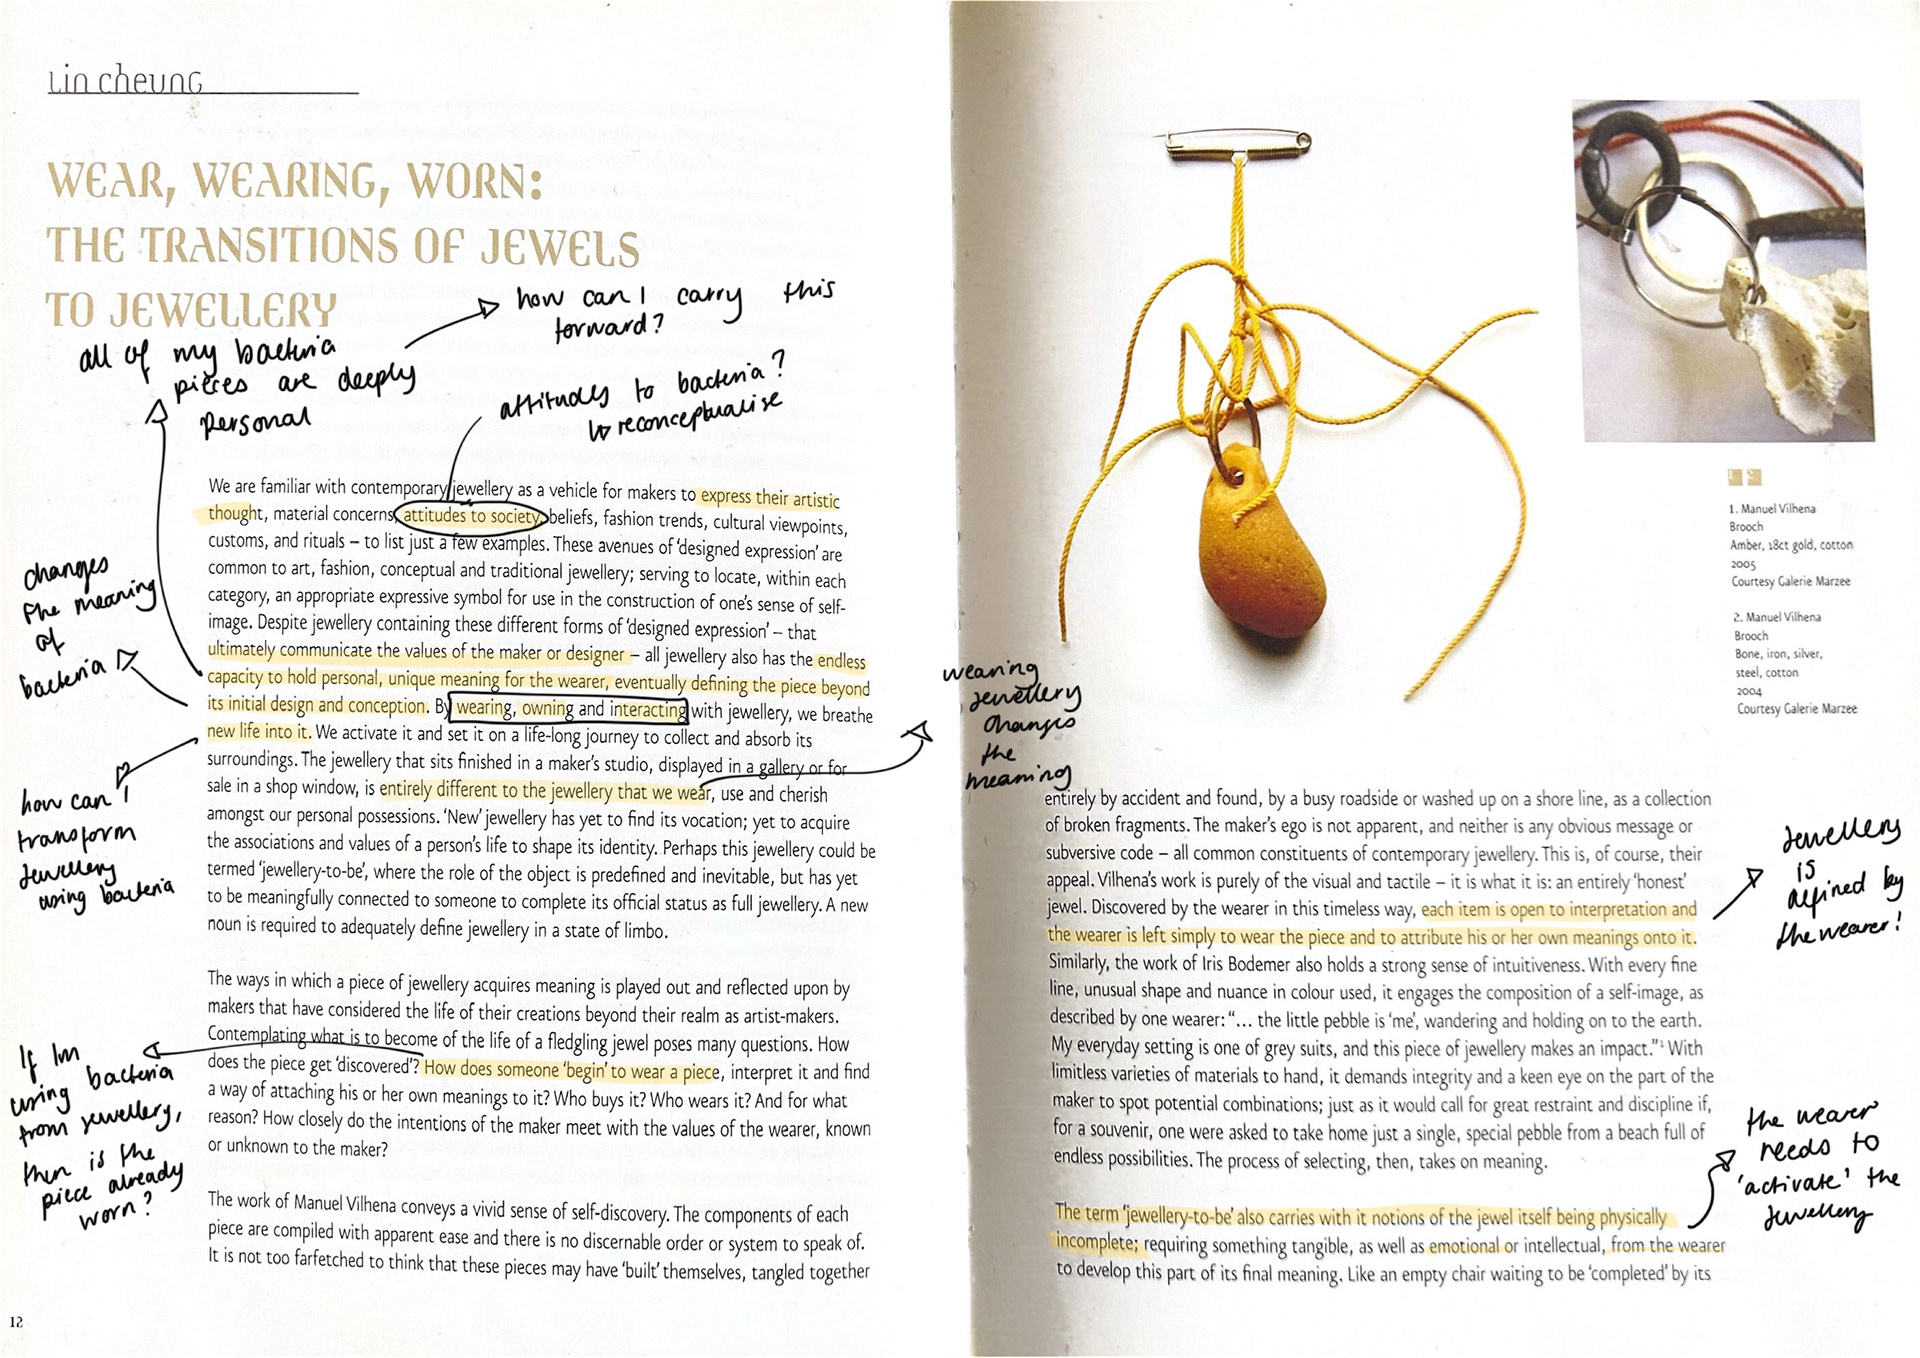
As part of my research, I read the essay 'Wear, Wearing, Worn: The Transition of Jewels in Jewellery' from the book 'New Directions In Jewellery II. The essay by Lin Cheung explains how jewellery is often defined by the context in which it is worn, and how personal connections to the jewellery can change its meaning.
This relates to my work whereby I use bacteria to often capture sentimental jewellery, and therefore redefining the object/bacteria. While bacteria is often feared, I found that by using familiar objects as sample sites, people were more likely to interact with the objects and begin to see bacteria in the same way I do.
Amy Congdon
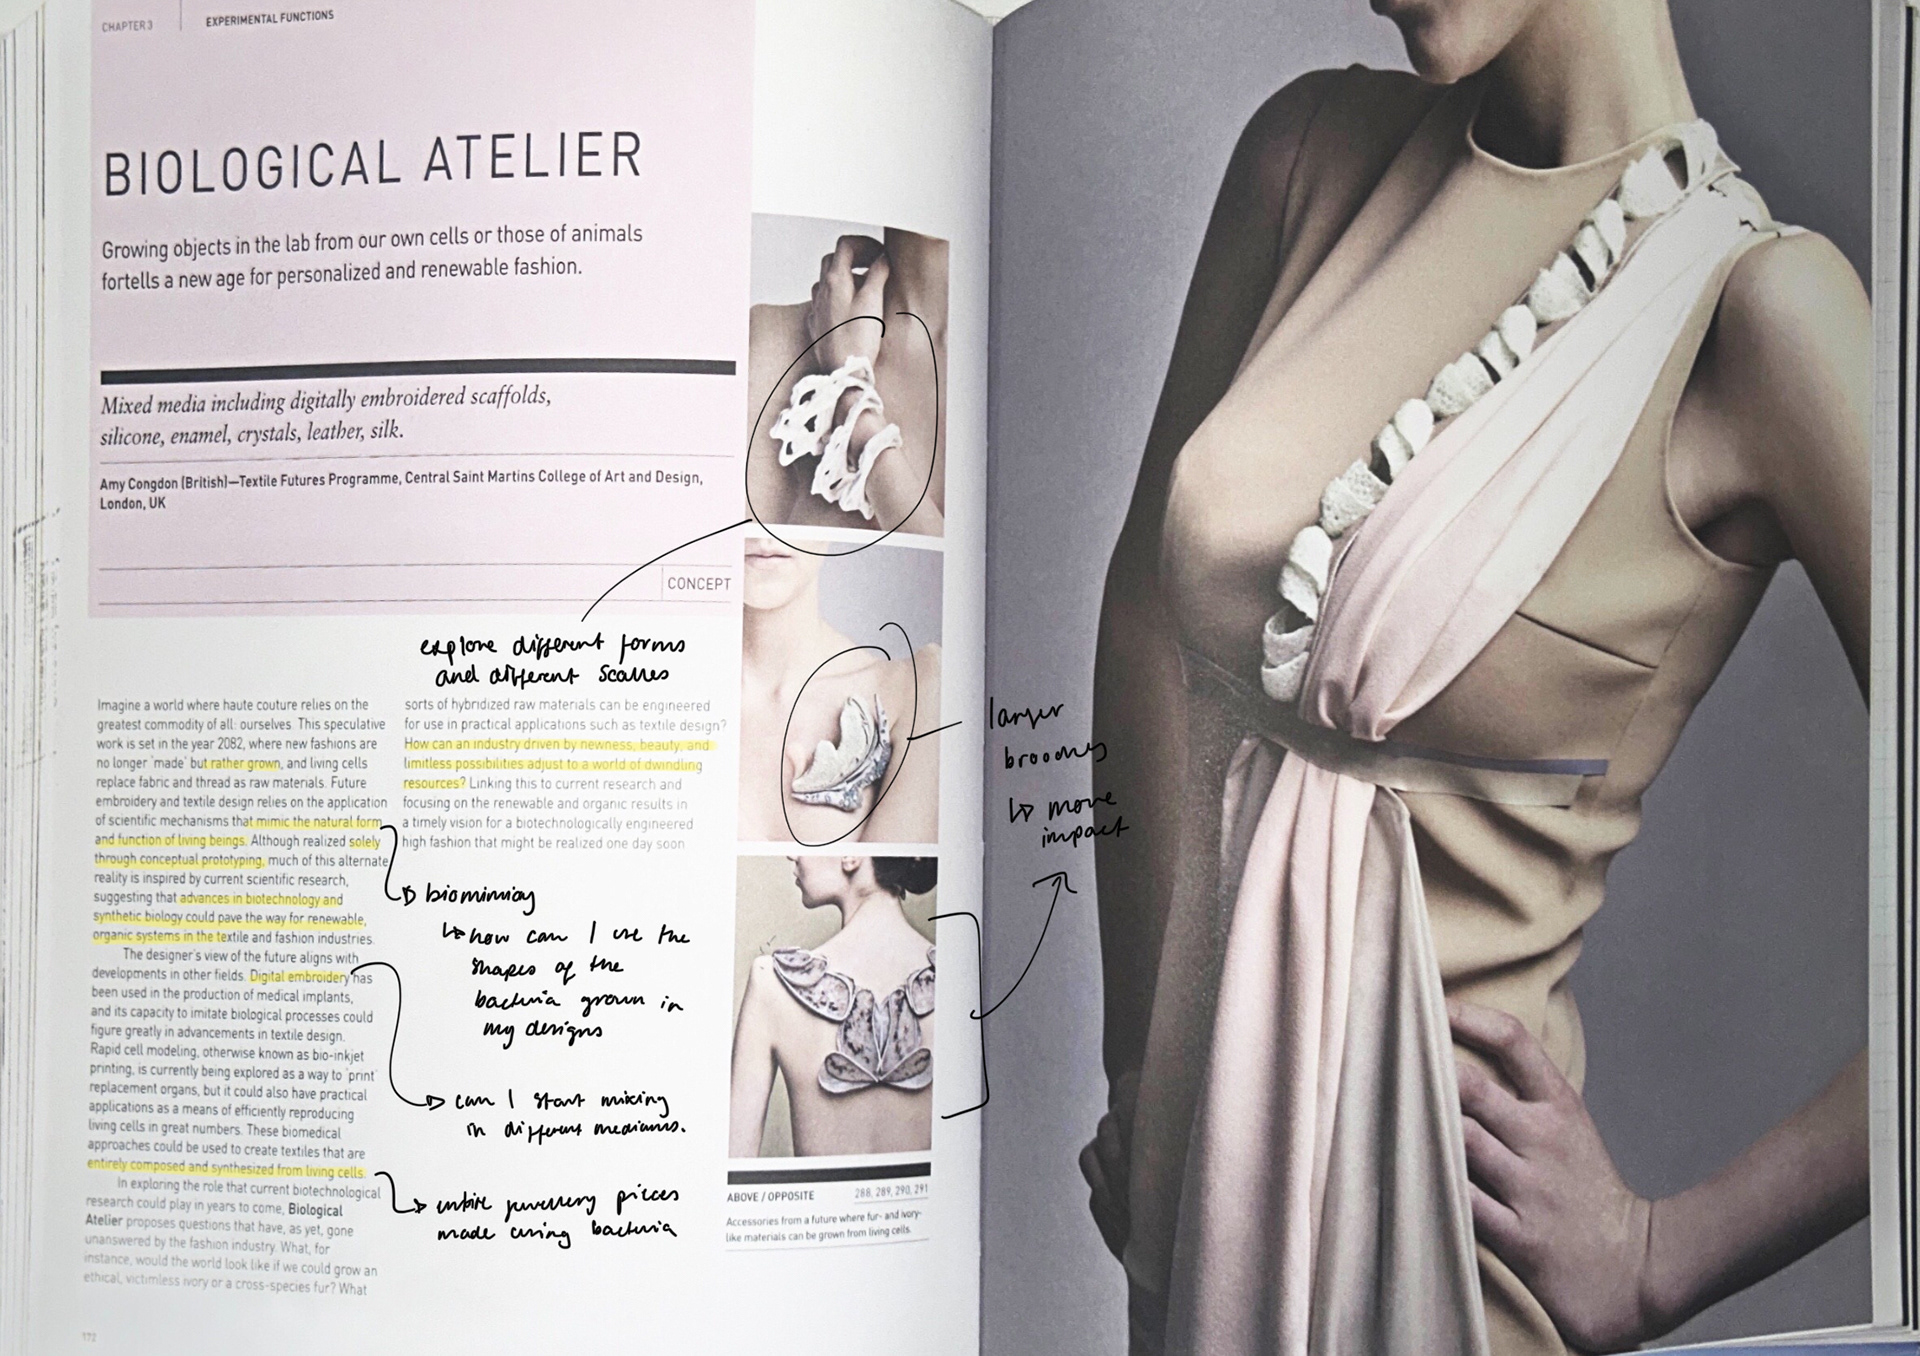
Amy Congdon is a London-based designer whose work explores the intersections of design and science through an experimental, research-driven practice. Using design, she investigates the implications of emerging technologies such as biotechnology, using her work as a platform to provoke debate and discussion on the potential consequences of incorporating living materials into future products.
Amy actively engages with science in laboratory settings, working with technologies like tissue culturing to fuel her understanding of their current capabilities. One of her most influential experiences in the lab was a residency at SymbioticA, an artistic research lab in Australia. She is currently collaborating with tissue engineers at King’s College London to further her research.
Trained as a textile designer, Amy earned her undergraduate degree in Contemporary Textile Practices from Norwich University of the Arts before completing an MA in Textile Futures (now Material Futures) at Central Saint Martins in 2011.
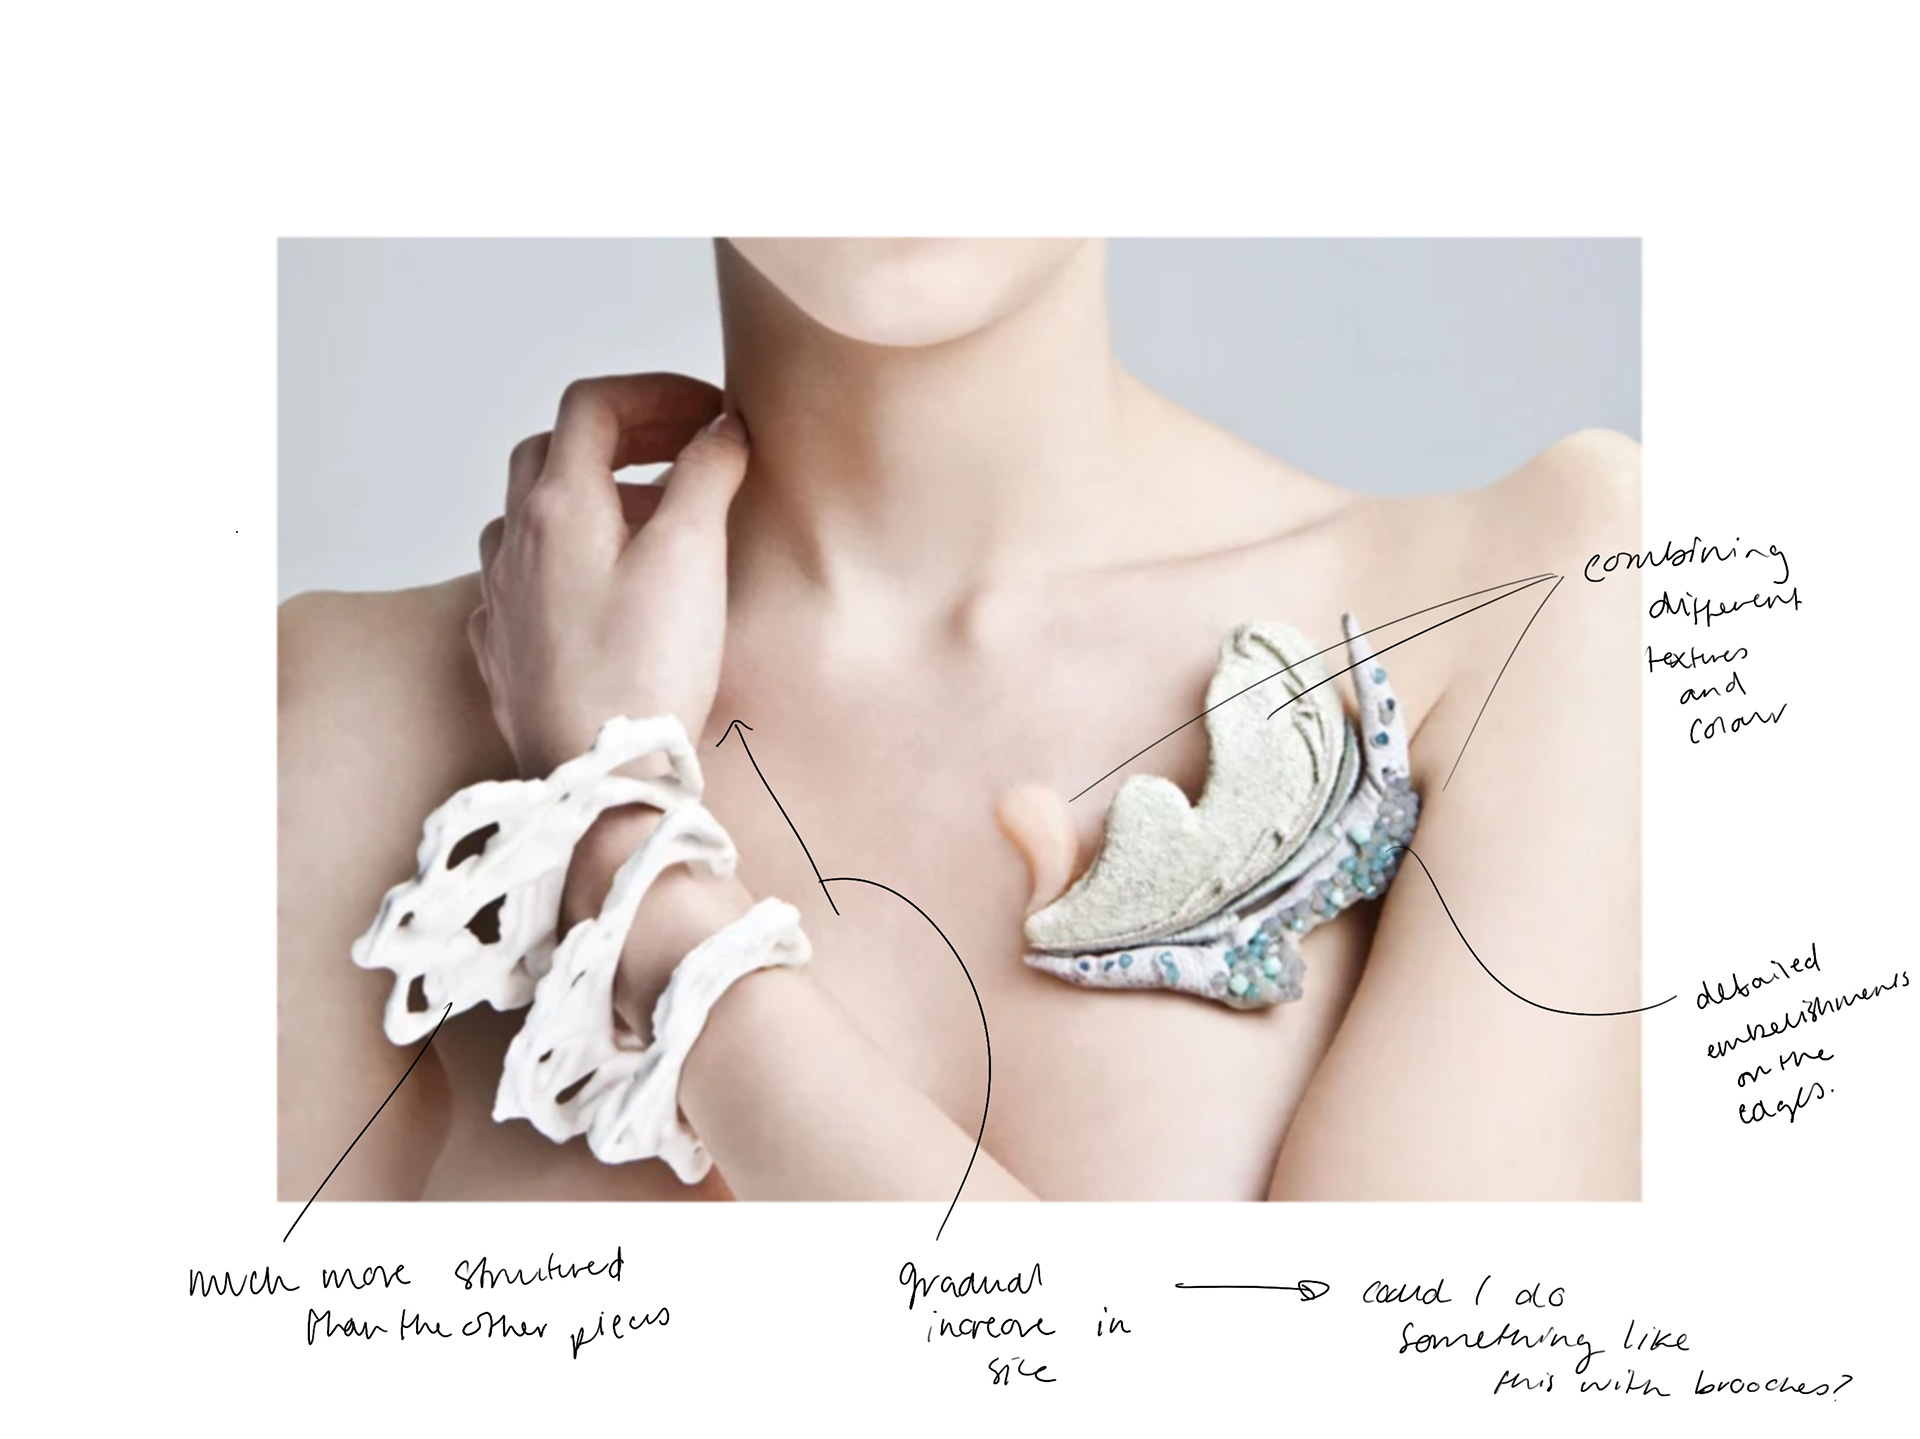


Her 2013 project “Extinct” “envisions a world where materials are not made, they are grown – where luxury materials are fashioned from cells, not fabrics”. These pieces have been made using tissue engineering. While it is not possible for me to use tissue engineering for this project, the idea of using science as a collaborator is something I have been using and am planning to continue using. I like how she uses unconventional materials in her work combined with more traditional techniques, such as embroidery.
The forms and shapes taken are also rather inspiring and remind me of the bacterial growth I have seen so many times before.
She also combines the two practices of science and design, changing and blurring the boundaries of the role as a designer, which is something I wish to take forward into my practice post-graduation.
I like how the pieces have become extensions of the body through the use of tissue culturing, which I feel is mirrored in the shapes of the designs. This can be seen in the back piece, whereby the piece extends over the entire shoulder blades, mirroring the bone structure.
From 'BioDesign' by William Myers, page 172
Charlotte Van Houbroeck

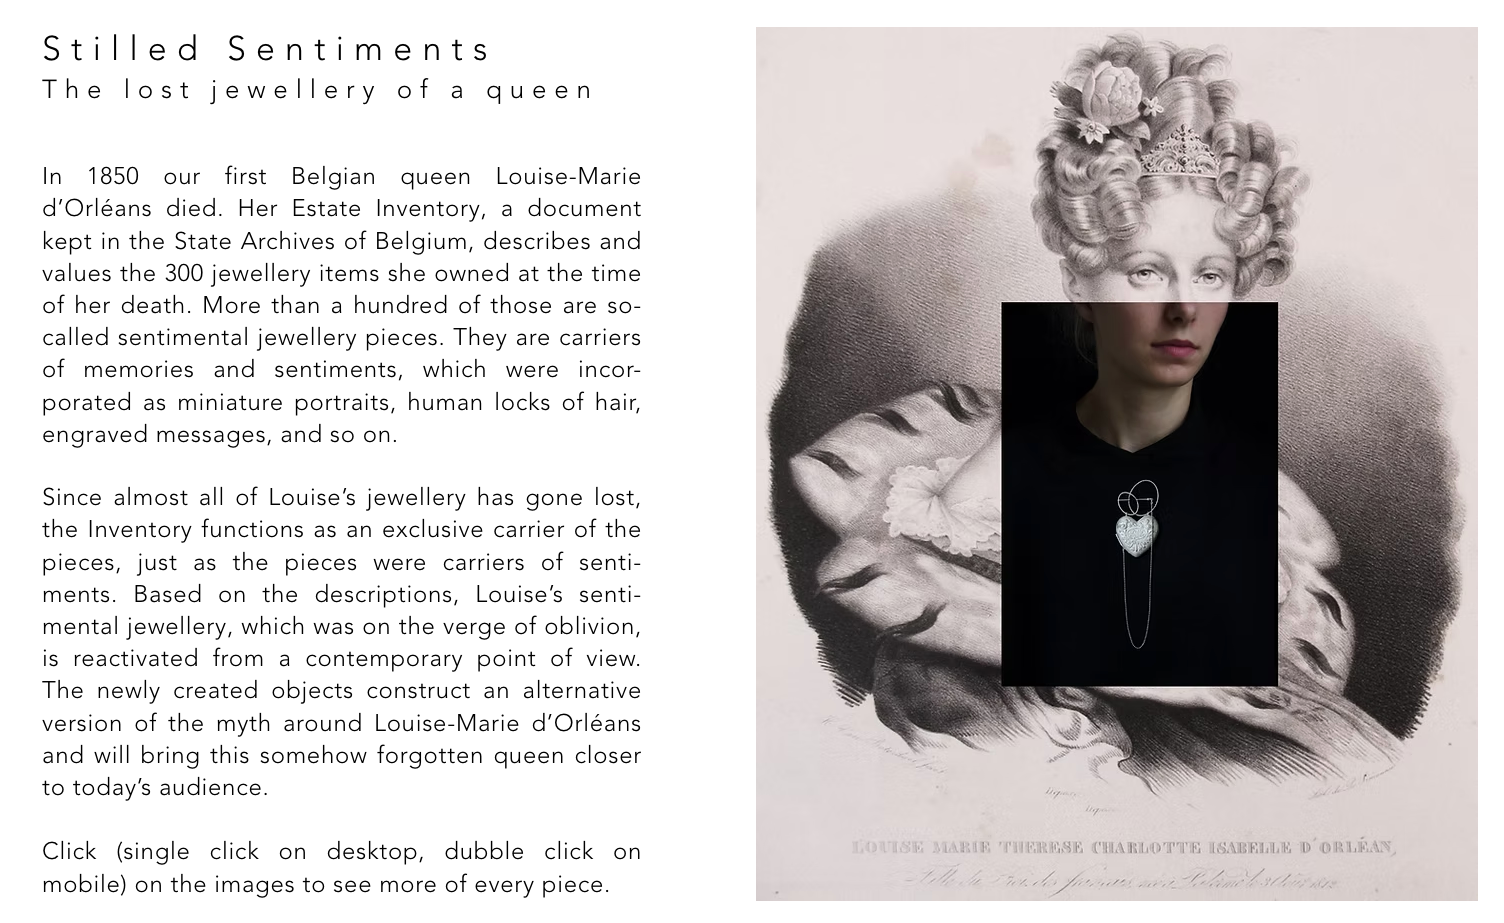
Charlotte Van Houbroek is a Belgian jeweller whose doctoral research focuses on the lost sentimental jewellery of Queen Louise-Marie d’Orléans. She aimed to investigate and reactivate these pieces from a contemporary perspective. This project uses the descriptions of the jewellery from archives and reconstructs these pieces from her own contemporary interpretation of the descriptions.
What particularly intrigued me was her approach to reinventing jewellery without relying on the original objects themselves. While my practice doesn’t involve historical descriptions, I share a similar interest in reinterpretation. I aim to reinvent jewellery through the patterns of bacterial growth sampled from worn pieces. Since we interact with jewellery daily, I see the biological traces they carry, something I think of as ‘data’, as a way to inform and reshape new pieces.
Leonie Damm
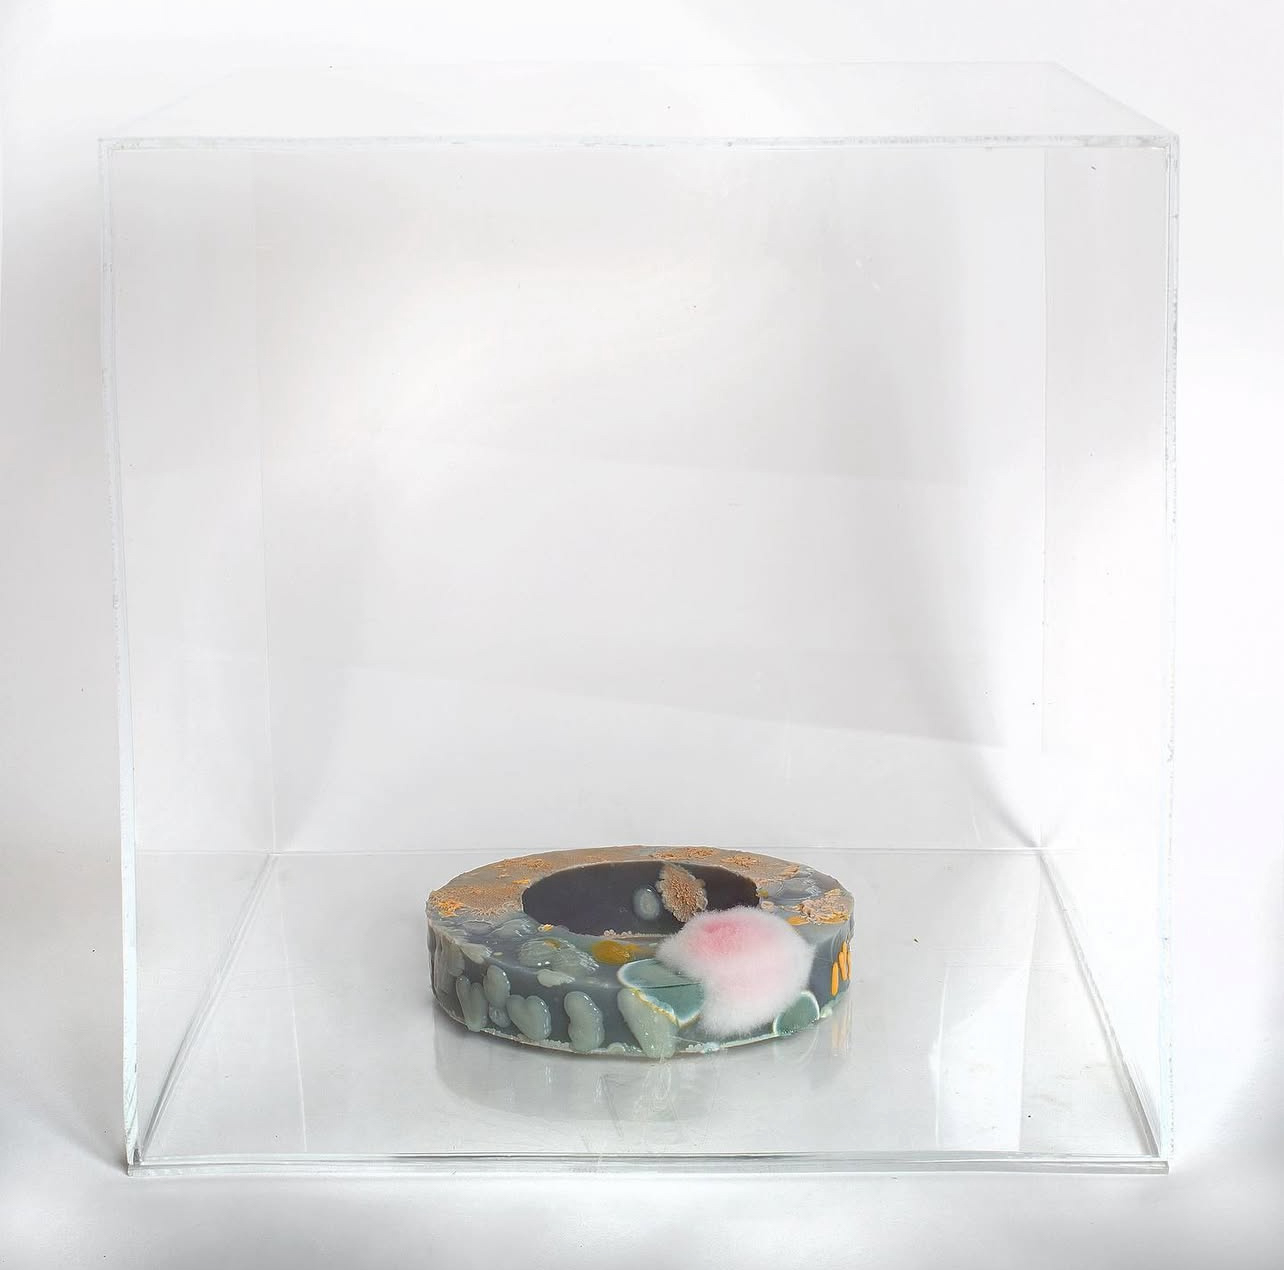

While I can't find any find any information on Damm, Patricia showed me her work after my Beta Project presentation. I was instantly inspired by her bold use of bacteria and growth medium. She does not seal the designs with resin and instead lets them sit in a plexiglass box to protect the viewer.
I like how the growth medium / agar is dyed to a solid colour. While I have typically been using the translucent nature of agar in my designs, which helps showcase the intricacies of the bacteria, I want to experiment with adding pigments to my agar in the hopes that it would make it less translucent, and add more visual interest. My hope is that by using colour, it makes the bacteria more approachable and appealing to the viewers.
I also really like her use of timelapse, and is something I'm trying to figure out how I can do this with my own work for a context video.
Yarina Dai
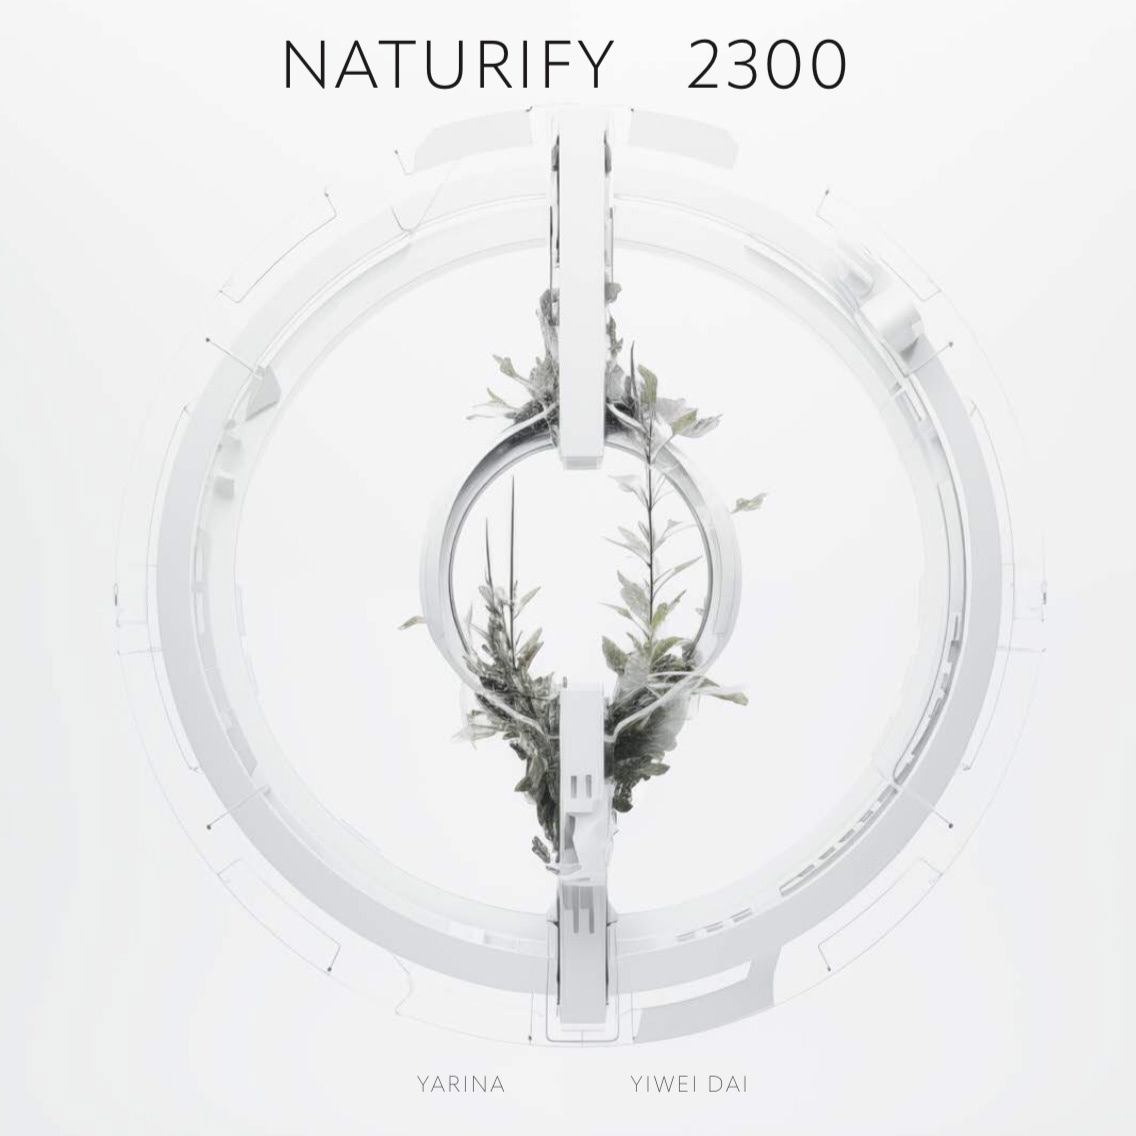
Yarina Dai is a contemporary jeweller who explores the intersection of nature, technology, and bioengineering. Her pieces often include bioengineered plants that serve as wearable companions, similar to how I use bacteria in my work. I decided to look at her Thesis project from when she studied at RISD, called Naturify 2300. In this thesis, she explores how plants can be wearable collaborators with humans, specifically how plants signal to each other and release oxygen close to the body.
This is similar to how bacteria are essentially wearable collaborators with us.

I found this thesis incredibly interesting. I enjoyed reading about how we can use nature in product design, learning from living things that have evolved over billions of years to become more efficient.
I also really enjoyed seeing how she used 3D printing and notions of petri dishes in her work, something similar to what I do. It has helped me see the broader perspective of this project, and while it has given me many ideas for projects, I will not be able to use all of these ideas now. That being said, I am excited for how I can use these ideas in the future to develop my own practice.
Jed Green
Jed Green’s practice revolves around transforming clear borosilicate glass tubes, commonly used in scientific settings, into sculptural forms. She uses lampworking techniques to shape the glass, then drills and pins the components to create dynamic, movable clusters. Colour is introduced by painting the inside and applying handmade ceramic transfers to the outside, adding layers of texture and pattern.
Her pieces are designed to be both wearable and displayable, blurring the line between jewellery and sculpture. This dual functionality is exemplified in her "Wear/Display" series, which features multi-use pieces that can be worn or showcased as standalone art objects.

What initially drew me to this work was the use of circular forms. The circular shape immediately reminded me of petri dishes, something I have used before within my own practice. Although I’ve recently been thinking about ways to move beyond the flat, round format, I find myself still drawn to it and questioning whether it might still have a place in my work, perhaps in a more subtle way.
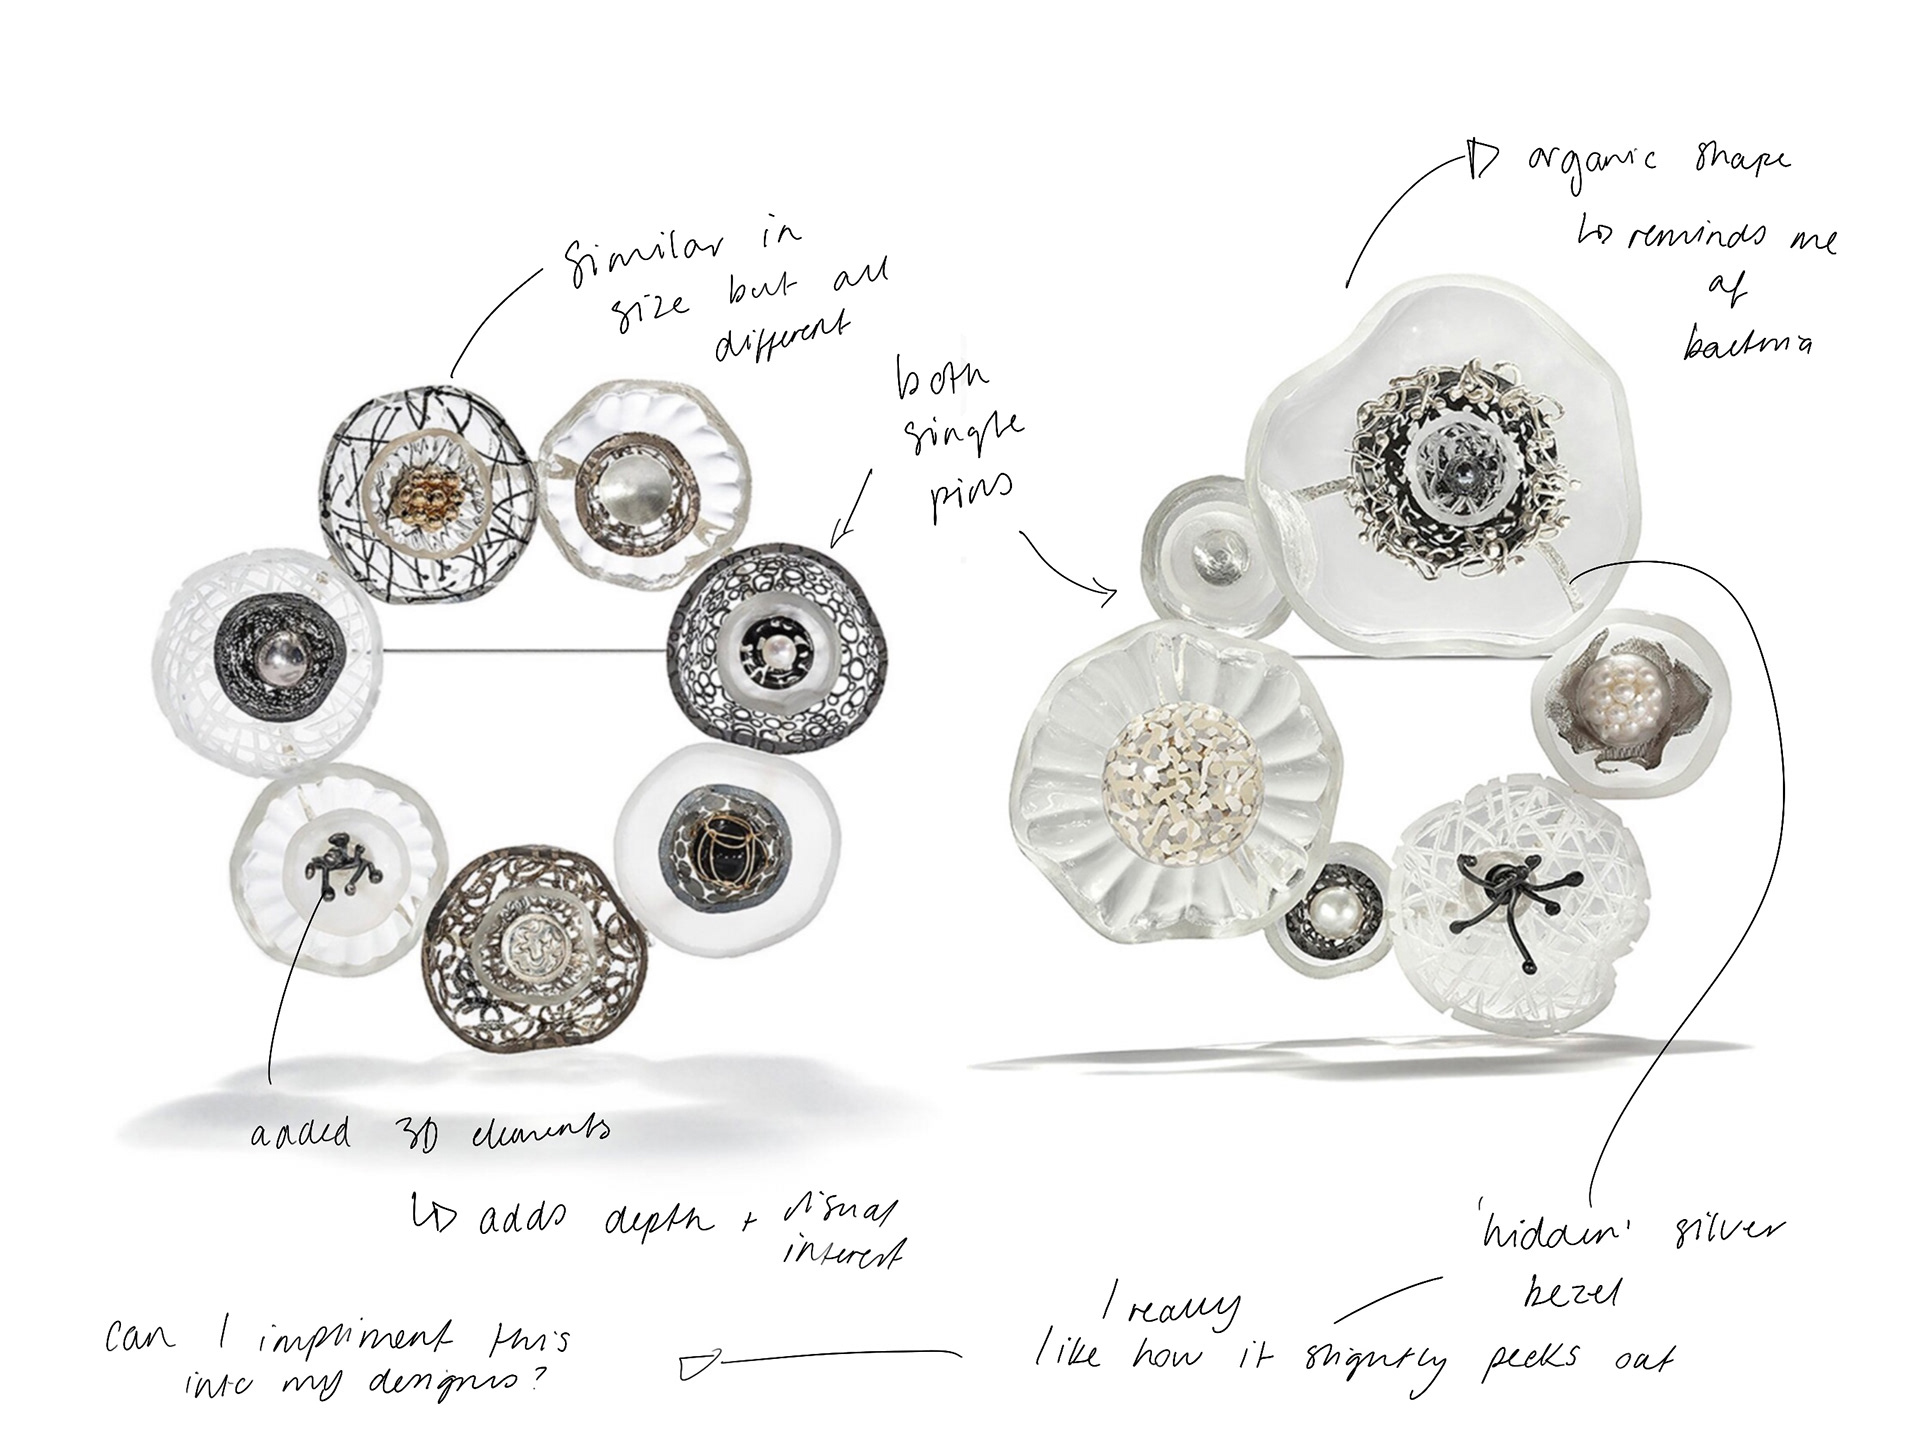
What I also like is that each circular form is slightly different, making each piece individual while maintaining a consistent visual language. I’m inspired by the idea of combining a range of contrasting elements within a piece, all linked by a shared element. In this context, the petri dish shape could act as a consistent element.
Julia Lohmann
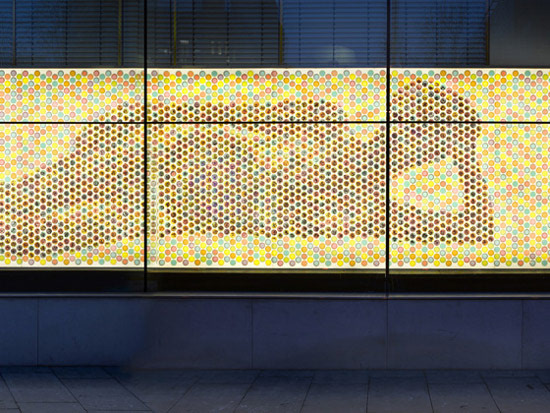
The piece 'Co-Existence' is an exploration into the intricate relationships between humans and the microorganisms that inhabit our bodies. The piece includes two reclining human figures, each made from approximately 9,000 Petri dishes mounted on backlit acrylic panels.
Each Petri dish contains images of bacterial colonies, strategically placed to correspond with the areas of the human body where these microbes are typically found. From a distance, the installation presents a pixelated representation of the human form; however, upon closer inspection, viewers can observe the detailed bacterial images within each dish.
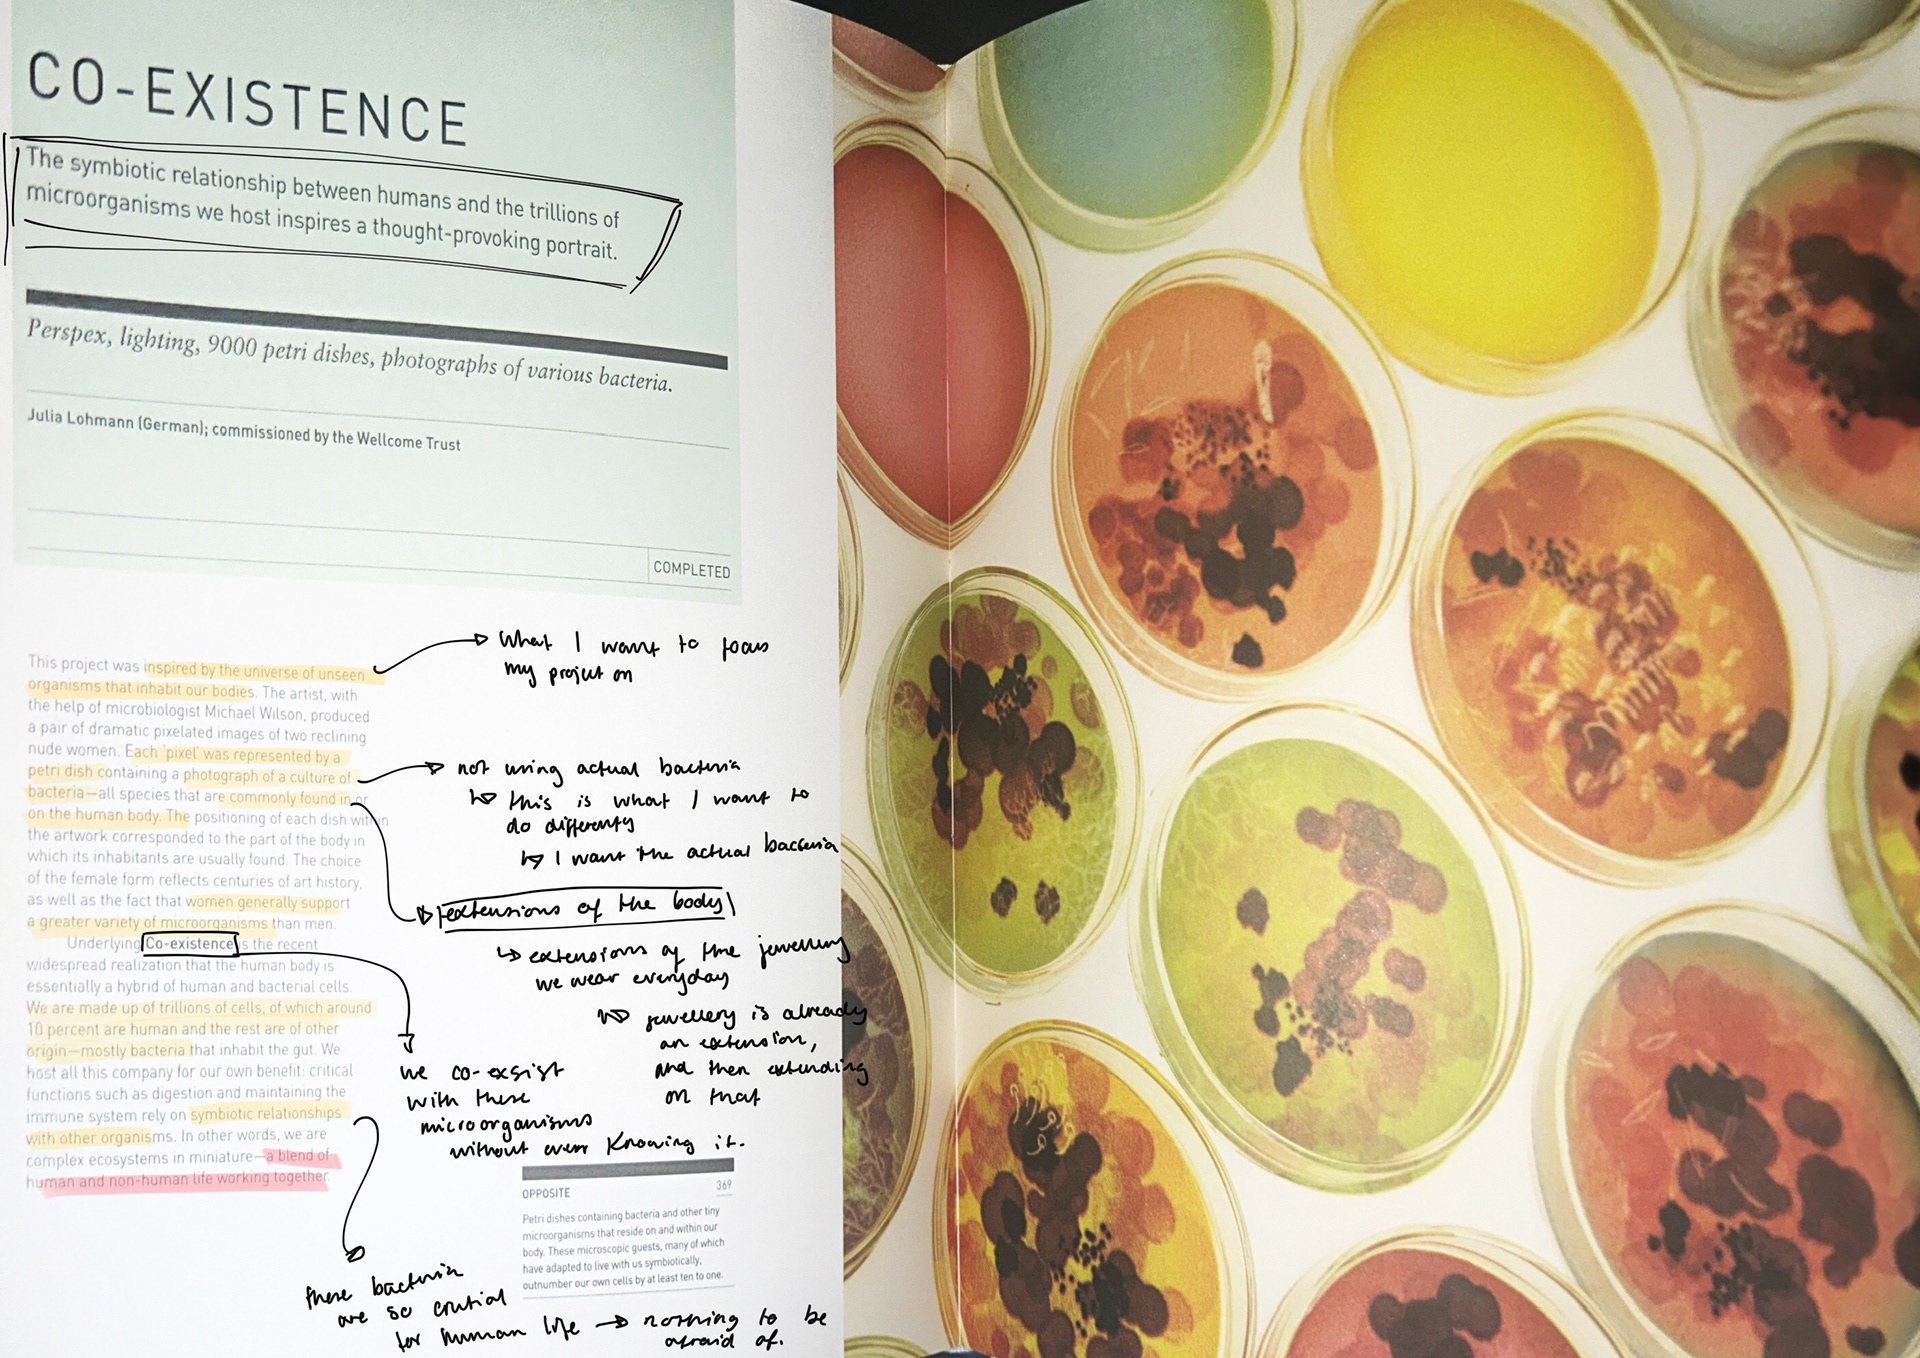
From 'BioDesign' by William Myers, page 218
I like how the piece uses bacteria to show a physical extension of the human body, as well as the samples being taken from a specific area of the body. I want to continue using bacteria to show a physical and tangible extension of the body. I also like how the petri dishes are different colours. During the Beta Project, I explored dying my dishes; however, the food dye I was using ended up fading over time and therefore, was not a long-term solution. I want to explore how different dyes and potentially different agars will work with the bacteria I will be growing from my ring.
Patricia Tutorial
12th February 2025
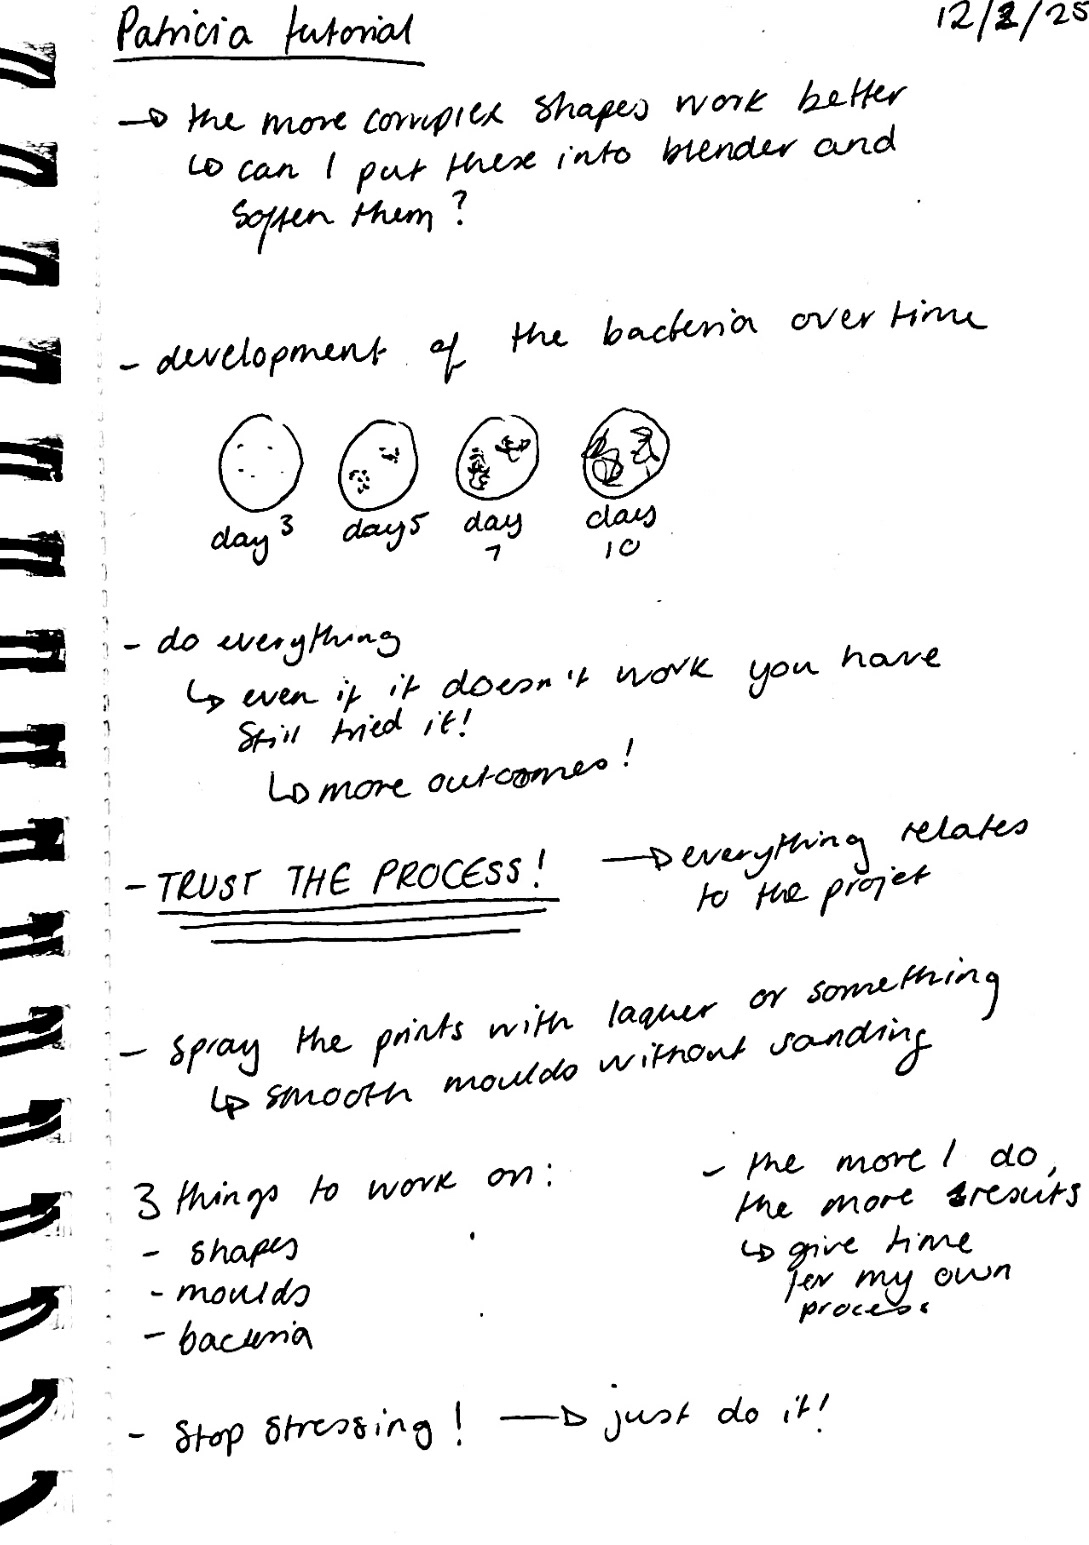
During my tutorial with Patricia, I discussed how I did not like my 3D prints. I explained how I liked the complexity of the models created in Rhino but preferred the smoothness of those made in Blender. She agreed that the Rhino models were more visually interesting and encouraged me to explore ways to replicate similar forms in Blender.
She also suggested experimenting with the development of bacteria over time and how it evolves. I found this idea intriguing, particularly in relation to how bacteria on an object change over several days, subtly altering the object in ways we are not aware of. I had thought about this in a previous tutorial, however, I did not know how I could implement it into my project. With this idea though, I think there is lots of room for development and exploration.
In addition, we discussed my struggles with sanding the 3D prints. Patricia recommended trying a lacquer or coating to smooth out the print lines, potentially eliminating the need for sanding altogether.
Patricia Tutorial
17th February 2025

During my tutorial with Patricia, I showed her the 3D print I had created using Rhino, Fusion, and Blender. We both agreed that this iteration was much more refined. Now that I had established a solid workflow, I could continue to make additional prints once my bacterial samples had fully developed.
I then shared my concerns about the project, particularly my uncertainty regarding the final design. I typically work best when I have a clear vision of the final piece, as it allows me to reverse-engineer the process. To help with this, Patricia and I experimented with different compositions using the 3D-printed shapes and paper, which ended up being incredibly helpful. This helped me visualise what my final outcomes could be.
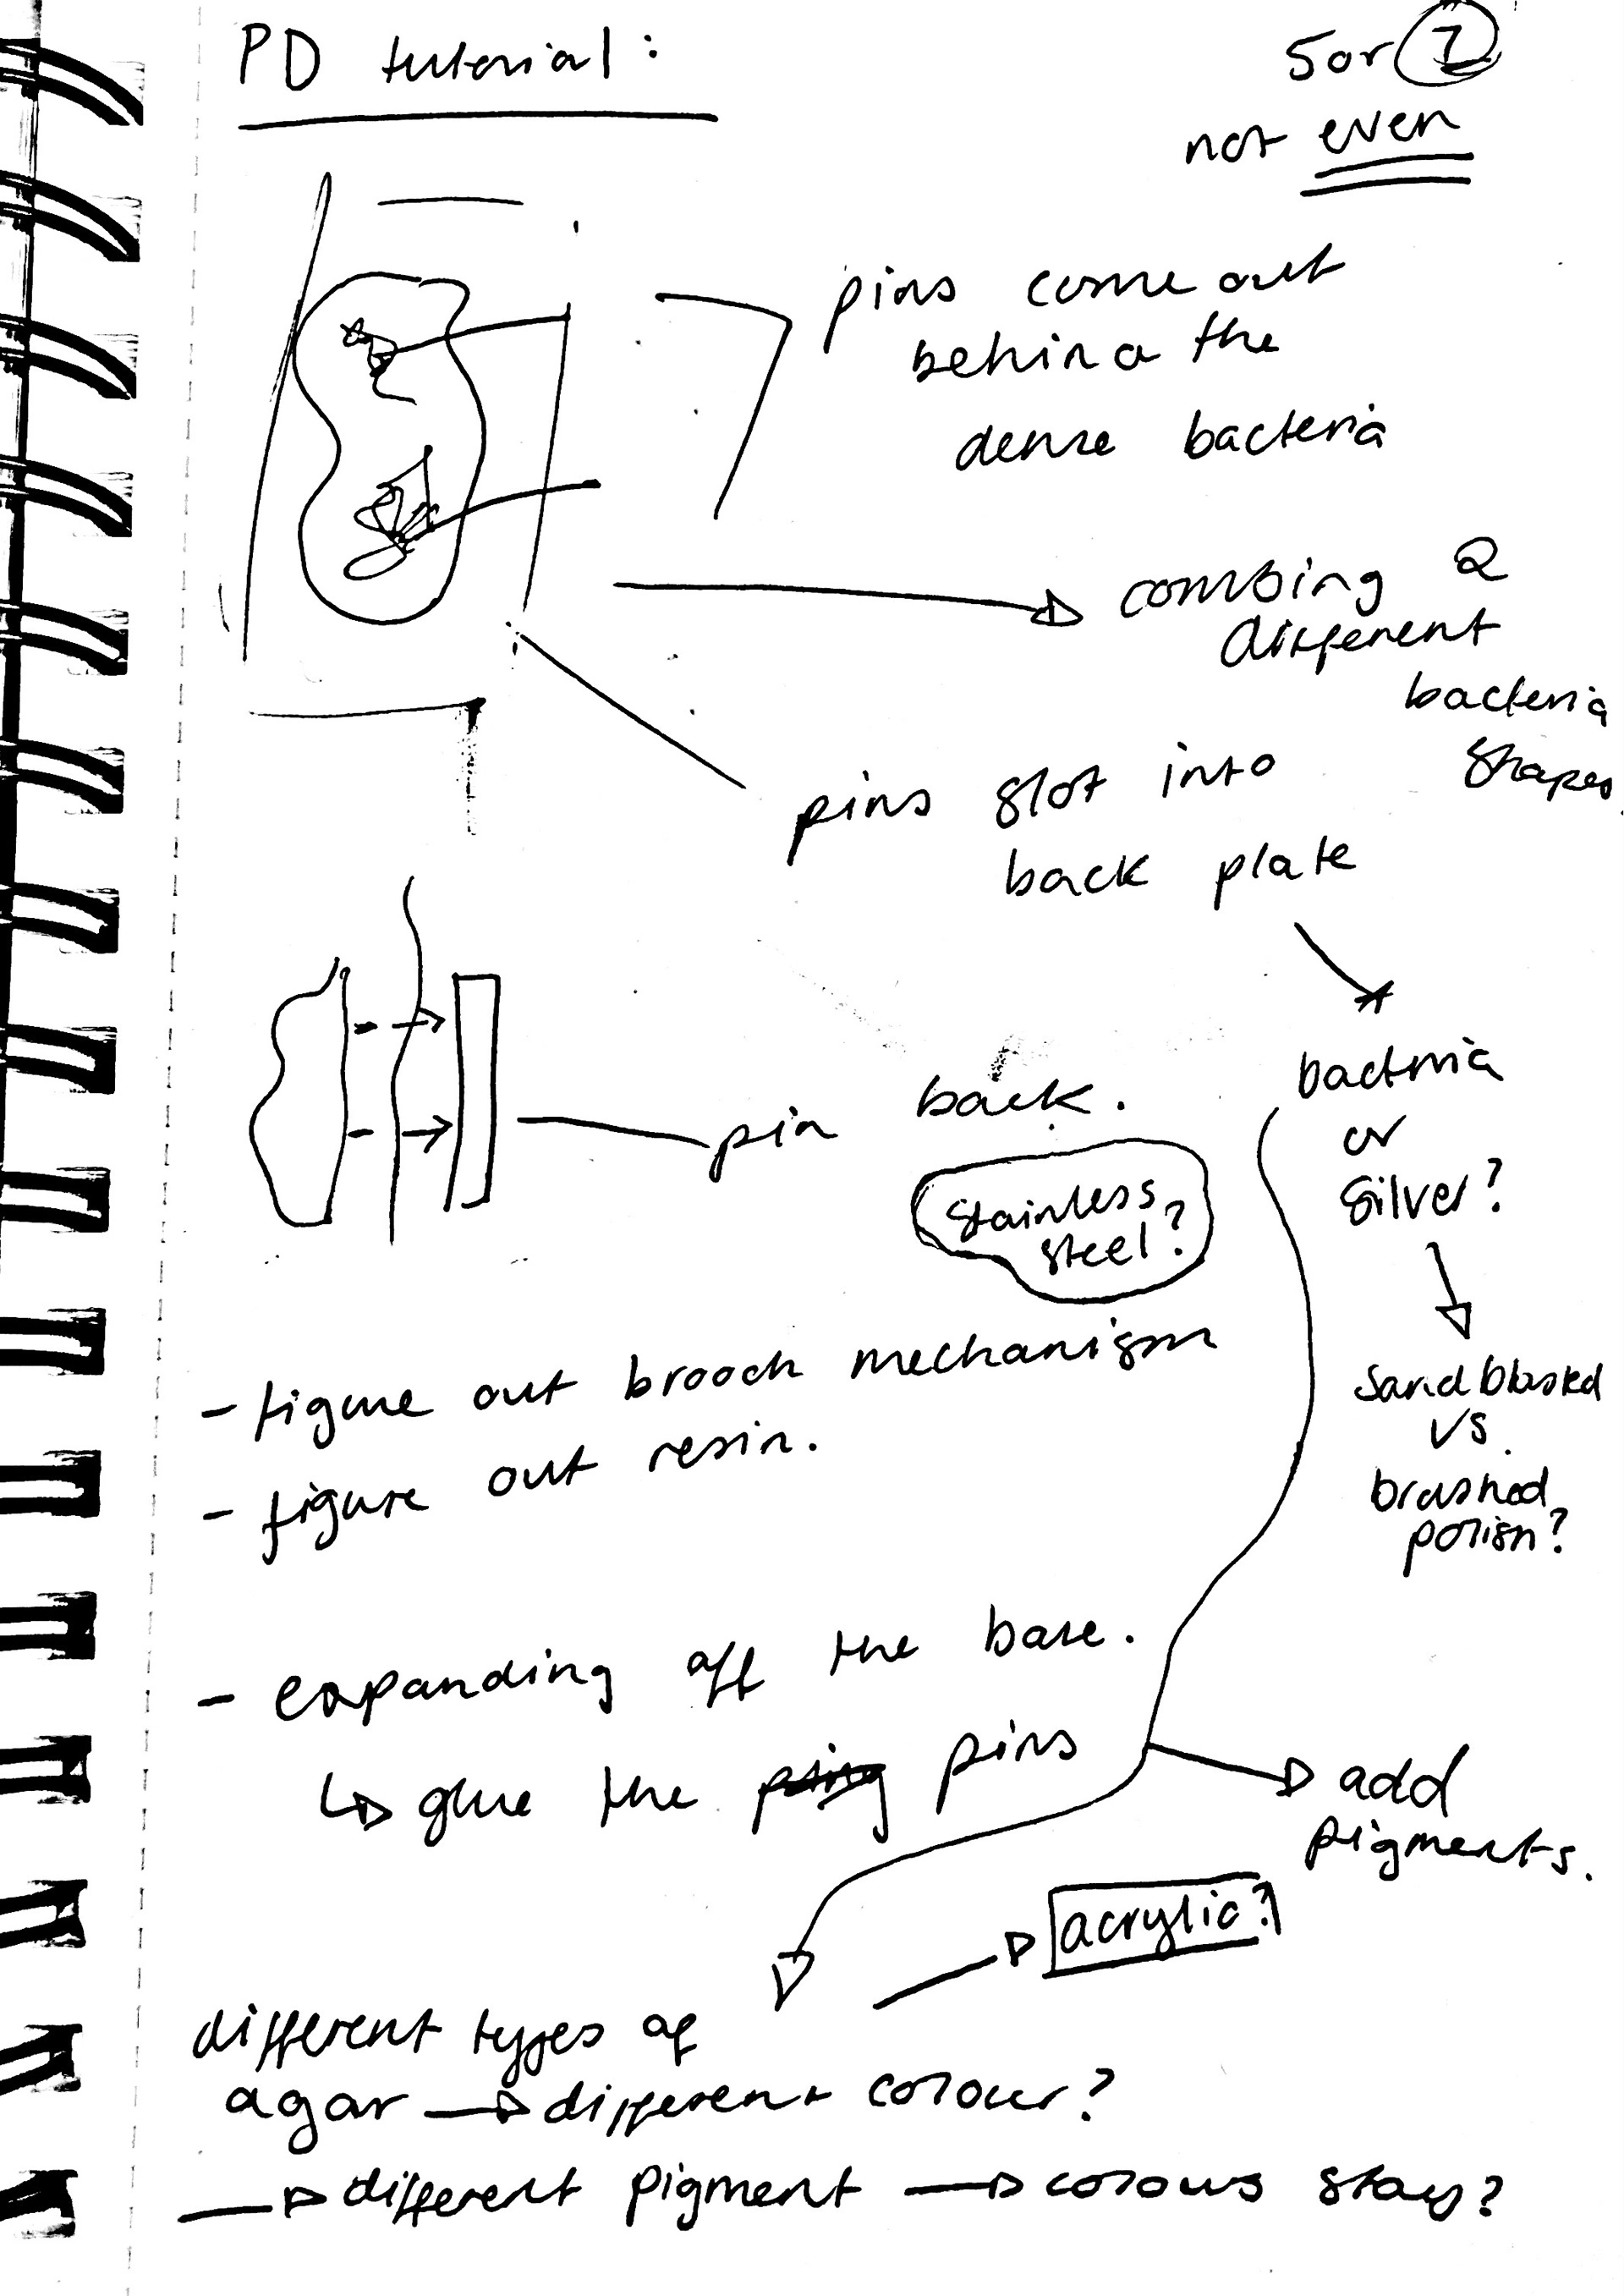
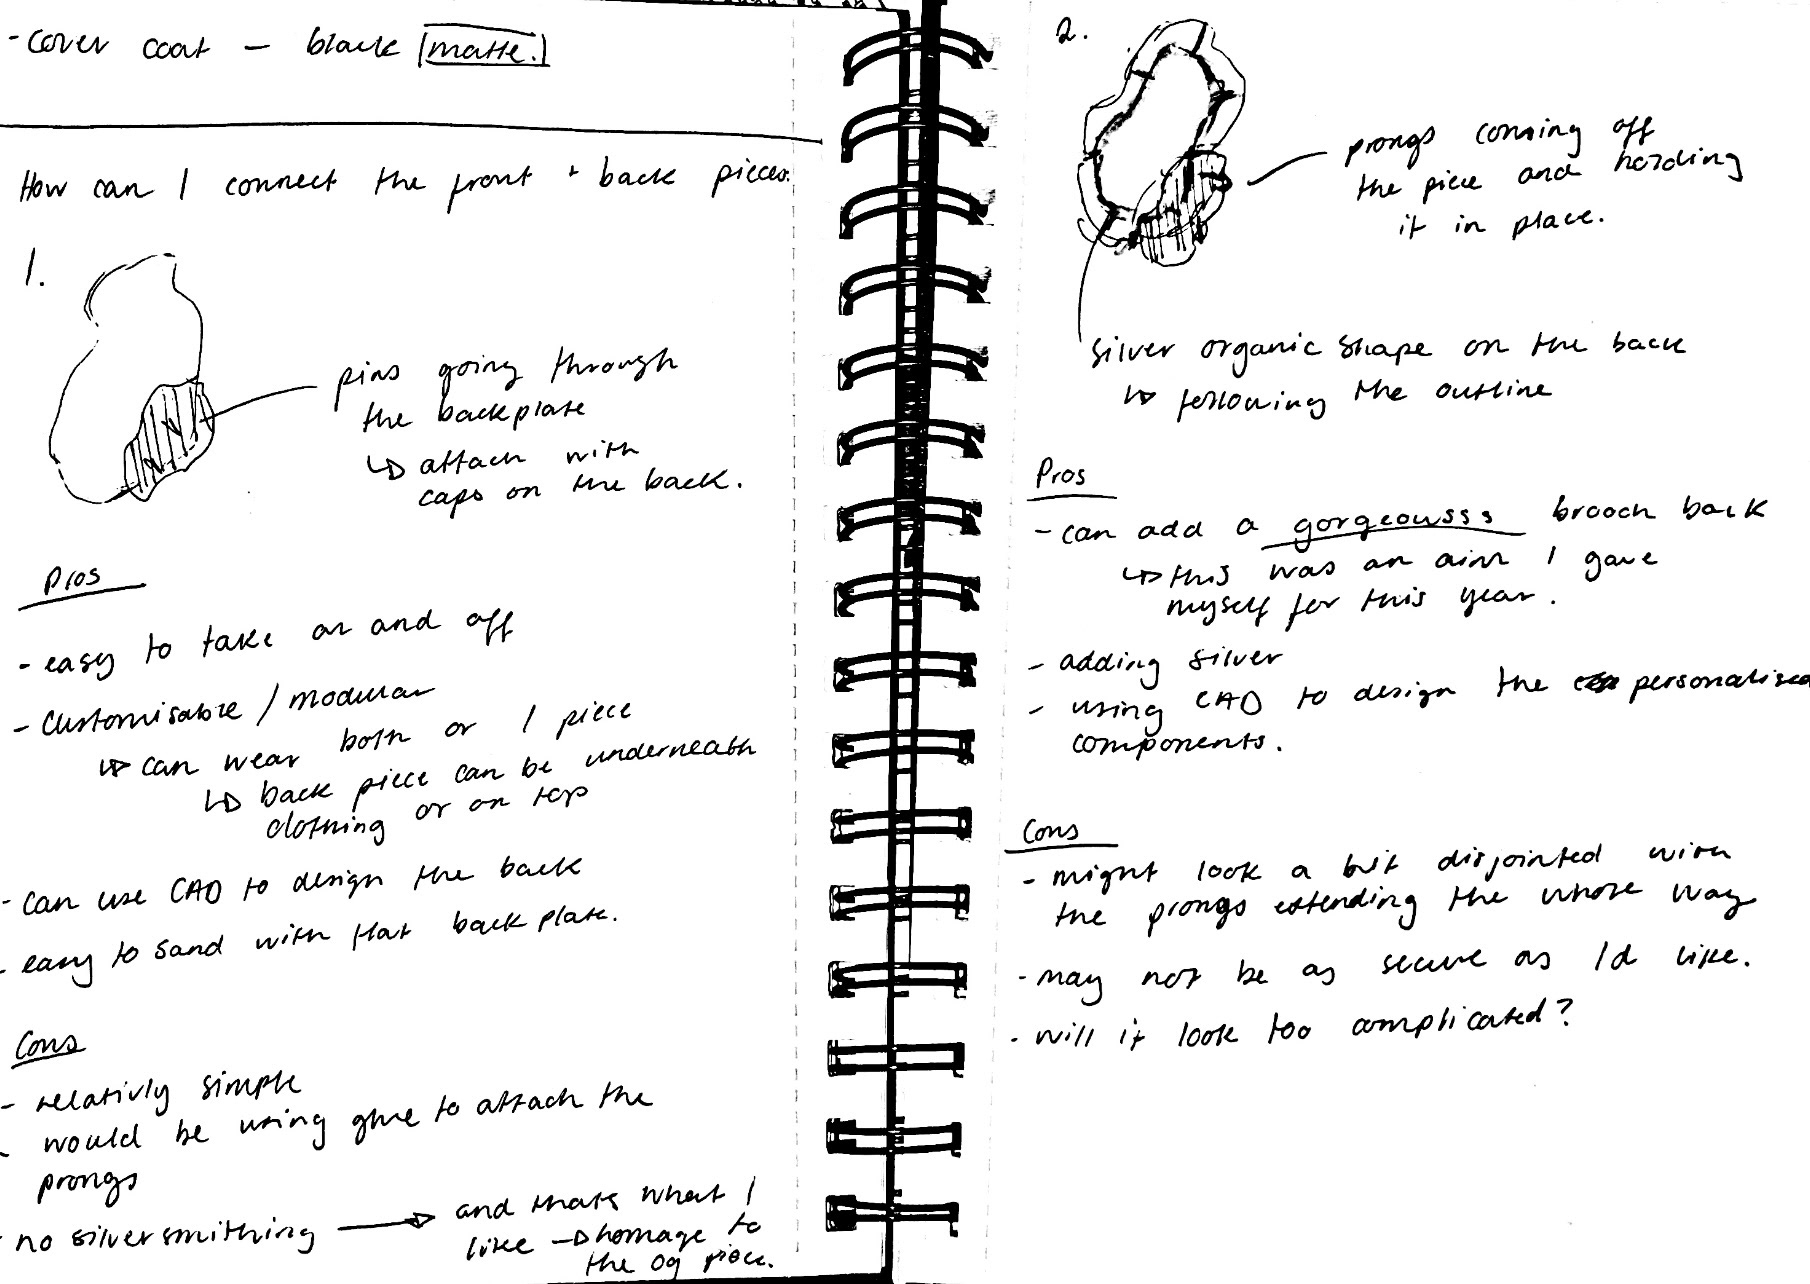
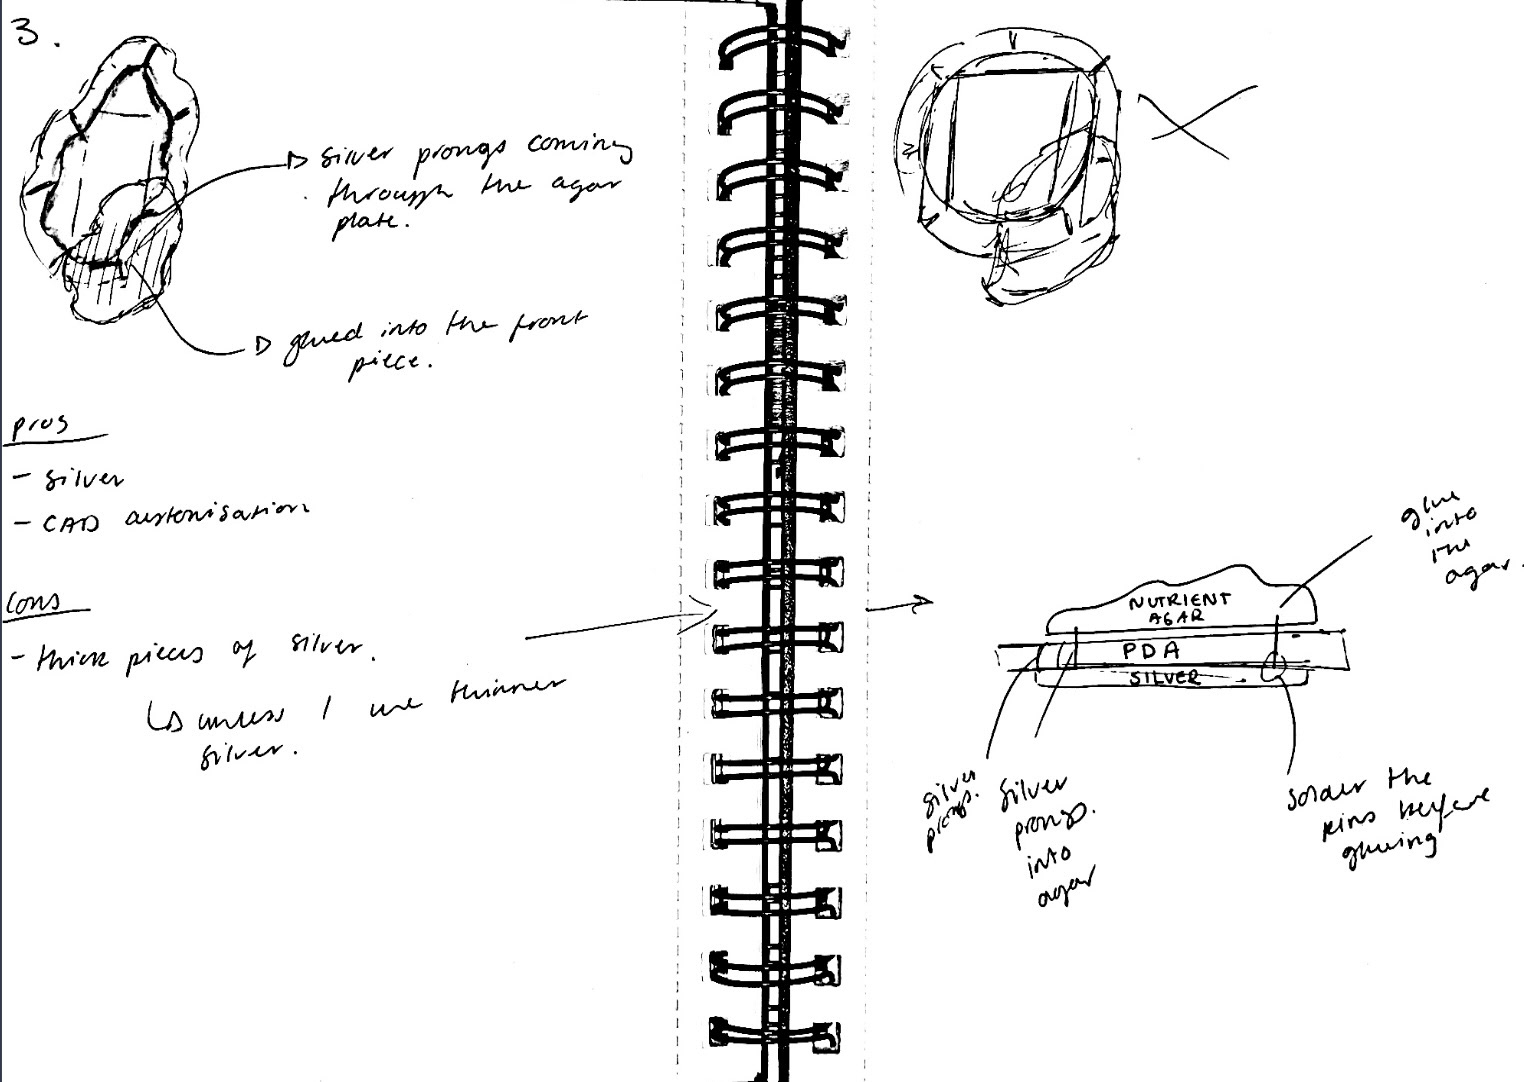
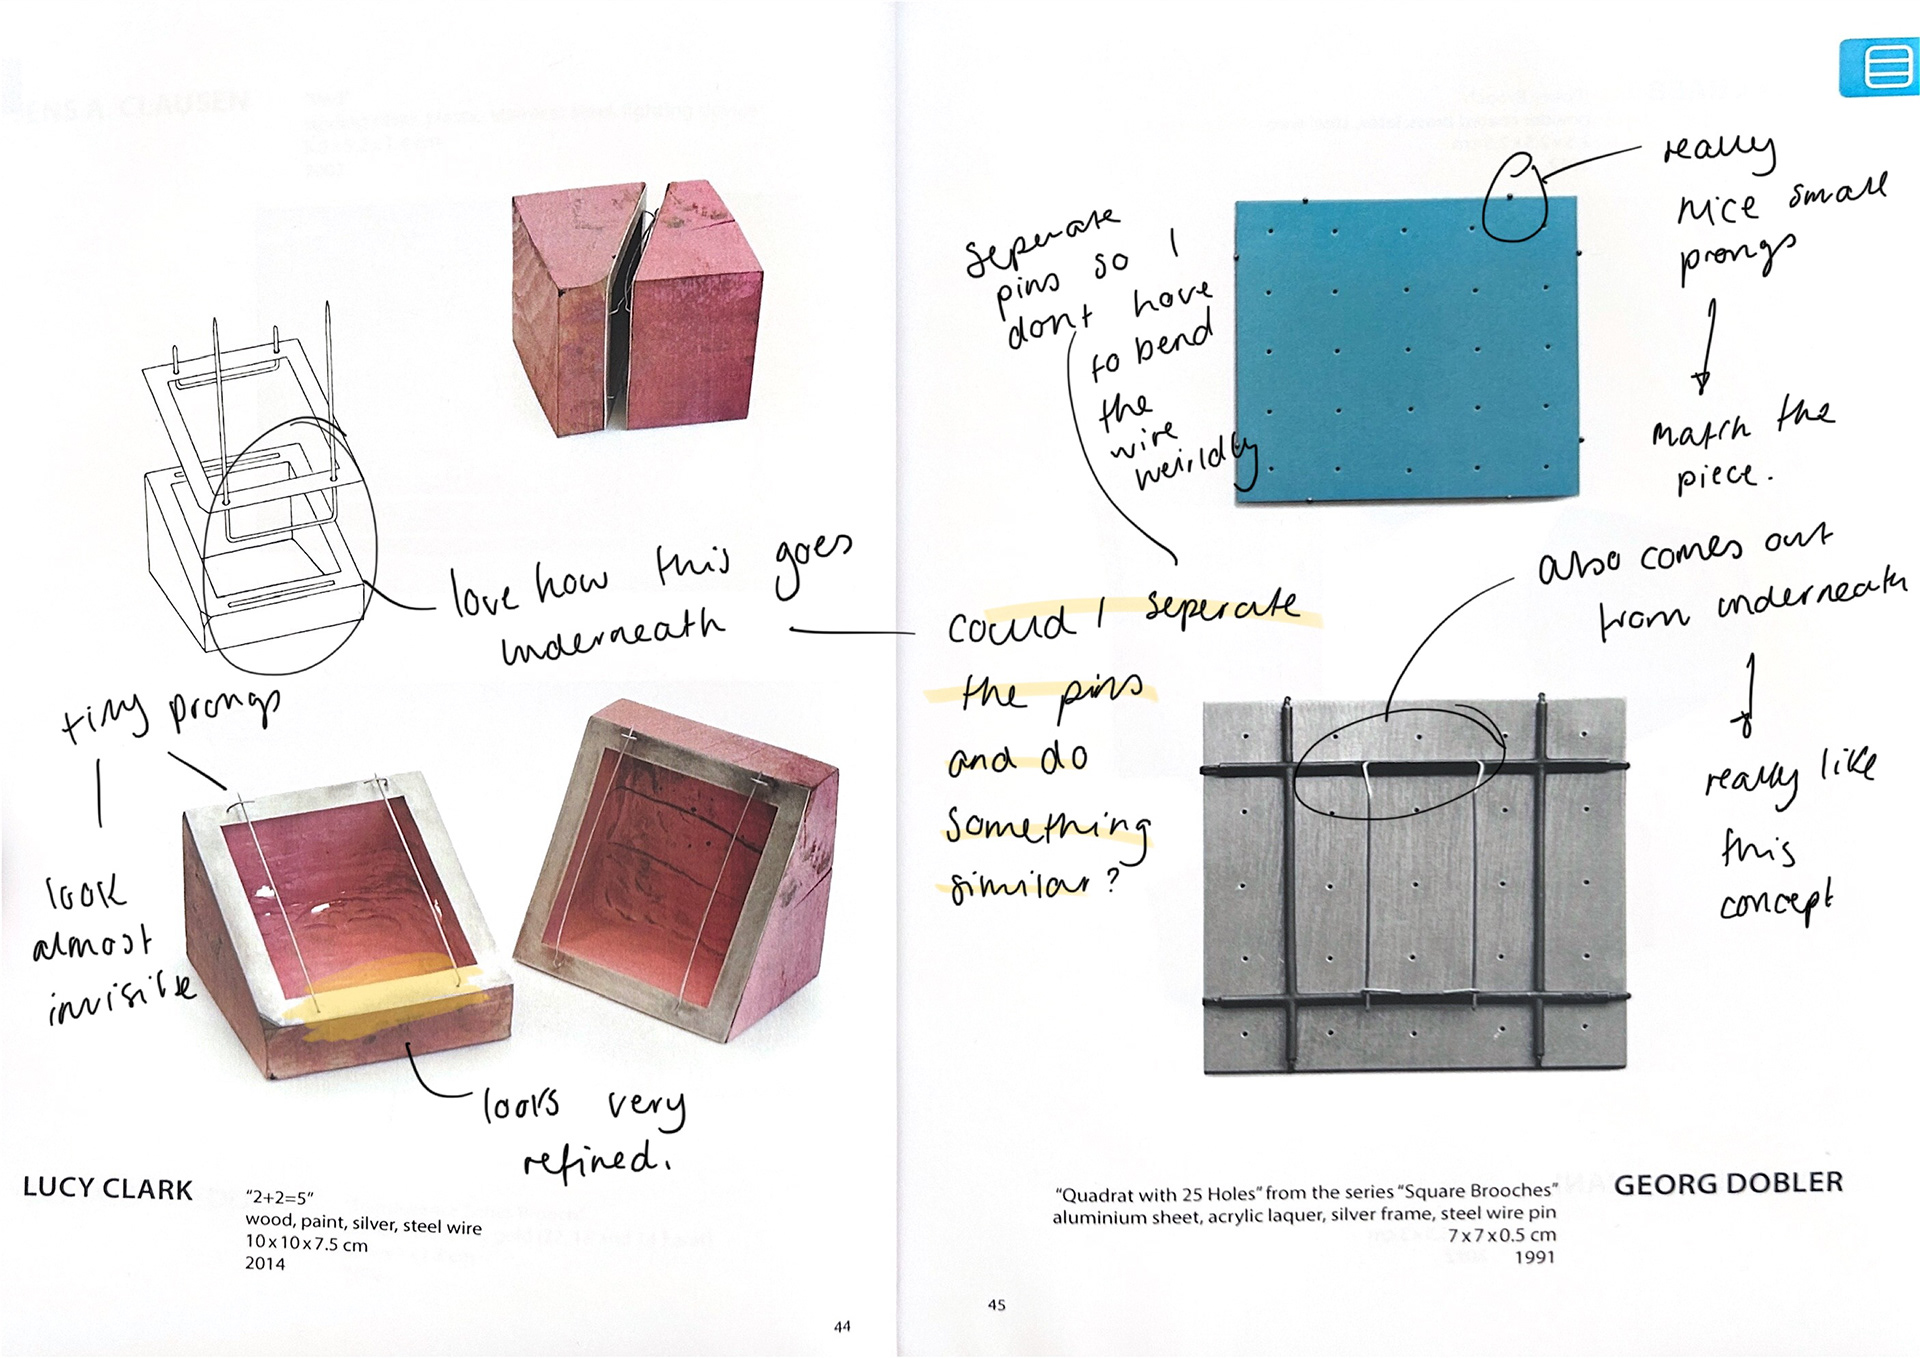
Patricia also suggested that the final series of brooches could consist of two distinct components: a front piece featuring bacteria grown within the 3D-printed shapes, and a flat back piece with an organic outline derived from the bacterial forms (also made from bacteria but using a different type of agar).
Rather than using a traditional silver backing, the brooches will have pins extending directly from the agar, eliminating the need for soldering a separate mechanism. This approach should create a more seamless appearance. The back plate will be designed with holes throughout, allowing the pins from the front piece to pass through and secure both elements together. This structure would also provide the wearer with the flexibility to either display both components or tuck the back piece beneath their clothing.
Additionally, the back piece will feature chamfered edges around the pinholes, ensuring a precise and seamless fit. While there are multiple ways to achieve this, I believe that 3D printing the back plate and creating a silicone mold for the agar and resin will be the most accurate and effective approach.
Different Agars
17th February 2025
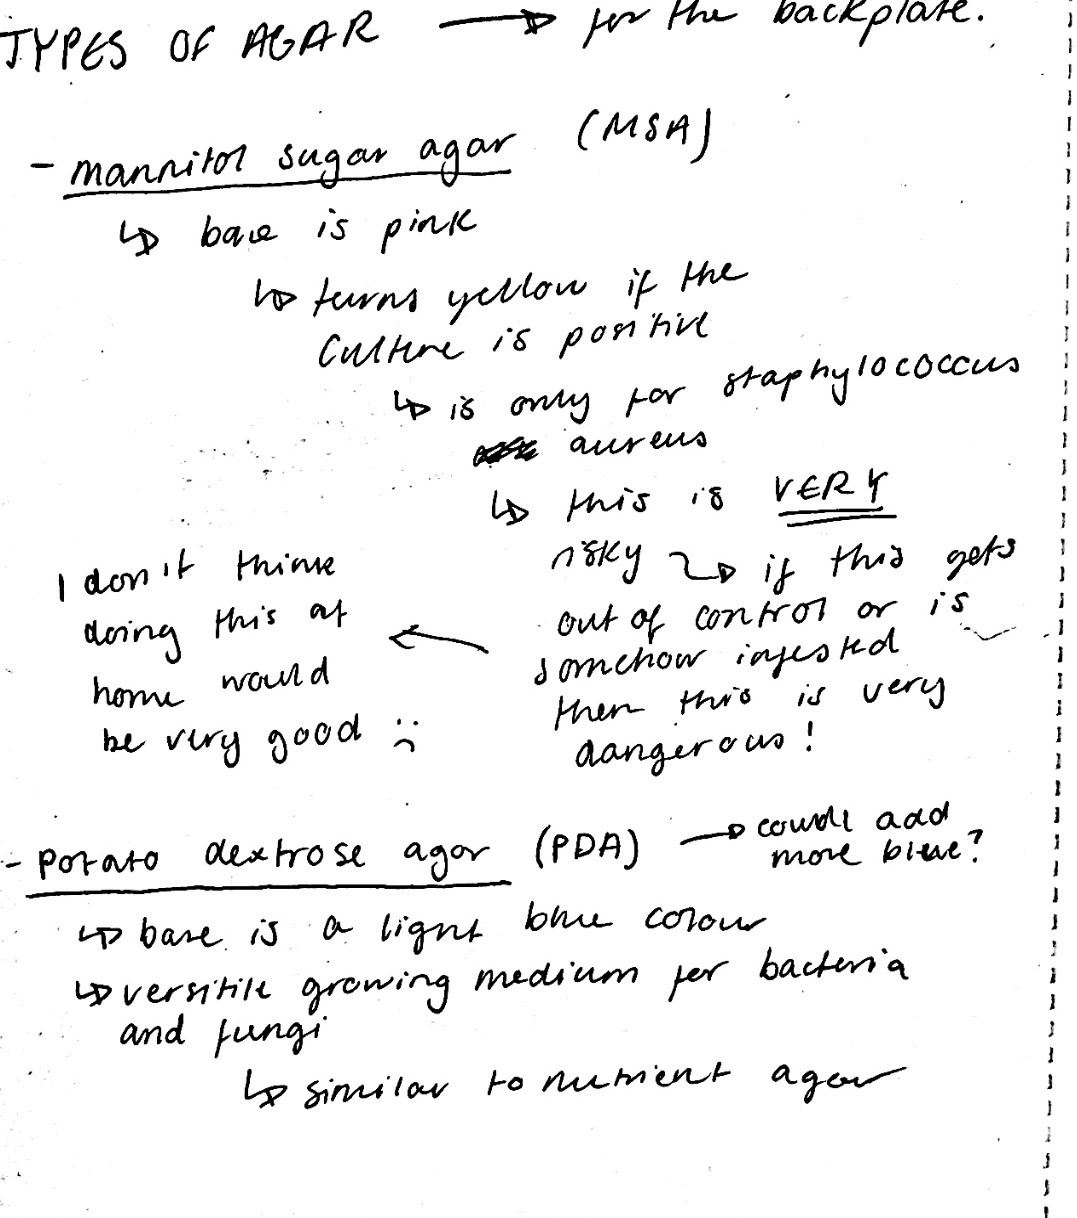

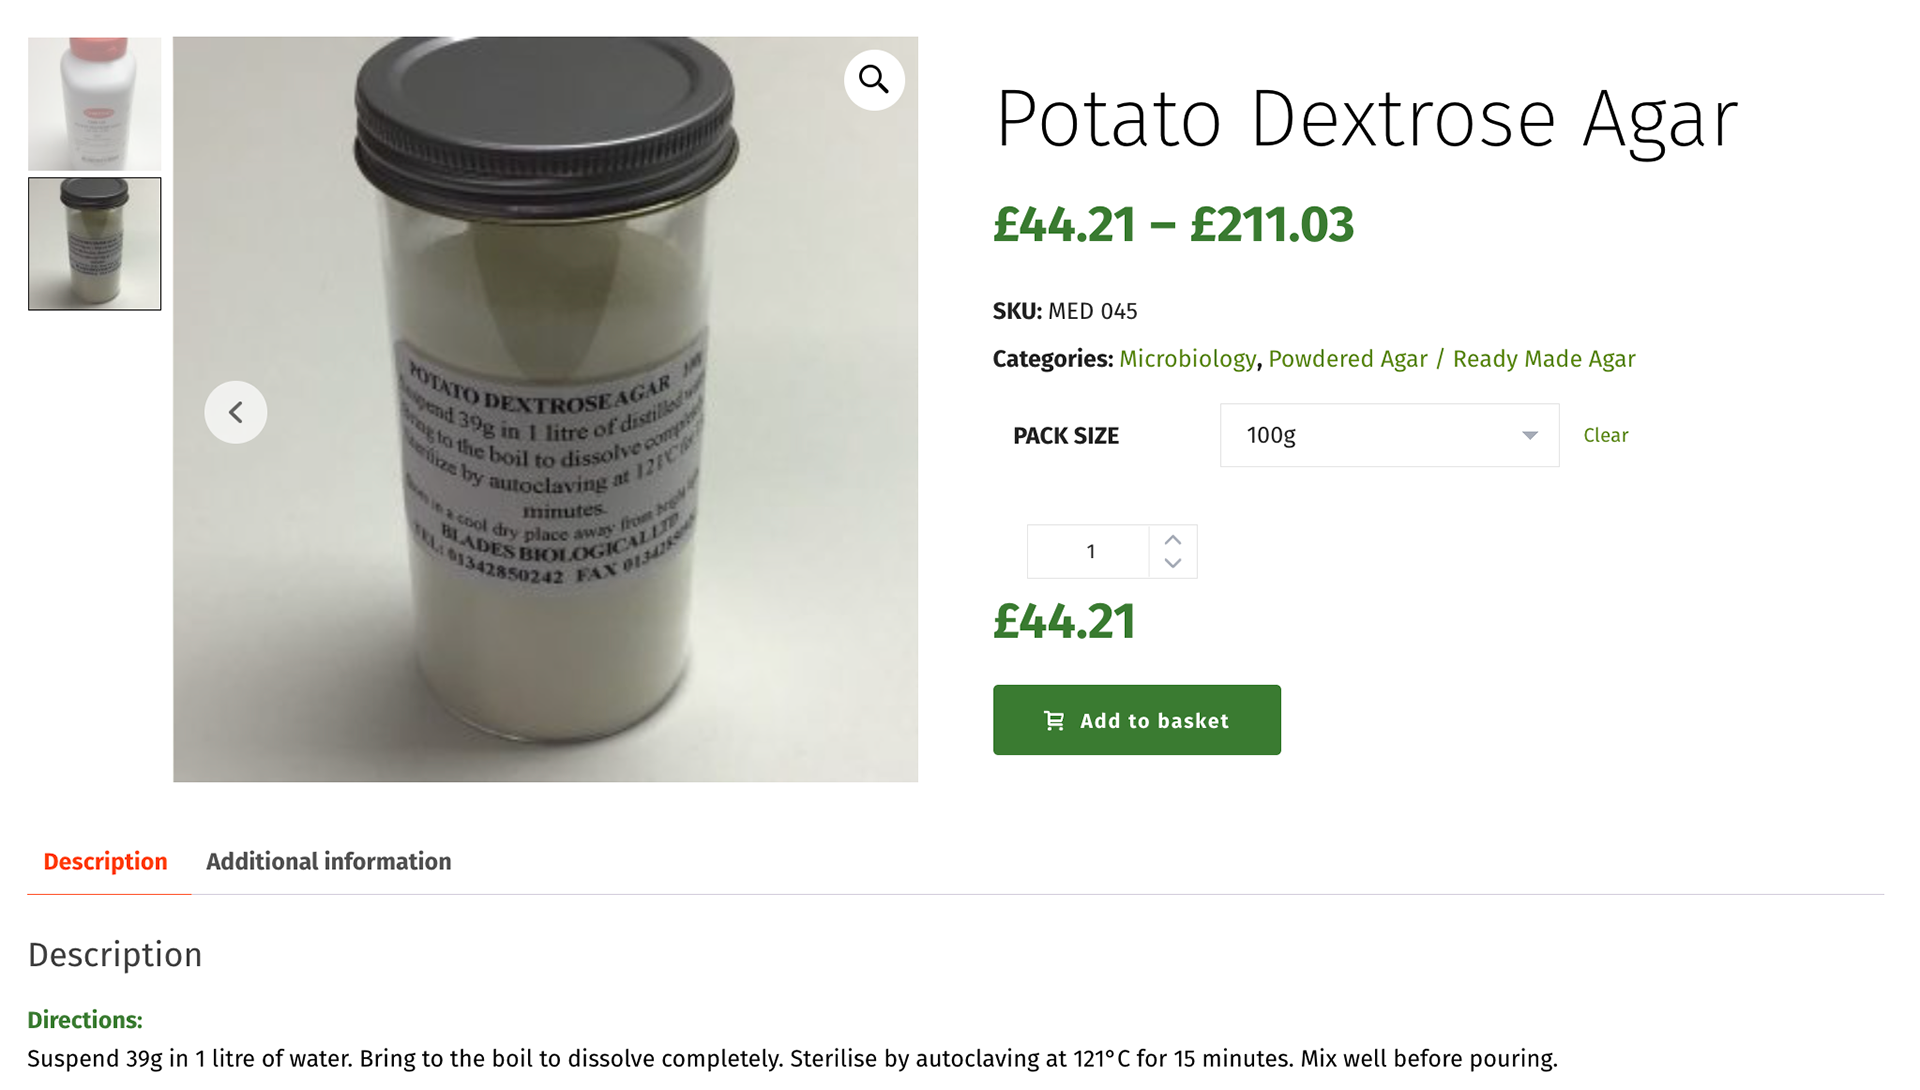
Mannitol Sugar Agar
Potato Dextrose Agar
After my tutorial with Patricia, we discussed the idea of using a different backplate for my designs. While I had previously dyed agar during the Beta Project, I was aware that the food dyes I had used could change colour over time. To explore a more stable alternative, I decided to order pigment powder to see if it would be more effective than traditional food dyes.
I also considered the possibility of using different types of agar, as many varieties have distinct base colours and can change shades depending on the bacterial culture grown on them. Through my research, I identified two potential options that could be prepared in the same way as nutrient agar.
The first option, Mannitol Salt Agar (MSA), has a bright pink base that turns yellow when a specific culture is present. However, the bacteria required to induce this colour change is Staphylococcus aureus. While Staph is not inherently dangerous in small amounts, it can cause infections if it enters an open wound. Although the risk of this happening is low, I ultimately decided it wasn’t worth taking.
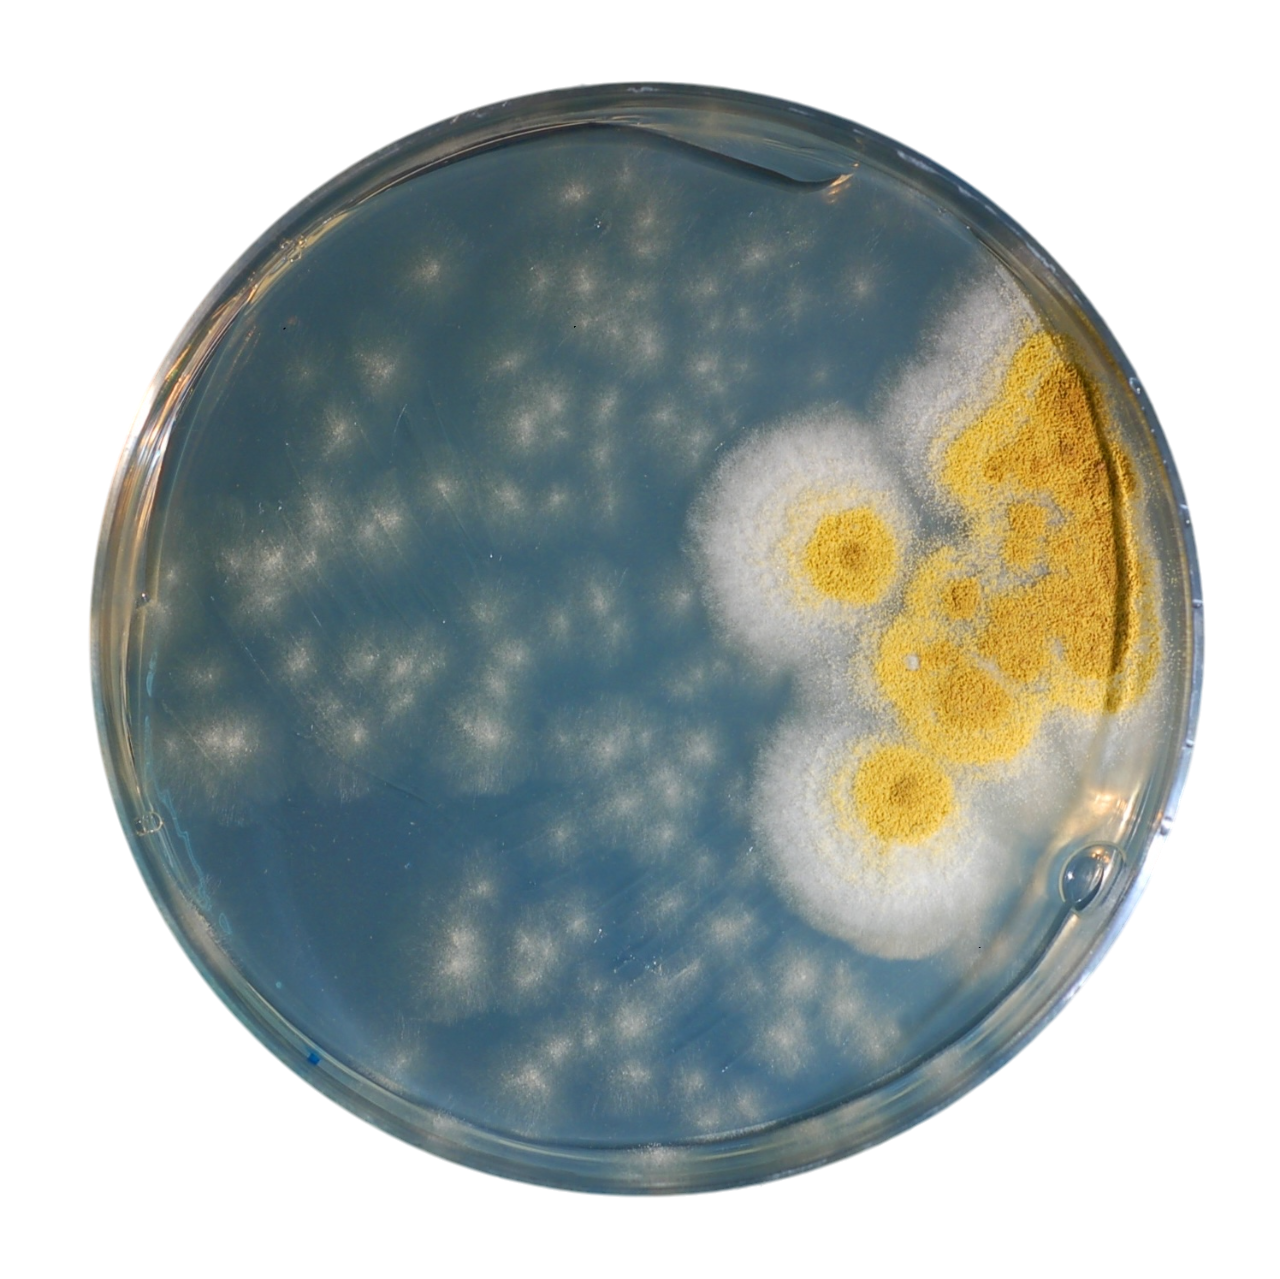
The second option, Potato Dextrose Agar (PDA), has a light blue hue and is a non-selective medium, similar to nutrient agar. It effectively supports the growth of various bacteria and fungi without posing the same risks as MSA.
After weighing my options, I chose to order Potato Dextrose Agar. This will allow me to achieve similar results while maintaining a safer working environment. Additionally, using a different type of agar presents an opportunity to explore how bacterial growth varies across different growth mediums—something I haven’t experimented with before but am looking forward to seeing the results.
Refined Project Idea
At this stage in my project, I am finally beginning to refine my concept and gain a clearer understanding of the direction I want to take. I have decided that my work will revolve around creating a collection of brooches incorporating bacterial growth, but I realise I haven't fully articulated the process I will be using to achieve this.
My approach involves cultivating bacteria over a series of days, tracing the organic patterns that the bacteria grows in. These formations will serve as the basis for my designs. I will take these shapes into CAD (Rhino and Blender), using them to create models for silicone moulds for 3D agar shapes. Once the moulds are made, I will take fresh samples from the same bacterial source and swab these onto the agar shapes. These bacterial cultures will then be sealed with resin at the same time point as the original tracing.
For example, if I trace bacterial growth patterns on day 3 and use them to design my CAD models, I will then grow bacteria on custom-shaped agar plates derived from those models. The new bacterial cultures will also be sealed with resin on day 3, preserving the bacteria at the same stage of development as in the original experiment. This method will allow me to create a direct visual and material connection between the bacterial growth process and the final wearable pieces.
In terms of materials, I plan to use Potato Dextrose Agar for the backplates (assuming my current experiments with it work) and Nutrient Agar for the front section. These components will be assembled into brooches, following the process I explained after my tutorial with Patricia (17/2/25).
However, one key decision I still need to make is determining the source of my bacterial samples. For the initial experiments, I have been swabbing pieces of jewellery to collect bacteria, but I am now considering shifting my focus to the body itself. This would mean swabbing directly from the skin to explore the natural bacterial extensions of the human body. Each approach has its own set of advantages and challenges. Swabbing jewellery ties the work to personal objects and the unseen microbial traces we leave behind while swabbing the body directly might create a more intimate connection to the wearer.
I need to make this decision soon, but with whichever path I choose, I am excited to continue refining my process and pushing the boundaries of how bacteria, jewellery, and material preservation intersect.
End of Week 4 Reflection
By the end of week 4 I was not happy with my progress. I did not feel as if I had been doing enough making, as the CAD had been taking so much longer than I thought. With this said however, I do feel much more prepared for the rest of the project than I was at the start of week 4. I have spent the past week trying to figure out what my project actually is, and what I want to make. I knew at the start of the project that I wanted to continue making brooches, however I was not sure what these brooches would look like. After the laser cutting experiments, I have a much clearer vision in my head which is a positive.
The experiments with bacteria and timescale were also very intriguing and is something I plan to explore more.
I have planned to give myself approximately 6 weeks of making, which allows for a 2-week contingency, enough time to make more moulds and grow more bacteria if something were to go wrong, meaning that I have another week of testing before I need to start culturing my bacteria and using CAD to make the models. The reason I have allowed so much time for making is because of the resin polishing process. These pieces need to be perfectly polished, which as I found out in Unit X, can take a very long time. I will also be making all of my brooches simultaneously as I did in Unit X, as this is much quicker.
If I stick with the idea of using time, then I plan to have 7 brooches, 1 brooch for each day of growth. I need to decide whether I start the days from when the bacteria starts to grow (resulting in the first 2 days being virtually empty) or from the first day of growth, which would make the shapes much easier to make as there would be bacteria to reference.
I need to spend week 5 making a prototype of the brooch mechanism to see what adjustments might need to be made during the modelling process, as well as focusing on the bacteria experiments.
Looking at my Work
25th February 2025
Throughout this project, I have found it incredibly challenging to pinpoint exactly what I want to create. I knew from the start that I wanted to make brooches, as I set this as a technical challenge for myself. However, determining the theme for this project was far more difficult. The only certainty I had was the idea of exploring how bacteria as a physical extension, an area I had previously looked at within DC3.
Patricia played a crucial role in helping me refine my ideas. She helped me lay out all of my work, examining and interrogating each piece, and questioning my creative decisions. This process allowed me to better understand why I create what I do and how this could lead to new directions.
Through this, I realised that the bacteria I swab come from three distinct sources: people, places, and objects. Personally, I see these elements as fundamental to my identity and my motivations as a maker. They shape my creative practice and inspire the narratives I wish to communicate through my work.
Patricia suggested that I could develop three separate projects to fully explore each of these themes, however, I ultimately decided against it. I knew I needed to focus entirely on one direction in order to do it justice. After much consideration, I found myself most drawn to the theme of objects, aligning closely with my previous Unit X project.
I have always been fascinated by the relationship people have with the jewellery they wear and how it becomes an extension of themselves, carrying personal significance and memories. Taking this concept further, I am intrigued by how bacteria, become an extension of these objects, adding an unseen layer to their meaning.
Laying out my work
Patricia suggested that I look at the bacterial extension of different objects, and from a curational perspective, laying the original objects next to the sample.
We spoke about how I could make the brooches using the same mechanism as last year, as there were many points and alterations I would make to the mechanism itself, and I really liked this idea.
I would also be able to add the 3D agar shapes that I had spent weeks figuring out how to make, which was also a positive. However, I was still slightly torn between using the circular shape of the petri dish, and the organic shapes of the bacteria grown. I thought back to a conversation I had with Patricia near the end of Unit X where she told me I was overcomplicating my design and that a simpler version of my design would work better. While I was very hesitant to change my design to a simpler version, it definitely worked out for the best.
Knowing this, I decided to start exploring my options.
Digital Drawings
26th February 2025
From the conversation with Patricia above, I began using digital drawings to see what my design could look like. I decided that the simple circular shape was a better shape overall, however, I knew that I needed to speak to Geoff about using the same mechanism as Unit X.
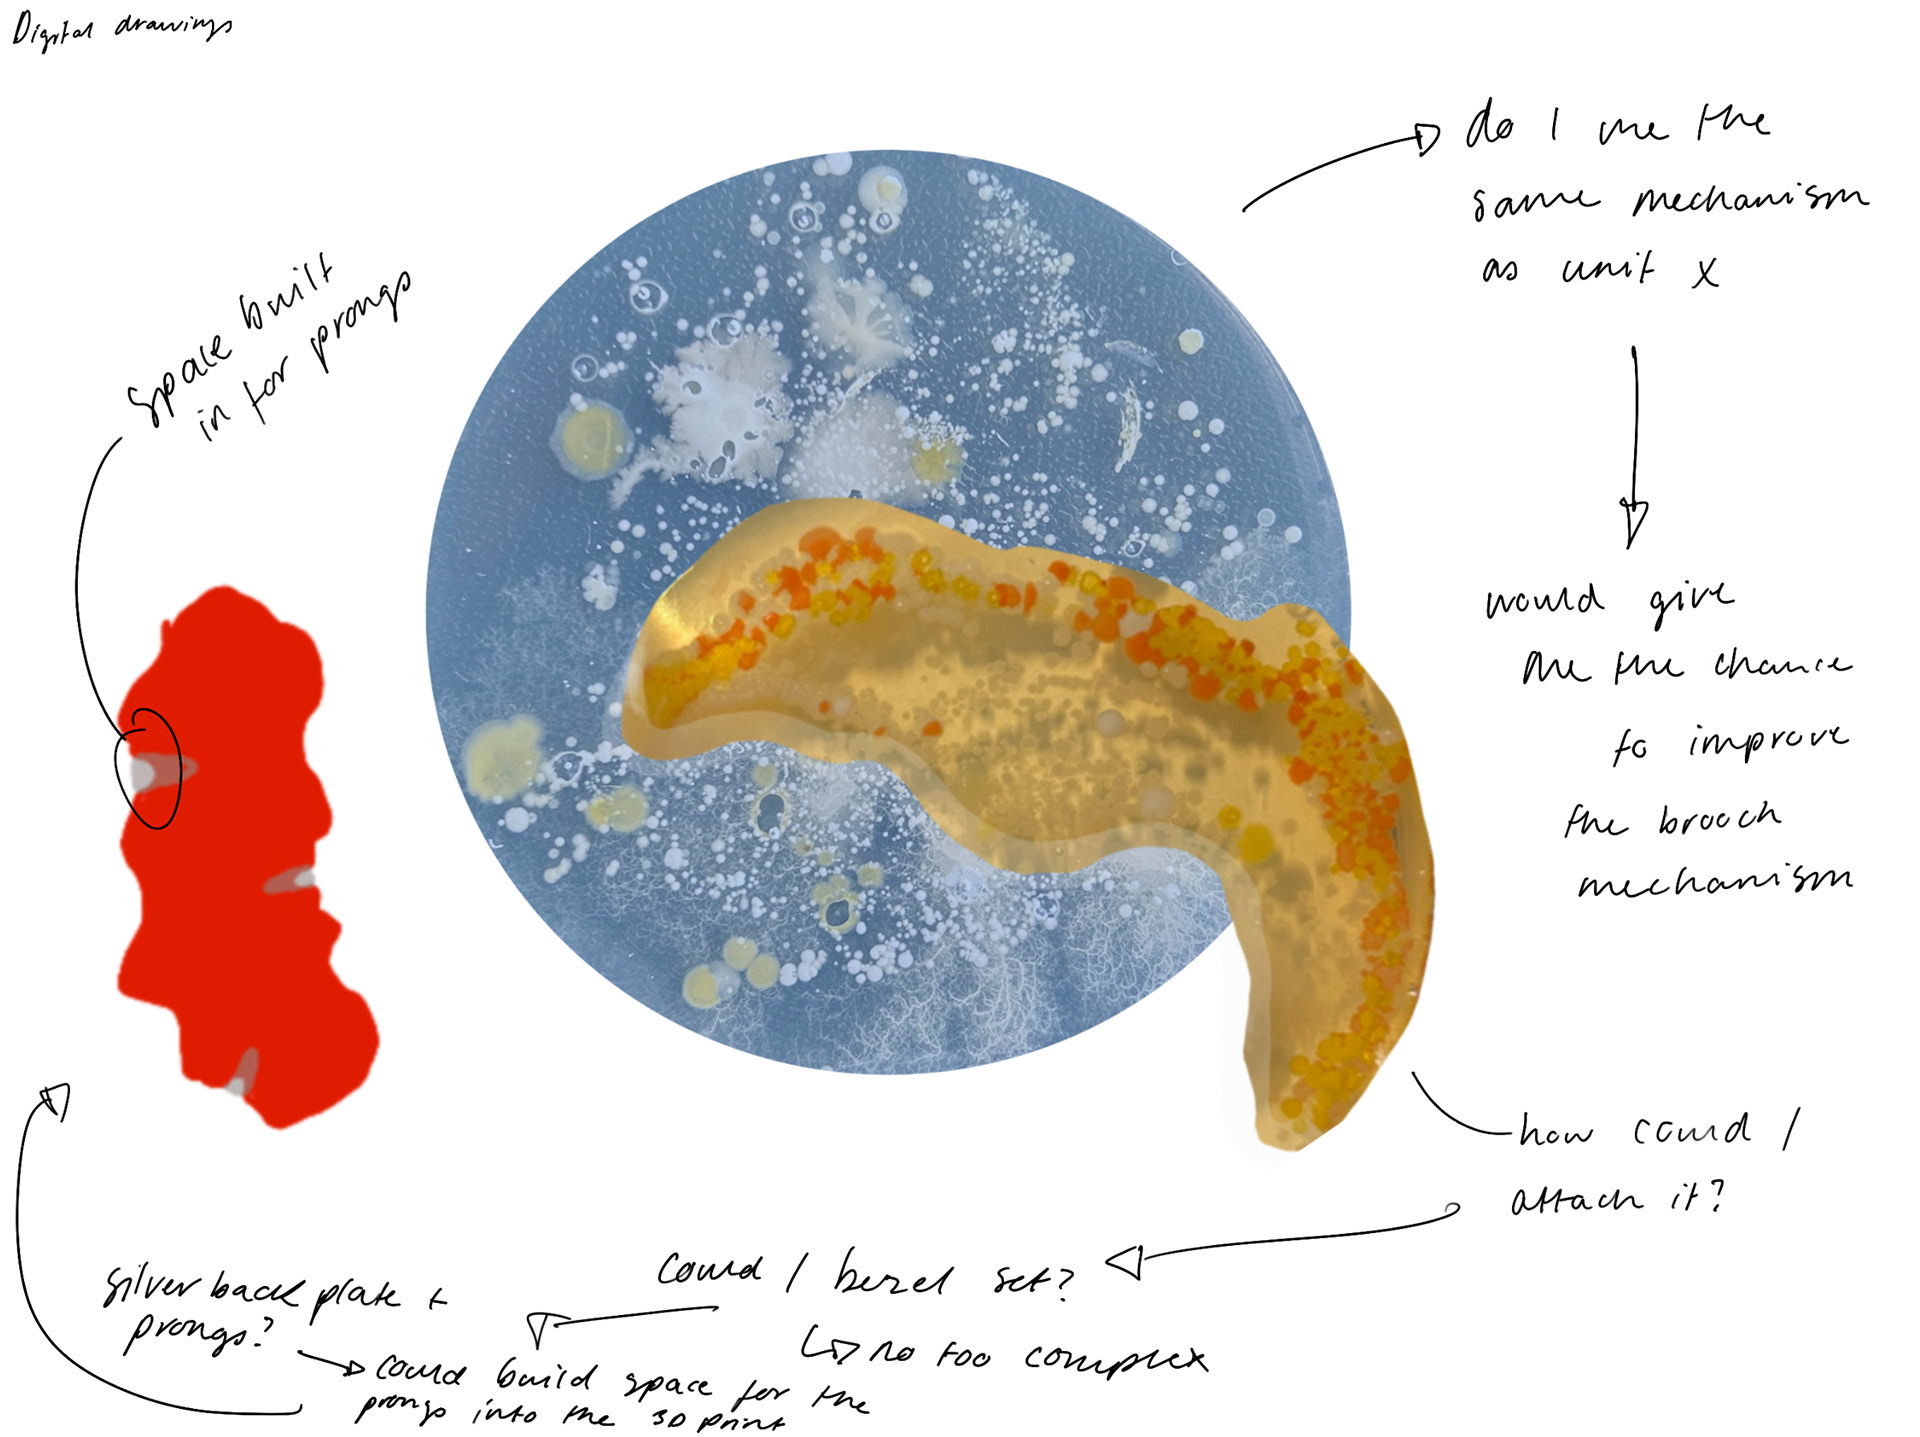
I spoke to Geoff about my idea, and unfortunately, he told me that while I could use the same mechanism, I would not get as many marks for idea generation, especially since I would be using the same theme as last time (swabbing objects). This feedback made me reconsider my approach, so I decided to revisit my ideas and explore a new direction.
From this, I decided to explore how bacteria on the objects we wear change over the span of a week.

This was another digital drawing I did using the actual shapes grown from the bacteria. Thankfully, I liked this outcome and how the brooch mechanism could work.
I would include a silver bezel inset into the resin, using similar techniques to that of my Unit X idea, but in a completely different way.
I would then attach a silver tube along the silver wire to add the brooch wire.
Collect Visit
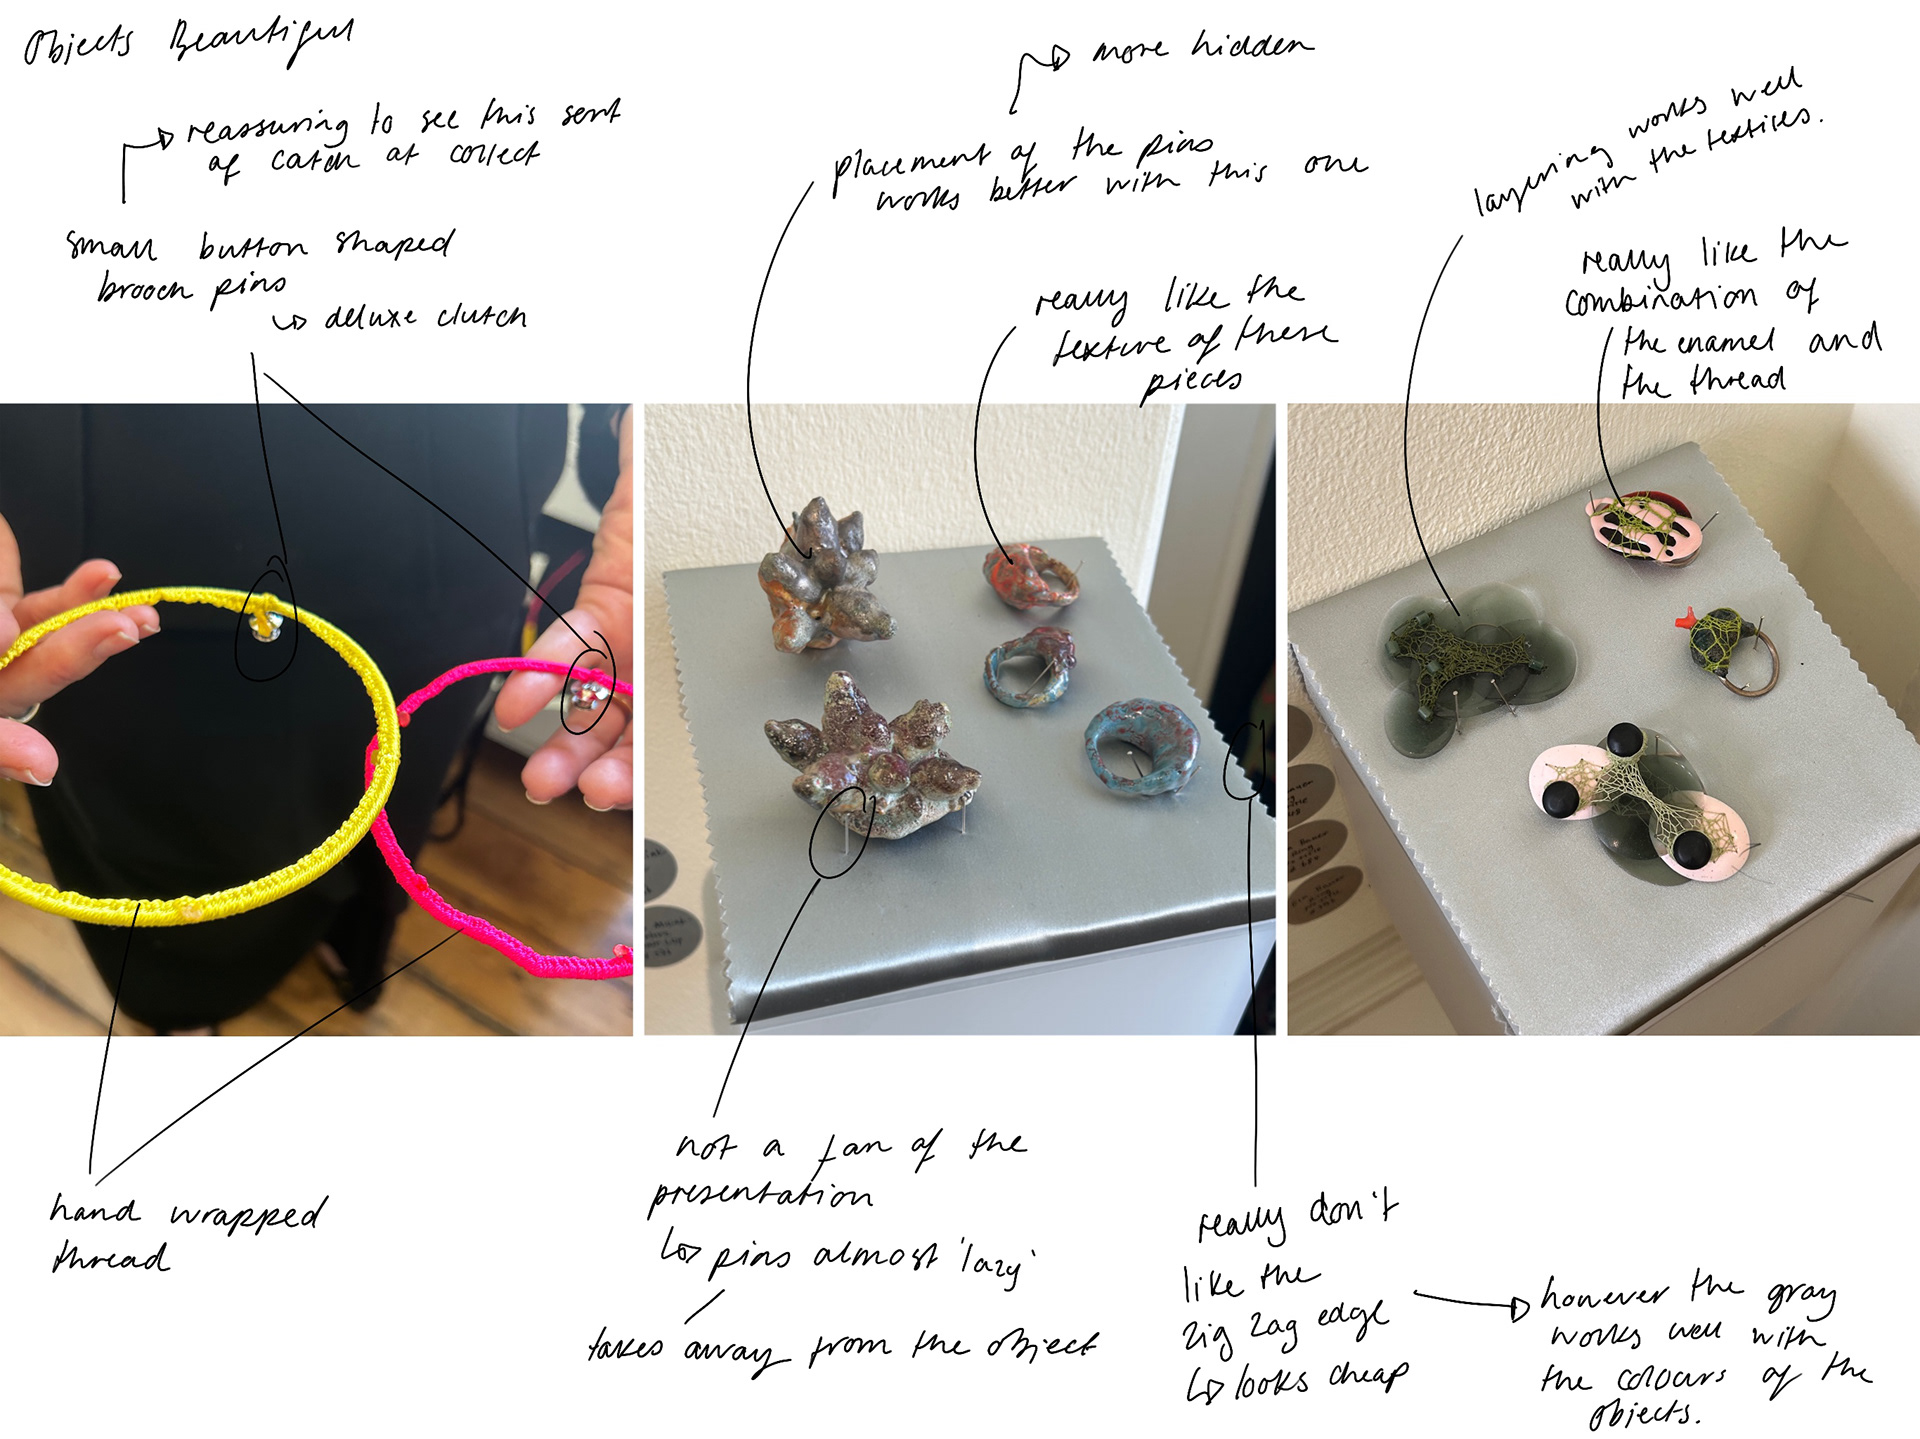
28th February 2025

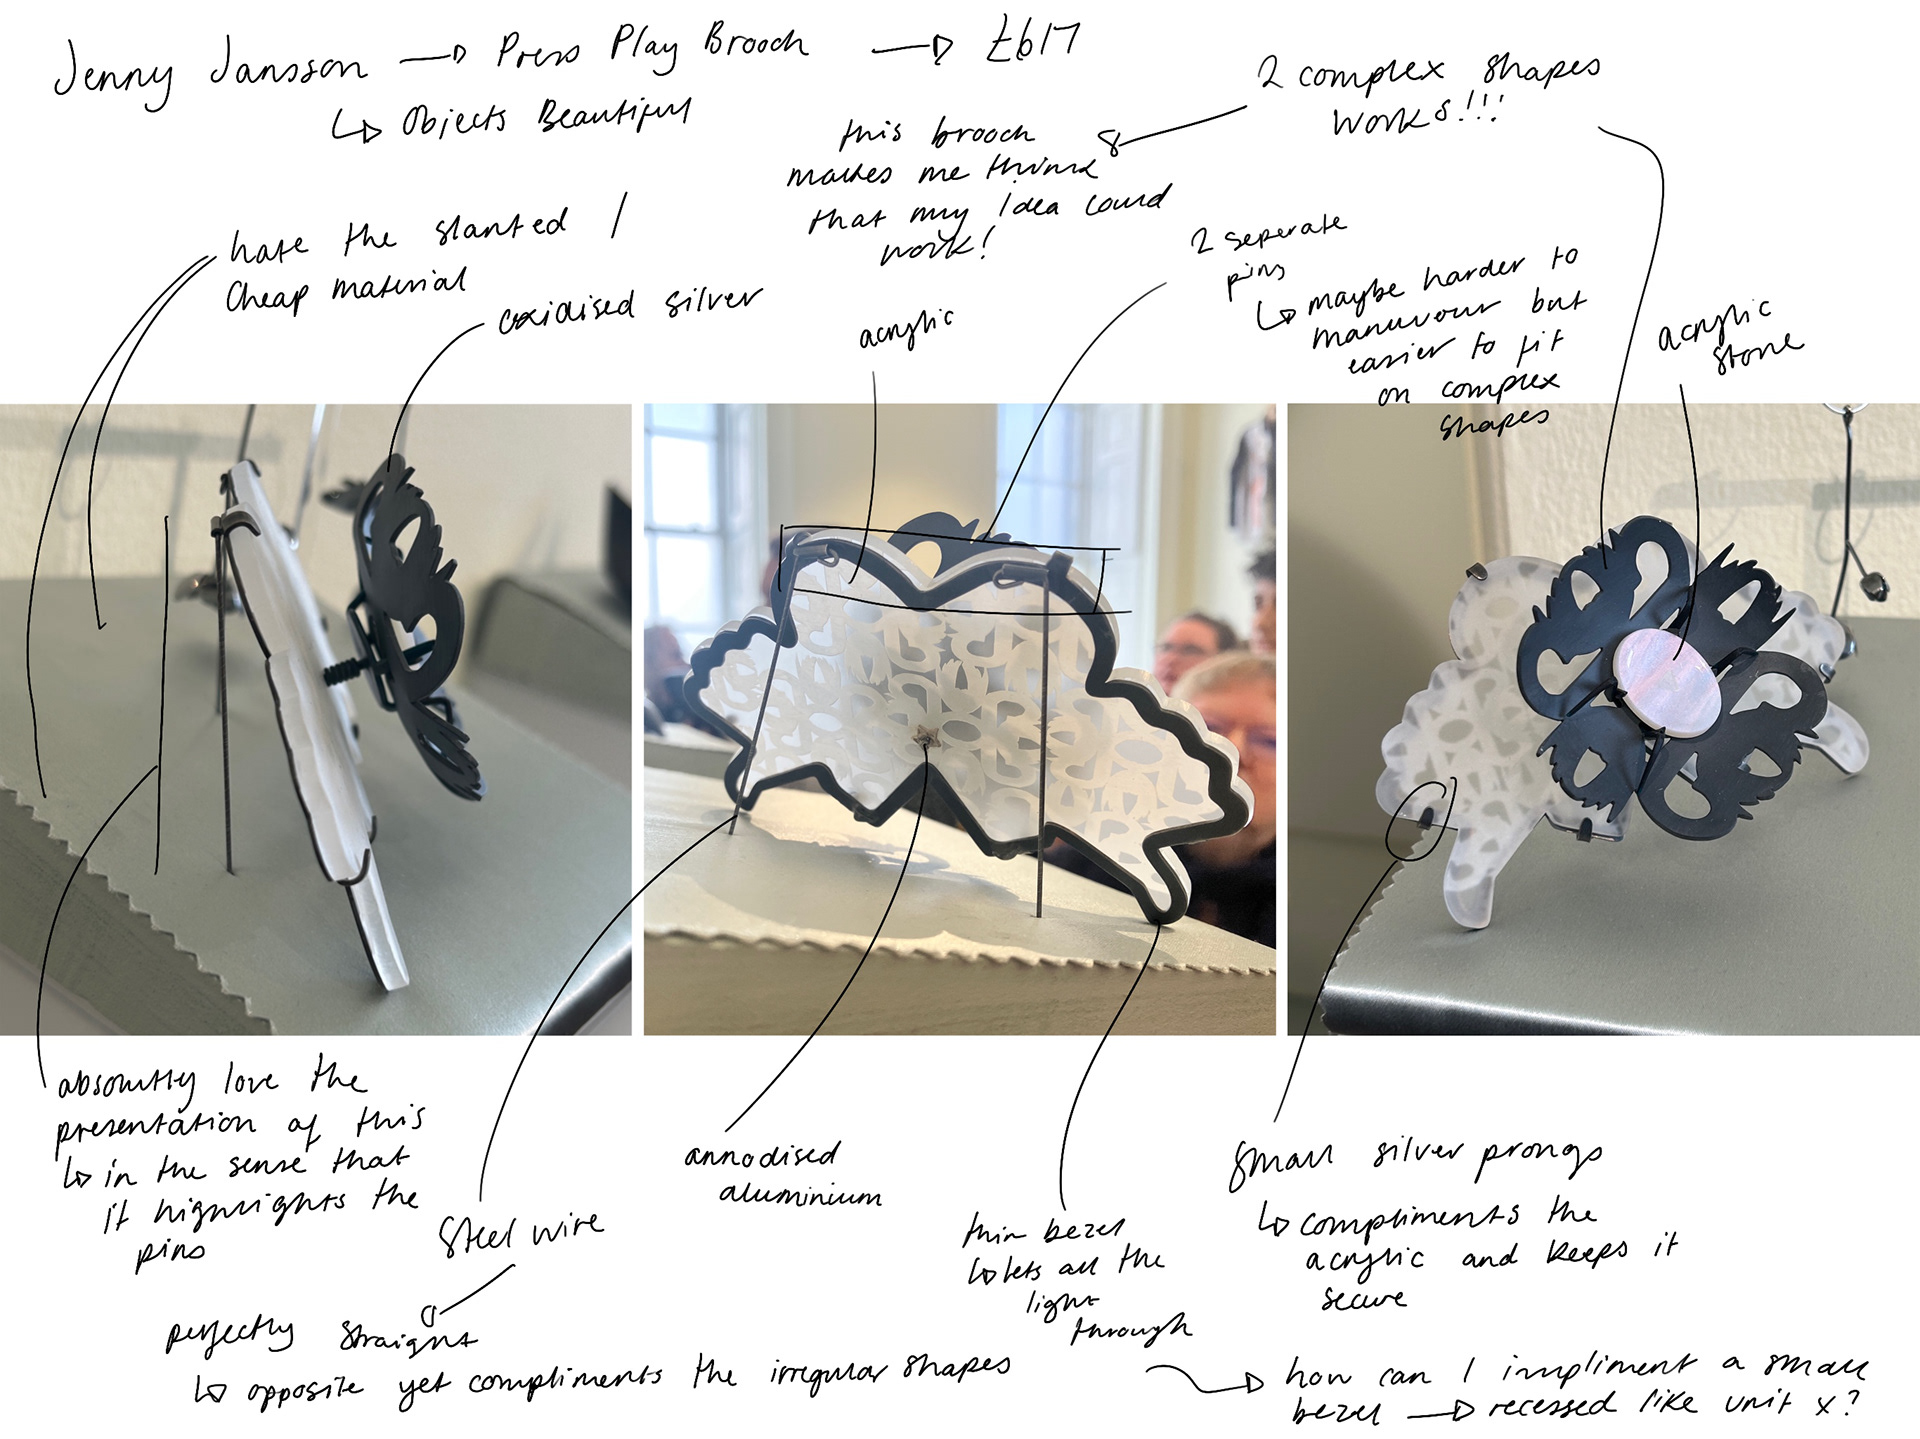
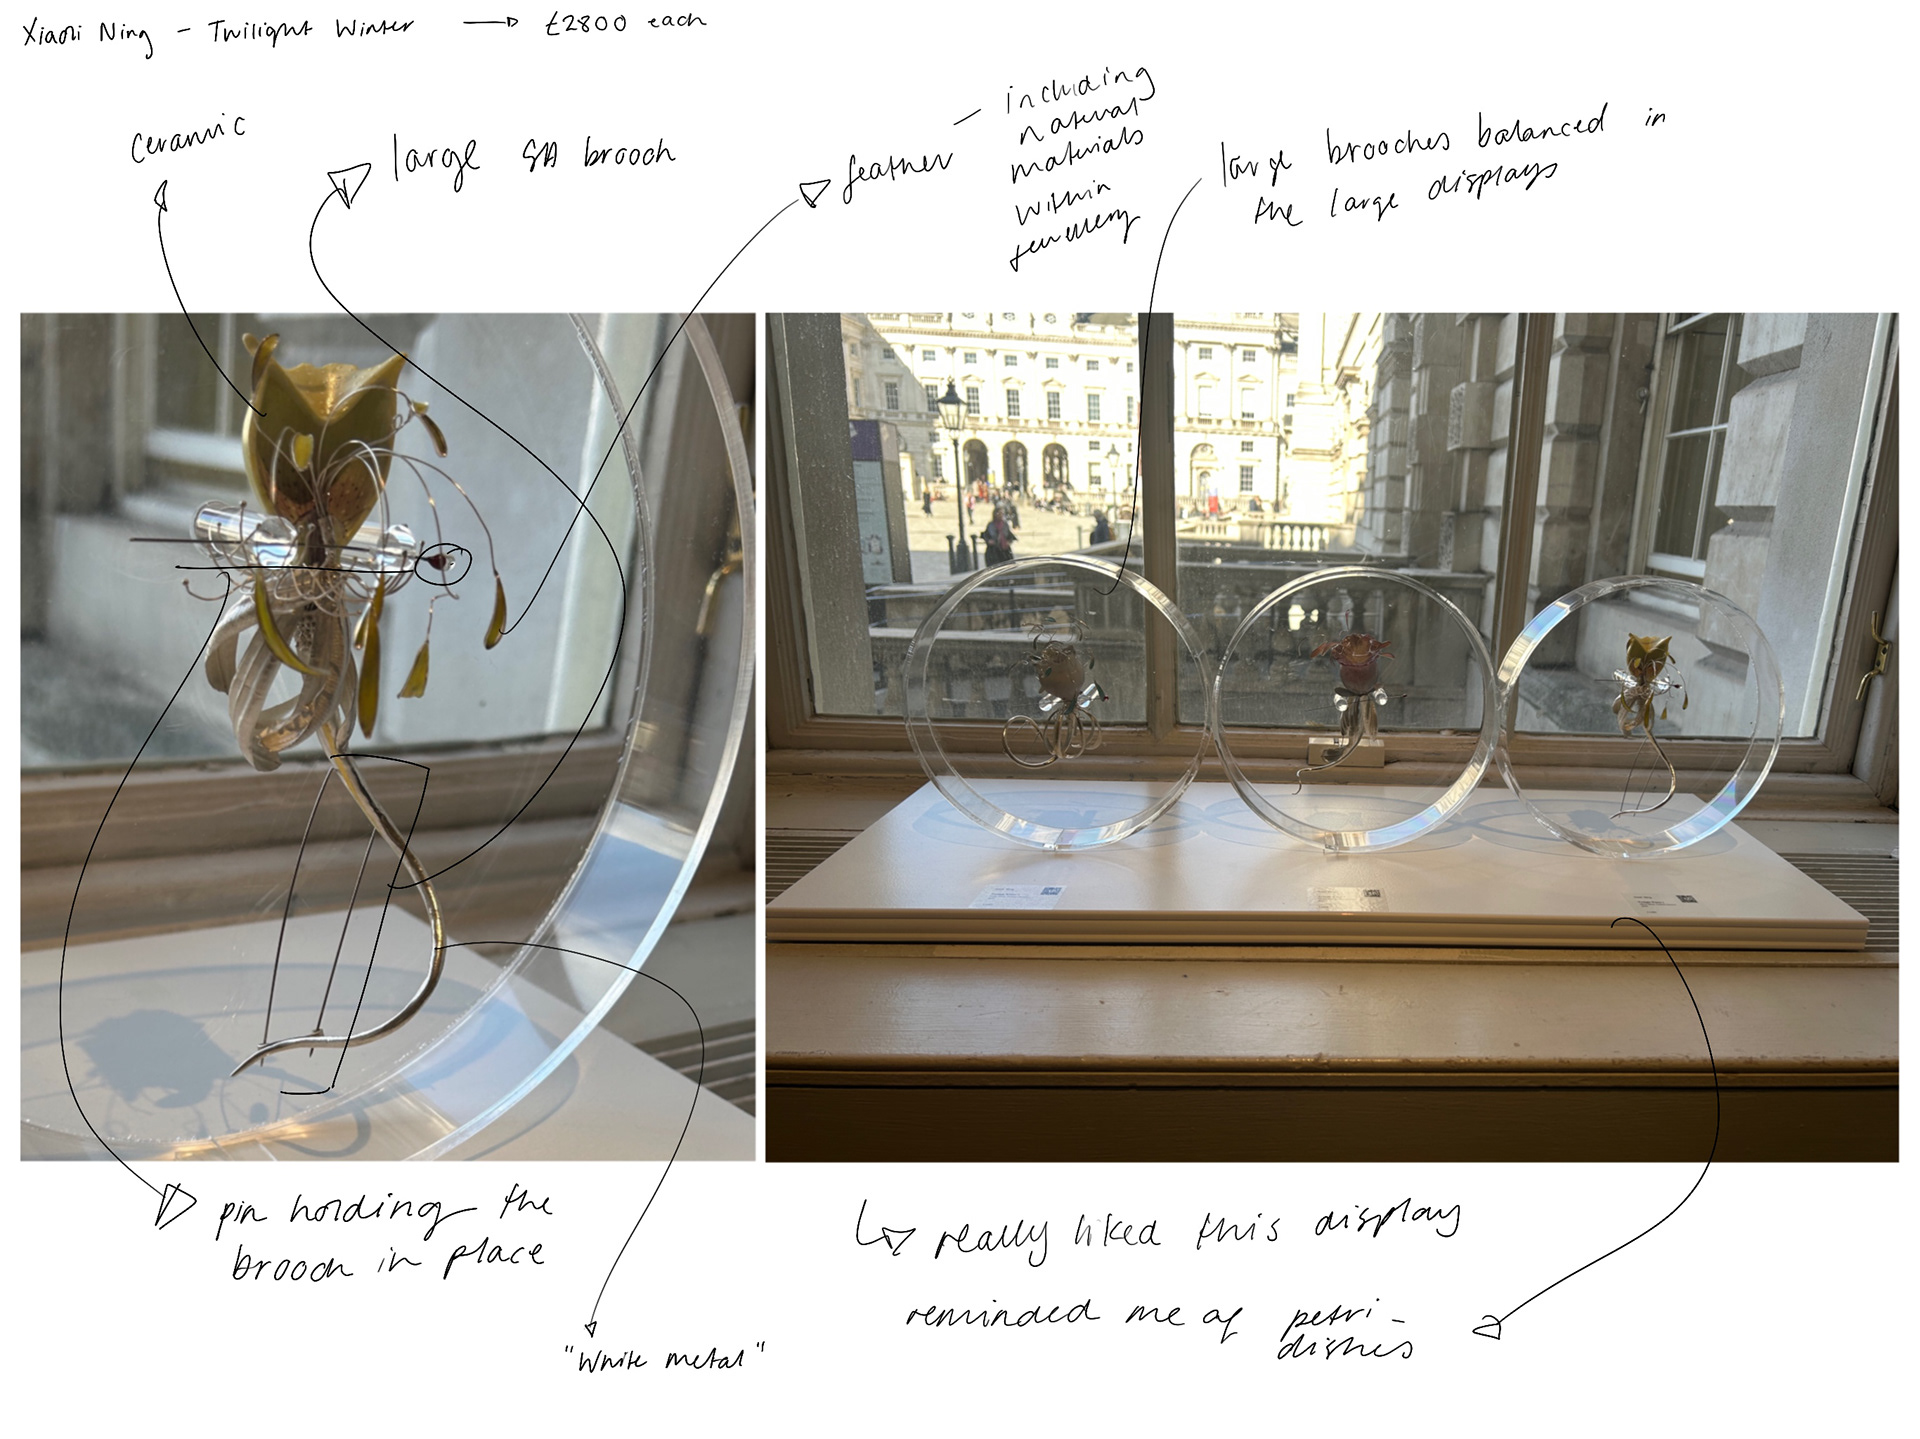
While visiting the Objects Beautiful stand at Collect, I came across a brooch made by Jenny Janson. This brooch featured two different pieces, a backplate and a front piece, which were both made from complex forms. At this stage in the project, I was unsure whether the complex designs I had drawn were actually going to look cohesive and work. However, after seeing this particular brooch, I became convinced that I would be able to do something similar.
V&A Museum
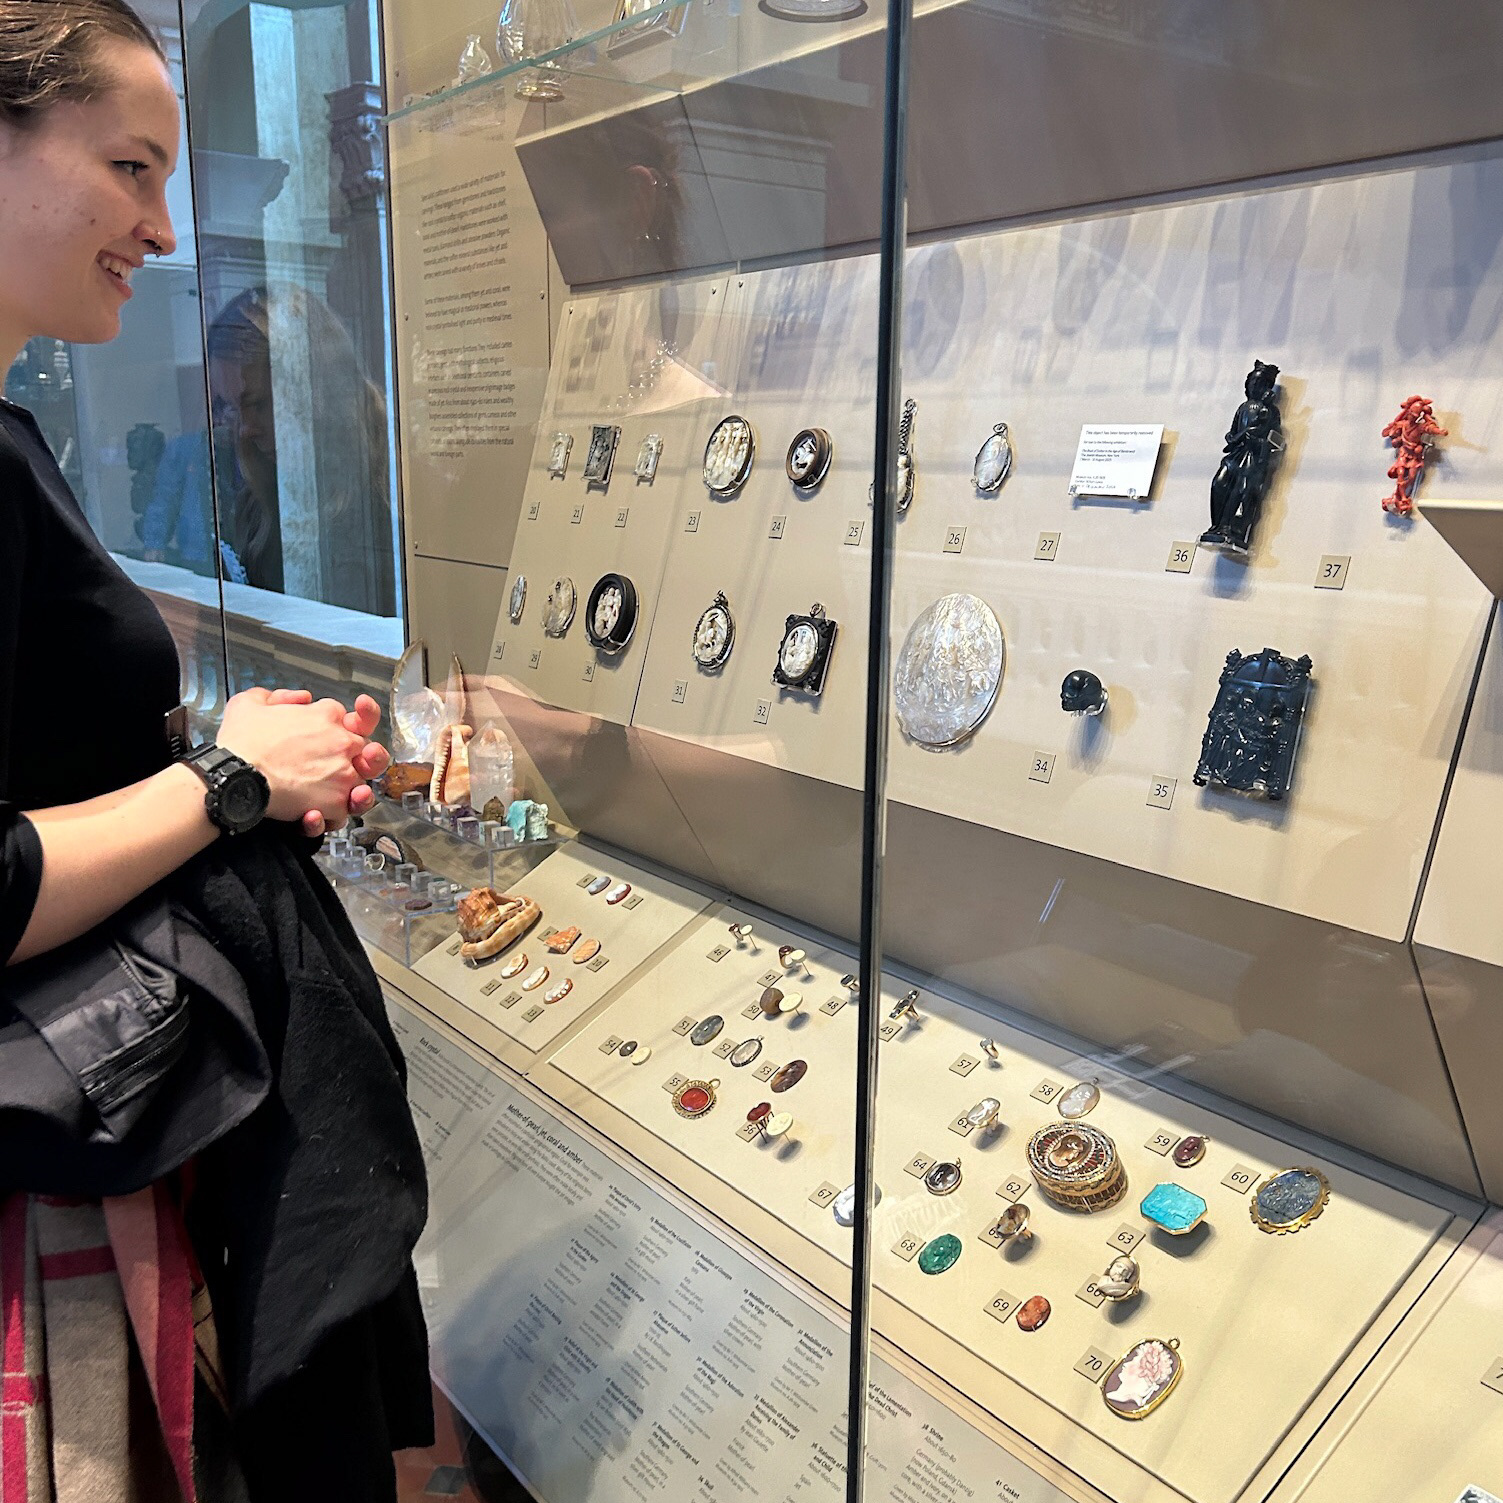
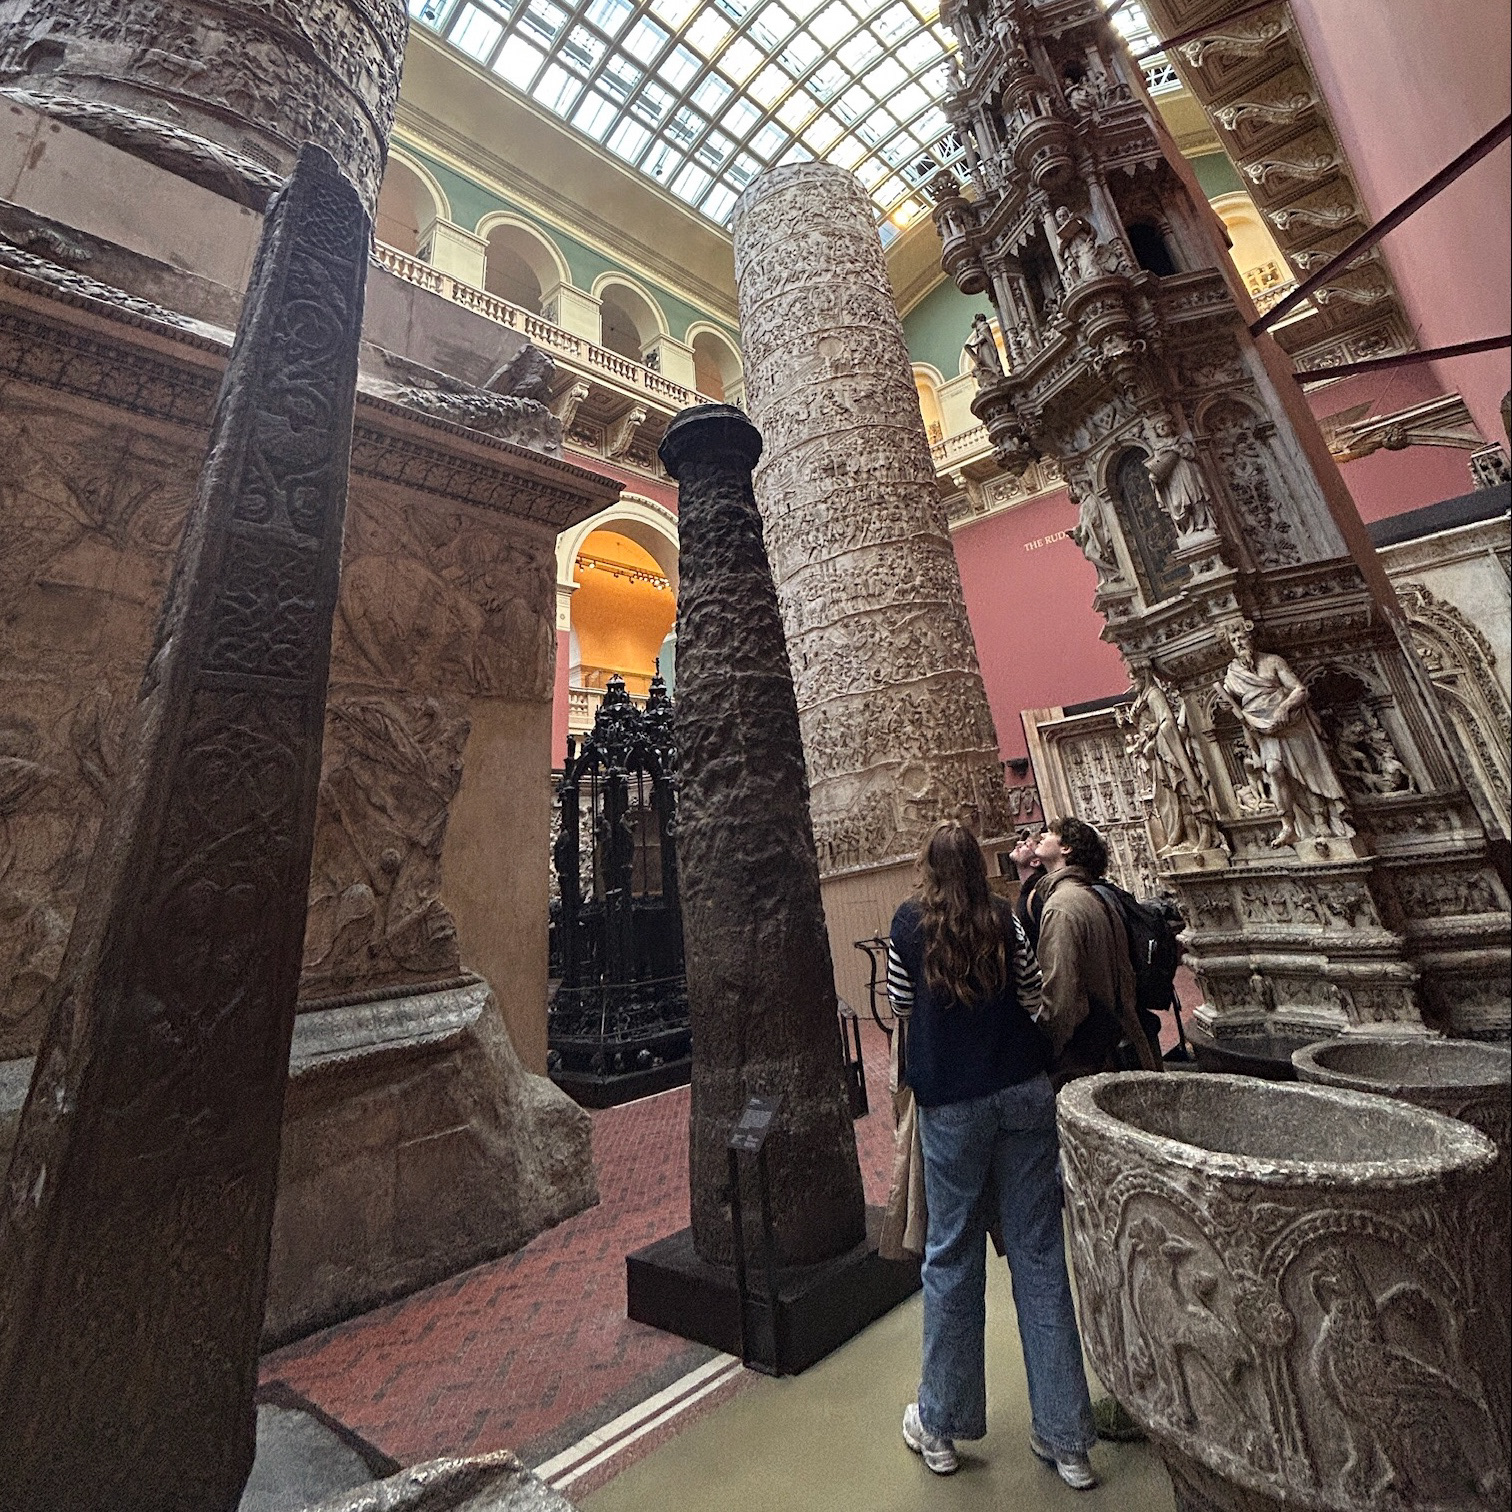
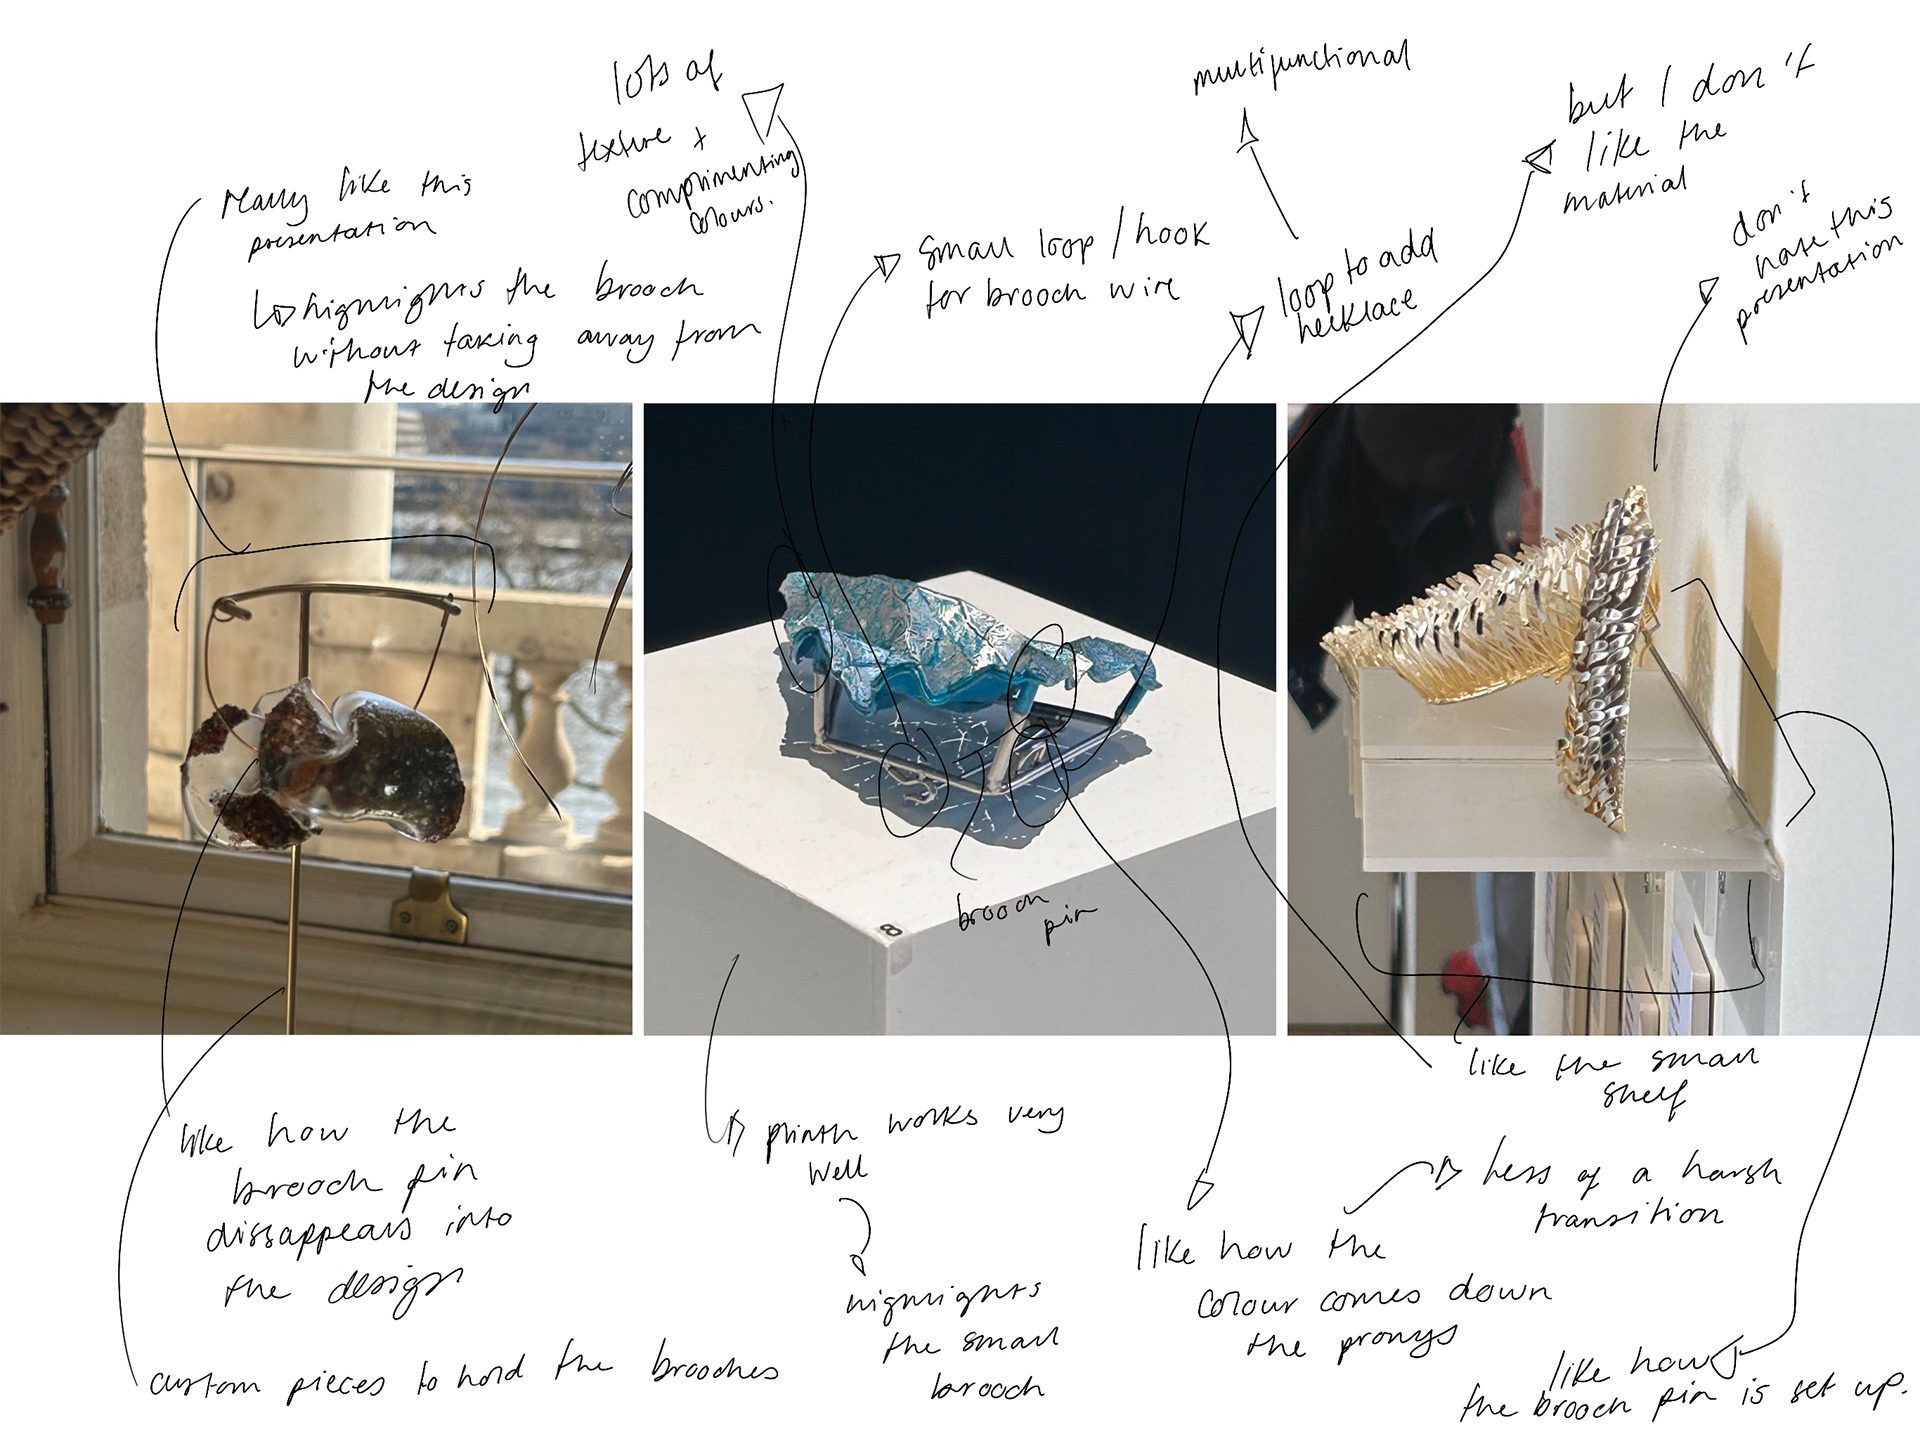
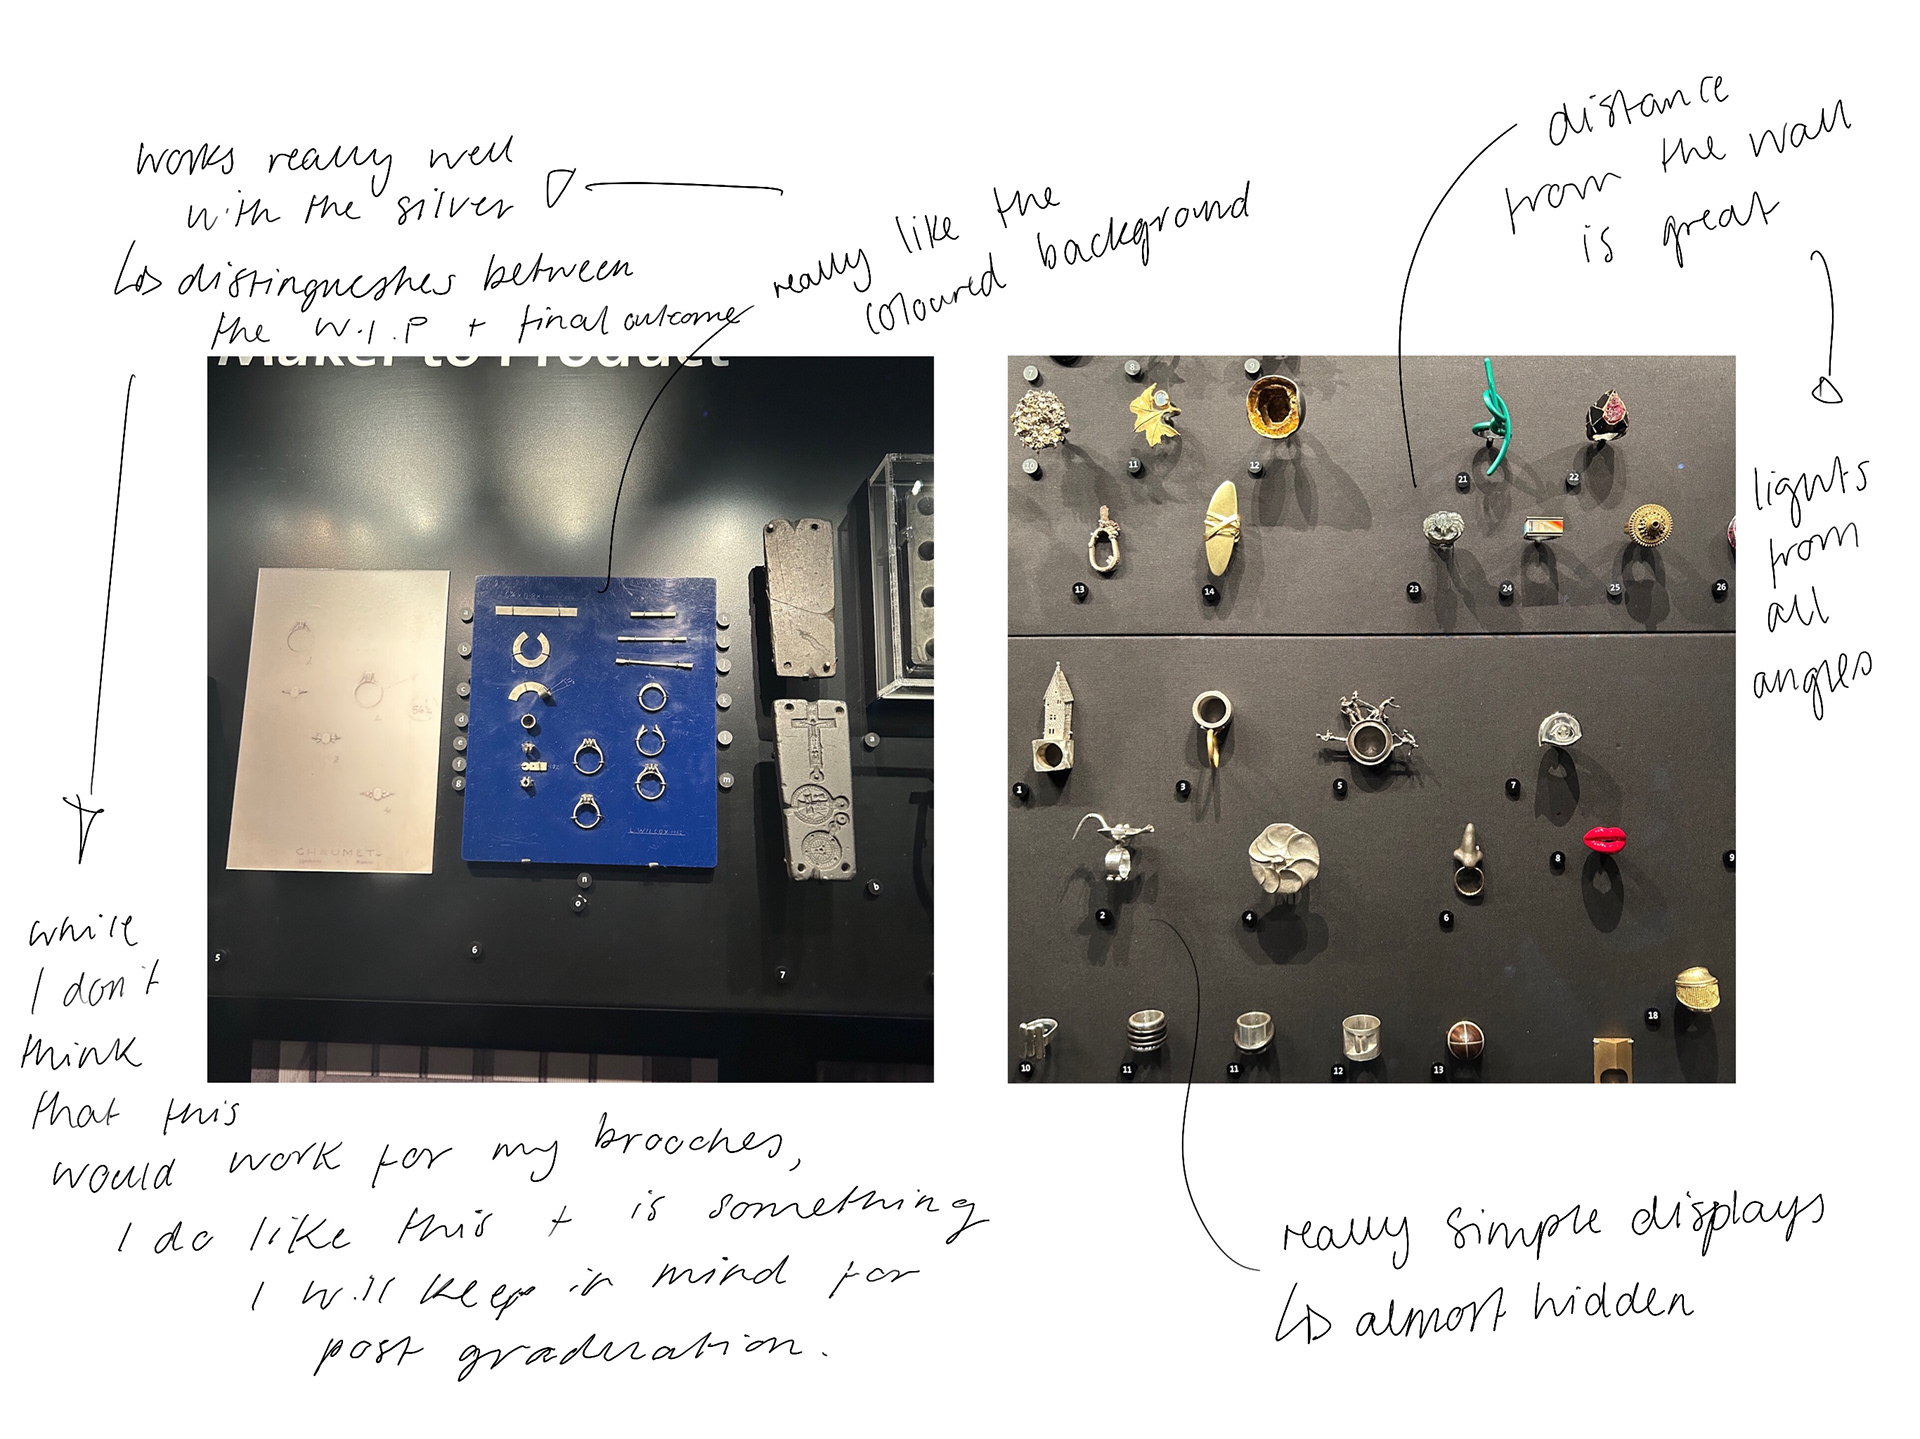
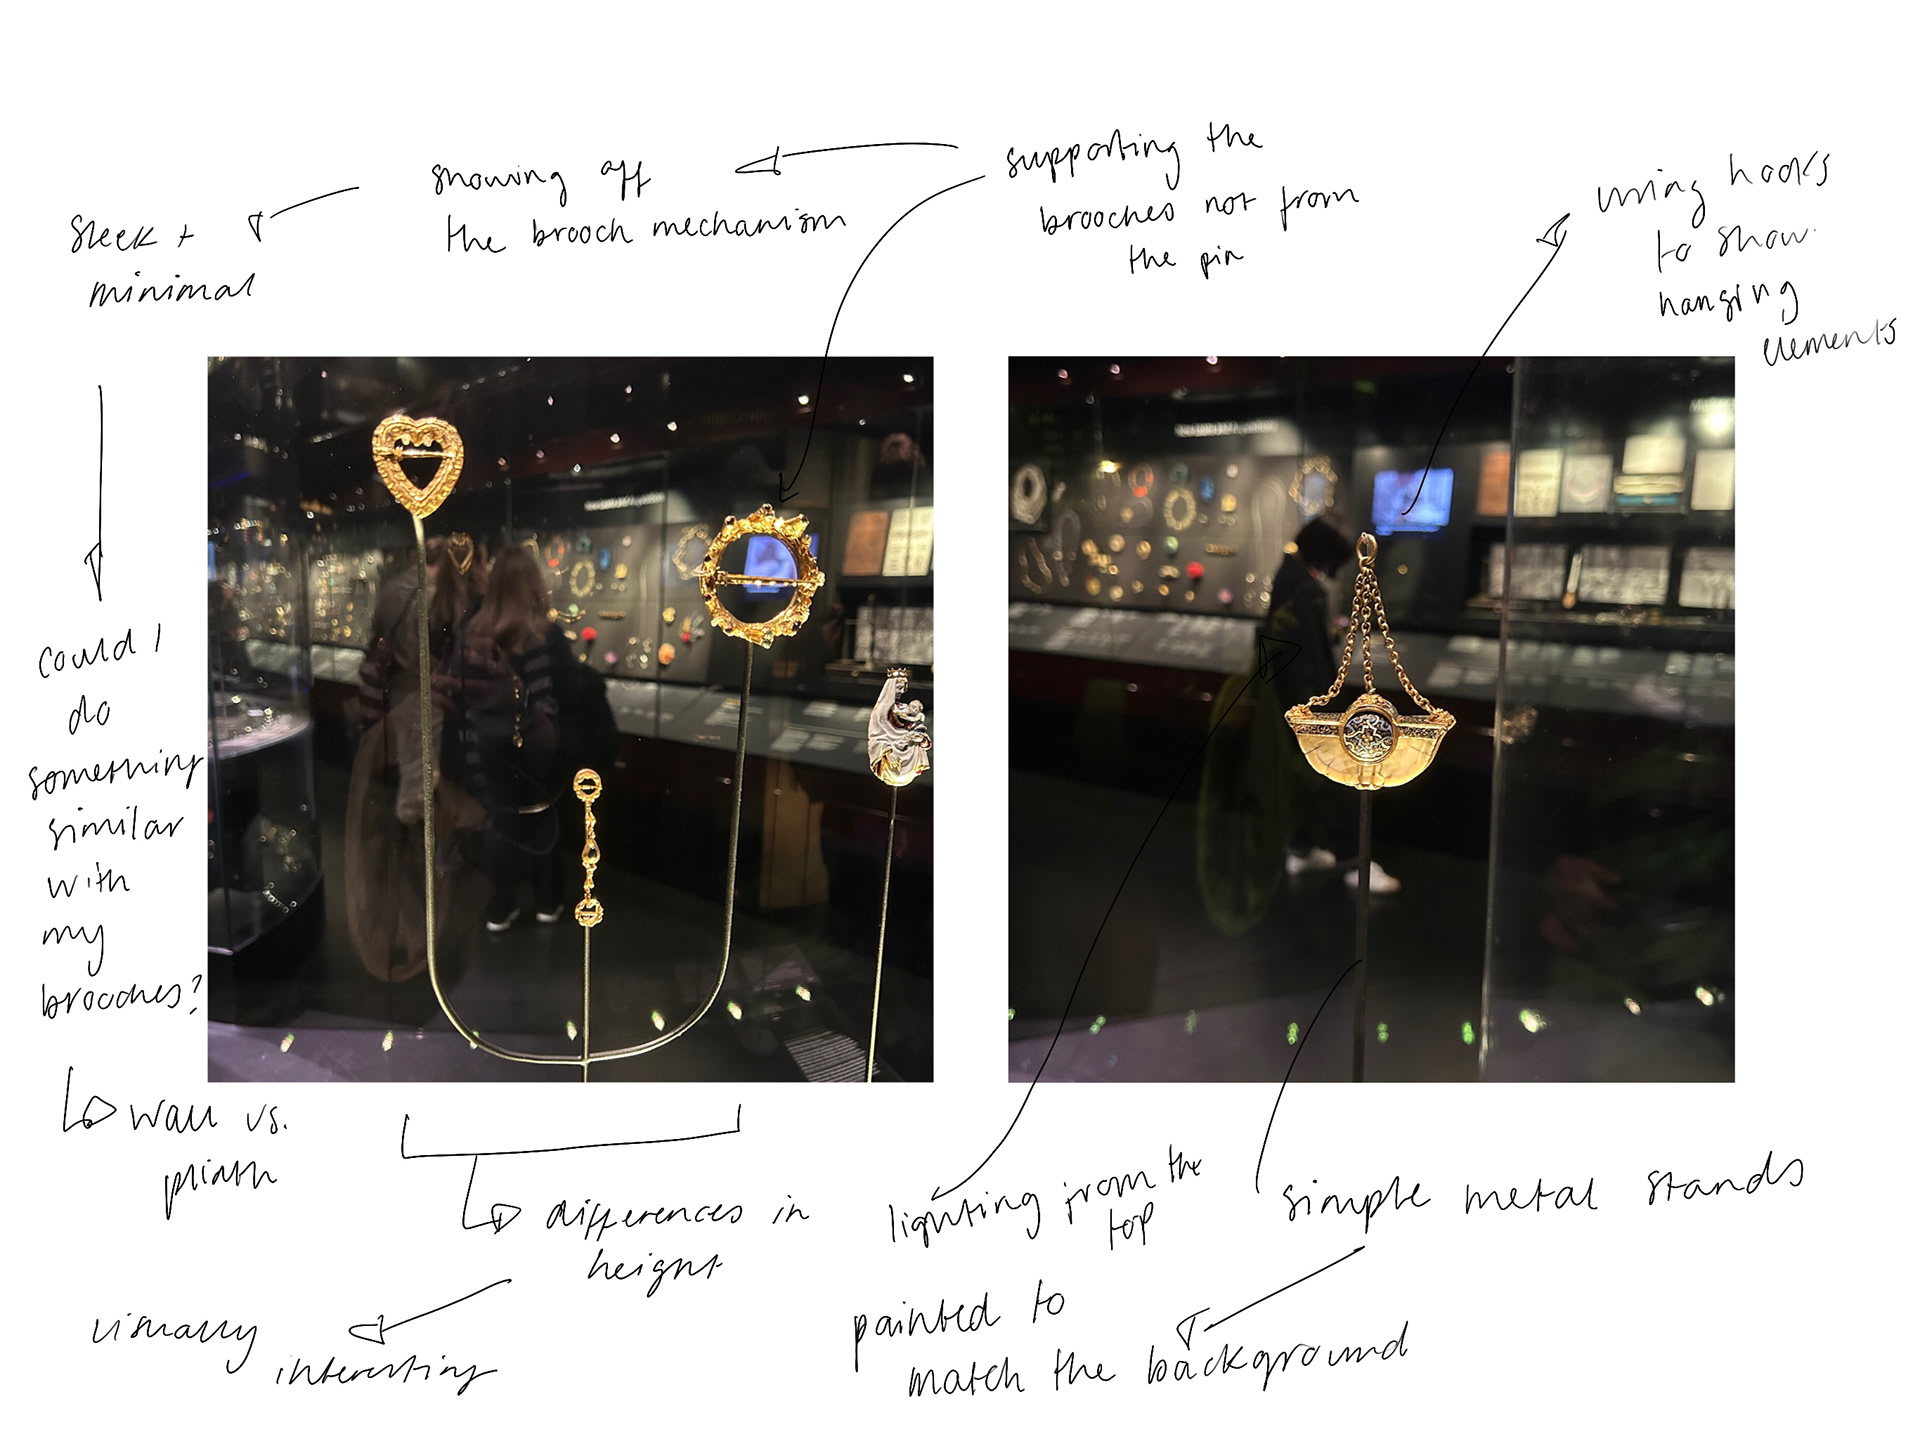
While in London, a few of us took the opportunity to visit the V&A Museum. For me, the visit was less about drawing inspiration from specific pieces and more focused on the displays from a curatorial perspective. I was particularly interested in how the jewellery was presented, how lighting, layout, materials, and spatial design were used to showcase the work.
I paid attention to the way certain objects were displayed, placement at eye level, the use of spotlights, and labelling. I noted the balance between aesthetic appeal and informational clarity—how text panels, labels, and digital media were used to communicate historical and material significance without overwhelming the viewer. Displays need to complement the work, not distract from it. The simple labels worked well and were easy to read ,even if there were lots of labels.
Jonathan Boyd
3rd March 2025

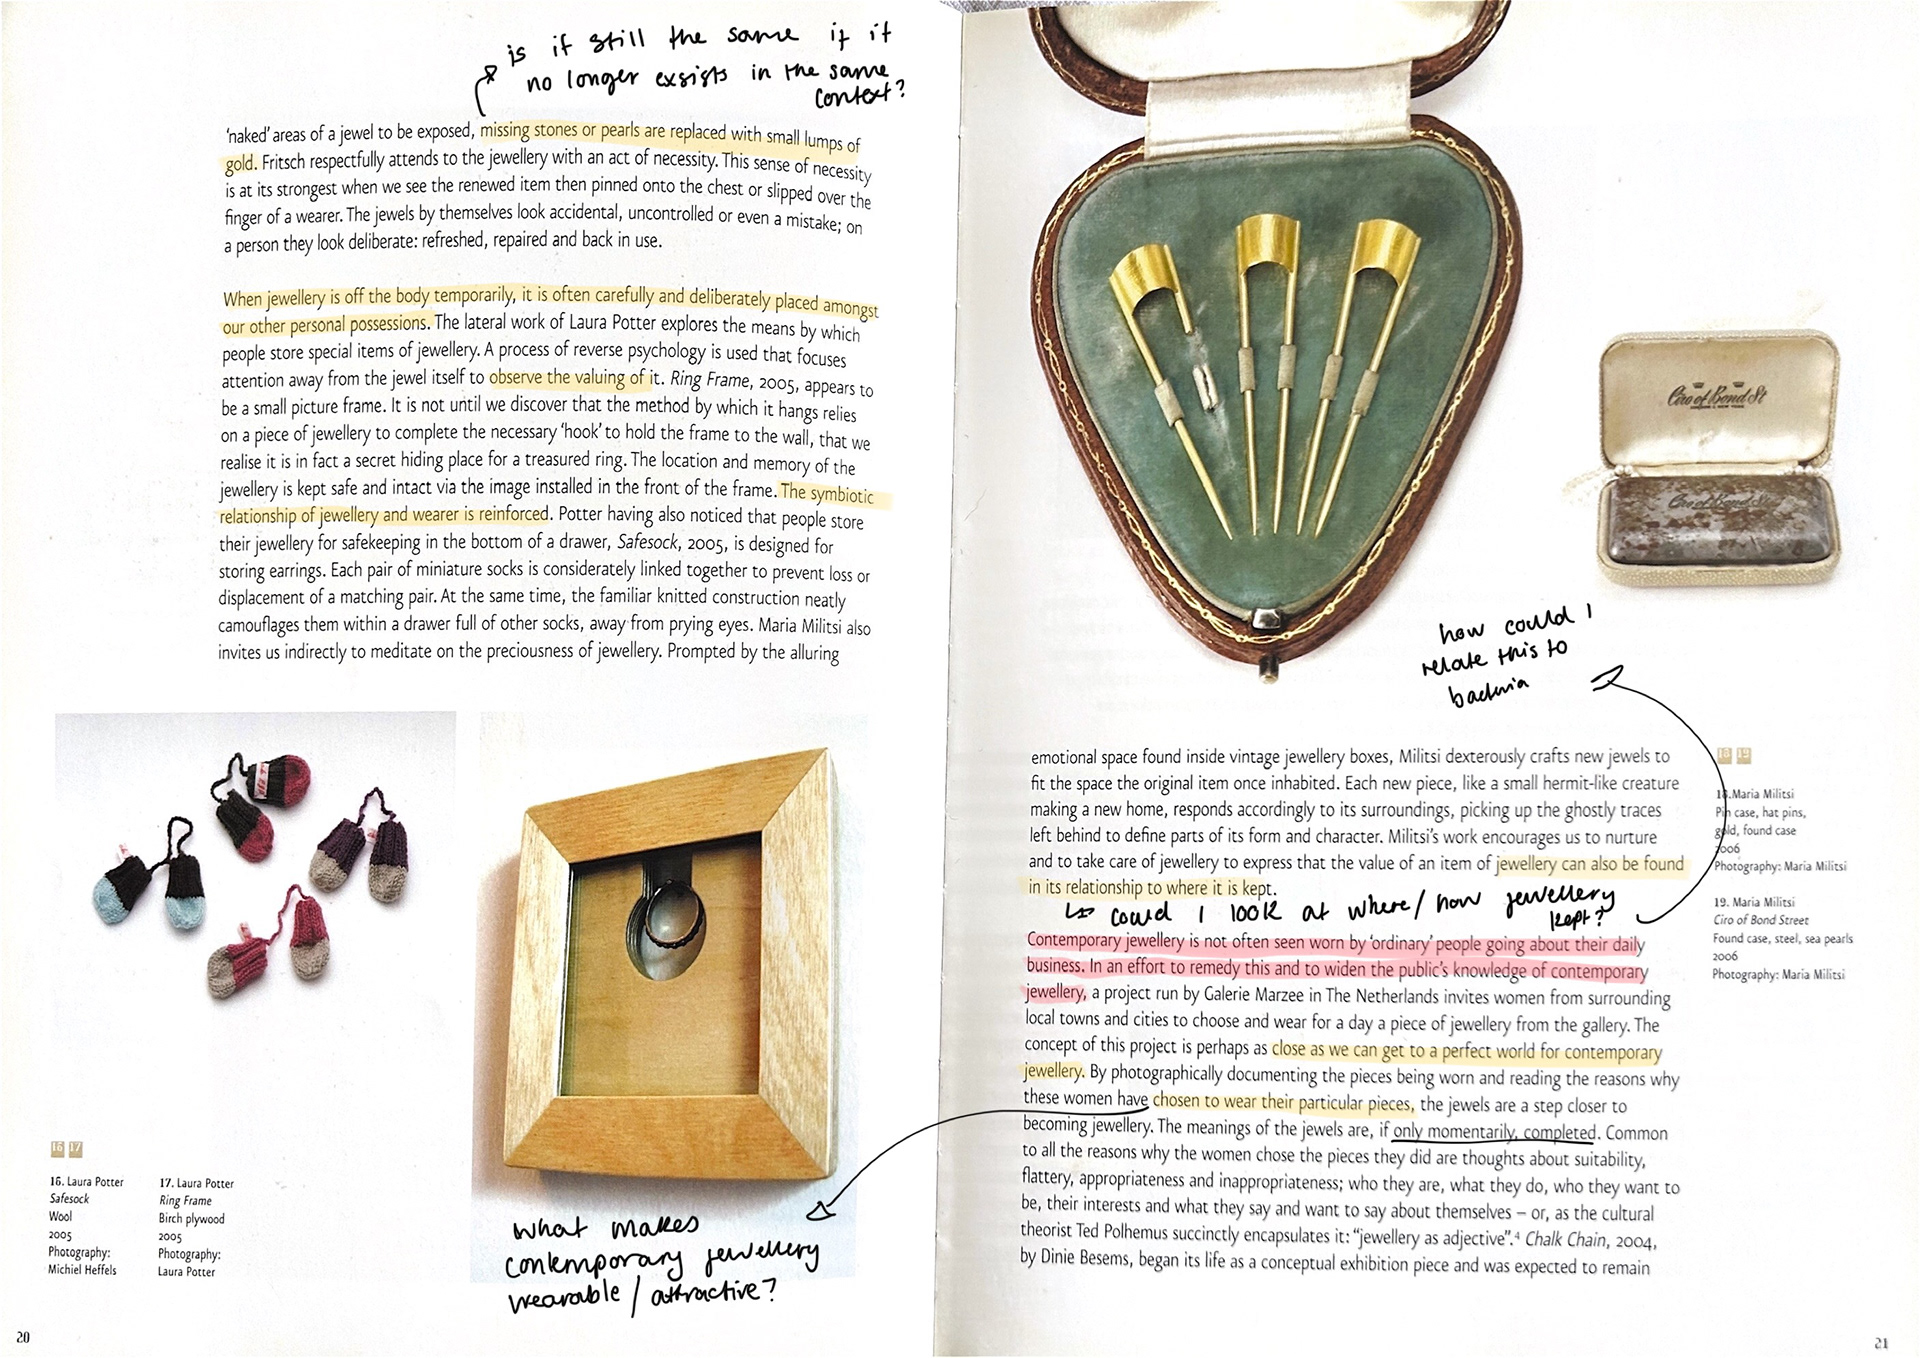
We had a talk from guest Jonathan Boyd who spoke to us about his work and the context behind it. What I actually found most interesting was the bracelet he was wearing, which his daughter gave to him. This plastic bracelet featured beads, which over time have broken and he has replaced them with clay beads instead. We spoke about whether this bracelet would still be the same bracelet even if all the beads have been replaced, which while physically it would not be the same bracelet, the value and context to these objects have stayed the same.
Tutorial with Jonathan Boyd
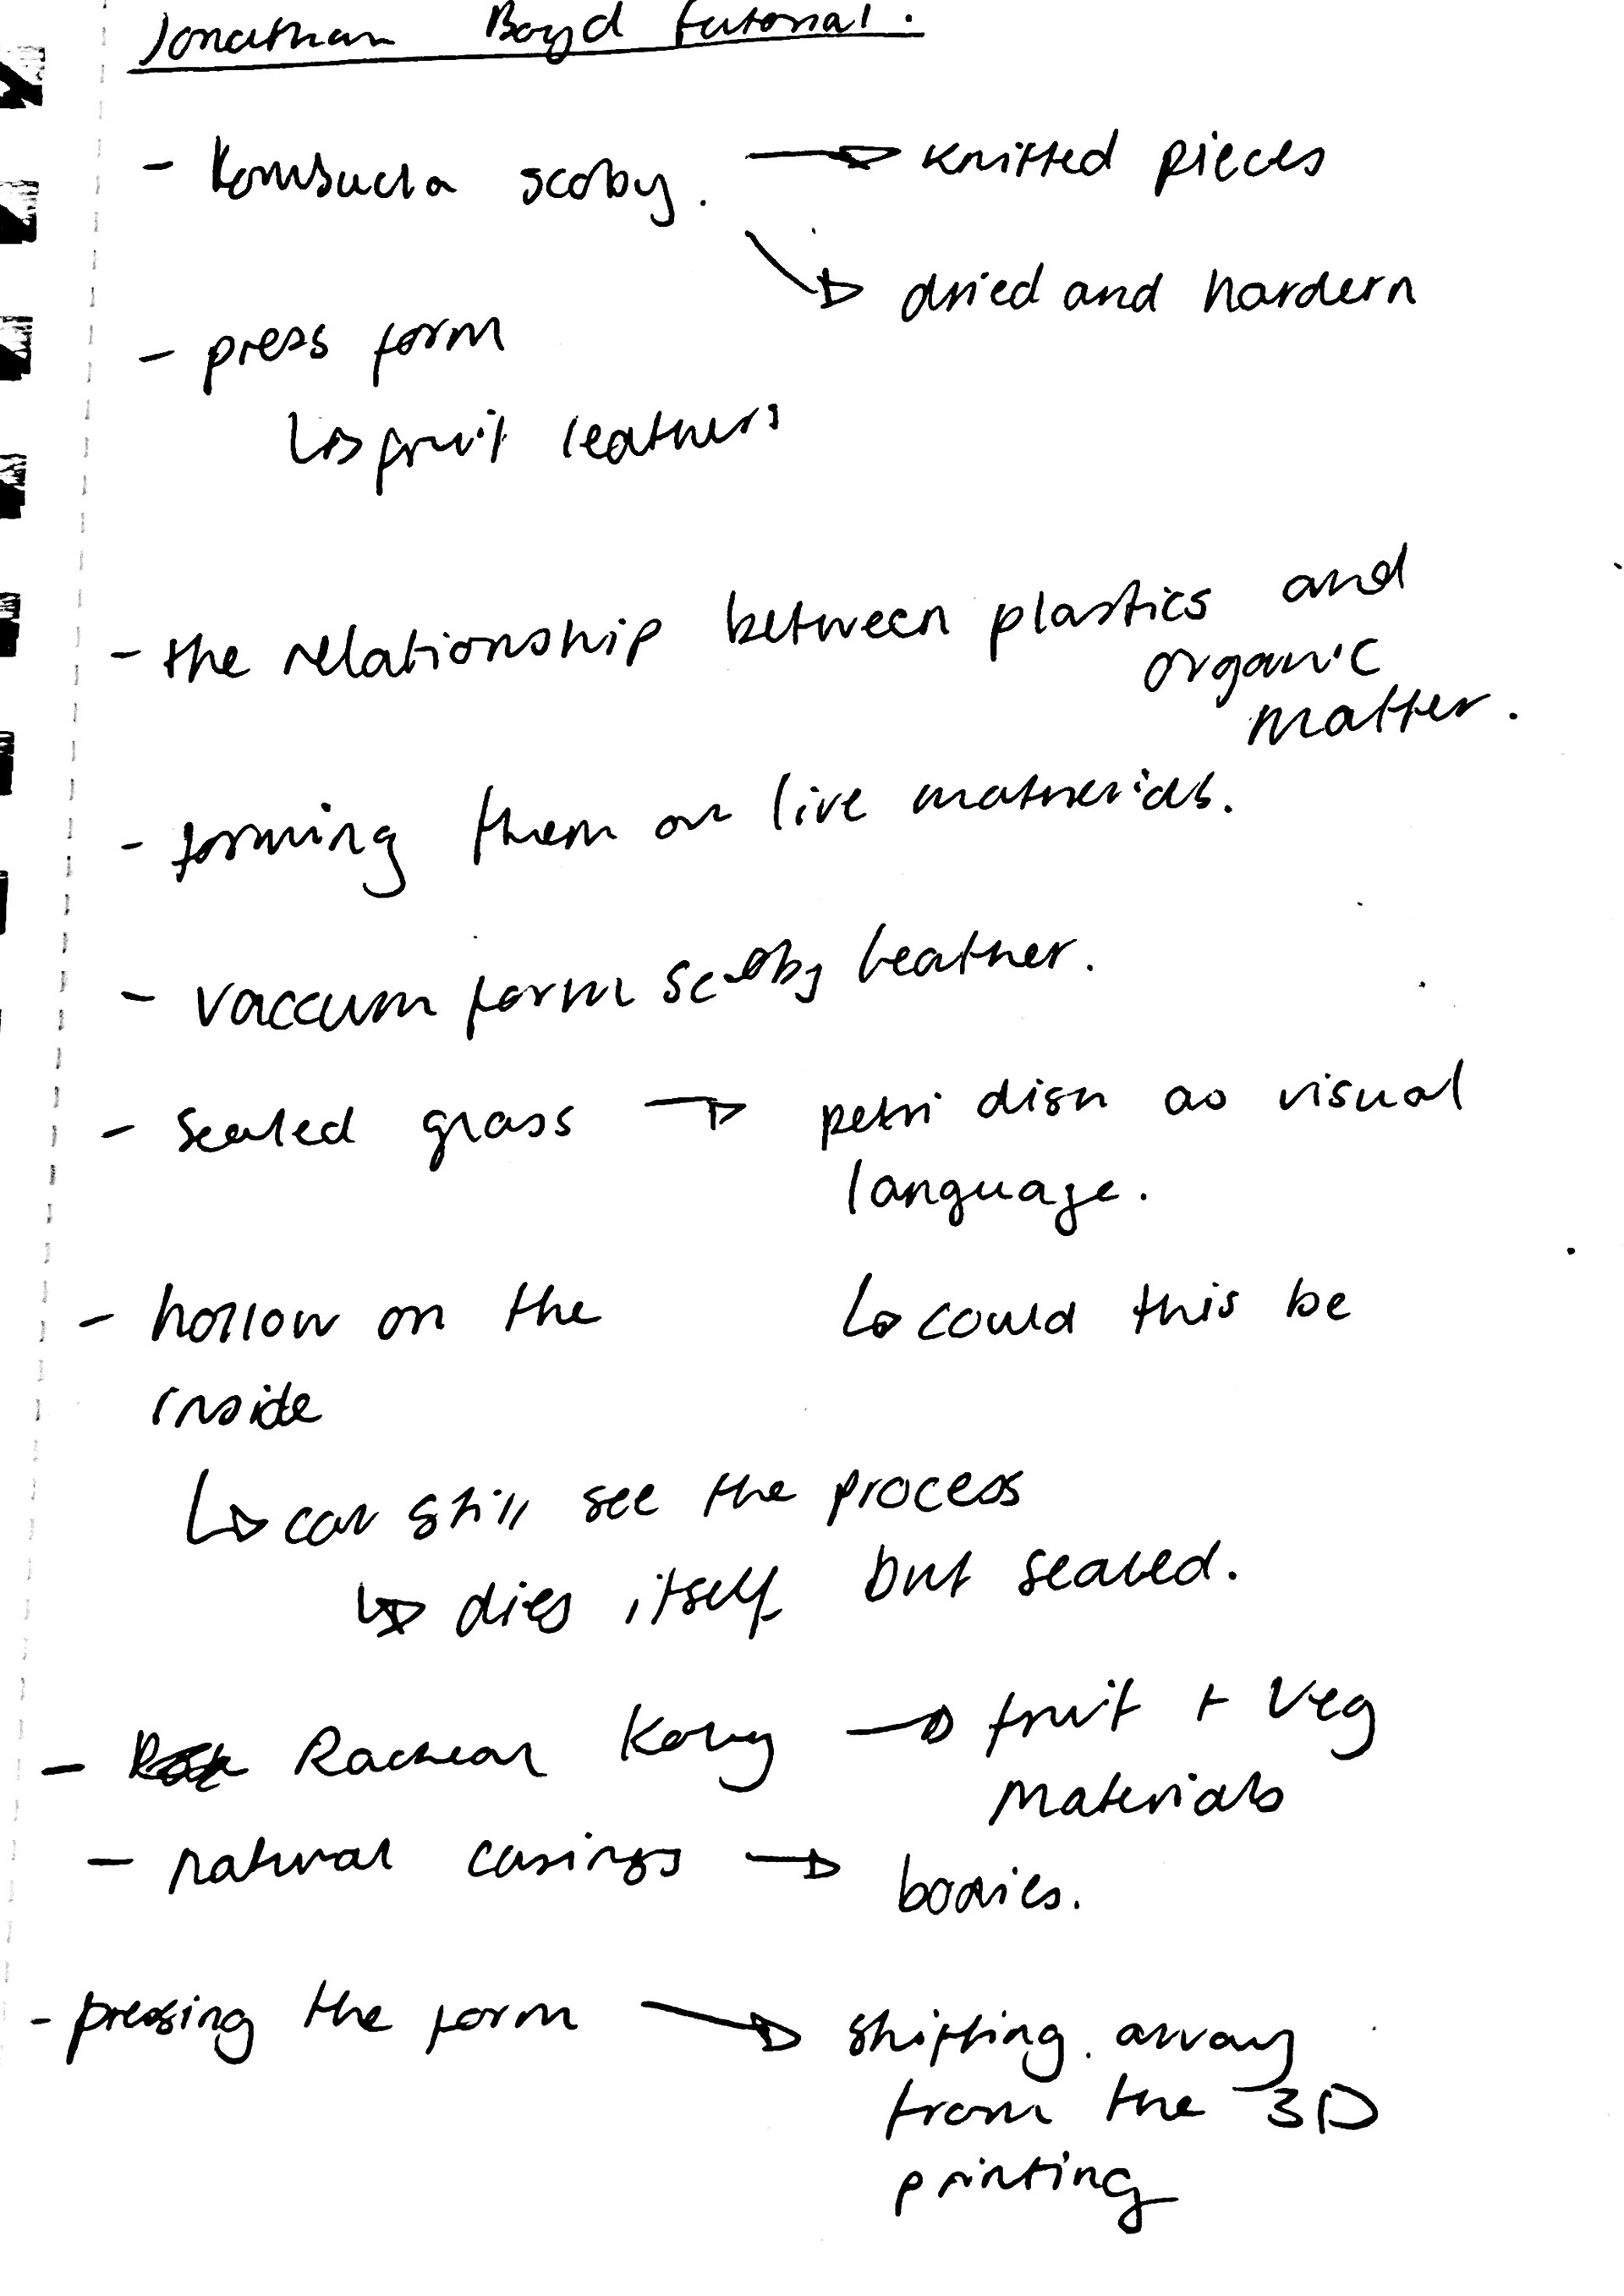
We then had group tutorials with Jonathan, where I had the chance to explain my idea to someone who knows nothing about my project.
He suggested that I look at different materials to make the 3D forms, rather than 3D printing and silicone.
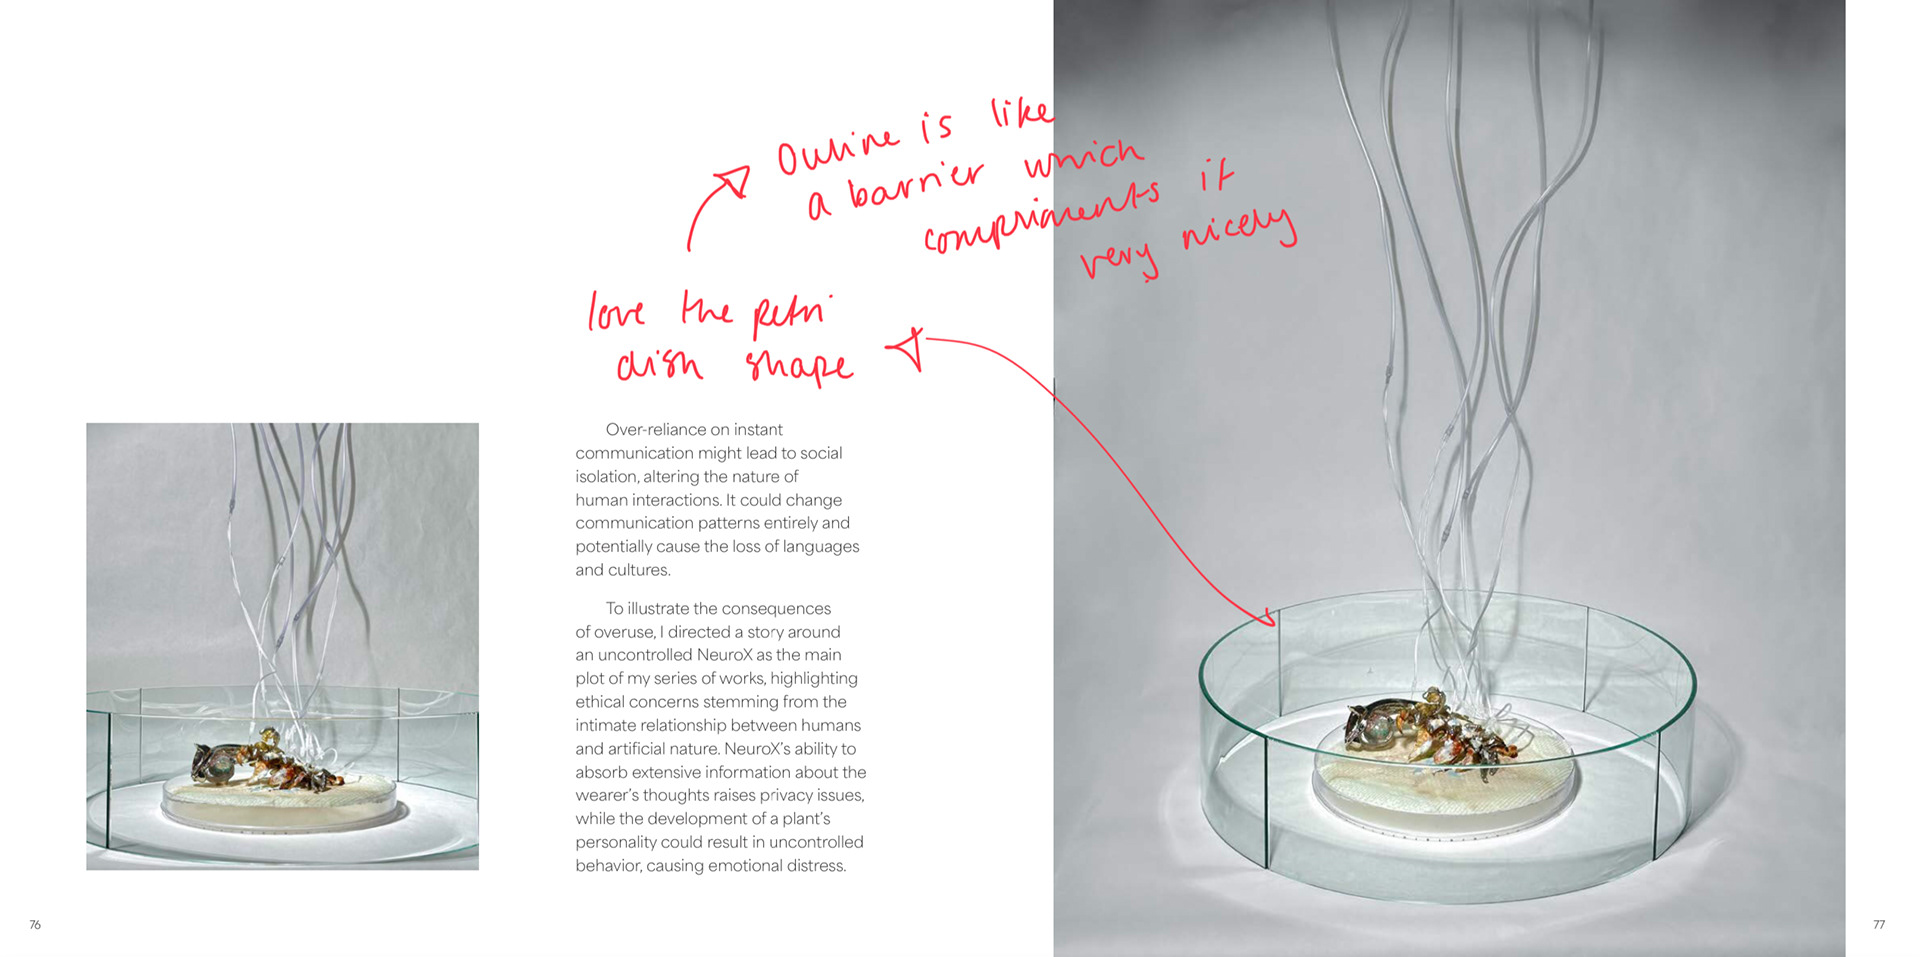
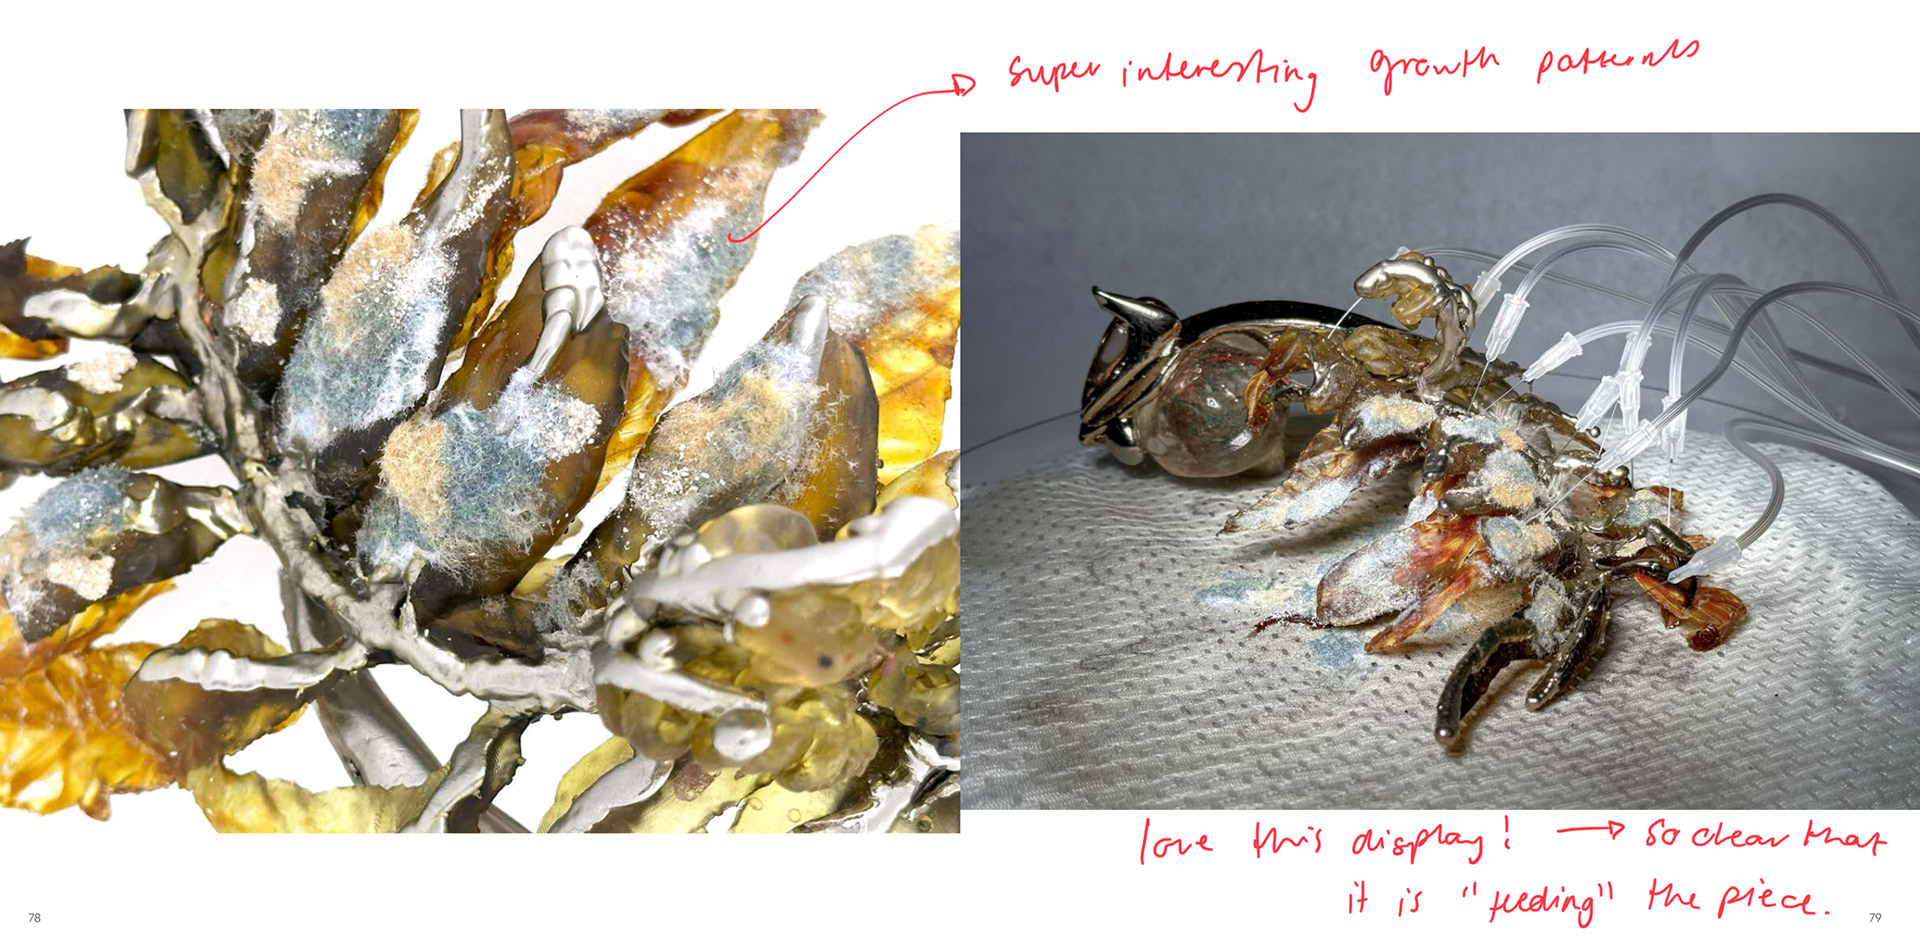
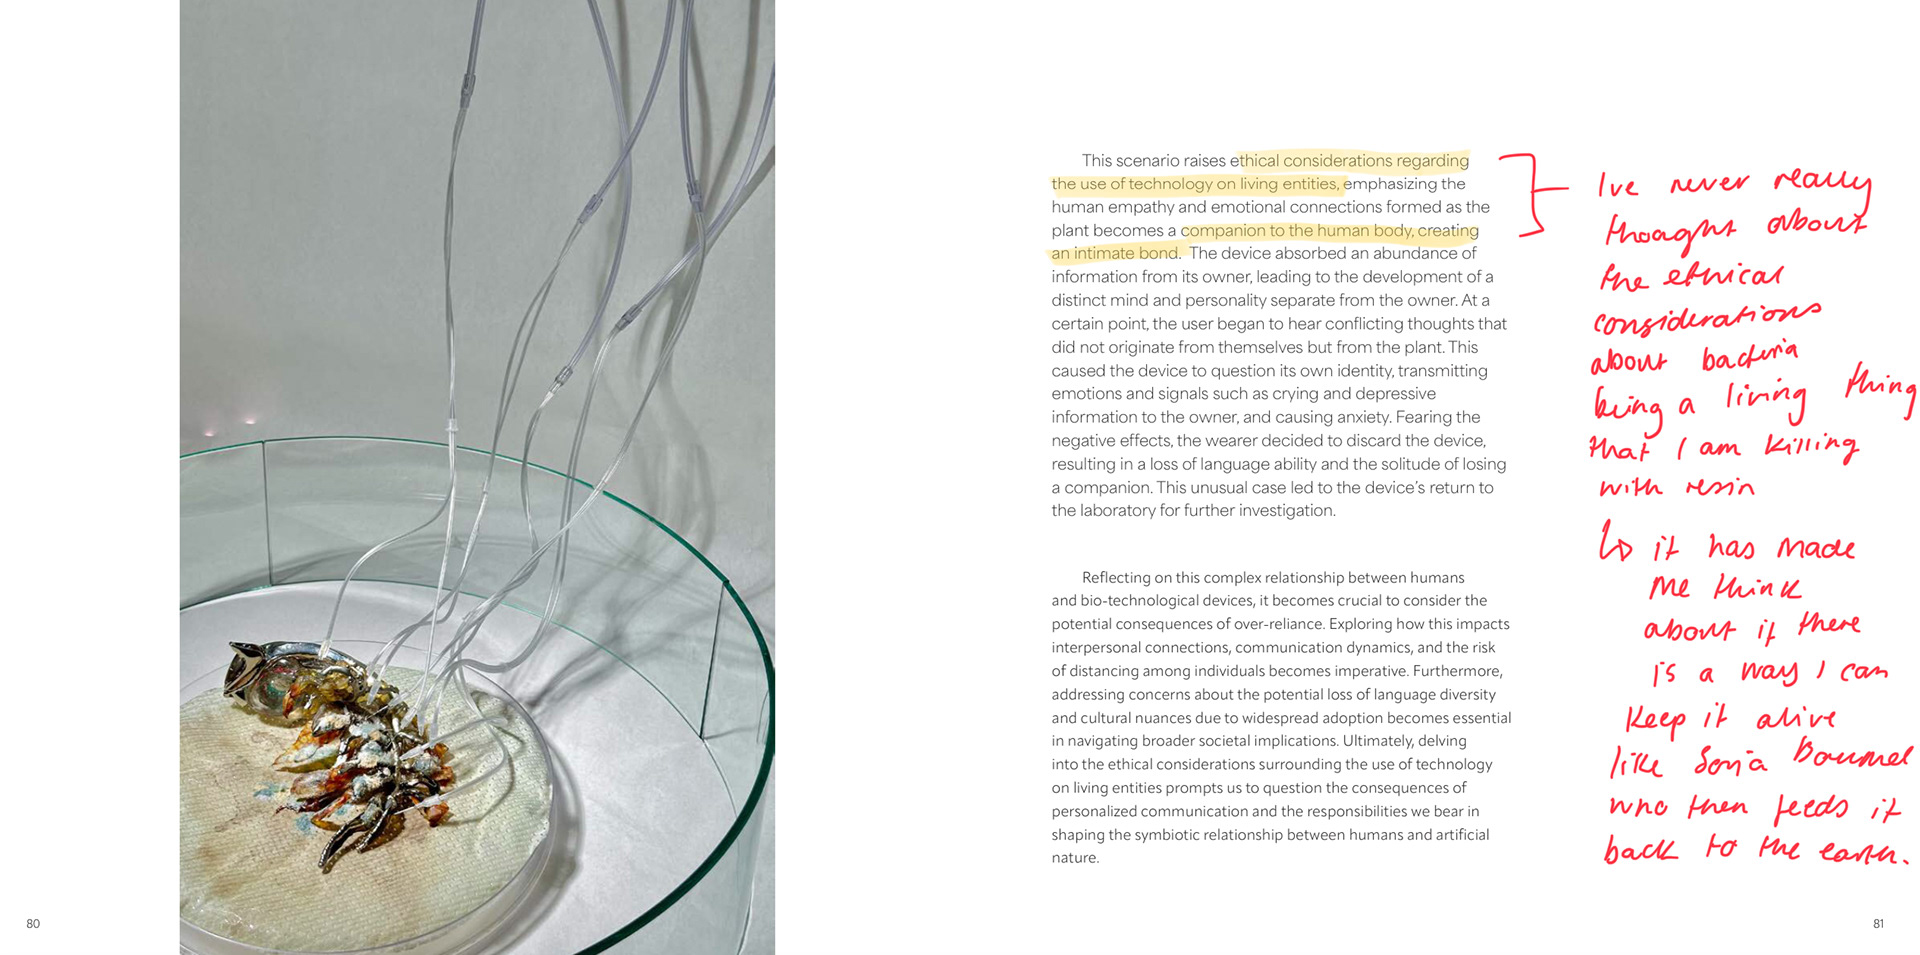
He also suggested that I look at the idea of conserving the bacteria in a different way. He found it almost funny how I put so much of my project into showing how this live extension of us (the bacteria) is destroyed, and how I am trying to show it, but I then 'kill' the bacteria with resin. He suggested that I look at ways to encase the live bacteria in a way that I can show it changing over time, for example, in a glass container.
I have already looked at this before, however, there are a couple of reasons why I did not pursue this idea. Firstly, I like the idea of capturing the specific moment of bacteria, and secondly, I do not know that this way of sealing bacteria would be completely safe.
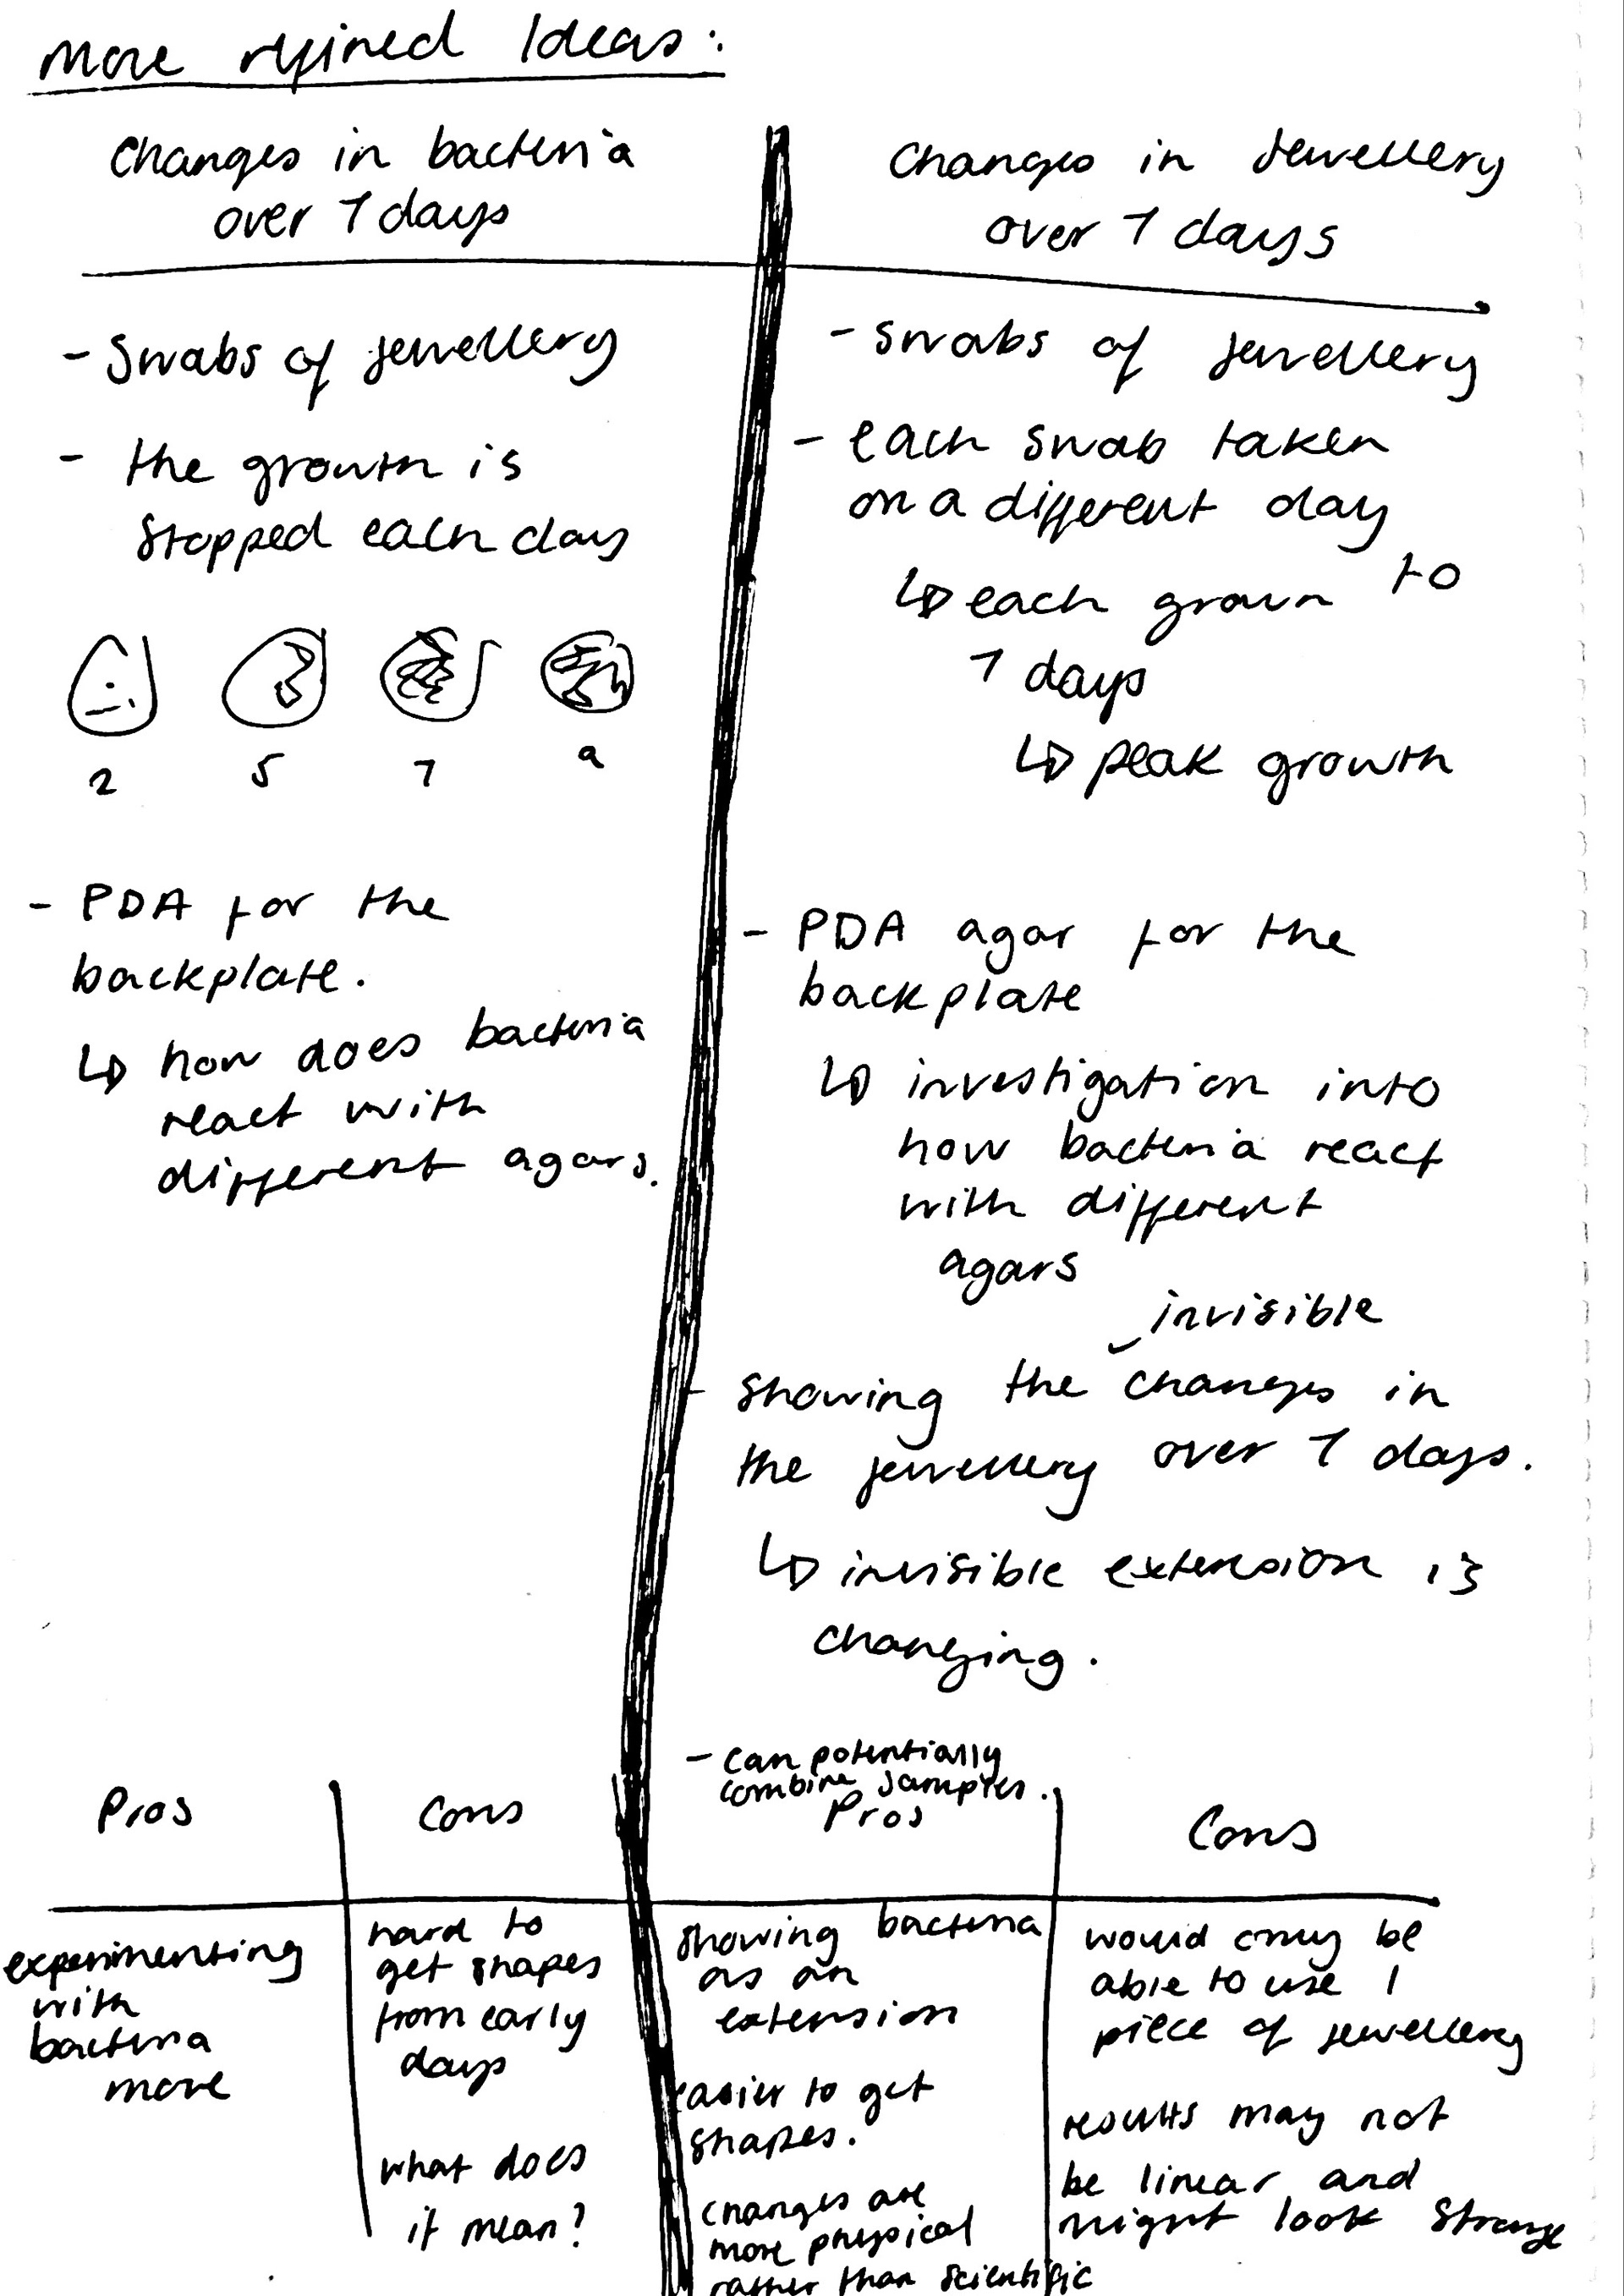
Project Direction
After speaking with Jonathan, I wanted to take a step back and evaluate the direction of my project. I realised that there were two potential paths I could explore:
1. Examining how the bacteria itself evolves over seven days.
2. Investigating how the bacterial extension of jewellery changes over the same period.
Both ideas had their pros and cons, and I weighed up the options before deciding which path to follow. One of my main concerns with focusing solely on bacterial growth is that for days 1 or 2 there would be a lack of distinct shapes. If the bacteria had not developed enough in that short timeframe, there would be very little visual information for me to translate into my Rhino models. This uncertainty made it difficult to justify a viable approach, as my process heavily relies on the organic forms created by bacterial growth.
On the other hand, exploring how the bacterial extension of jewellery evolves over a full week presented a much more dynamic and engaging opportunity. This approach would allow me to observe not only the biological changes but also how the bacteria interact with the jewellery itself over time. By extending the timeframe, I would have a richer body of material to analyse, providing a stronger foundation for developing my models.
This direction aligns well with my broader interest in how jewellery carries traces of the wearer, both physically and symbolically. By focusing on the evolving bacterial extension, I can deepen my exploration of the unseen relationships between jewellery, time, and bacteria
Designs and Mechanisms
Now that I have a clear direction for my project and a solid understanding of what my models will be based on, I began exploring different mechanisms and how they could work with the organic shapes taken from bacterial growth.
While I had already started sketching out some of these mechanisms, I needed to be realistic about what I could feasibly create. My goal was to produce brooches that felt sleek and refined, maintaining the level of craftsmanship I had envisioned from the start. Reflecting on my work from Unit X, I was pleased with the mechanisms I developed and the overall level of refinement I achieved. However, I recognised that there was still room for improvement. This reinforced my decision to pursue a similar approach in this project while refining and elevating my designs further.
Initially, I considered making the front piece and backplate as separate components, connected using a deluxe clutch pin. However, I quickly realised that this approach did not have the level of silversmithing I wanted to challenge myself with. Silver was an essential material in my design process, not only because it tied back to the original object I swabbed (my silver ring) but also because it would enhance the overall aesthetic and value of the brooches. If I were to secure a place at New Designers, then both of these things would be important.
After much deliberation, I decided on an inset silver bezel with small prongs to secure the backplate to the brooch mechanism. This design choice allowed me to integrate silver while maintaining the level of craftsmanship I wanted. The next challenge was determining how to attach the 3D agar front piece. Initially, I had planned to use a bezel-set extension from a silver wire, but this felt too predictable and too similar to my Unit X designs. I wanted to push myself creatively and find a different solution.
Eventually, I combined elements from my initial ideas to develop a more refined approach. I realised that I could drill into both the 3D agar piece and the backplate, allowing a silver wire to extend from the backplate and be securely glued into the agar structure. While I hate the idea of using glue in my work, I know that in this case, there is no alternative. This method would allow the front piece to be positioned slightly above the backplate, creating approximately 5mm of clearance.
While visiting Collect, I noticed similar techniques used in other jewellery pieces, which reassured me that this approach could add an interesting dimensionality to my work. By allowing the agar piece to hover slightly above the backplate, I could emphasise the concept of bacterial extension, further reinforcing the themes of my project.
Planning Mechanisms


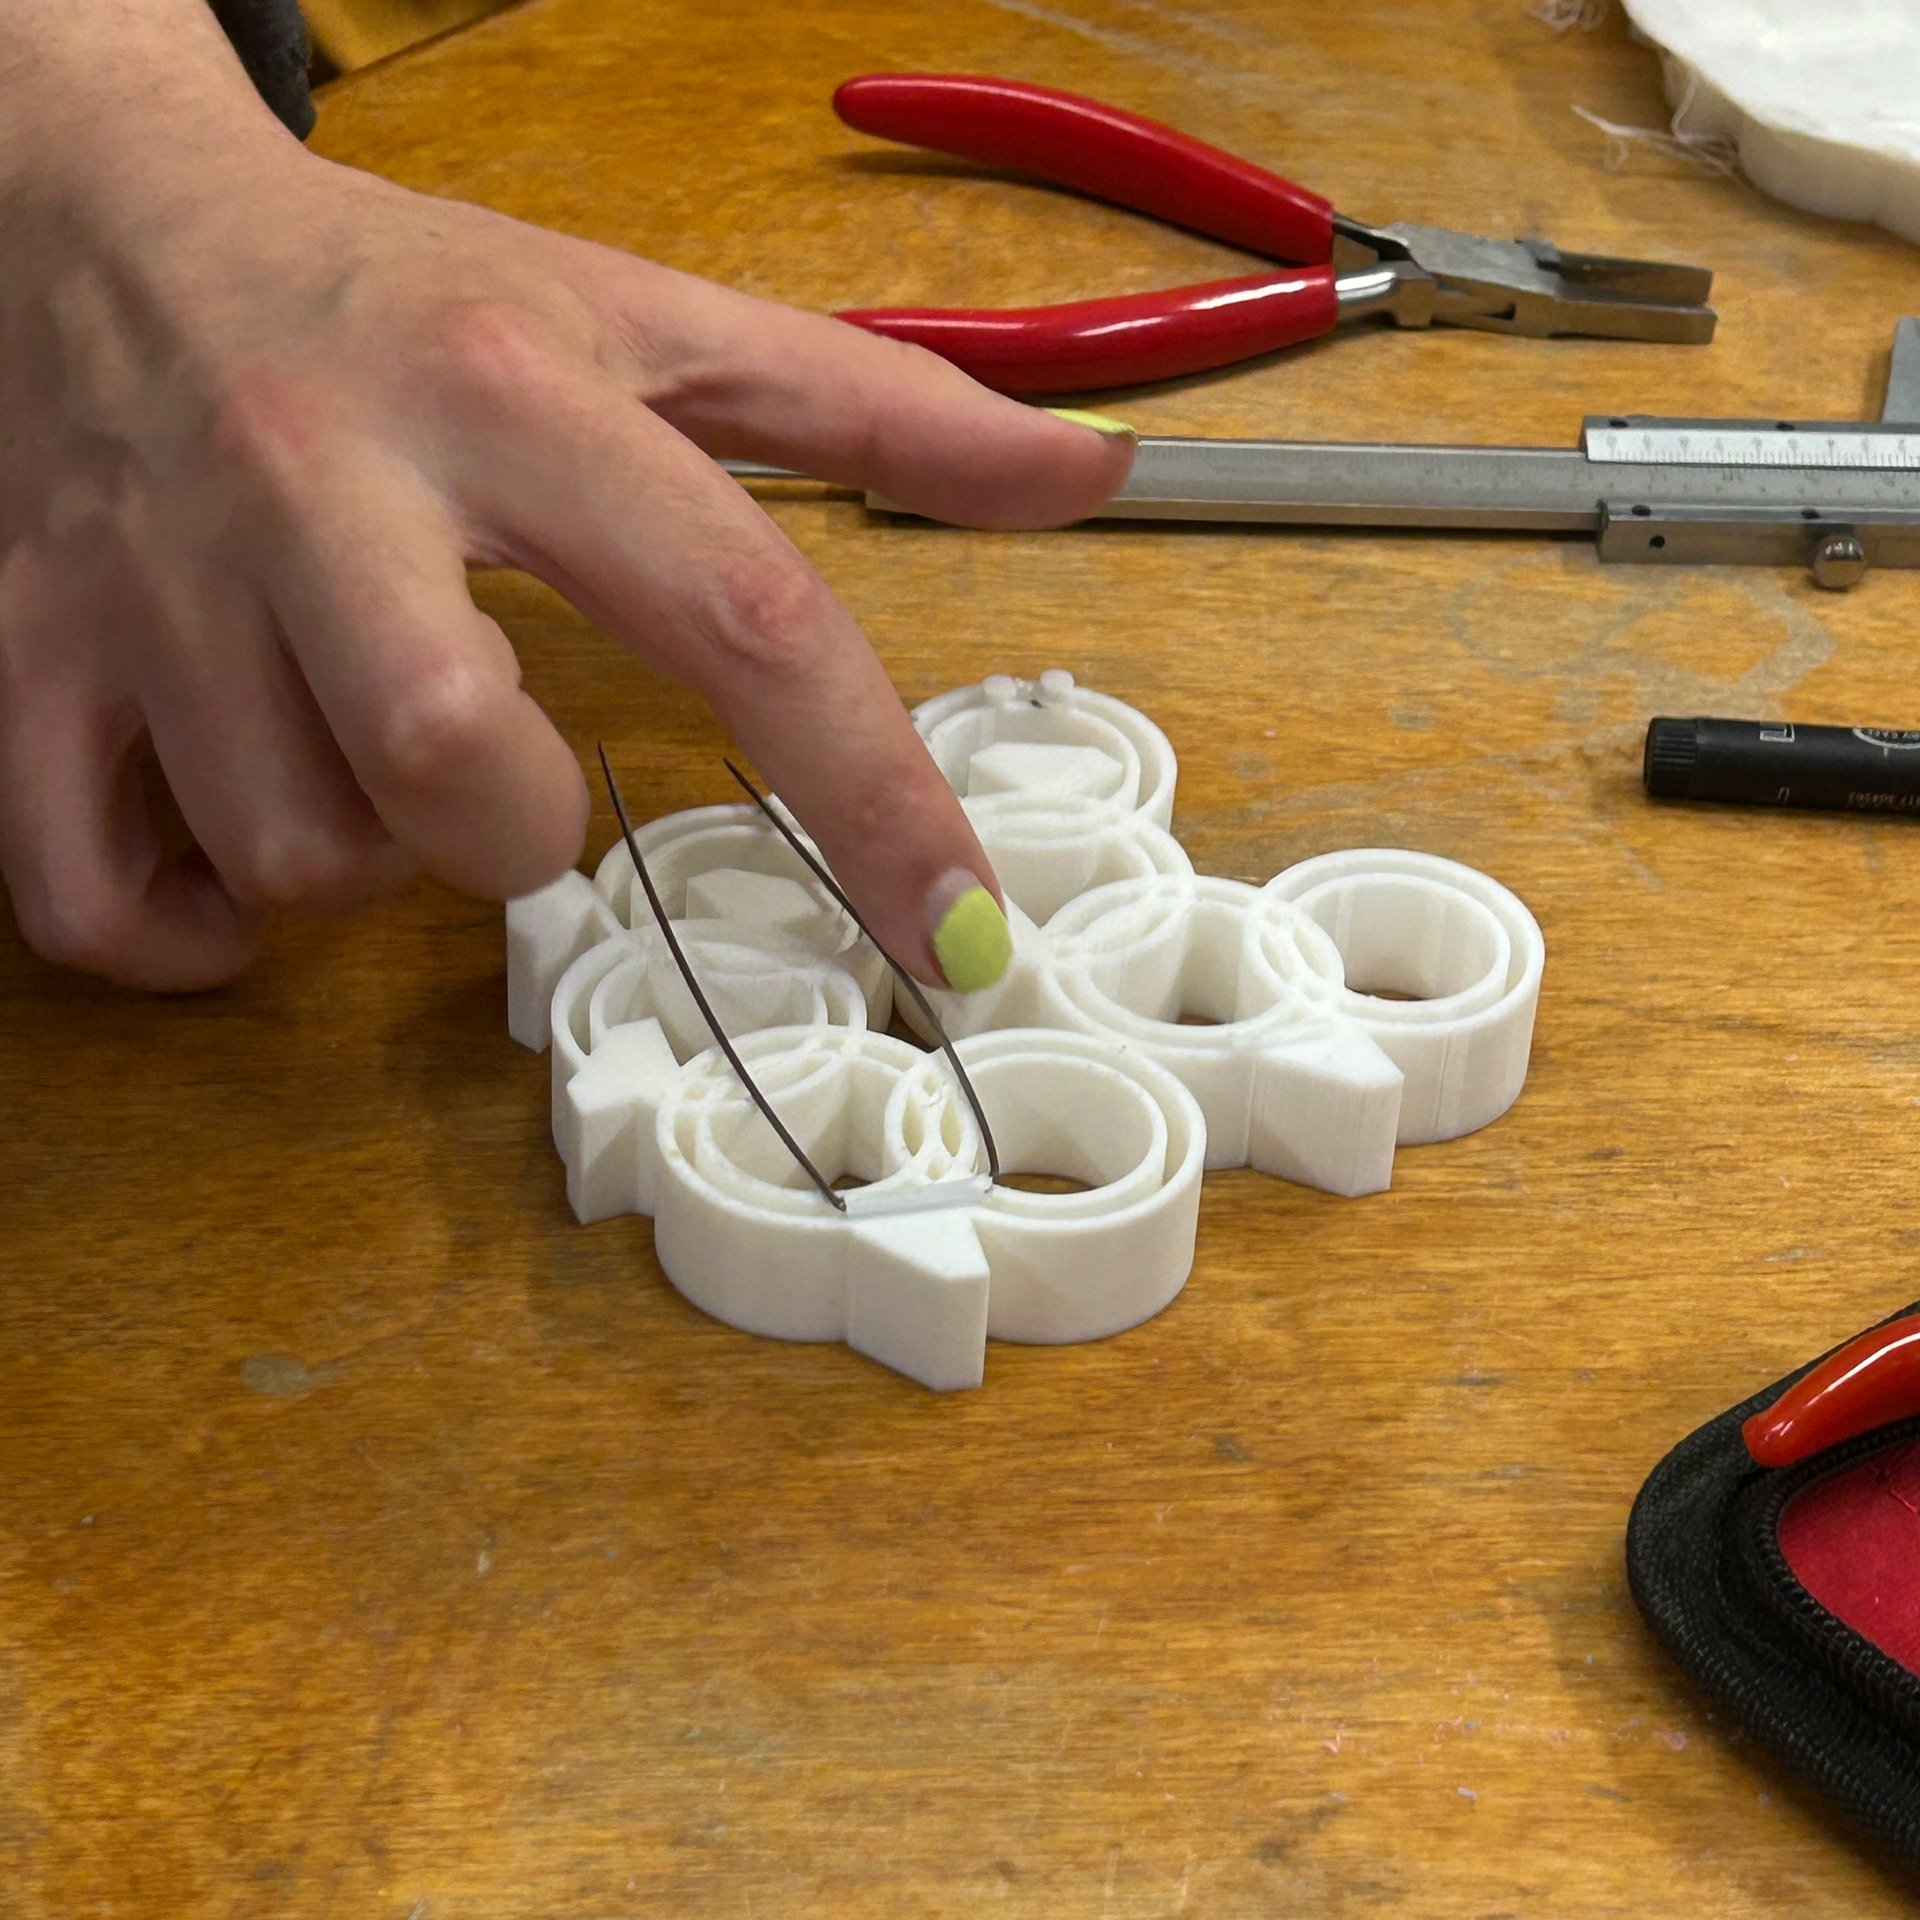
Moving forward from my initial mechanism ideas, I began sketching directly onto my 3D prints. This allowed me to visualise how the designs would function and help me identify any potential adjustments that might be necessary. Since the success of my mechanisms depended on the specific shapes I chose from the bacterial growth, I needed to be highly selective in deciding which forms to incorporate.
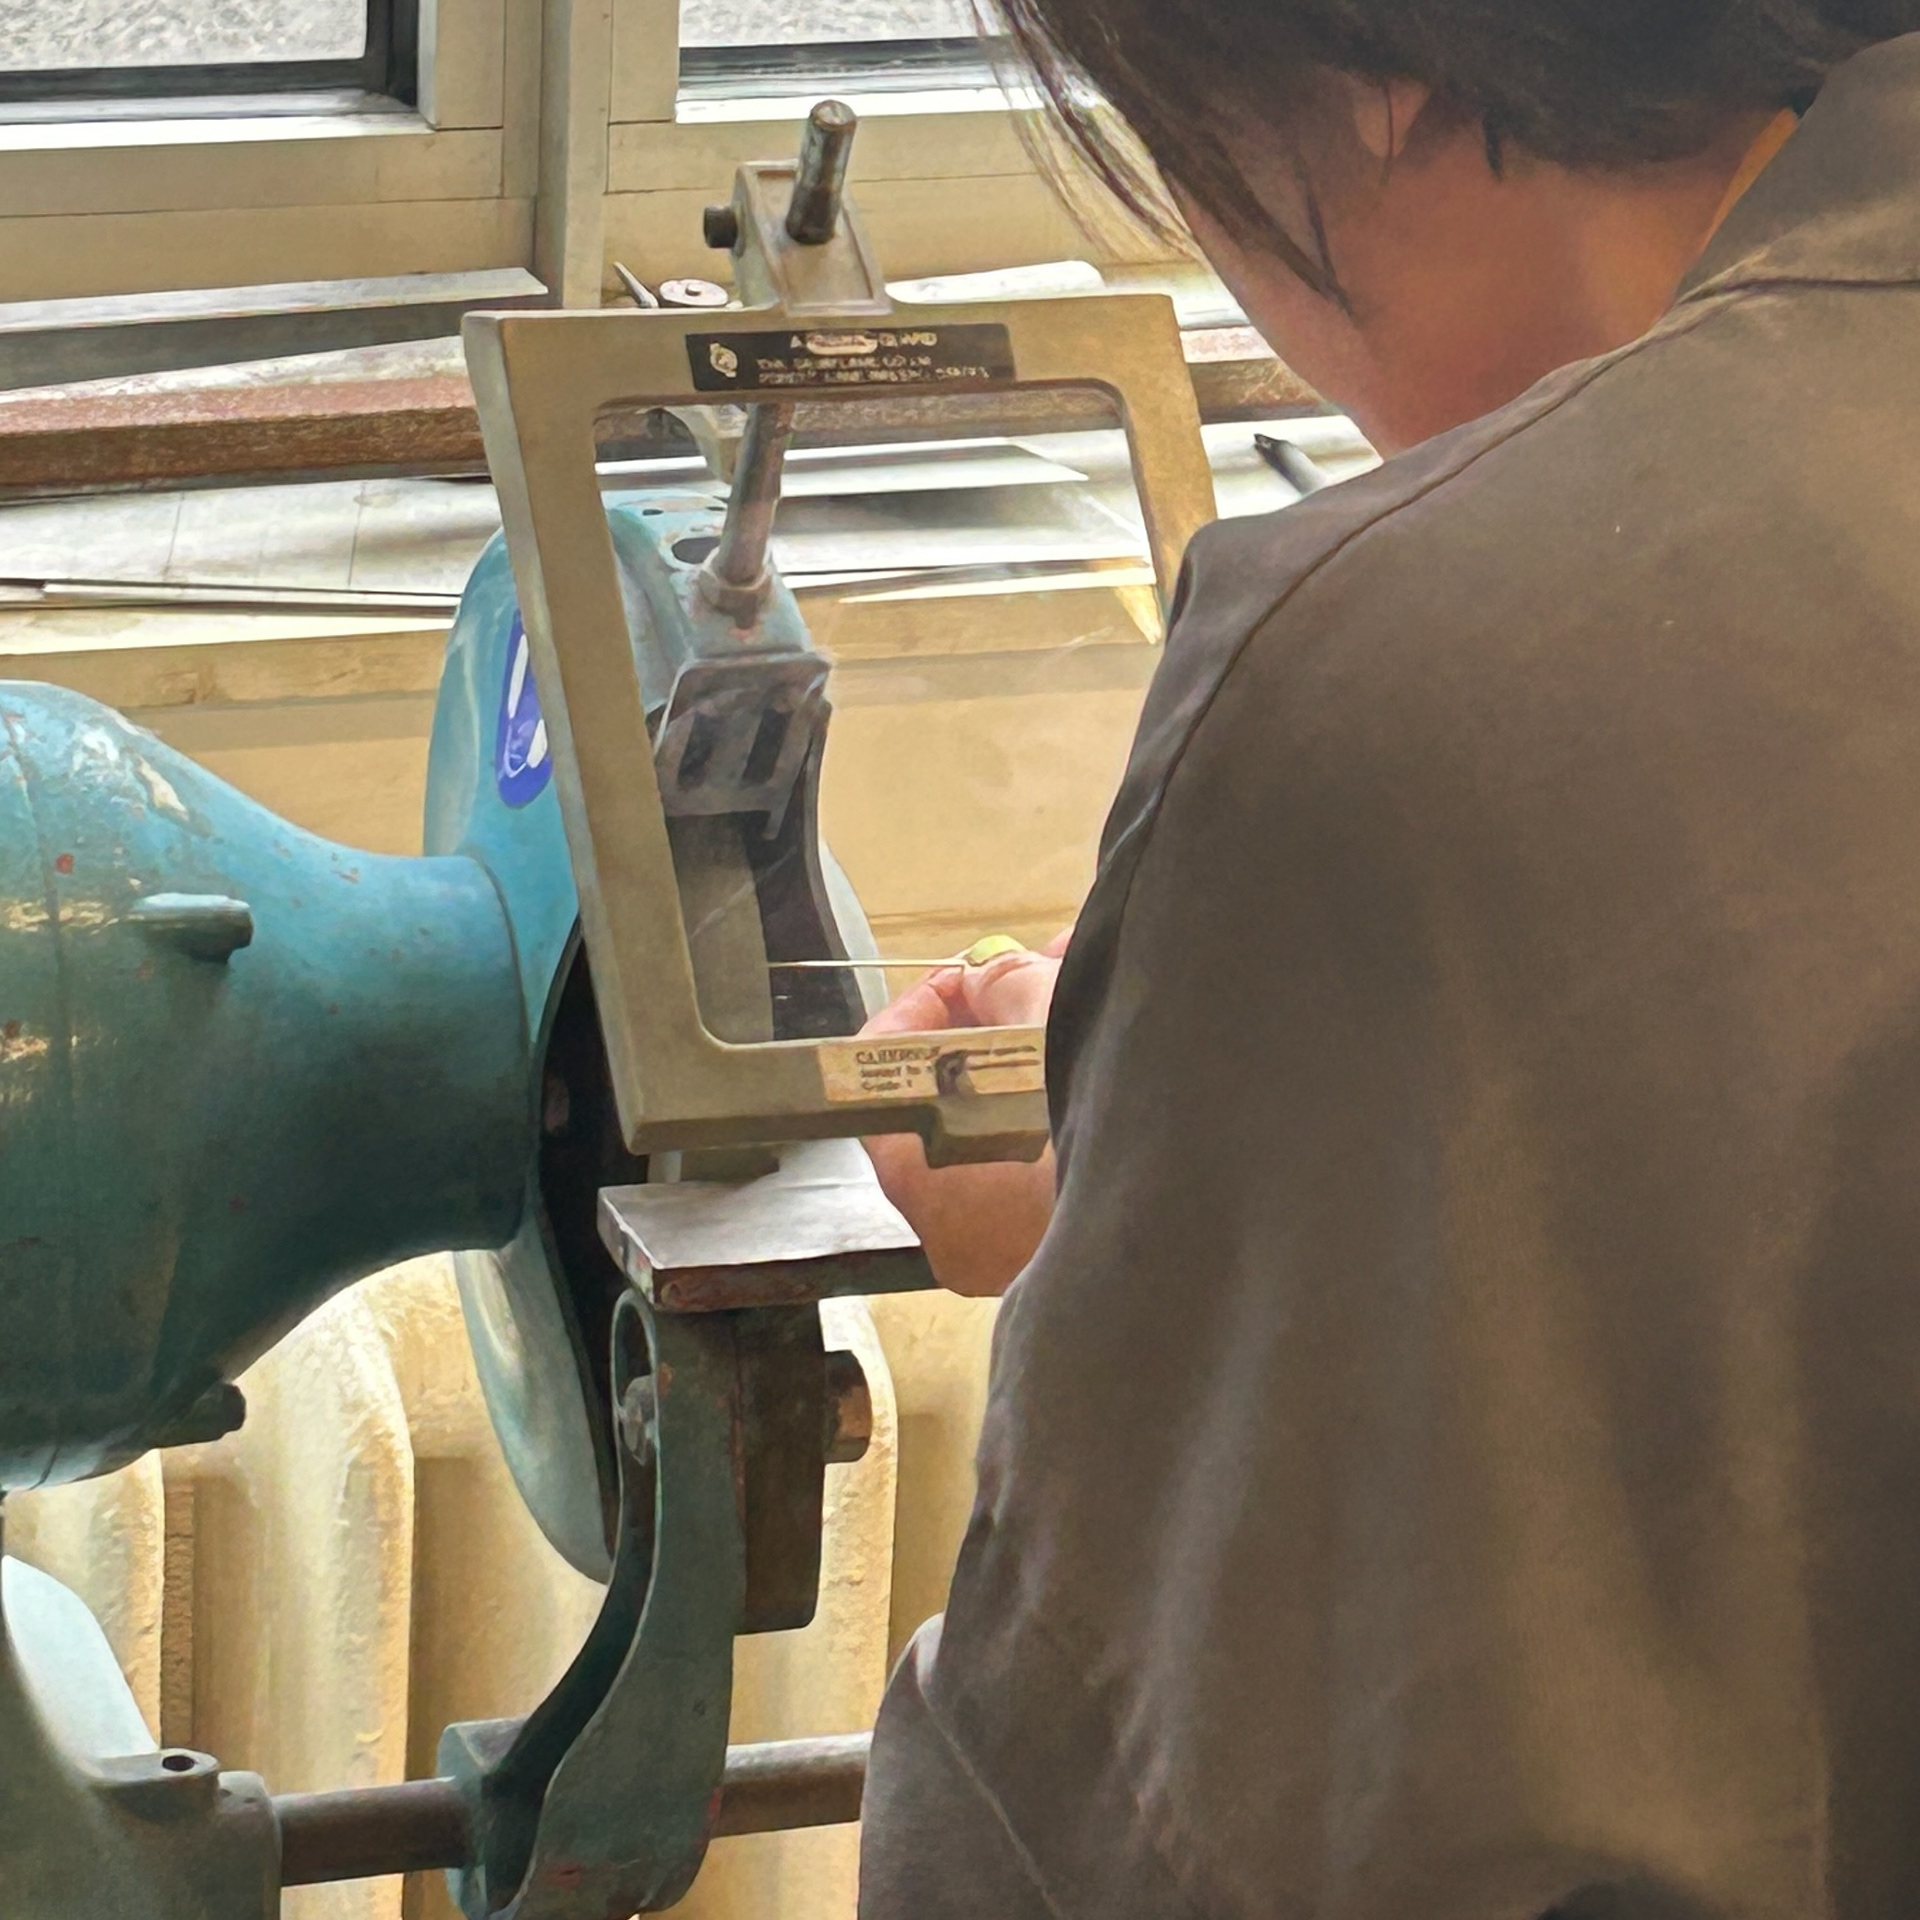
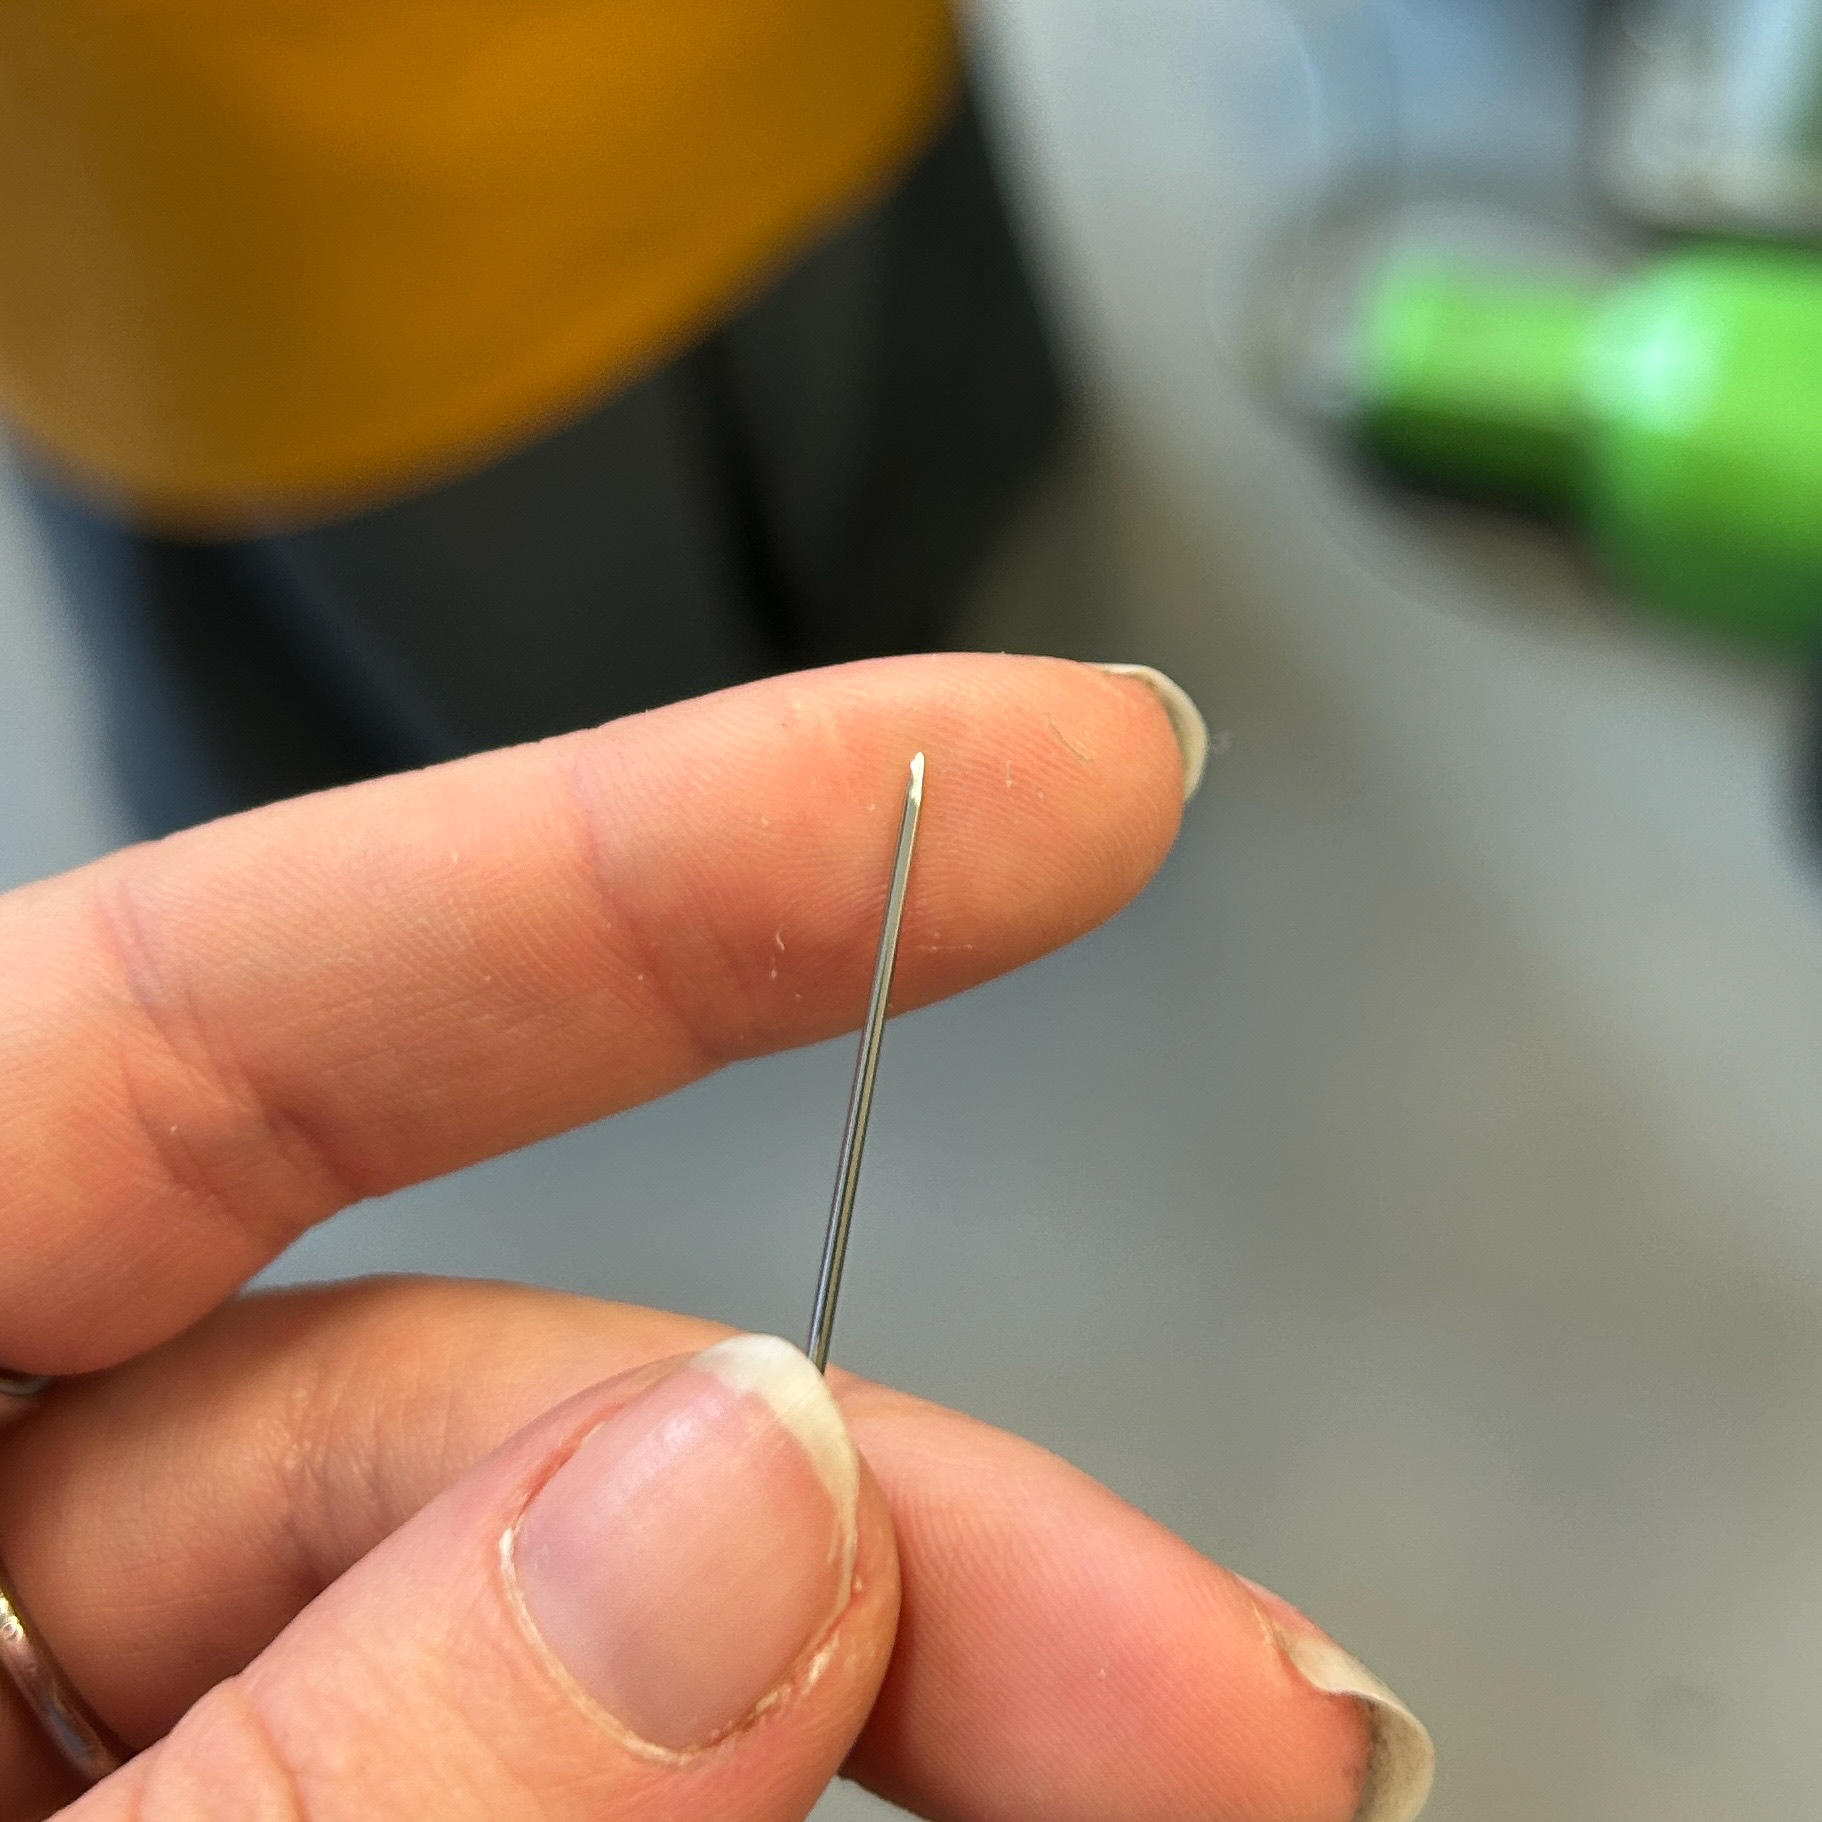
With this in mind, I returned to Rhino to experiment with the thickness of the silver wire I planned to use. I initially started with 3mm wire, as I had worked with this before, but I quickly found that it appeared too thick and visually heavy for this design. This led me to explore different wire thicknesses to find the right balance. Although the 3mm wire was not suitable, working with it gave me an opportunity to test potential placements for the brooch mechanism, helping me refine the overall structure of the piece.
This process of sketching, modelling, and digital experimentation has been crucial in ensuring that both the aesthetic and functional aspects of my brooches work.
To the Point by Daniela Malev
As part of my research into brooch pins, I revisited To The Point by Daniela Malev, a book I have found incredibly useful in the past. Not only does it give me inspiration for brooch mechanisms, but also in terms of design choices. For example, the array of different prongs used on the different brooches is also inspiring and has given me new ideas.
Patricia Brooch Workshop
11th March 2025
Most of the jewellers on the course are creating brooches, yet none of us are entirely familiar with the technical rules of brooch-making. While we have all looked through the book 'To The Point', I have personally found it challenging to apply the mechanisms shown in the book to my own designs. Once again, translating theory into practice has proven to be more difficult than expected.
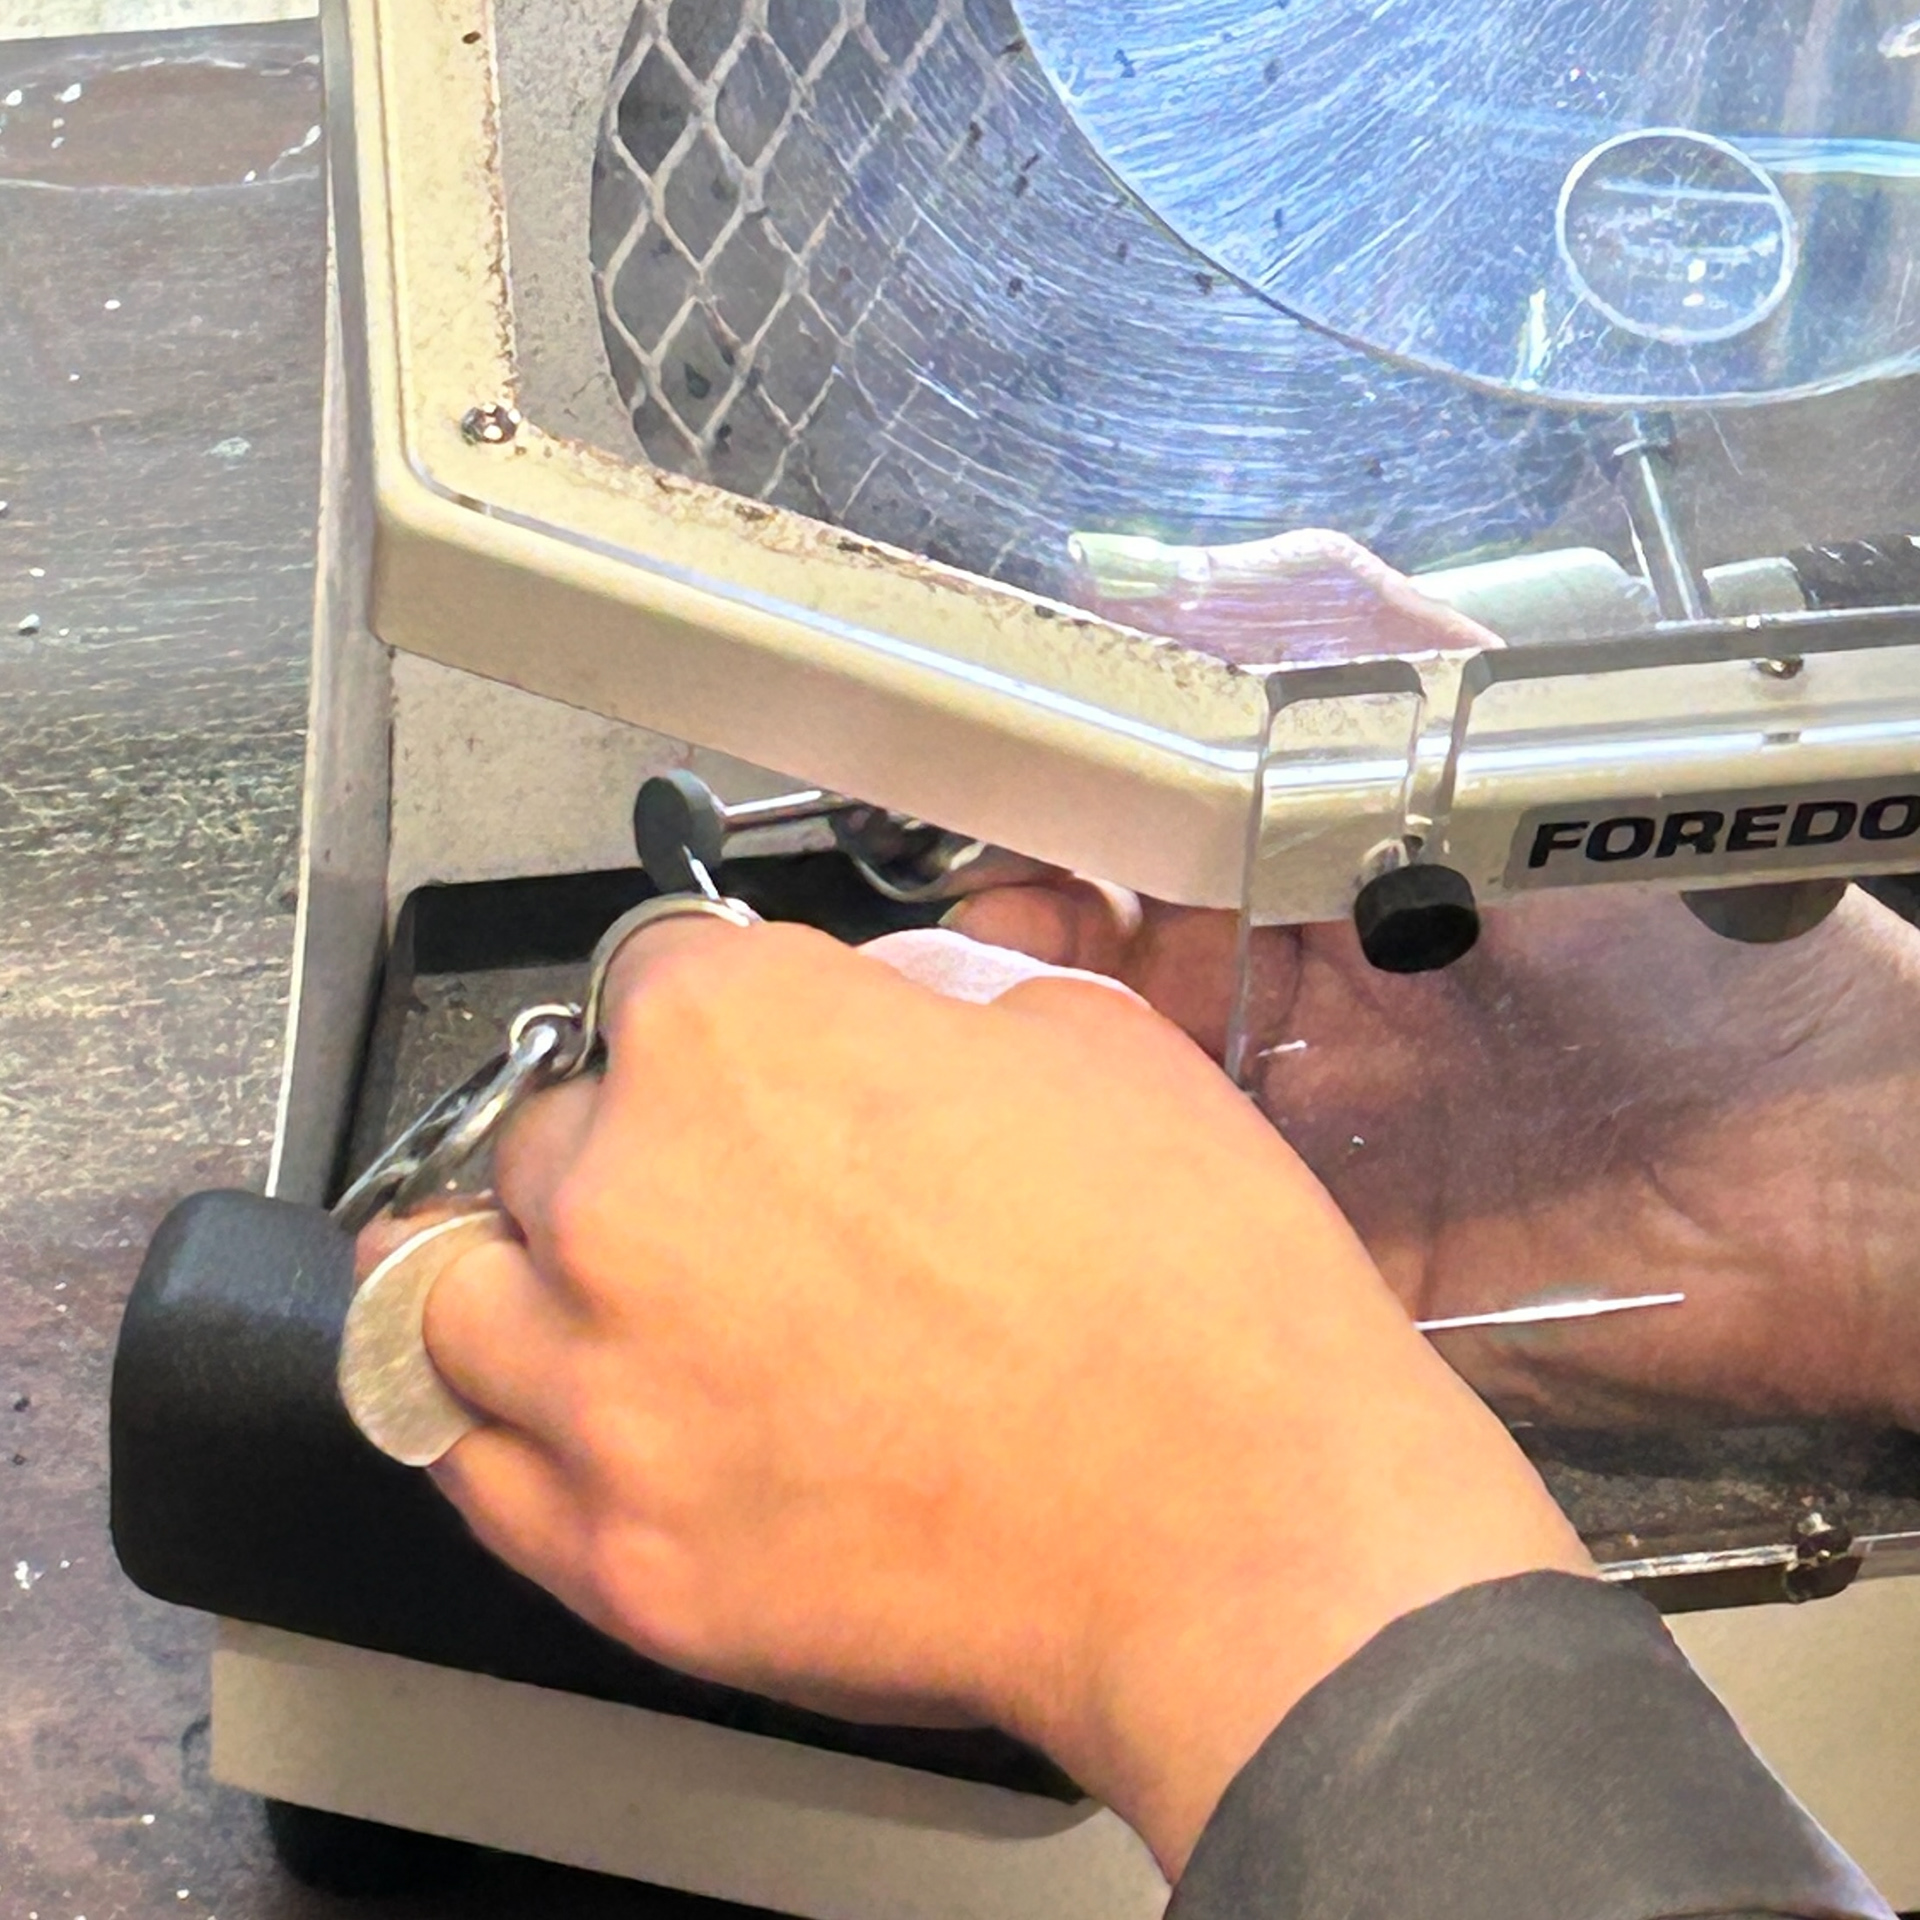
Fortunately, Patricia has an excellent understanding of brooch construction and showed us the process step by step. She demonstrated how to take precise measurements, consider appropriate widths, and properly shape the pin. Previously, we had all been filing our pins manually, which, at least in my experience, often resulted in the pins being uneven and asymmetrical. However, Patricia introduced us to a more efficient technique using a pendant drill and the grinding wheel in the big metal workshop. This method not only ensures greater accuracy but also produces a cleaner, more professional finish.
Her insights and advice have been incredibly valuable, giving me a clearer understanding of how to refine my mechanisms and improve the overall quality of my brooches.
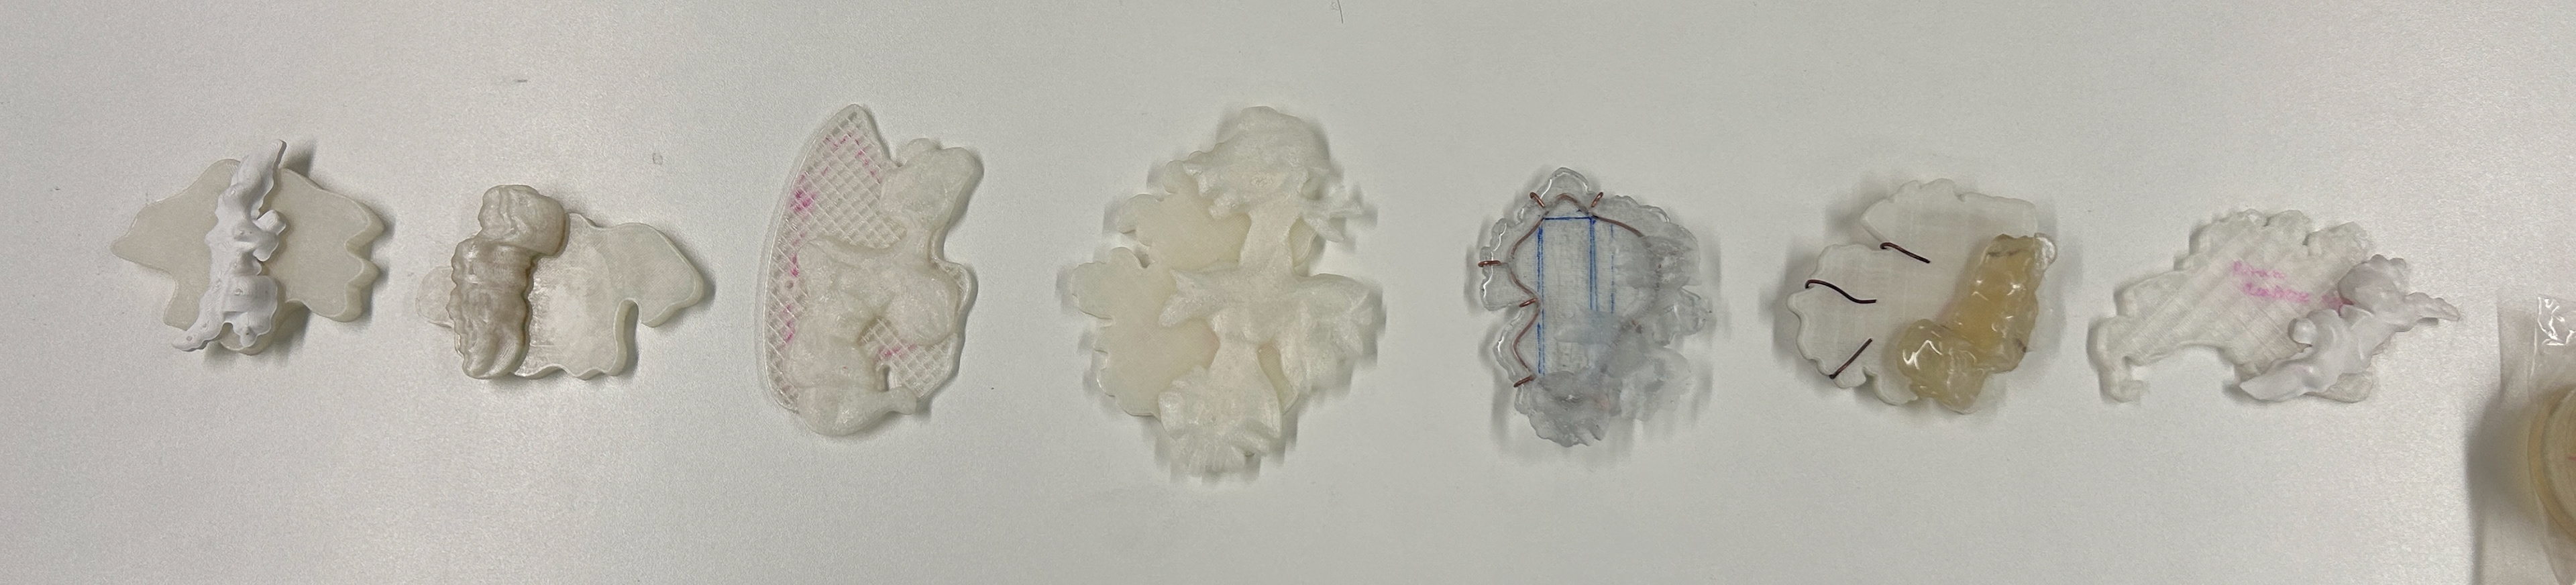
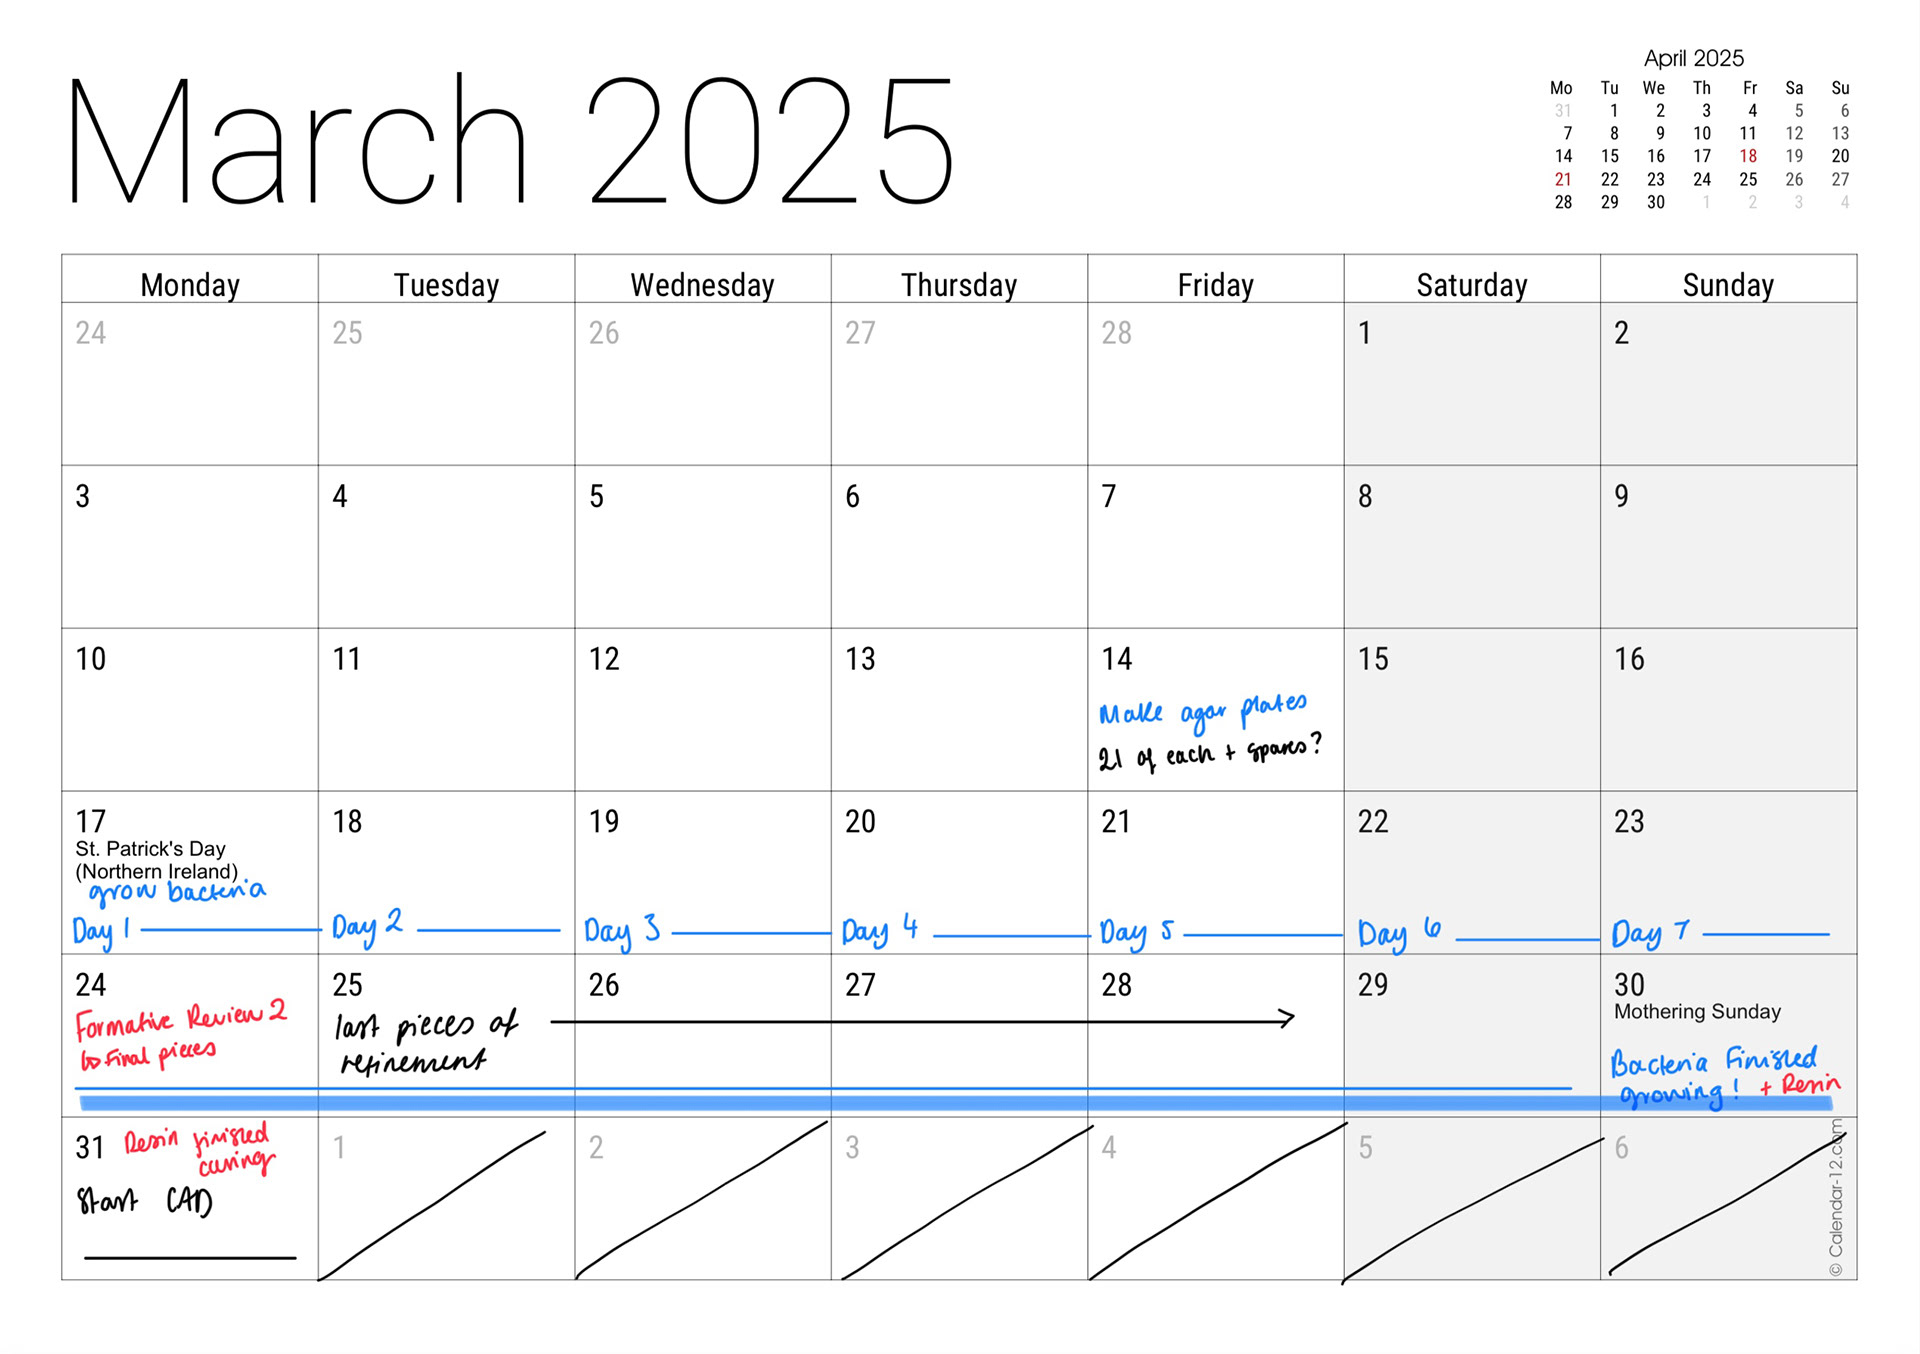
Time Experiments

Day 1

Day 2

Day 3

Day 4
Day 5
Day 6
Day 7
After reevaluating my project concept, I decided to track the growth of the bacteria found on my ring over the course of seven days. I allowed the bacteria to grow to its full potential, which took four days, as the agar plates I was using were smaller than the usual ones I work with.
I found the concept of observing how the bacterial extension from the same object changes throughout a week to be particularly intriguing. The changes in growth over the days provided lots of material that was useful for creating my CAD models, as each day's growth had a unique texture and form.
However, I did encounter a challenge on Day 1. The bacteria had already covered most of the plate, despite being grown for the same amount of time, leaving very little material for me to work with. I could use the negative space to make the shapes in Rhino, however, I feel as if this is not using bacteria as a collaborator in the same way. This outcome made me realise the importance of careful planning for my final piece. Knowing this, I plan to grow three plates per agar per day, totalling 42 plates. This approach will give me more flexibility in selecting the most interesting bacterial colonies and will help ensure I have enough material to work with. Additionally, by doing this, I will be able to mitigate any potential issues with the bacteria not growing in the desired way. This will provide a broader range of options to choose from.
Formative Review 1 Feedback
13th March 2025

After receiving my formative review feedback, I used ChatGPT to help summarise the key points from the transcript.
The main takeaway was that while I have been consistently critically reflecting throughout this project, this has also had a downside, I have been overly self-critical, not allowing the project to "breathe." I have become so focused on small details that it has affected my overall progress. I feel behind because I’ve spent so much time in CAD, trying to perfect the shapes I want, which has resulted in less time in the workshop. This has led to me not completing a single model and, in some ways, becoming disconnected from the materials I work with.
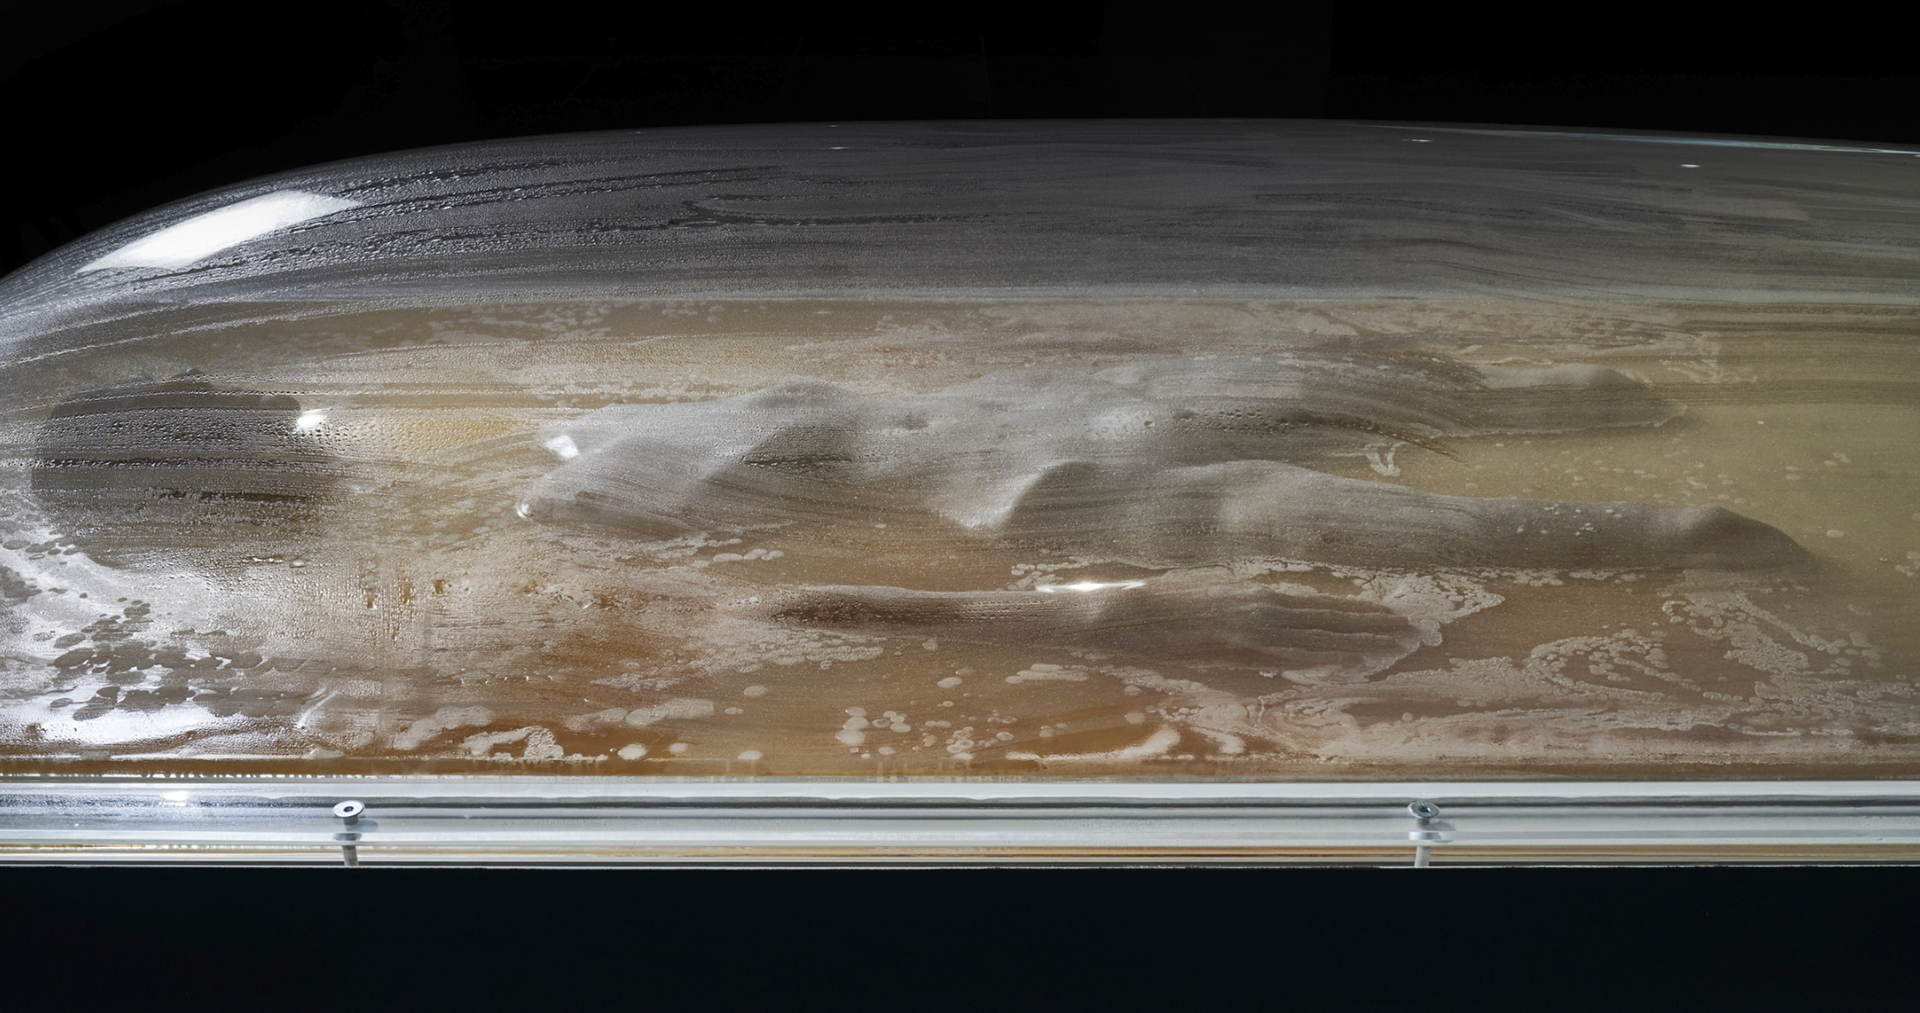
Thankfully, just before my formative review, I recognised how much time I had lost and made a conscious effort to return to the metal workshop. Since then, my progress has improved. However, when working on the piece I brought into the workshop, I encountered casting issues with the resin. There were too many bubbles in the material, while this wasn’t my primary concern at the time, I knew I needed to resolve the issue before creating my final piece. As a solution, I have since invested in a vacuum chamber for the resin, and after testing it on my bacteria samples, I found that it works very well.
Another key goal I need to focus on is completing at least one finished brooch, a challenge set for me by Geoff, Patricia, and myself. While I have been testing each individual element of the brooch, I now need to assemble everything and see how it all comes together, incase I need to make any adjustments.
Overall, I was surprised by the grades I received, they were much better than I had expected and has given me a clear sense of what I need to accomplish next as I move toward creating my final pieces.
Curation


As part of the degree show curation, we were tasked with setting up our displays in the box to experiment with different layouts. Initially, I had planned to present my pieces on a long plinth, but after receiving the New Designers' decision, my display was moved to the wall. I took this as an opportunity to explore a wall-mounted presentation for my work.
Inspired by the displays at Munich Jewellery Week, where fabric canvases were used to hold jewellery, I decided to recreate a similar approach. I debated between using white or black fabric. White would create a cohesive look with the rest of the group, but black enhances the details of bacteria, making them more visible. However, as I was using blue agar for the backplates, then white may be a better option.
While thinking about which colour to use, I looked at which CAD models to exhibit in place of refined objects. While deciding on the arrangement, I went back and forth between displaying five or seven brooches. Seven would conceptually reference the days of the week, but it felt too cluttered, especially since each piece is unique.
I asked the other students which they thought would look better, and most agreed that five brooches looked more balanced than seven. Taking this into account, I decided to showcase five brooches and gather further opinions, including feedback from Lillie Tew.
5 brooches
7 brooches
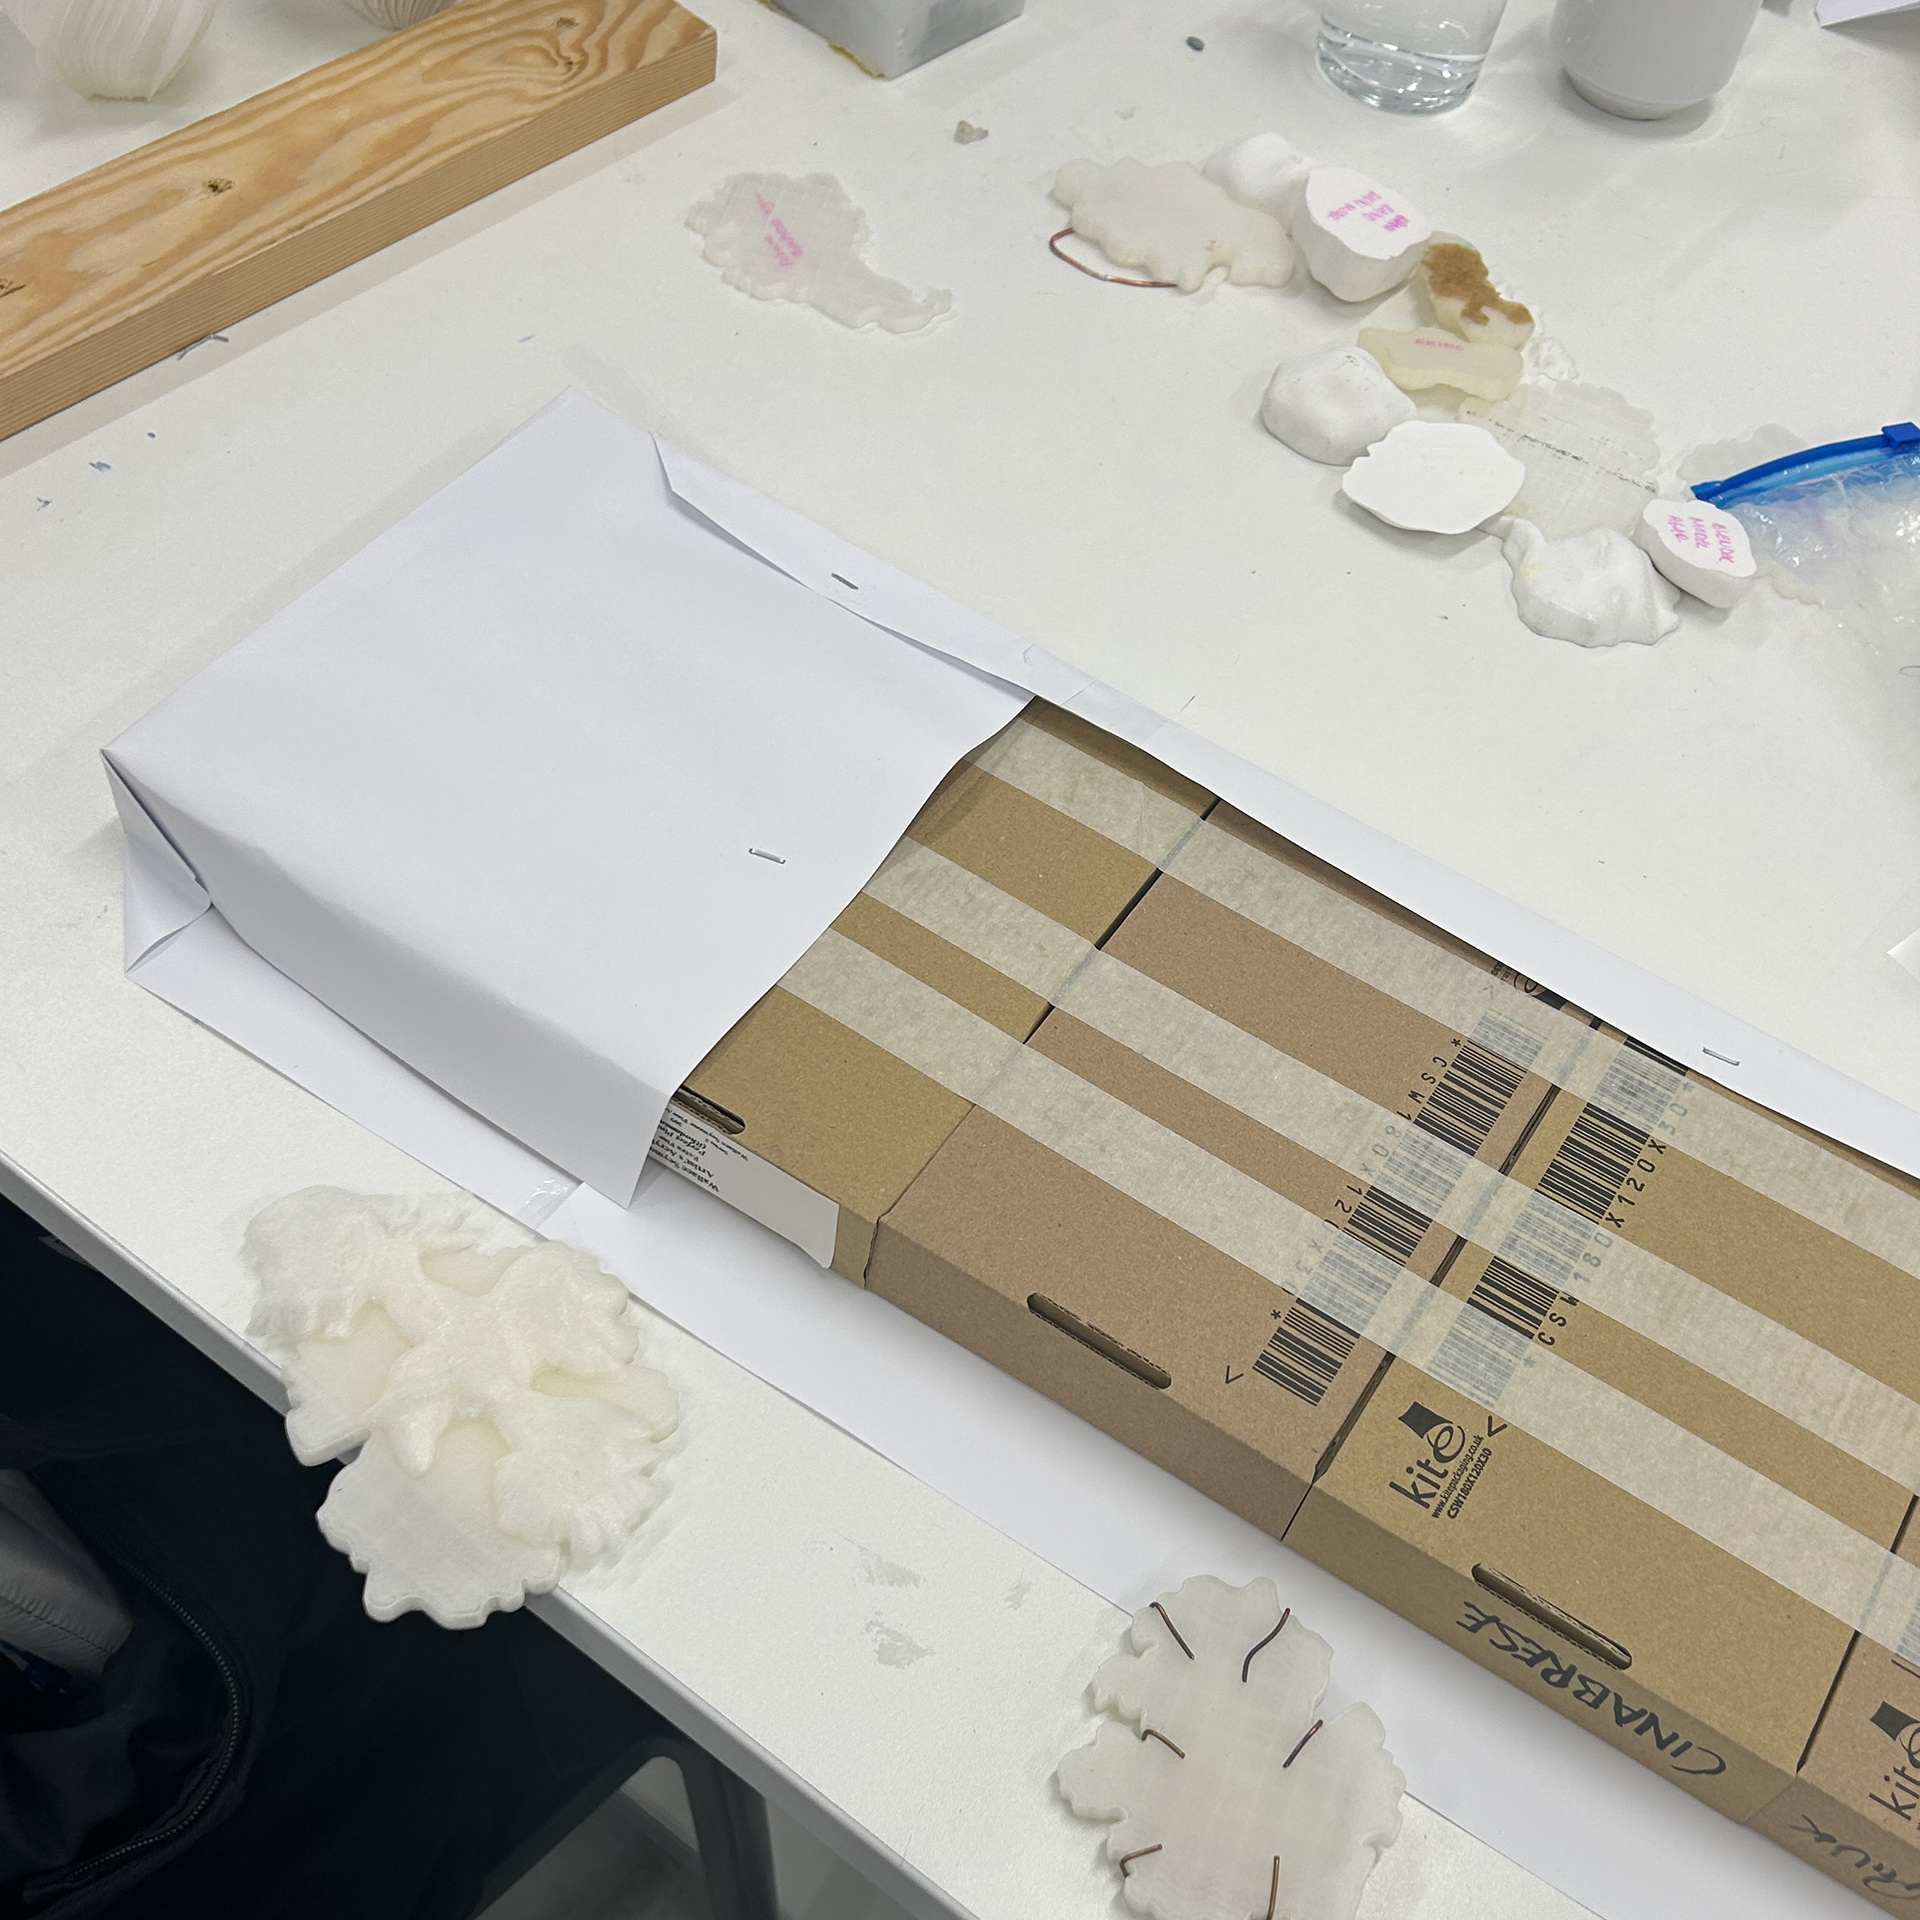
I then moved on to constructing my display. As part of the brief, we were encouraged to be resourceful with materials we already had. This prompted me to experiment with cardboard and paper as my primary materials. Cardboard allowed me to easily adjust the structure and dimensions of my display, while the white paper served as a stand-in for the fabric I had initially considered.
I then set up my display, using tape to hold the pieces that didn't have brooch pins, and pieced the paper with the one that had the brooch pins. However, as I stepped back to look at the setup, I realised that I actually preferred the clean, flat appearance of the white paper over textured fabric. The simplicity of the paper created a modern aesthetic that complemented my pieces without overshadowing them. This has made me reconsider whether fabric is necessary at all or if I should embrace a minimalistic display.
Making my display
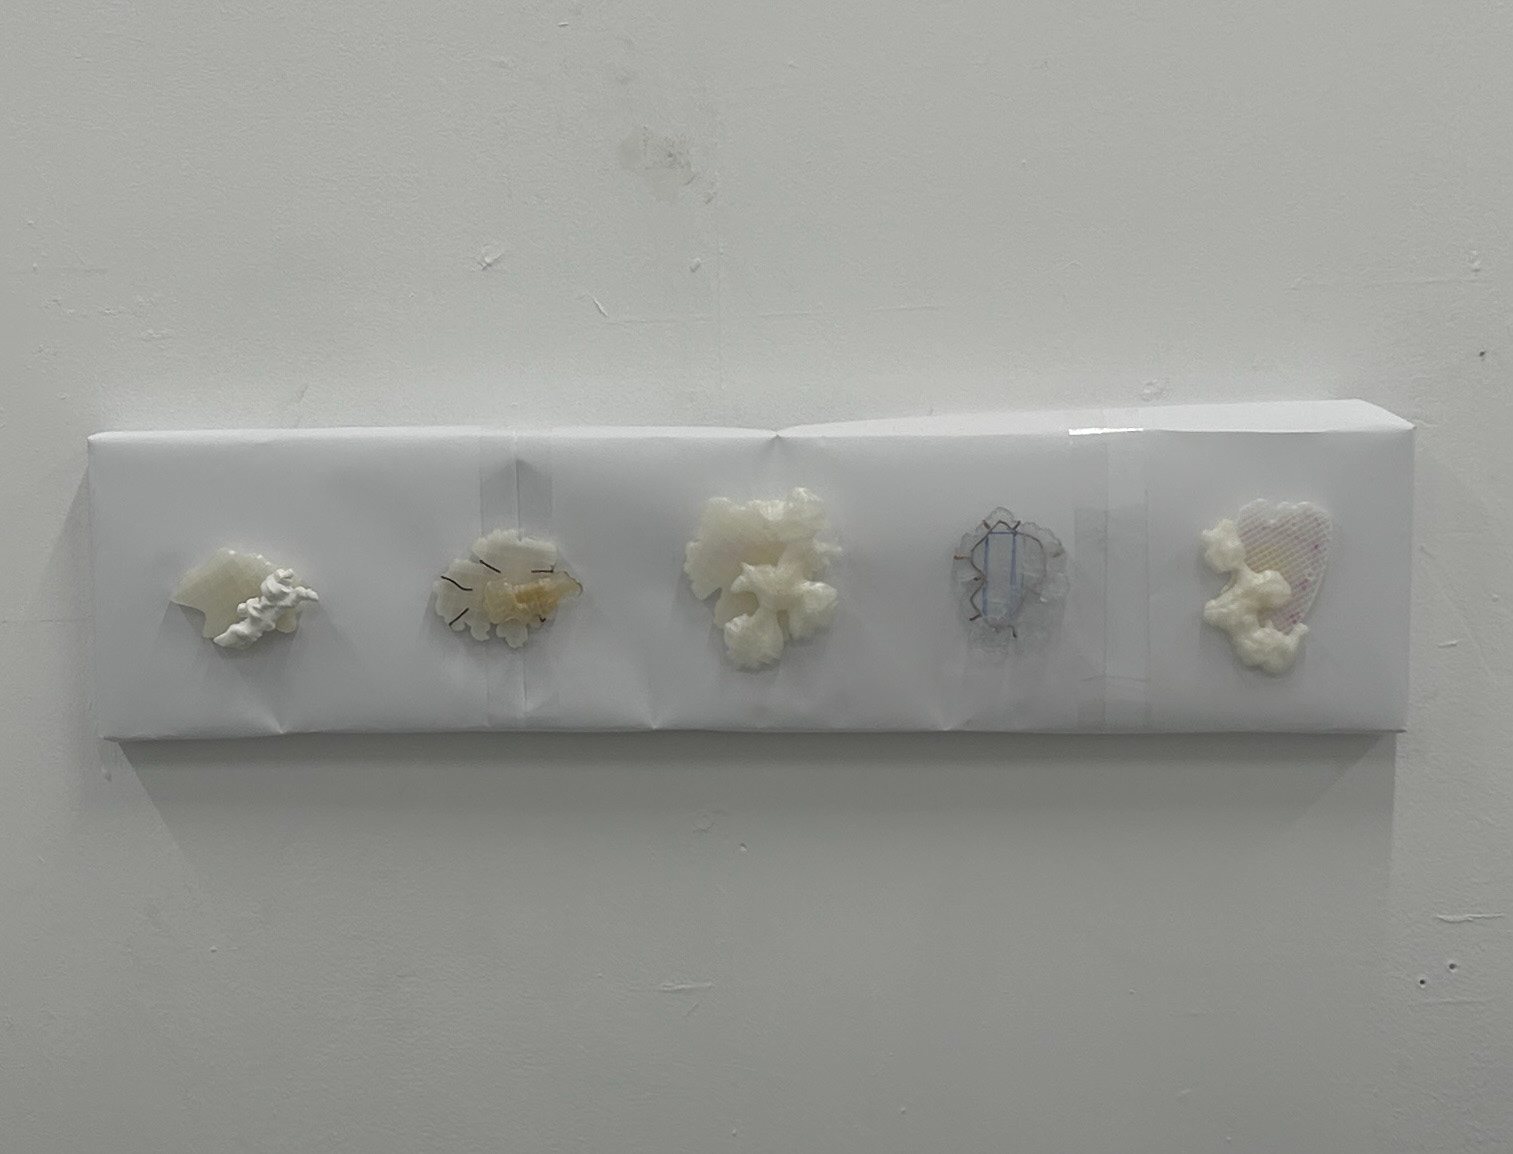
Putting my display on the wall
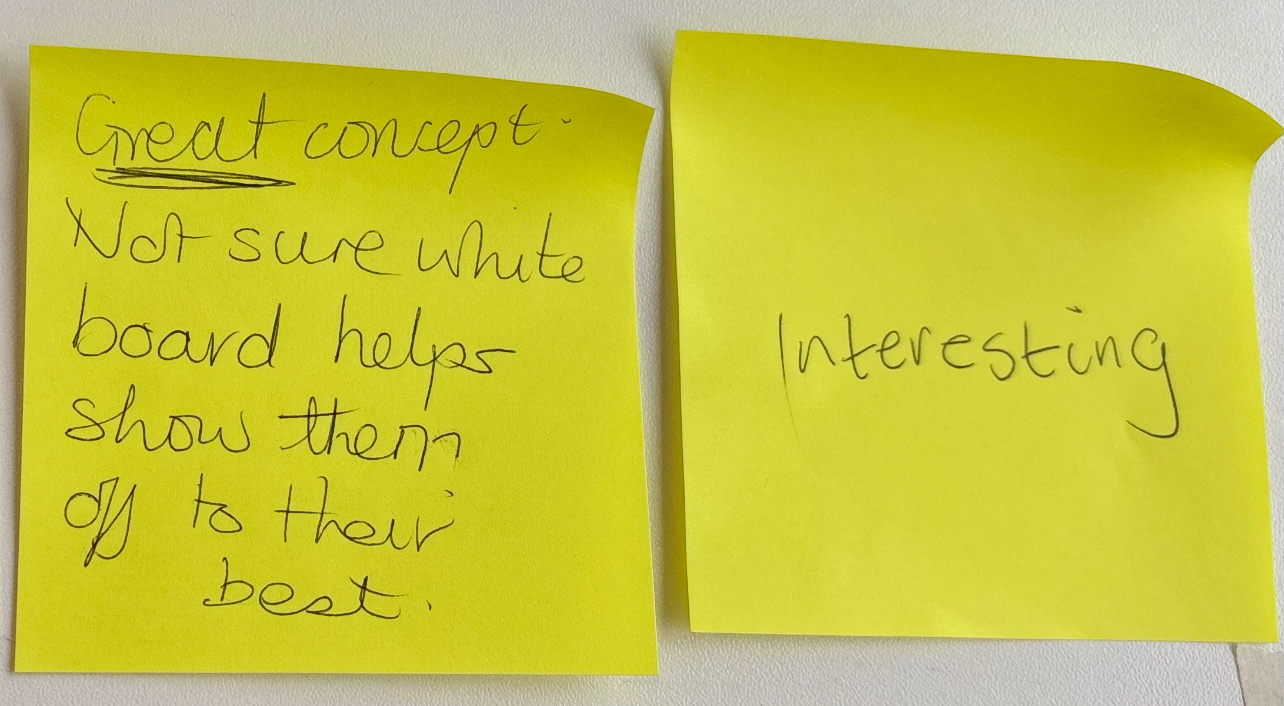
We received feedback, both from Geoff and Lillie, as well as L4 and L5. I had two points from L4 and L5. One of which says how the whiteboard may not show the pieces to their best potential. However, after the conversation with Geoff, he explained that he thinks a lightbox with small hooks to hold the brooches would be a better idea.
I was hesitant to include a lightbox in my display, as then I would need power, and to make a lightbox, which I do not know how to do. However, I know that I am able to teach myself how to do so.
This lightbox would allow light to pass through the brooches, and the hooks would give them some clearance between the edge of the lightbox and the brooches, allowing for more of a glowing effect.
This lightbox may also give my work the particular medical feel that I want in my work.
Curation Meeting
3rd April 2025
After speaking with Geoff about displaying my brooches and being hesitant about using a lightbox, he suggested that I 3D print a small shelf-like structure that could attach my brooches to the wall. He showed me a rough version in Rhino, which I later went in and refined. The piece would feature holes for the brooch pins, as well as a filleted hole for a screw to go into the wall.
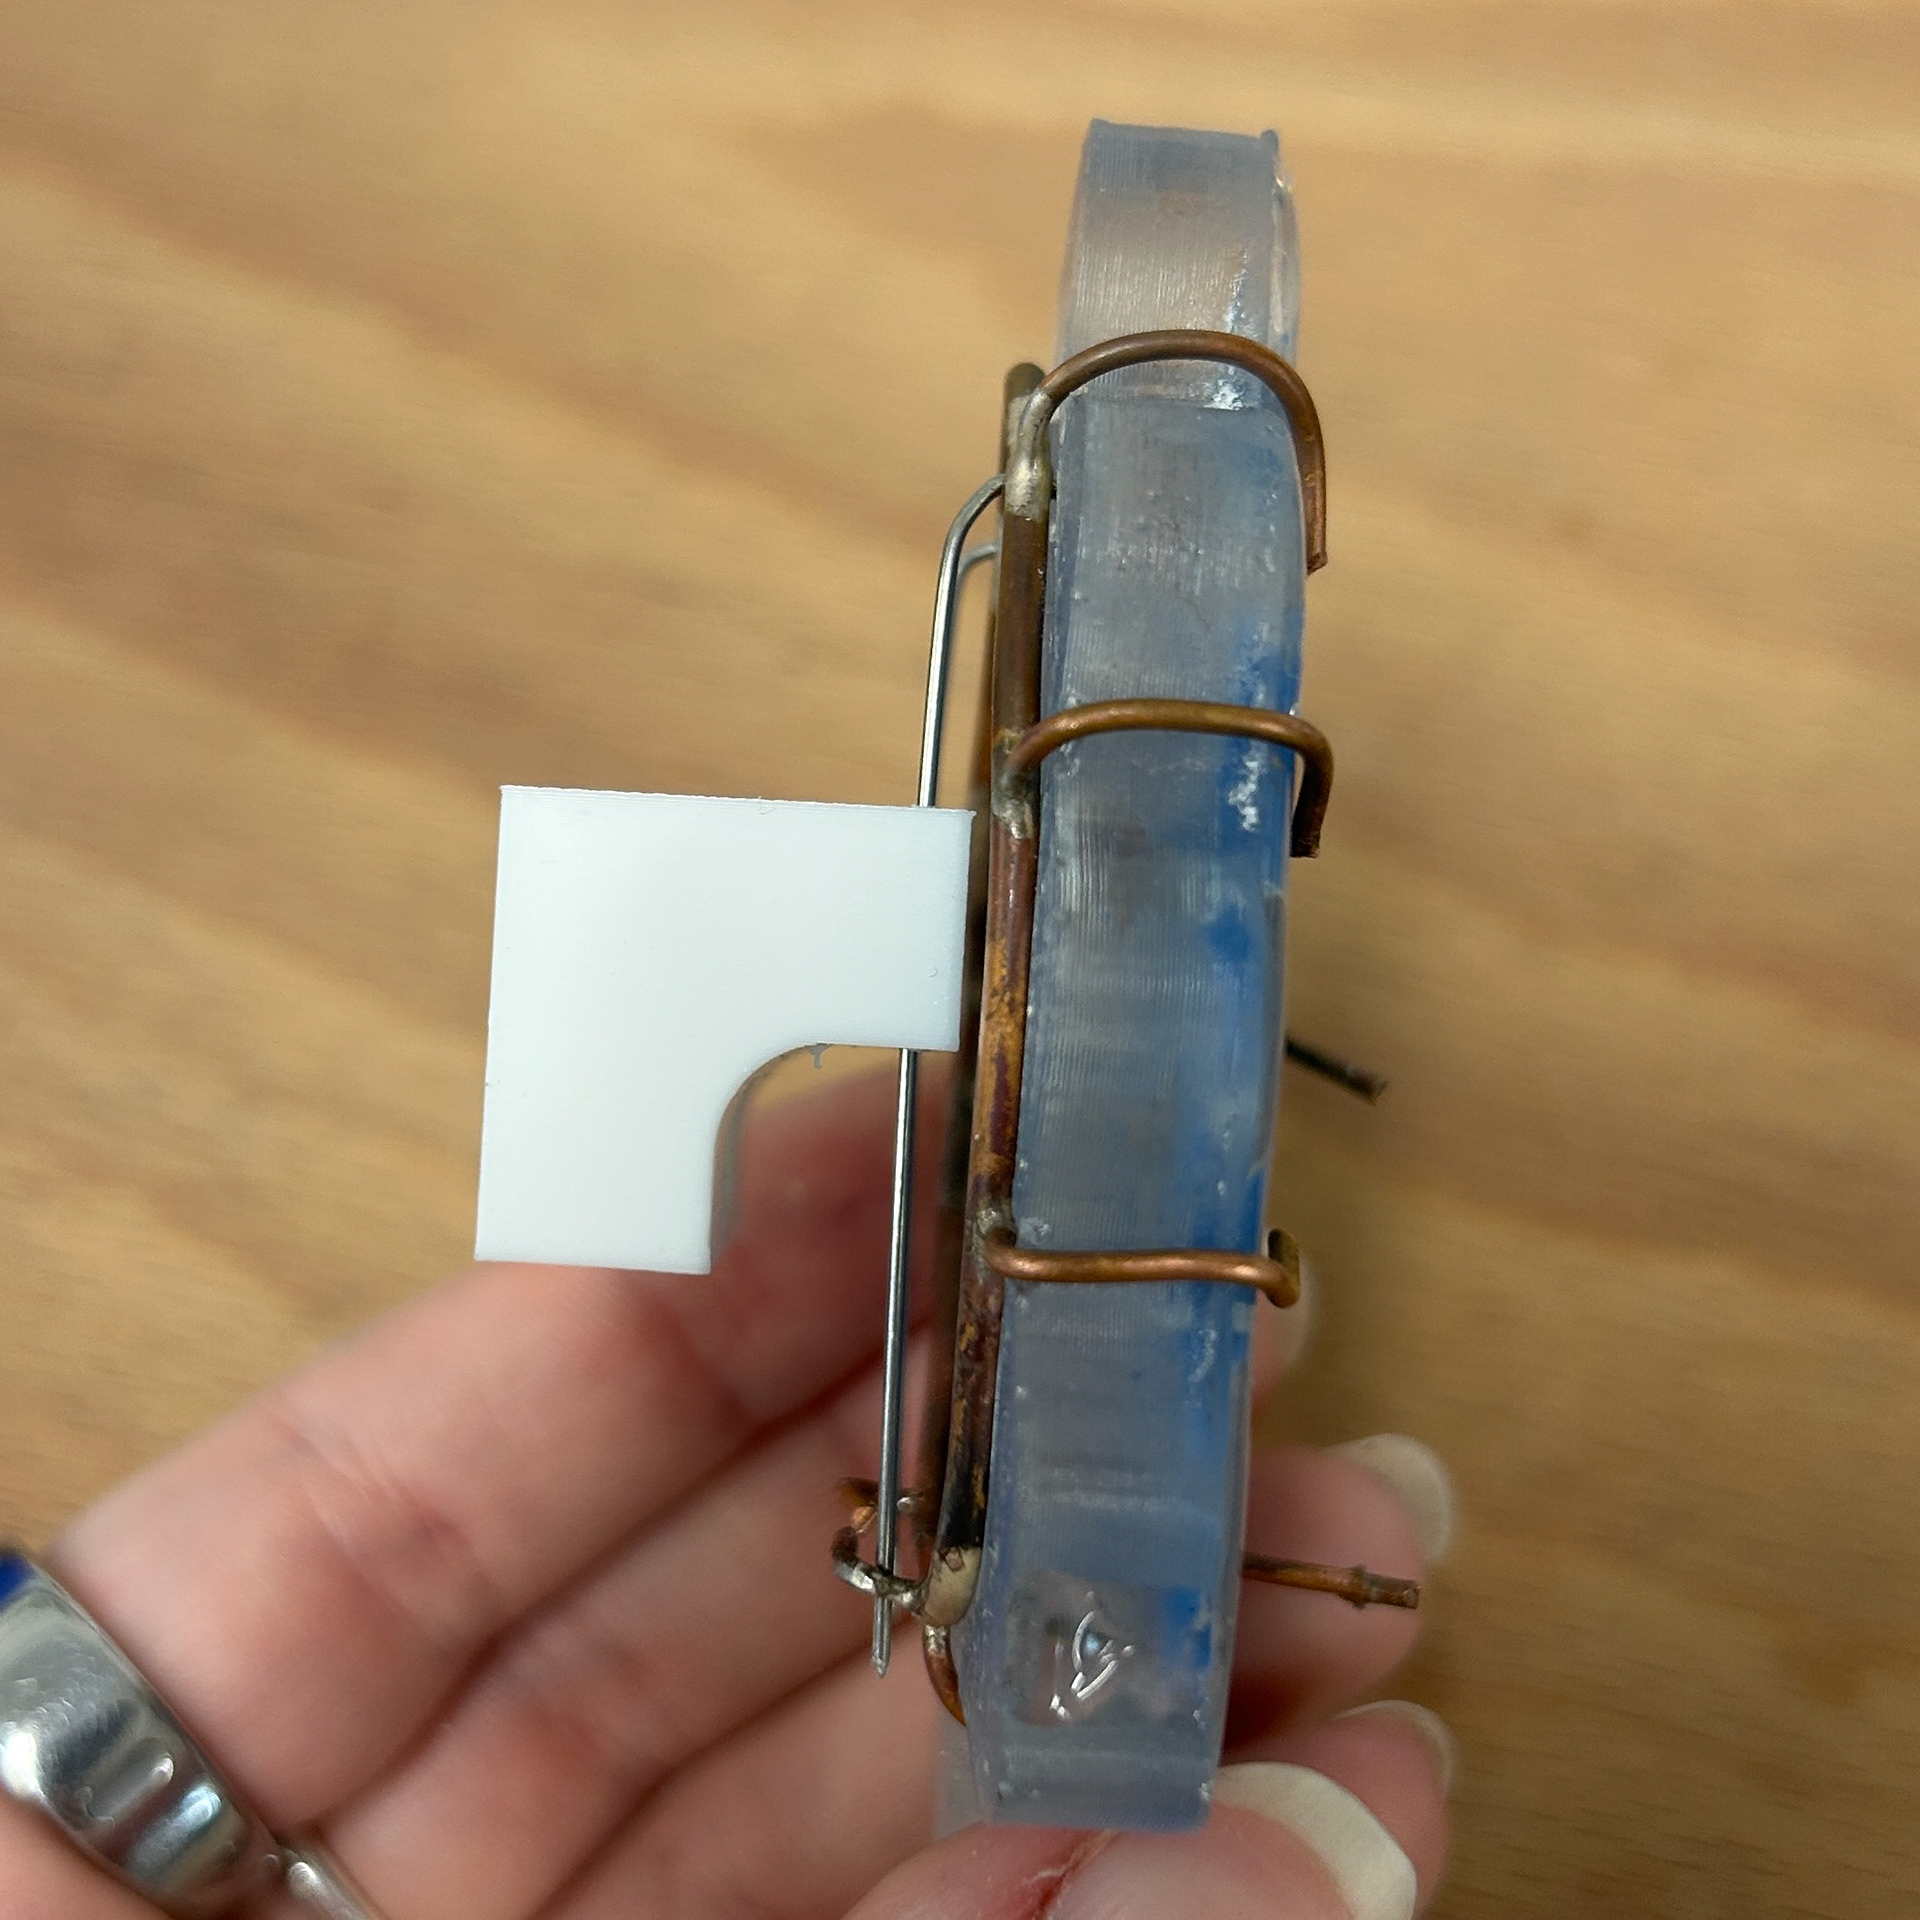

I printed this design in both white PLA and transparent PETG. To test it, I reused the piece from my formative review. Although I got the measurements slightly wrong, I tried drilling a couple of holes at the correct width. However, due to the 10% infill in the prints, there were no solid 'walls' around the newly drilled holes, which made it difficult to align the pins properly. In the end, I decided to use the original printed holes, as they had structural walls that helped guide the pins through.
Although this was a rough test, I was pleased with the outcome. The hole thickness was just right to support my brooches without any sagging. In this version, the white PLA is barely visible from the front, but I know the agar in my final pieces will be thinner and more translucent. Because of this, a transparent material may be more suitable. While the transparent PETG isn’t perfectly clear, it could still offer a better visual result than the white PLA.
Formative Review 2
24th March 2025

During the formative review, I showed Geoff and Patricia my brooch prototype. Although I wasn’t satisfied with the outcome, the tutors gave me advice on how to refine the piece.
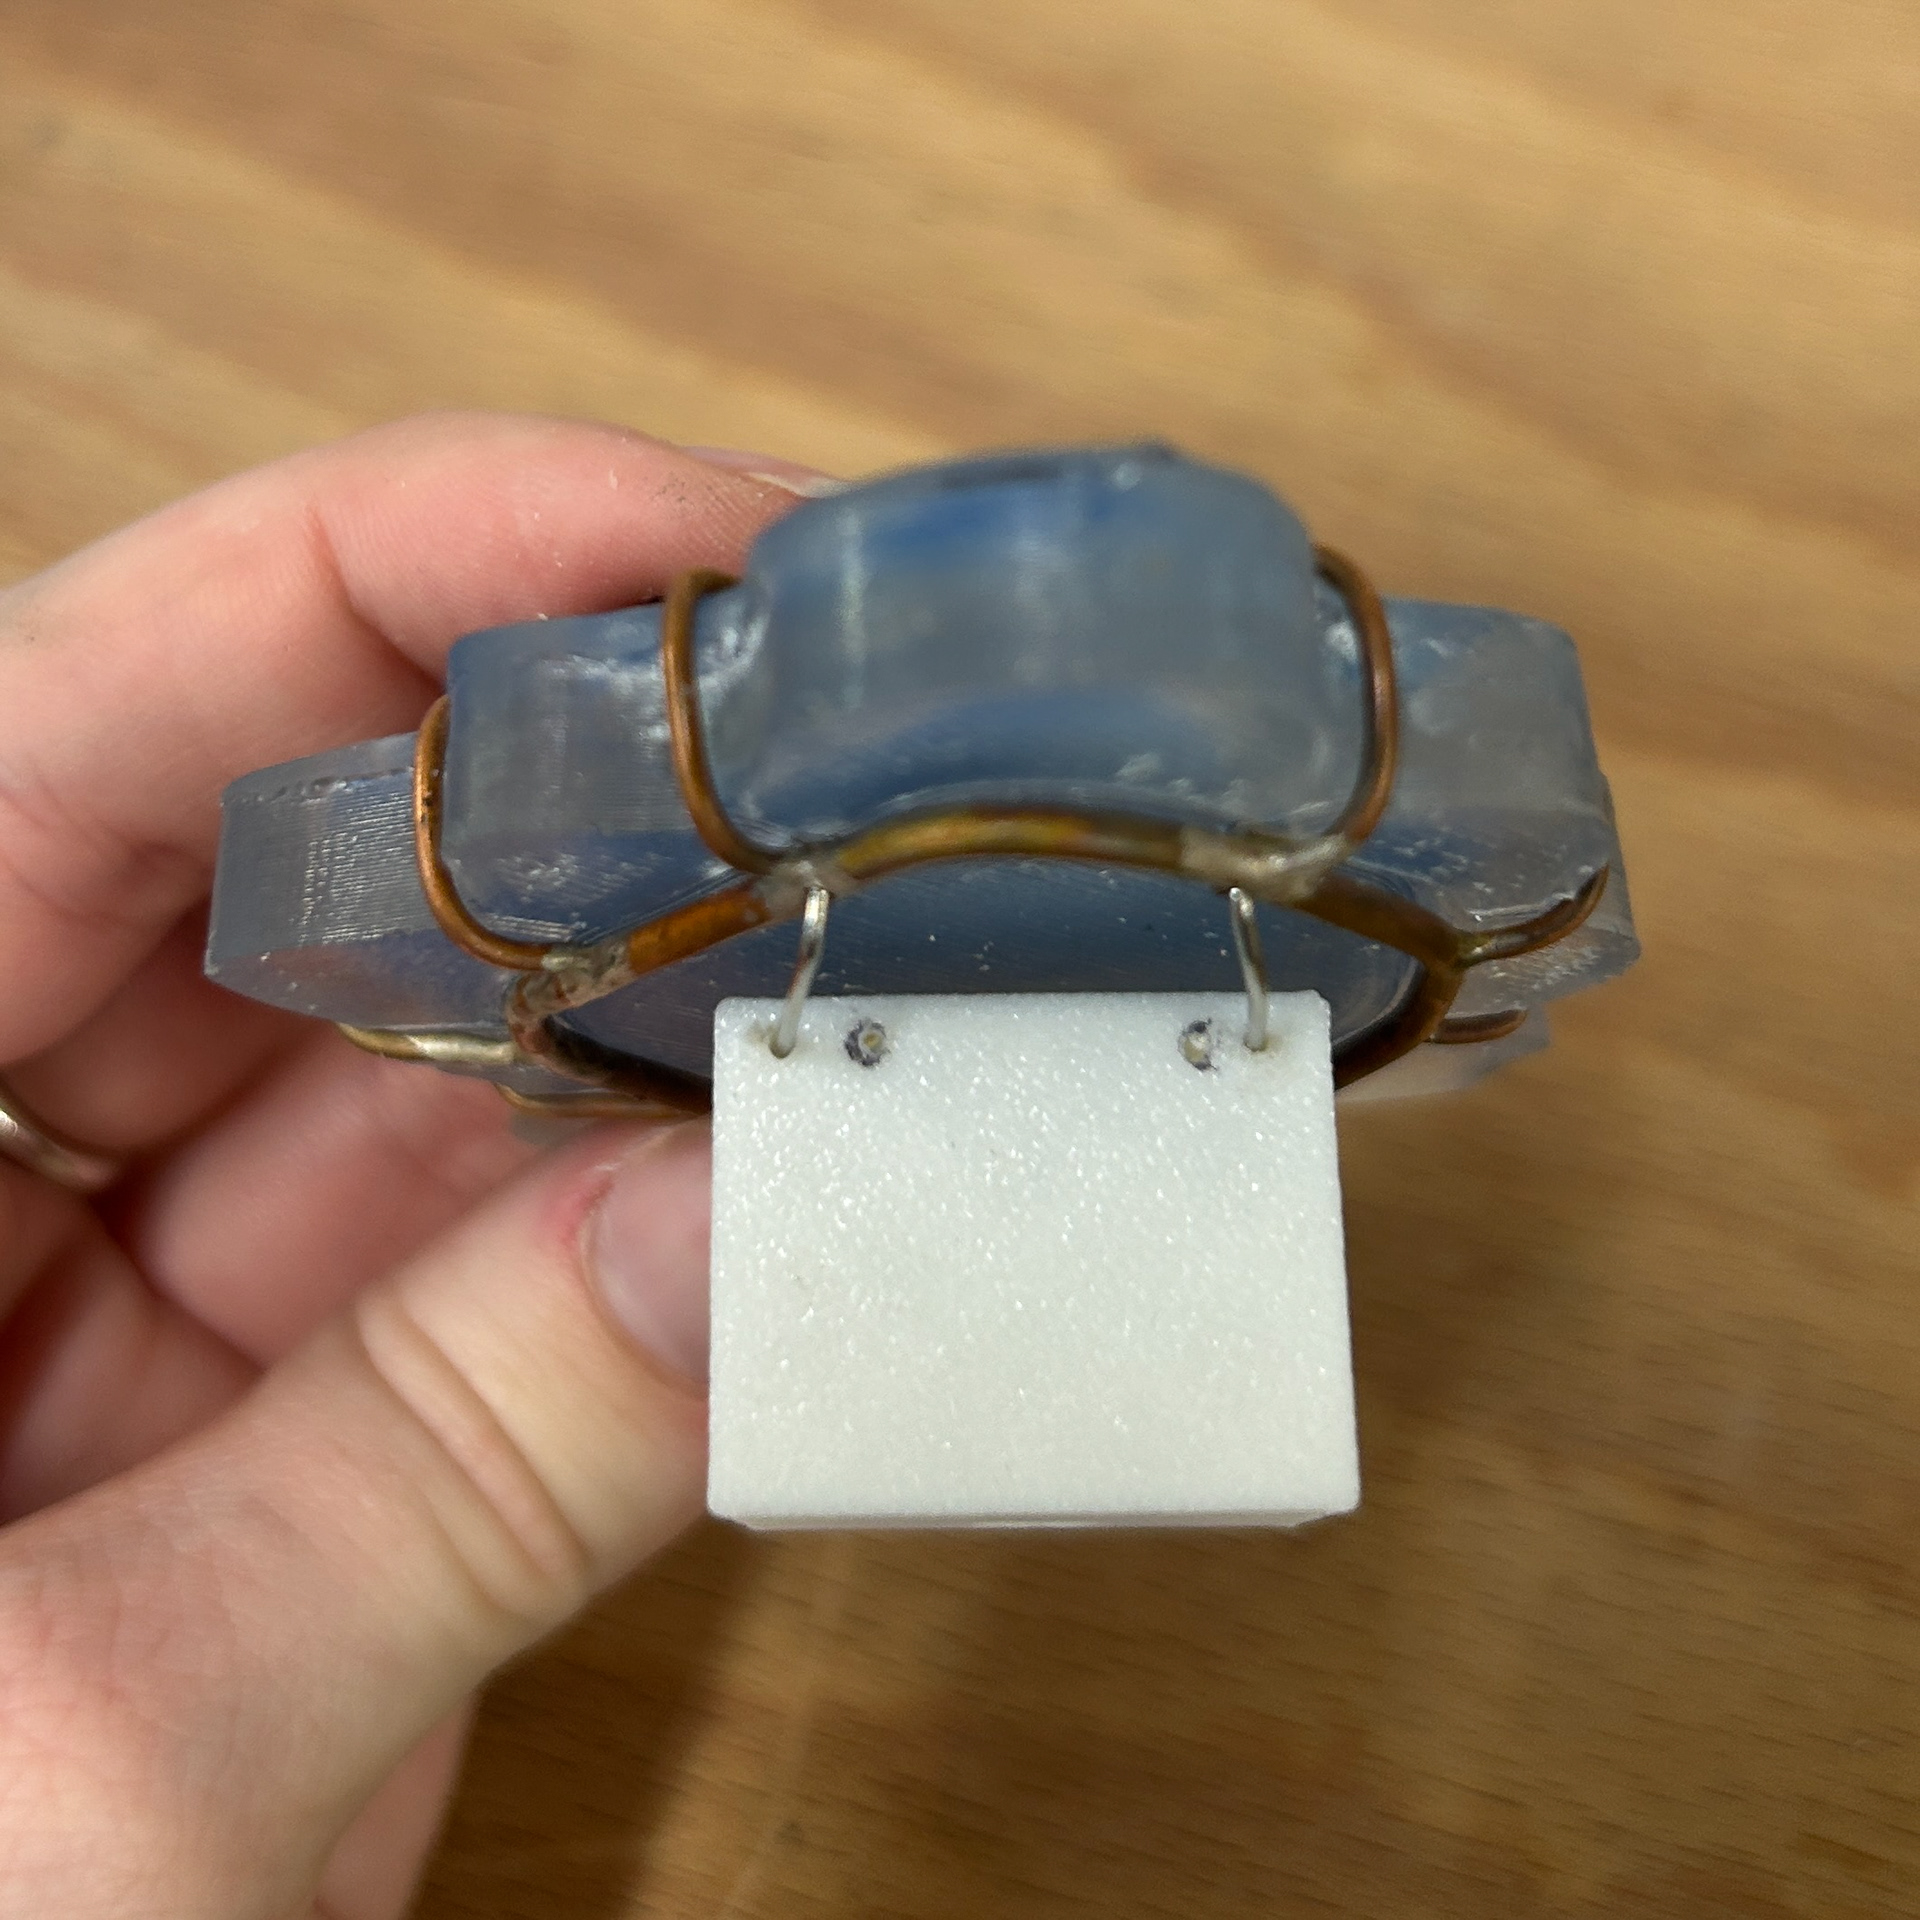
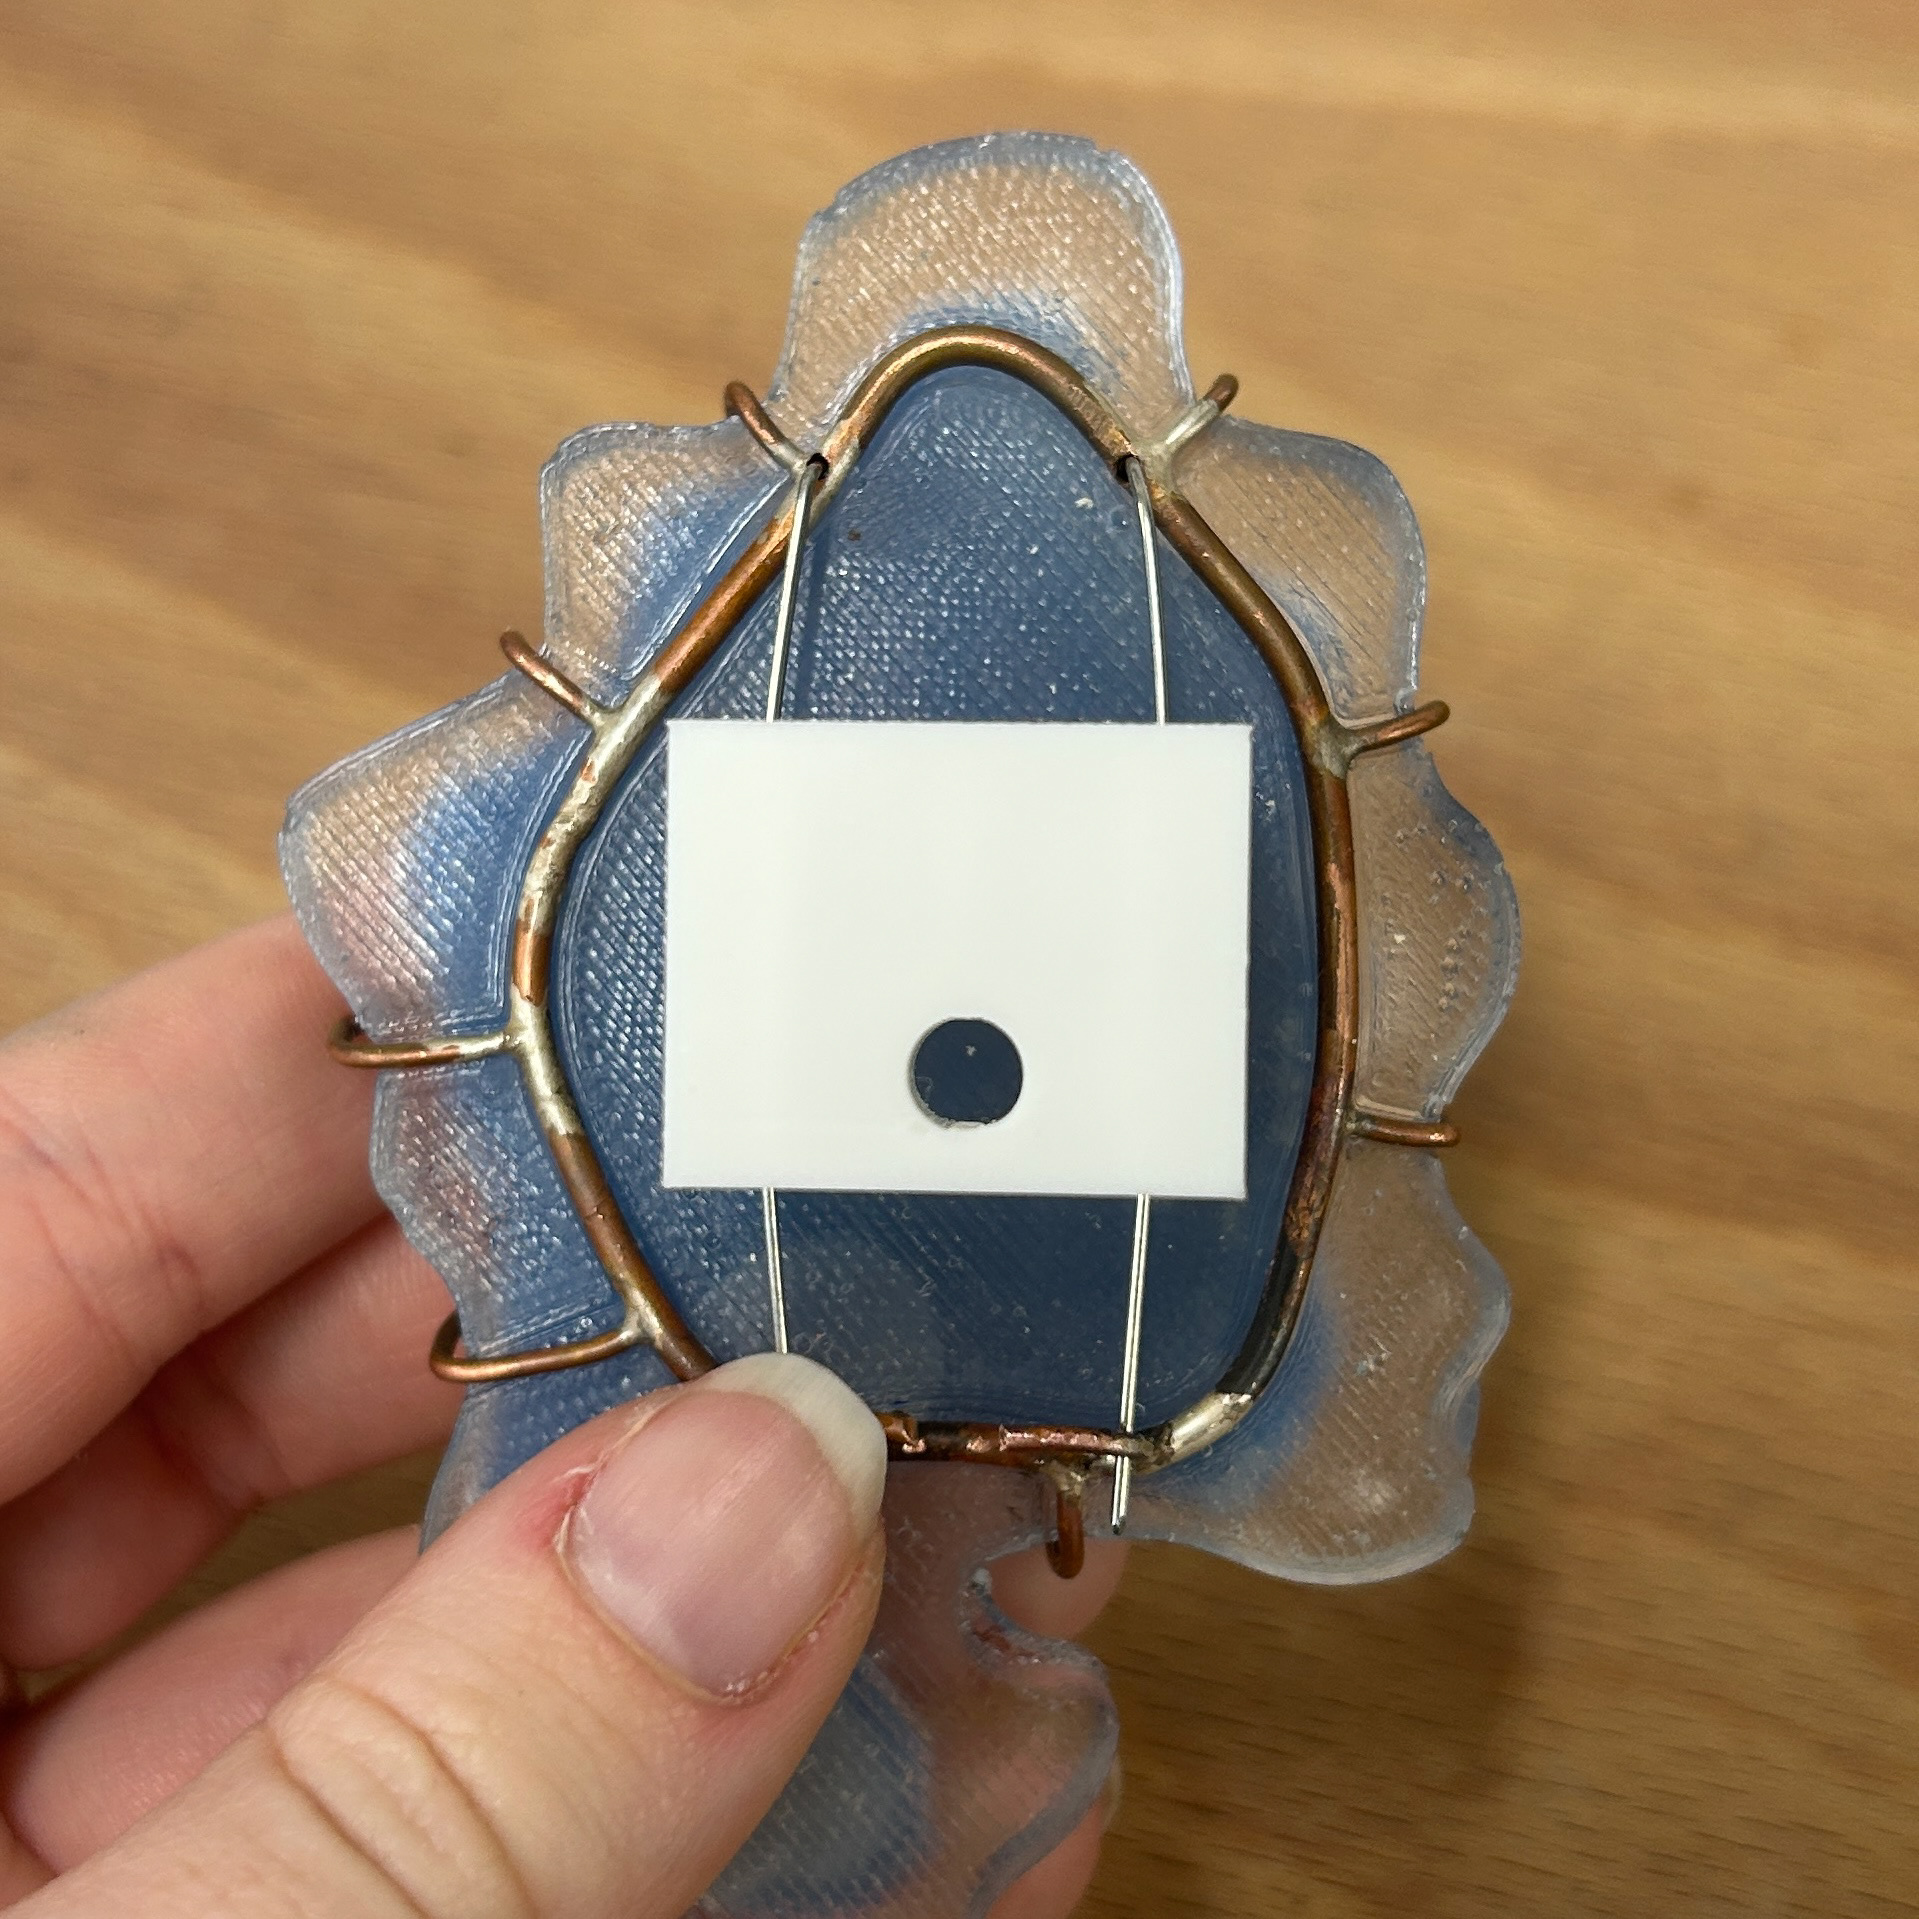
One of the key points they raised was removing the 3D agar piece from the front. It wasn’t working visually with the design, and it wasn’t clear that it represented bacteria. While this was frustrating, especially after spending weeks figuring out how to create those models, I understand that it simply doesn’t suit this piece. We agreed that the 3D agar pieces feel like a separate project, one that could exist alongside this one.
Although it’s not possible to develop that idea further in time for submission, I’m now thinking about creating a small series of wearables using those 3D agar forms—something I could wear myself at New Designers.
Timetable
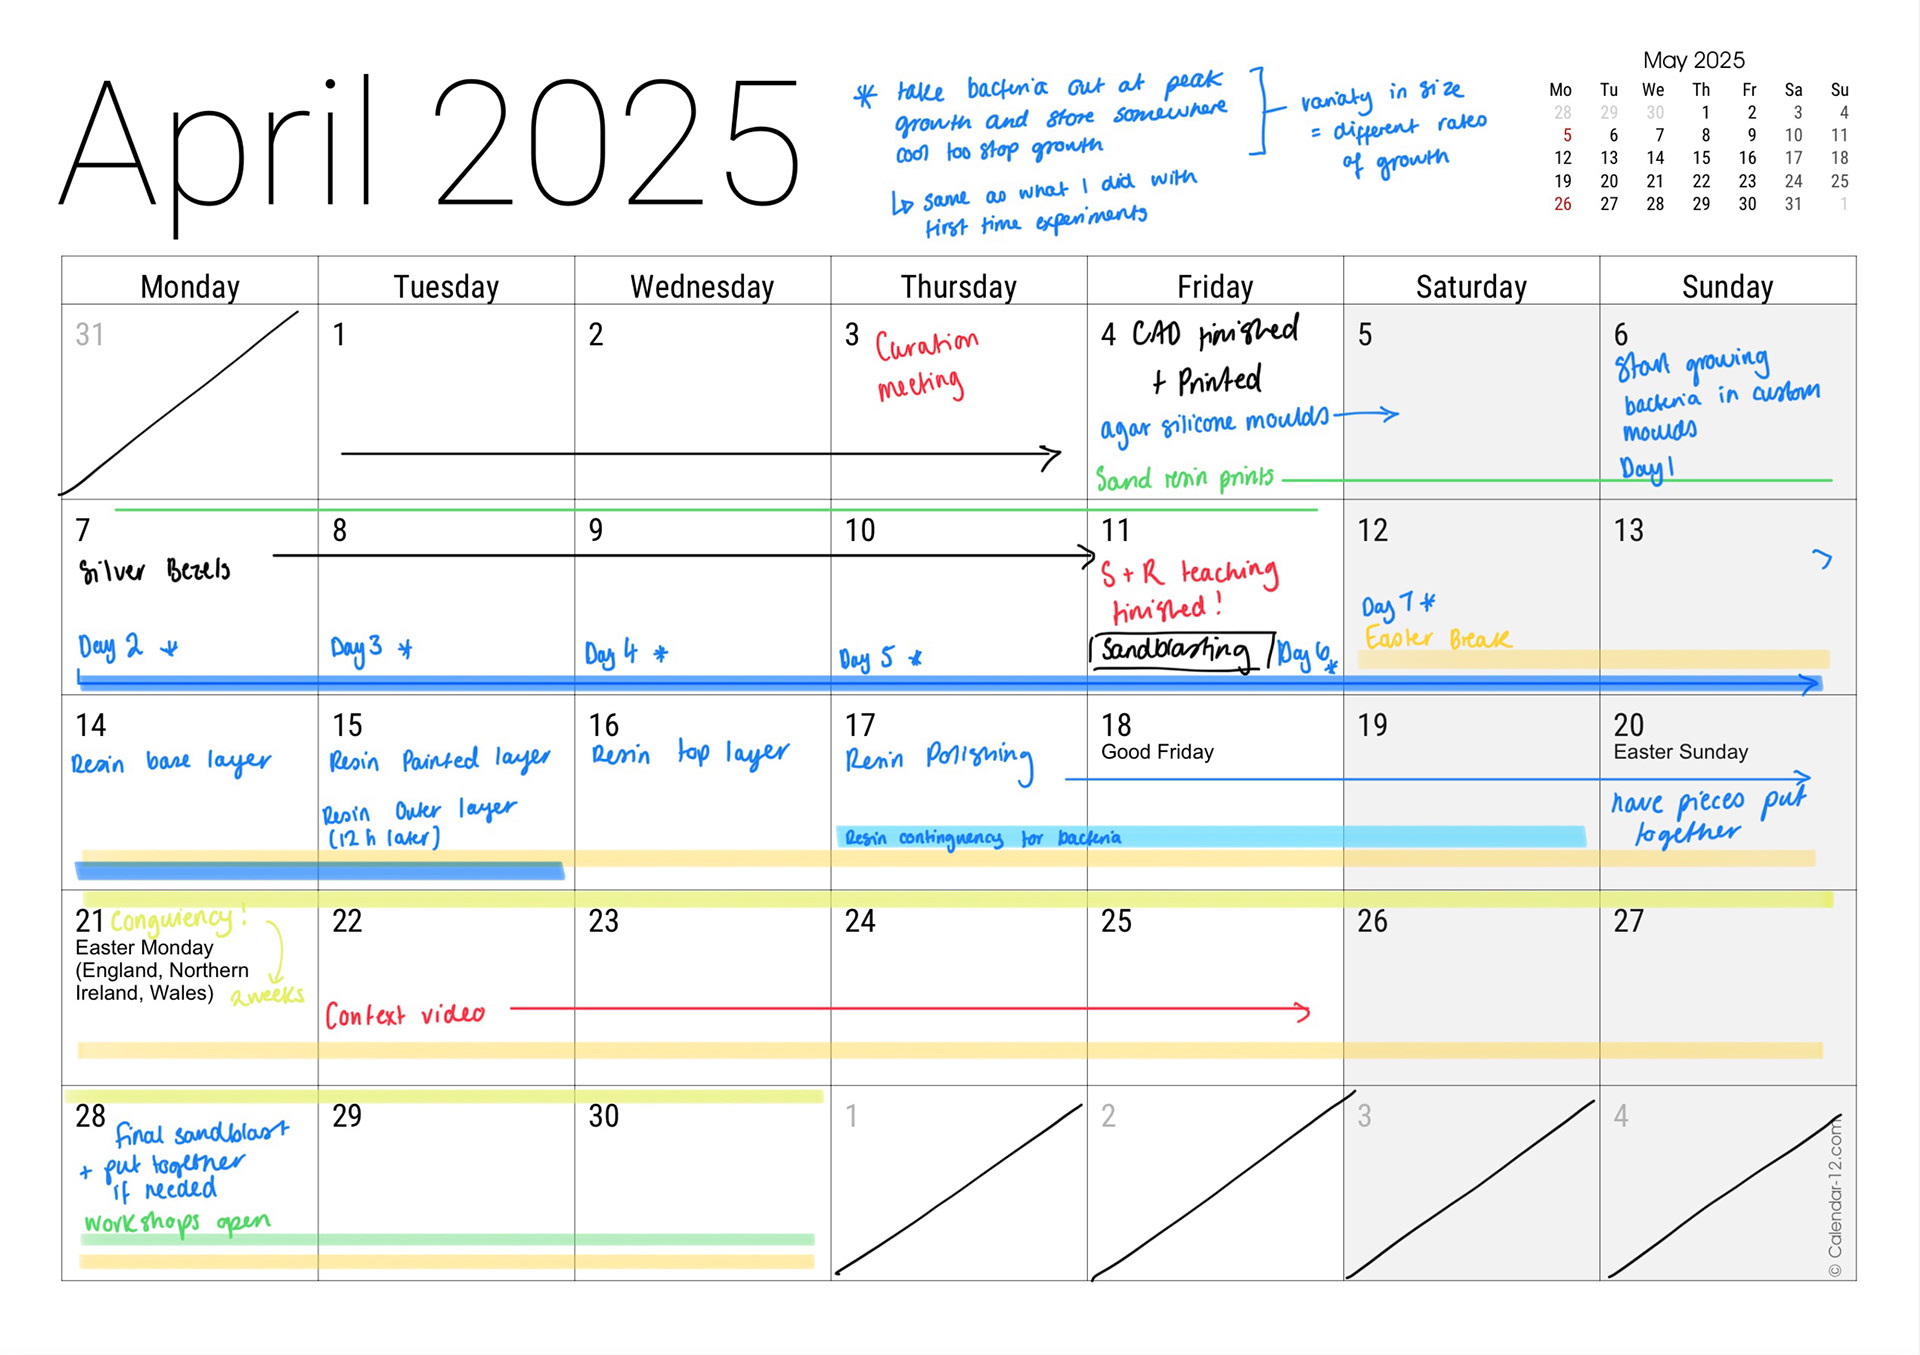
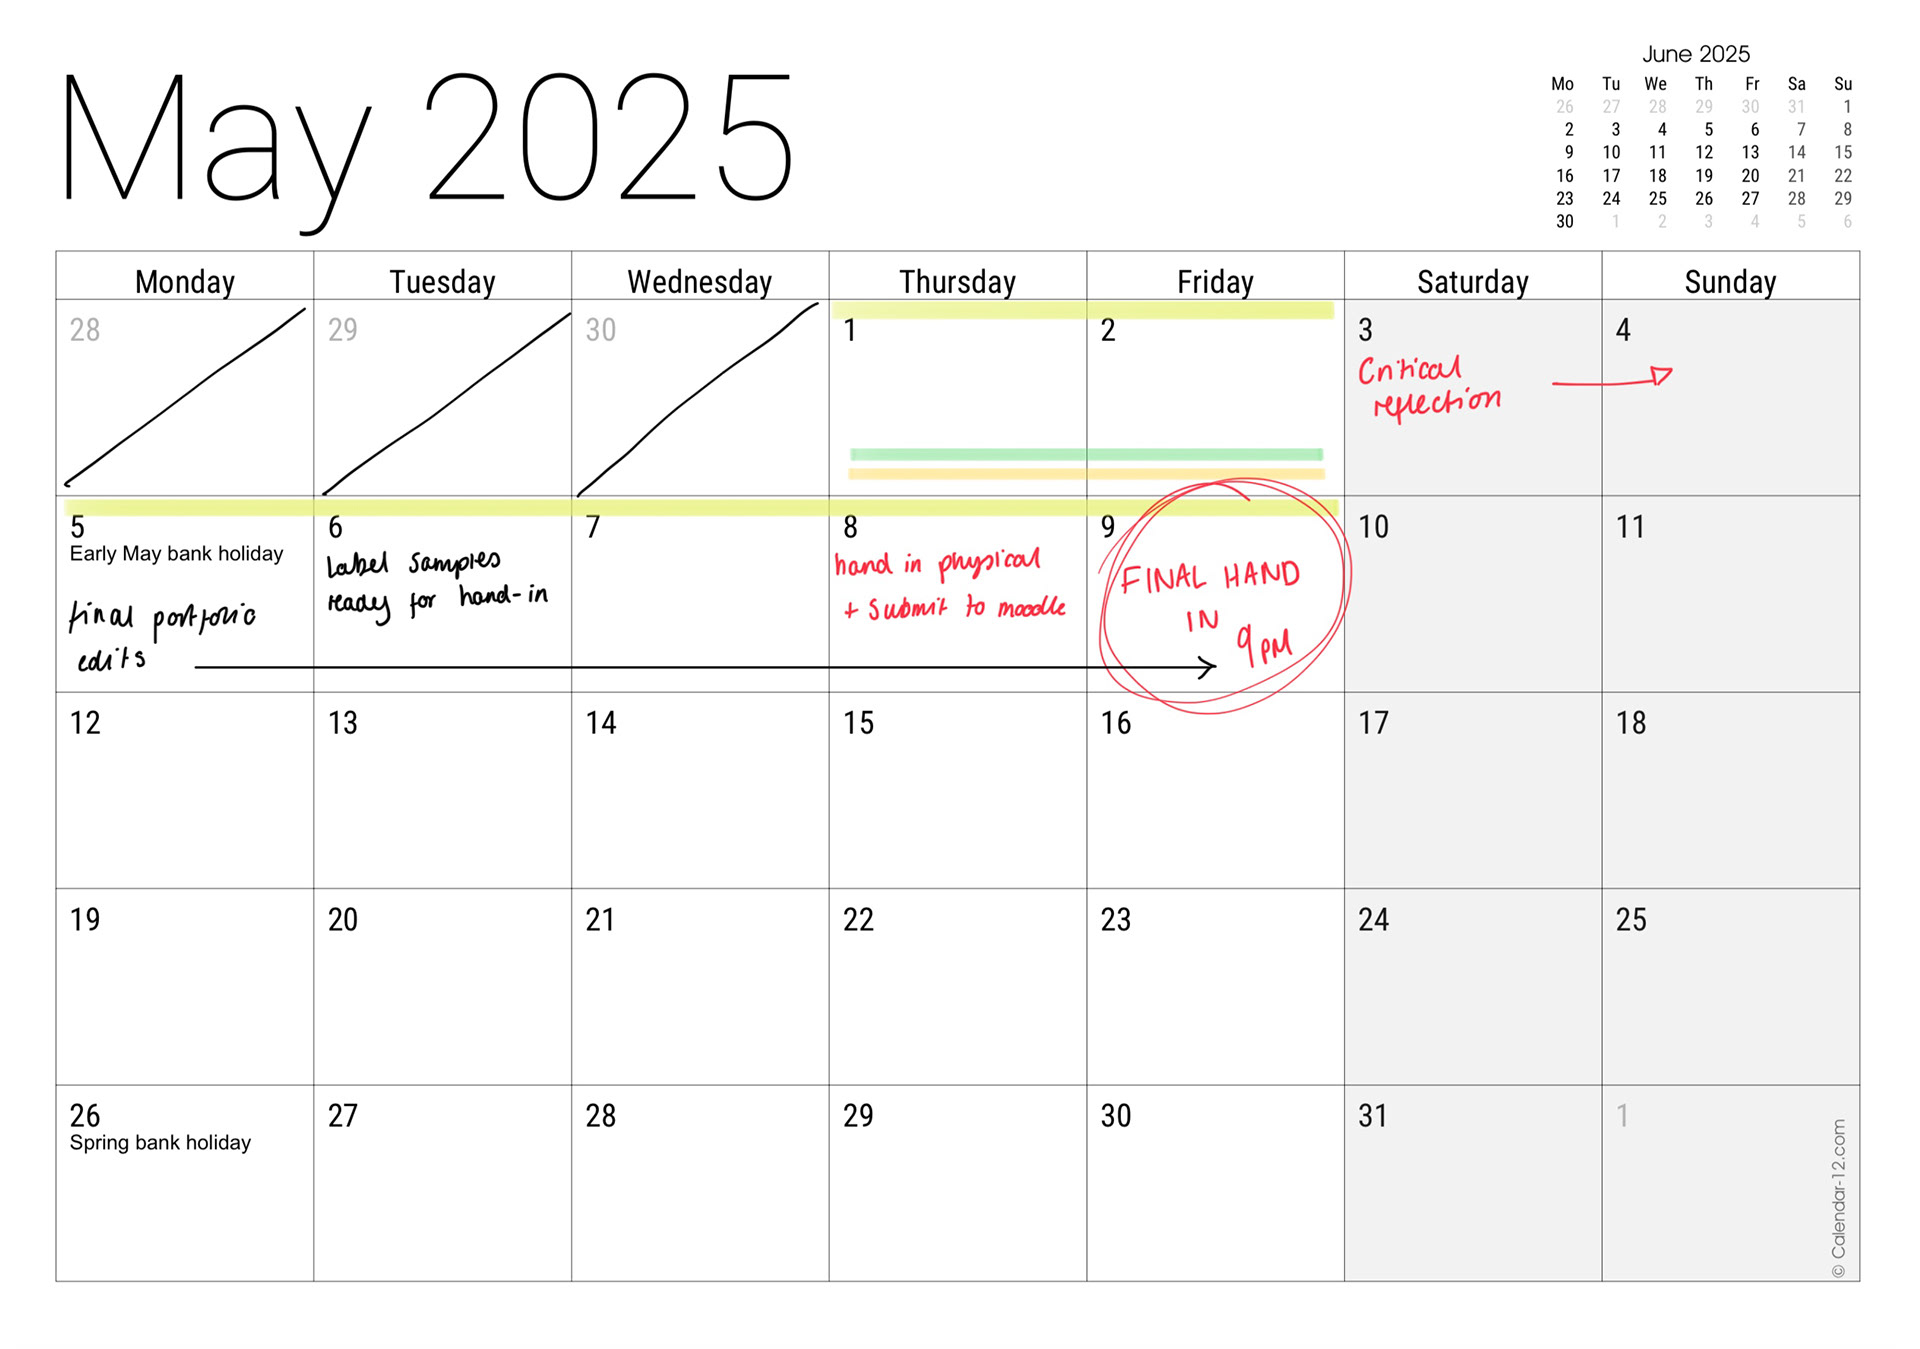
Above shows the timetable I made for myself a week before the formative review. While a couple of elements changed post-formative, the basis of my plan stayed the same. I will still give myself a 2-week contingency before submission, just in case anything goes wrong, while still giving myself enough time pre-submission to make sure my portfolio is finished.