Technical Workshop Notes
Contents:
Enamelling induction and samples .................................... 2
Copper Engraving ................................................................... 12
Cabochon Setting ................................................................... 16
Engraving with Pitch ............................................................. 27
Experimental Stone Setting ................................................. 30
Making Sheet Silver ................................................................ 37
Engraving Silver ...................................................................... 41
Enamelling Silver .................................................................... 46
Raising ....................................................................................... 50
Fold Forming ............................................................................ 53
Making the Screw Mechanism ........................................... 55
Final Piece Basse-Taille ......................................................... 57
Making a Figaro Chain .......................................................... 65
Making the Setting for My Final Piece ............................. 70
Setting the Enamelled Pieces ............................................. 78
Making the Back Fastening ................................................. 81
Final Outcome ..........................................................................89
Enamelling

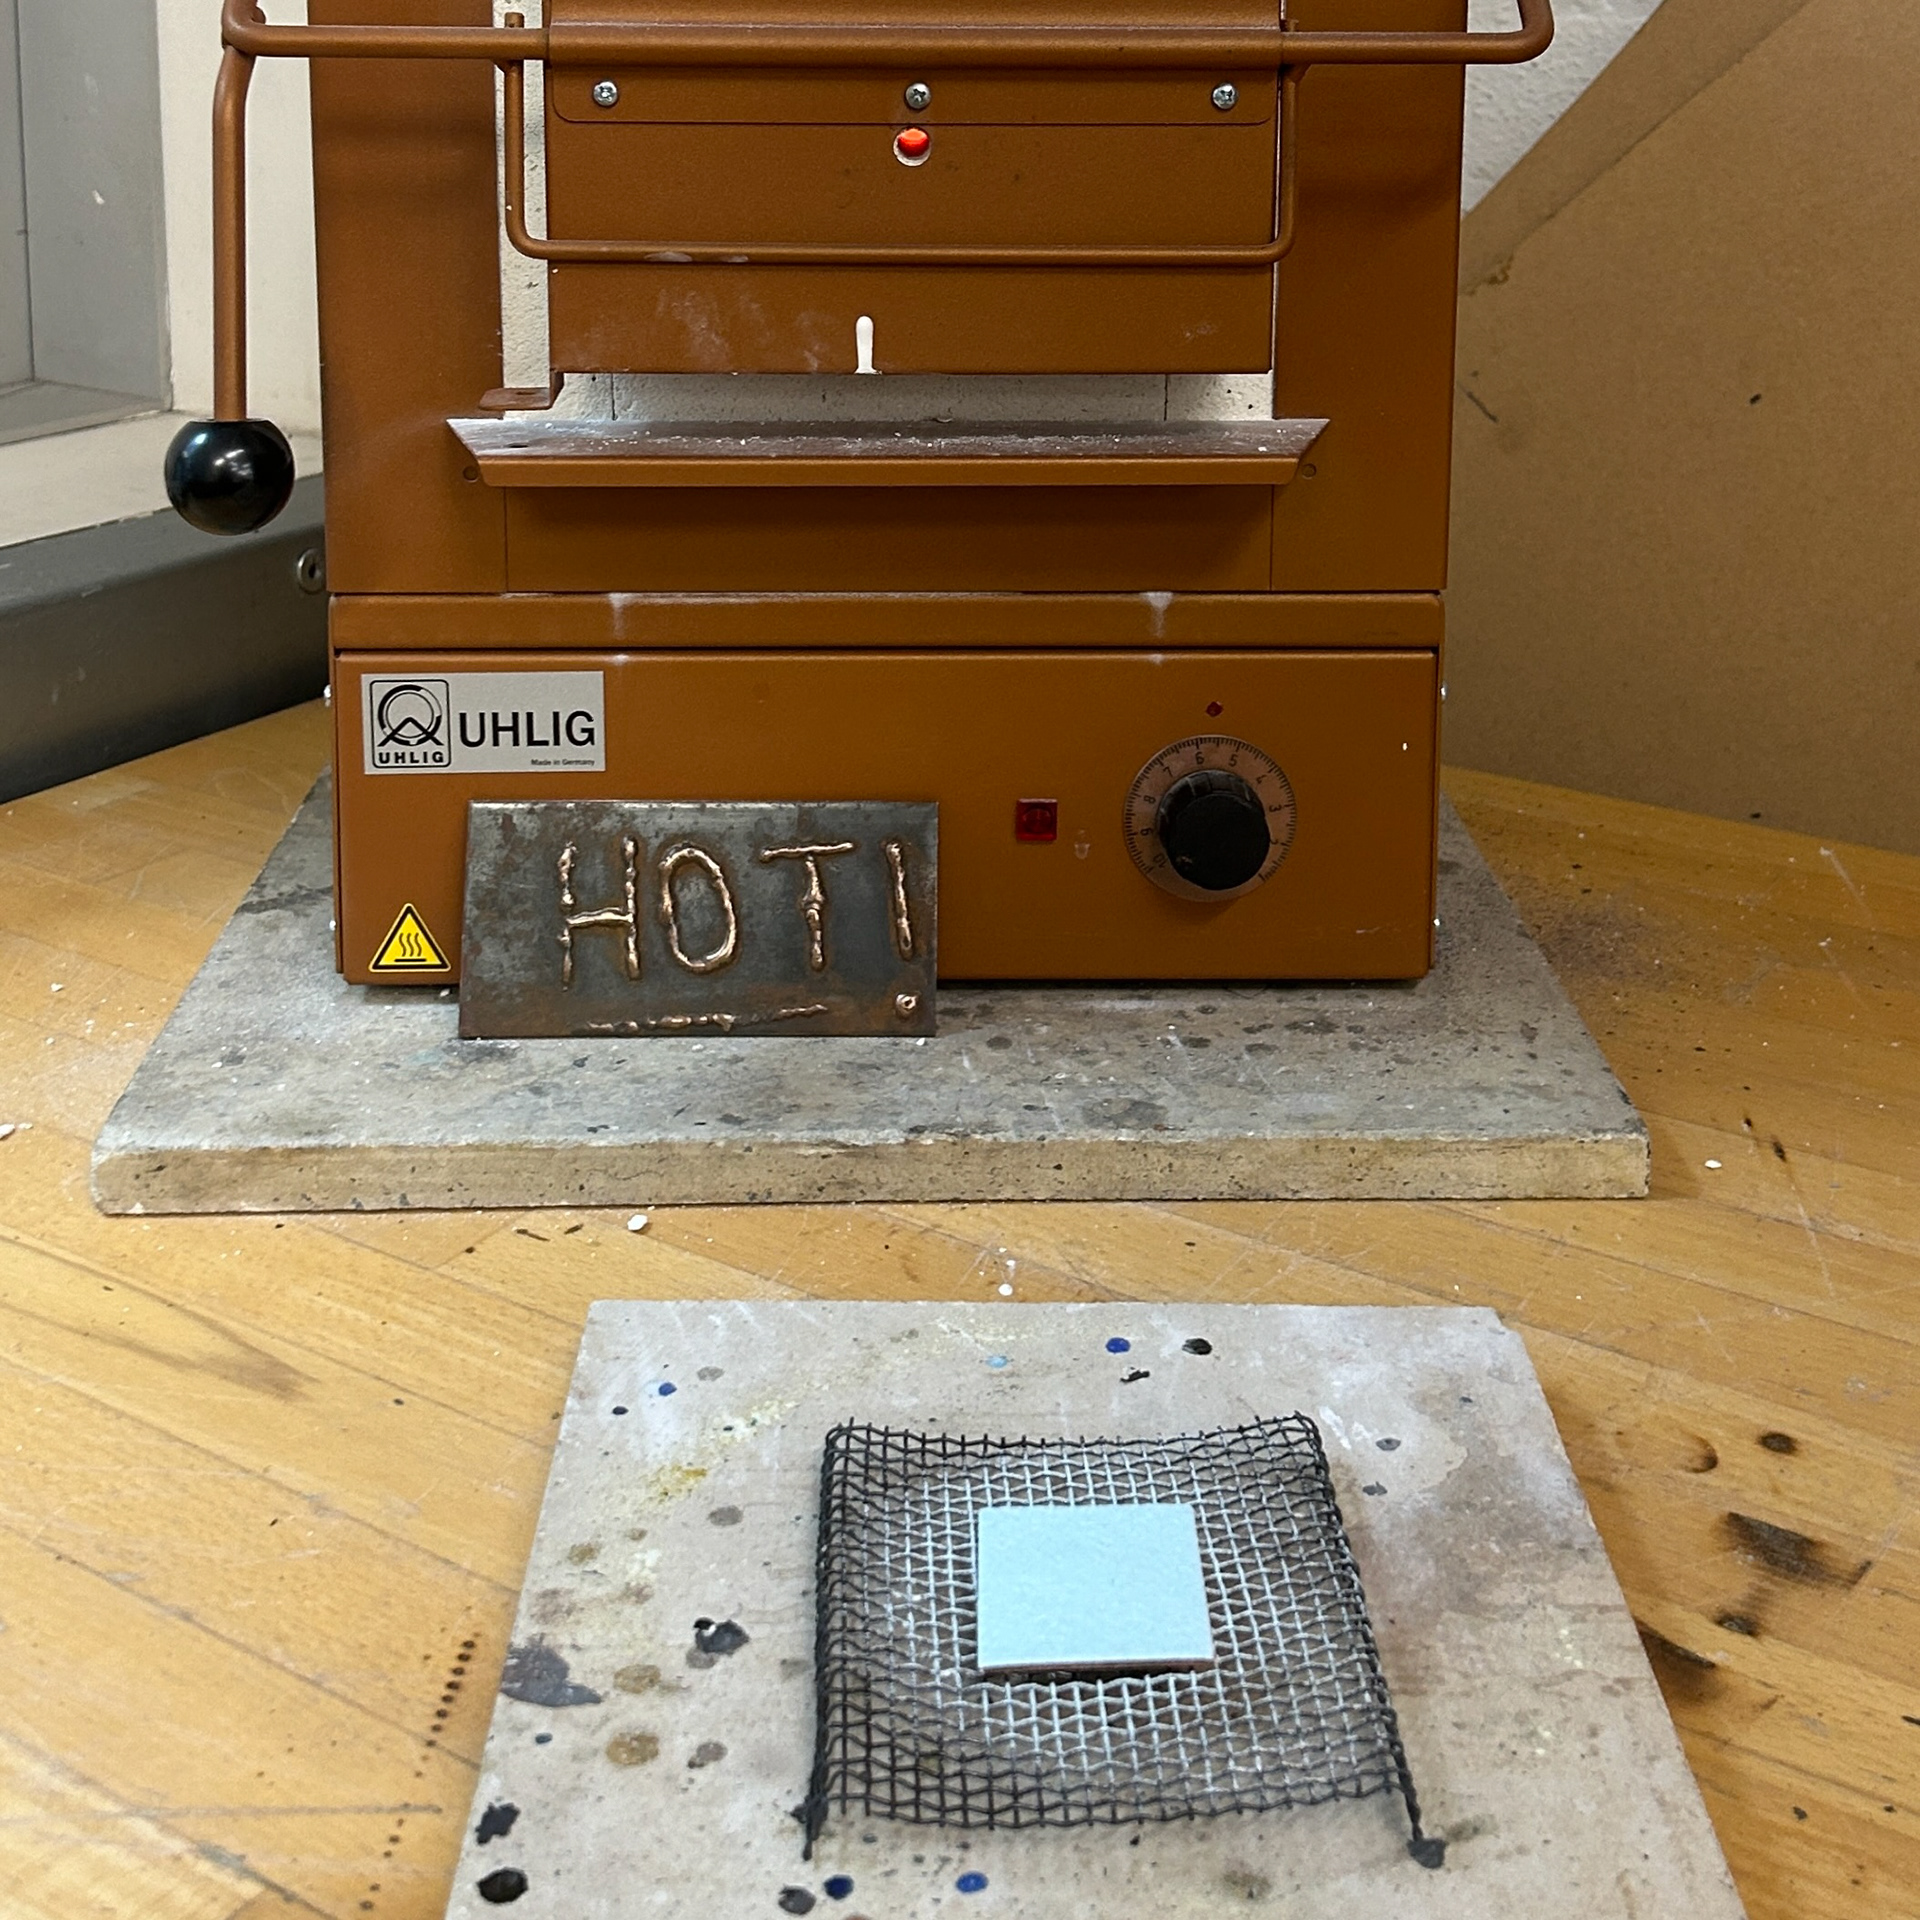
Here are some of my enamelling samples. Here I learnt how to use wet enamelling techniques on curved or '3D' surfaces, as well as counter enamelling and the importance of it when it comes to refined, finished pieces. Counter enamelling is used to prevent the piece from warping after enamelling a side of the piece. This also helps reduce the risk of the enamel cracking and 'pinging' off the metal, resulting in professional-looking outcomes.
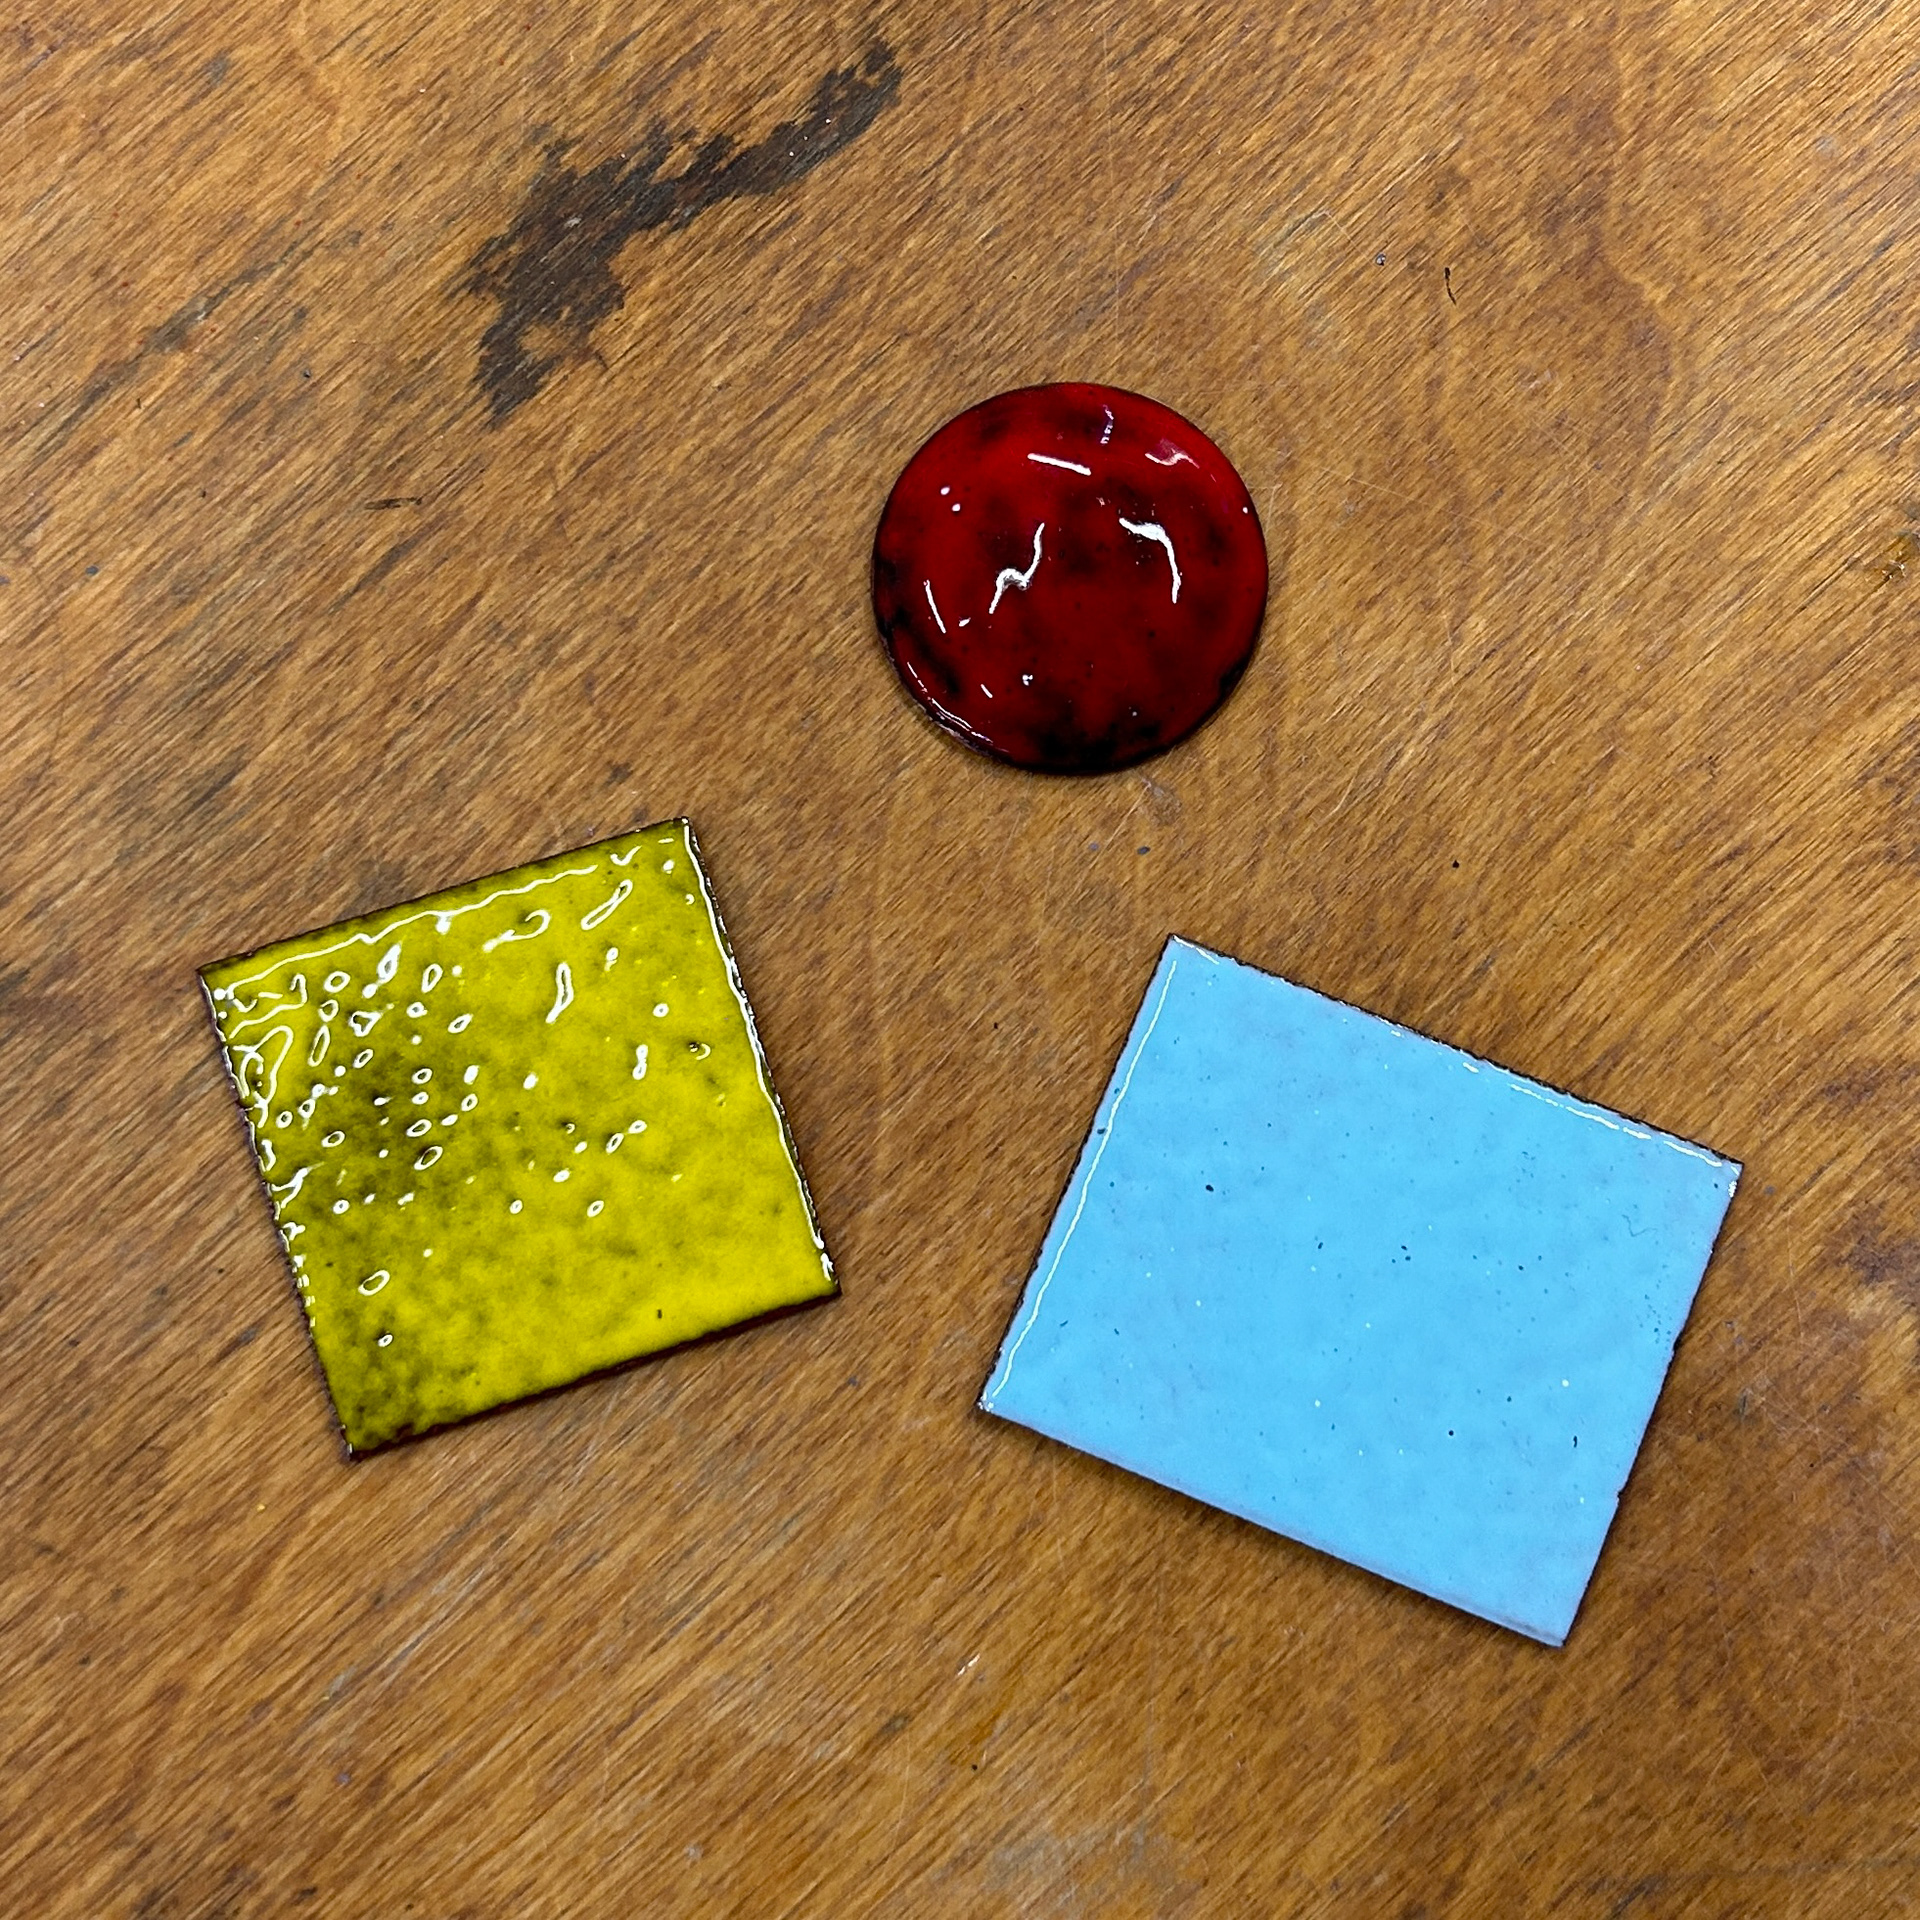
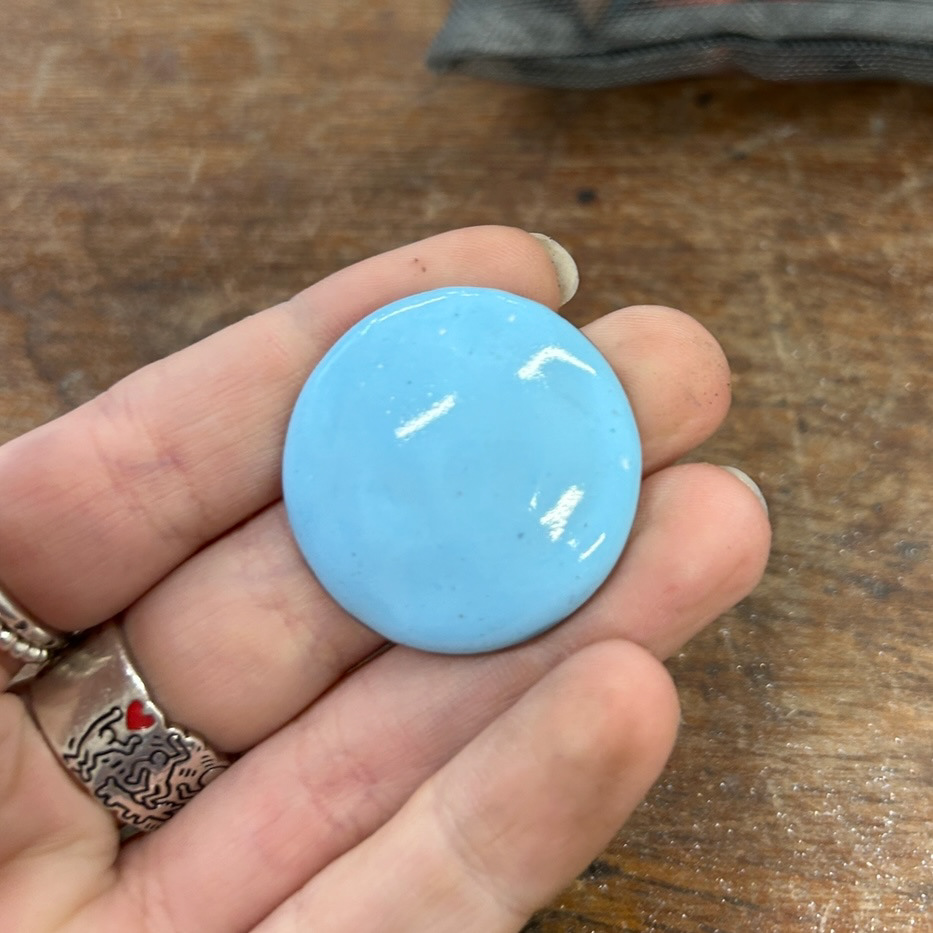
While I was happy with the light blue enamel, I need to work on my timing and application for the yellow enamel, as this one burnt slightly, potentially due to less powder on the surface. As well as that, I need to practice with the wet enamelling technique as shown on the red dome. My application here was not as precise as I had hoped for as there were gaps all over the piece. However, with my second attempt, I was a lot more satisfied with the application. The outcome was significantly smoother and opaque. As well as that, there wasn't any of the enamel that had seeped over the edge, like there was with the red one.
Engraving
Practicing hand engraving on copper plates
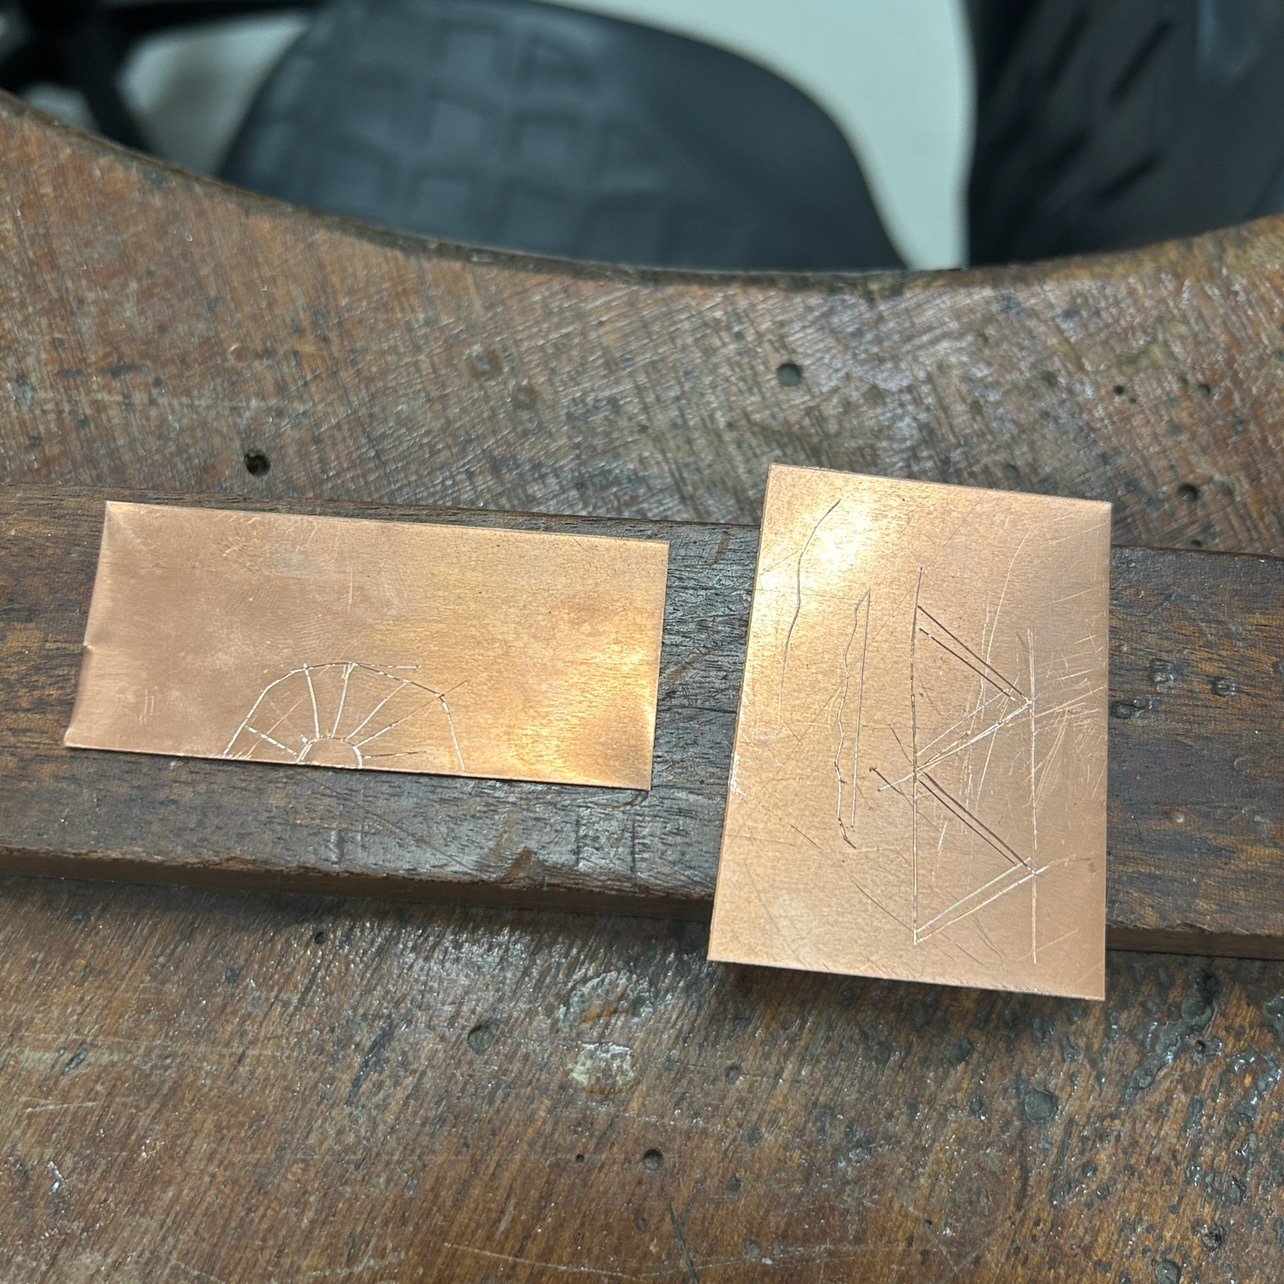
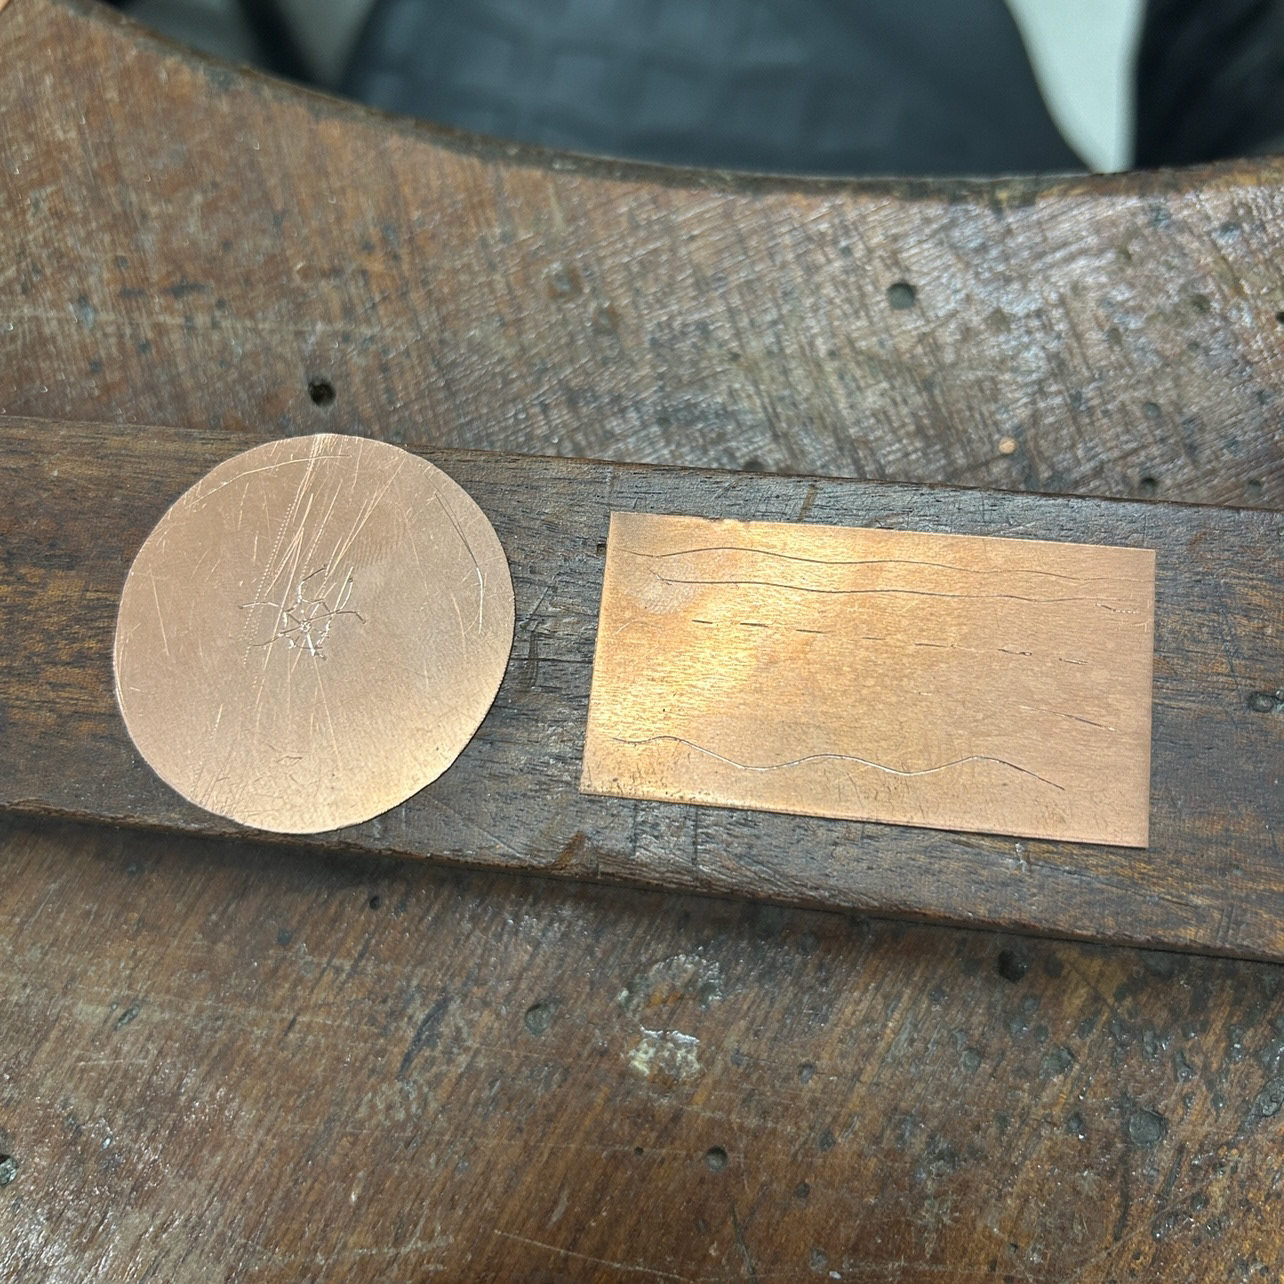

Above are some examples of my first attempts at hand engraving. When practising my engraving, I plan to try using materials like pitch or setters wax to help secure the piece into place. This will hopefully also add more surface area for me to hold and get a better grip on the piece. This will be vital when using silver as I don't want to keep having to melt it down when I make a mistake, this is time-consuming and could result in losing some silver in the process.
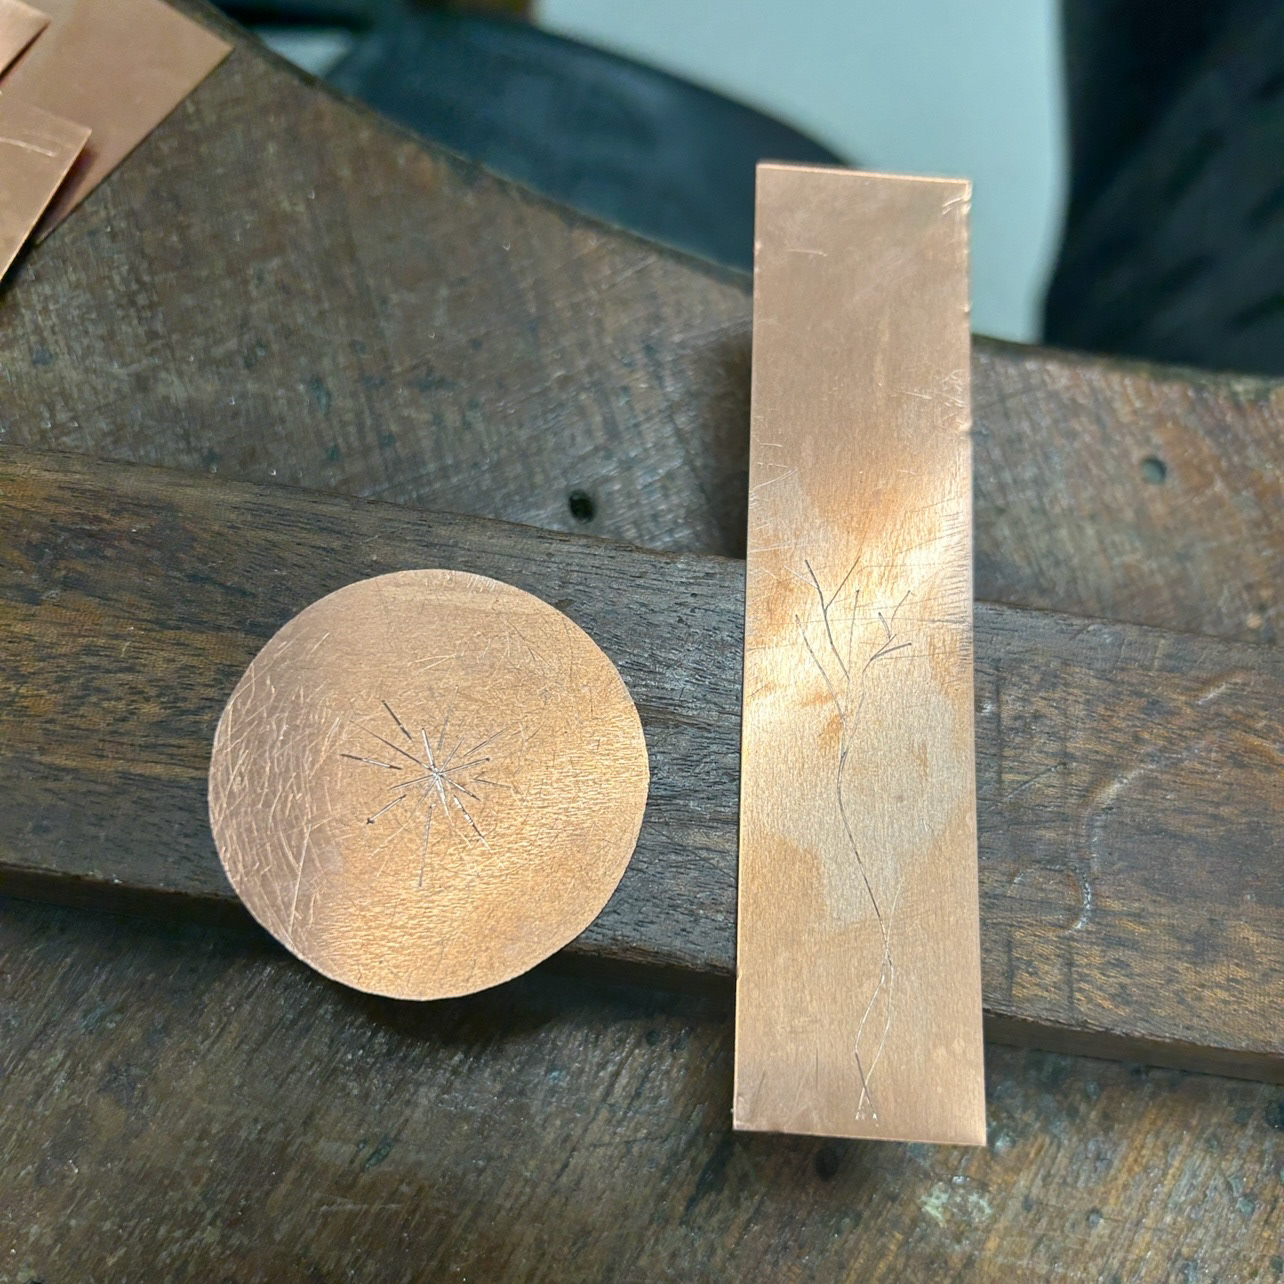
Here I used pitch to hold my metal in place. I found it significantly easier to engrave with this as I was able to move the bowl in the direction that I was engraving. I found that if I tilted the down downwards away from me then I was less likely to slip and make mistakes. I started with a larger motif and slowly scaled down to a size that I would potentially be using in my final design (shown in the top left corner). When creating the smaller motif I actually found that I was slipping less, this potentially could've been because the lines were shorter and so the time I had to keep the engraver steady was less than the bigger designs.
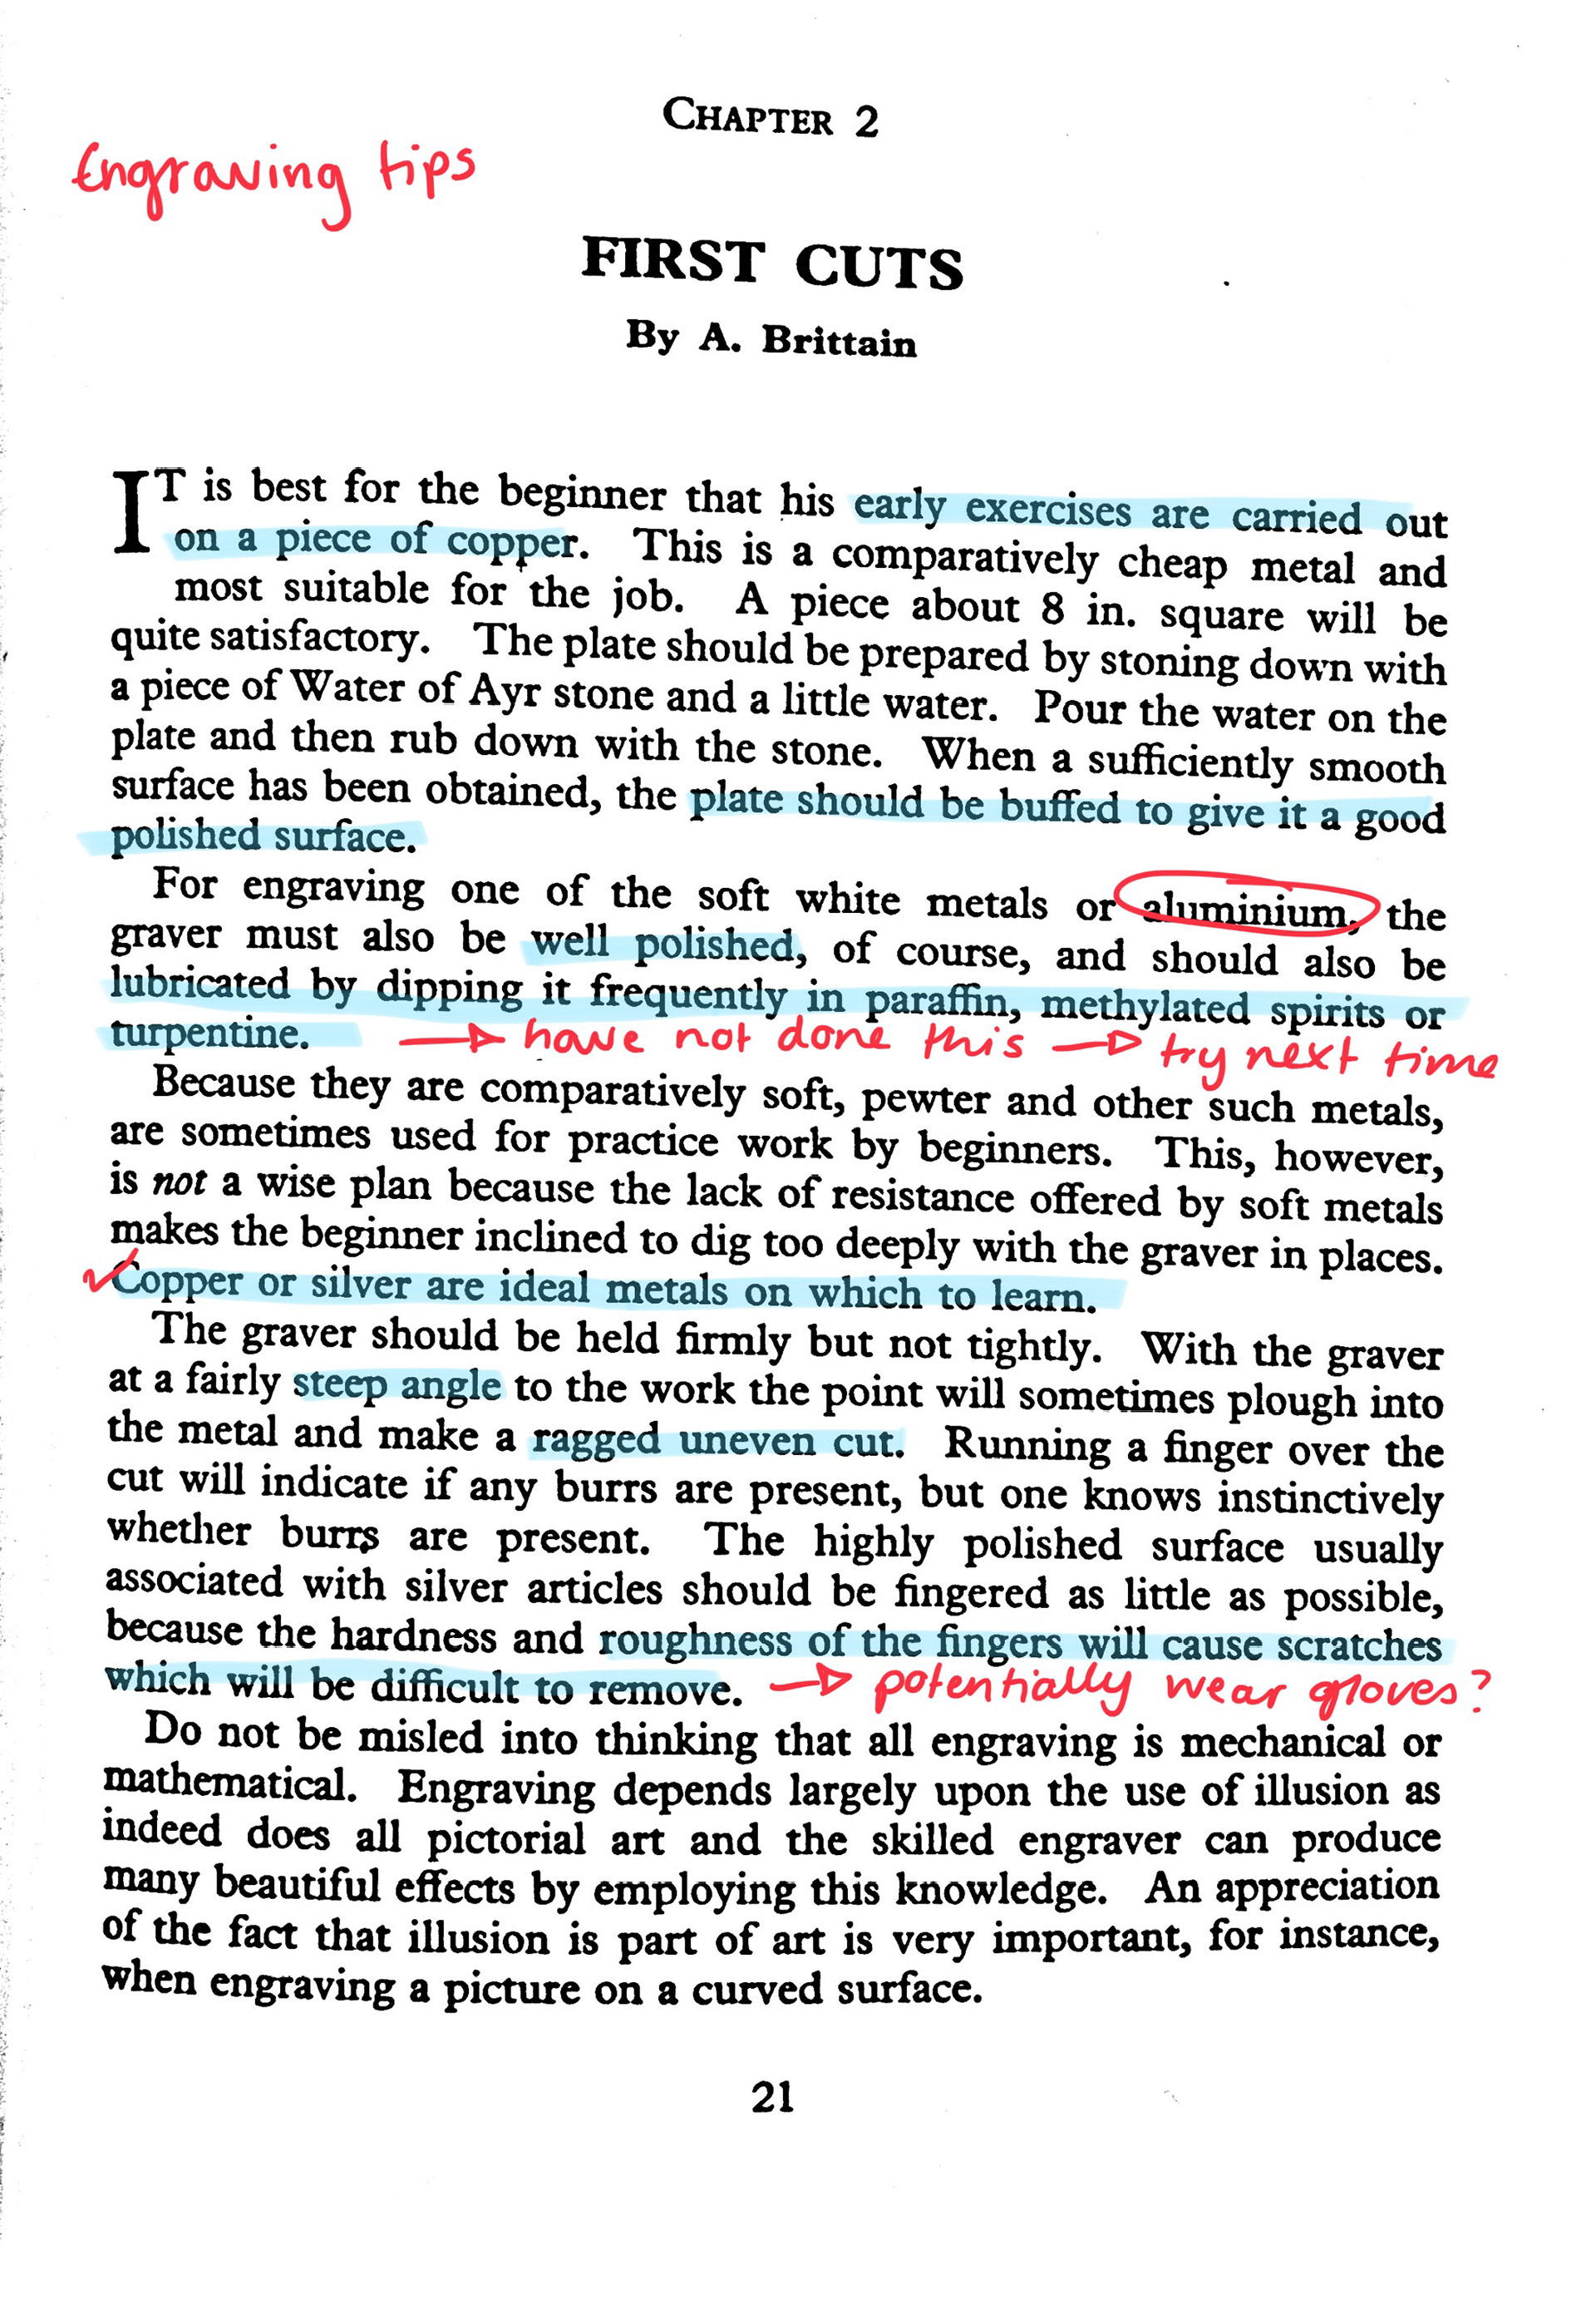
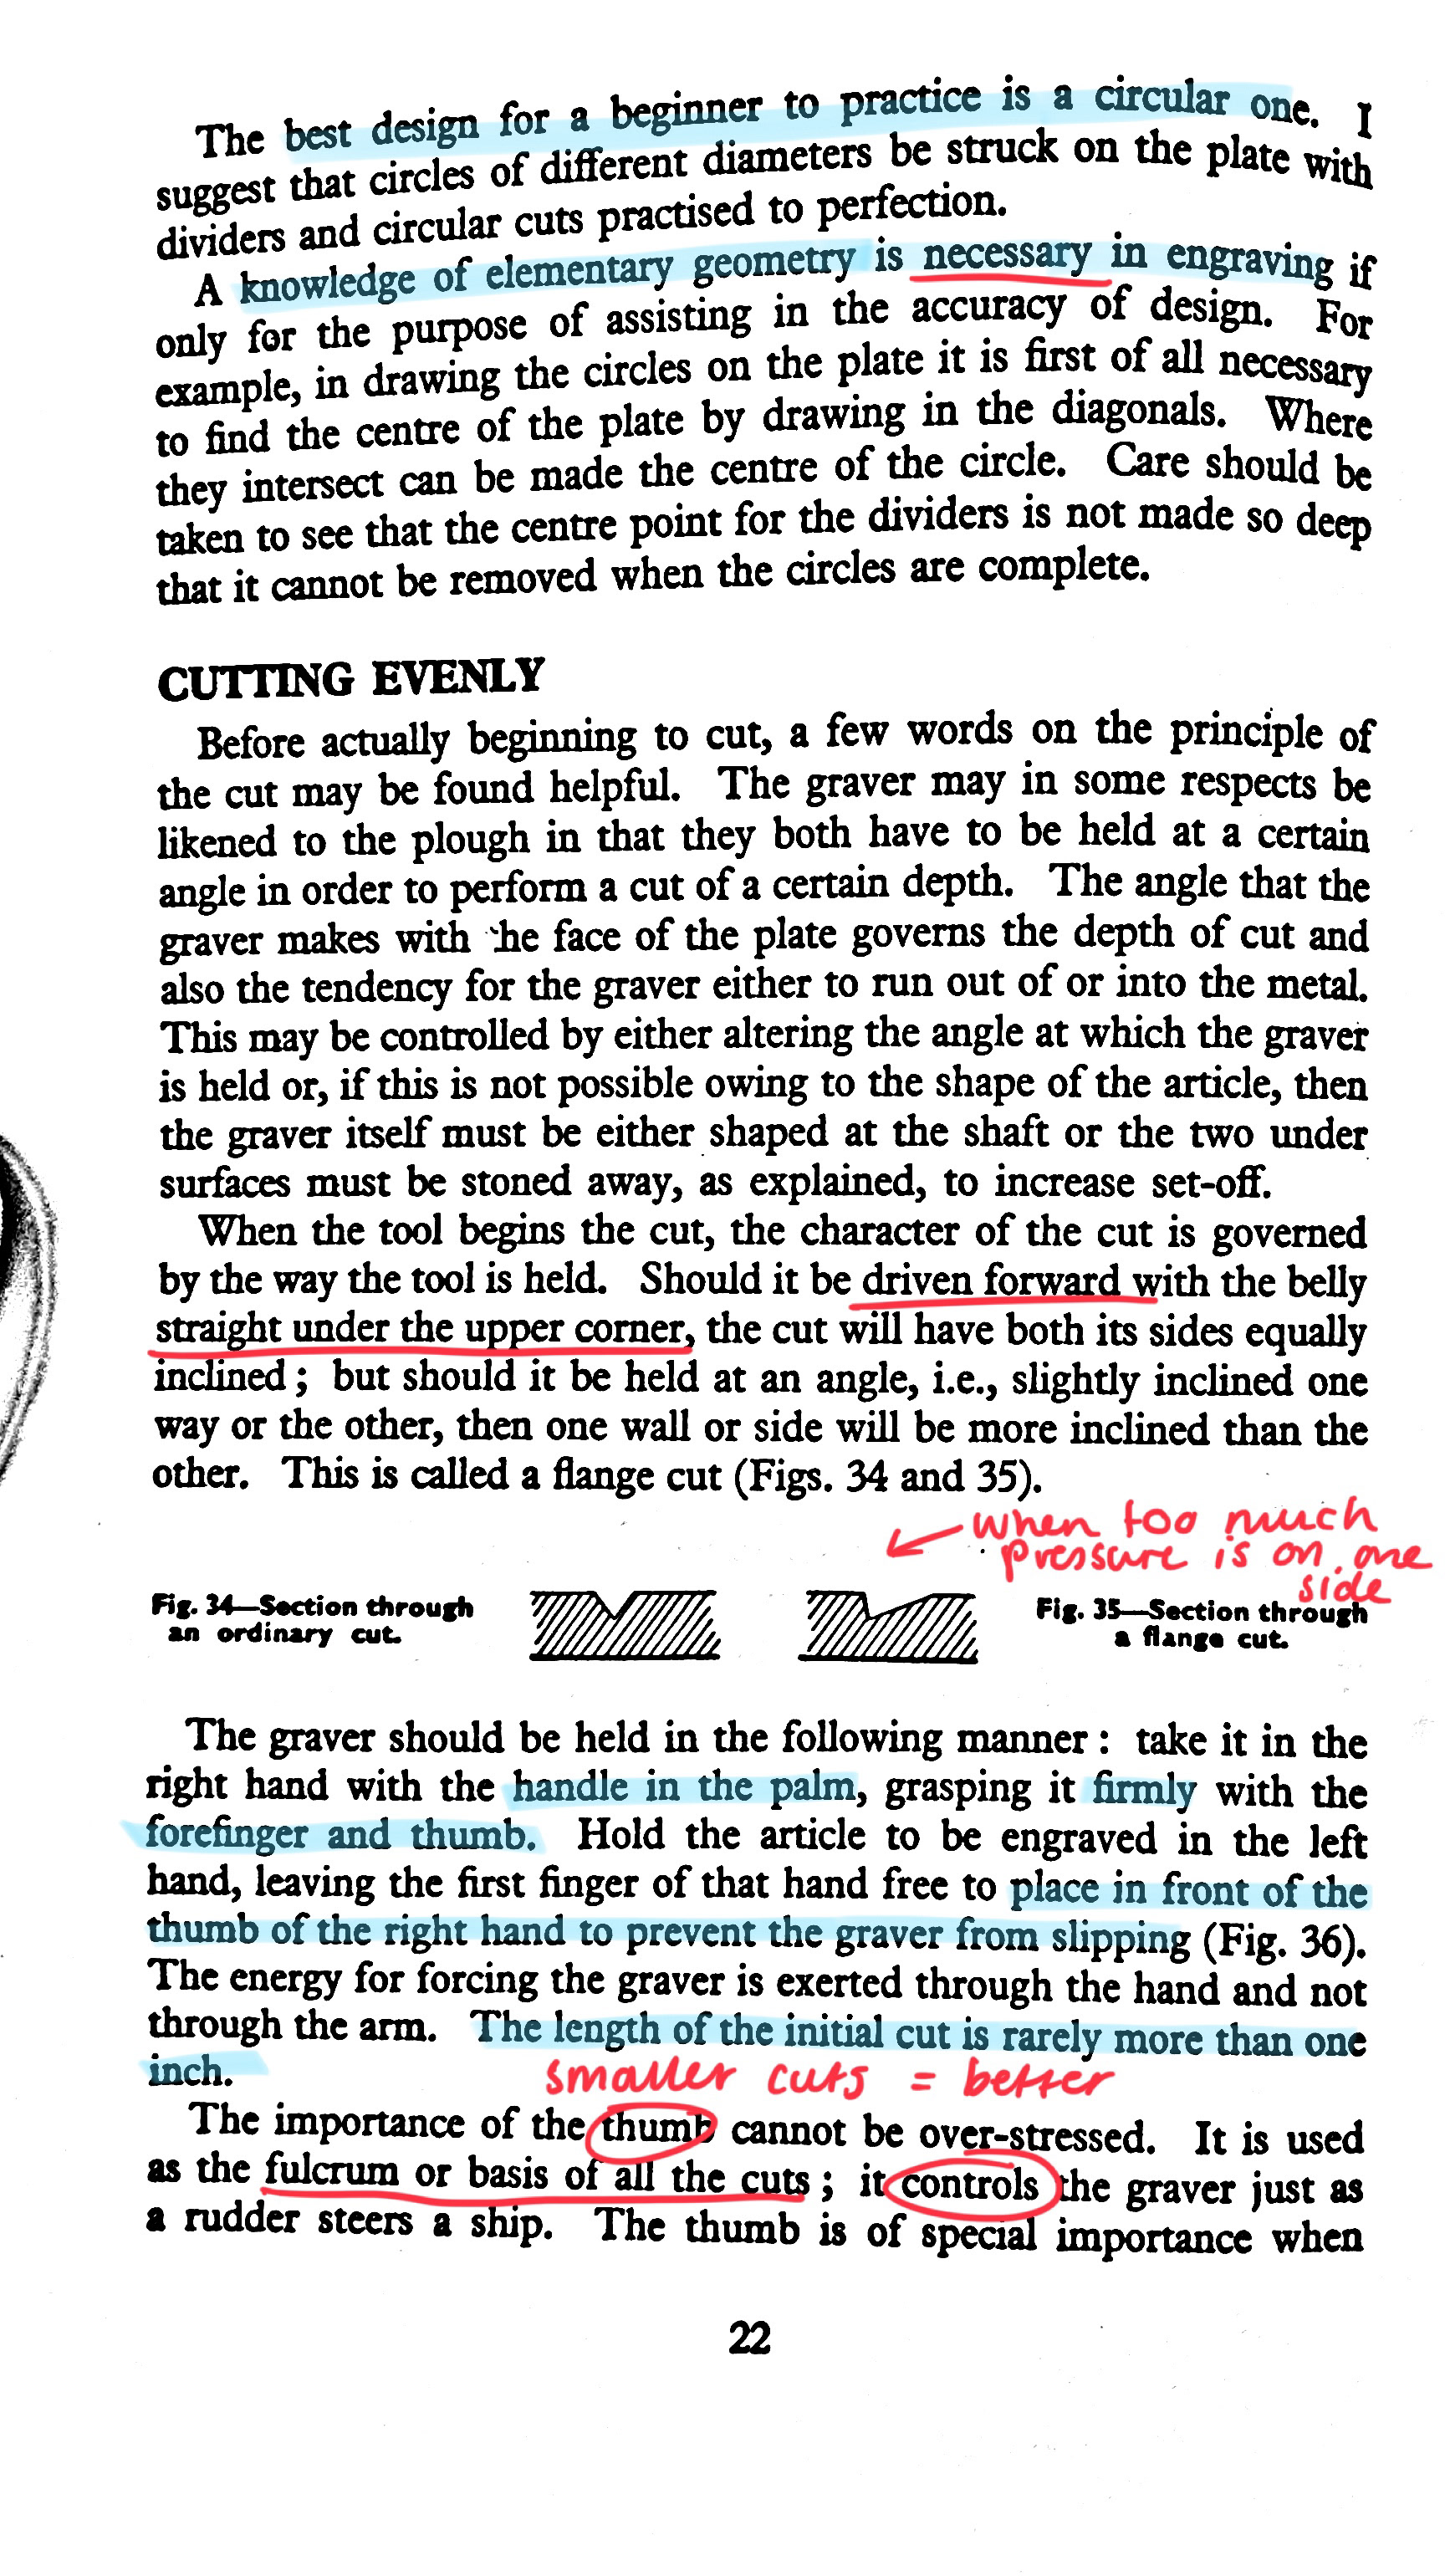
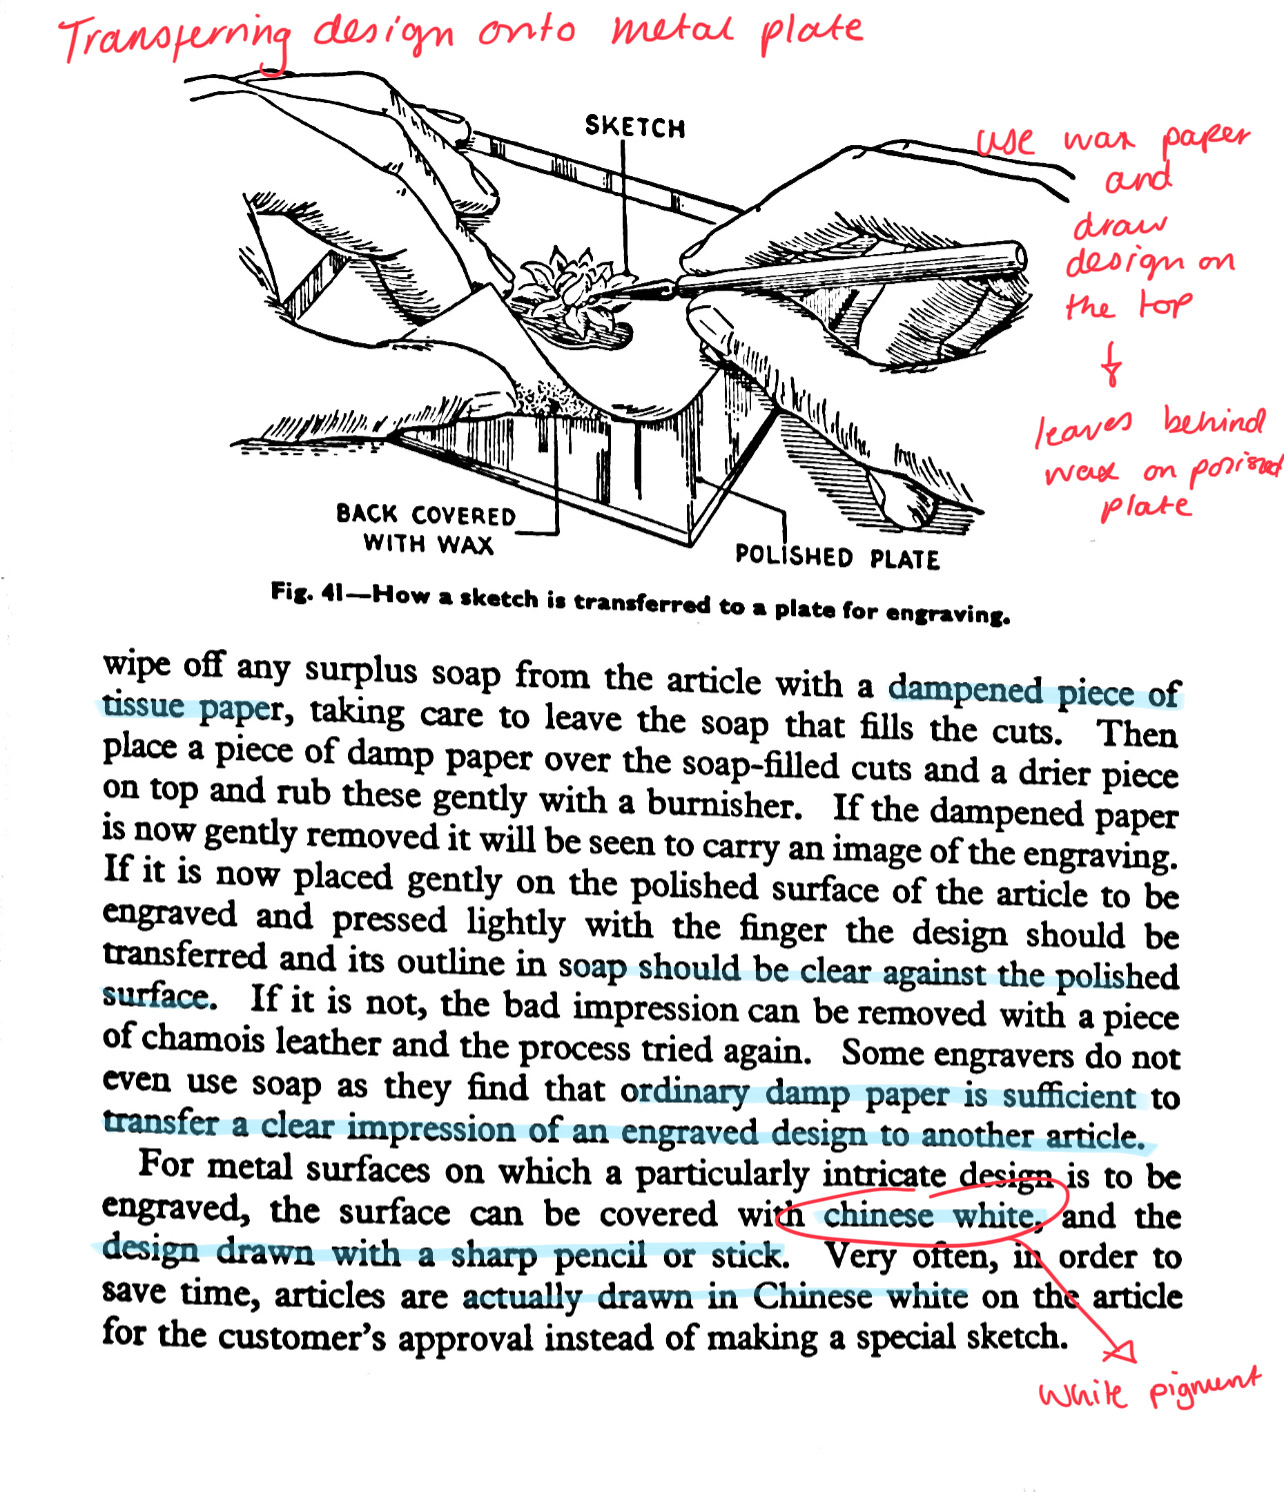
For some research and tips on engraving, I went to the library and found some books on engraving. The book 'Engraving on Precious Metals' was particularly useful when it came to basic tips. One fact I learned was that it is easier to engrave when the surface has been lubricated. I will try this next time either with wax or methylated spirits. I also learned how to transfer a design onto a polished surface using paper covered in wax.
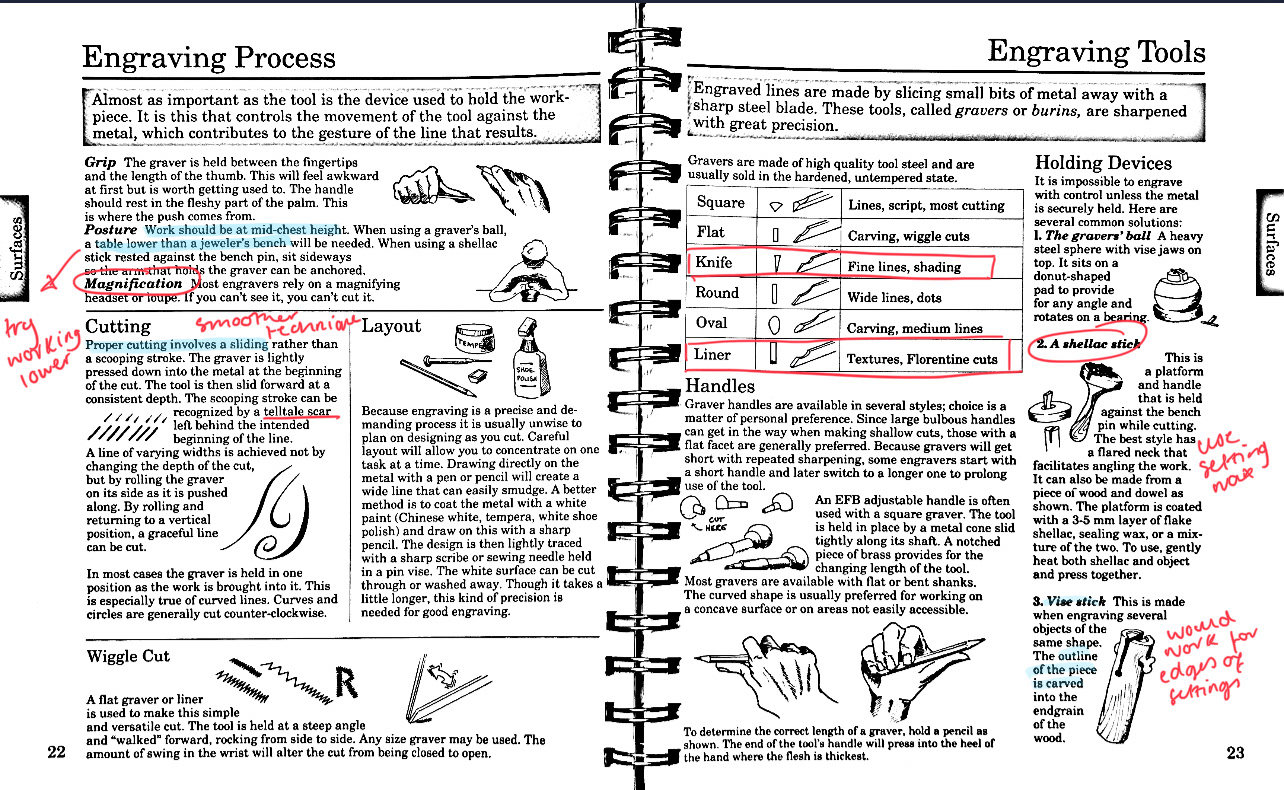
The Complete Metalsmith by Tim McCreight, Page 22-23
For more research, I read the book 'The Complete Metalsmith' by Tim McCreight. I found this book to be incredibly useful and contained lots of information about engraving an other metal techniques. I have learnt the best way to hold and engraver, and how to minimise the risk of slipping. I plan to have my work lower on the desk, mid-chest height as then I can use more of my body to help push the graver. It also showed me the different types of gravers and their uses, which before I had found hard to visualise.
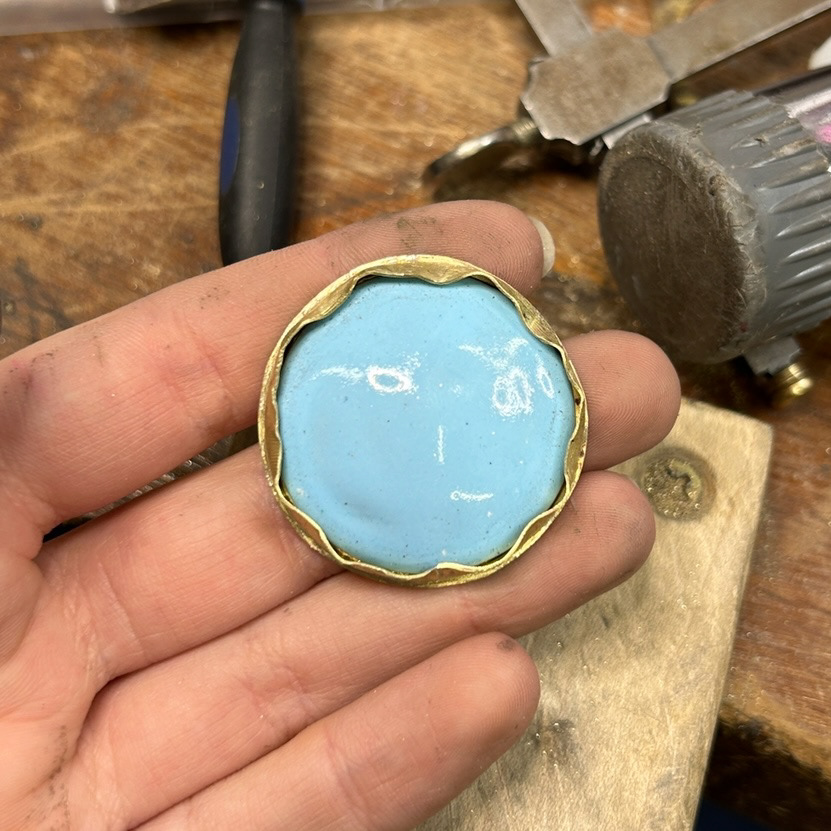
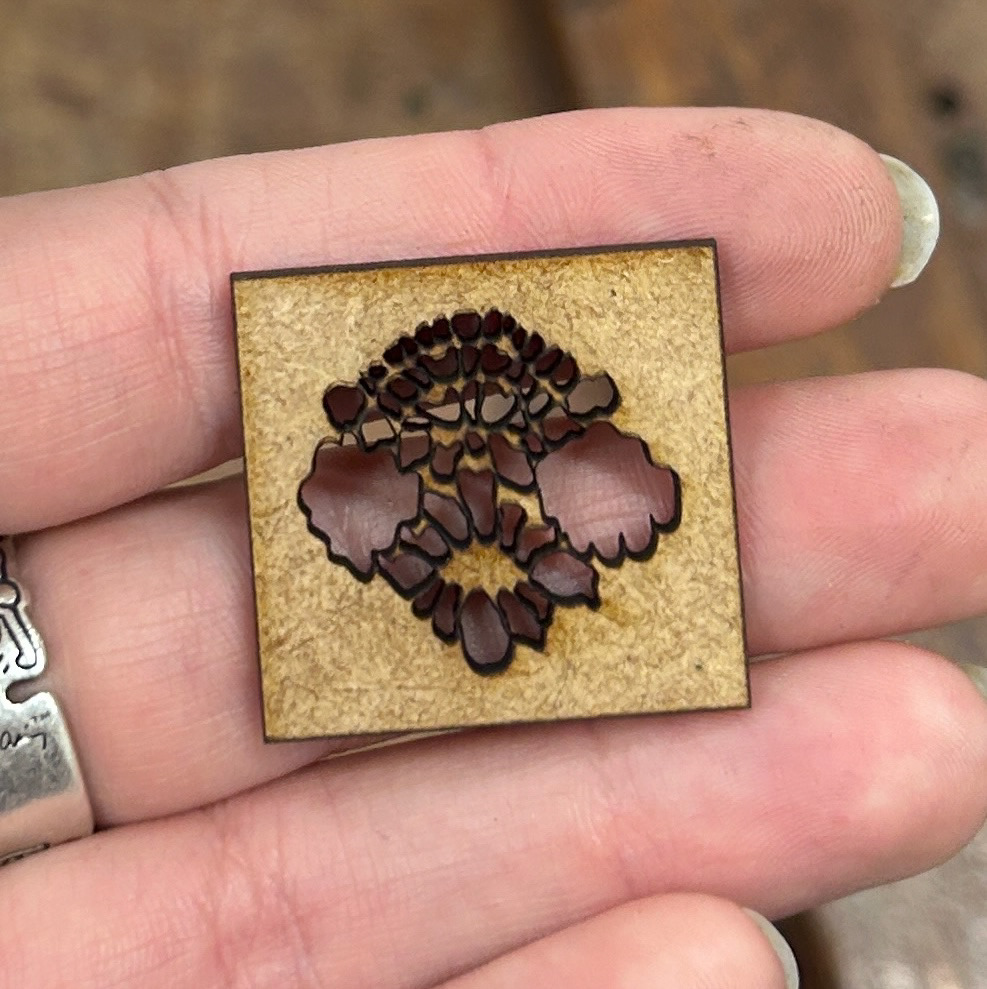
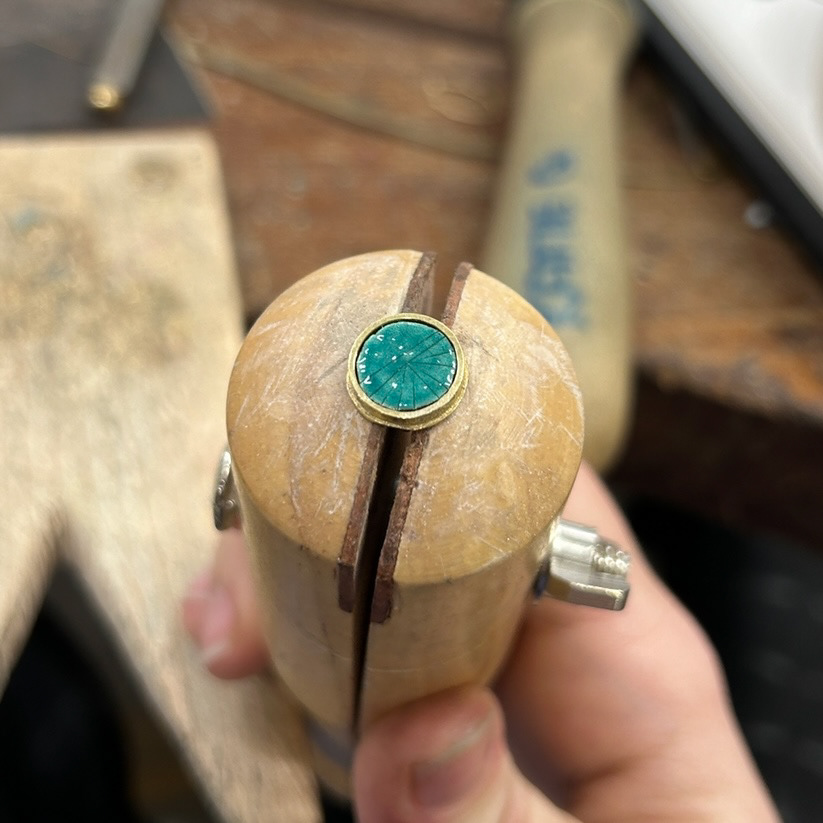
Basse-Taille with Copper
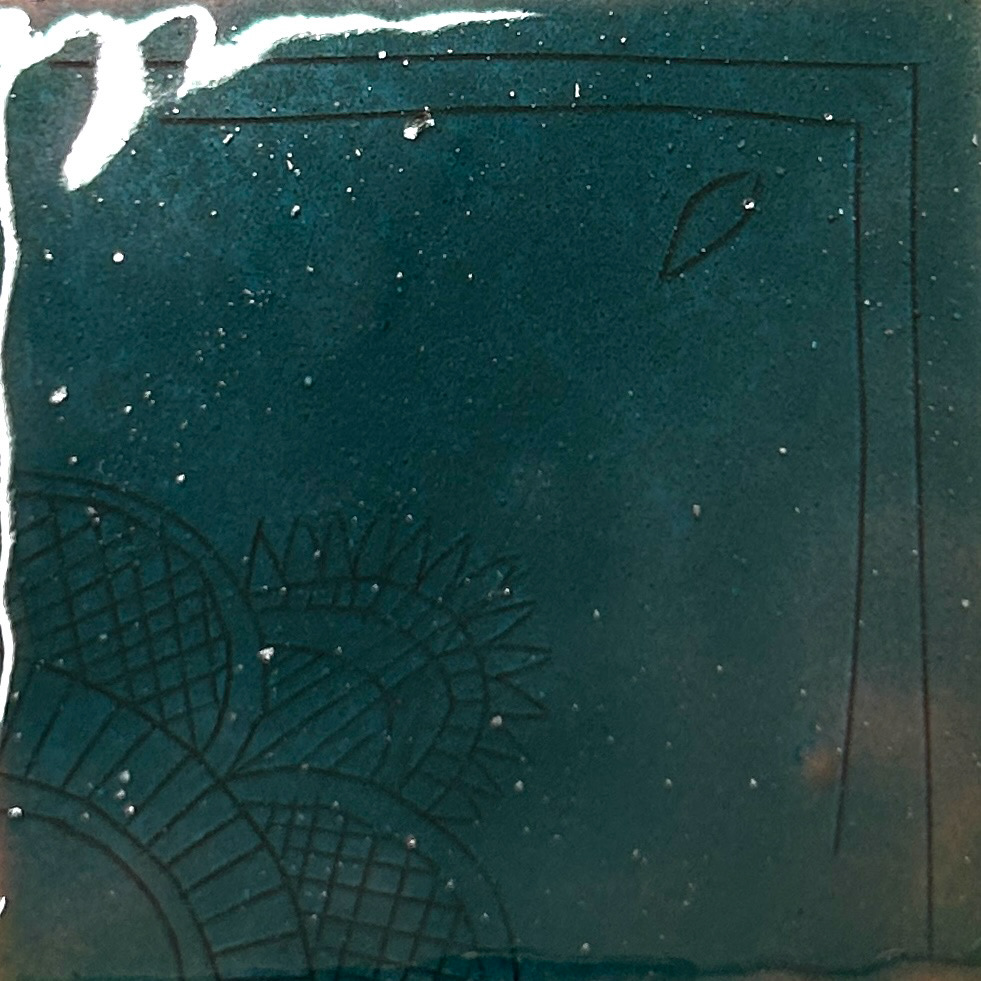
Here I used translucent turquoise enamel after engraving on a 1.5mm copper plate. This technique is called Basse-Taille and when enamelled, results in darker lines where the glass has seeped into the grooves on the plate.
This is going to be a consistent technique used throughout this project as I want to create enamelled pieces and then 'stone set' them and create jewellery. Next, I want to use silver and engrave and enamel on that, which I hope will show up better than the copper. The copper oxidises in the kiln resulting in a darker colour when the enamel is applied, thus making it harder to see the design. I also want to practice my technique when applying the enamel, as you can see the design starts to get lost towards the centre of the piece. I definitely think I added too much enamel so want to work on that, in order to produce the best results possible.
I like the idea of creating 'stones' out of these enamelled pieces as while they aren't precious stones, it does have the similarities of being precious, delicate and time-consuming.
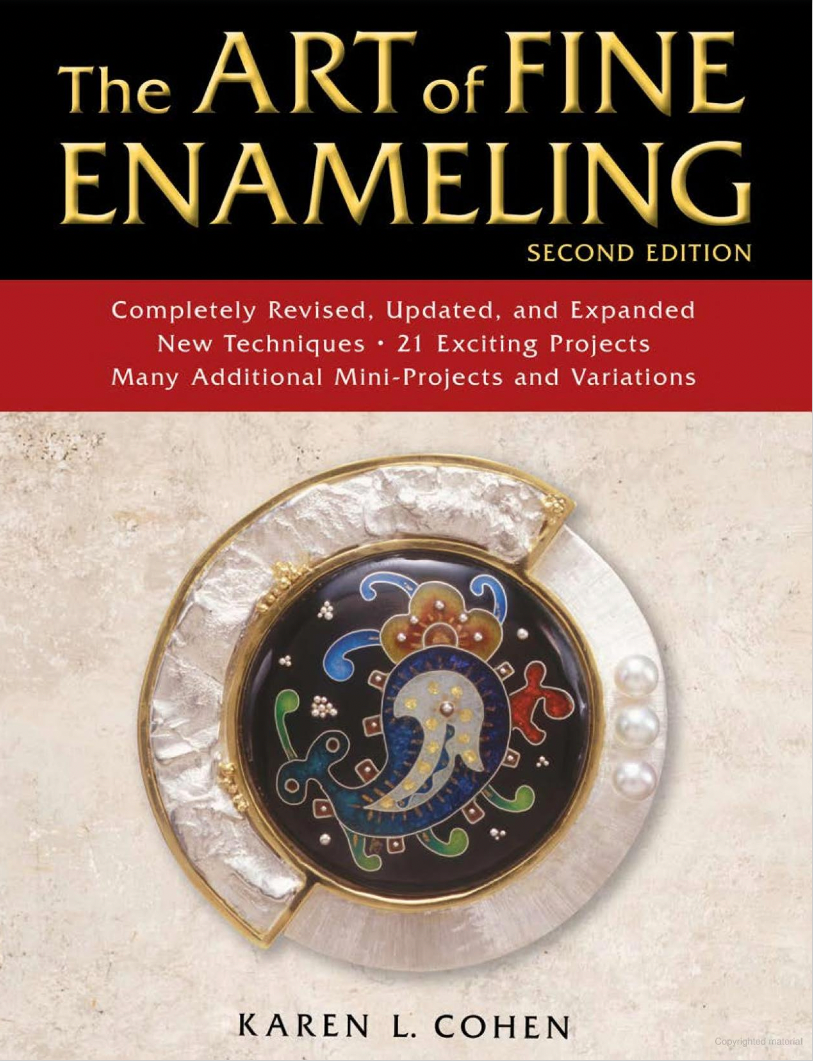
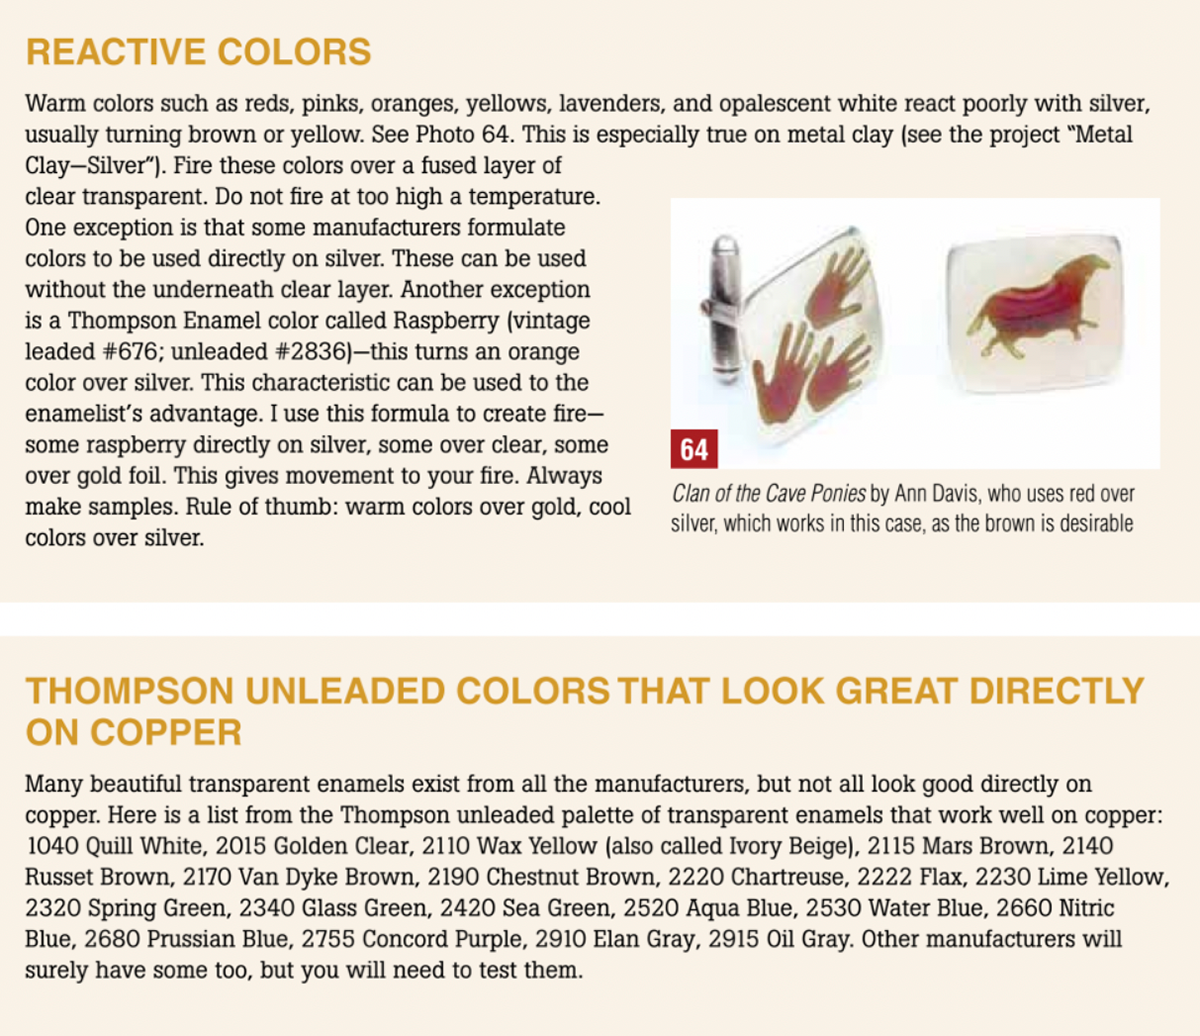
While researching more enamelling techniques, I found this very useful extract about reactive colours when enamelling silver. This was from the book 'The Art of Fine Enamelling' by Karen L. Cohen.
In the extract, it explains that often when using warm-coloured enamels, for example, reds, pinks, browns and yellows, can have a reaction with the silver and unintentionally turn a darkish brown colour, looking almost burnt.
It also says that some companies create enamels that are designed to be applied directly to silver. While the enamels I have been using previously say they are suitable for silver (WG Ball), I will be conscious of this in the future. I have learnt to always make a sample of any warm colours on silver, in case there is any sort of reaction. I might do this by using silver foil ontop of copper, rather than using valuable silver sheet. One way that might help reduce this reaction is using a layer of flux underneath (clear enamel) to create a barrier between the silver and the red, however, this would not work with the Basse-Taille technique as the relief is needed for the technique to work.
Stone Setting
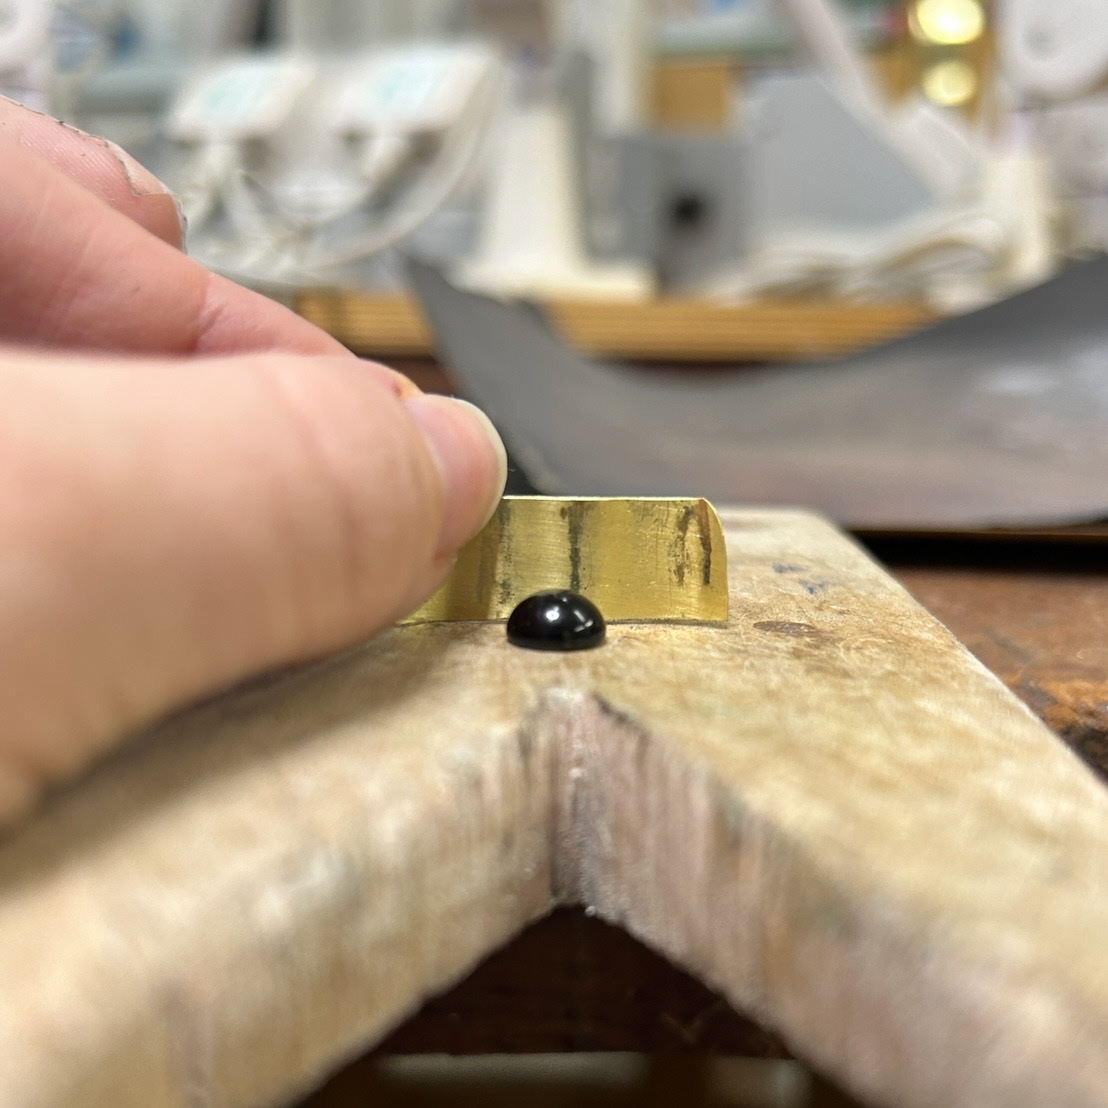
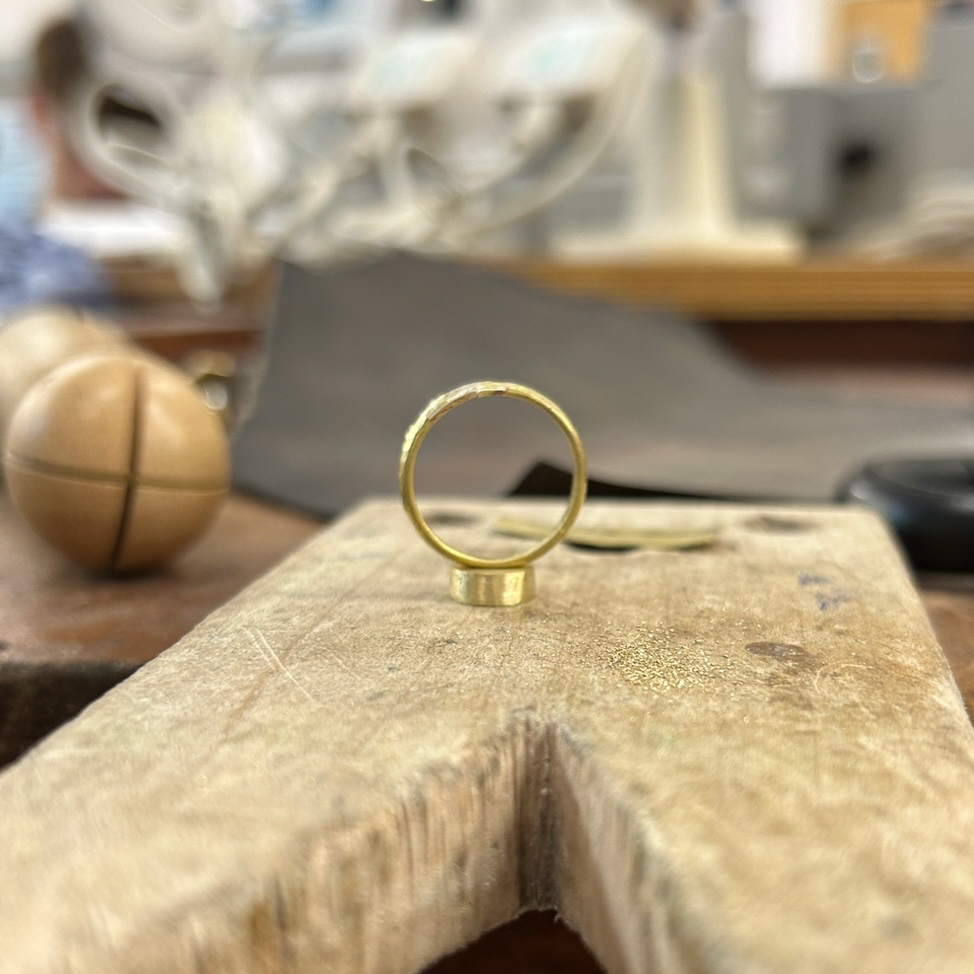
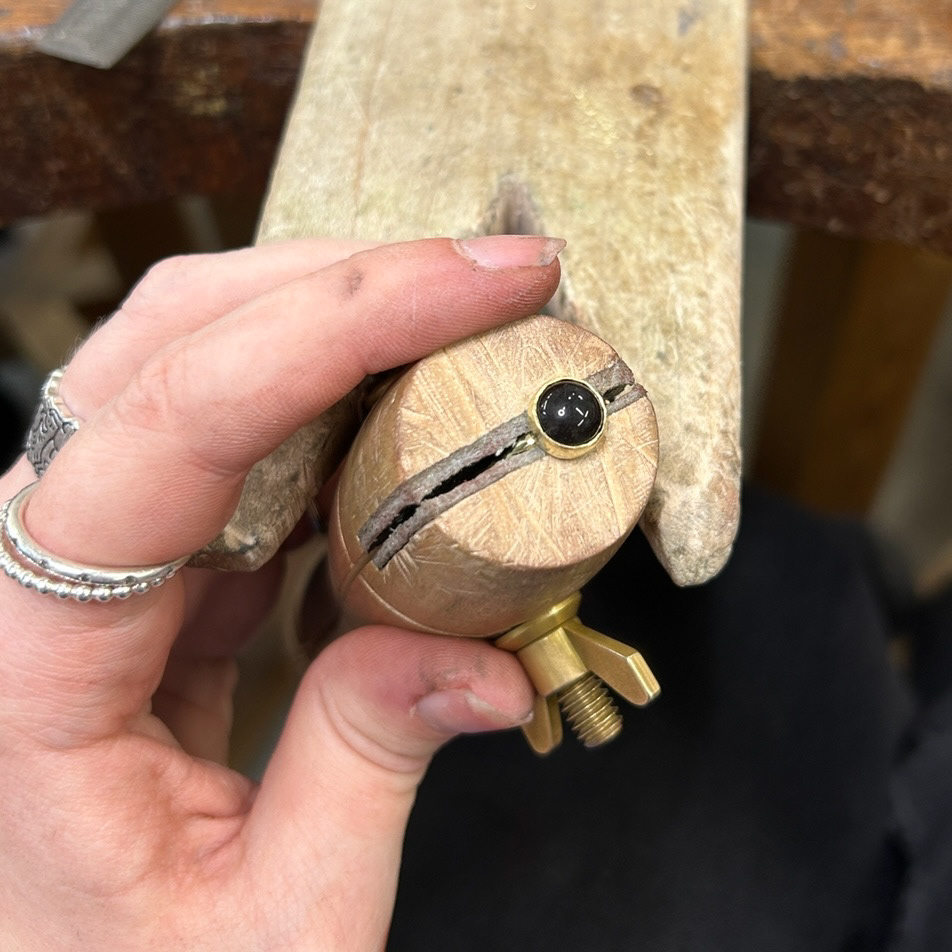
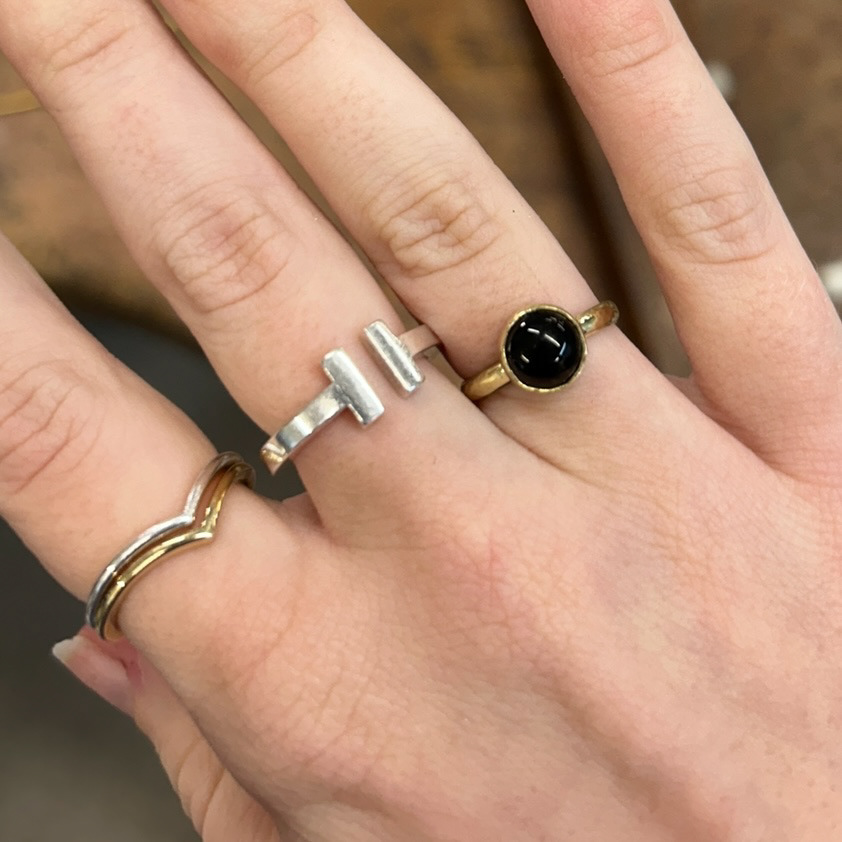
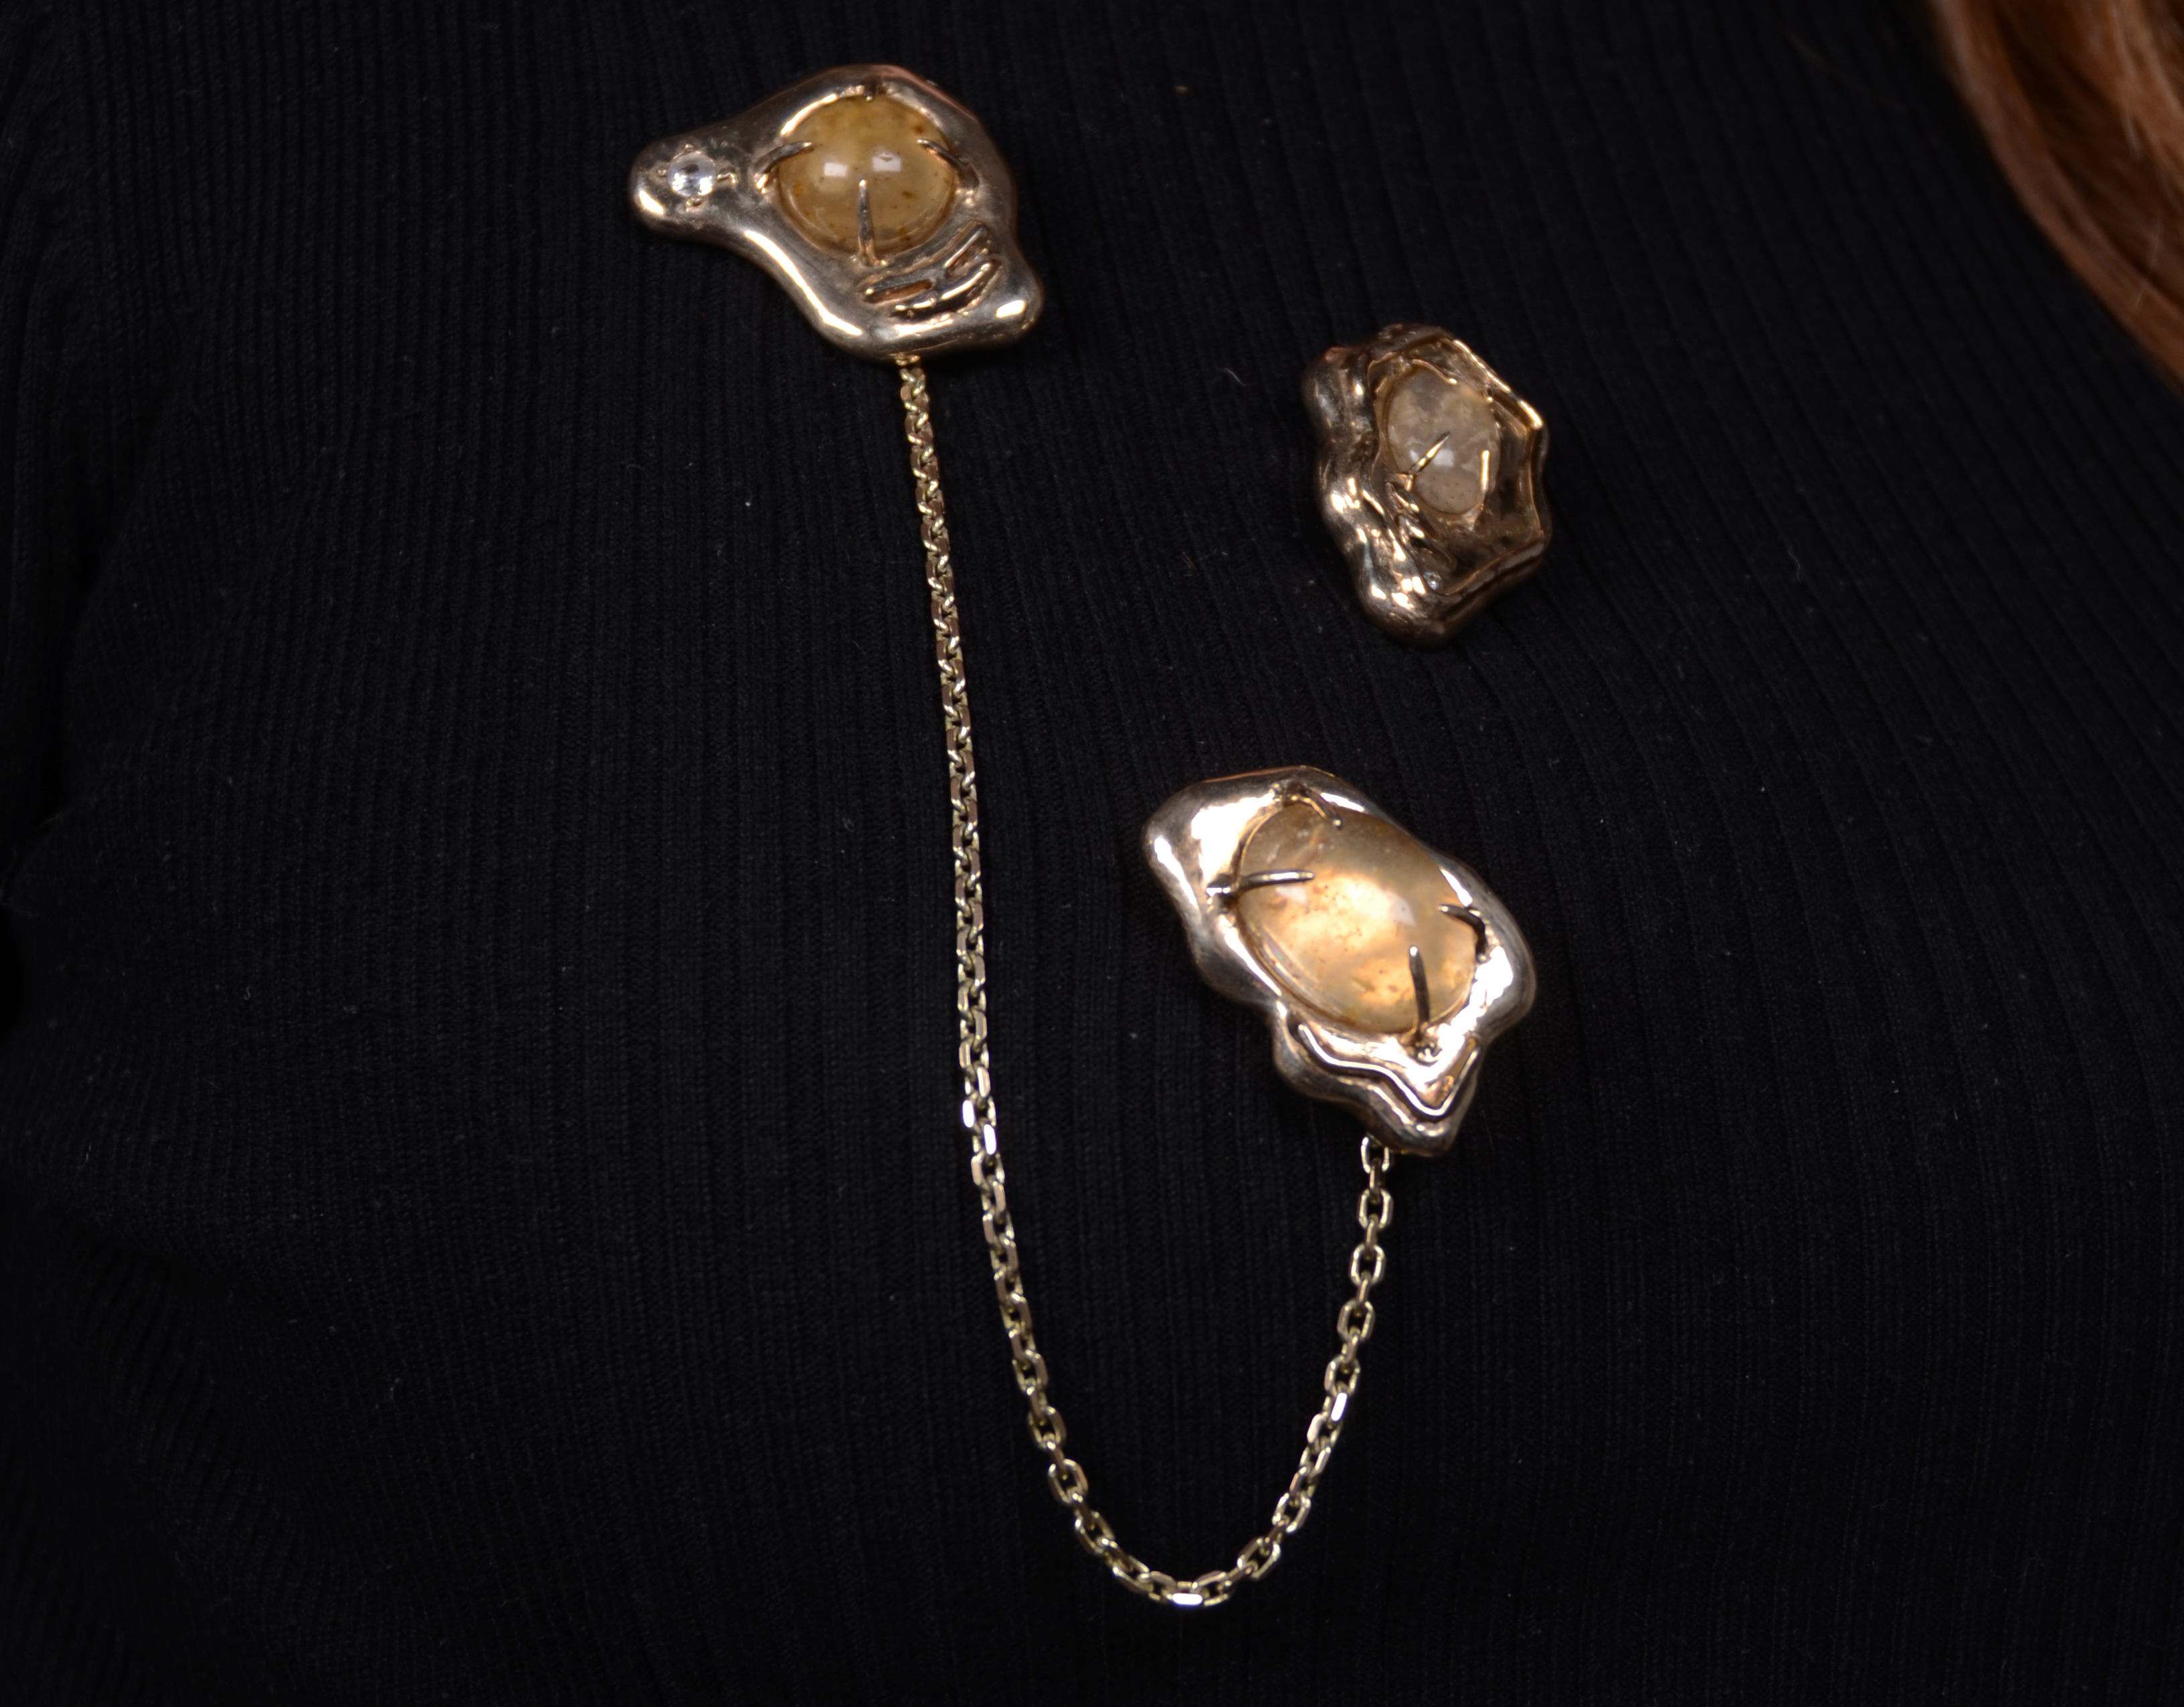
Here was my first attempt at a cabashon stone setting. I was very happy with how this turned out however I know that I could definitely improve. Next time I do one of these settings I will take more time on making sure that the setting is 100% level all the way around, as I believe you can see in the final result that there are some discrepancies in the height of the setting. However, I was happy with how the setting was attached to the band as I think it looks relatively central.
Experimental stone setting inspiration
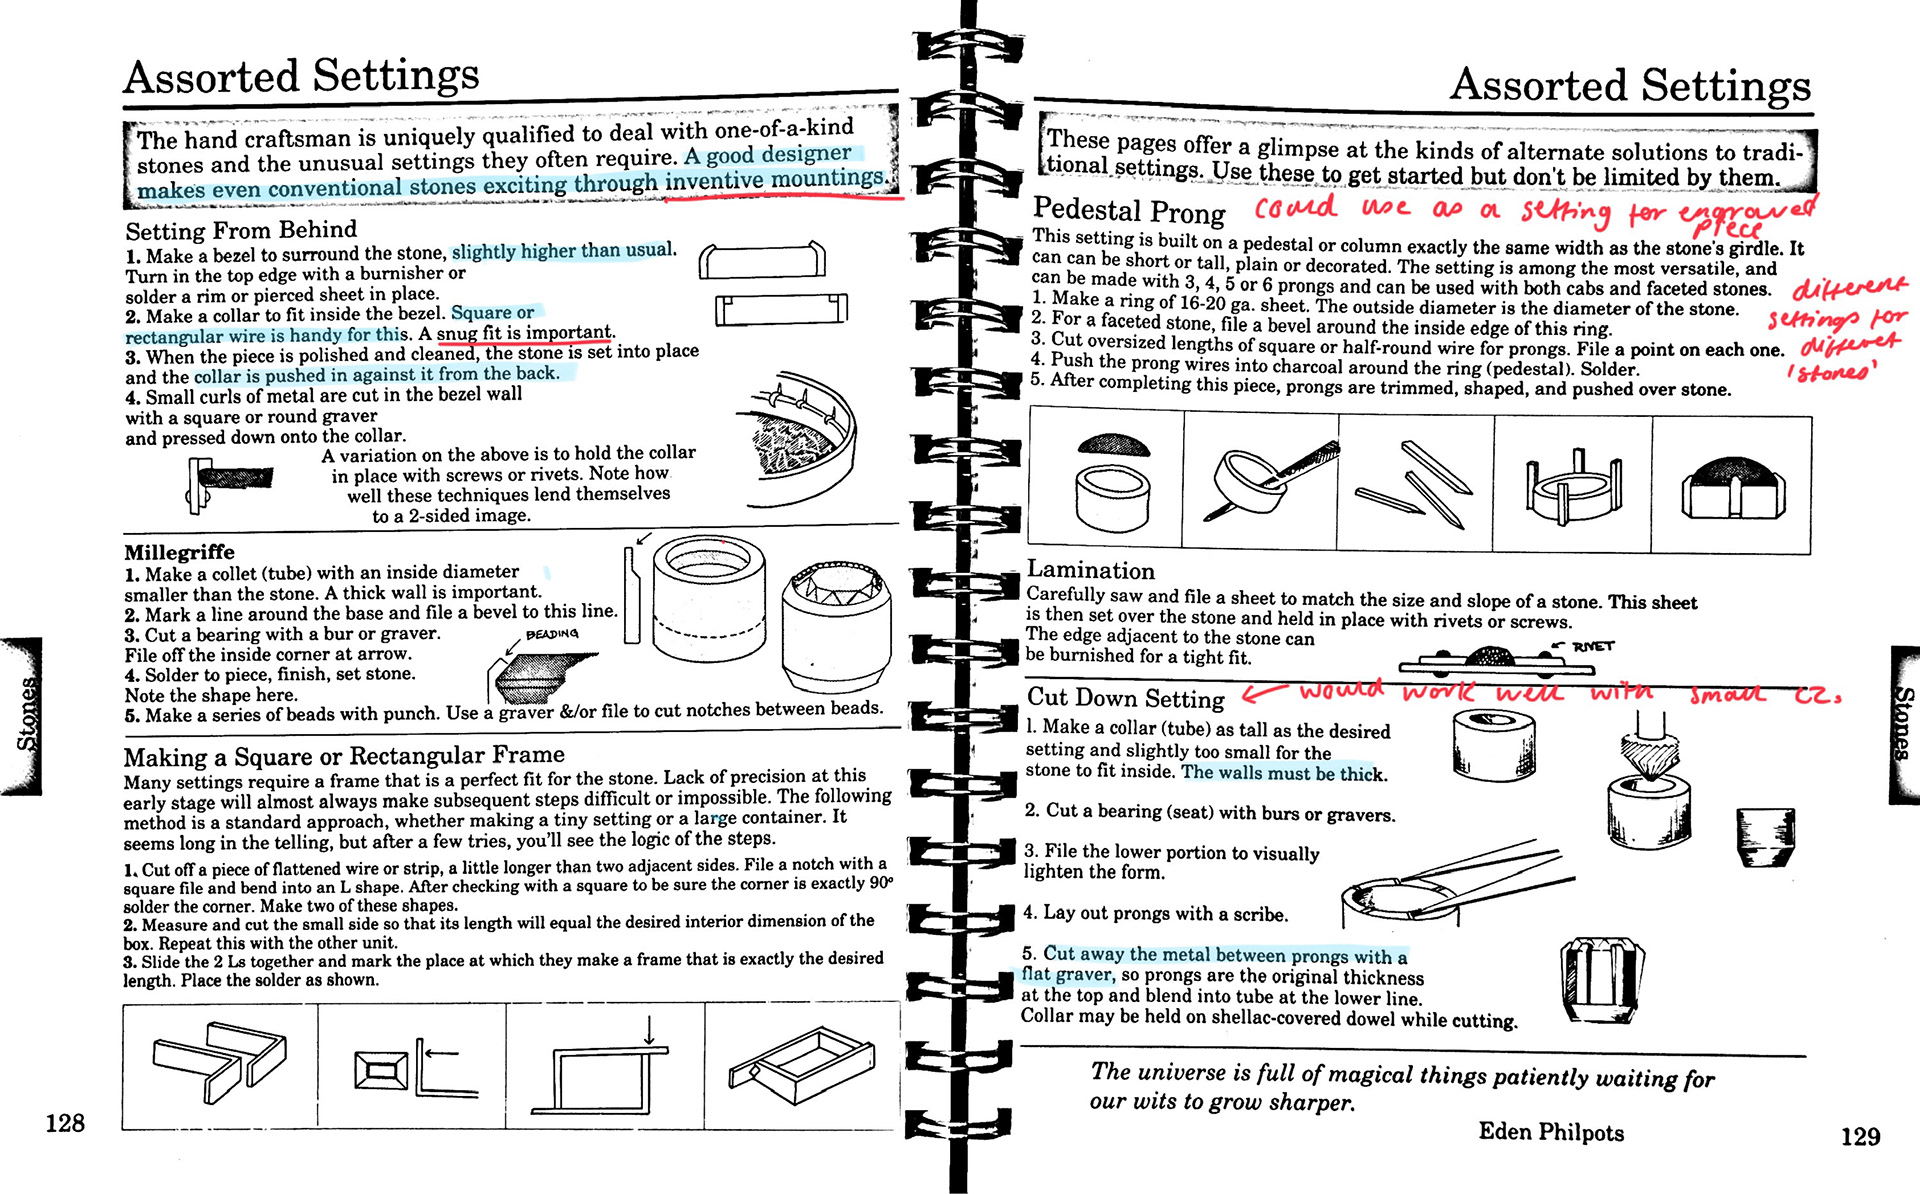
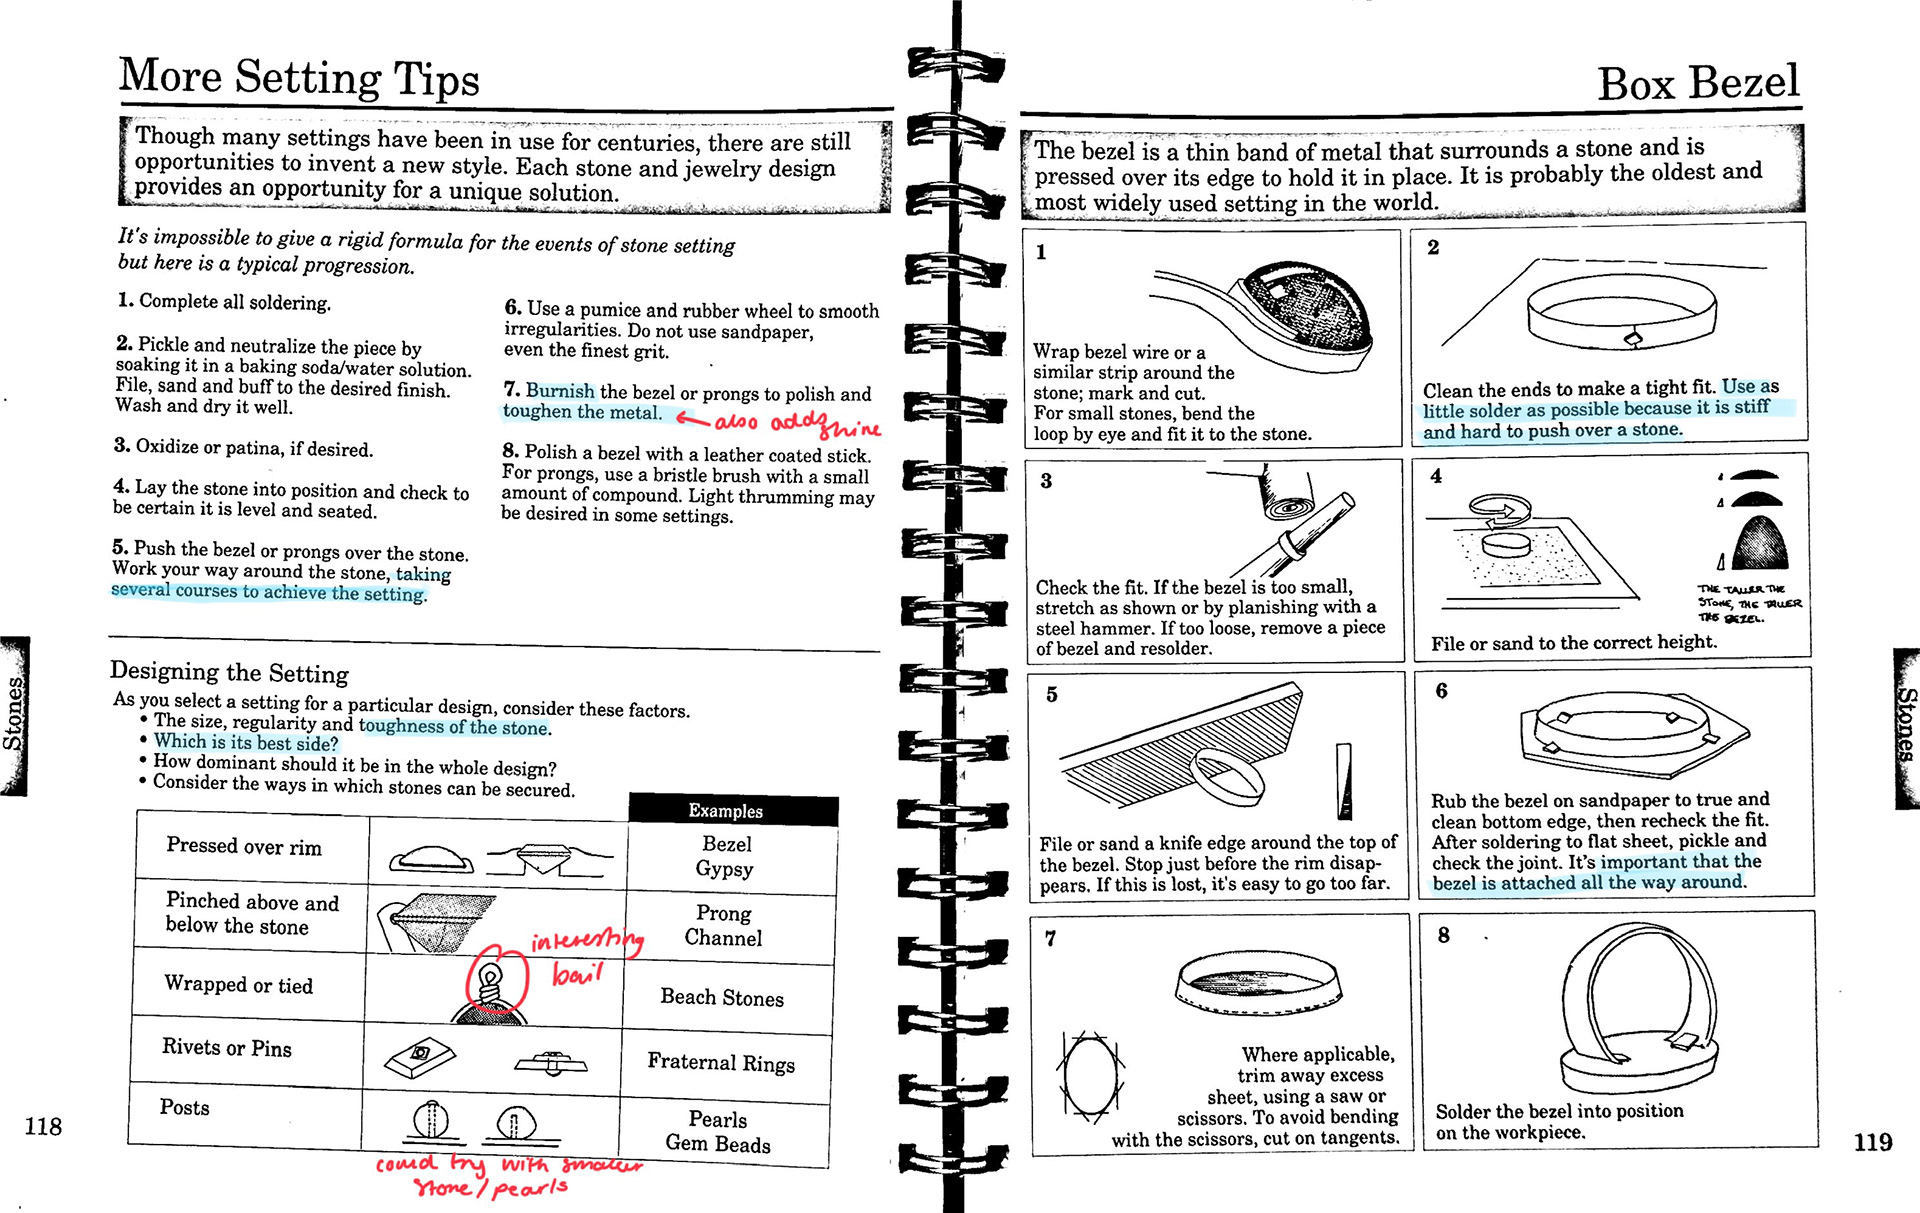
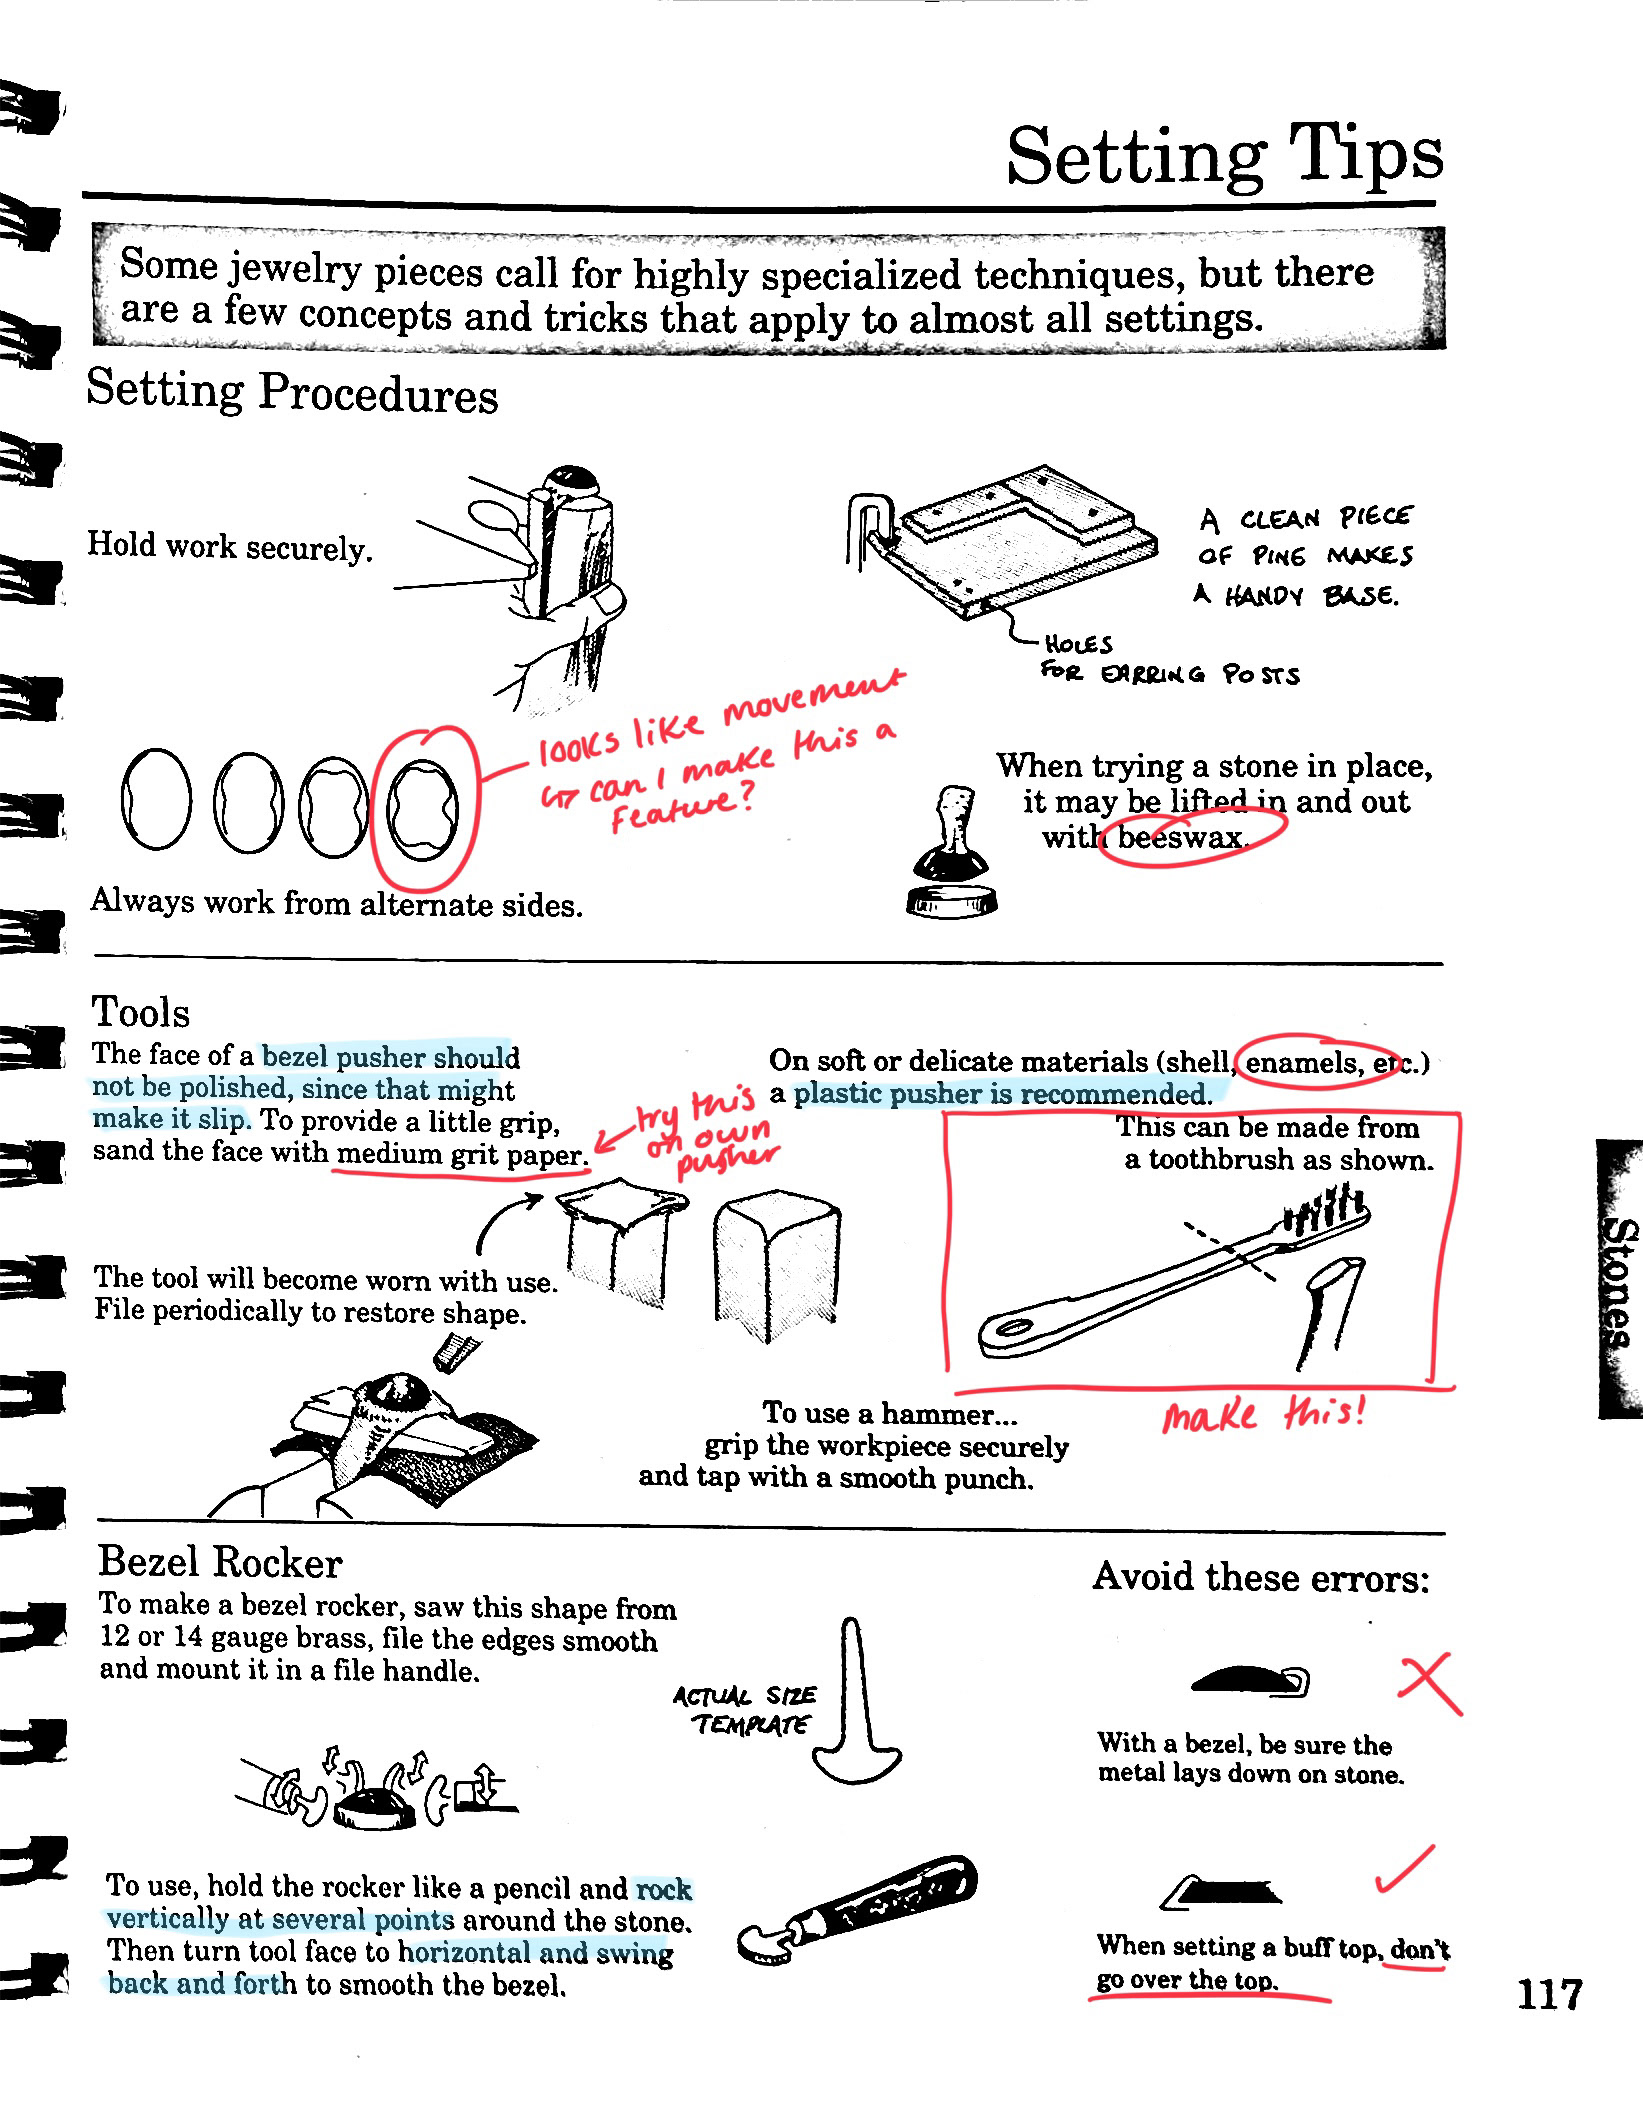
The Complete Metalsmith by Tim McCreight, Pages 128-129, 118-119, 117
Also from the book 'The Complete Metalsmith' by Tim McCreight there were lots of tips about stone-setting. This is something I plan to use a lot throughout this project, and my practice, and so researched more. While reading this book I found a very interesting graphic about stone-setting, and the different stages when pushing the 'collar' over the metal. I explore this next
This was an attempt at an experimental stone setting. As I am using lace as my main inspiration throughout the project I wanted to create a setting that would reflect that. When doing research on stone setting I noticed that when using a pusher to move the metal over the stone in a star-shaped pattern, it created some very loose and organic forms (3rd picture above). This reminded me of fabric and especially, how lave behaves. To achieve this I measured my setting slightly too big so there would be enough metal to secure the 'stone' in place while still leaving this wave pattern around the edge.
While the technique I hoped to achieve worked, I am not sure if I like the end result. I feel like it looks messy and not quite right in some aspects. As I planned to add a bail to the top and bottom of this setting I tried to make sure that each side had a slightly flatter setting so the bail would have a good connection with the setting(as seen on the left and right-hand sides). In the future, I plan to try this setting again, but by trying to make the 'waves' around the edge more consistent and smoother. I'm hoping this will result in a more 'finished' and intentional look to the setting.
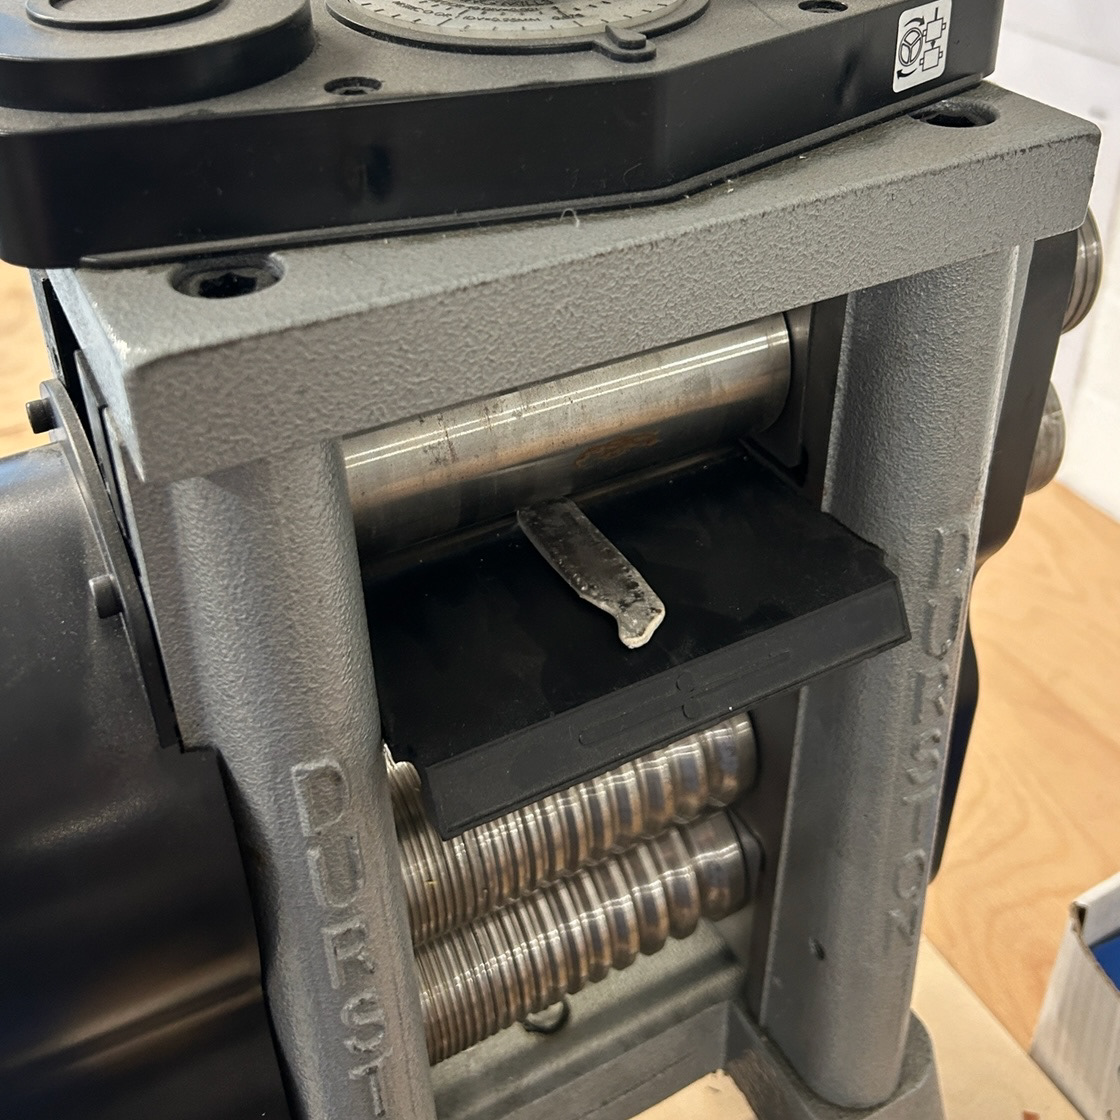
Making sheet silver
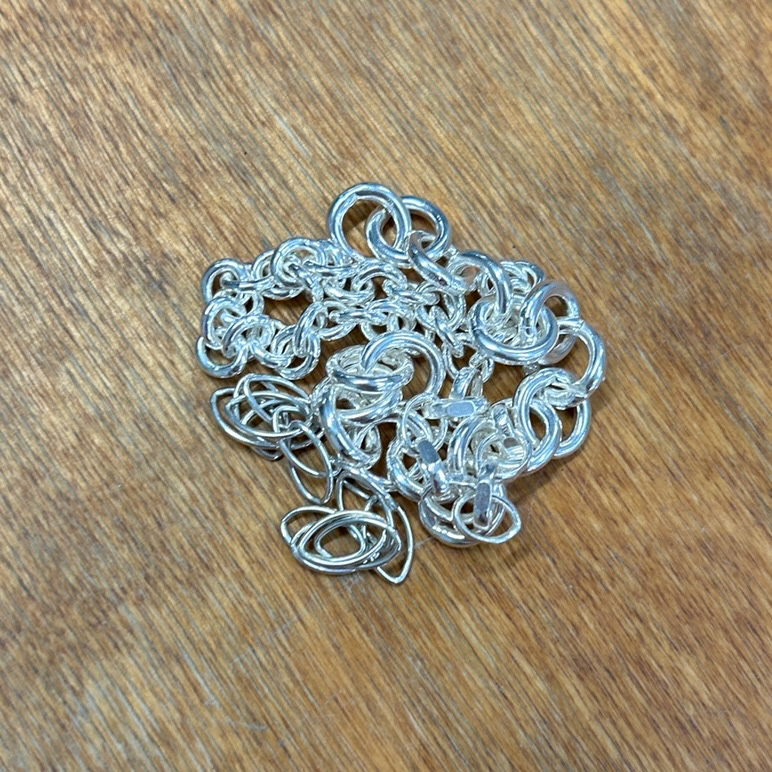
As silver is incredibly expensive, I first wanted to use recycled silver to practice on, before committing to the expense. I used loose 925 silver chain from a previous project and melted it down into a slab of silver.
The steps for this included:
- Heat furnace to 1040°C
- Heat casting block on the hearth
- Pour melted silver into cast and let cool slightly, then quench
- Place silver block into the silver pickle
- Hammer metal slightly to remove any rough surfaces
- Anneal on the hearth again and begin rolling
- Anneal after every few turns through the rolling mills
- Repeat until desired thickness
To anneal silver it is a completely different process to copper, Instead of waiting until the metal glows like you do with copper, you have to wait until the silver goes through a couple of different stages. First, the silver will darken slightly and then turn a slight yellow colour. After that, the silver will start to have red 'specks'. This is when you remove the heat completely. If this is not done at the right time, it can cause stress on the silver later down the line, which will be noticeable when working with it. Before quenching you have to wait until the silver has cooled down slightly and there are no more red specks, once again, if quenched too early it can cause stress on the silver.
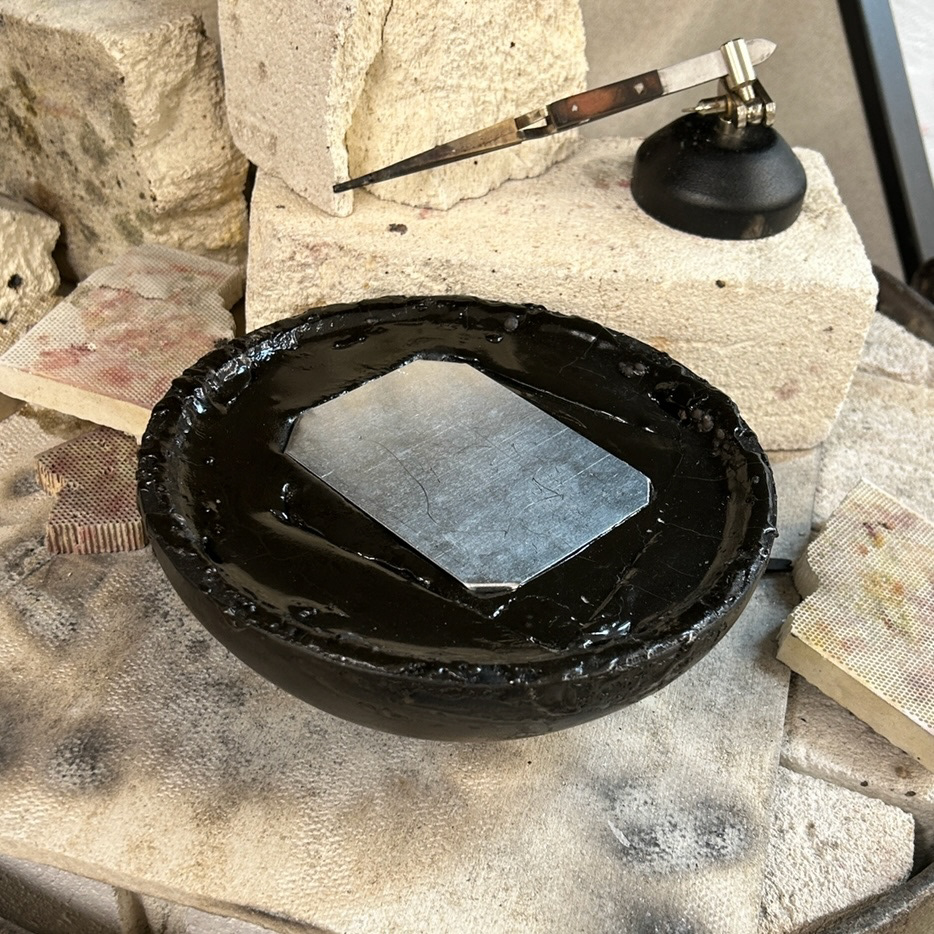
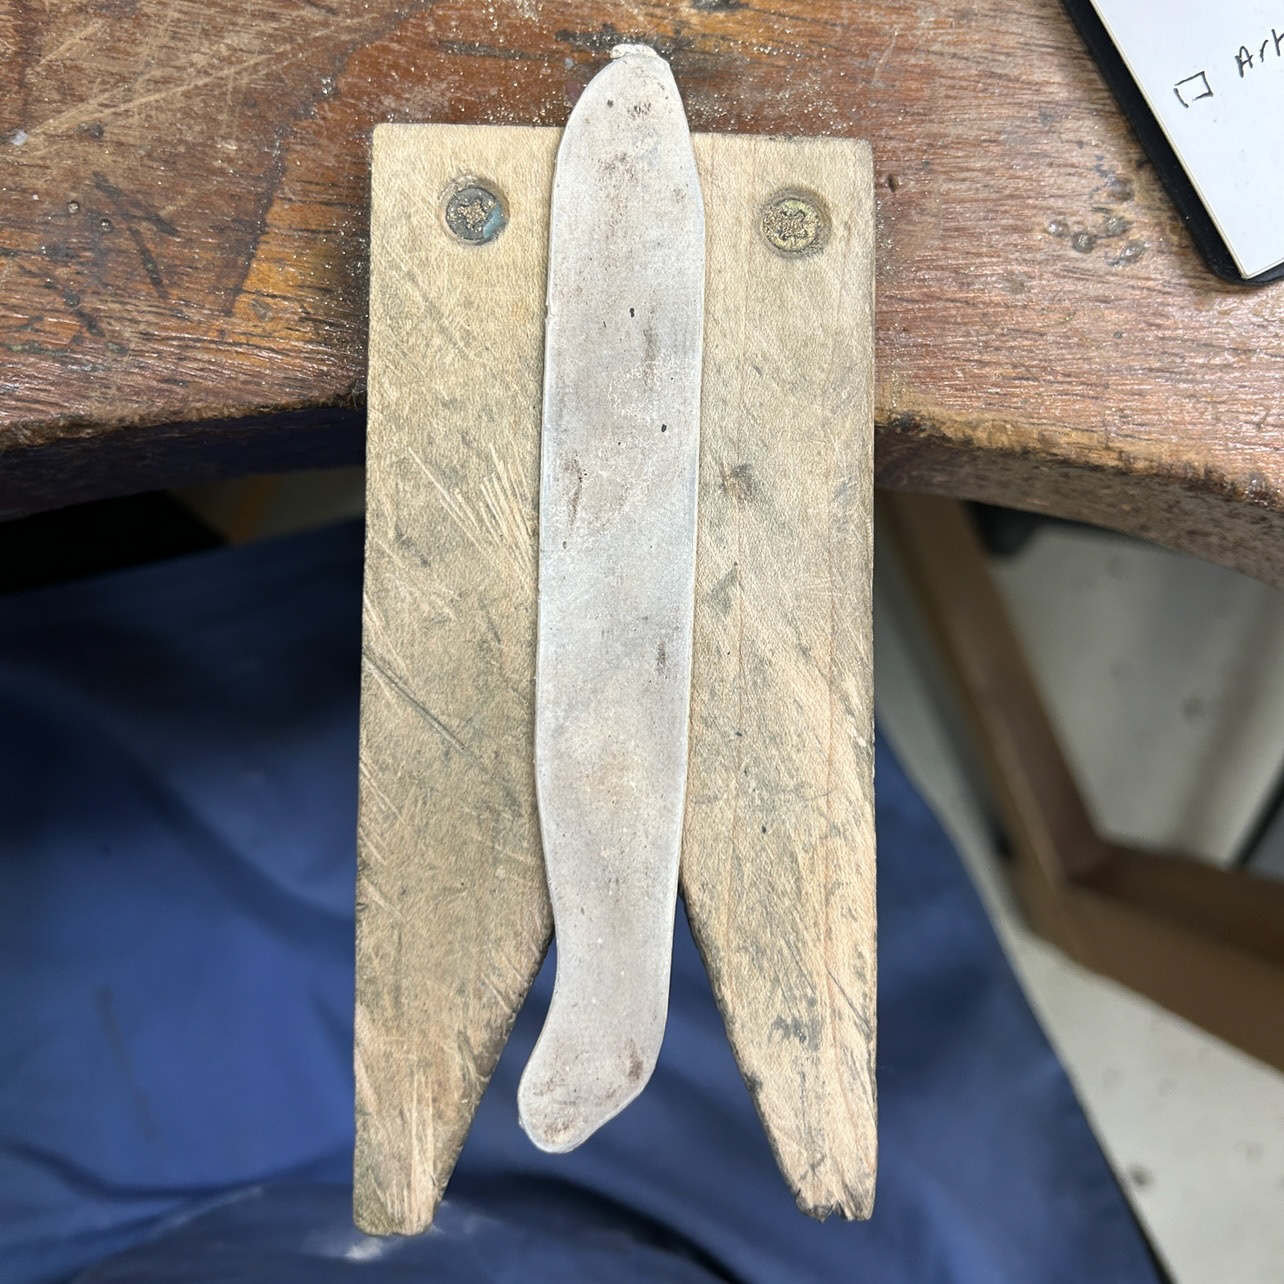
I spent a couple of hours rolling and annealing my silver, being patient and not trying to roll it too thin between each turn. Eventually, I got to the desired 1.5mm thickness, which will be perfect for enamelling. This time I will use setters wax to hold the silver pieces into place rather than pitch, as the cleanup can be time-consuming and I don't want to damage the silver with any chemicals or tools when removing the leftover pitch.
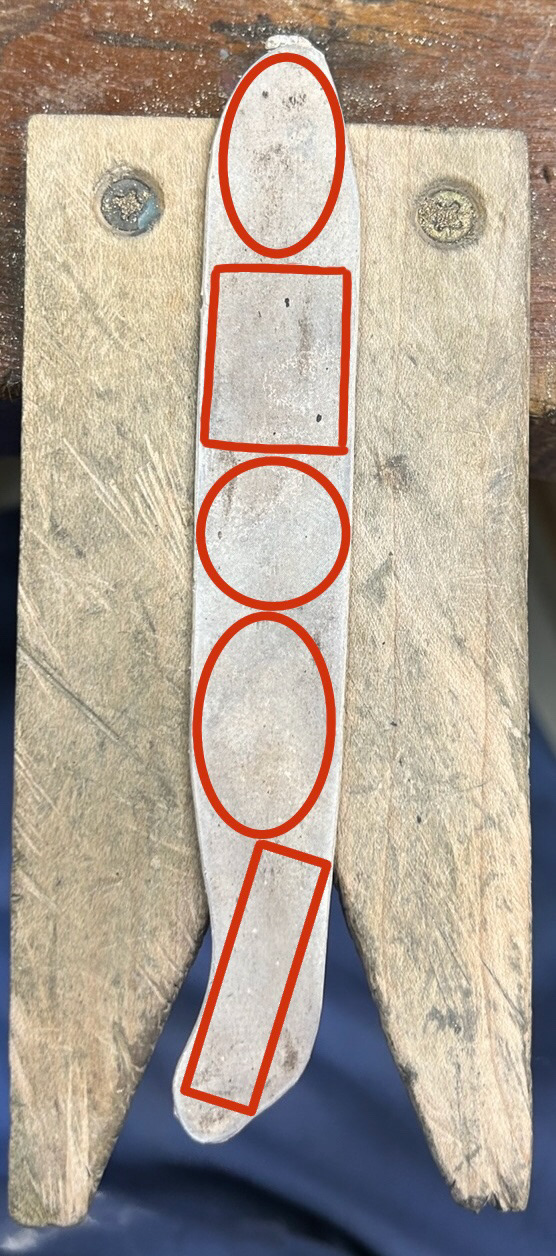
I also want to be cautious about how I'm using this silver for samples and have roughly drafted which pieces I'm going to cut and where.
Modular Jewellery Ideas
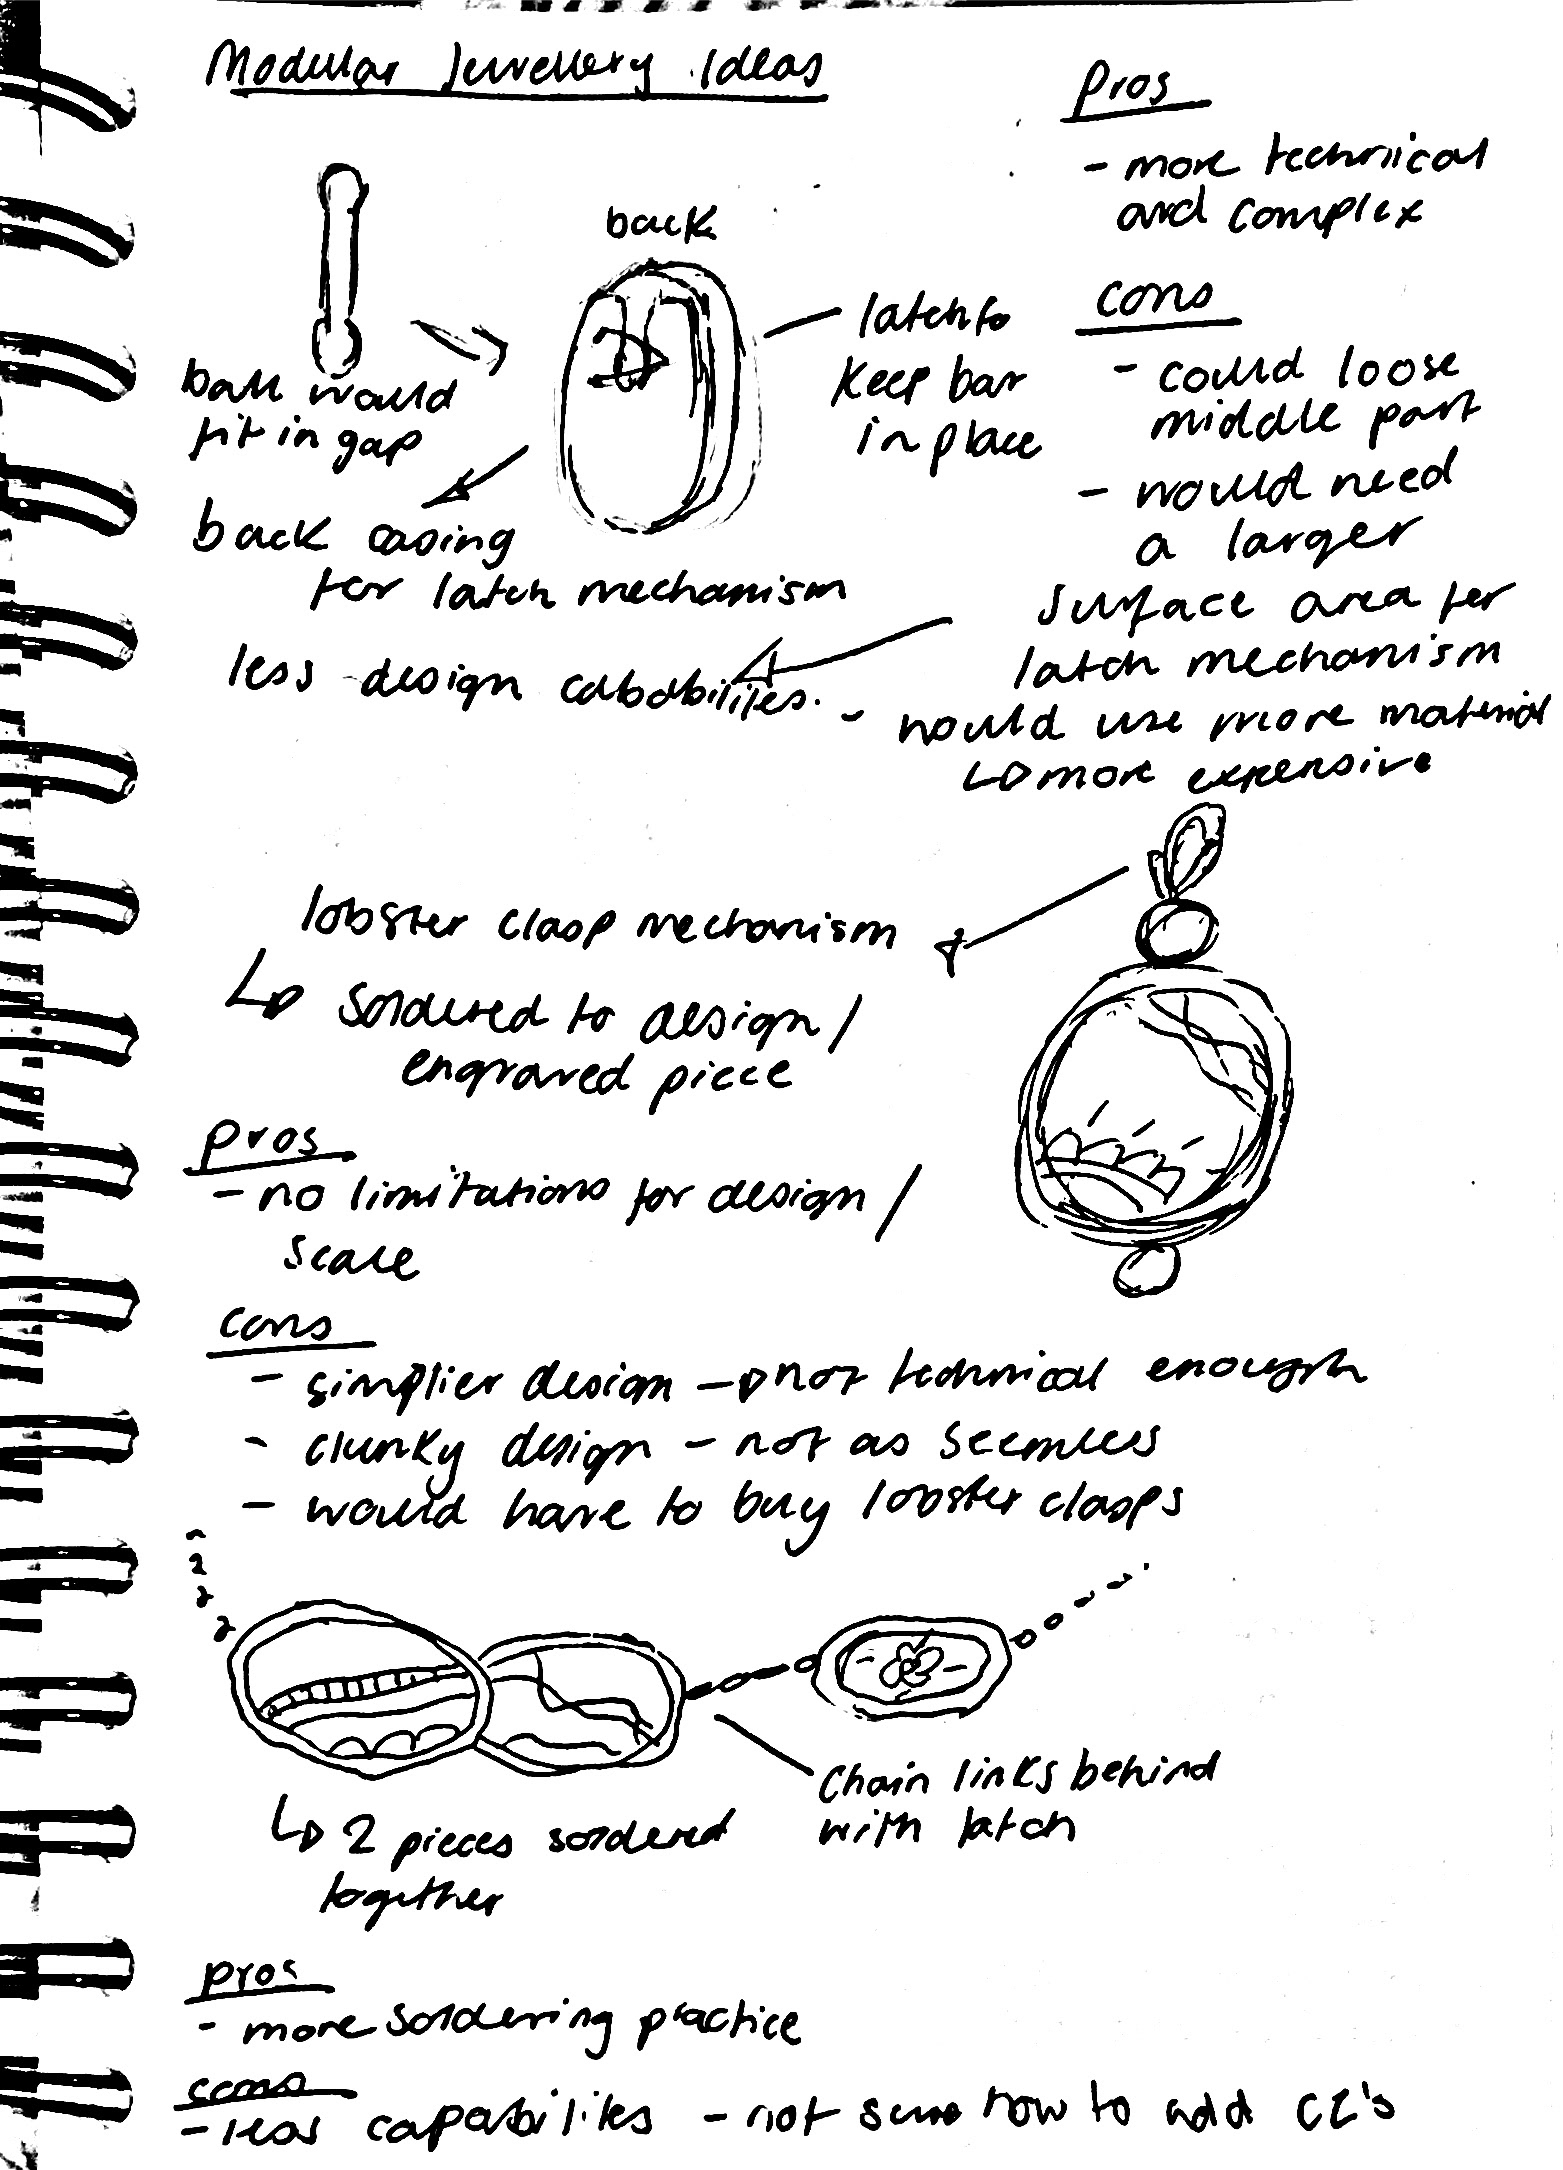
Here I showed some of my ideas for different techniques I could use for modular jewellery. I have shown the pros and cons of each design which resulted in me picking none of these designs.
While I think I prefer the first one, it would have design limitations when it came to scale. The pieces would have to be large enough to make sure the clasp on the back would fit. As well as that, this design would require more material which would be more expensive to make. Finally, I also want to add cubic zirconias into my design to practice stone-setting on a small scale, however, this wouldn't work with this design, as once again, the latch on the back would be too small. I thought that I could potentially mix two different types of links so that I could add cubic zirconias, I don't want the finished piece to look too busy with different fixings, especially when they would look so different. This might also defeat the purpose of this piece having interchangeable engraved plates as the CZ's might only be able to attach to certain points.
Finally, this mechanism might not work well on earrings as the fixture might be too large to wear comfortably next to the ear.
Final Design Ideas
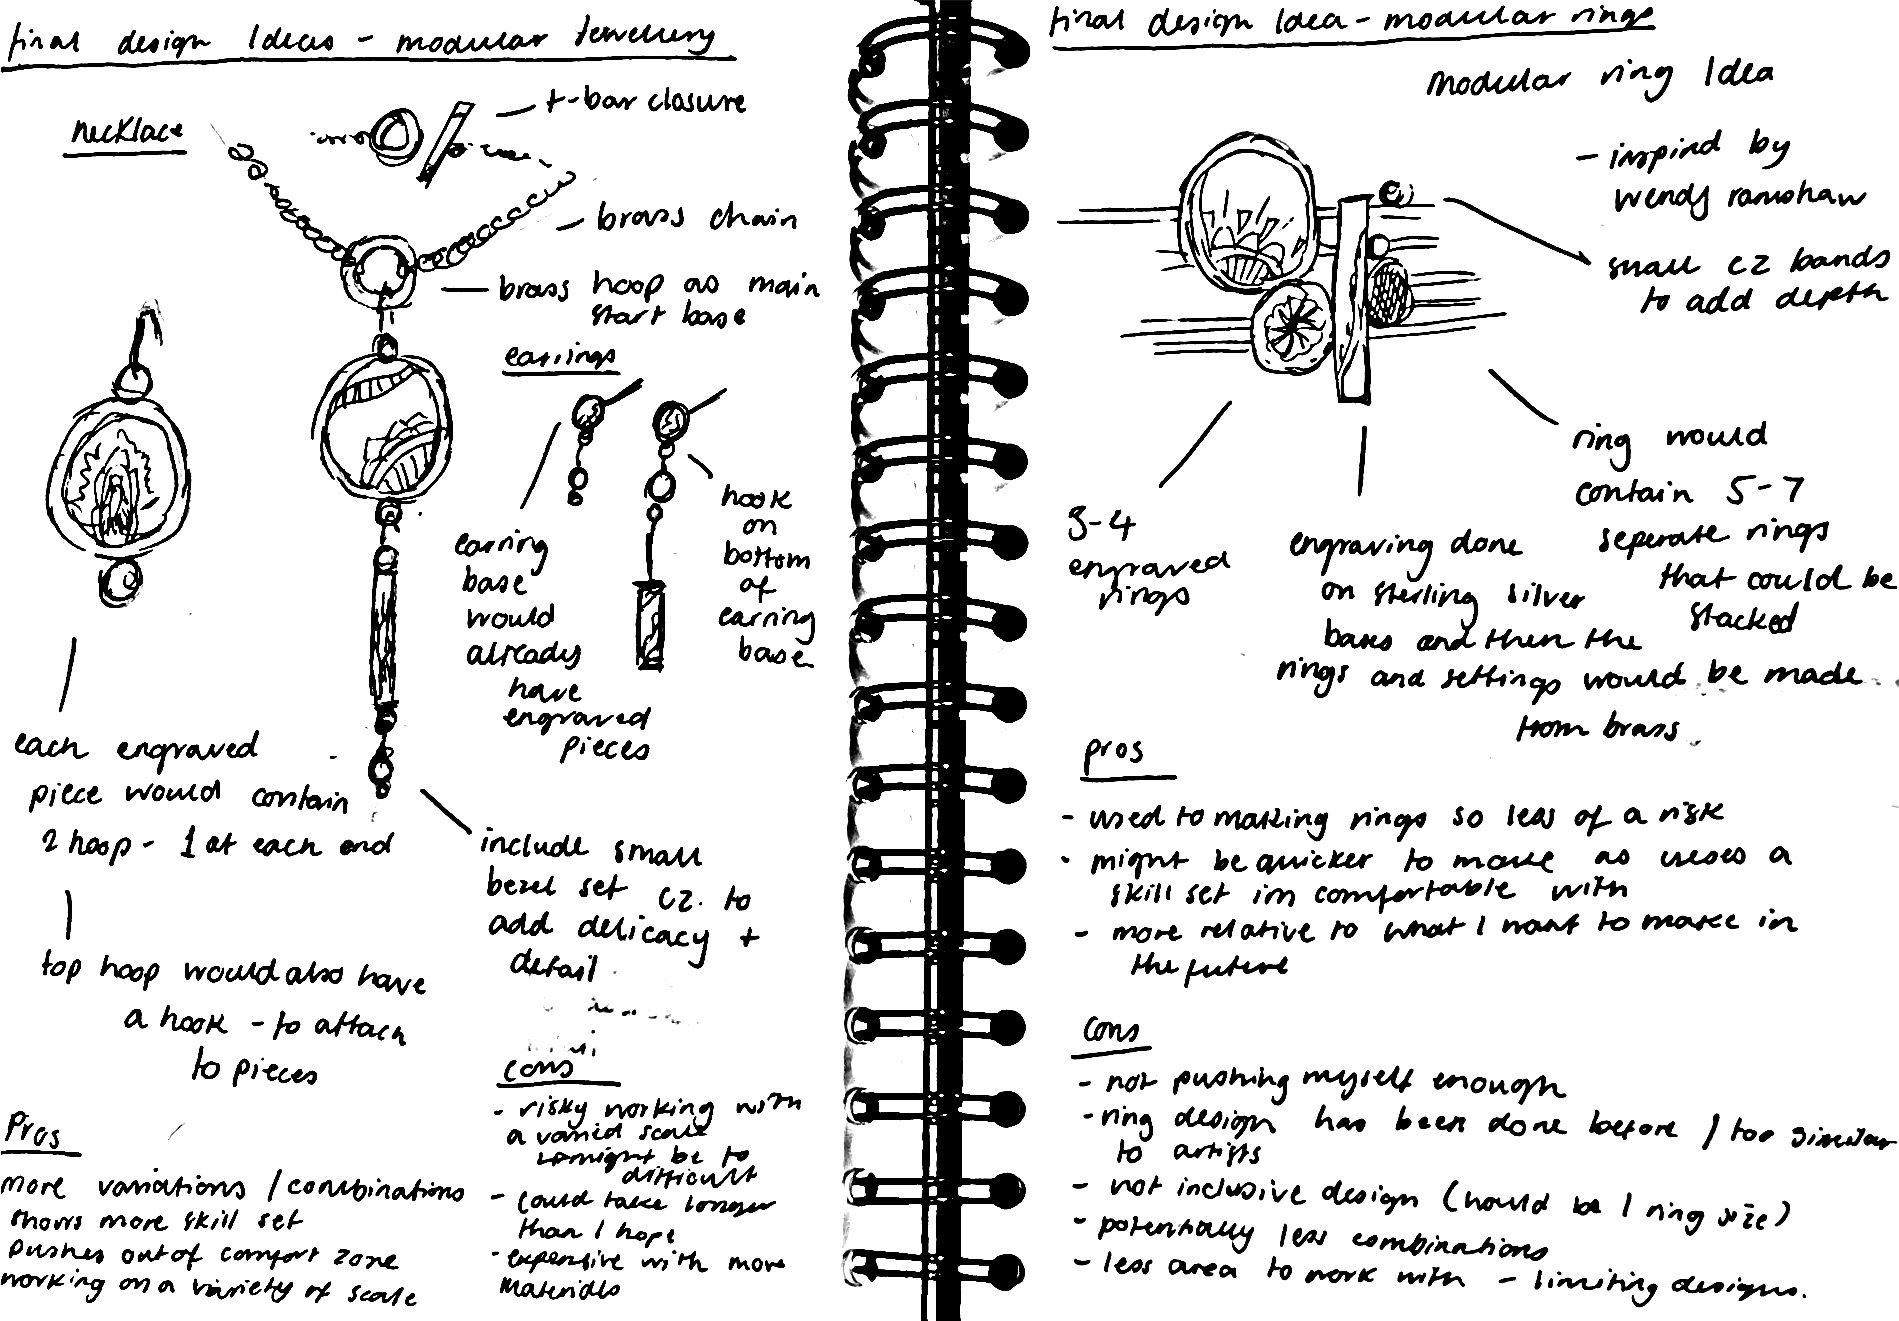
For a potential final design idea, I have decided to go with a necklace and earring set that can have interchangeable pieces. This will work seamlessly for the cubic zirconias as well as the engraved 'stones'. This would work by having brass loops that will attach through rings on the top and bottom of each piece. The design with the hoops will hopefully still look finished even if there isn't any piece attached to the end, however, I hope to make some pieces with cubic zirconias in case the wearer wants a more refined and embellished look. I plan to use brass for the cabochon settings as well as the hoops and chain, and then silver for the engraving, as it will show up better with the enamel.
While this is just a rough idea of what I want my final piece to look like, creating a rough design helps me decide what techniques I need to focus on in the studio and shows me whether I need to order any materials, so I can be prepared for when I do start making my final design.
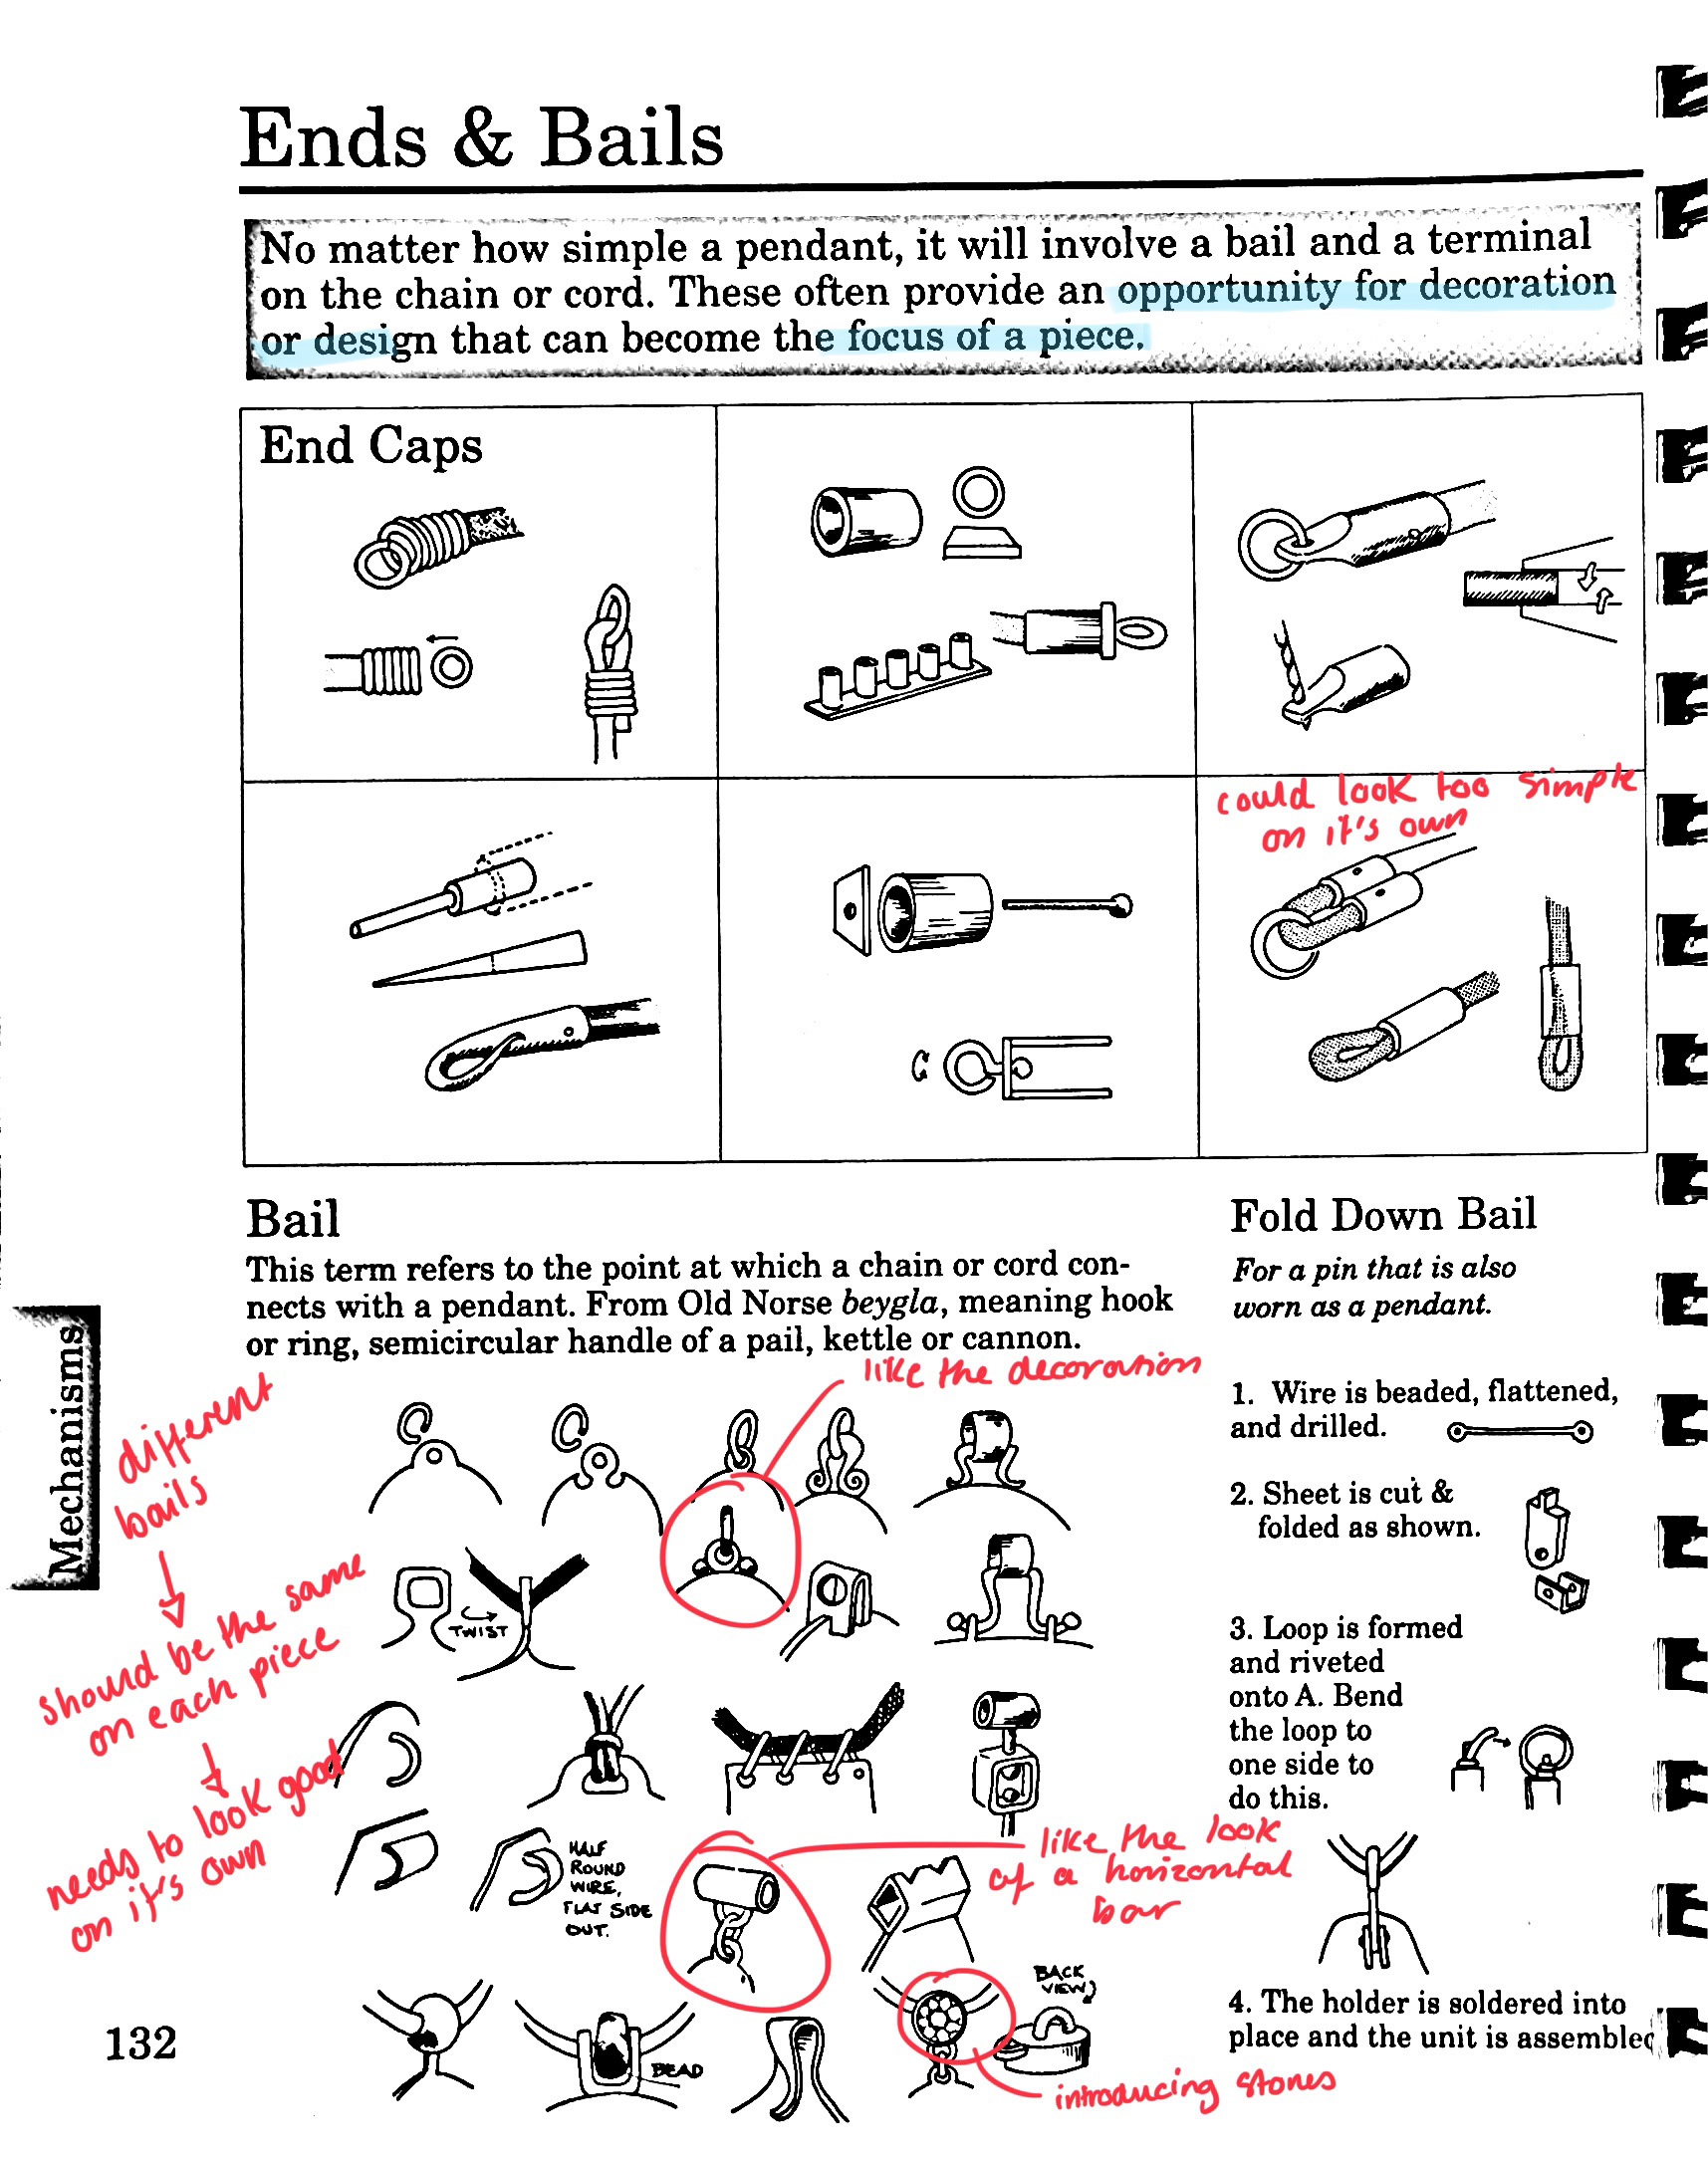
The Complete Metalsmith by Tim McCreight, Page 132
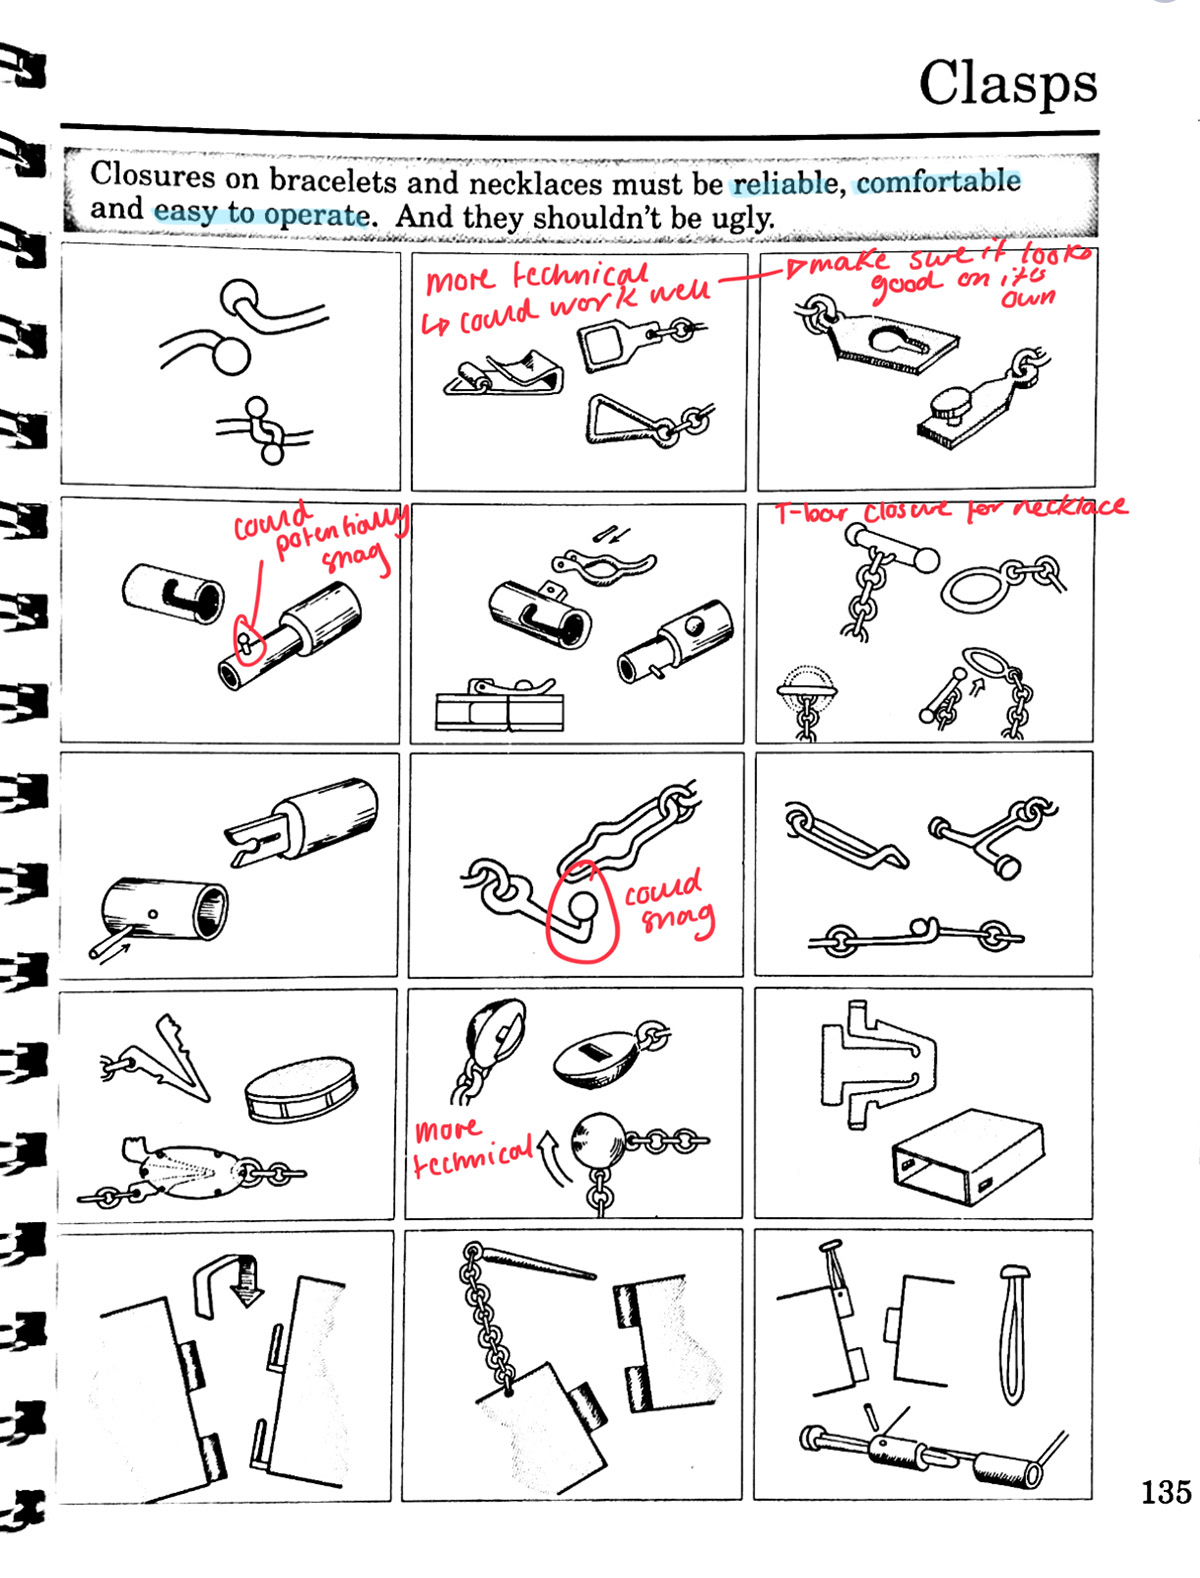
The Complete Metalsmith by Tim McCreight, Page 135
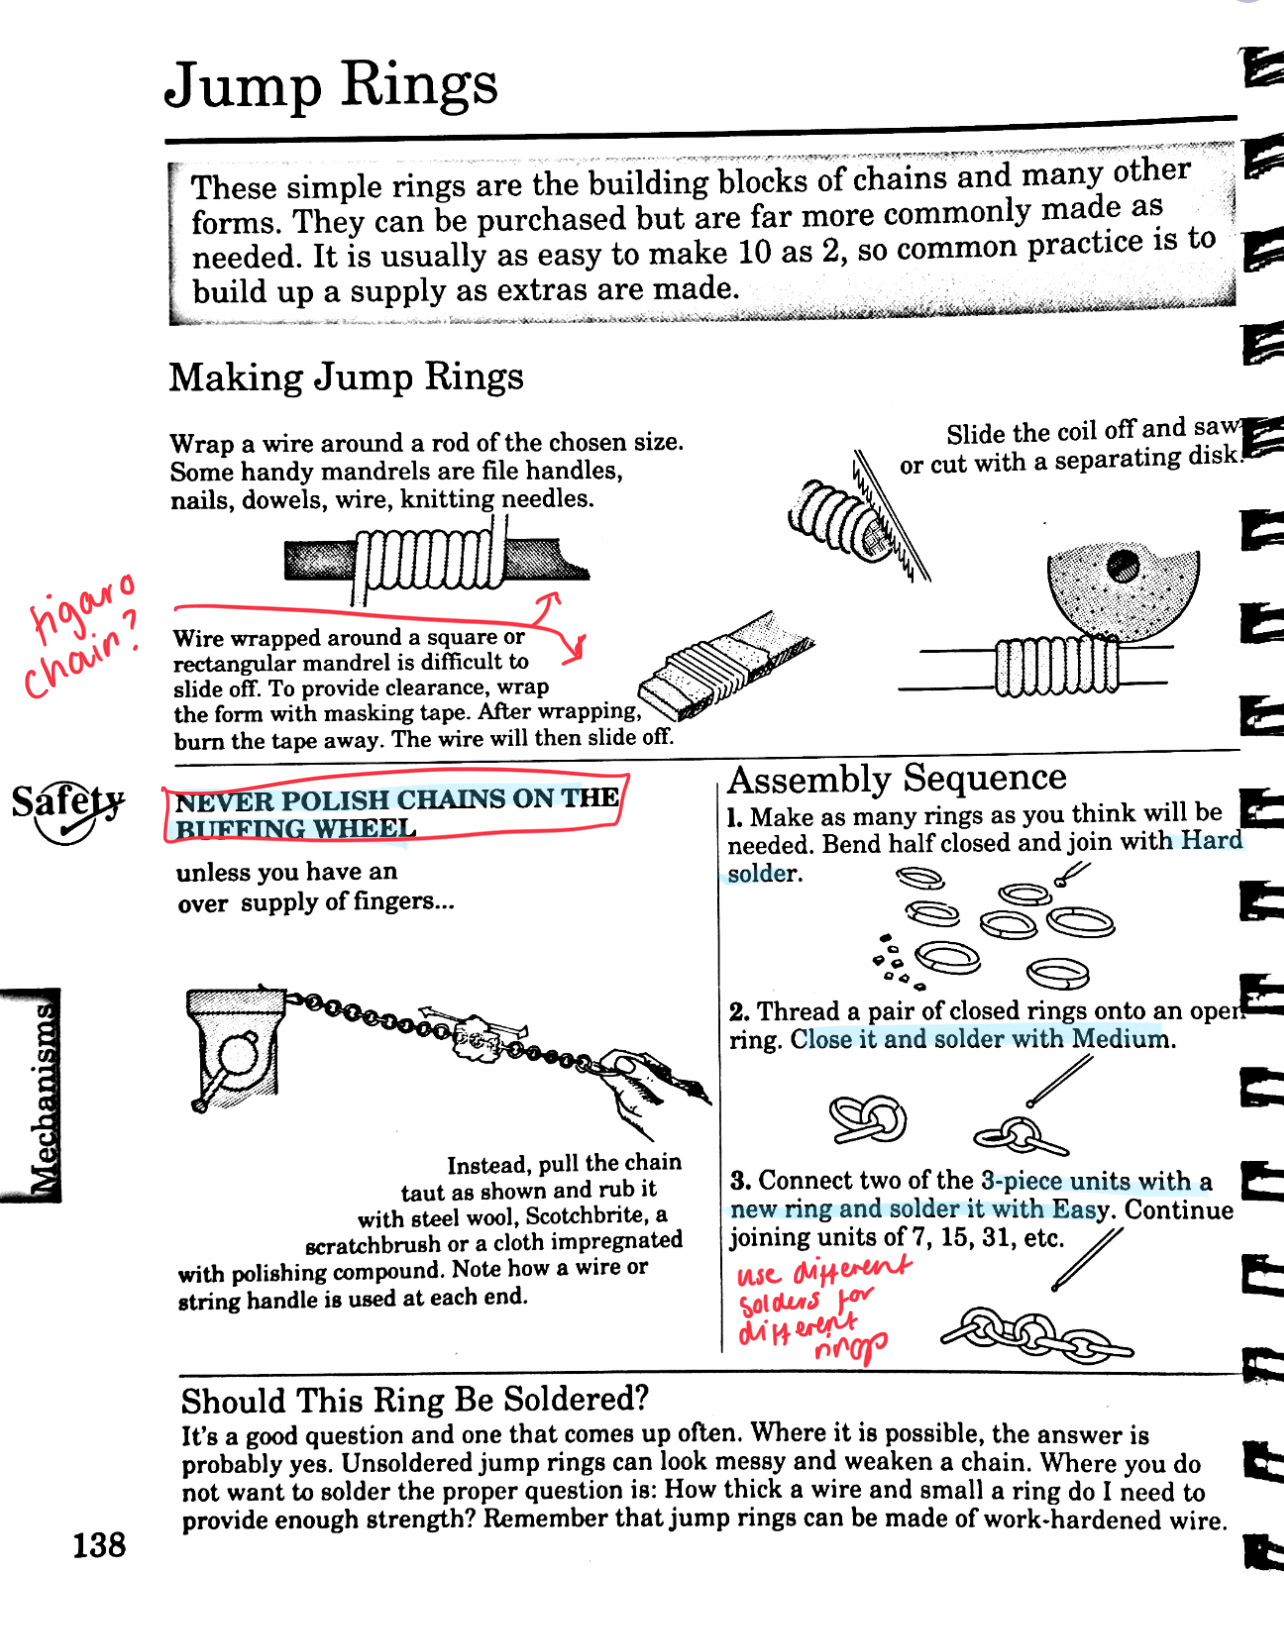
The Complete Metalsmith by Tim McCreight, Page 138
After designing some very rough final designs, I referred back to the book 'The Complete Metalsmith', From here I looked at techniques I hoped to use in my final design. This included different types of bails that I could use on the different stone settings for the pendant, as well as different types of jump rings I could use. I hope to have enough time to make a chain so I researched different types of chains rather than just a simple belcher chain like I've used in previous projects. This could be something more complex, such as a Figaro chain. A Figaro chain is 3 circular jump rings followed by 1 rectangular or oval ring. I also want to look at the capabilities of adding Cubic Zirconias into my chain, potentially replacing one of the small links.
If I don't have enough time to make a full-length chain, I hope to make a smaller length and attach this to a brass 'collar' to hold the pieces off the neck. With this in mind, I need to think about the wearability and comfort of the 'collar', as well as its relationship with the body, and how it will sit on the wearer.
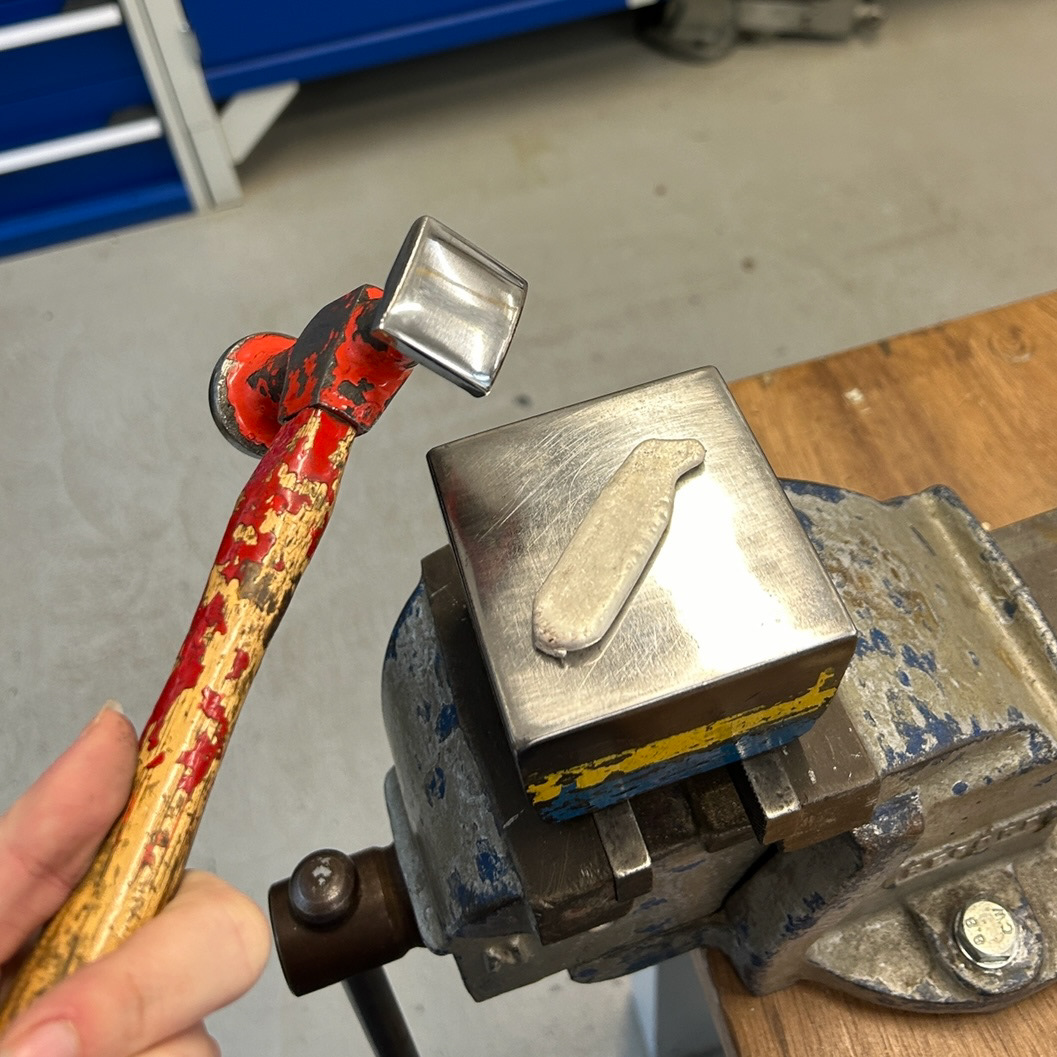
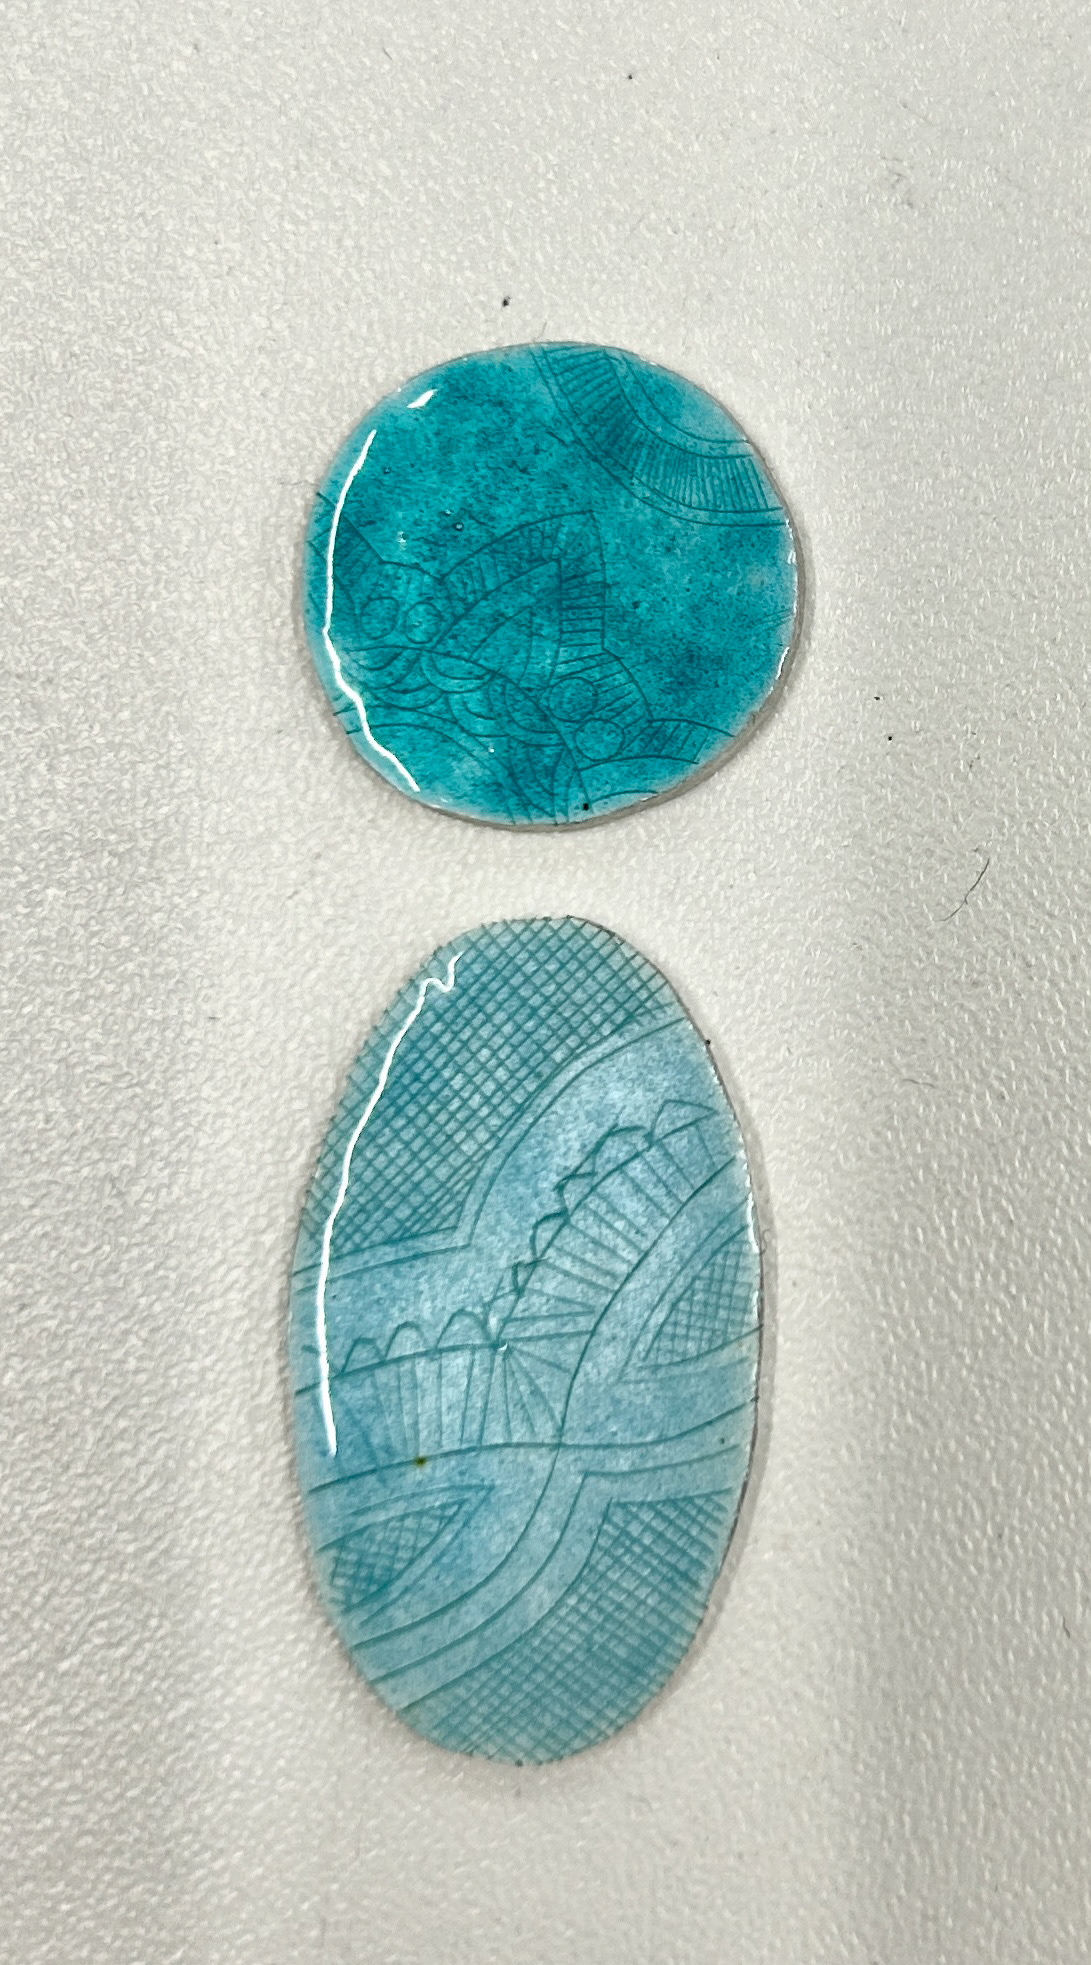
Basse-Taille with silver
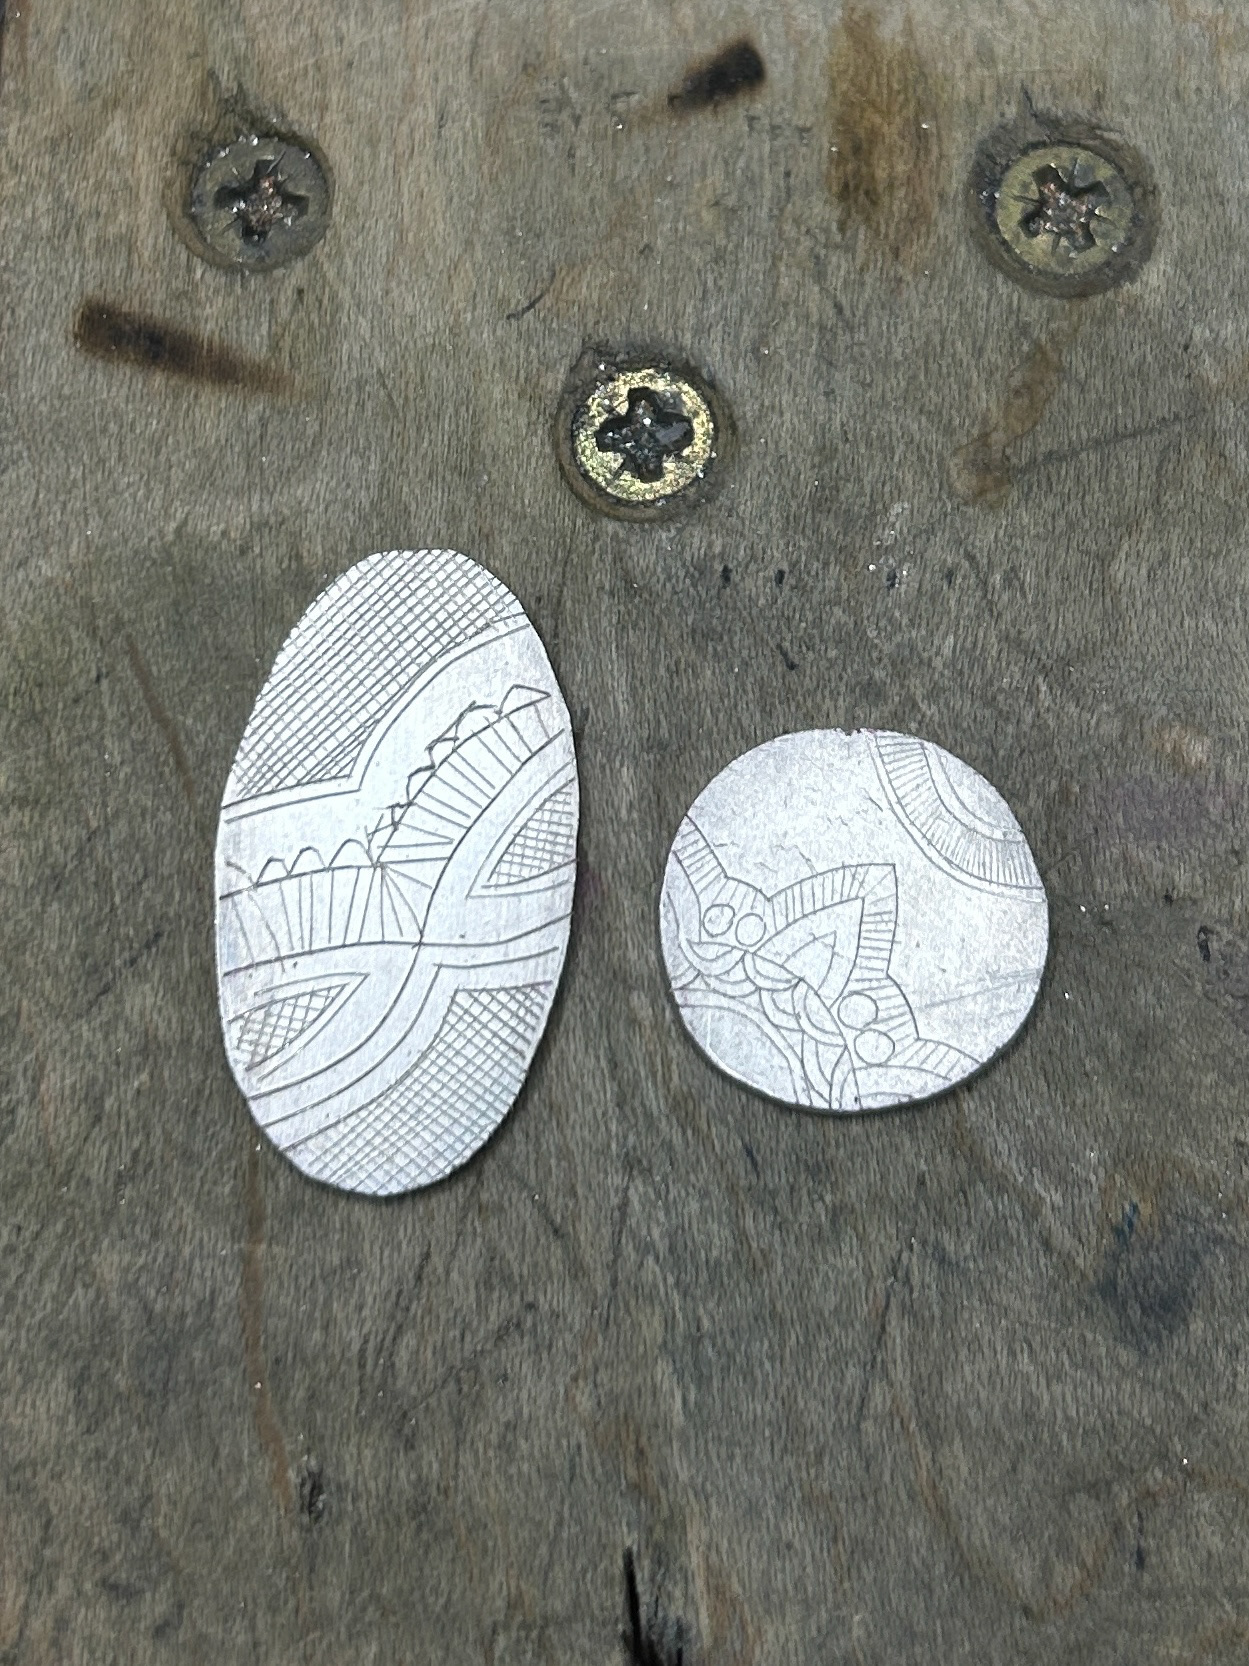
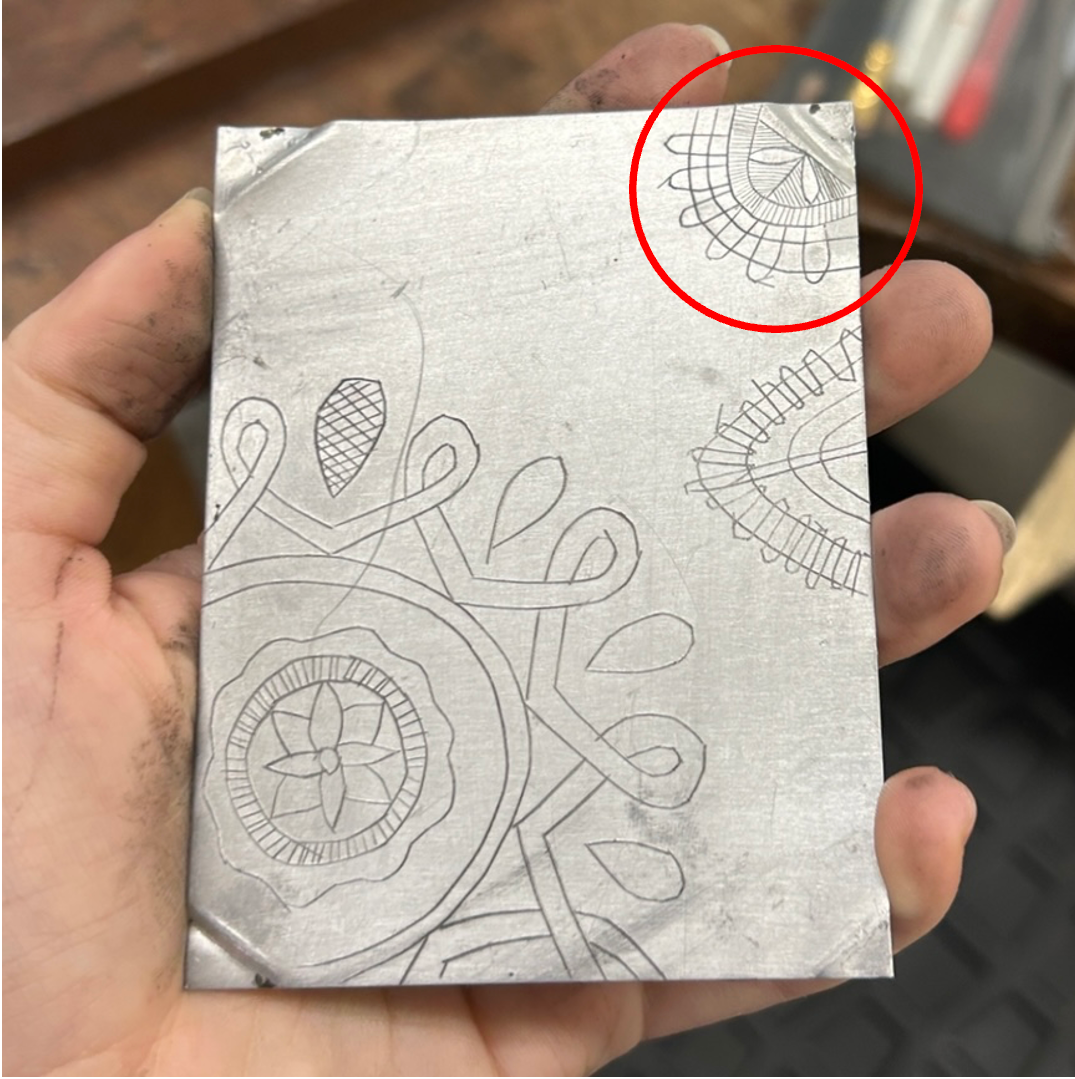
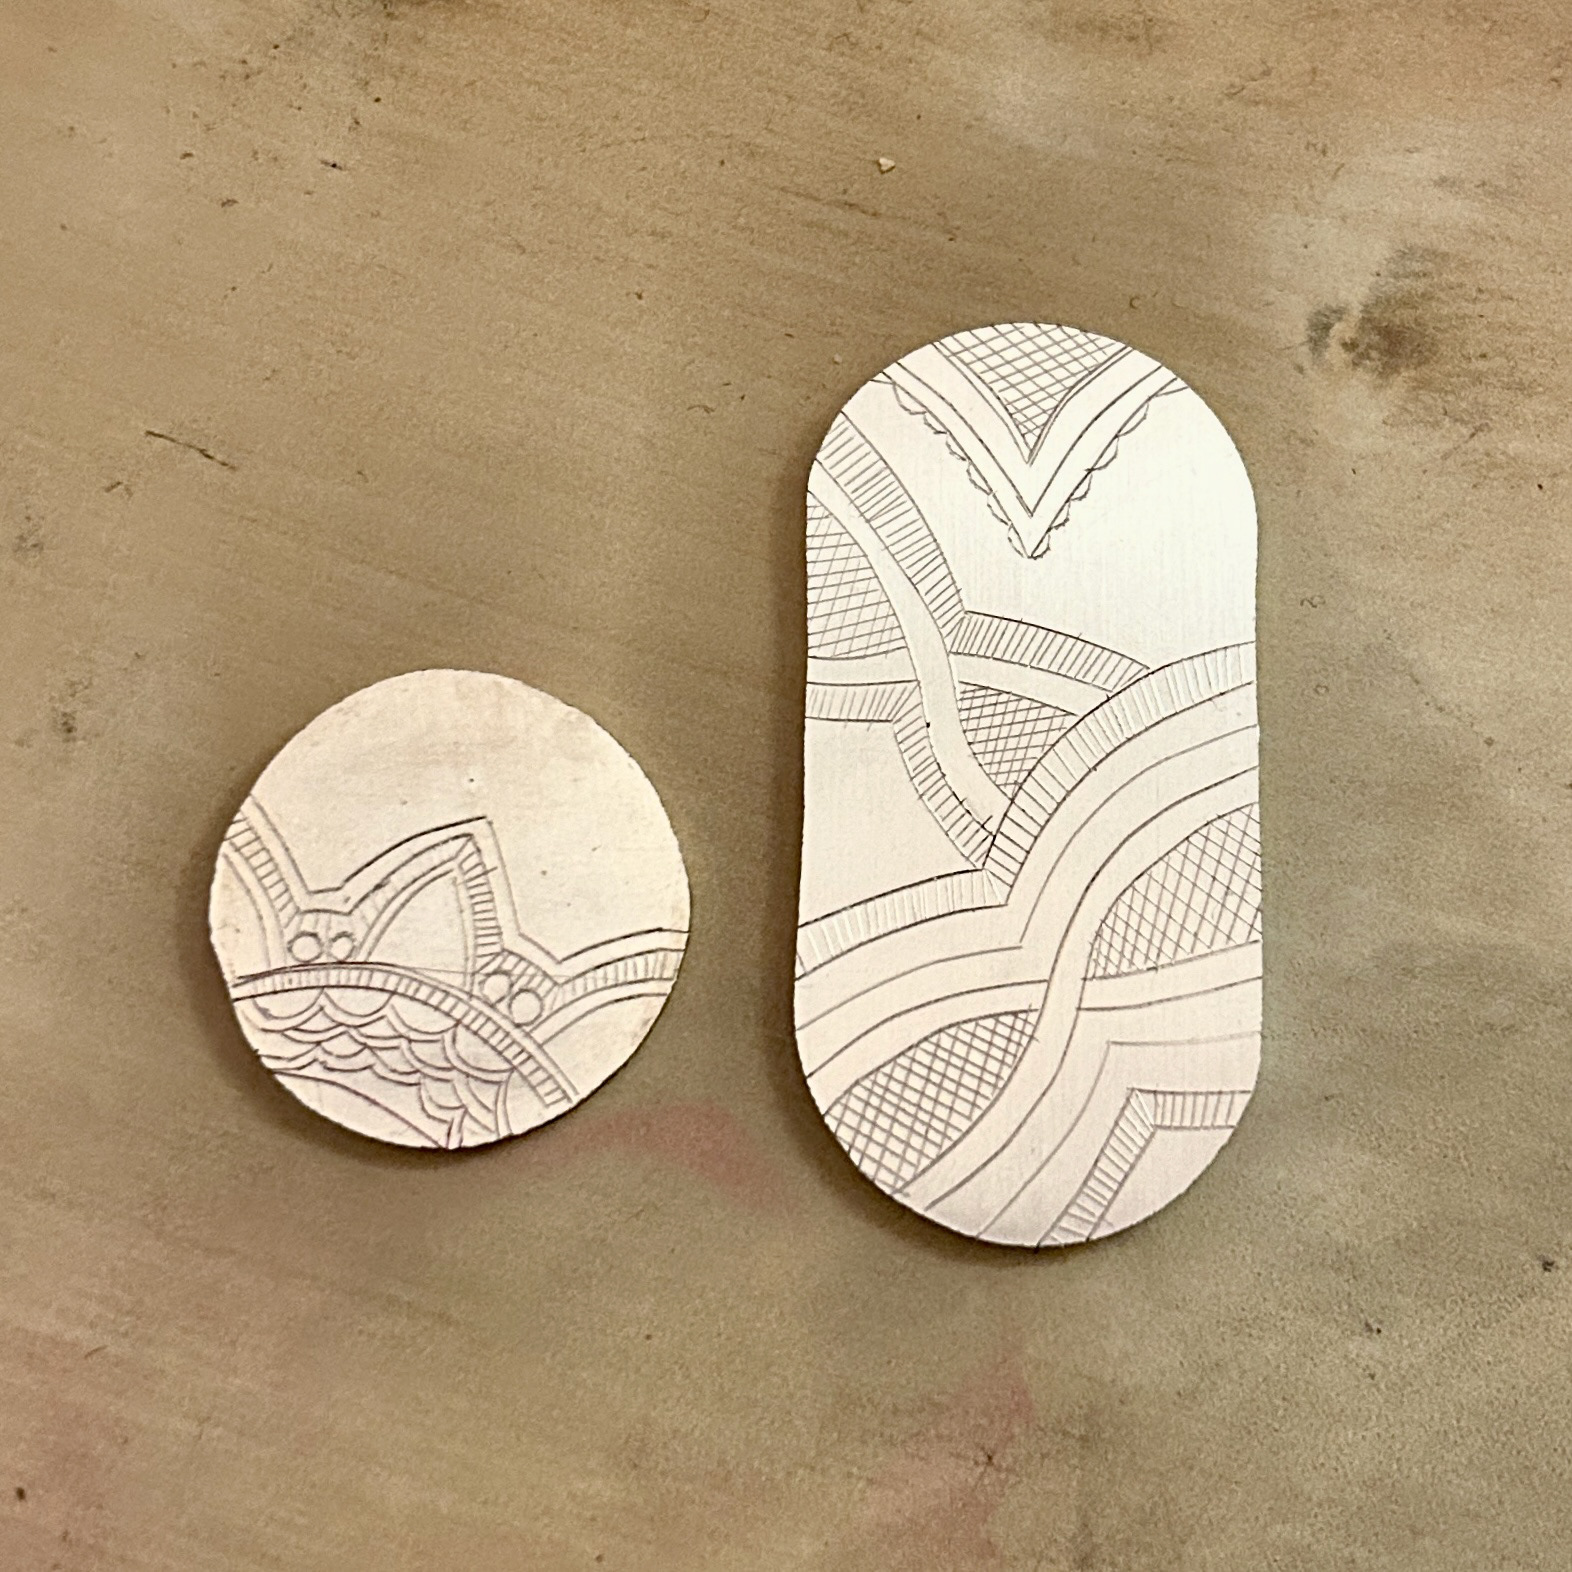
After making my recycled silver sheet and using a piercing saw to cut out my pieces, and eventually hand-engraving them. This time I used polymorph pellets to make a base for my silver to sit on. I realised a major advantage of using polymorph was that if I held it while it was solidifying, I could create some hand grips in the base. This meant that I had much more control when engraving, and also meant that I could move the silver with the engraver simultaneously, which I think helped massively with the outcome.
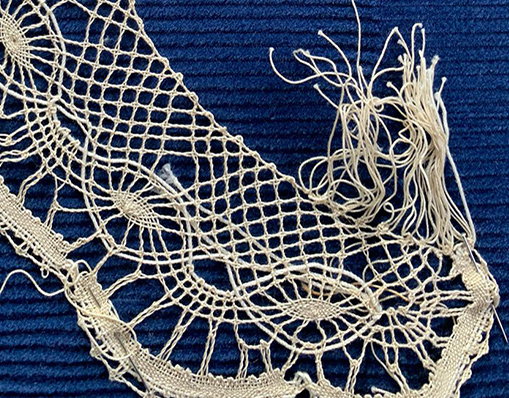
For my first attempt, I tried a design that I had come up with, taking patterns of the lace from 2 different pieces my grandmother had created, and then combining them into one piece (circular piece). For my second sample, I simplified just one of the pieces of lace (oval piece). While I know that my samples could be improved massively, I'm happy that I'm a lot more confident when engraving now, as I have found that when I was nervous and tense, it made it a lot harder to engrave. I discovered that silver is also a lot easier to engrave as it is relatively soft compared to copper.
These are the samples post-enamelling. While I am somewhat pleased with how they have turned out, once again, I feel like I can improve on them massively. One thing I think I could improve on, which would significantly improve the quality of the samples, would be my application of the enamel. When using translucent enamel it is very obvious to see where the application hasn't been consistent. This is particularly noticeable with the darker colours, for example, the turquoise.
For my next sample, I'm going to try and use a sieve with a higher mesh screen in the hopes that this helps create a more even application, and therefore a smoother, more consistent finish. I'm also going to try a slightly larger engraver, this should make the lines bolder and more noticeable.
Refining Design Ideas
After the crit, and reflecting on my design, I questioned why I wanted to create modular jewellery. I realised this was mainly because of the relationship people have with their jewellery. The idea of being able to customise and experiment with different combinations was my main driving factor, giving people the opportunity to change the look of their jewellery seamlessly. After looking at my design and the mechanism for changing the pieces, I decided I no longer wanted to go with this route. I concluded that the edges would look unfinished and would not be the most practical when wearing. This could be due to the edges snagging clothing, or even potentially falling off.
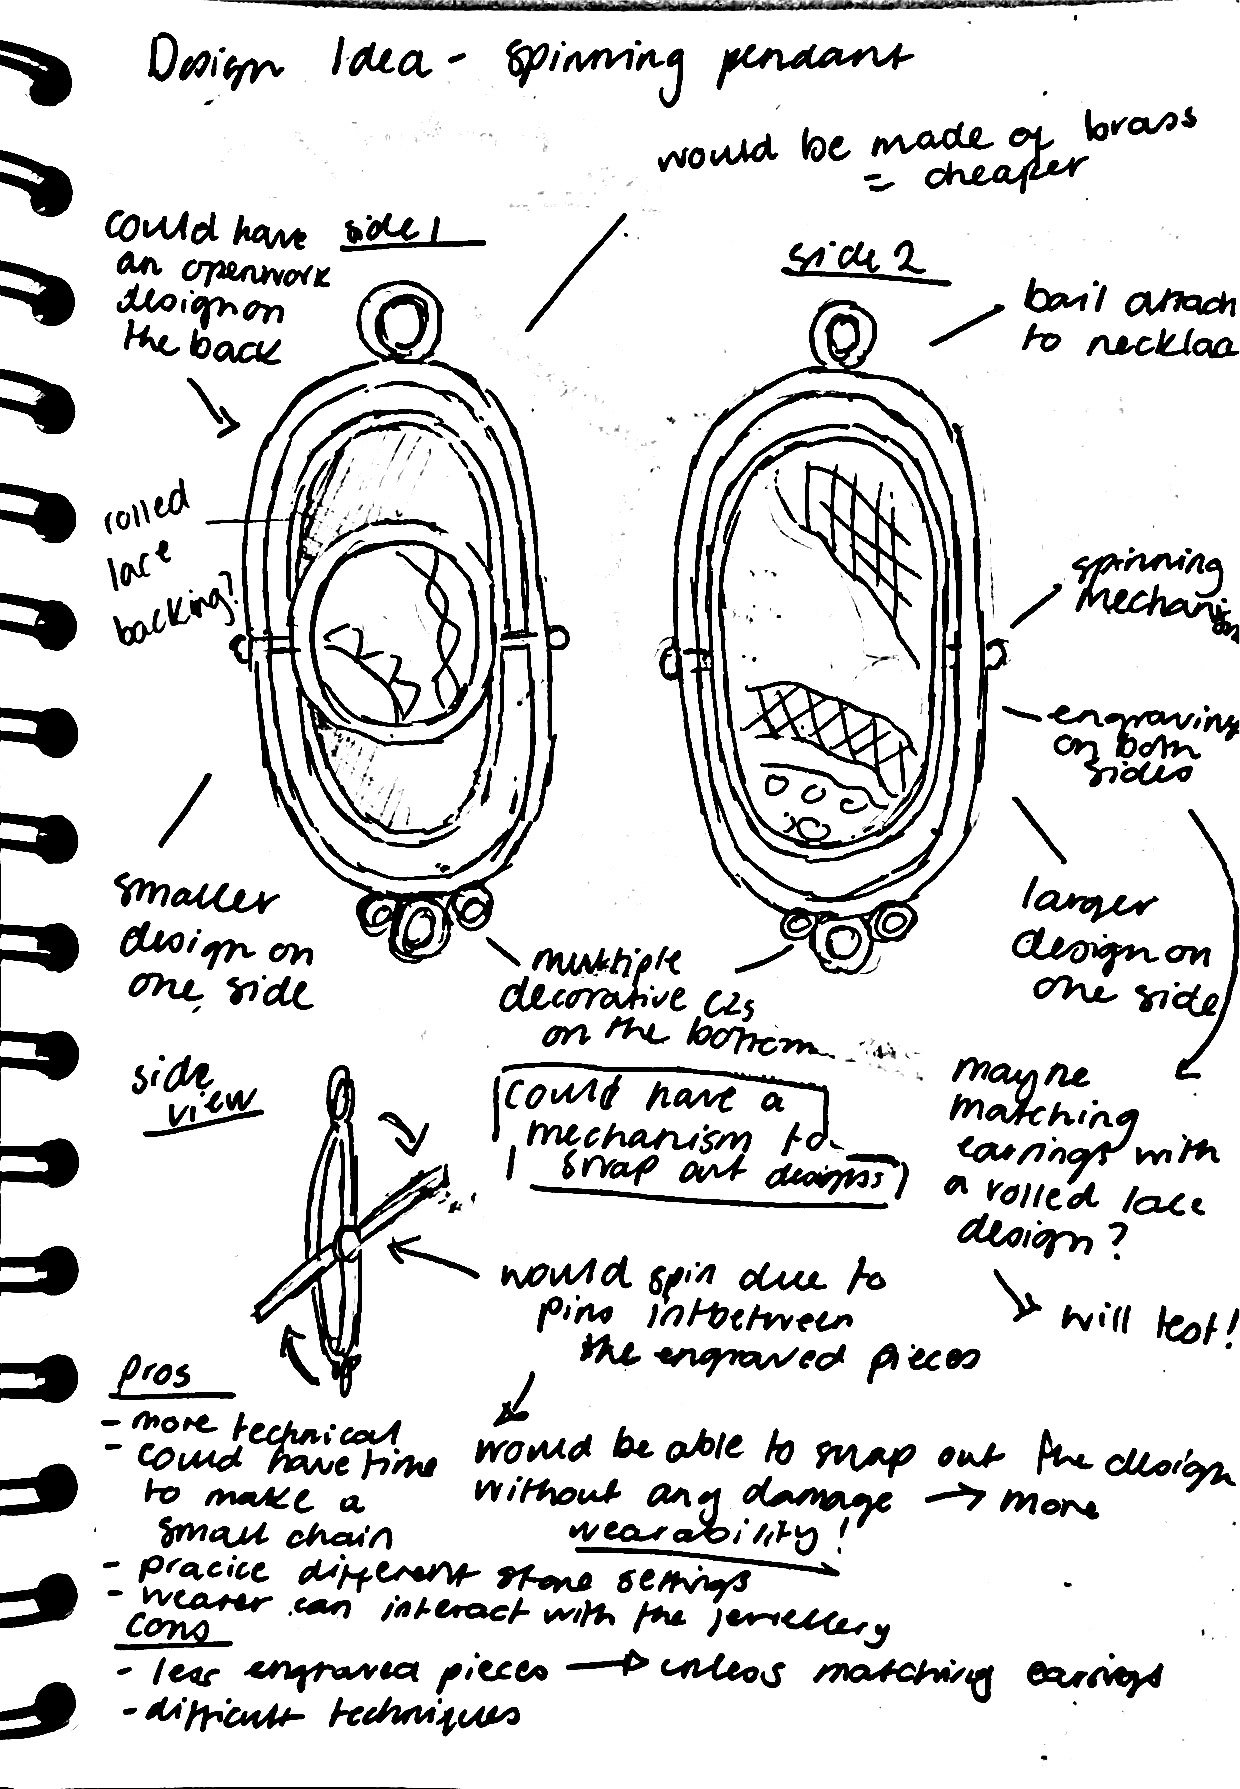
A basic prototype made from cardboard, showcasing the spinning mechanism (not to scale)
My new refined design included a spinning mechanism and a double-sided engraved piece. These would be bezel set and then have a further setting around them to hold the spinning mechanism. I hope to engrave these settings to add more of the hand engraving in my final piece. With the back plate of the bigger piece, I want to start including some more techniques as this would be seen from the other side. I contemplated using piercing and the lace inspiration to make a relief design, and after the crit, I potentially wanted to include more of the actual lace. I settled on a design by which the back plate would be rolled with a 3D-printed version of the lace. This wouldn't take away from the main design but would introduce more of the lace into it. I also decided that I could experiment with the idea of being able to switch the plates out. This could be done with a screw that would unscrew and you would be able to take out the engraved pieces and swap them with different ones. I decided to look further into these sorts of mechanisms.
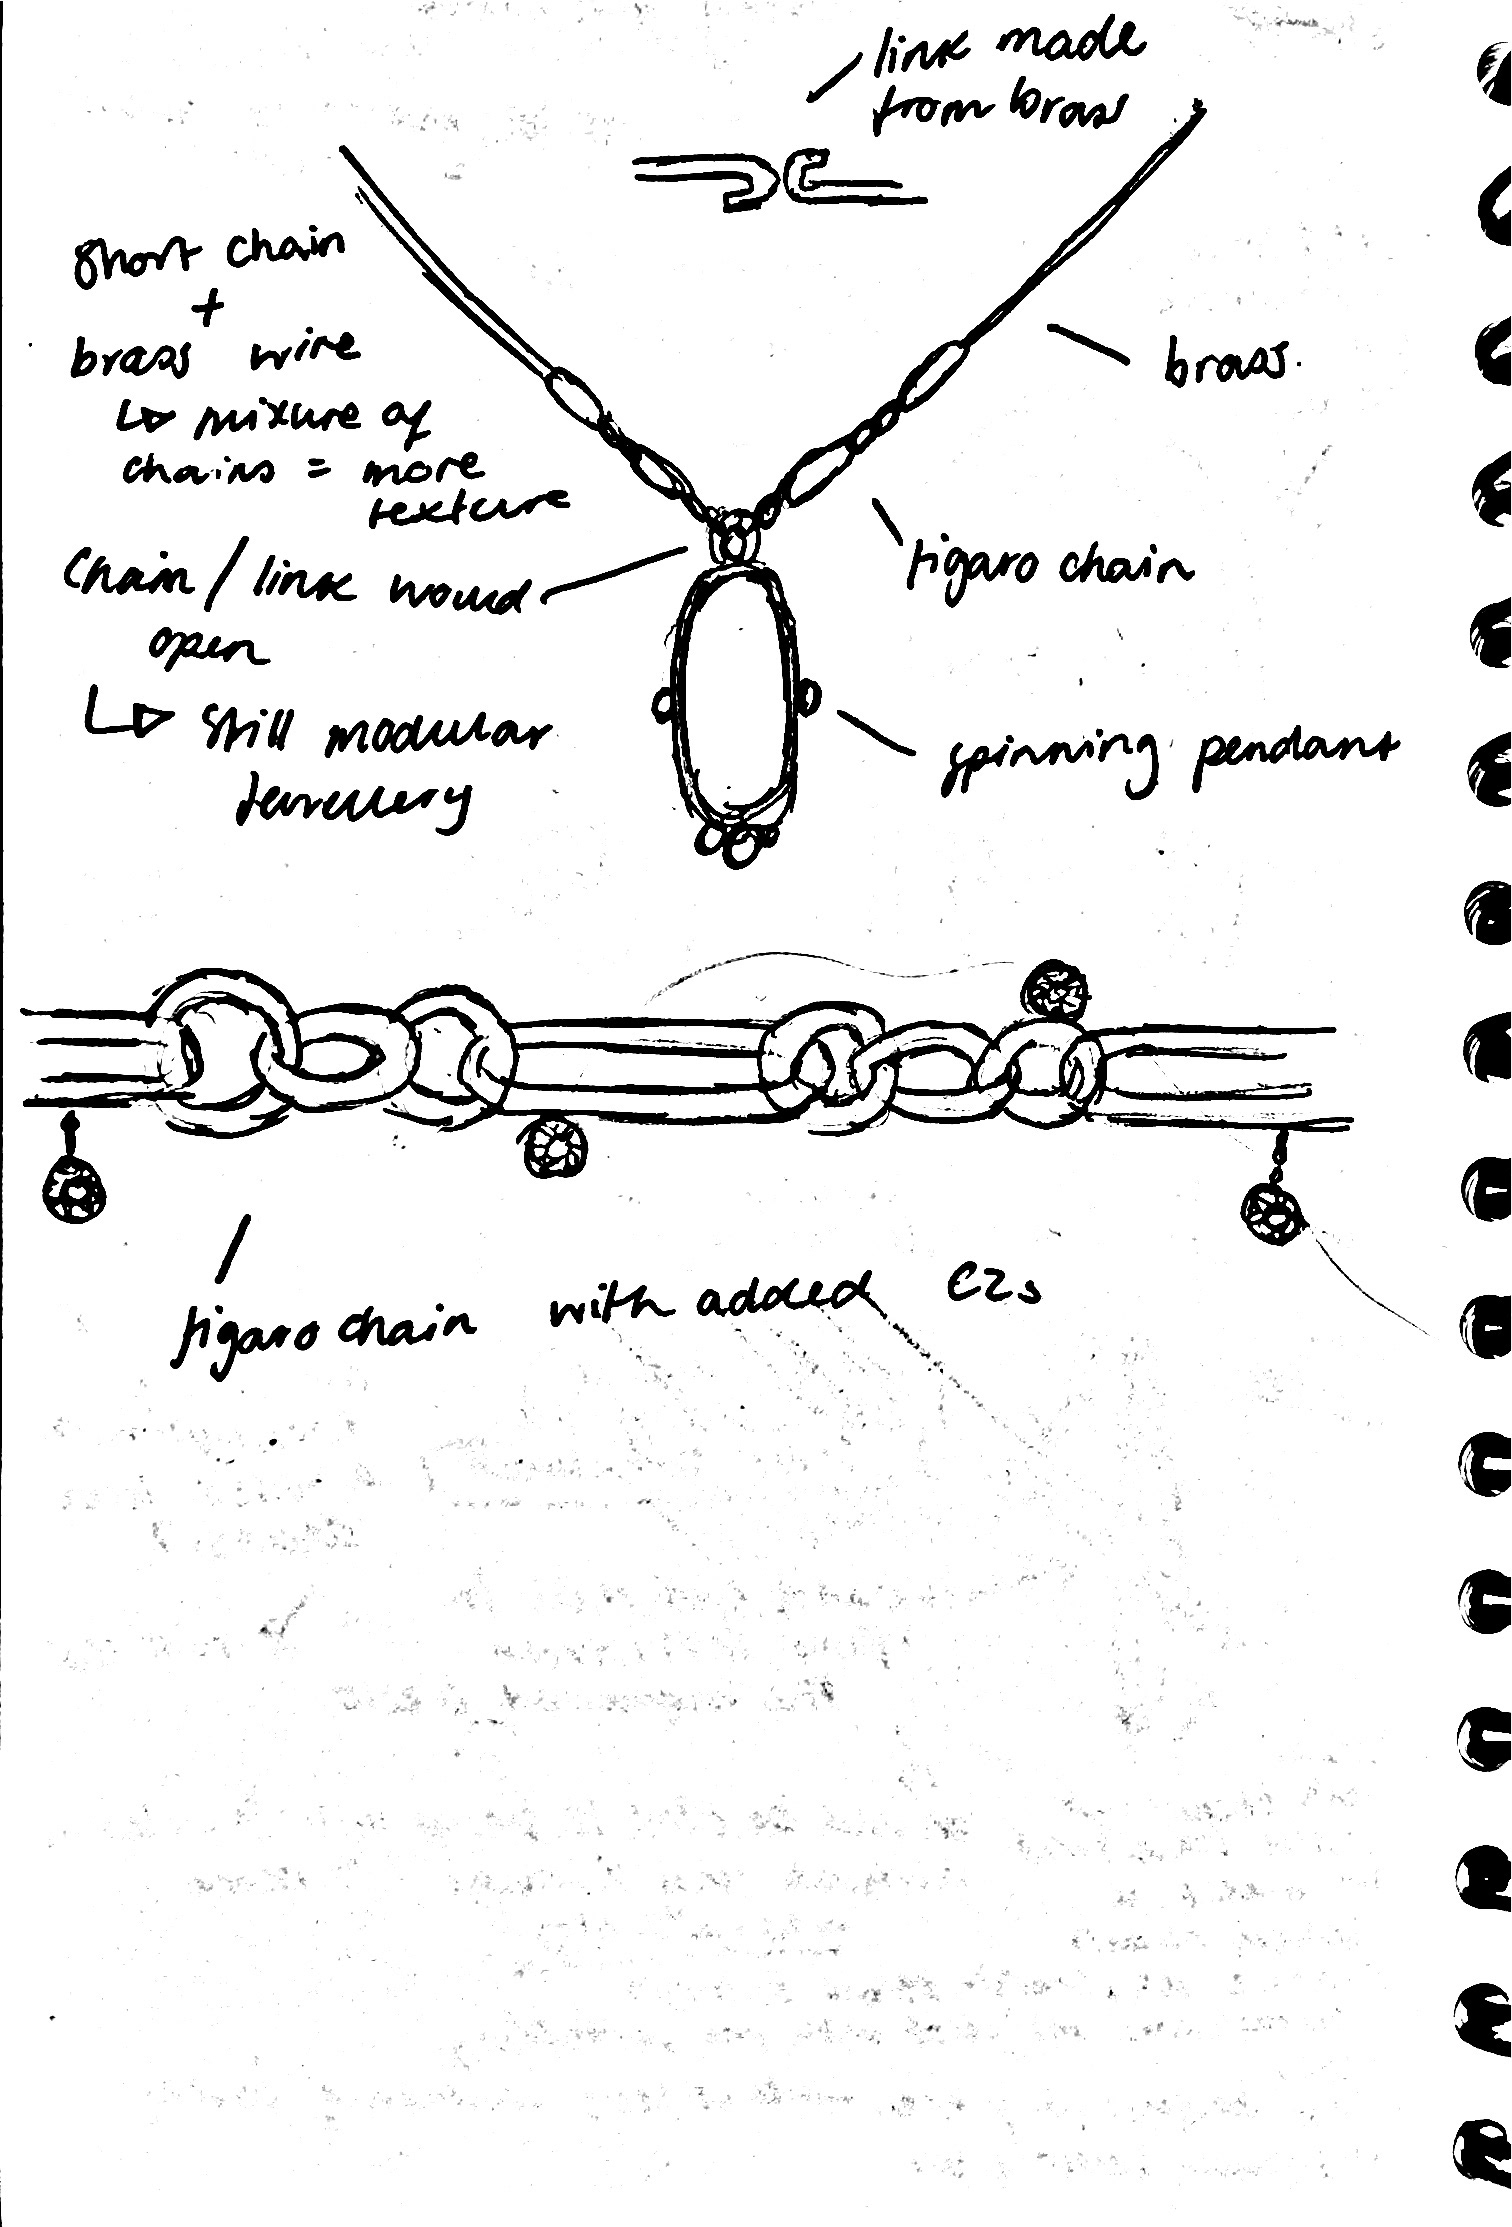
For the rest of the design, I decided to look at chains. Taking feedback from Unit X in first year, I was advised to look at the design of chains earlier in the project. I wanted to think of my design as a whole piece, rather than just a pendant on a chain. From this, I have designed a Figaro chain with added cubic zirconias for some more techniques and texture. I plan to add this chain to a brass wire, which will hopefully sit nicely around the neck and hold the pendant, combined with the chain. I will experiment with this and change my designs accordingly.
Experimenting with Metal Texture
From the crit feedback, I wanted to look at the possibility of including more of the actual lace that I have taken inspiration from. This would be included on the back of the larger setting.
I started by tracing the outline of a piece of lace in Adobe Illustrator. I then went into the laser cutting workshop and cut out a small piece to test, before committing two and a half hours to cutting out the whole design. Before cutting I had to make sure that the stroke line was 0.142pt wide and a solid red colour.
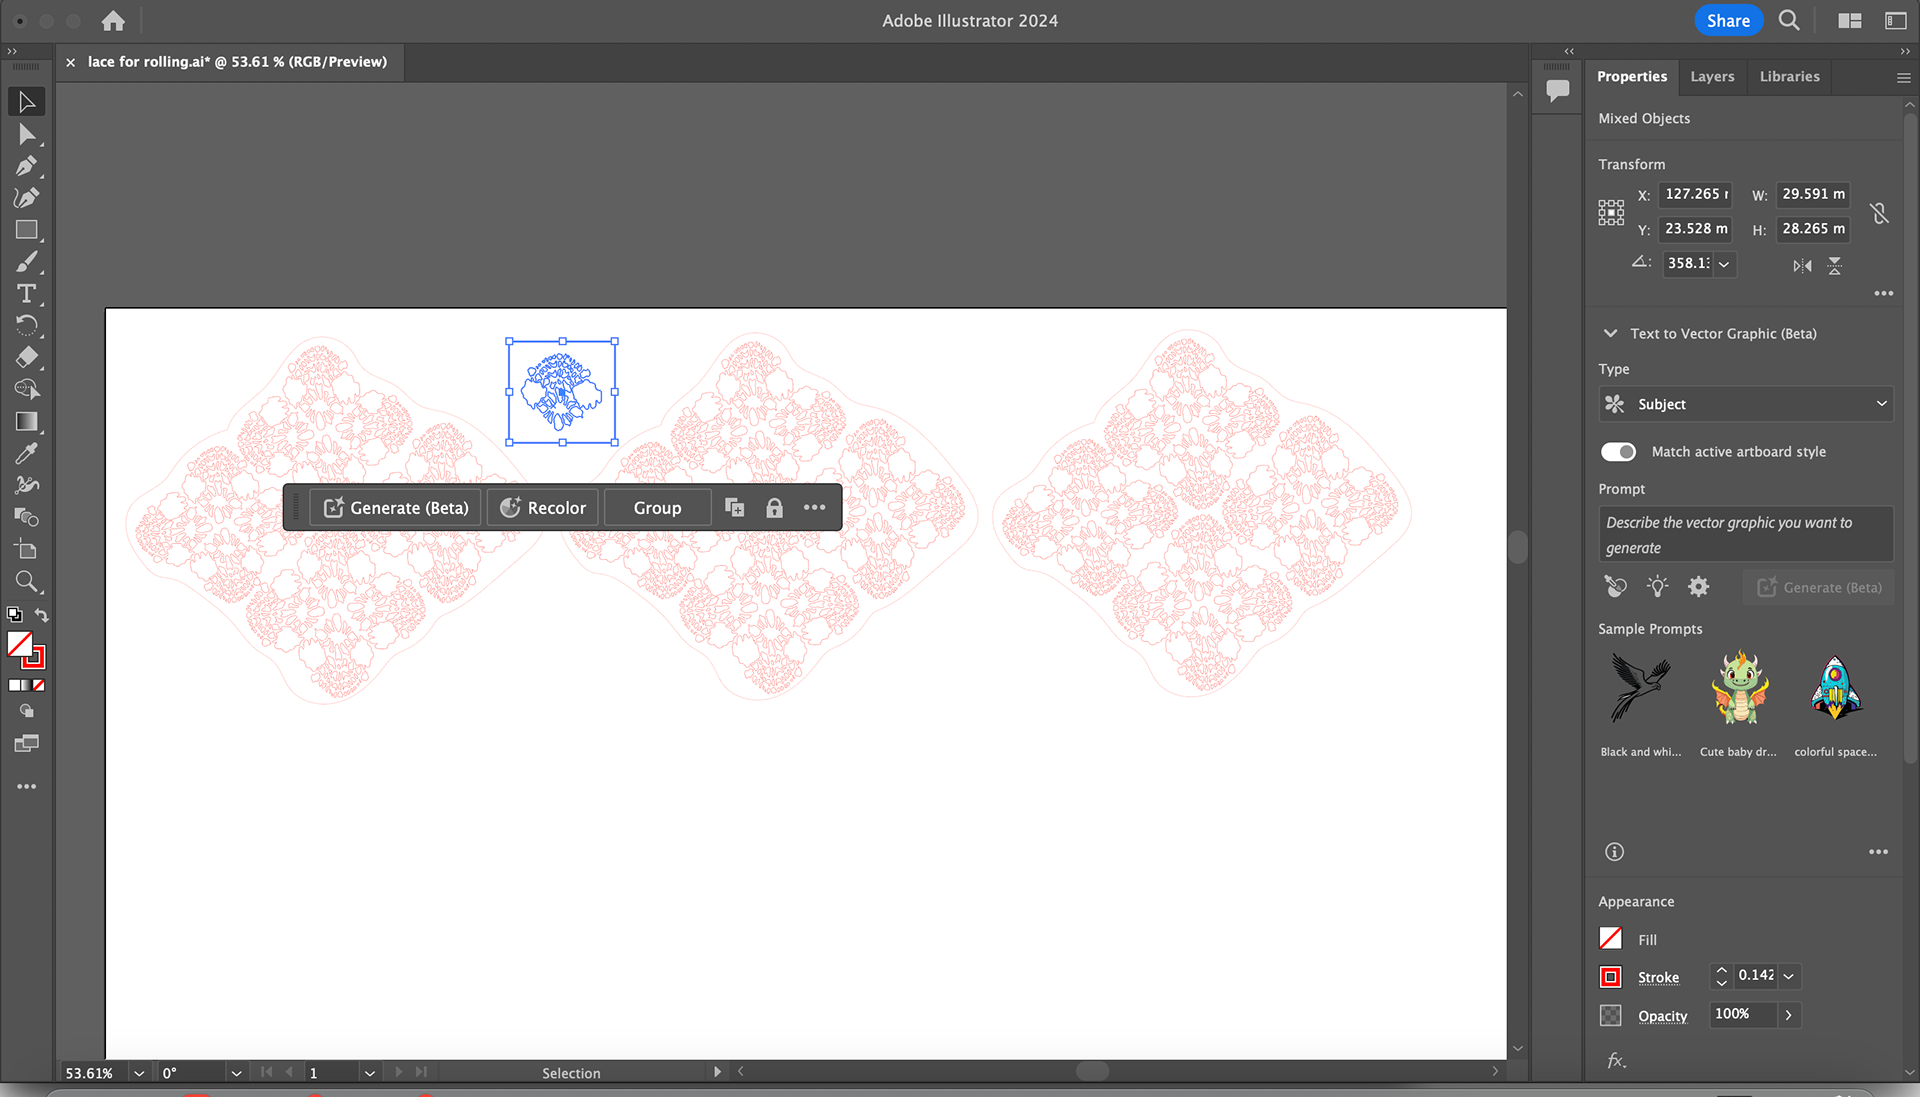

I used 2mm MDF to make the rolling piece, however, I did not make the desired pattern on the metal. For my sample I used a 1mm annealed copper sheet in the hopes that I would get the best results, however only a very faint line appeared so I did not progress with this design, and removed it from my final design idea.
Making My Final Piece
Basse-Taille with Silver


While creating the Basse-Taille pieces for my final piece, I encountered many challenges. I feel as if my engraving could've been better as I did go over the boundaries a couple of times. However, looking back to where I started, I think I have improved significantly.
After firing the circular silver piece, I was not satisfied with how the enamel looked. After cooling down I could see that the enamel was patchy and still had that 'orange peel' texture. This could be for a couple of reasons, the sieve I was using had too low of a mesh count and so was allowing thicker pieces of powdered glass to gather on the piece, or not enough powdered enamel. As well as that, the time in the kiln may not have been hot enough, therefore not allowing the glass to melt sufficiently. I decided to try and crack off the enamel, reapply and fire again, however, I accidentally ended up melting and burning the enamel. This ruined the piece and forced me to start again. While I was annoyed at first because of the wasted silver, I saw this as an opportunity to improve my engraving for the second attempt. As well as that, after further inspection of the silver before the melting, I realised that the enamel wasn't releasing from the engraved lines so I was most likely going to have the restart the piece again anyway, as I didn't want to risk the technique not being executed correctly.
For the enamelling I tried something slightly different as well, I tried using a sieve with double the mesh count, thus allowing only the finer parts of the power through the sieve and onto the piece. To achieve this I also used a pestle and mortar to grind the glass into a finer powder.
Above shows my final attempt at Basse-Taille. I was more satisfied with my engraving on the second attempt, as well as the enamelling. Both pieces ended up with a slight texture to them which I do quite like. I plan to set these in a polished brass setting so I feel like the contrast in textures could add some depth to the piece.
Making a Figaro Chain
After wrapping the copper around my 3D printed mould
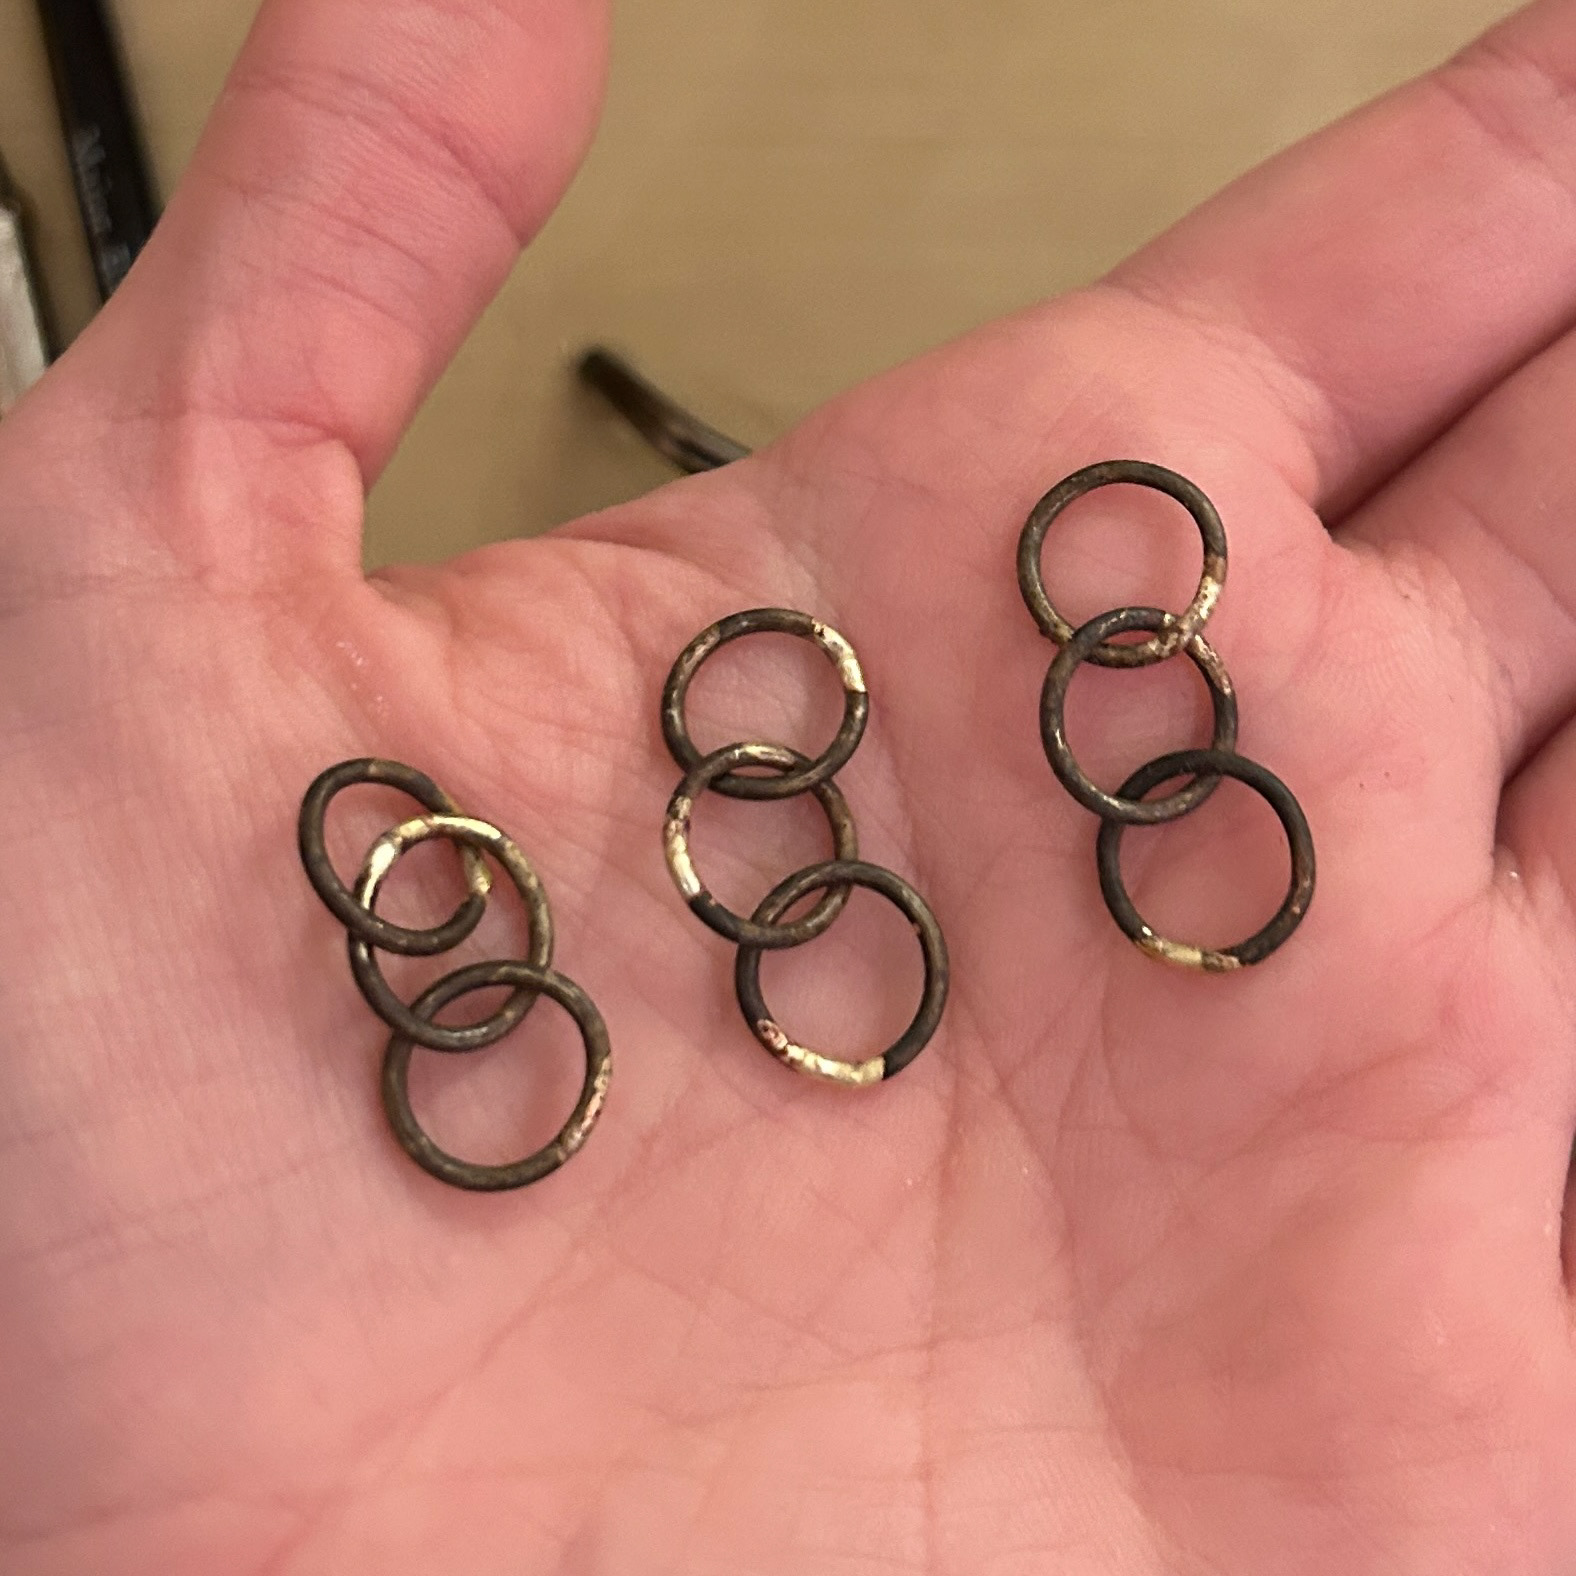
Soldering the jump rings

After soldering the larger links
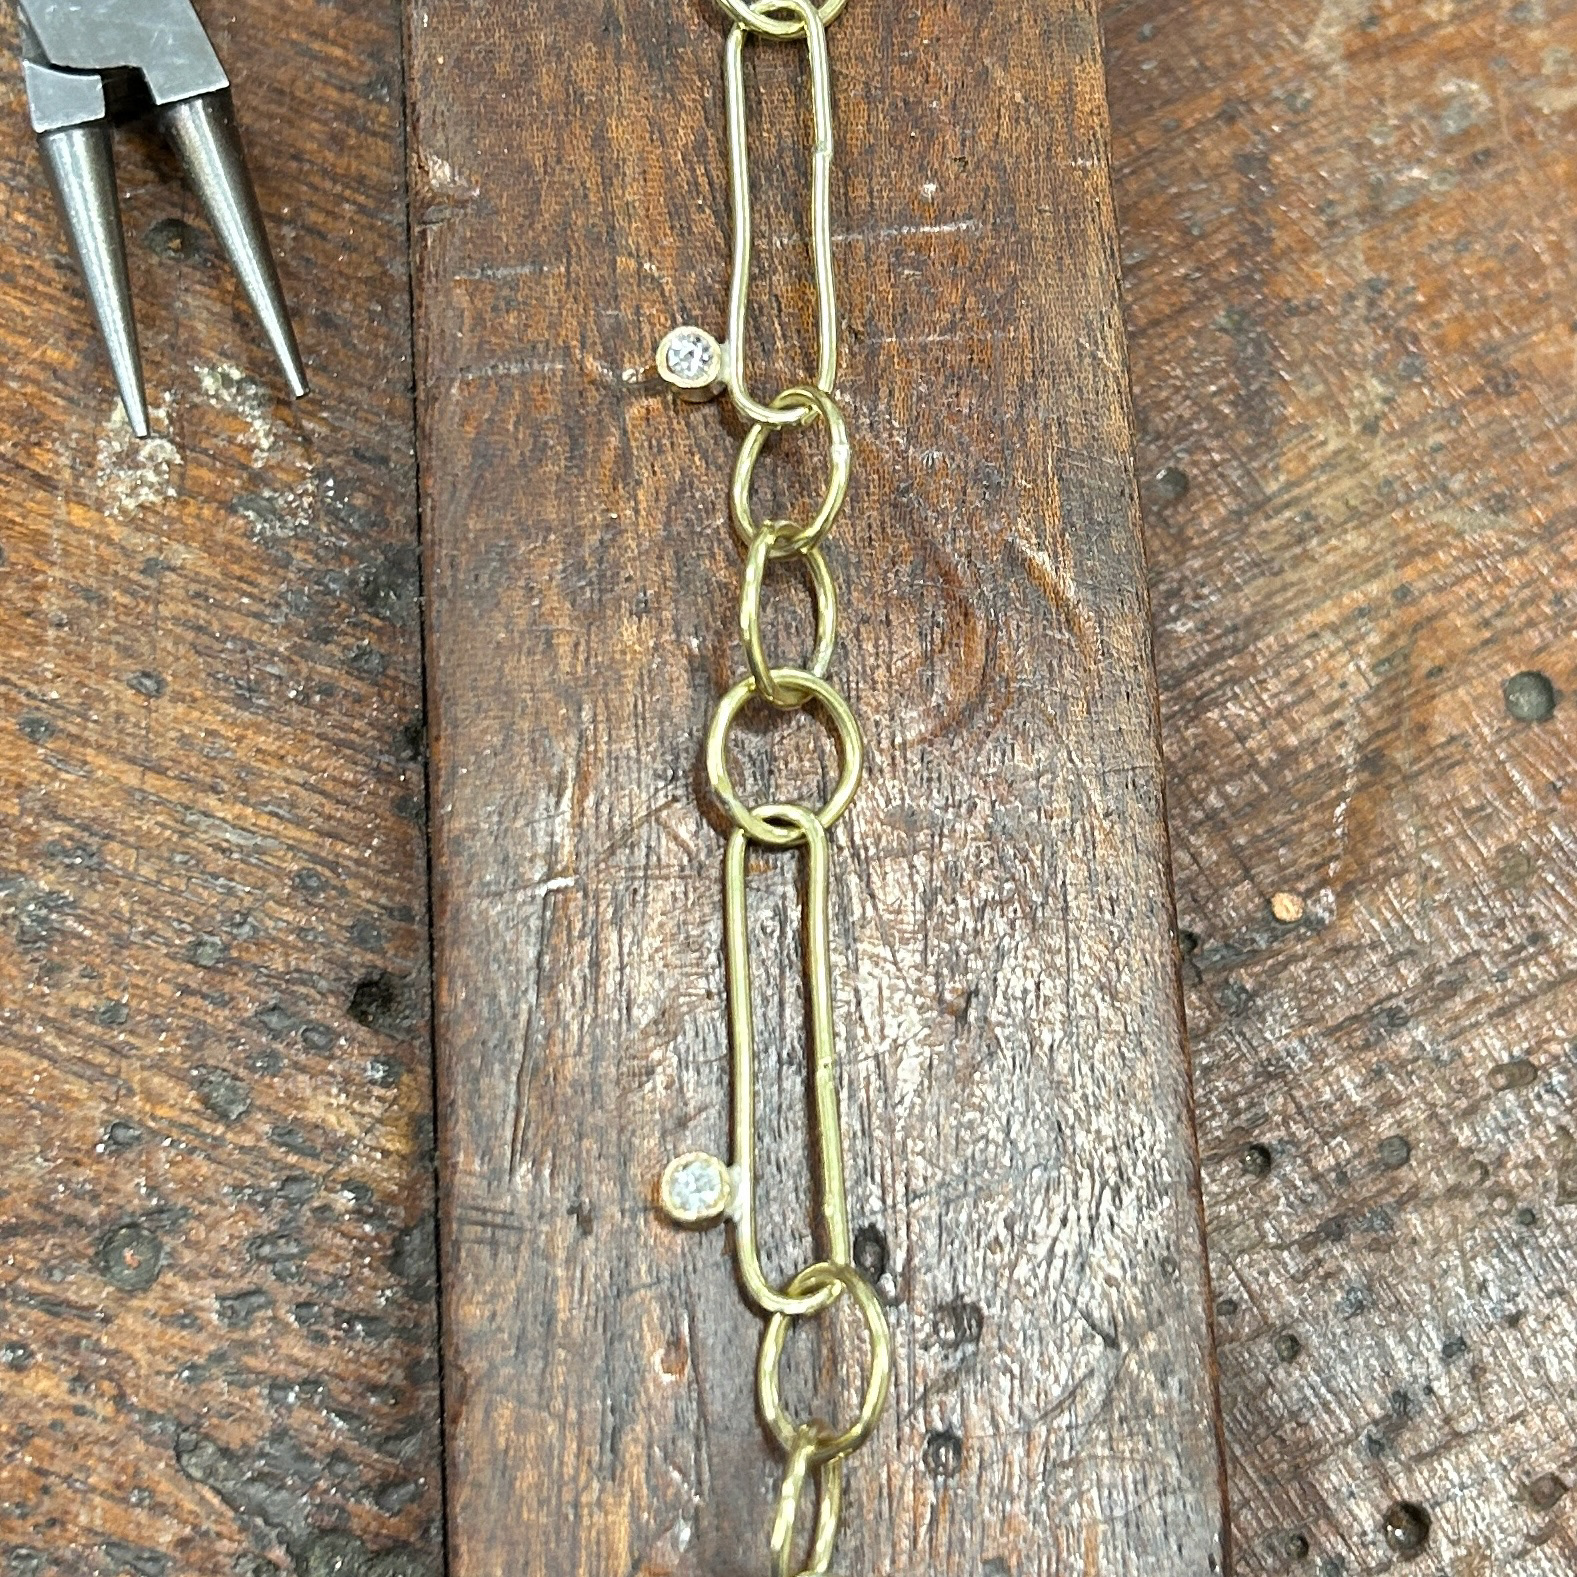
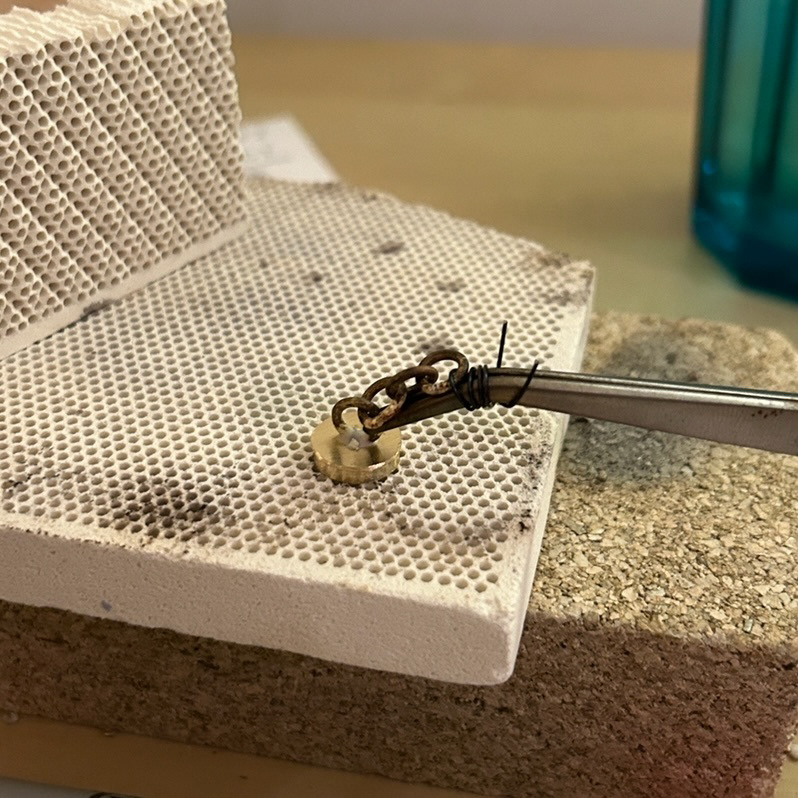
Completed chain with CZ attachments

Samples for attachment mechanism
For the pendant to hang off, I decided I wanted to create a Figaro chain. I started by making three sets of three jump rings and then creating the longer links for in between the smaller chains. To help guide me while making the longer links, I 3D printed a mould for me to wrap the chain around. This would give me a better shape for soldering compared to a larger circle link, as I meant that I could move the jump rings away from the heat at each end, which helped prevent the solder from melting and running. However, from my research, I learnt that using hard solder for these links would also help prevent this, so that is what I used. After soldering the whole thing together I needed to stretch out the larger links to try and perfect the shape.
To complete the chain I added small Cubic Zirconias to add a unique touch to the chain, as you don't often see chains with these sort of stone settings attached. This would also add some texture to contrast the polished finish to the brass. My original plan was to add brass clasps to each side of the brass wire to make the chain interchangeable, however, shipping got delayed until January, so I tried adding brass ends to slot into a mechanism on the neckpiece so that the chain could be removed and changed out. However, when I was making these, the brass wire kept melting in the wrong places so I decided to think of other ways I could swap out the chain.
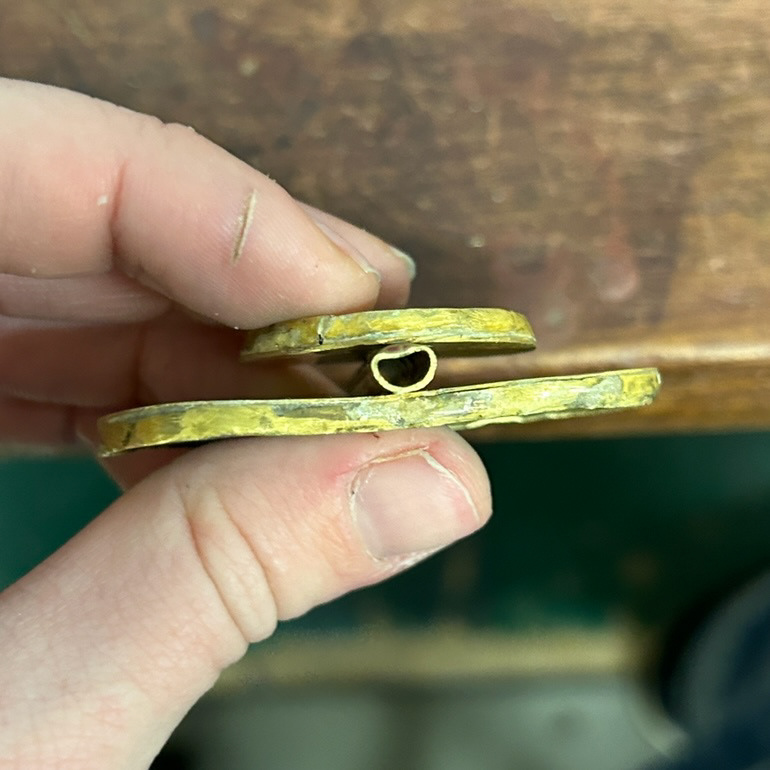
Making the Setting and Spinning Mechanism
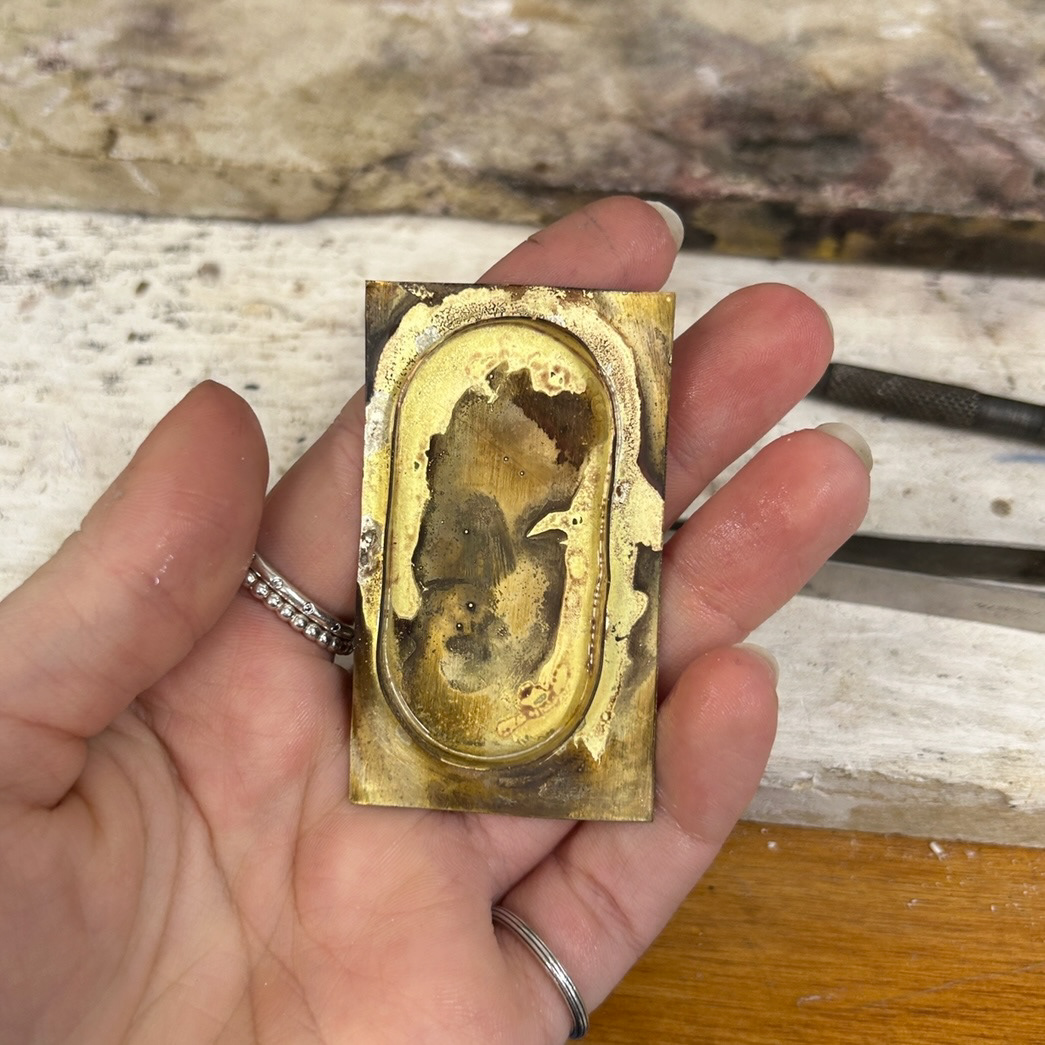

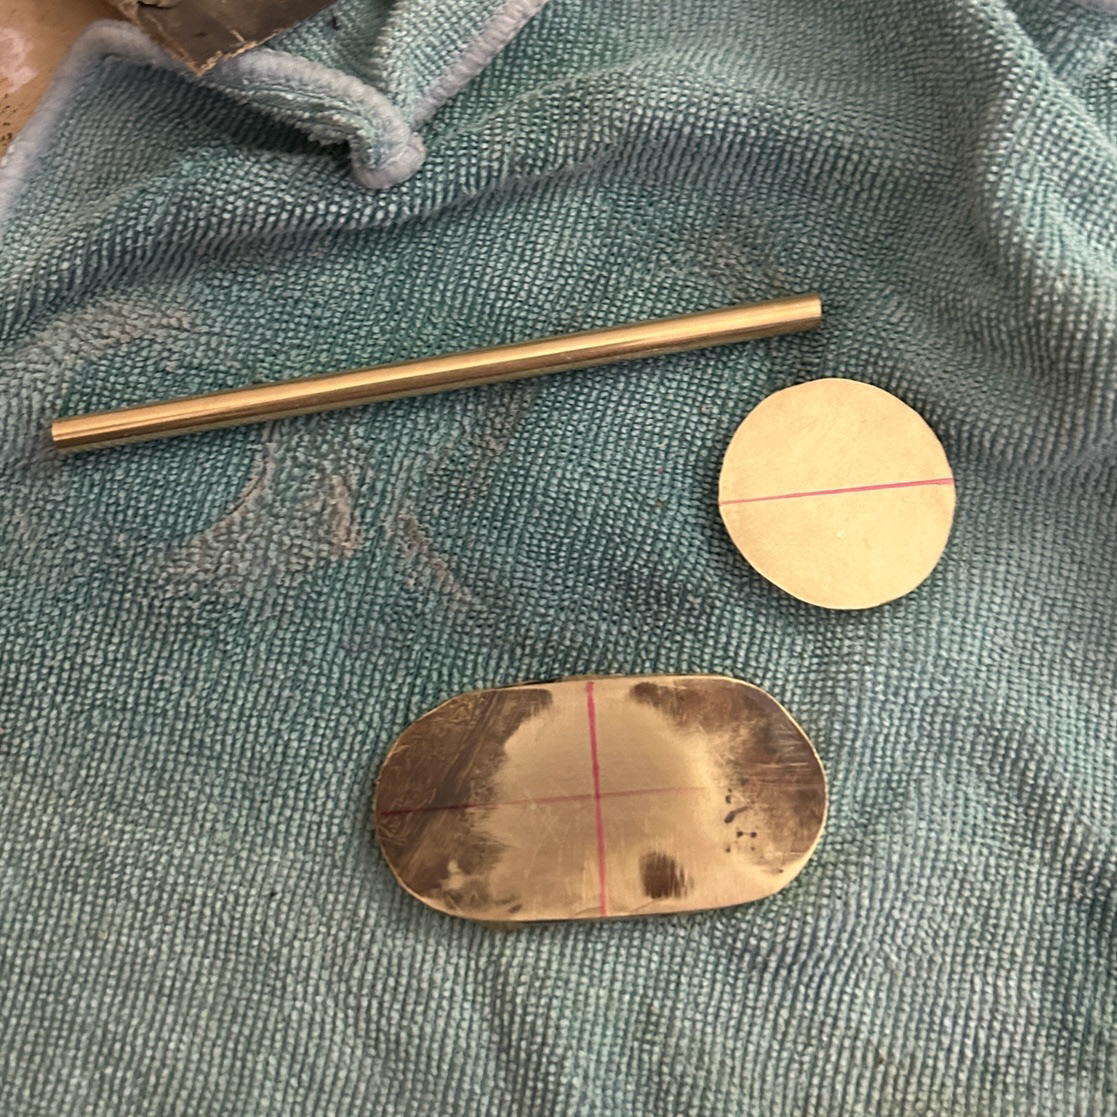
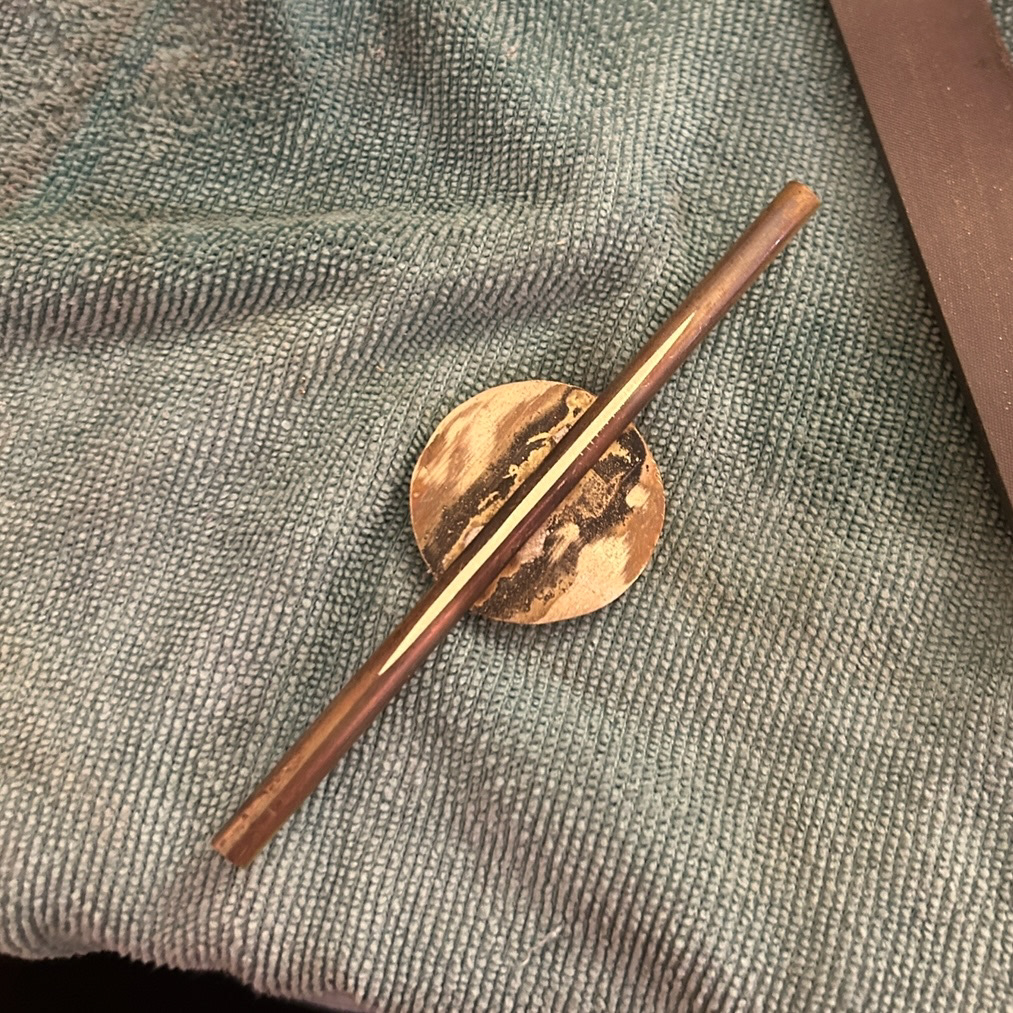
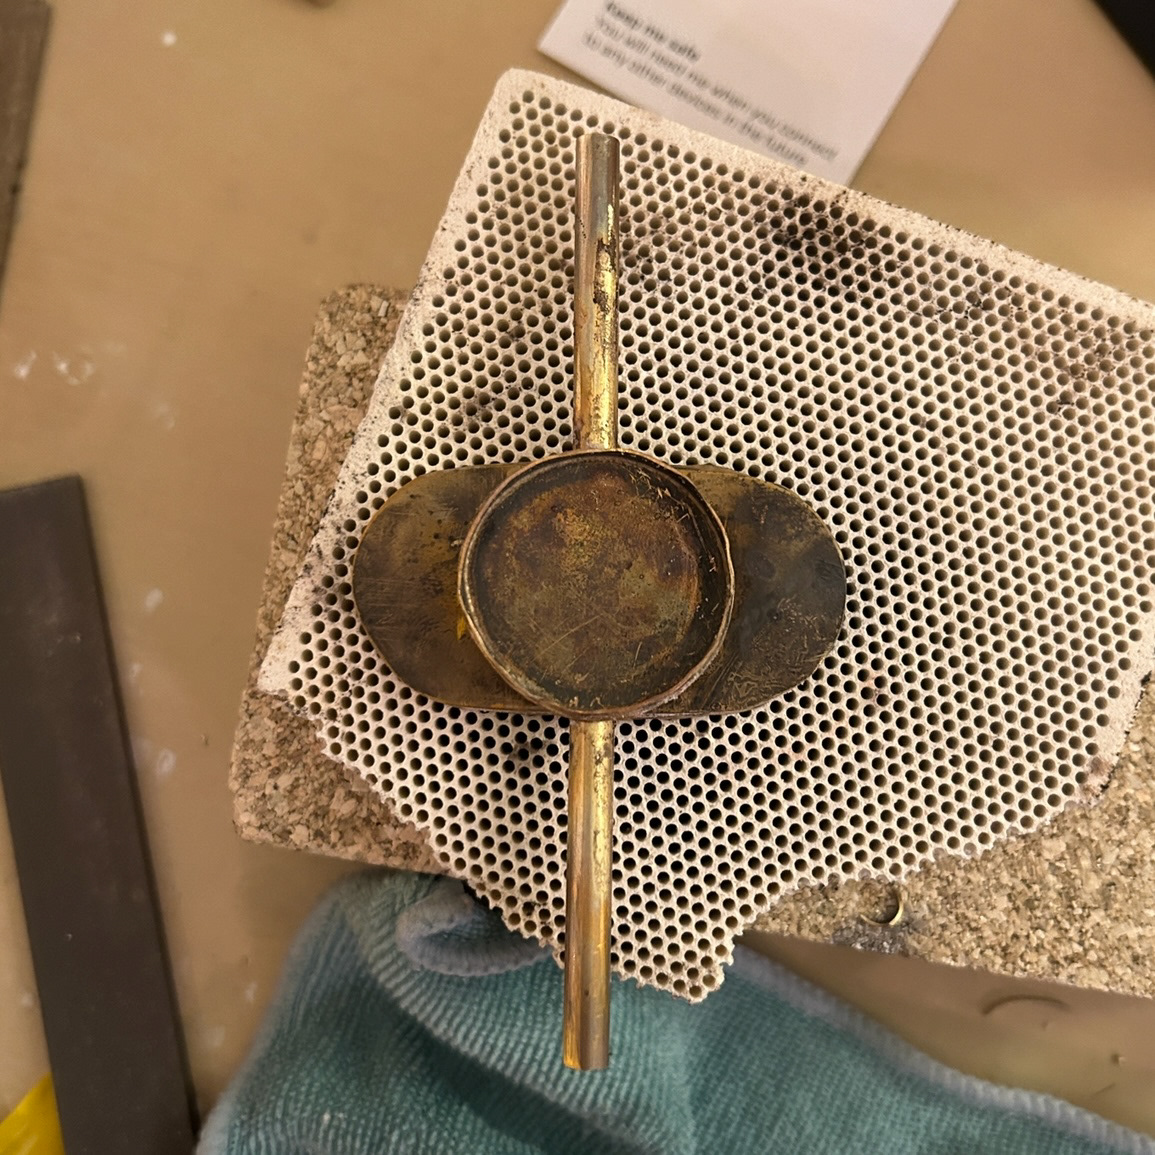
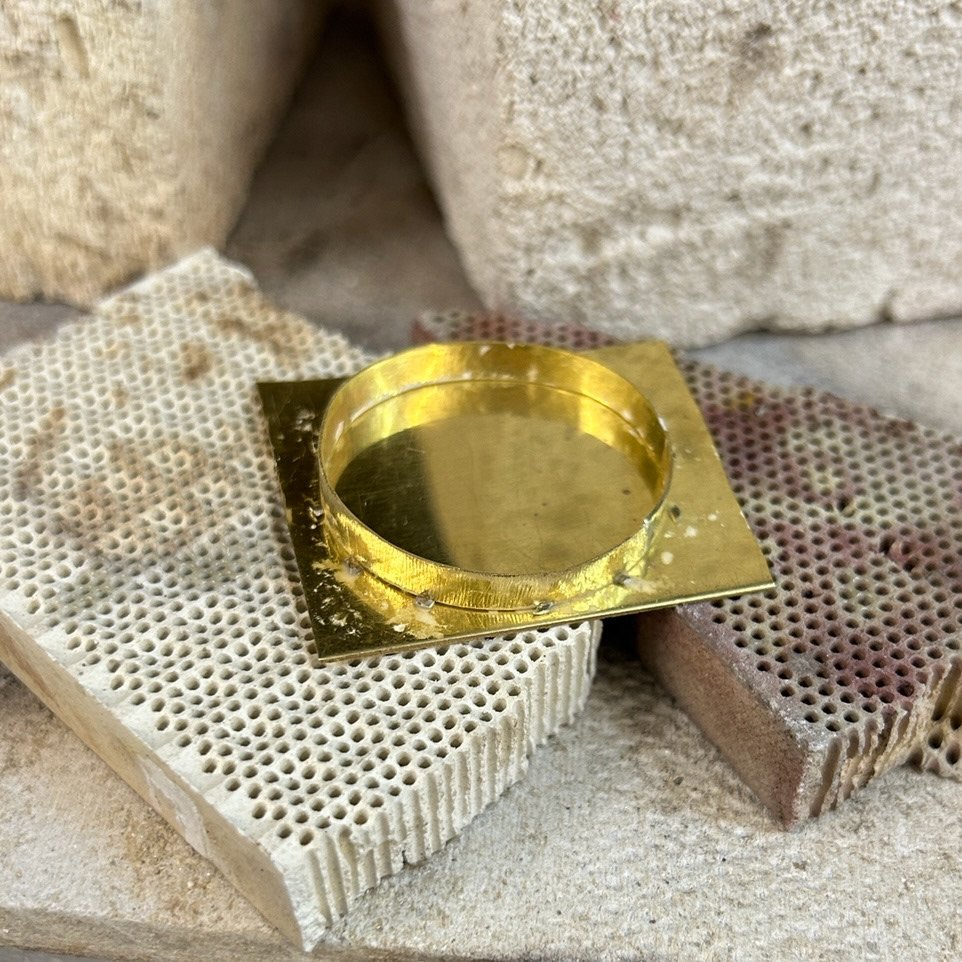
For the main part of my pendant, I needed to solder the two settings to a piece of brass tubing. I started by making the 2 settings needed to hold my enamelled pieces, using techniques I learned in October. After creating the settings, I marked out where I needed to solder the brass tubing to each backplate. The accuracy of this was crucial to my design because if the pieces weren't aligned correctly, then the spinning would be off-centre. I filed both sides of the tubing to create a flat surface for the brass to rest on, which created good contact between the metals. While the soldering on the smaller, circular setting went well, when I was trying to solder the larger plate, the solder would not run and connect to two pieces. I wasn't too sure why this was, however, I think it was a combination of the piece not being clean enough, and the solder not getting hot enough. When using my blowtorch to heat the pieces, the heat was being blocked by the circular piece. I decided that it would be better to file back all of the solder and retry in the workshop the following day.
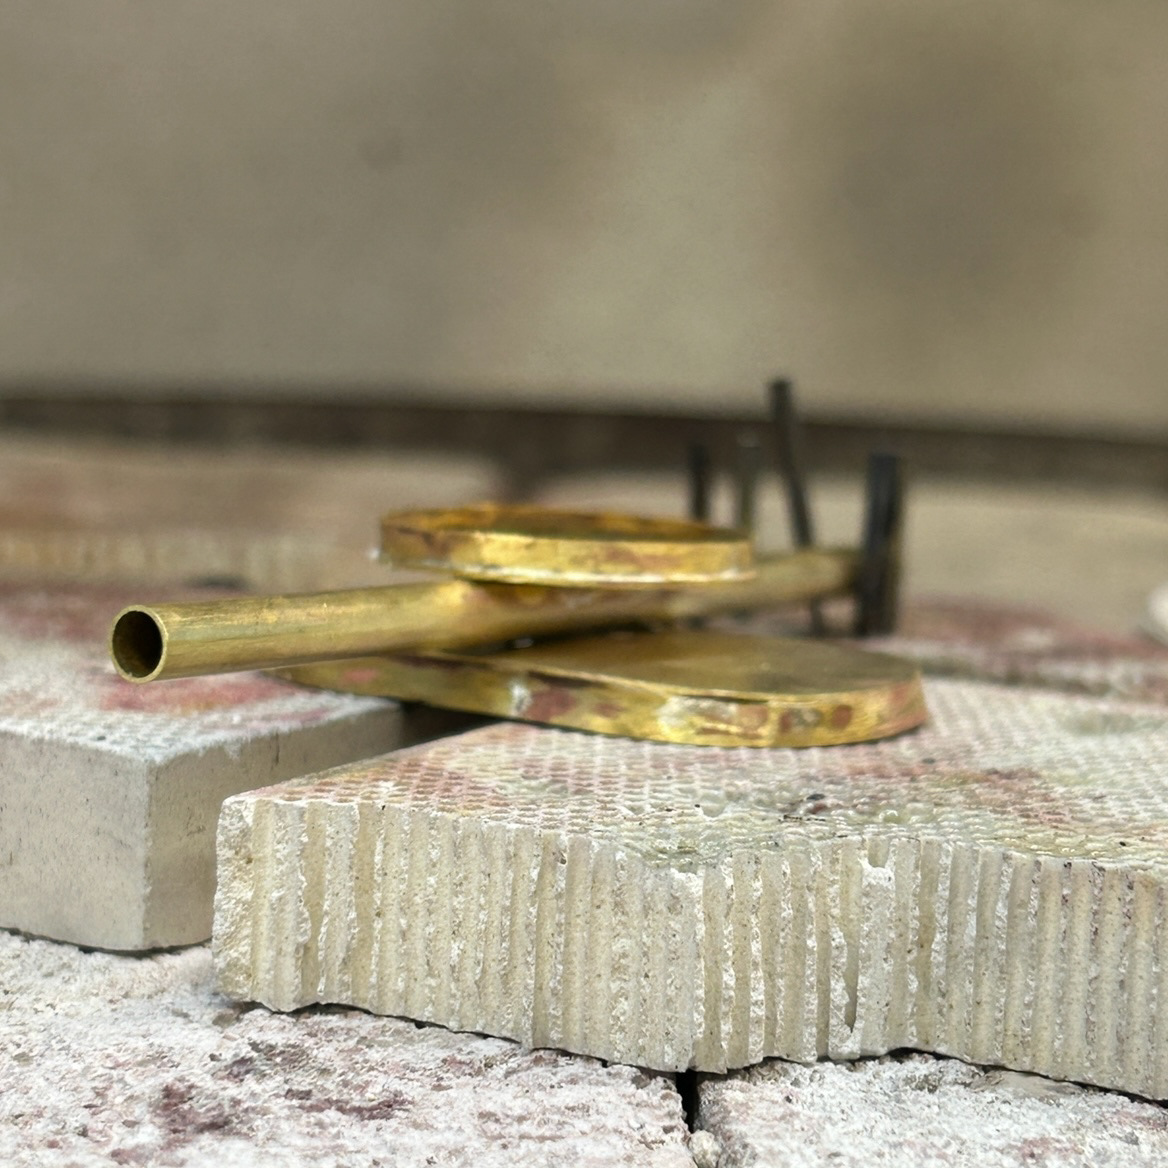
To retry soldering the setting, I first cleaned the brass thoroughly using the pickle and then used pumice and a brush to get any remaining dirt off the plate. While soldering I use soldering picks to hold the mechanism in place so the flame couldn't push the metal out of place. I also decided to use the hearth to solder the pieces together, this has a stronger heat source compared to my blowtorch so concluded that it would be the better option to try and get the pieces to solder together. This combination of cleaning and using a bigger heat source meant that the pieces soldered together correctly.
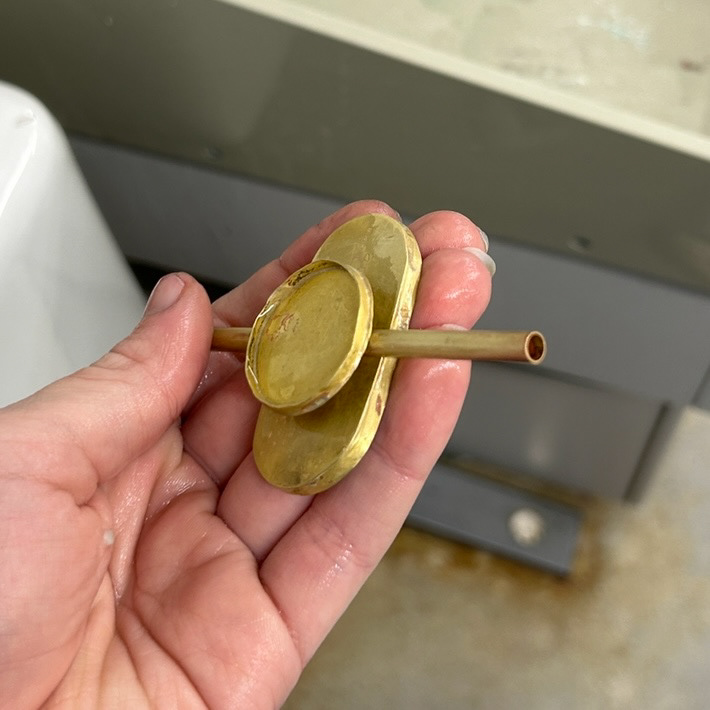
After the soldering, I measured the brass I needed for the outer setting and used a mandrel to help shape the curves at each end. After soldering this outer setting I was able to trim the edges of the tubing that was soldered to each setting.
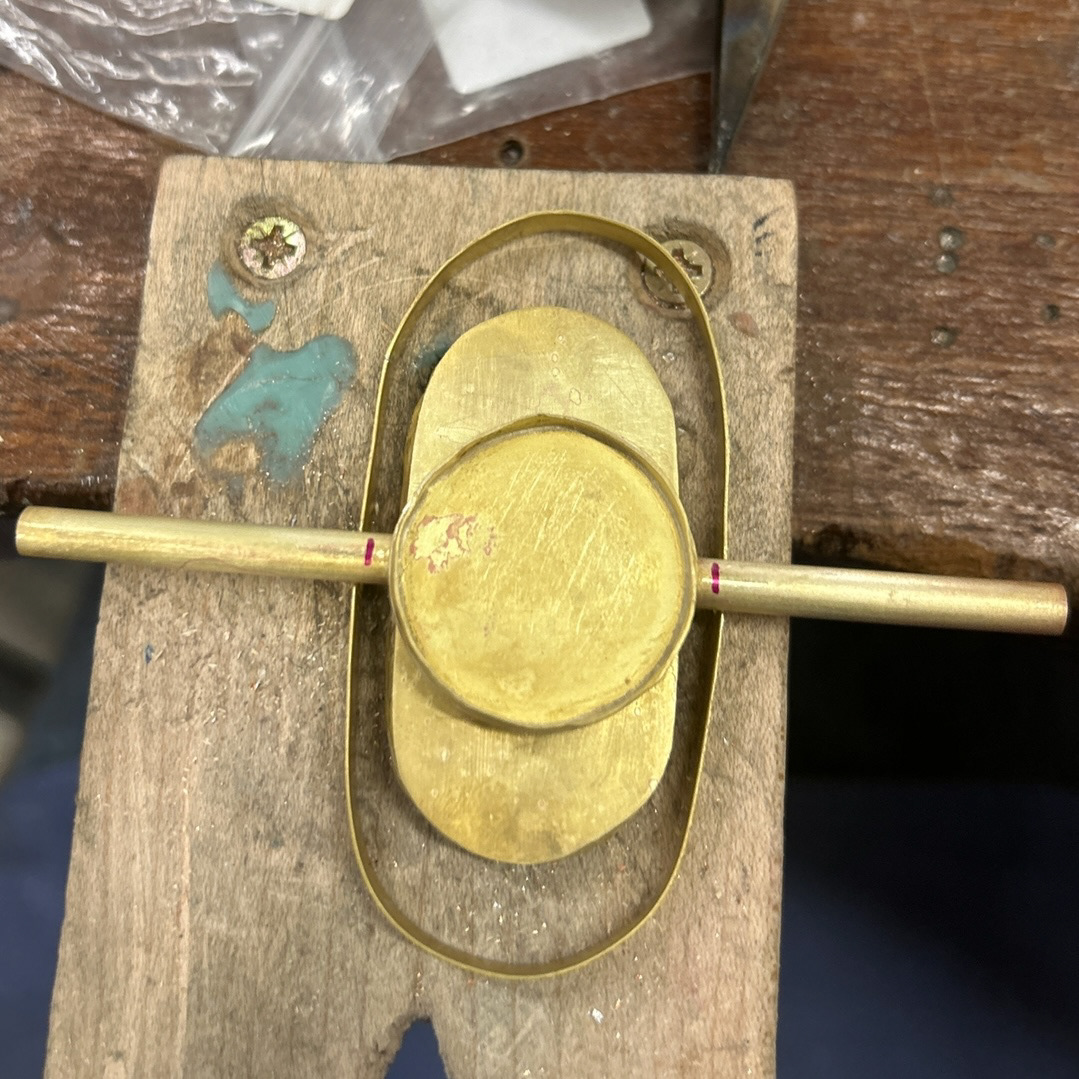
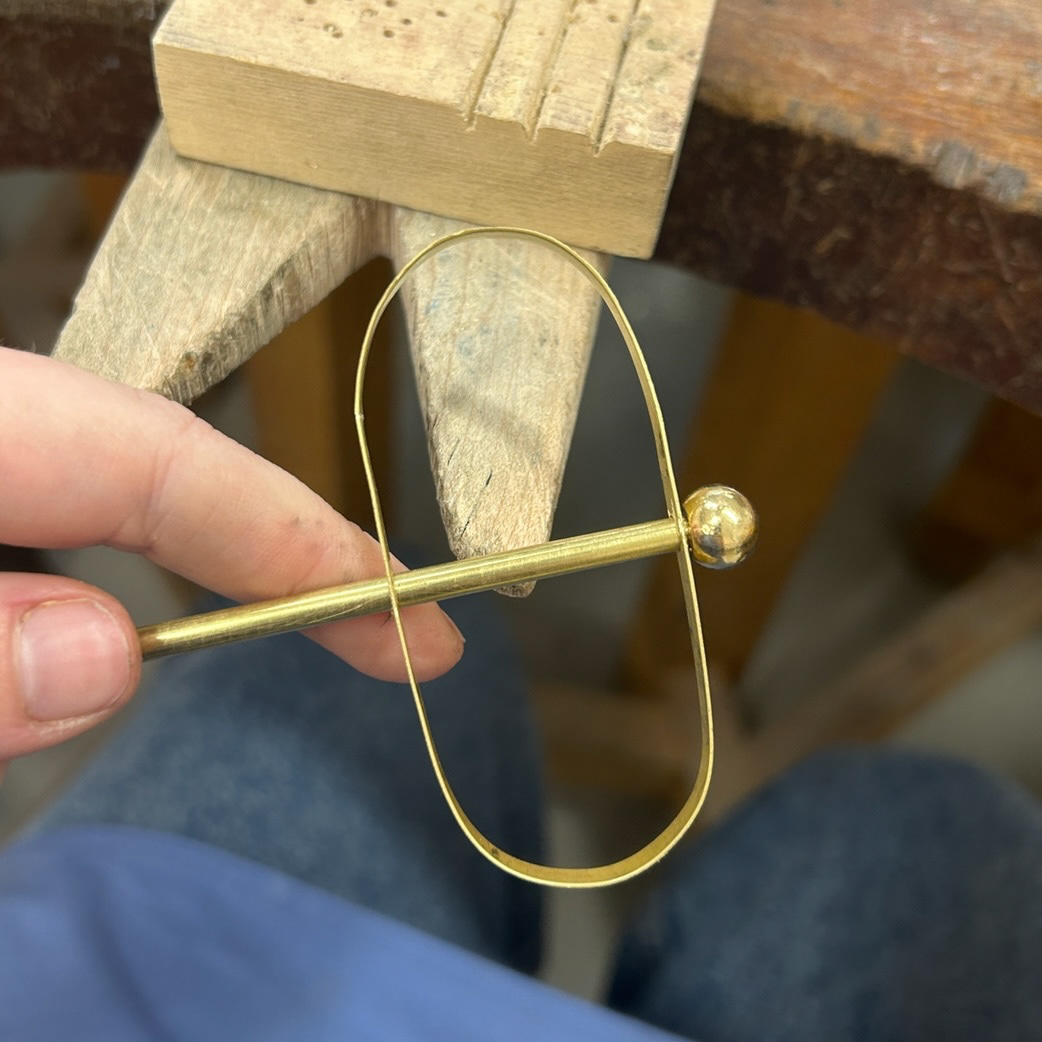
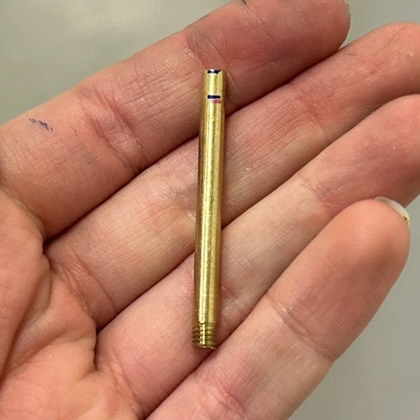
To make the pieces interchangeable, I needed to drill holes on each side of the outer setting so that the solid brass bar with a screw mechanism on each end could slide through the outer setting and then into the tubing. I wanted the outer setting to be a slightly thinner width than the width of the internal settings, as so had to be extremely delicate when drilling the holes, as I didn't want to go through the edges of the piece. After drilling the correct size, I tested the mechanism using the solid brass bar with the end that I had made a screw mechanism for and added the brass finial with a 4mm internal thread.
After a couple of adjustments to the side of the hole on the outer setting, I was happy with how the mechanism felt, and so cut the rest of the brass bar. I then used the tap-and-die mechanism on the other end to create the threads for the brass finial. I marked how long the threads had to be so that when turning the mechanism that cuts the threads, I knew where to stop.
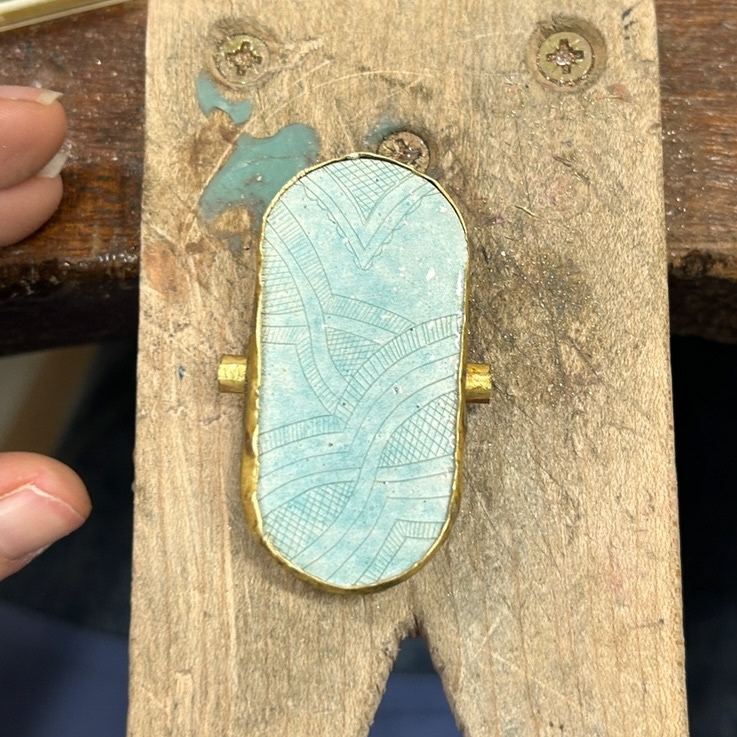
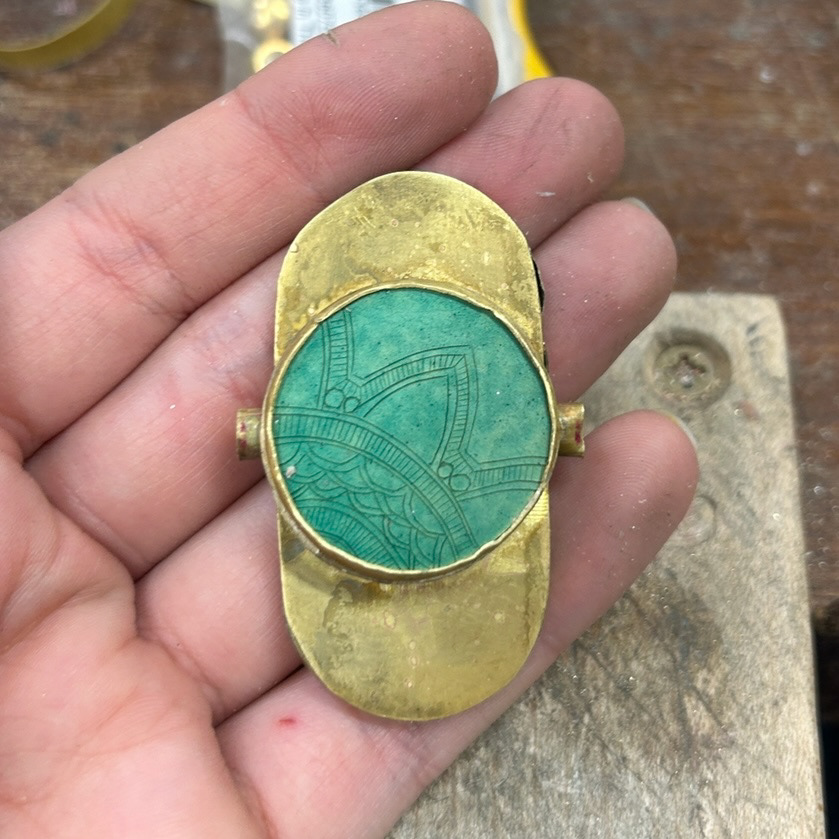
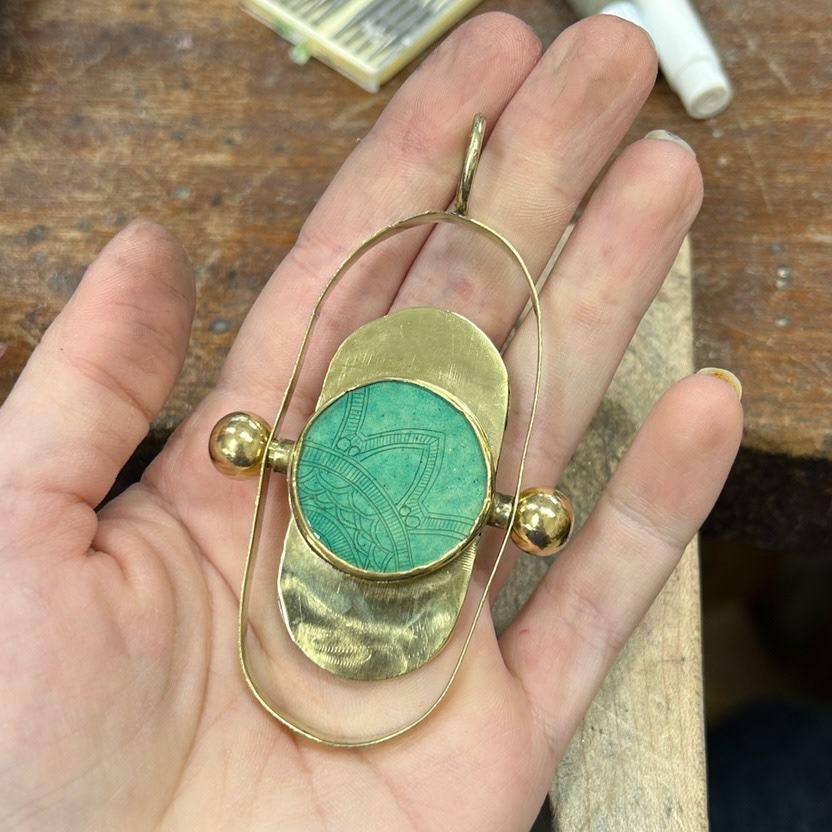
After using the pickle to clean my brass again, I was able to set the enamelled pieces into place. Both of these have specific orientations and angles that I wanted when the pendant is facing 'forward'. This included the circular piece having a 45° angle to the design, mimicking the design of the lace that I had taken inspiration from. I also wanted the longer piece to have the v-shaped design at the top of the pendant, to look as if the lace was dripping down the design. I understand that both of these designs flip when the pendant is spun, however, it was important for me to have the specific orientation work when the pendant is facing one way.
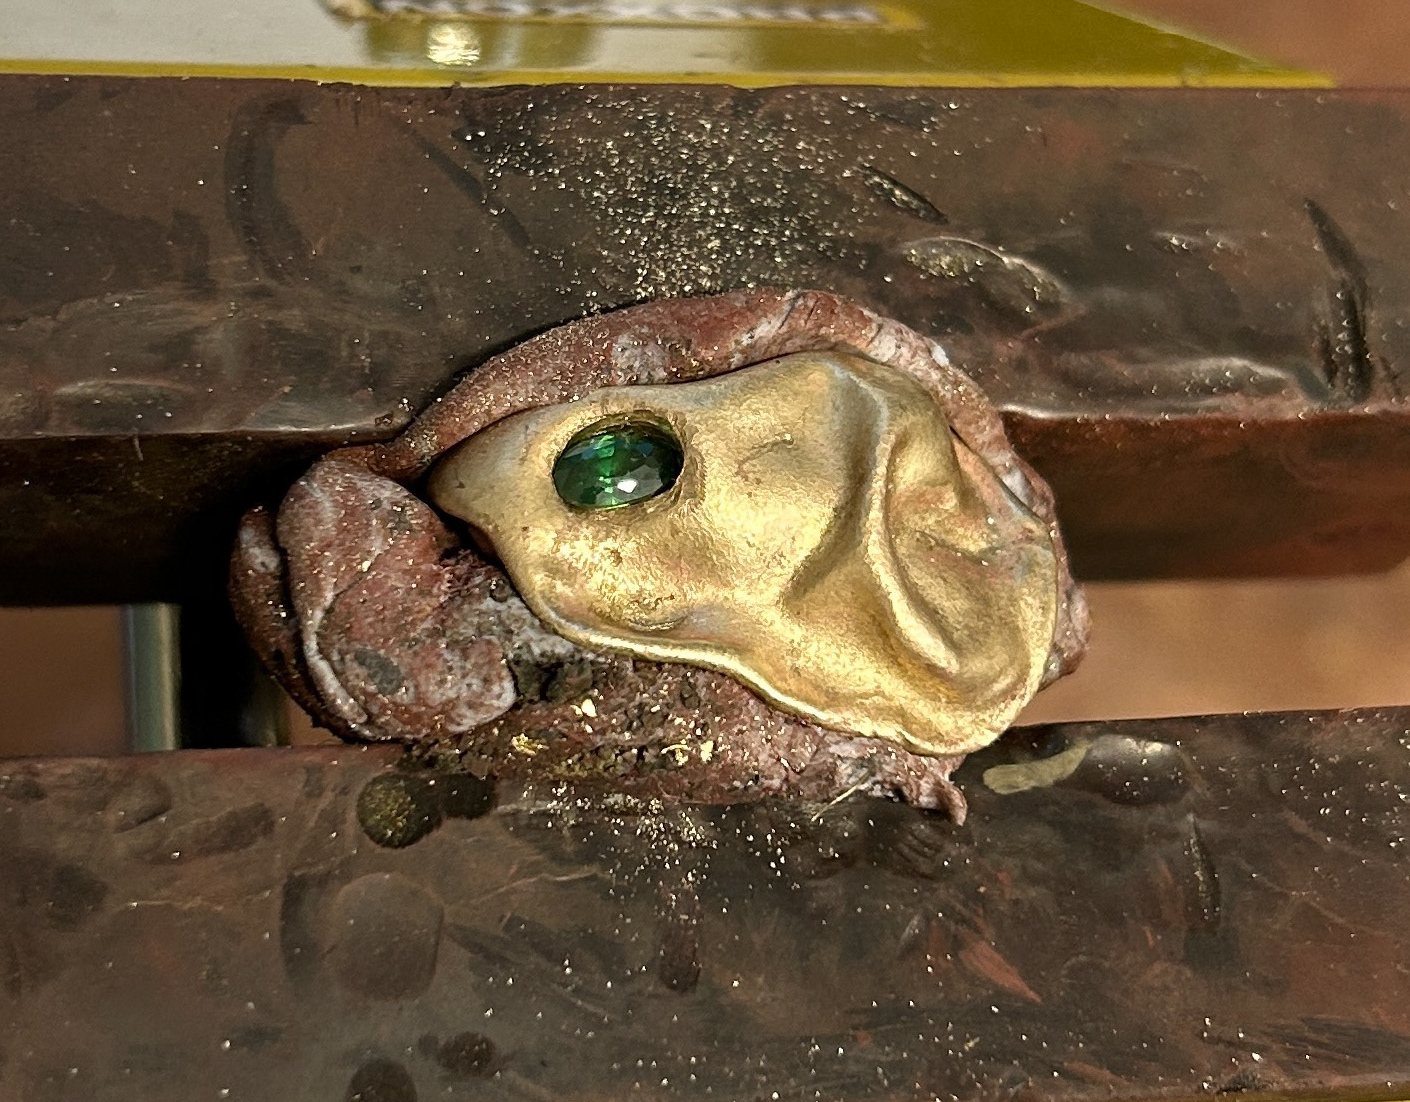
While setting the pieces, the brass tubing became misshapen. This was due to the pressure I was putting on the setting while moving the brass over the edges of the "stones", and as the brass had been annealed, it became very soft and easily malleable. To help correct this mistake, I used small long nose pliers to expand the tubing and then used the solid brass bar to slowly open the tubing again. After this, the mechanism was much tighter, but still worked.
Making the Fastening
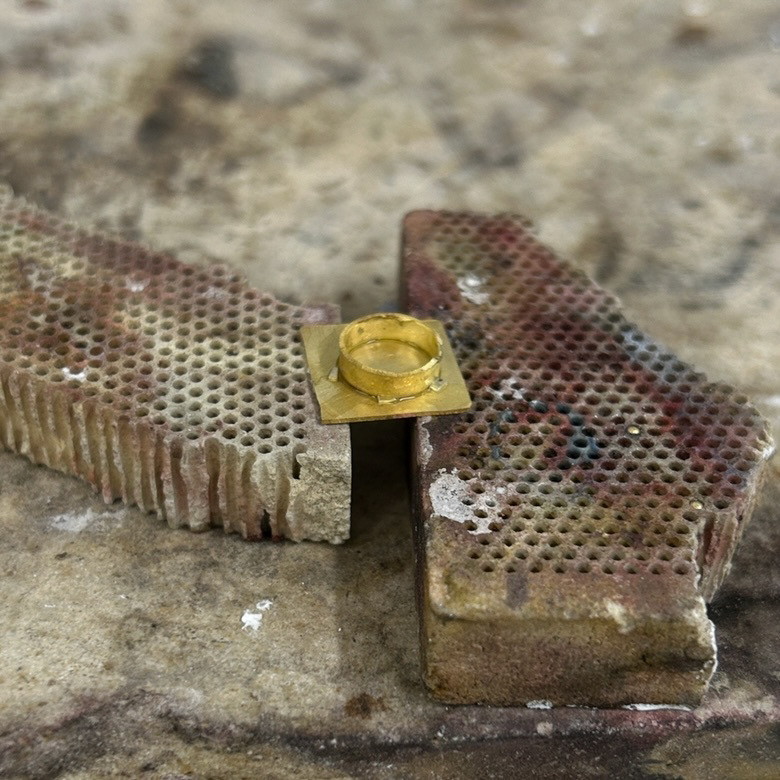
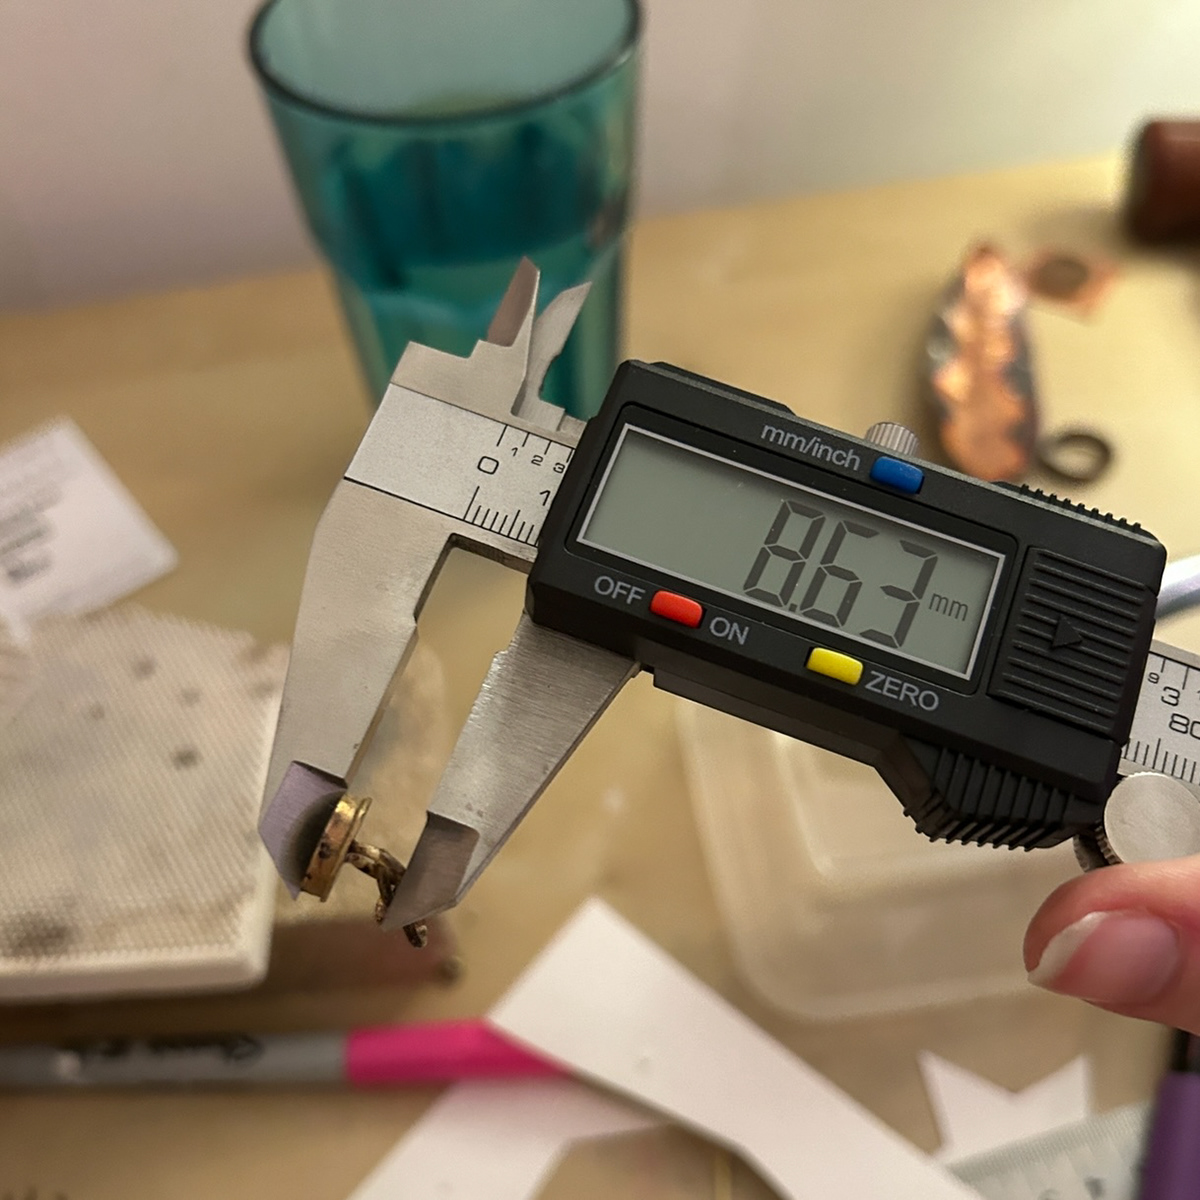
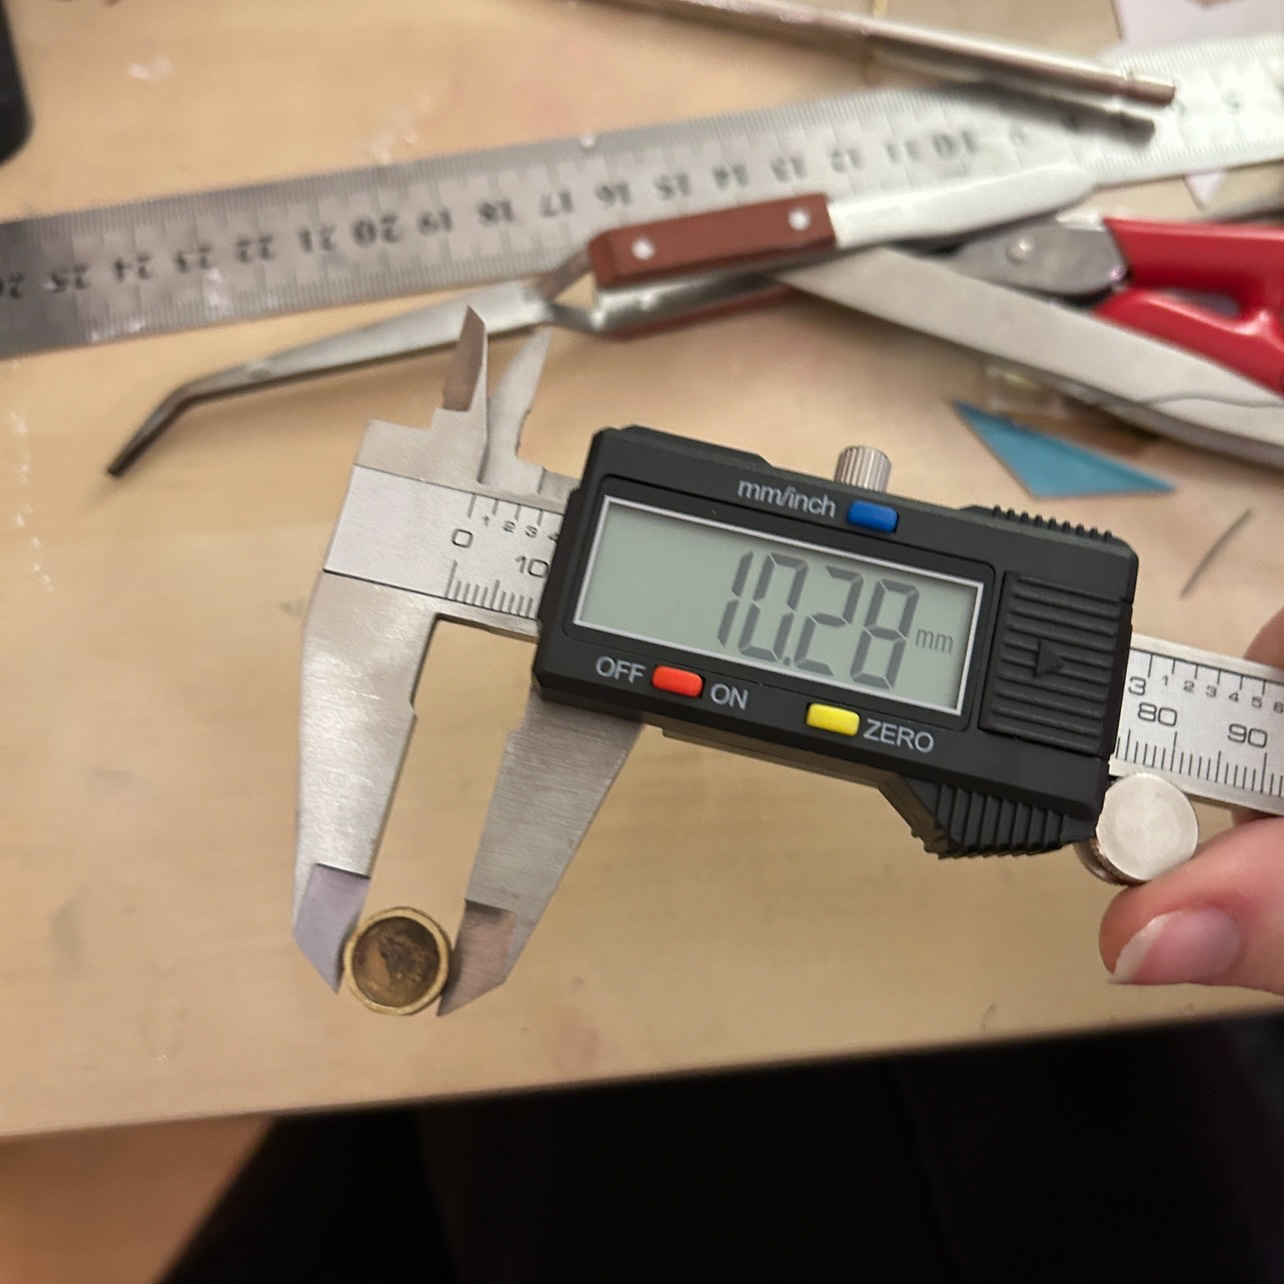
For the clasp at the back of the necklace, I decided to use stone setting techniques with an enamelled piece again. This meant that there was a consistent design element throughout the whole piece. I decided to create a fastening with a slotting mechanism. This meant that after crafting the setting for the enamelled piece, I had to use precise measurements to make the rest of the closure. I used my callipers to help with this. I made sure that each element of the fasting was filed so that it would be comfortable for the wearer.
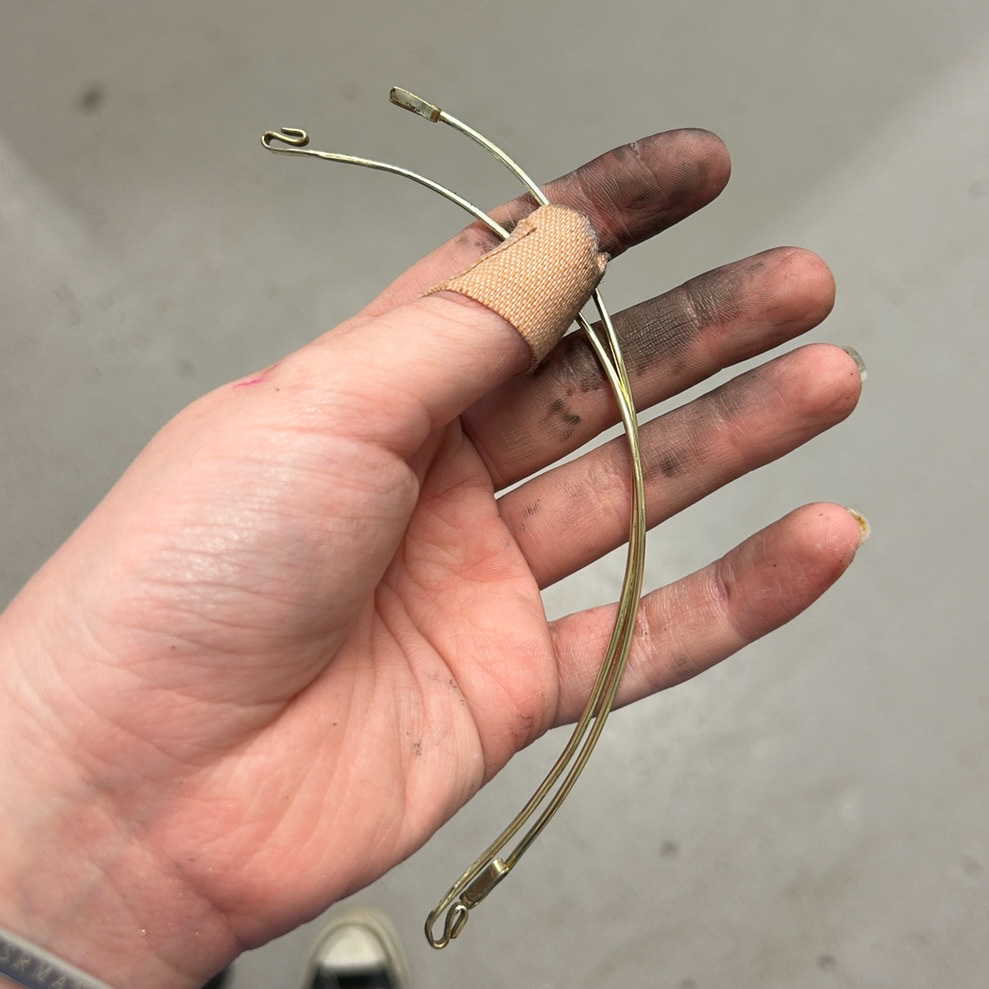

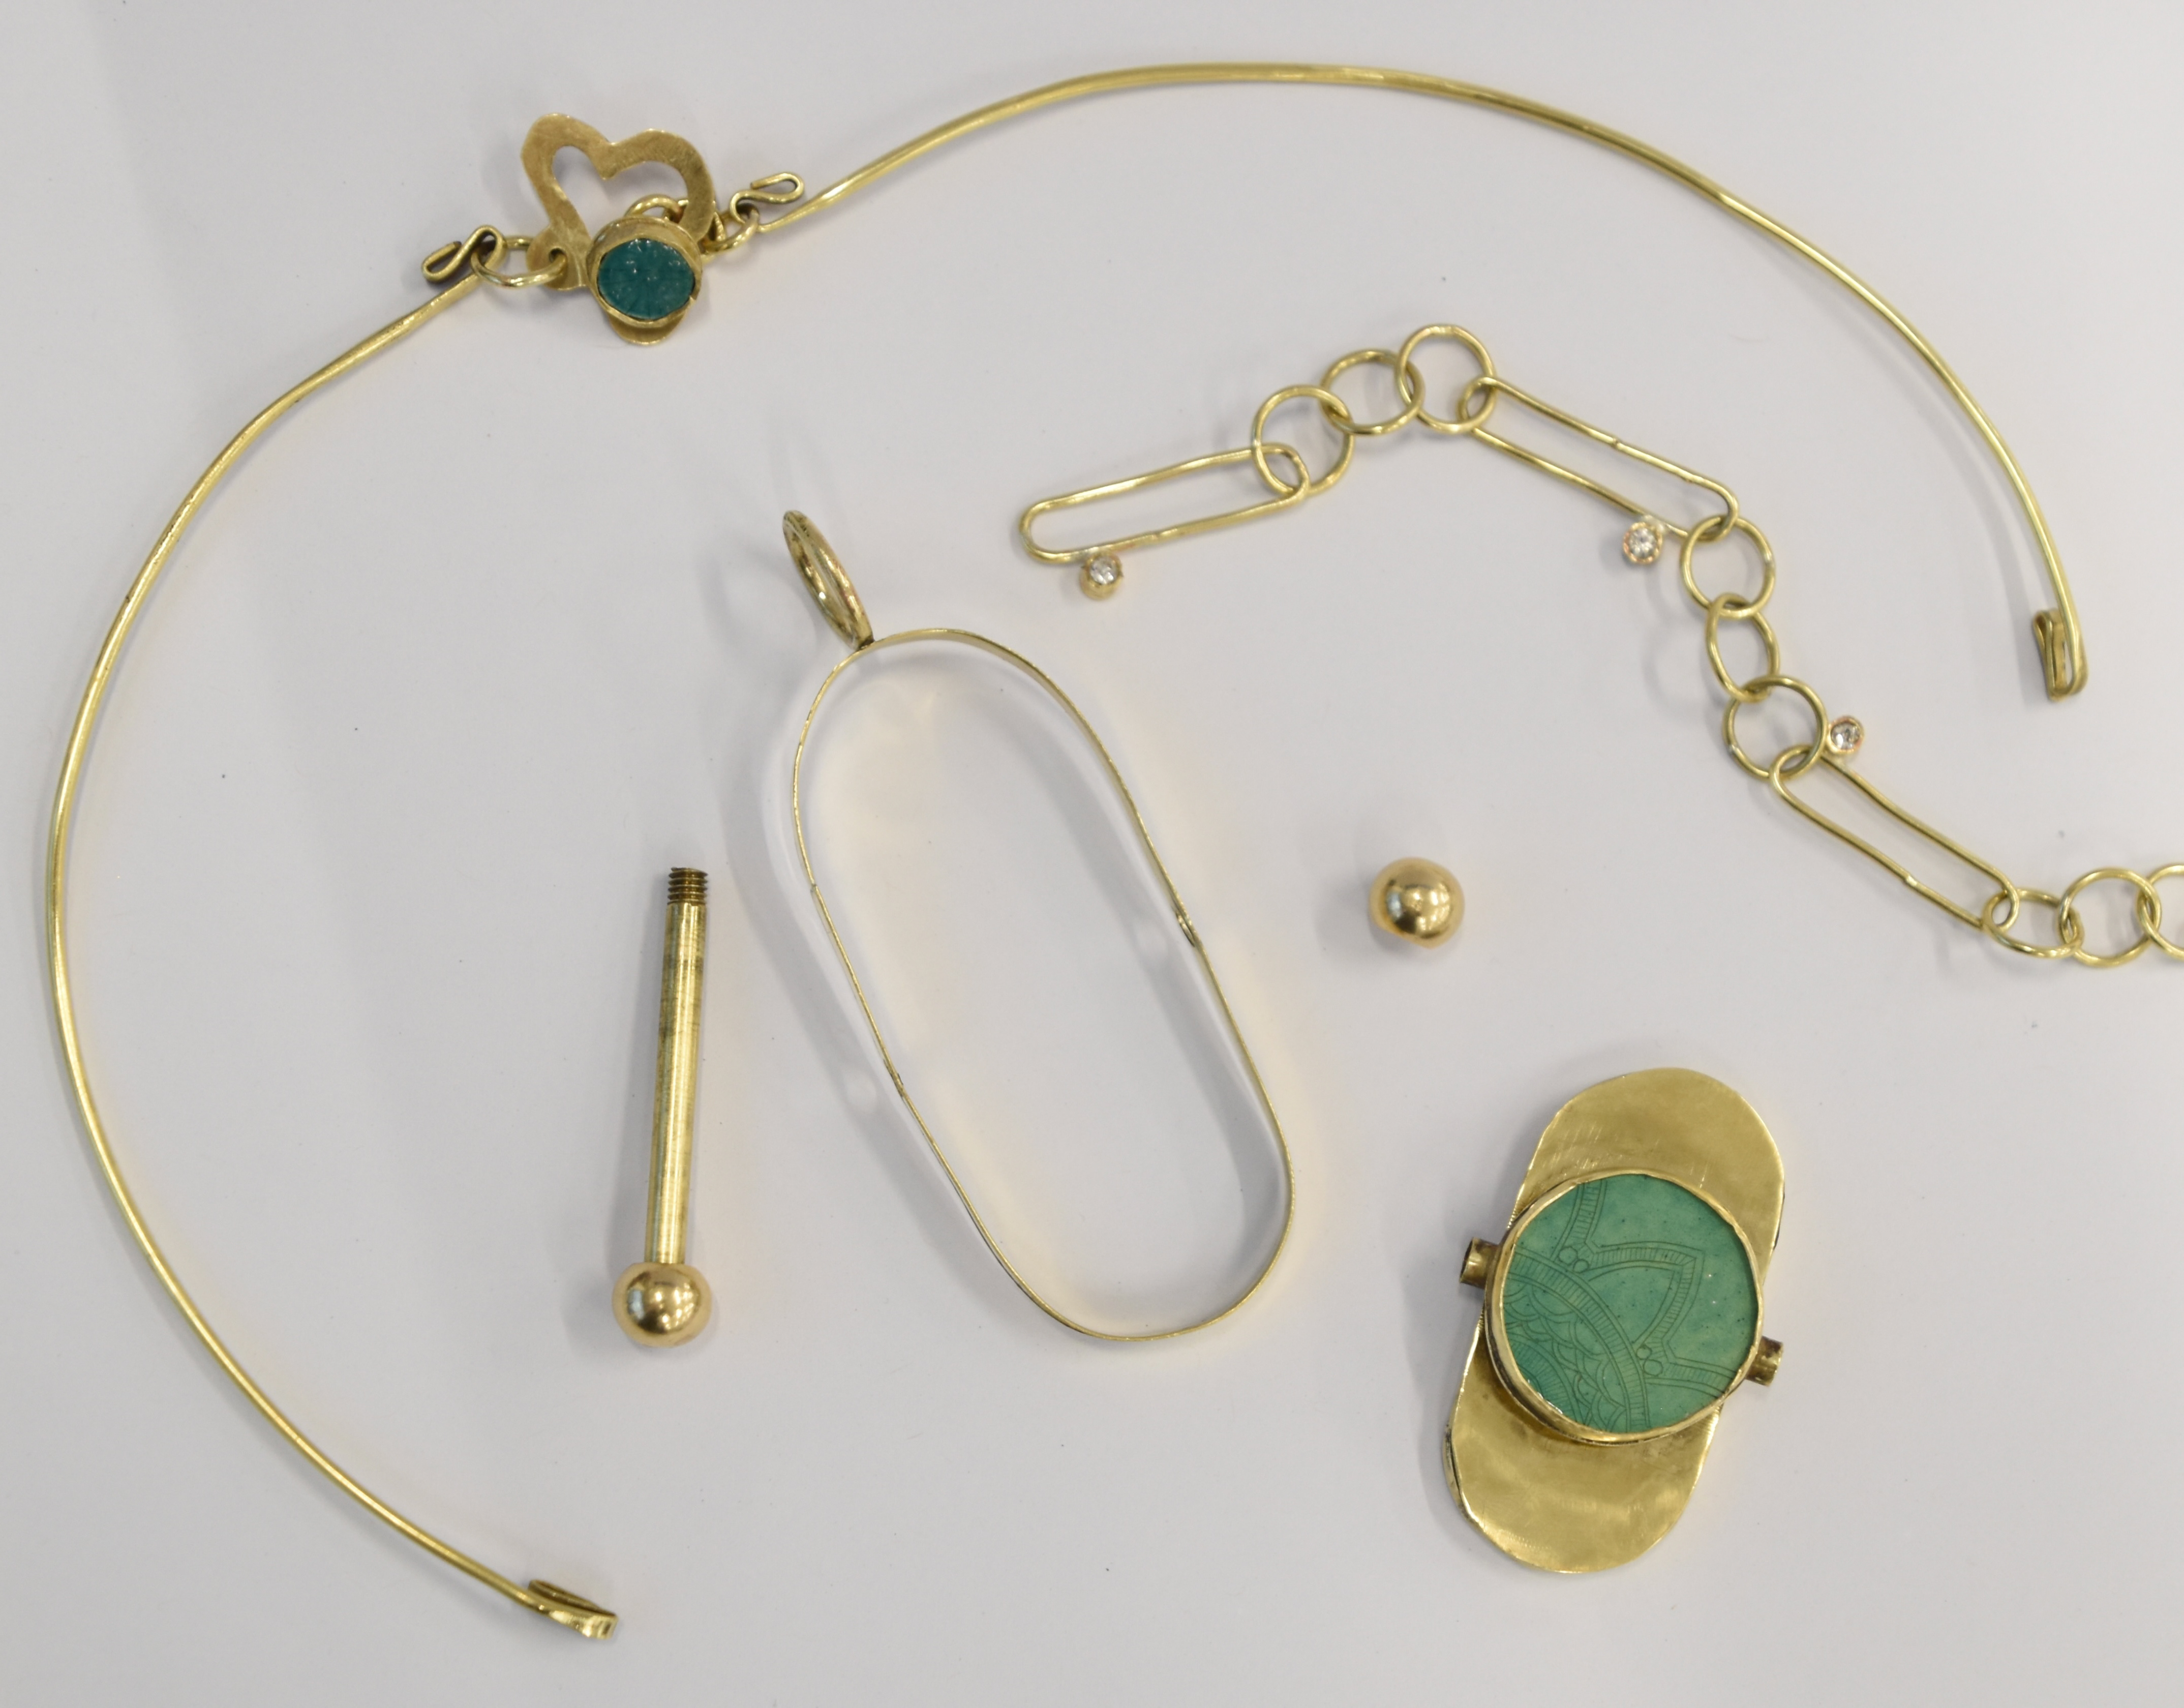
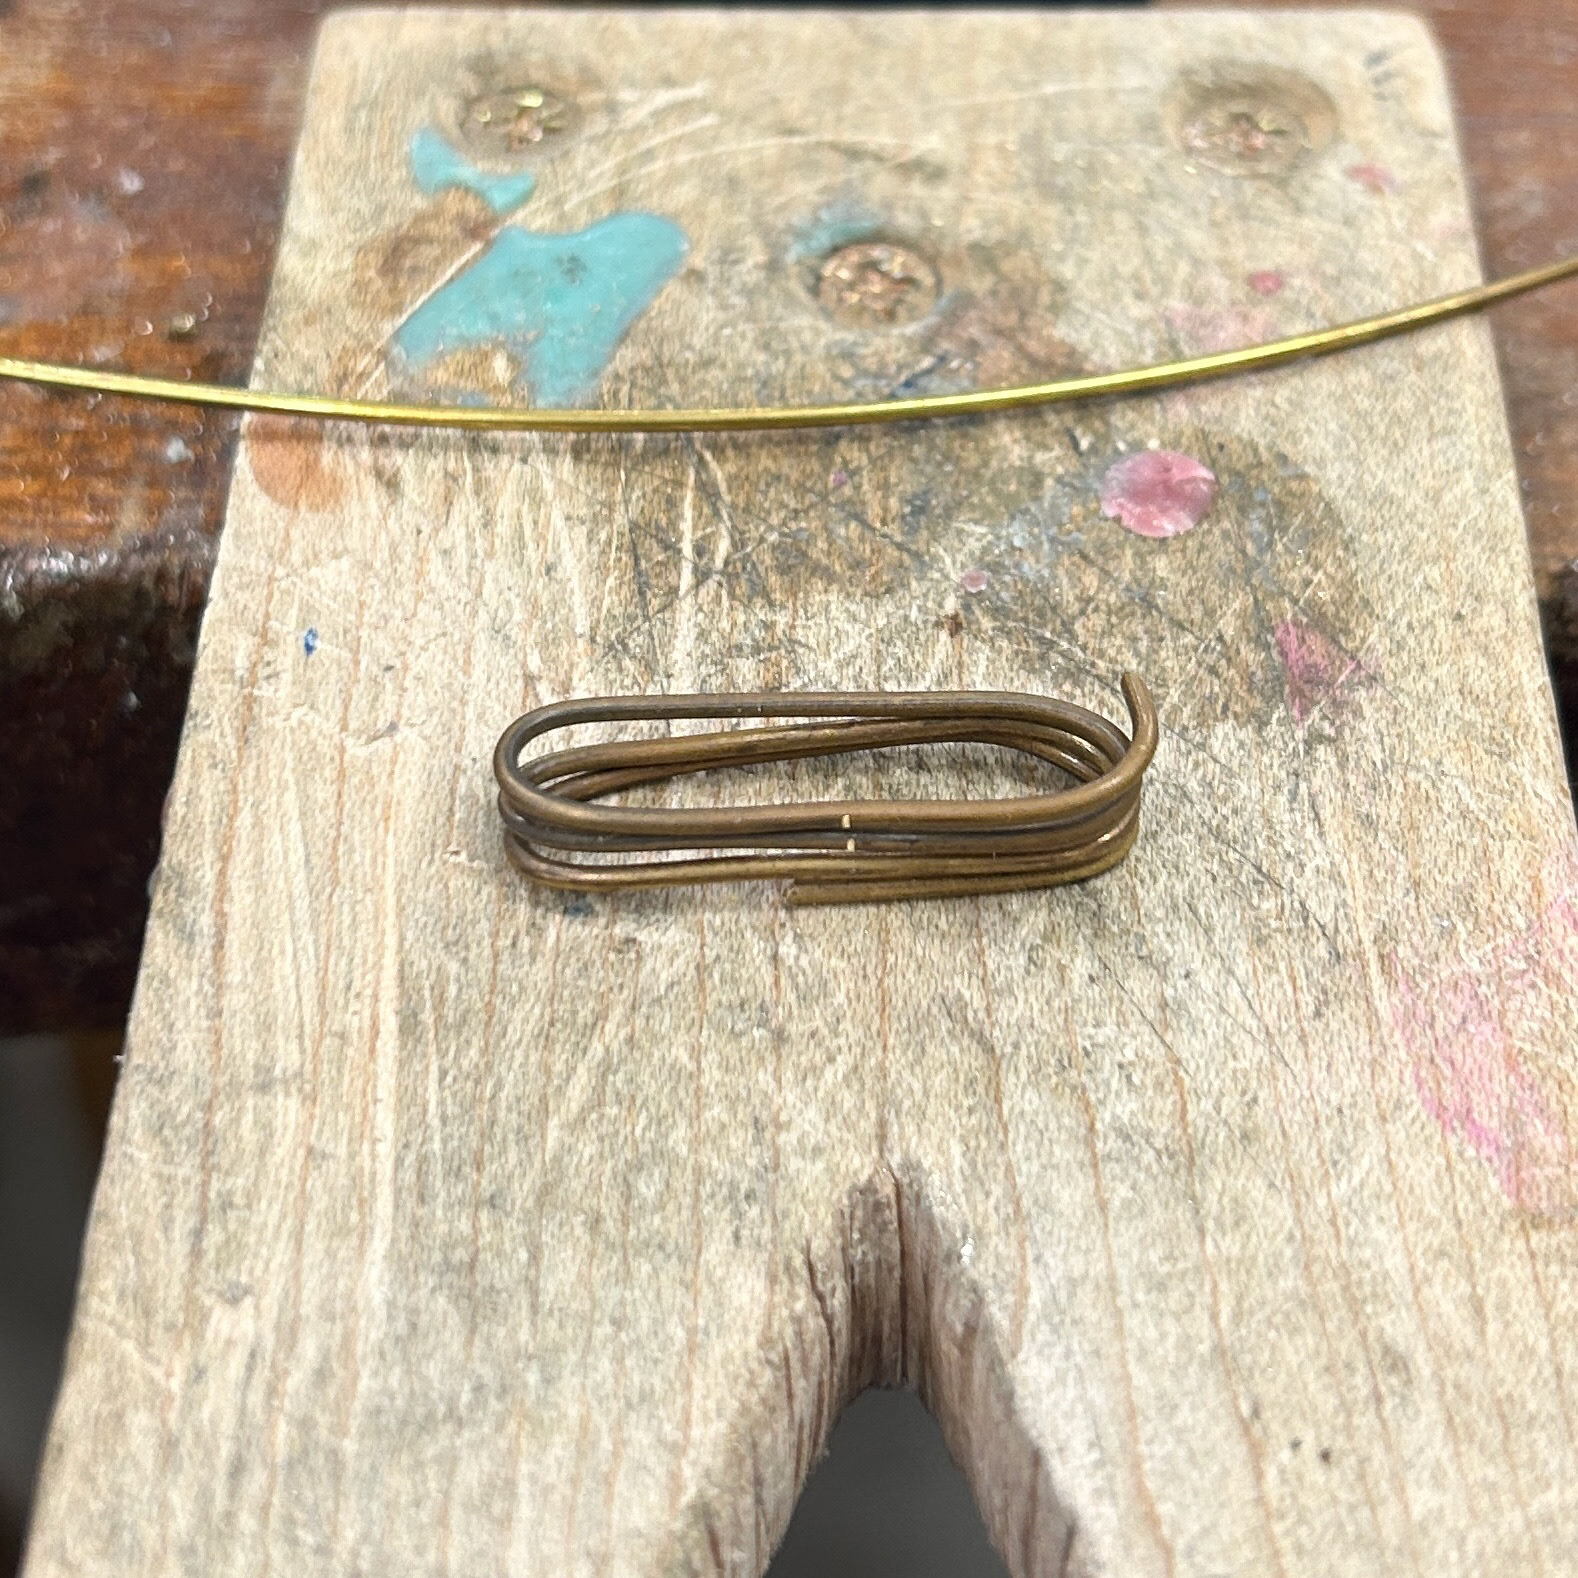
After setting the enamelled piece, I moved on to create the rest of the necklace. I had planned to use brass wire with small brass hooks at the end of each piece. These would have a spring mechanism to make changing the chain and clasp easier, but since delivery was delayed until January I had to think of another idea. I settled on using brass that would loop back on itself to help hold these pieces in place. In the end, I decided that I preferred this design anyway, this was because it made the piece look as if the chain seamlessly transformed into chain, instead of having a circular mechanism in between each piece.
I used the same technique for the closure at the back of the necklace, keeping the design consistent throughout the final product.
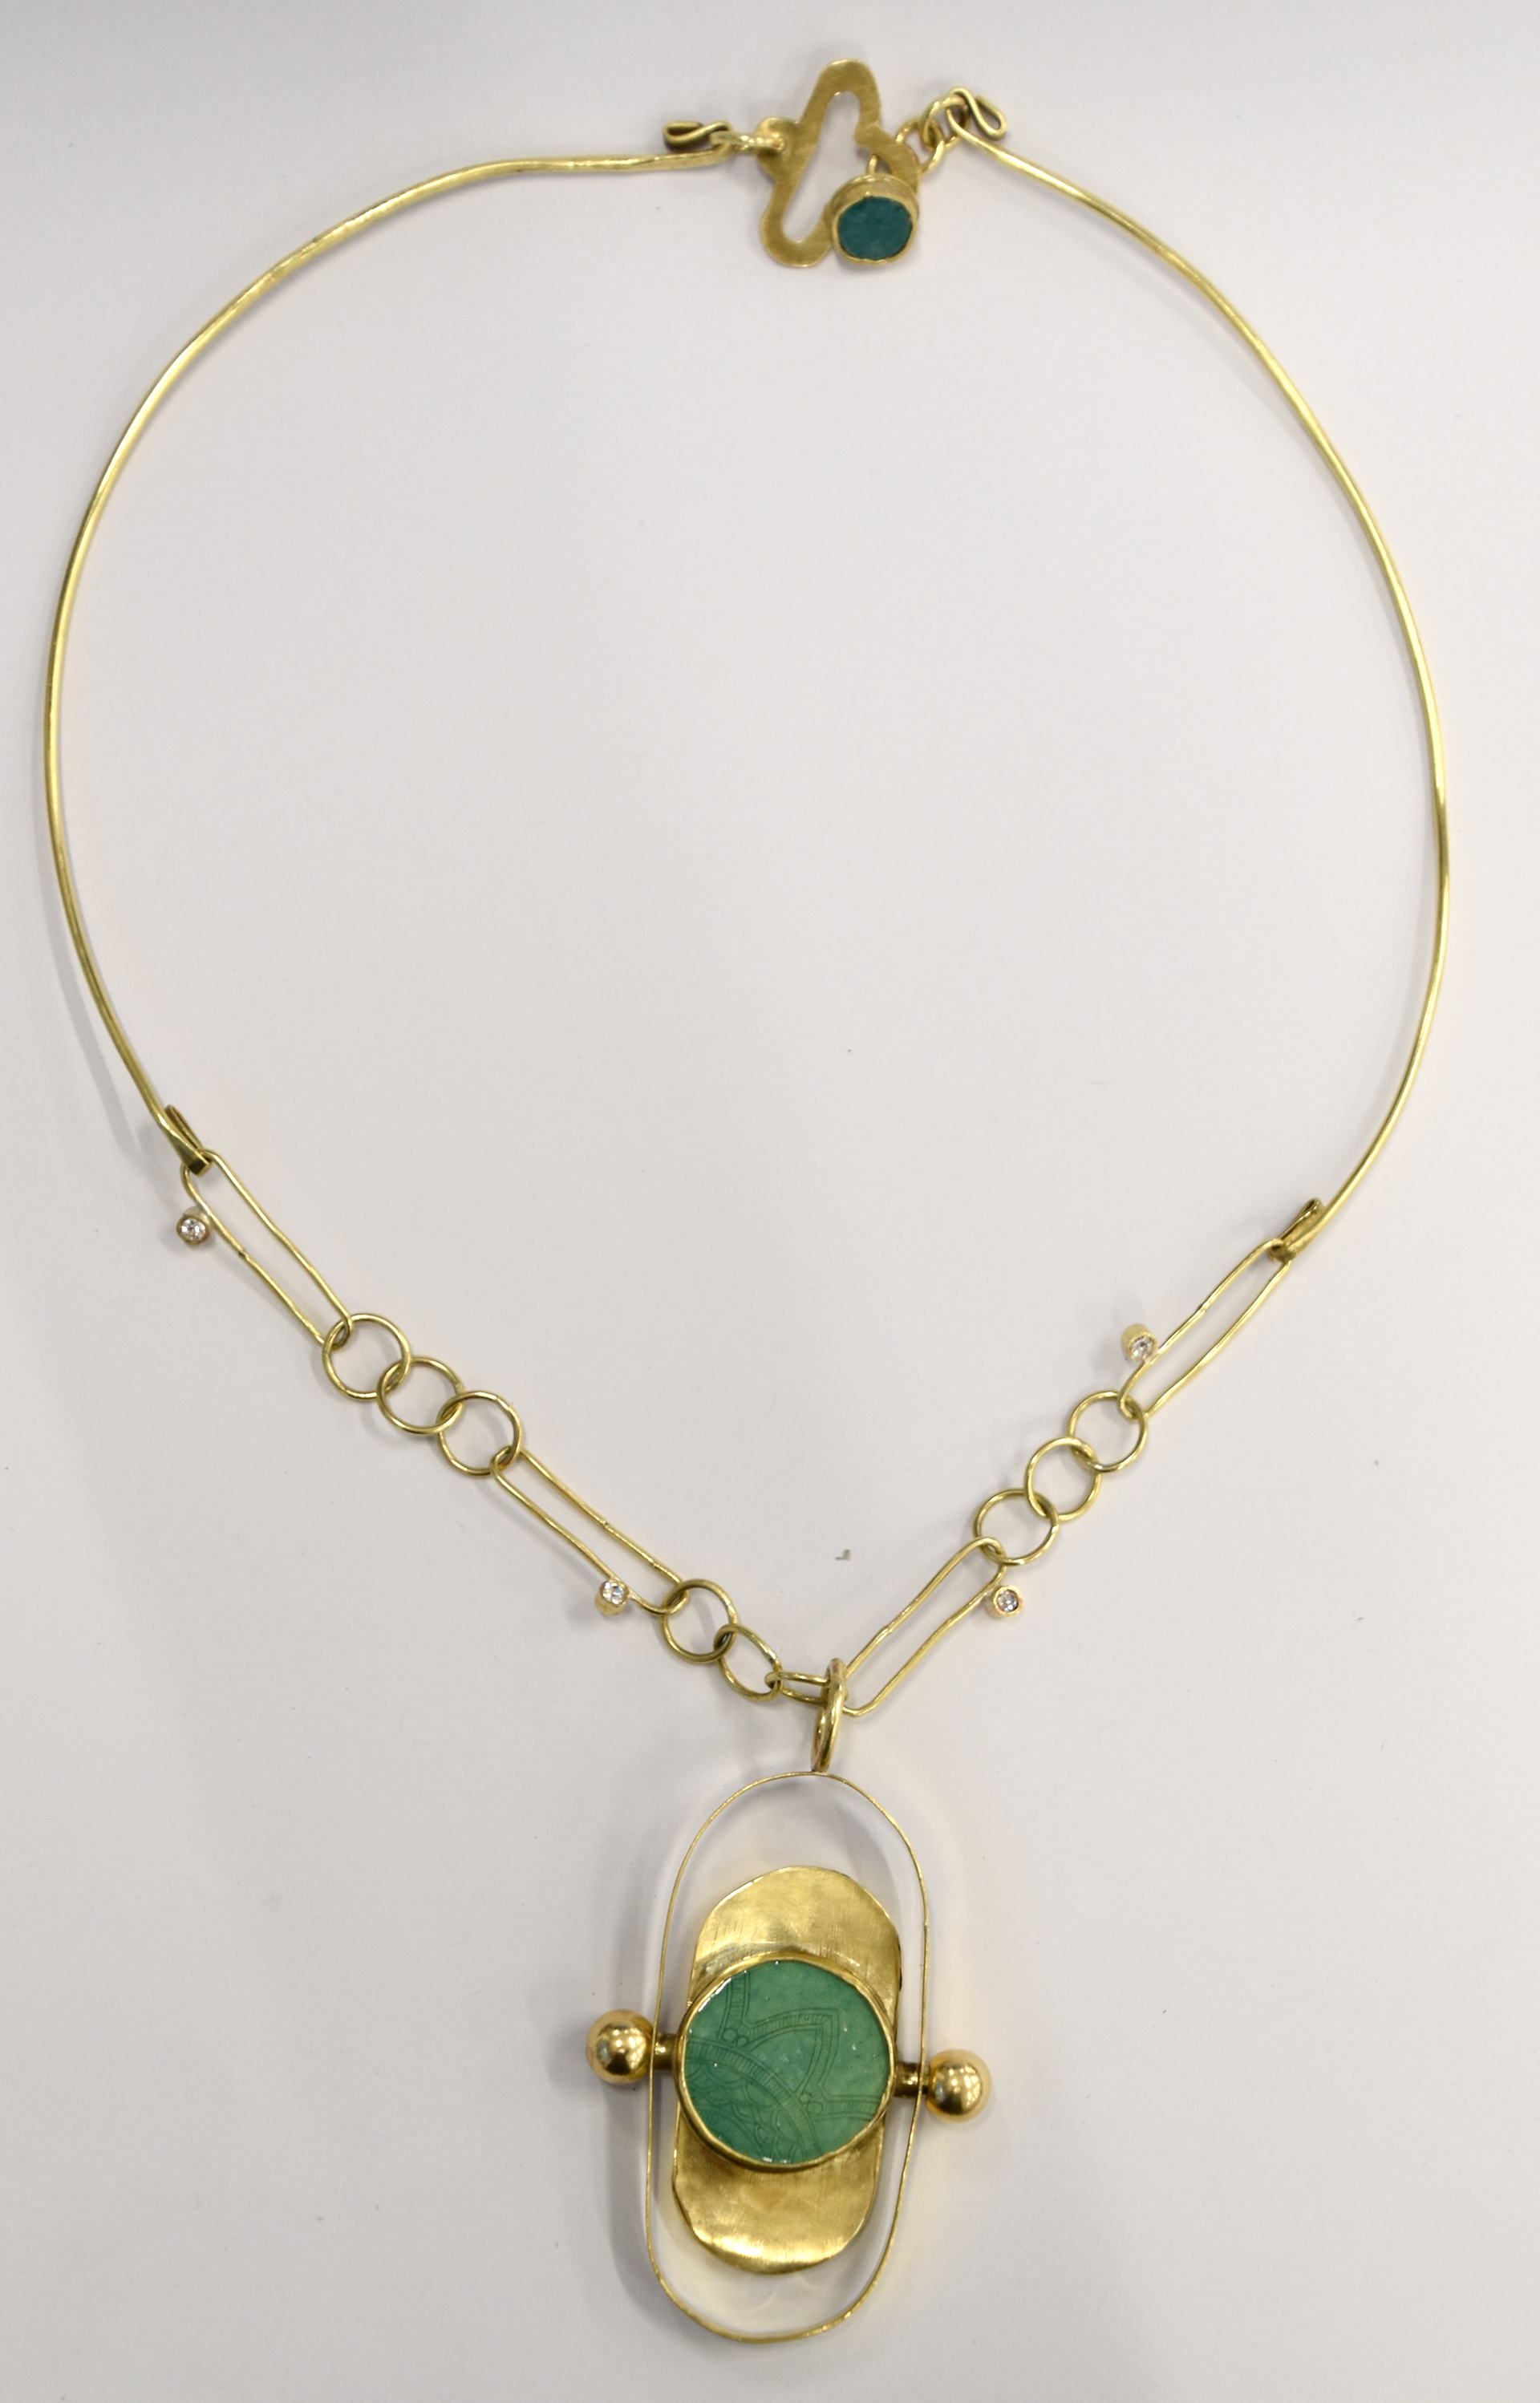
My completed necklace, with 3 modular aspects.
Polished with Tripoli and Rouge