Workshop Diary
(Vertical Scroll)
Relevant techniques can be seen further below
Contents:
Resin Samples .............................................................................. 2
Wax Carving ................................................................................. 4
Brass Casting ............................................................................. 19
Enamelling ................................................................................ 23
Refinement of Brass Casts ................................................... 25
Design Development: Pendant ........................................... 30
Testing Different Stone Seats ............................................... 37
Final Piece Carving ................................................................. 43
Different Brooch Mechanisms ............................................ 52
Bezel Set Brooch ....................................................................... 58
Final Piece Brooch Backings ................................................ 62
Casting Final Piece ................................................................... 65
Clean-up of Final Piece .......................................................... 69
Adding Brooch Pins ................................................................. 76
Setting Stones ............................................................................ 78
Making Chain Fixings ............................................................. 81
Final Outcome ............................................................................83
Resin Samples
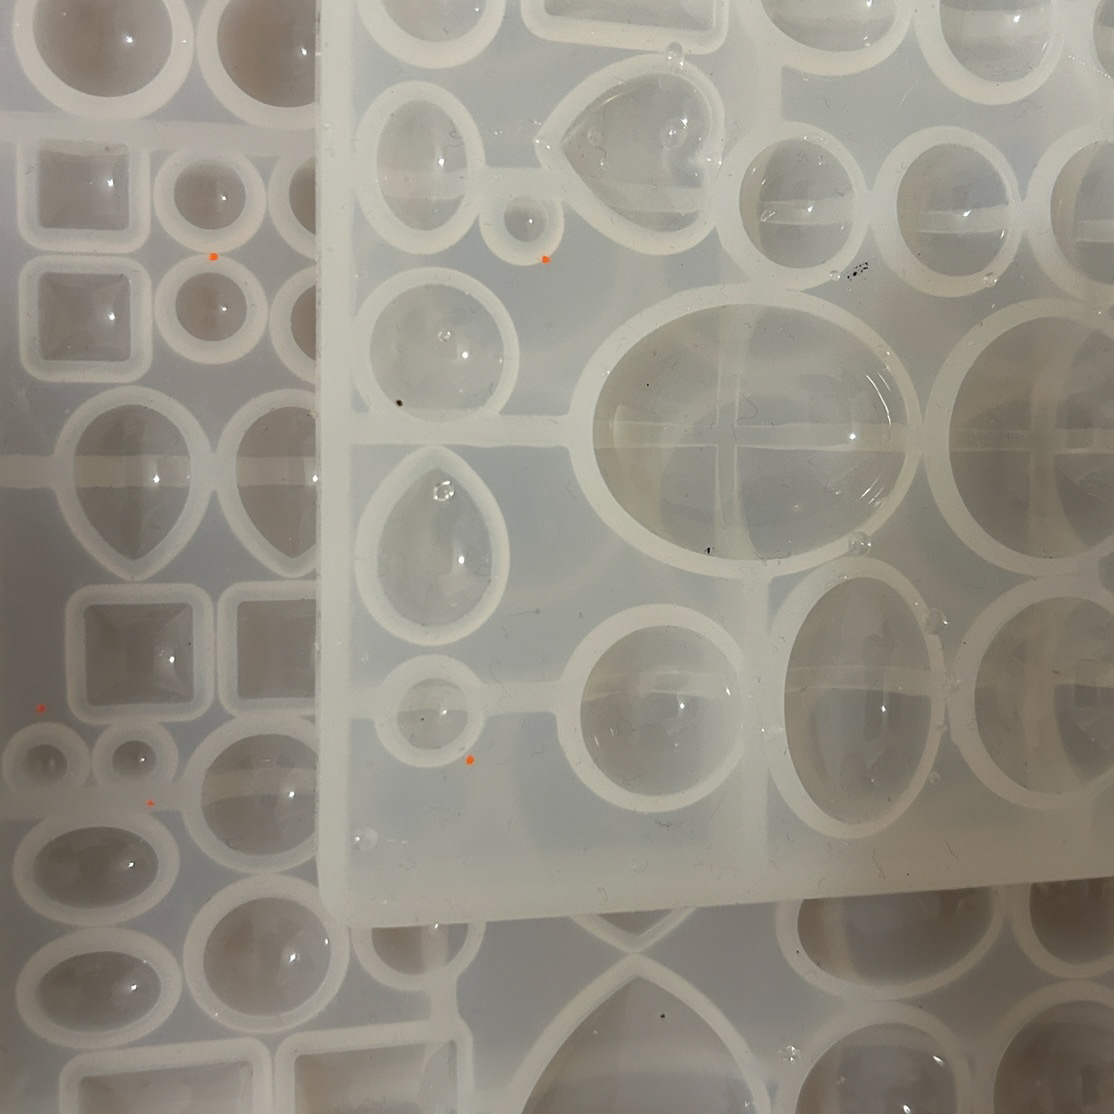

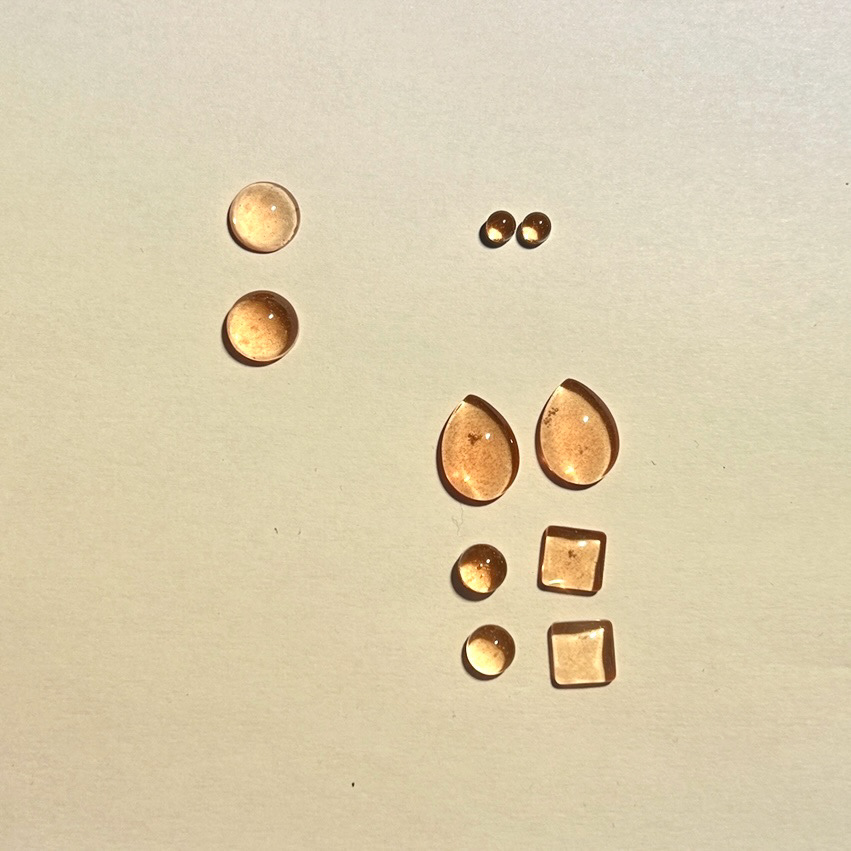
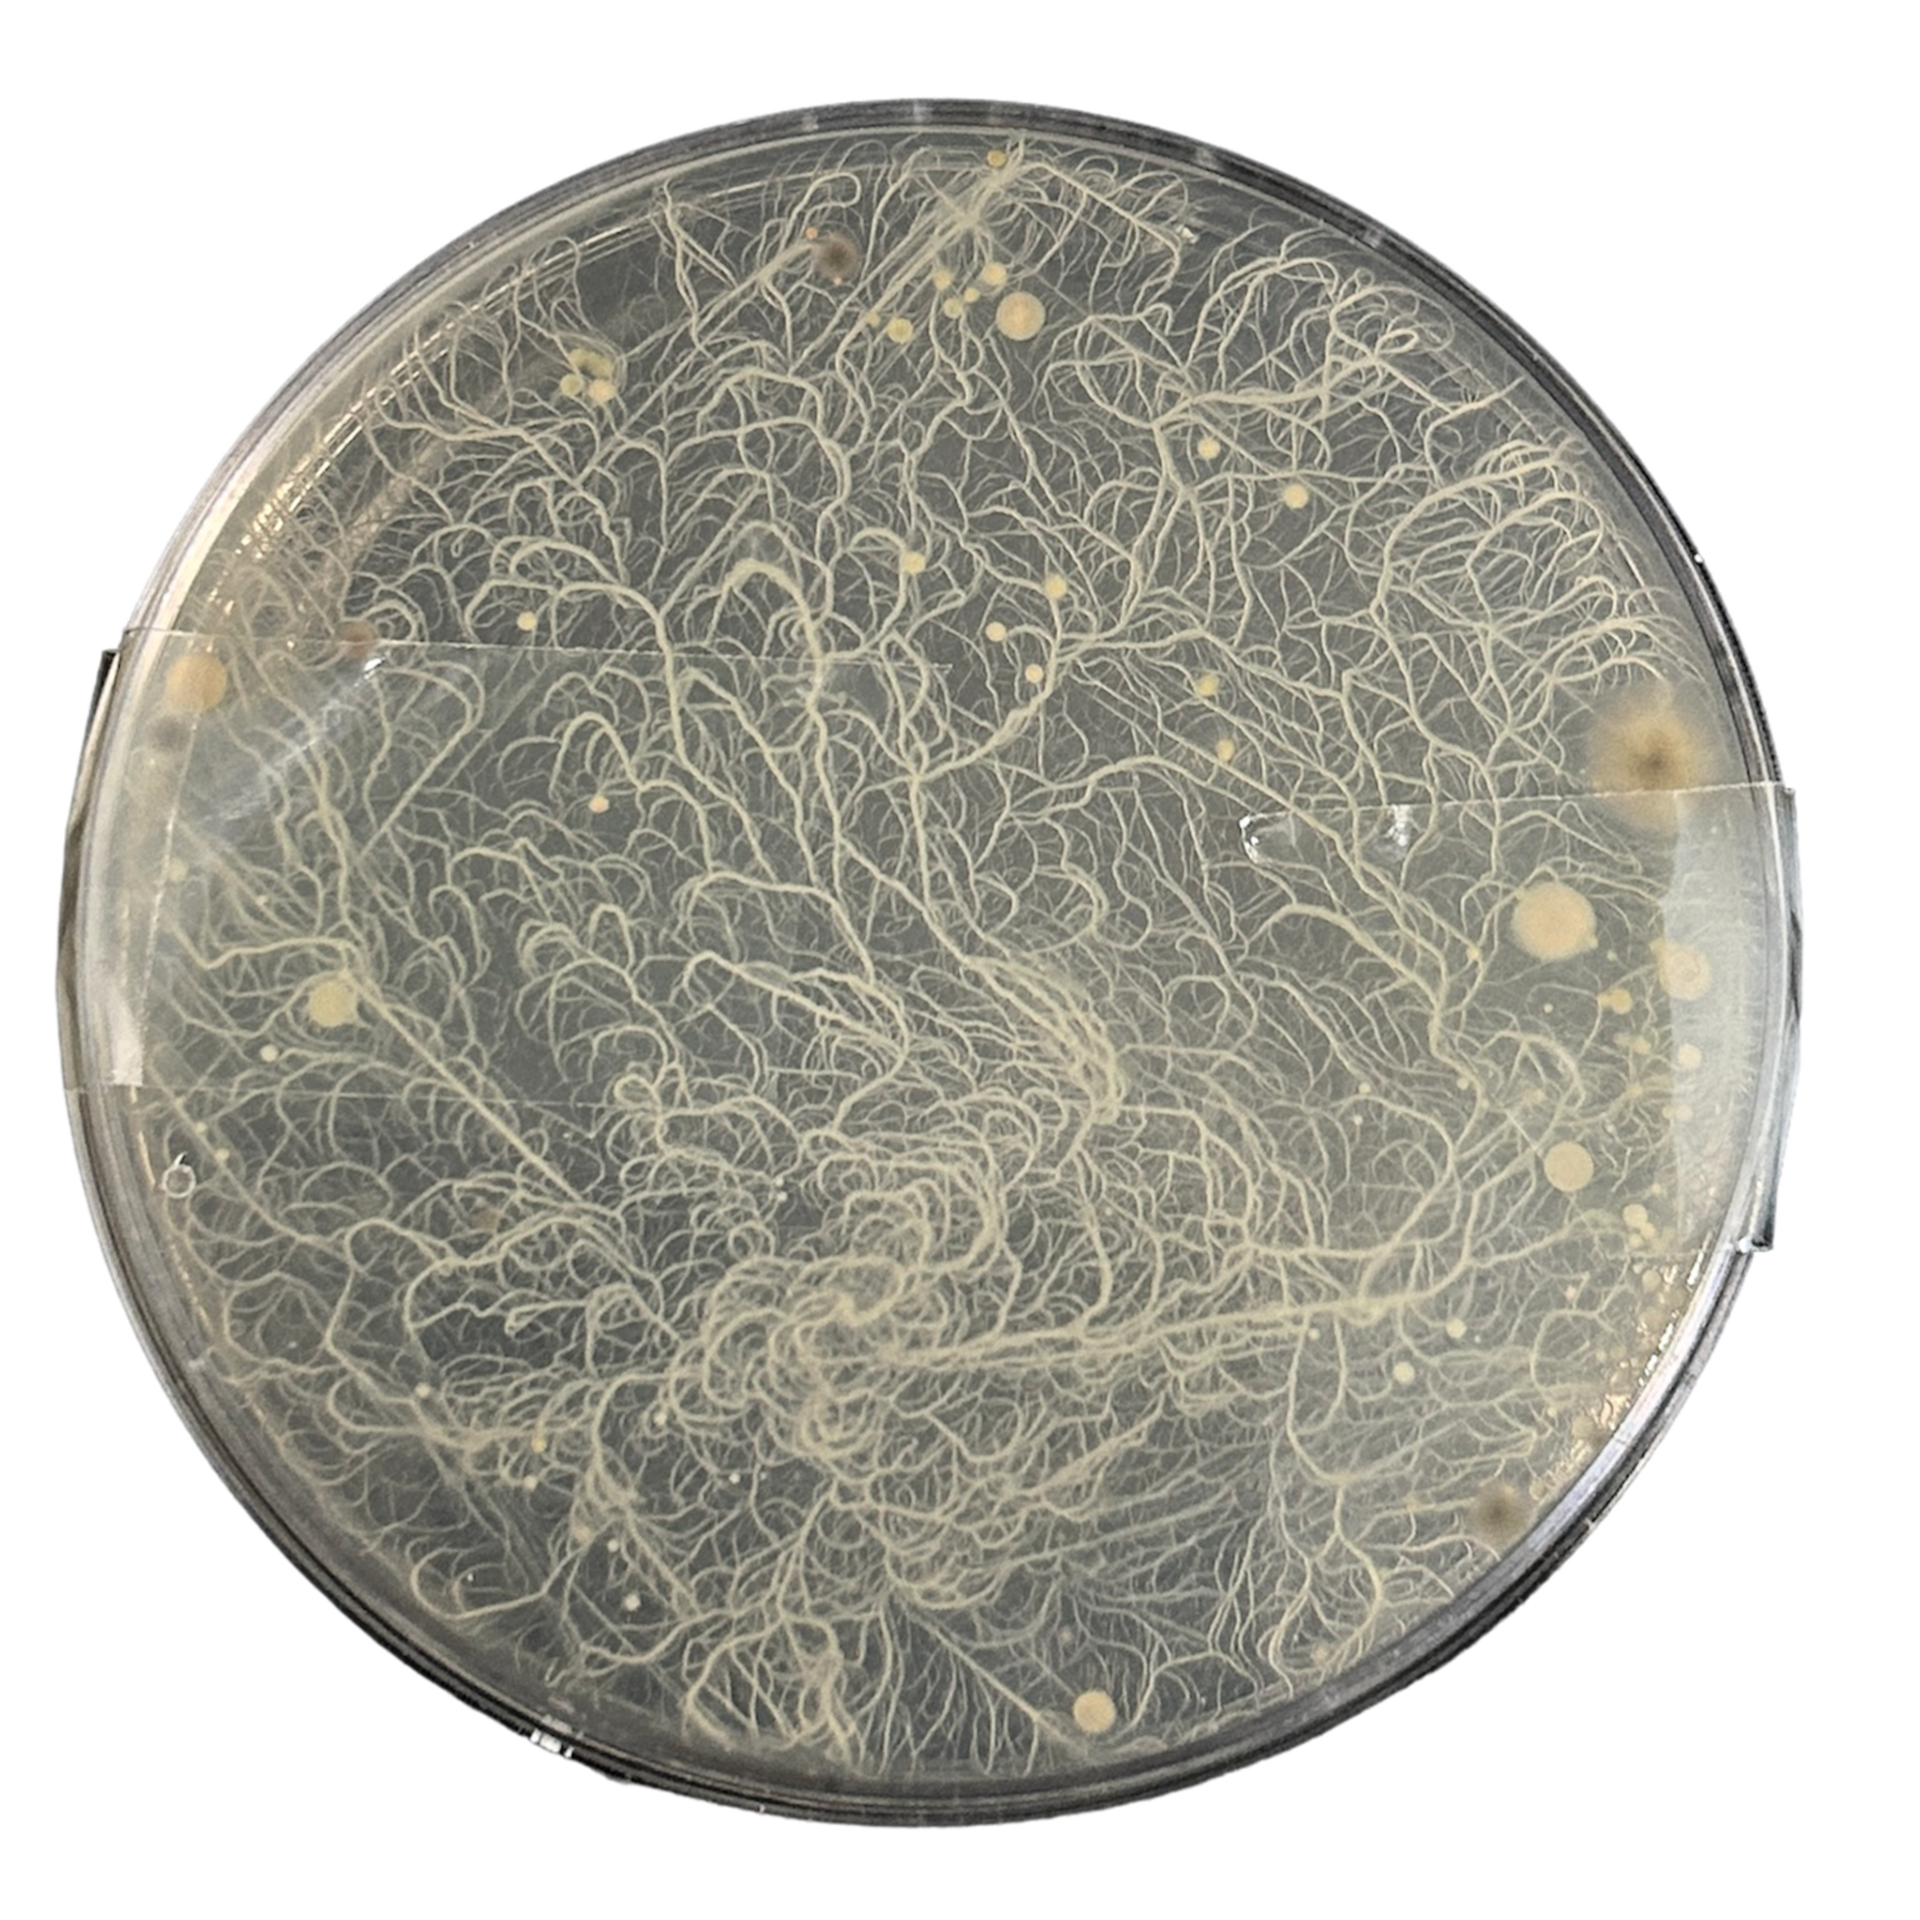
I decided after making my first batch of bacteria stones in Understanding Context 1, that I wanted to experiment with some of the smaller shapes as well. I want to test using multiple of the smaller stones in a design, rather than the 1 or 2 stones that I was currently having to design with, due to their large size.
To make using the resin easier this time round, I marked which moulds I would be using with small orange dots. As resin has a limited working time, this helped me make the pouring process quick and easy.
This particular resin also needs to cure in a room with a temperature above 18°C. To help the resin reach this temperature I placed them in water baths. When the resin is curing it has a slight exothermic reaction, and so by pre-heating the liquid, it helps keep the temperature above 18°C.
Wax Casts


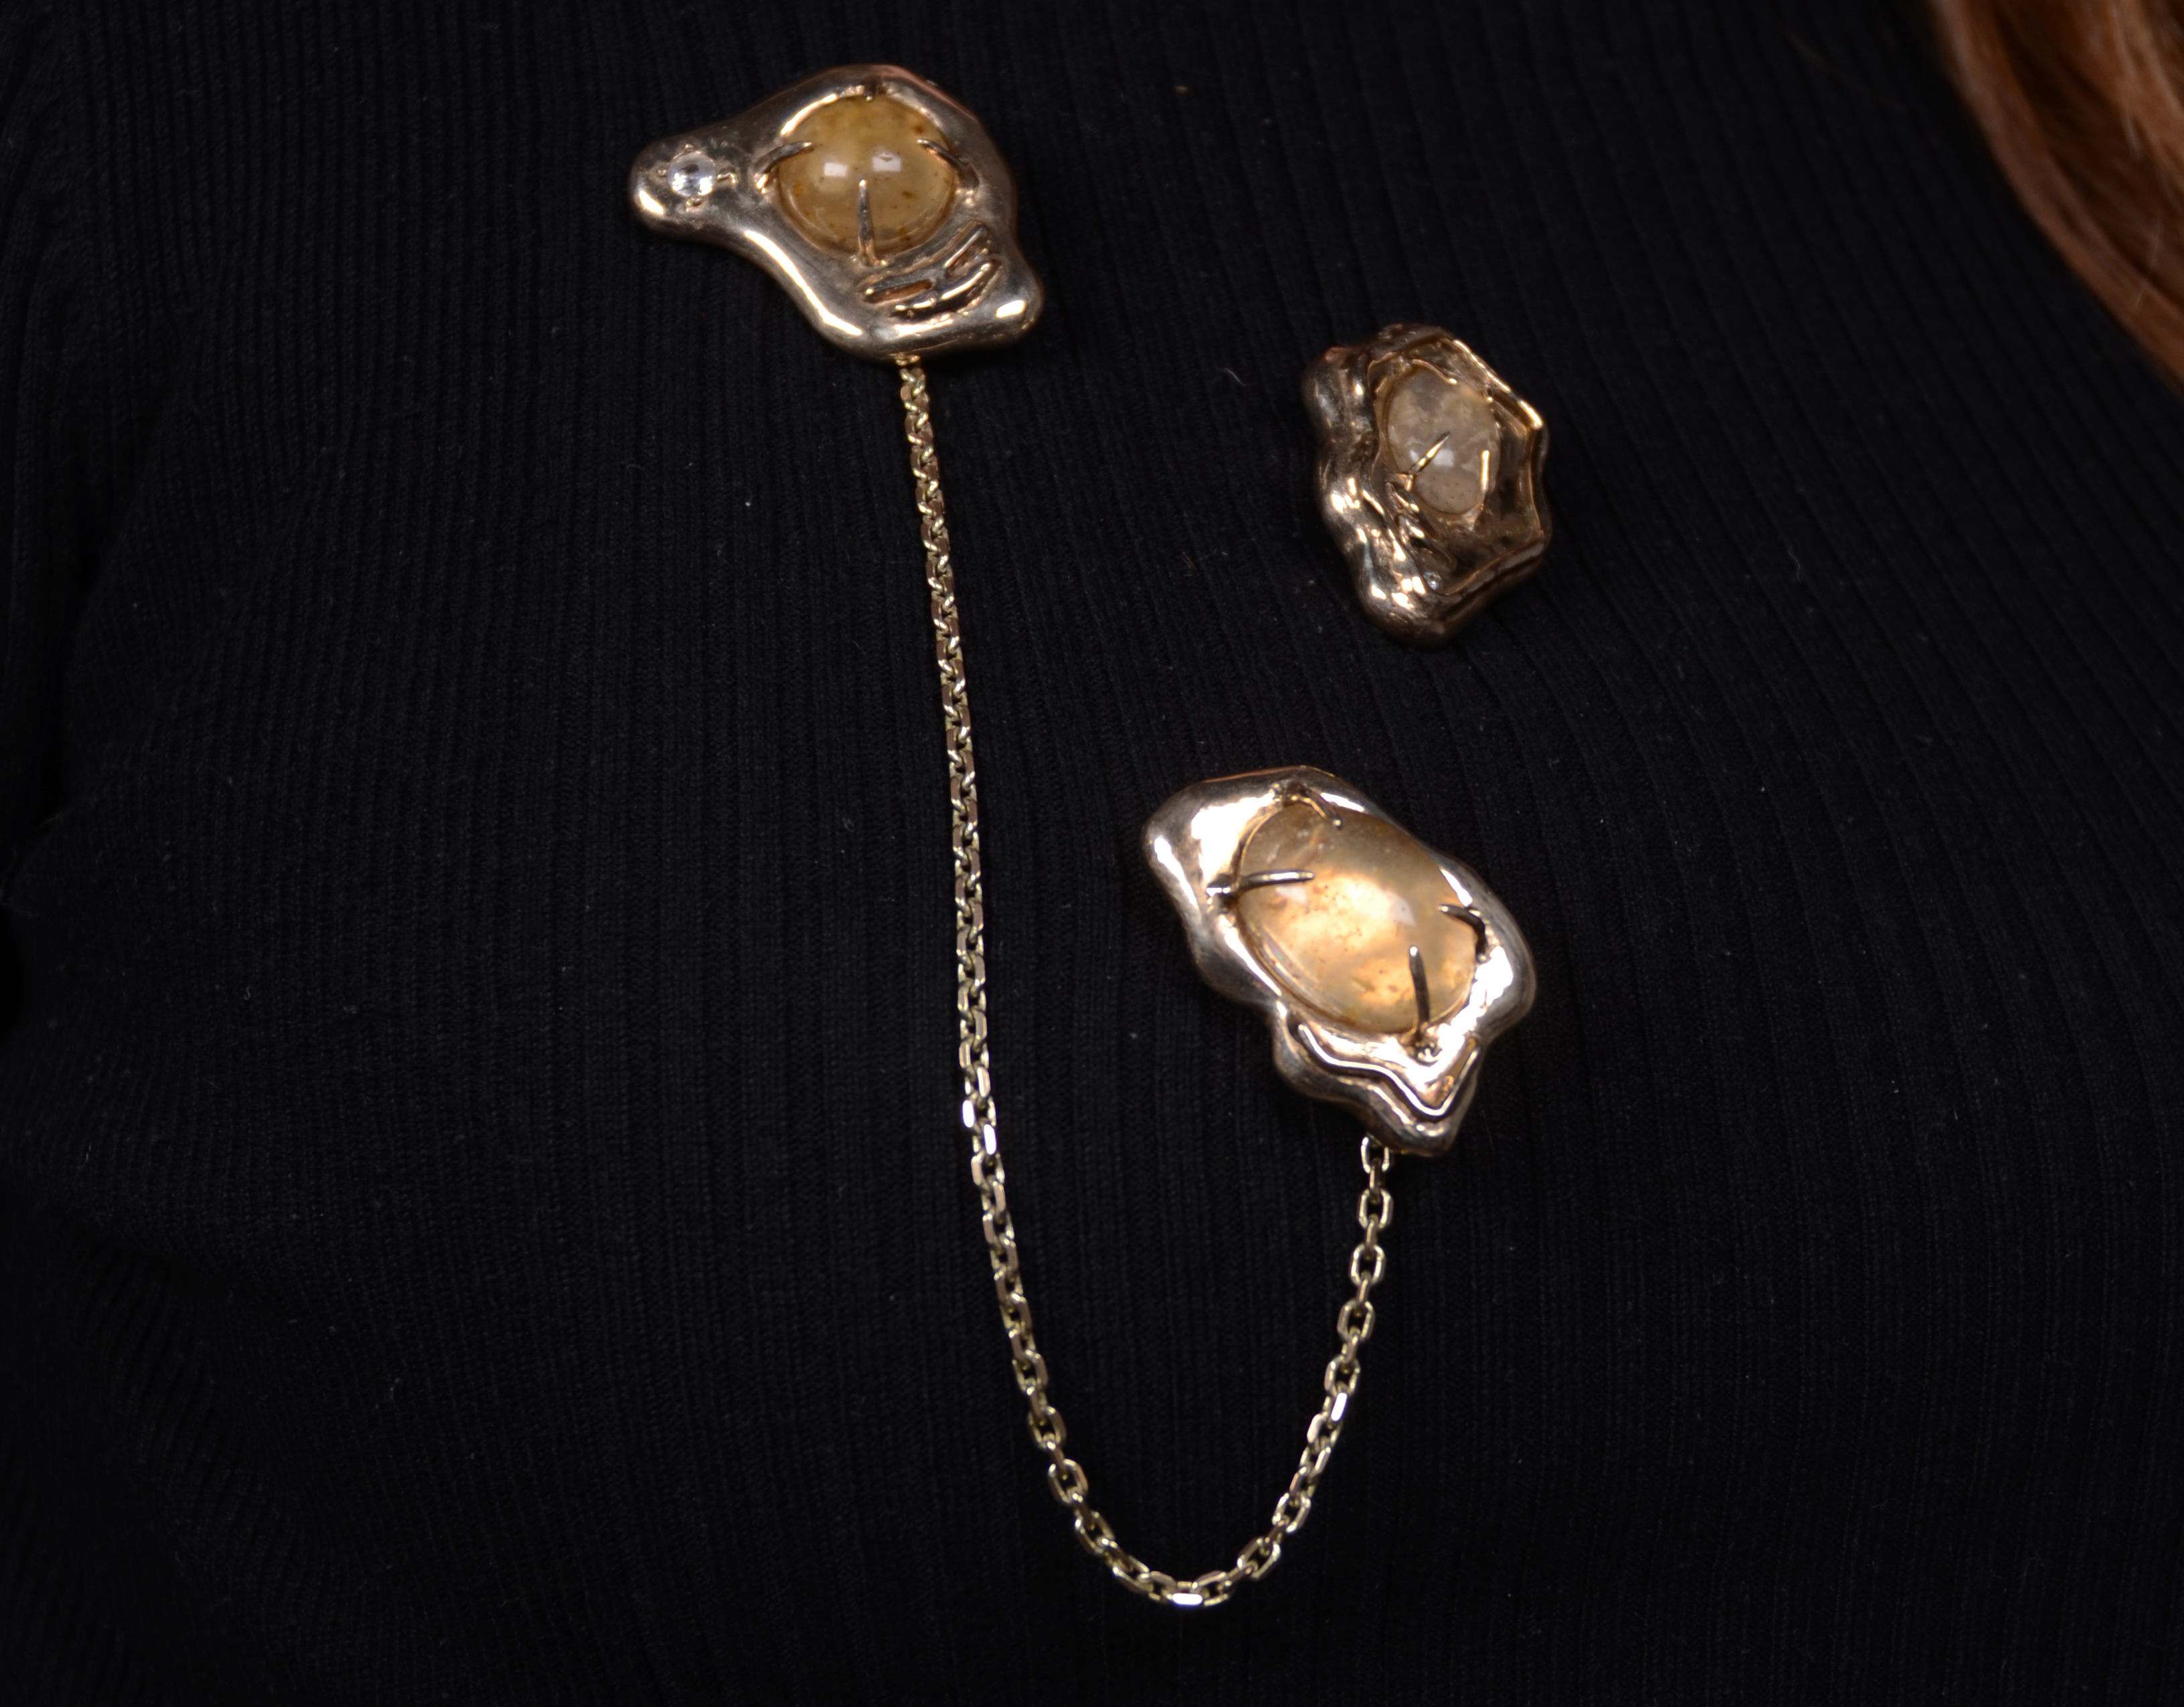
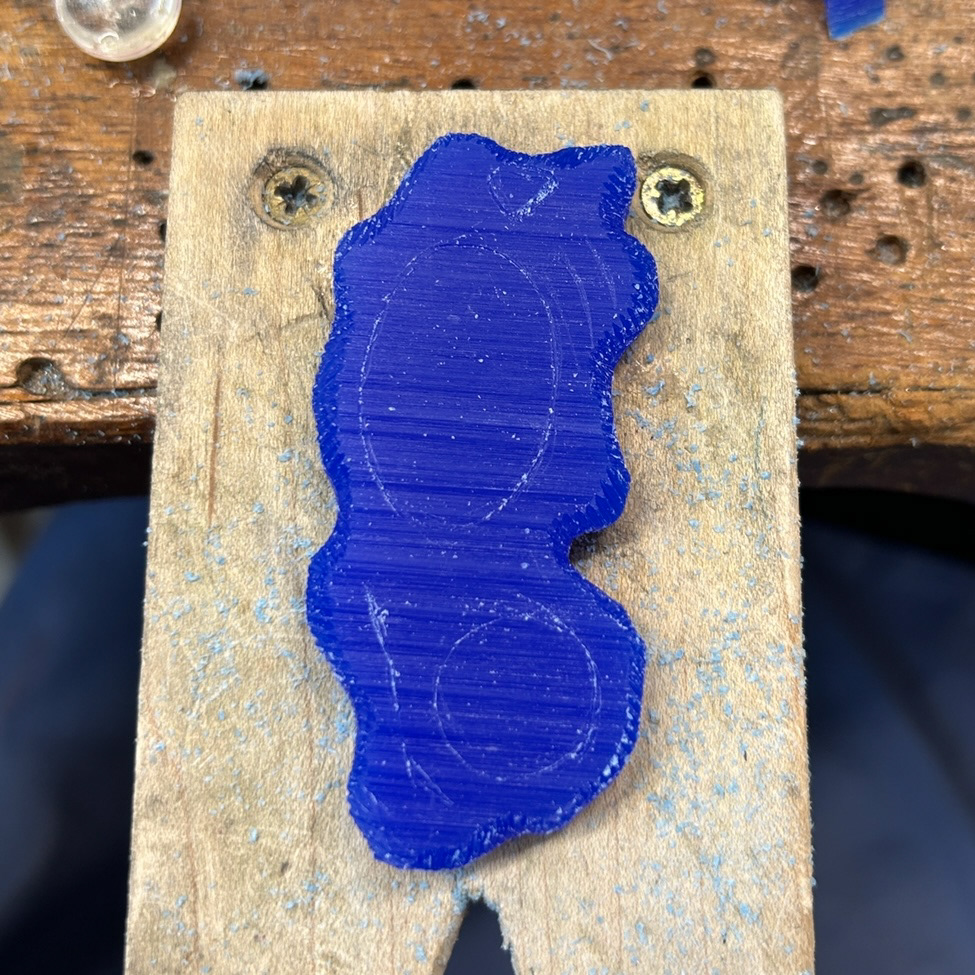
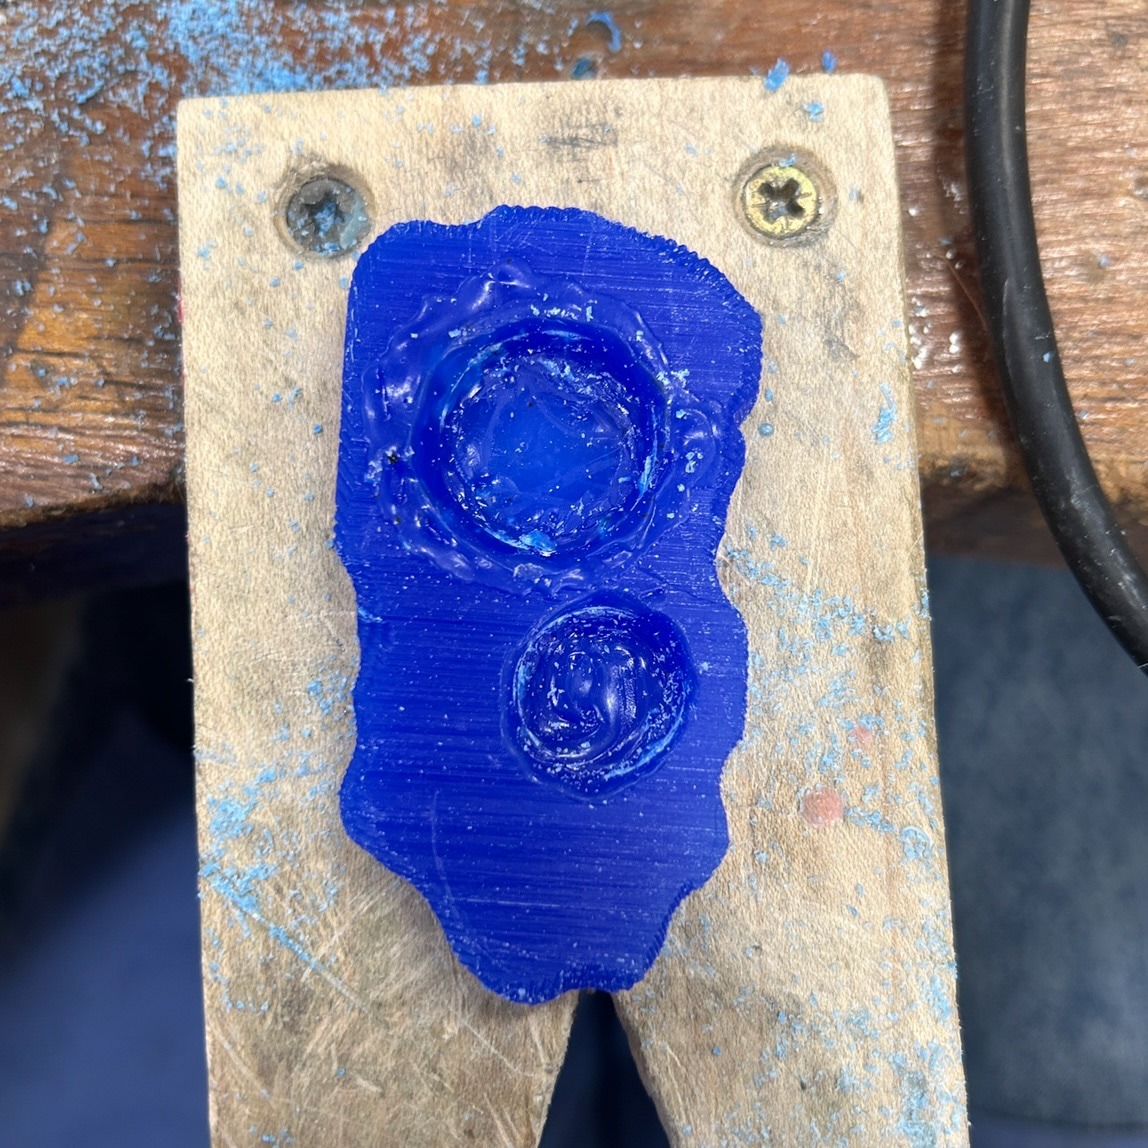
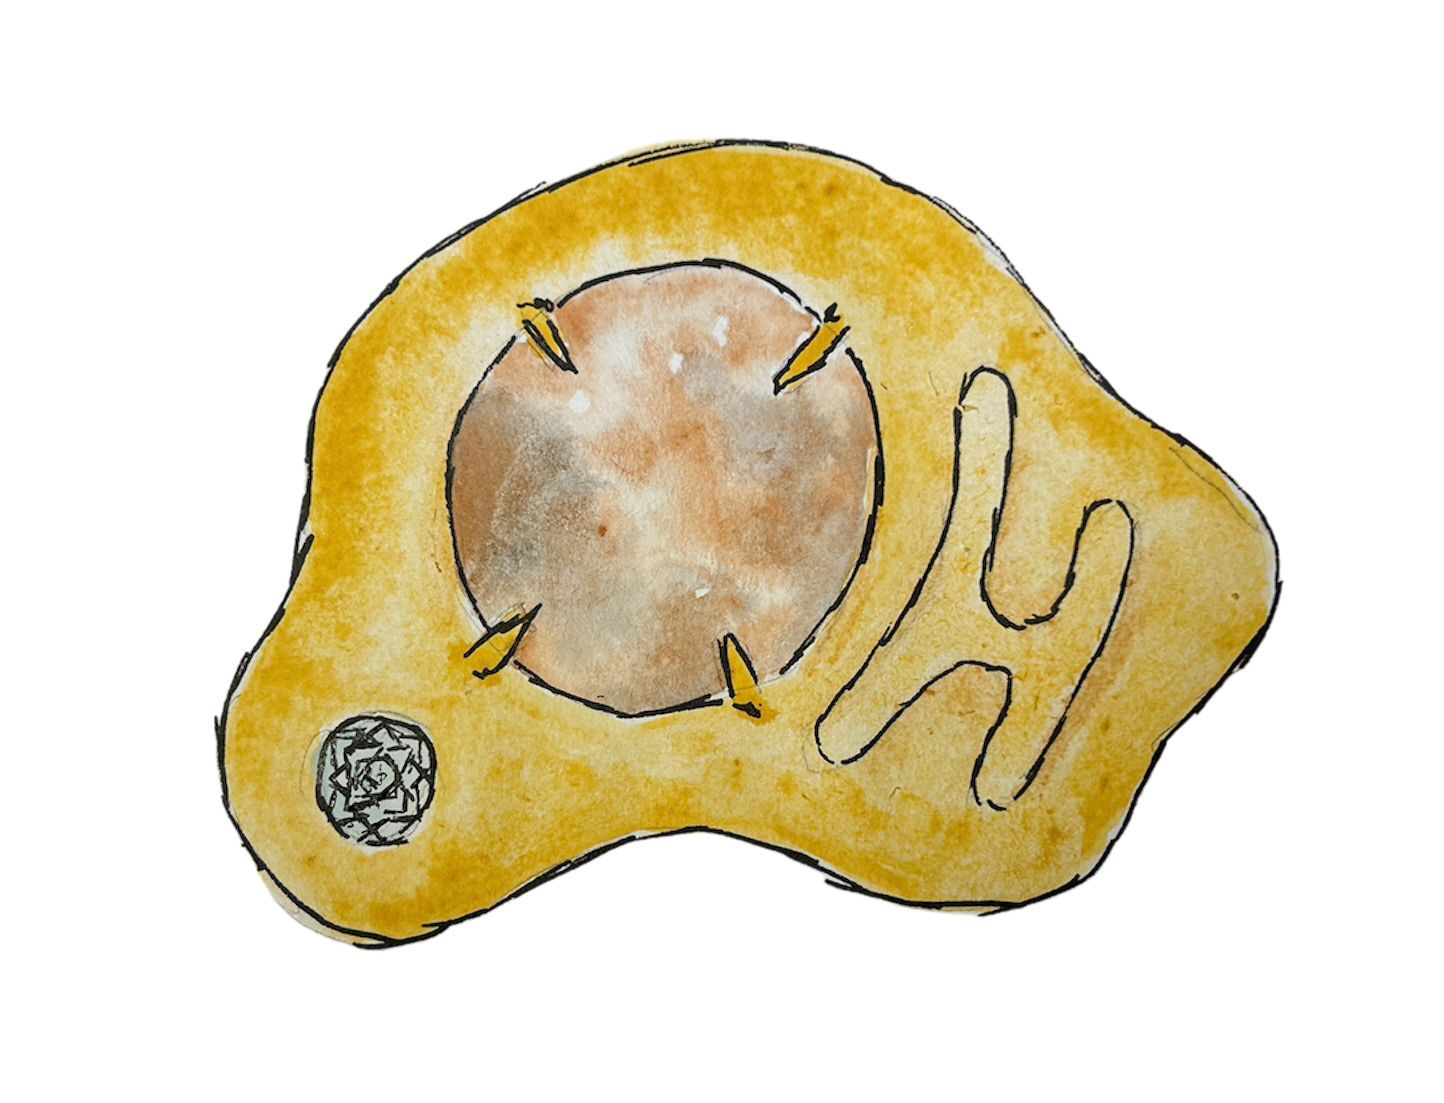
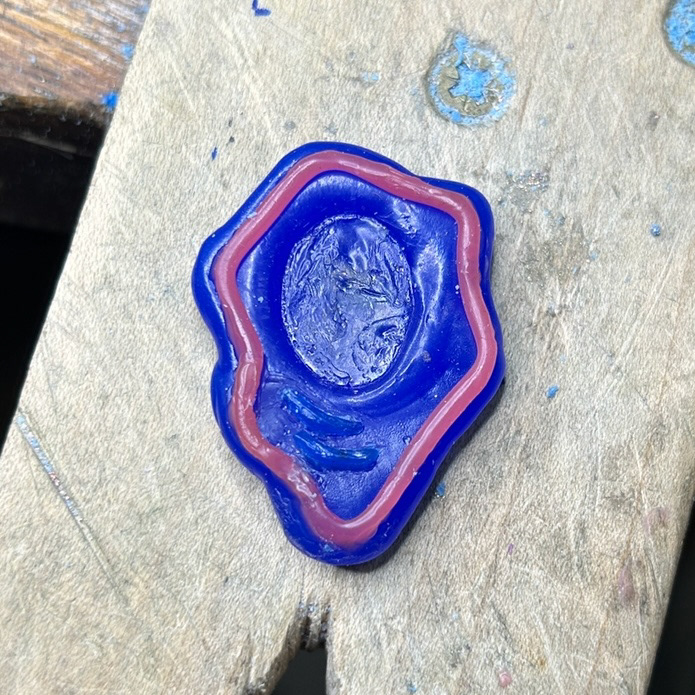
For my first wax cast sample, I created a design using 2 of the bacteria stones that I had previously made.
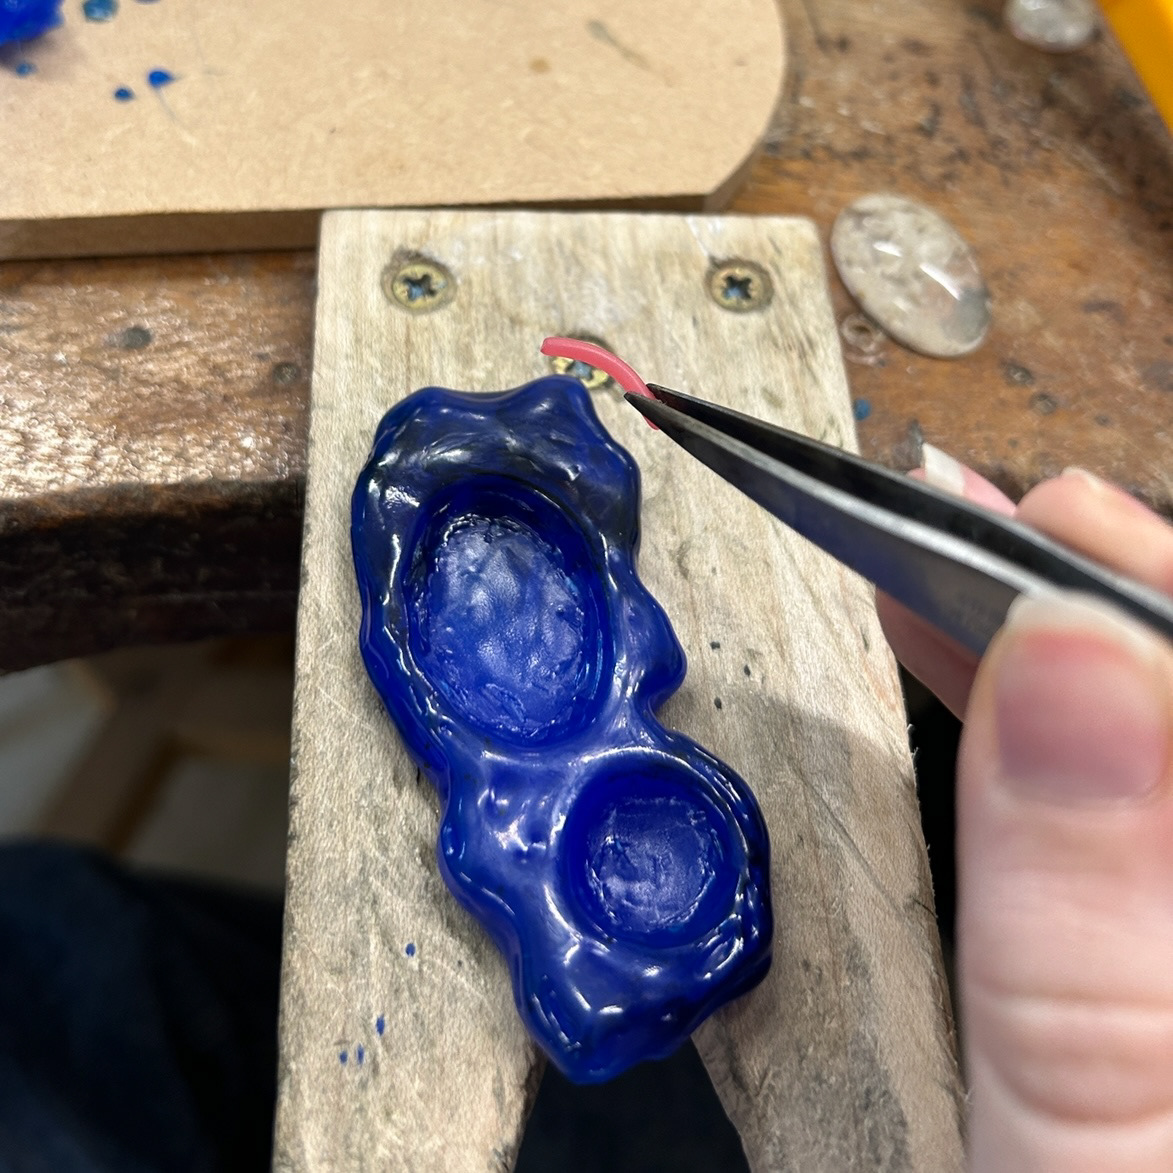
Firstly, I used wax blades to cut out the shape of my design (inspired by the shapes I saw in the bacteria that I grew), and then built up a wax base using melted wax and a soldering iron. This would be the base that the stones would sit on, so I tried to make it as flat as possible. I regularly tested the fit of the stones and would carve and add wax accordingly.
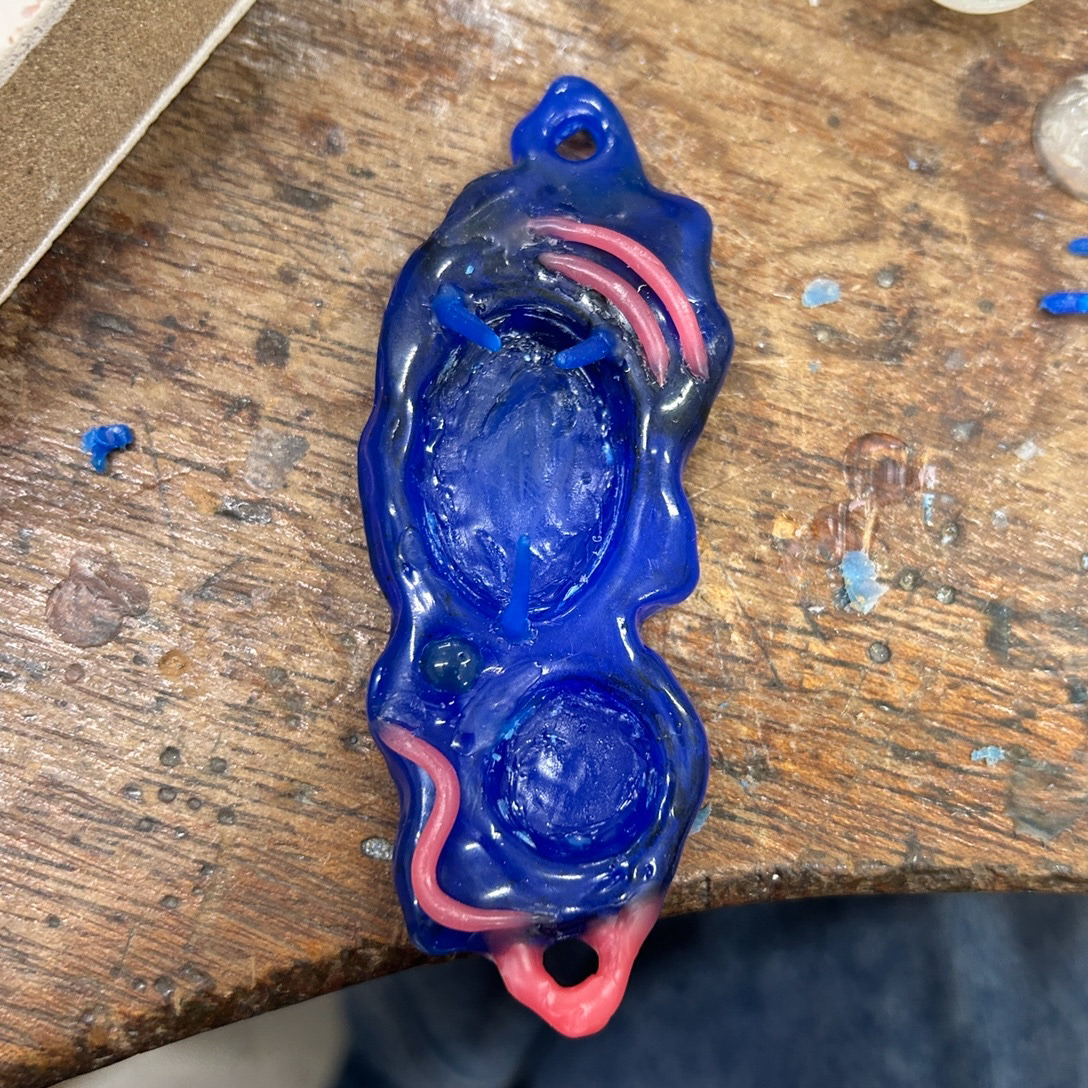
To make sure that the stones would be kept in place, I used wax rods to create prongs. These would then be folded over the stones, while also using tension from the bezel of the design, to hold the stones in place.


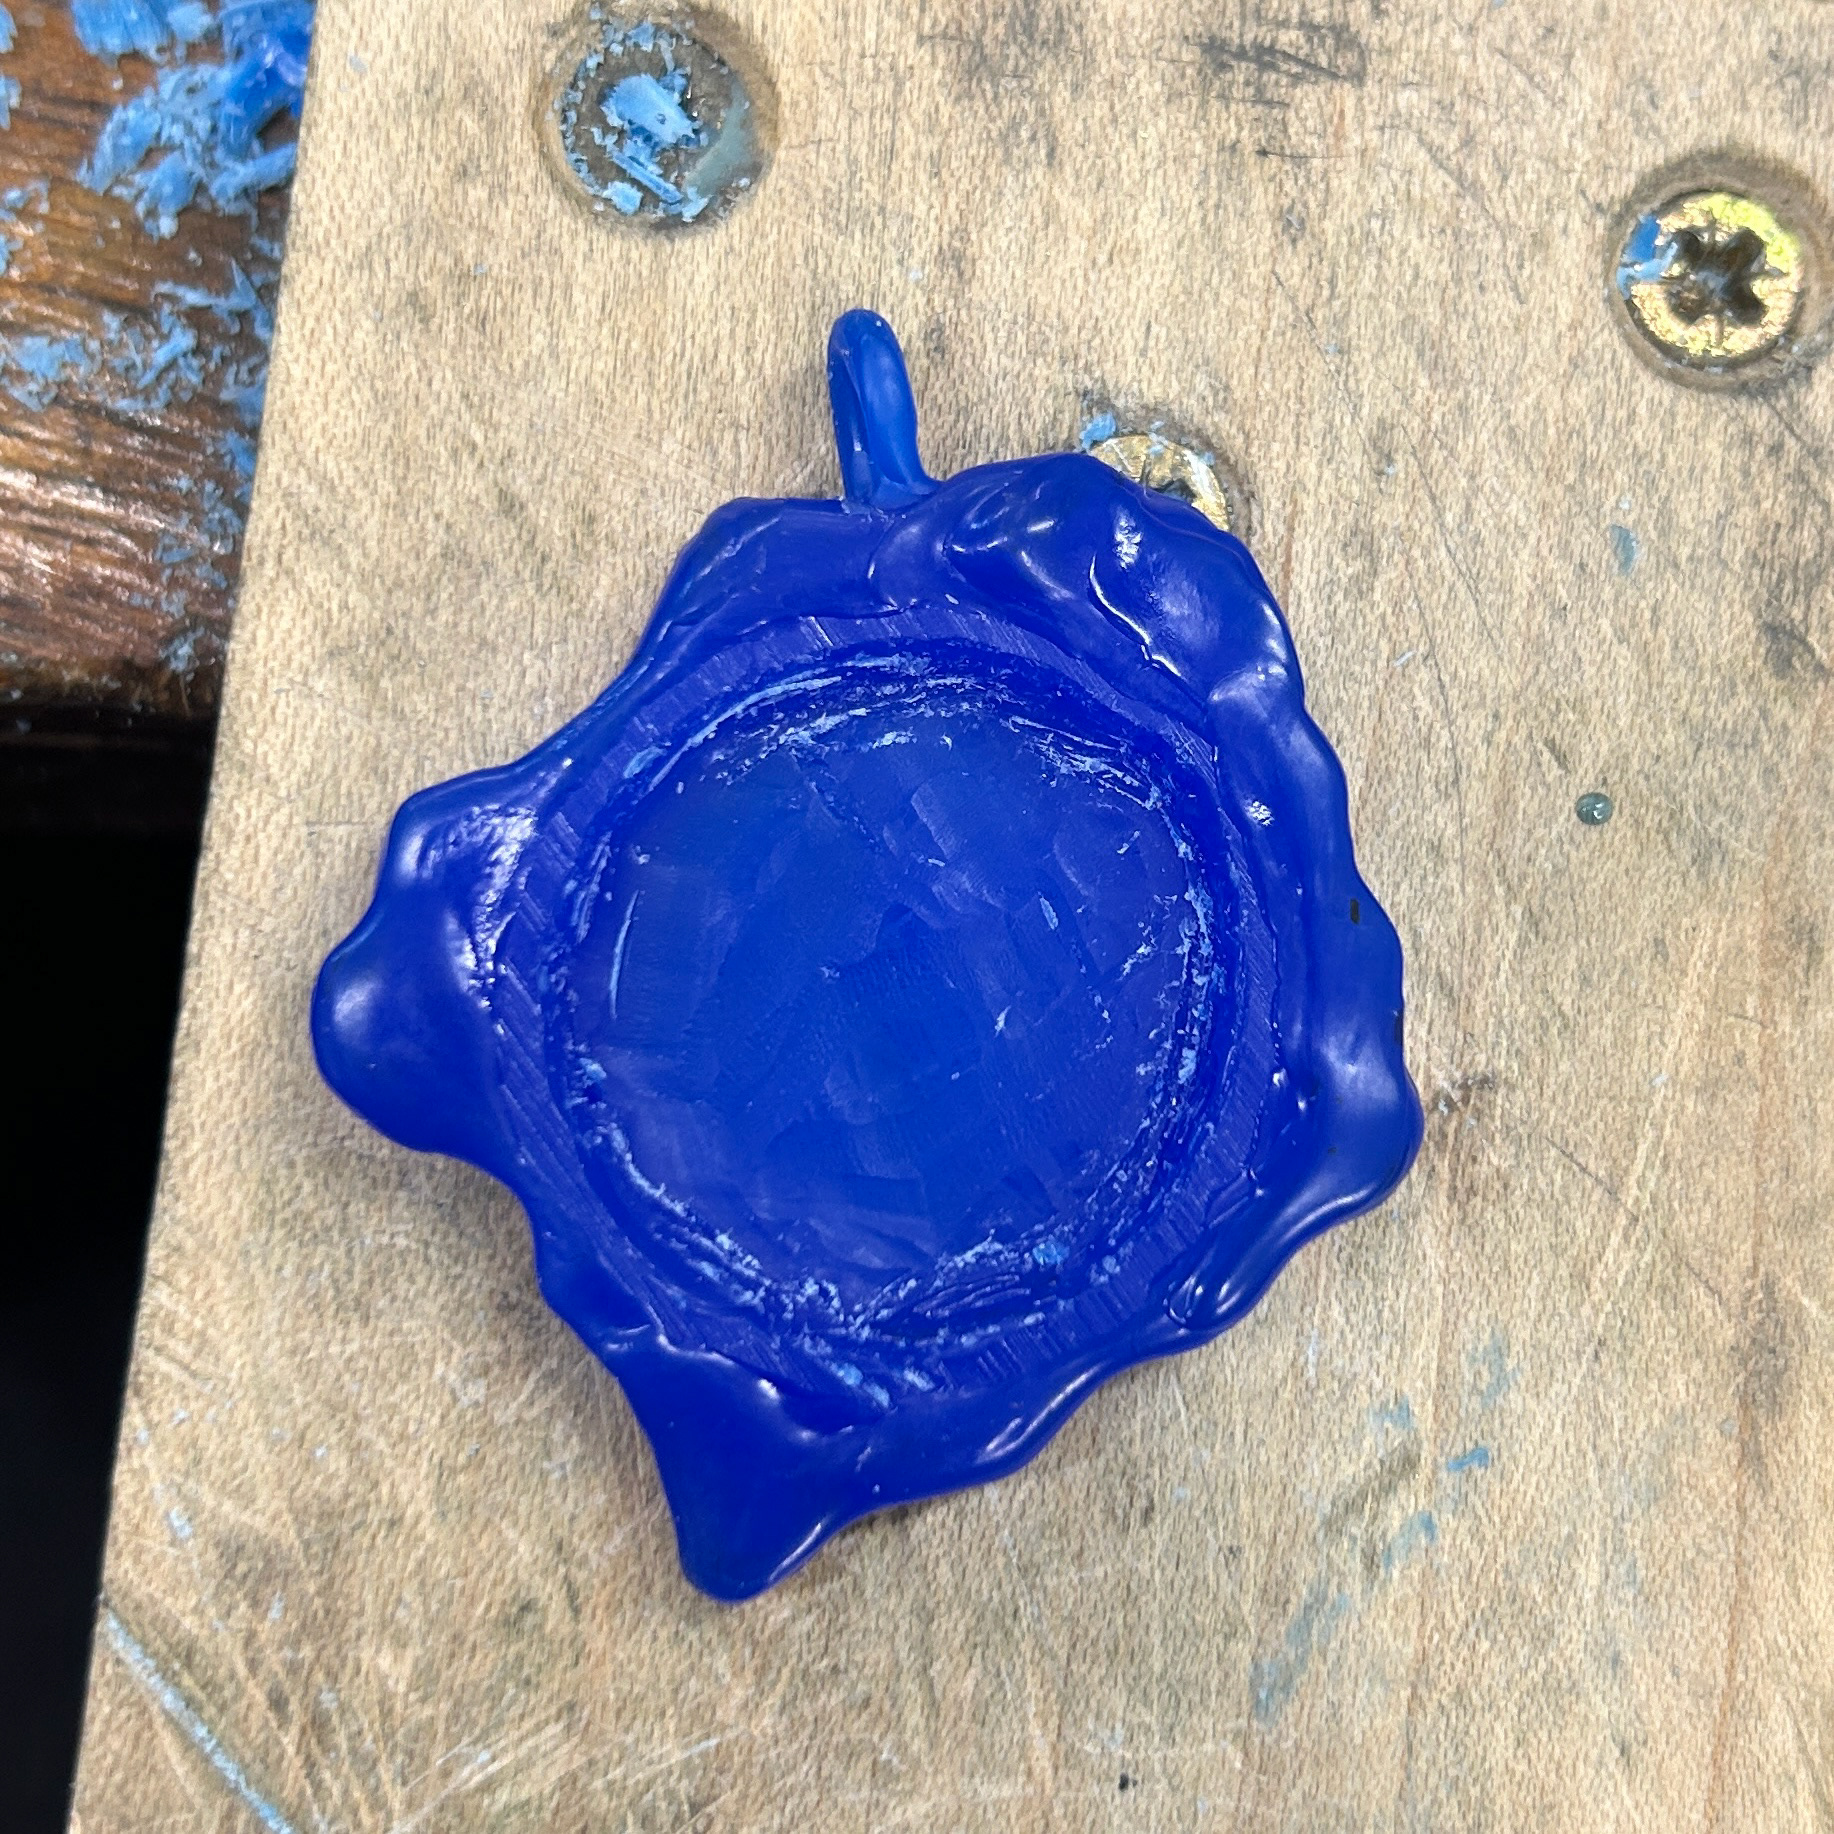
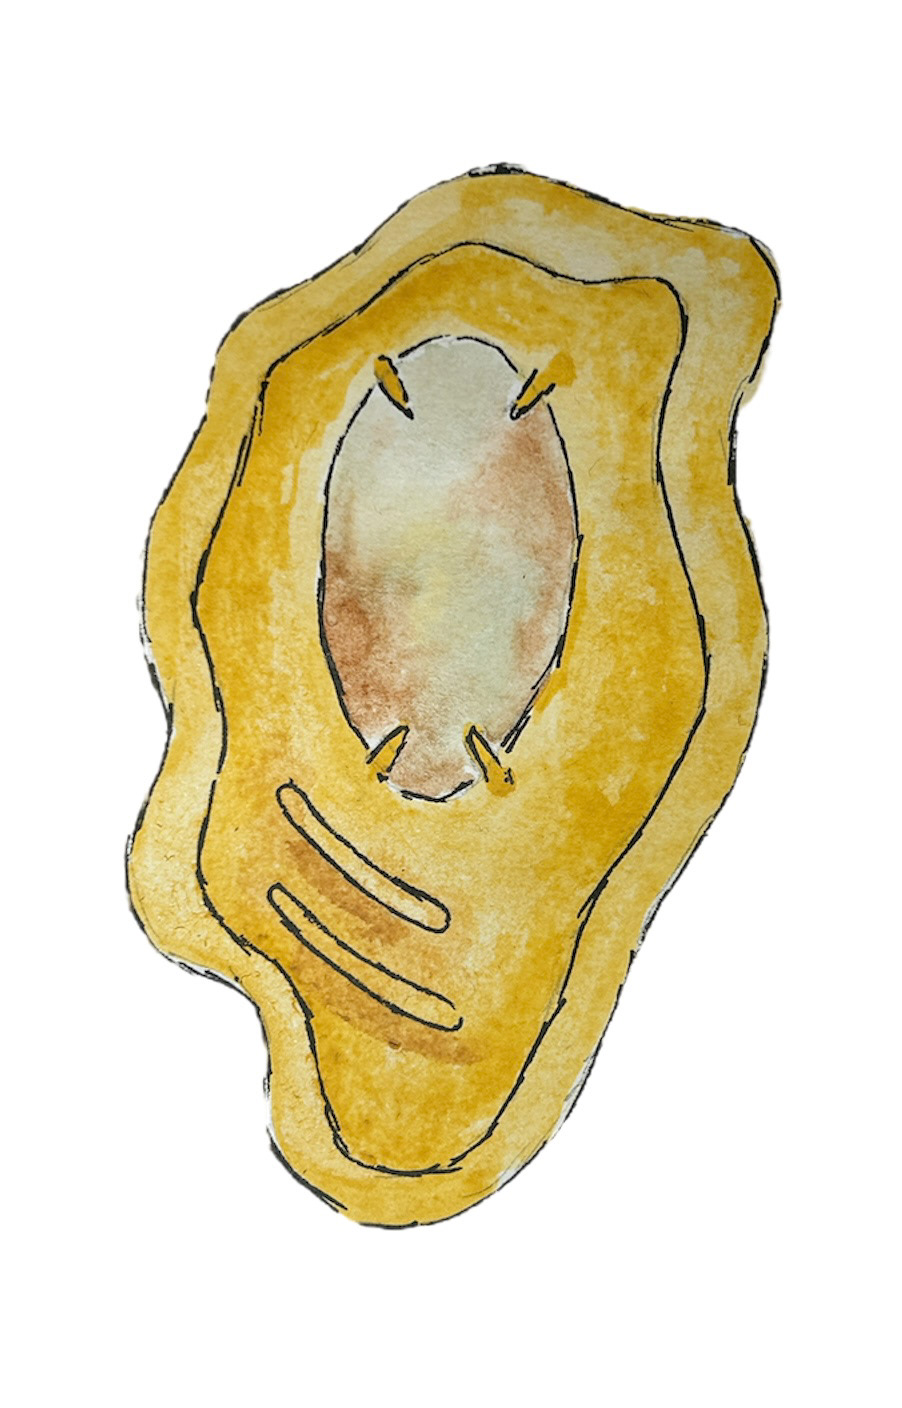
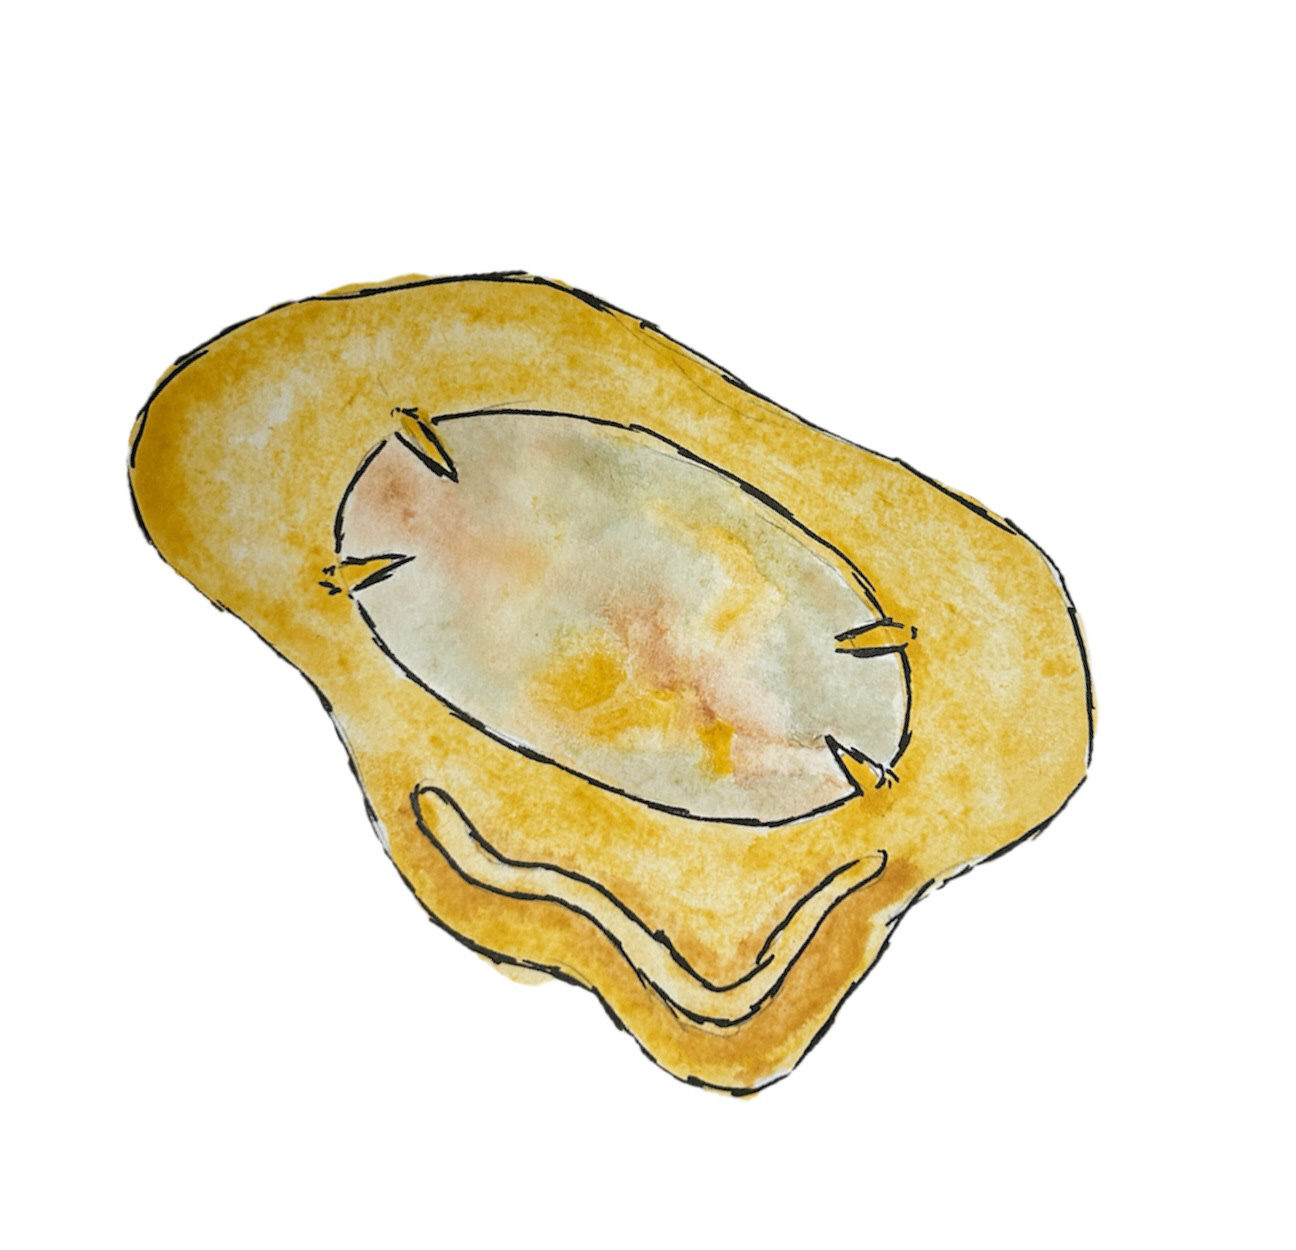
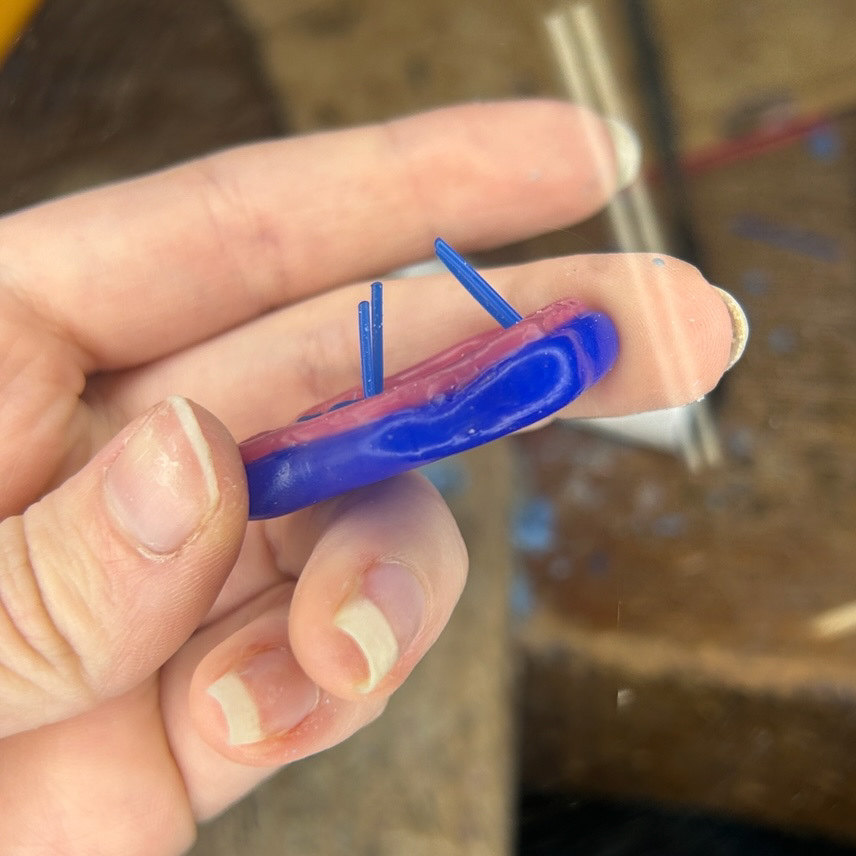
For another sample, I decided to create a wax carving with a built-in base. I did this so that the bacteria stone was on a smoother, more level surface compared to the base on the previous cast, that I built up myself. I used the same steps as before, with the cut 2 file and soldering iron to create the molten texture.

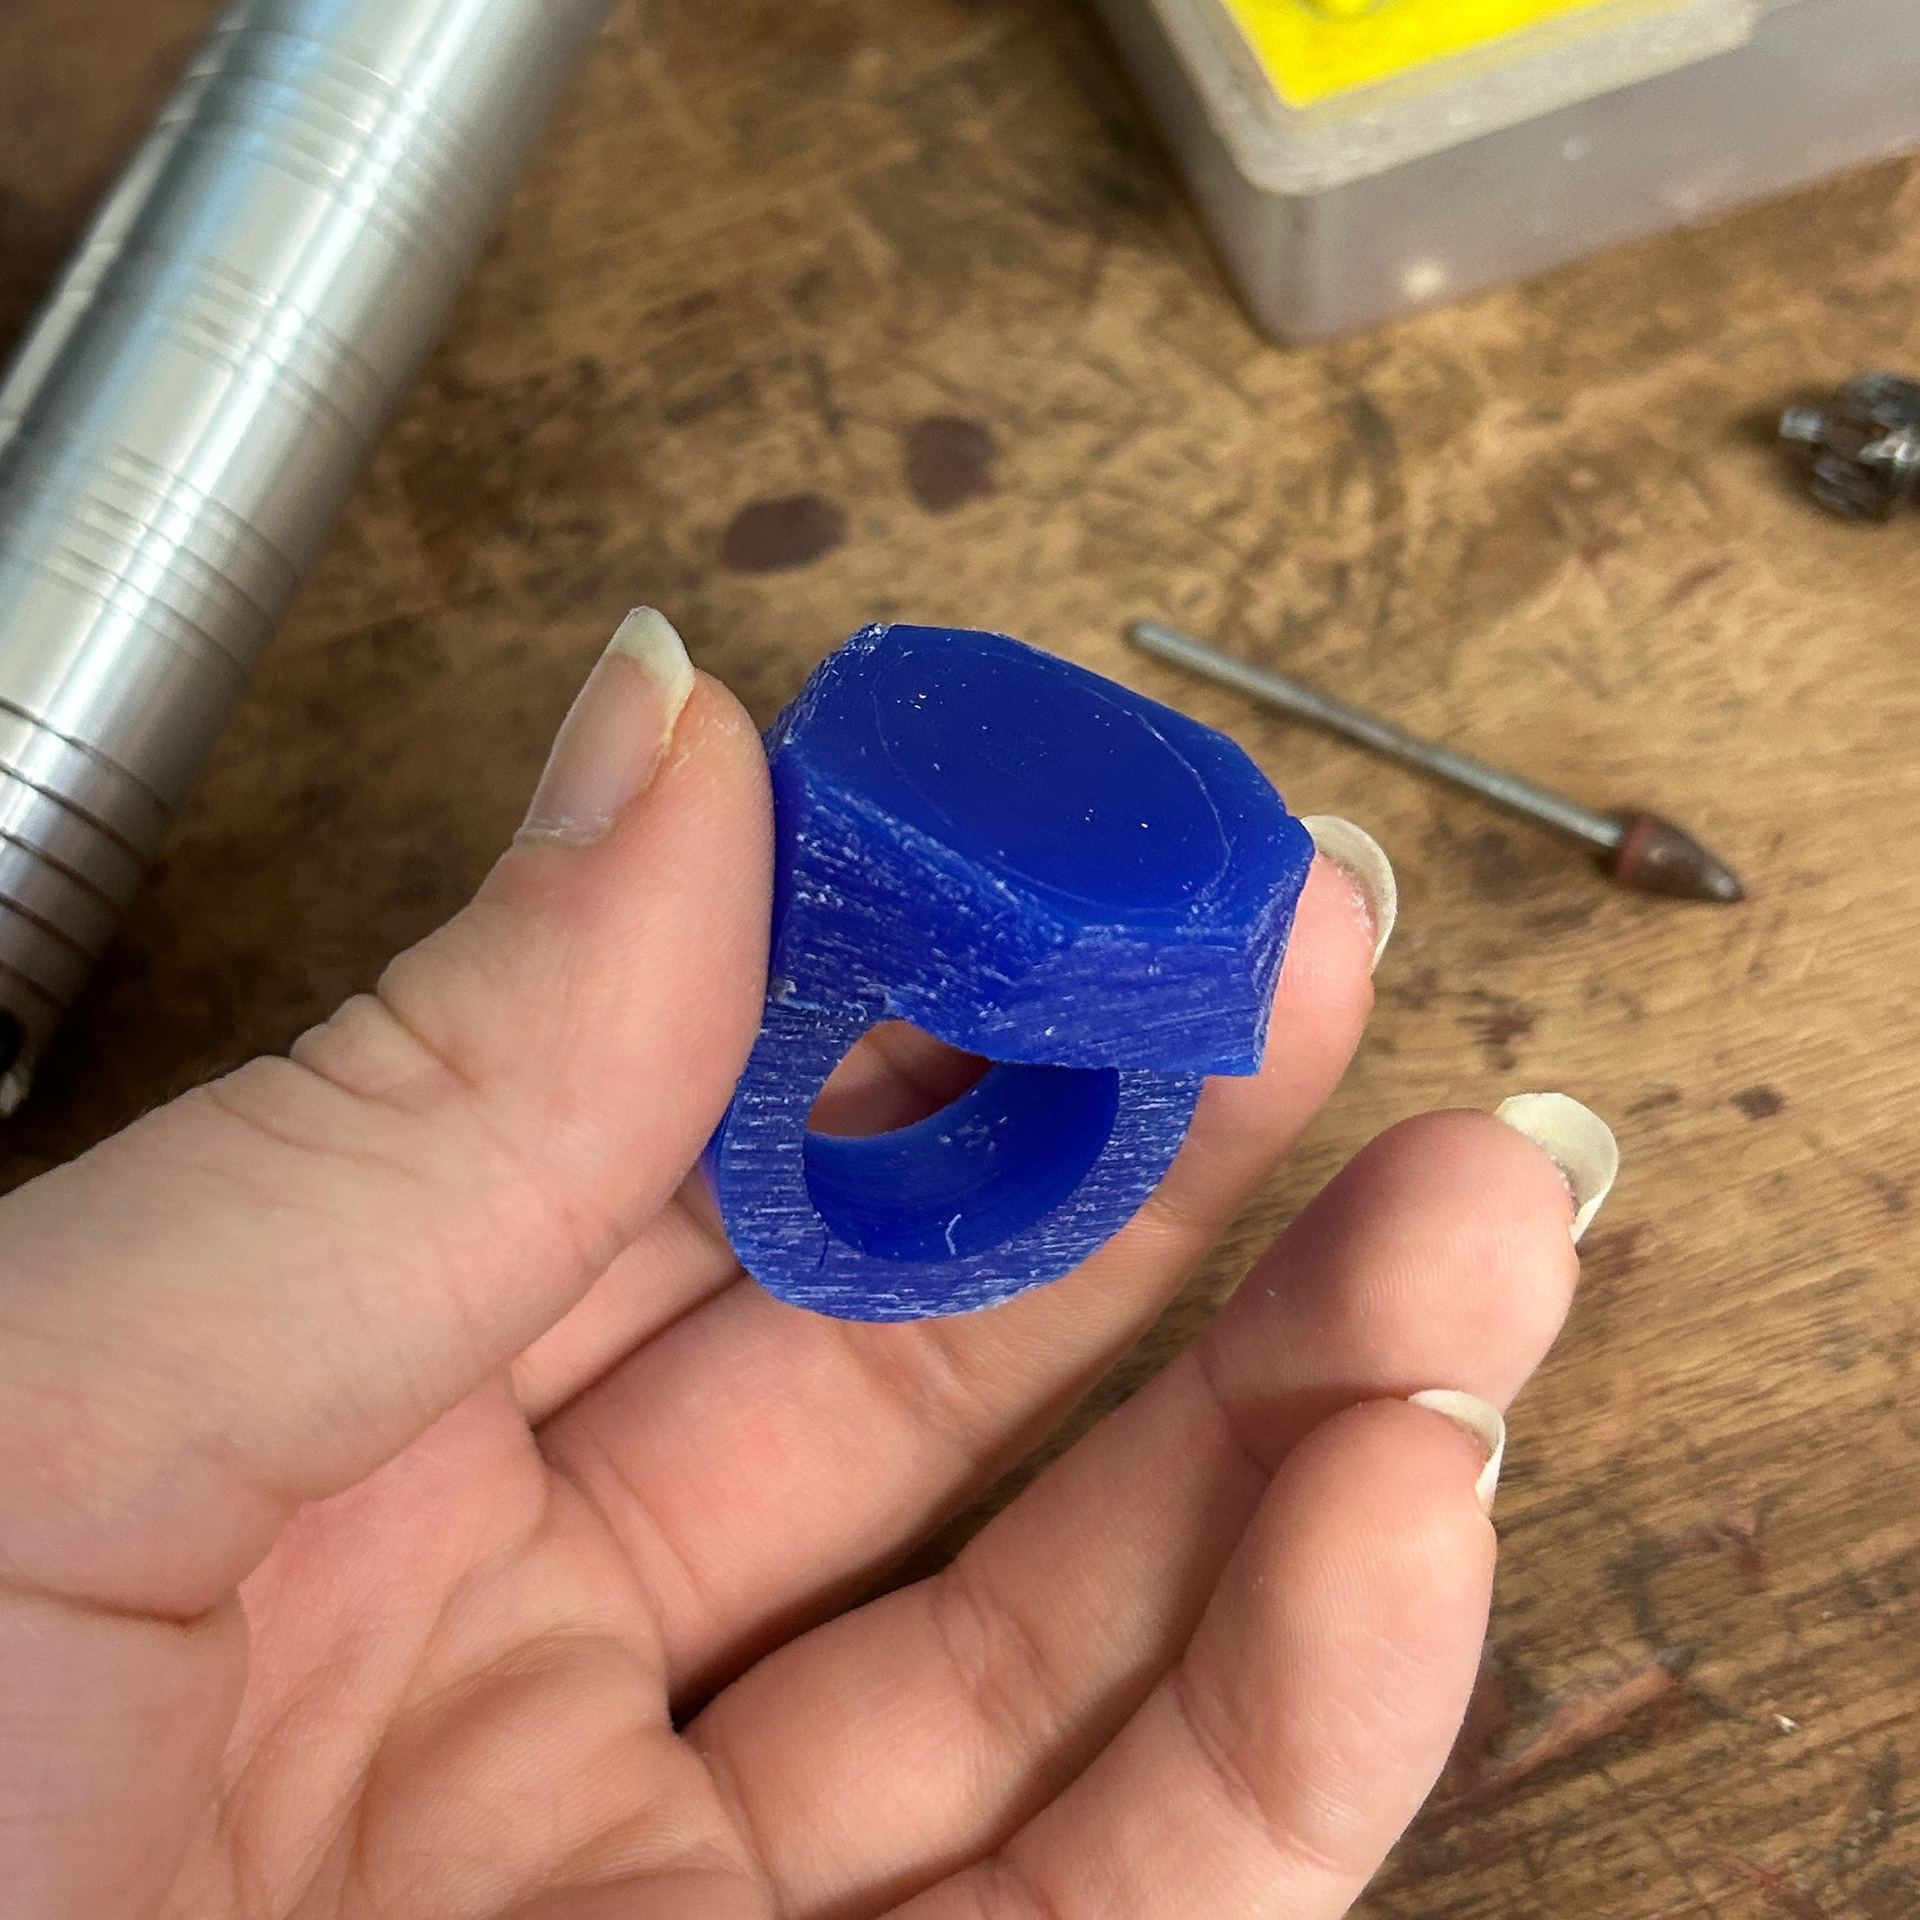


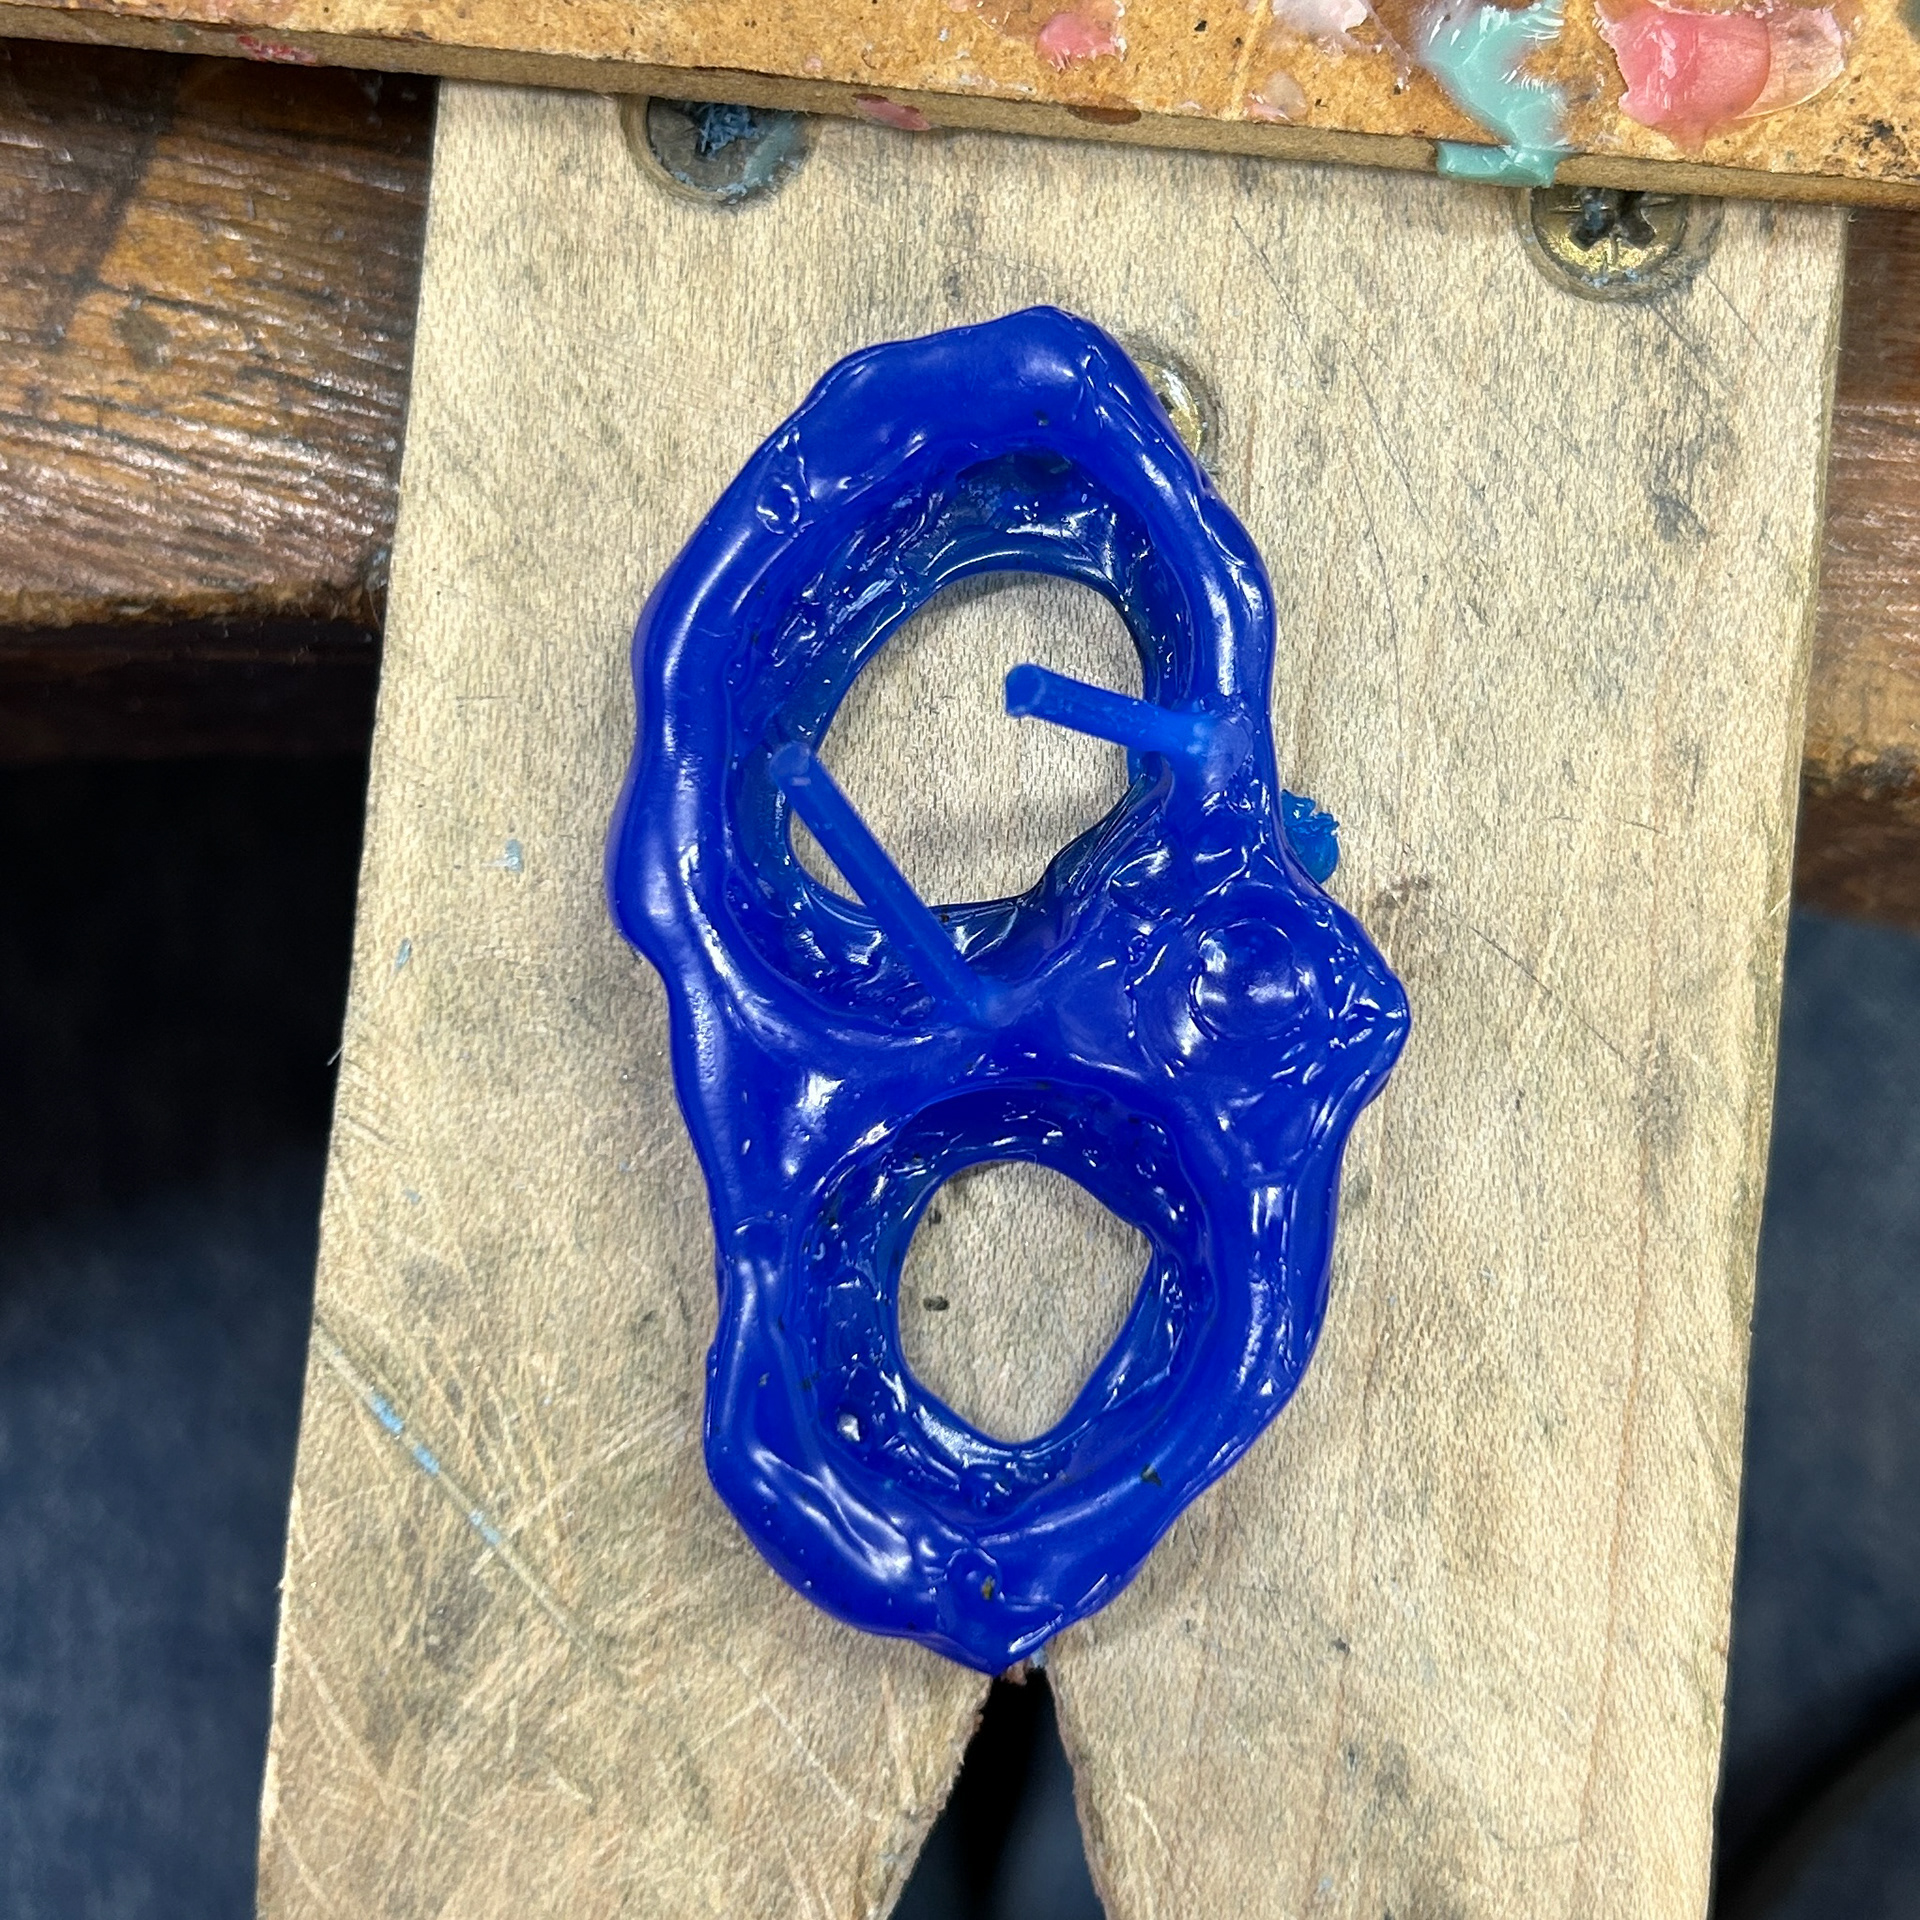
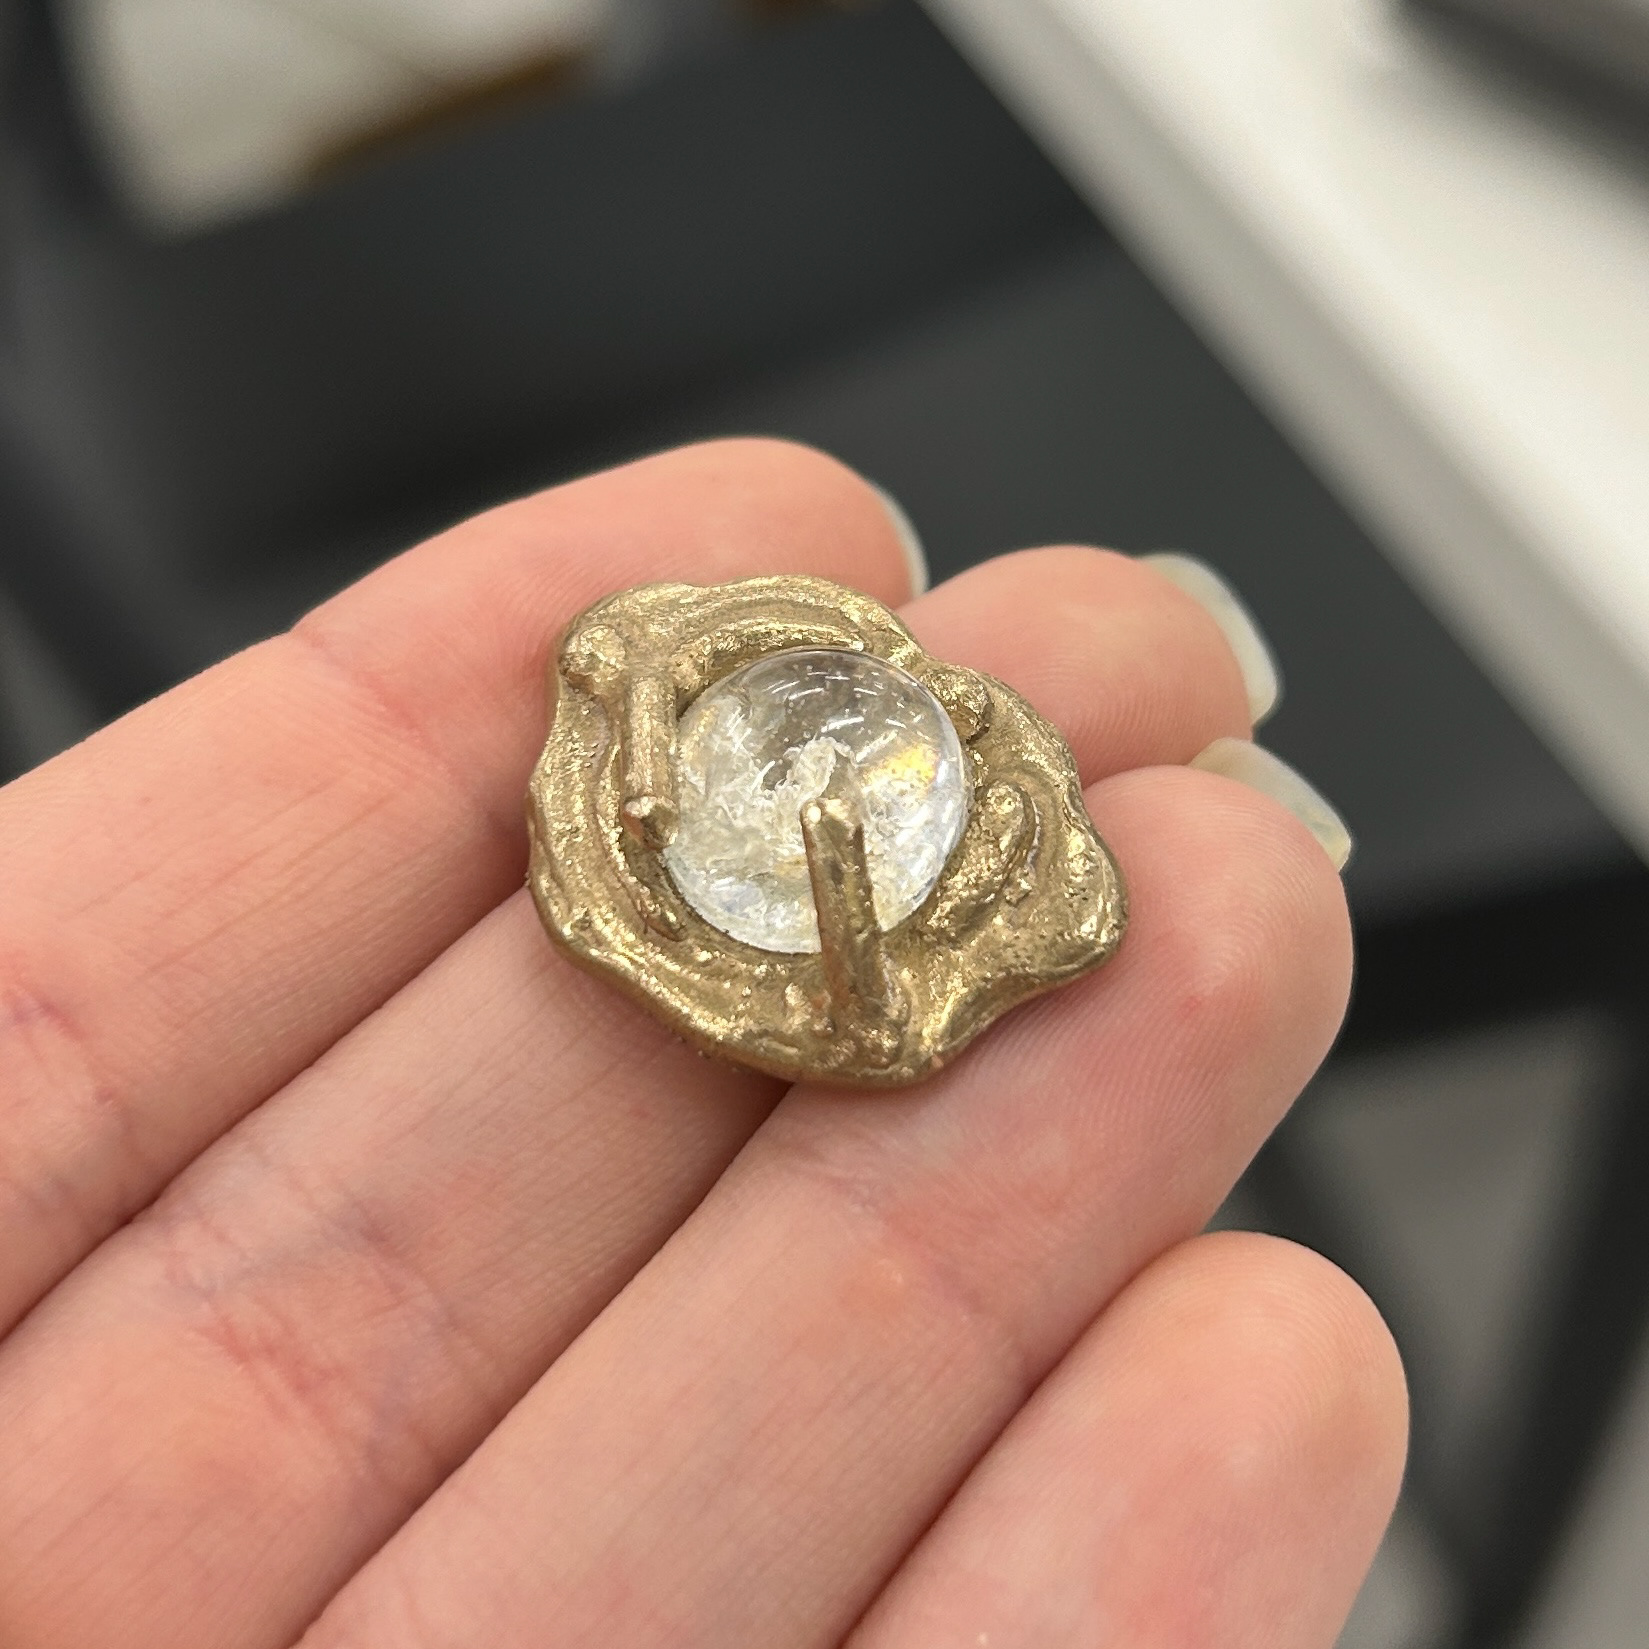
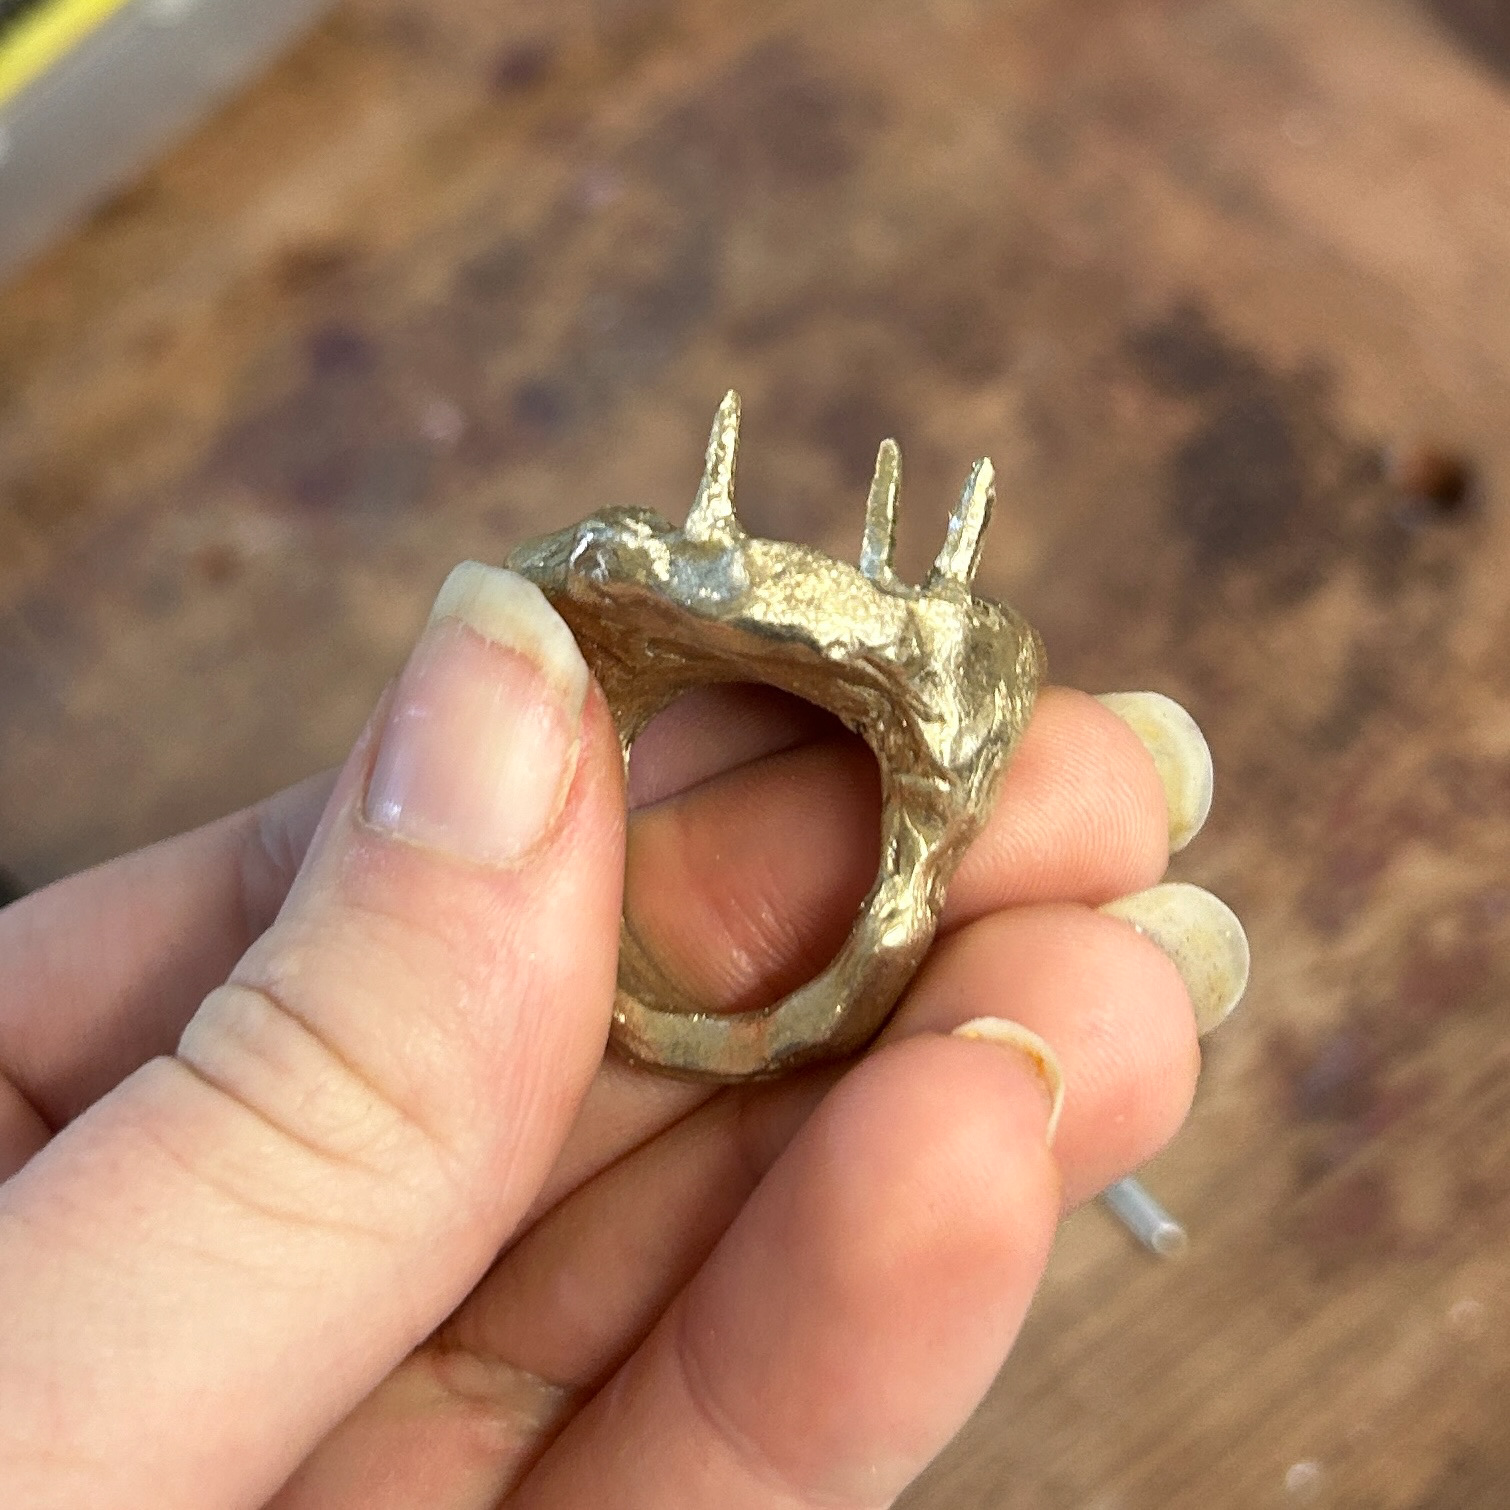
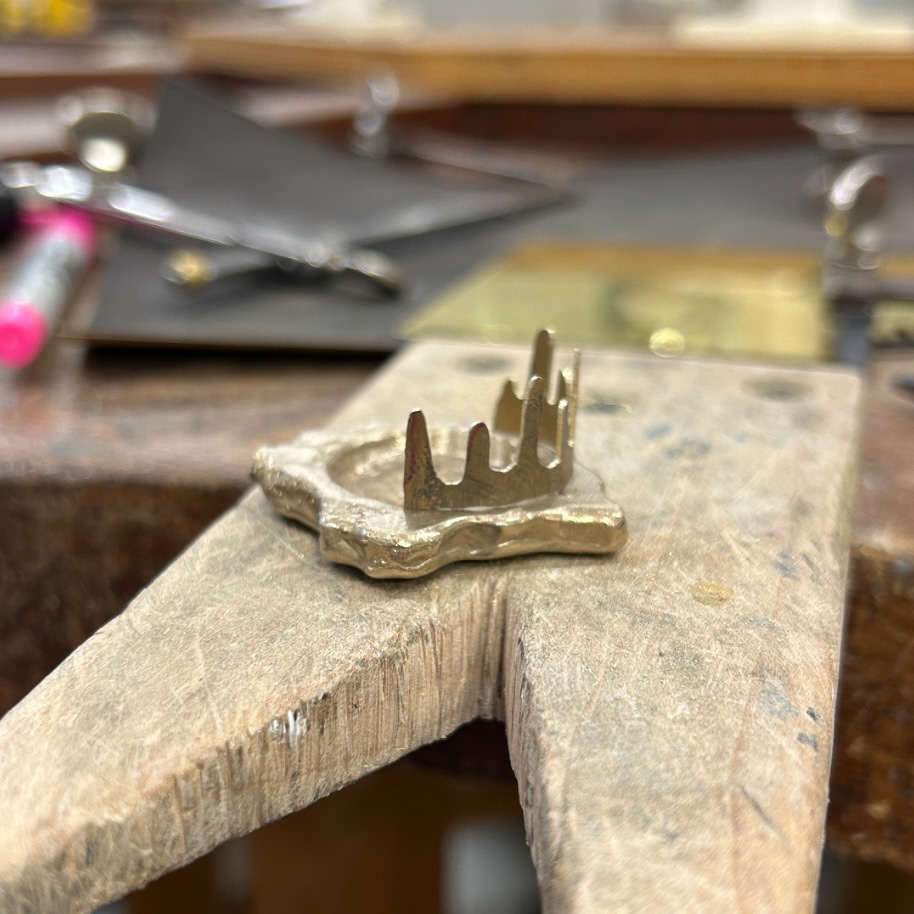
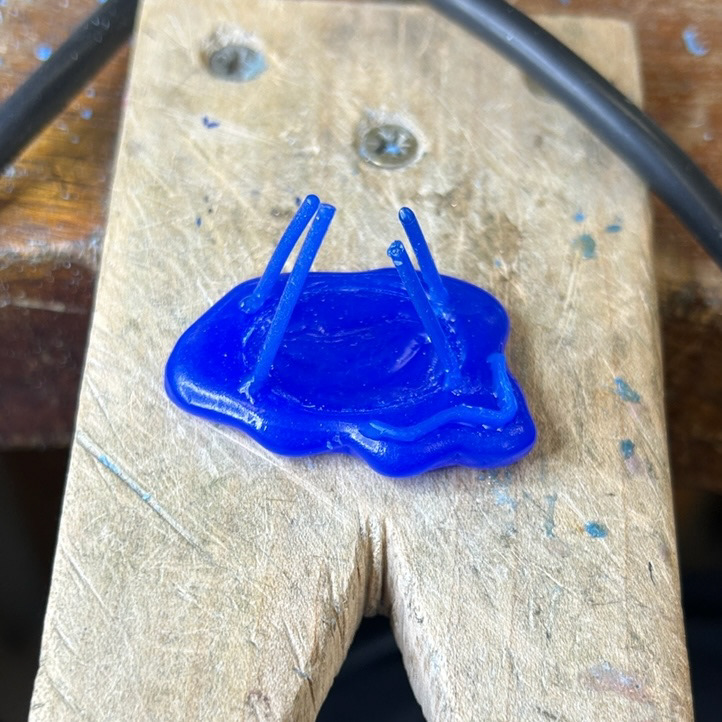
For my next design, I wanted to test my capabilities and create a ring. I started with a D-shaped wax block. I wanted to use a slightly larger stone and create a statement ring.
I used a reduction method rather than an addition method to create the base, as I felt I would have more control, and didn't feel confident in attaching larger pieces of wax together yet. I continued using a soldering iron to create a molten texture, inspired by the slides and cells that I had previously researched.
Once again, I used wax wire to create prongs to hold the stone. I found these incredibly hard to connect at first, as the wax kept melting and transferring the heat upwards, causing the whole wax wire to collapse. However, after practising with the wire wax pen, it became easier.
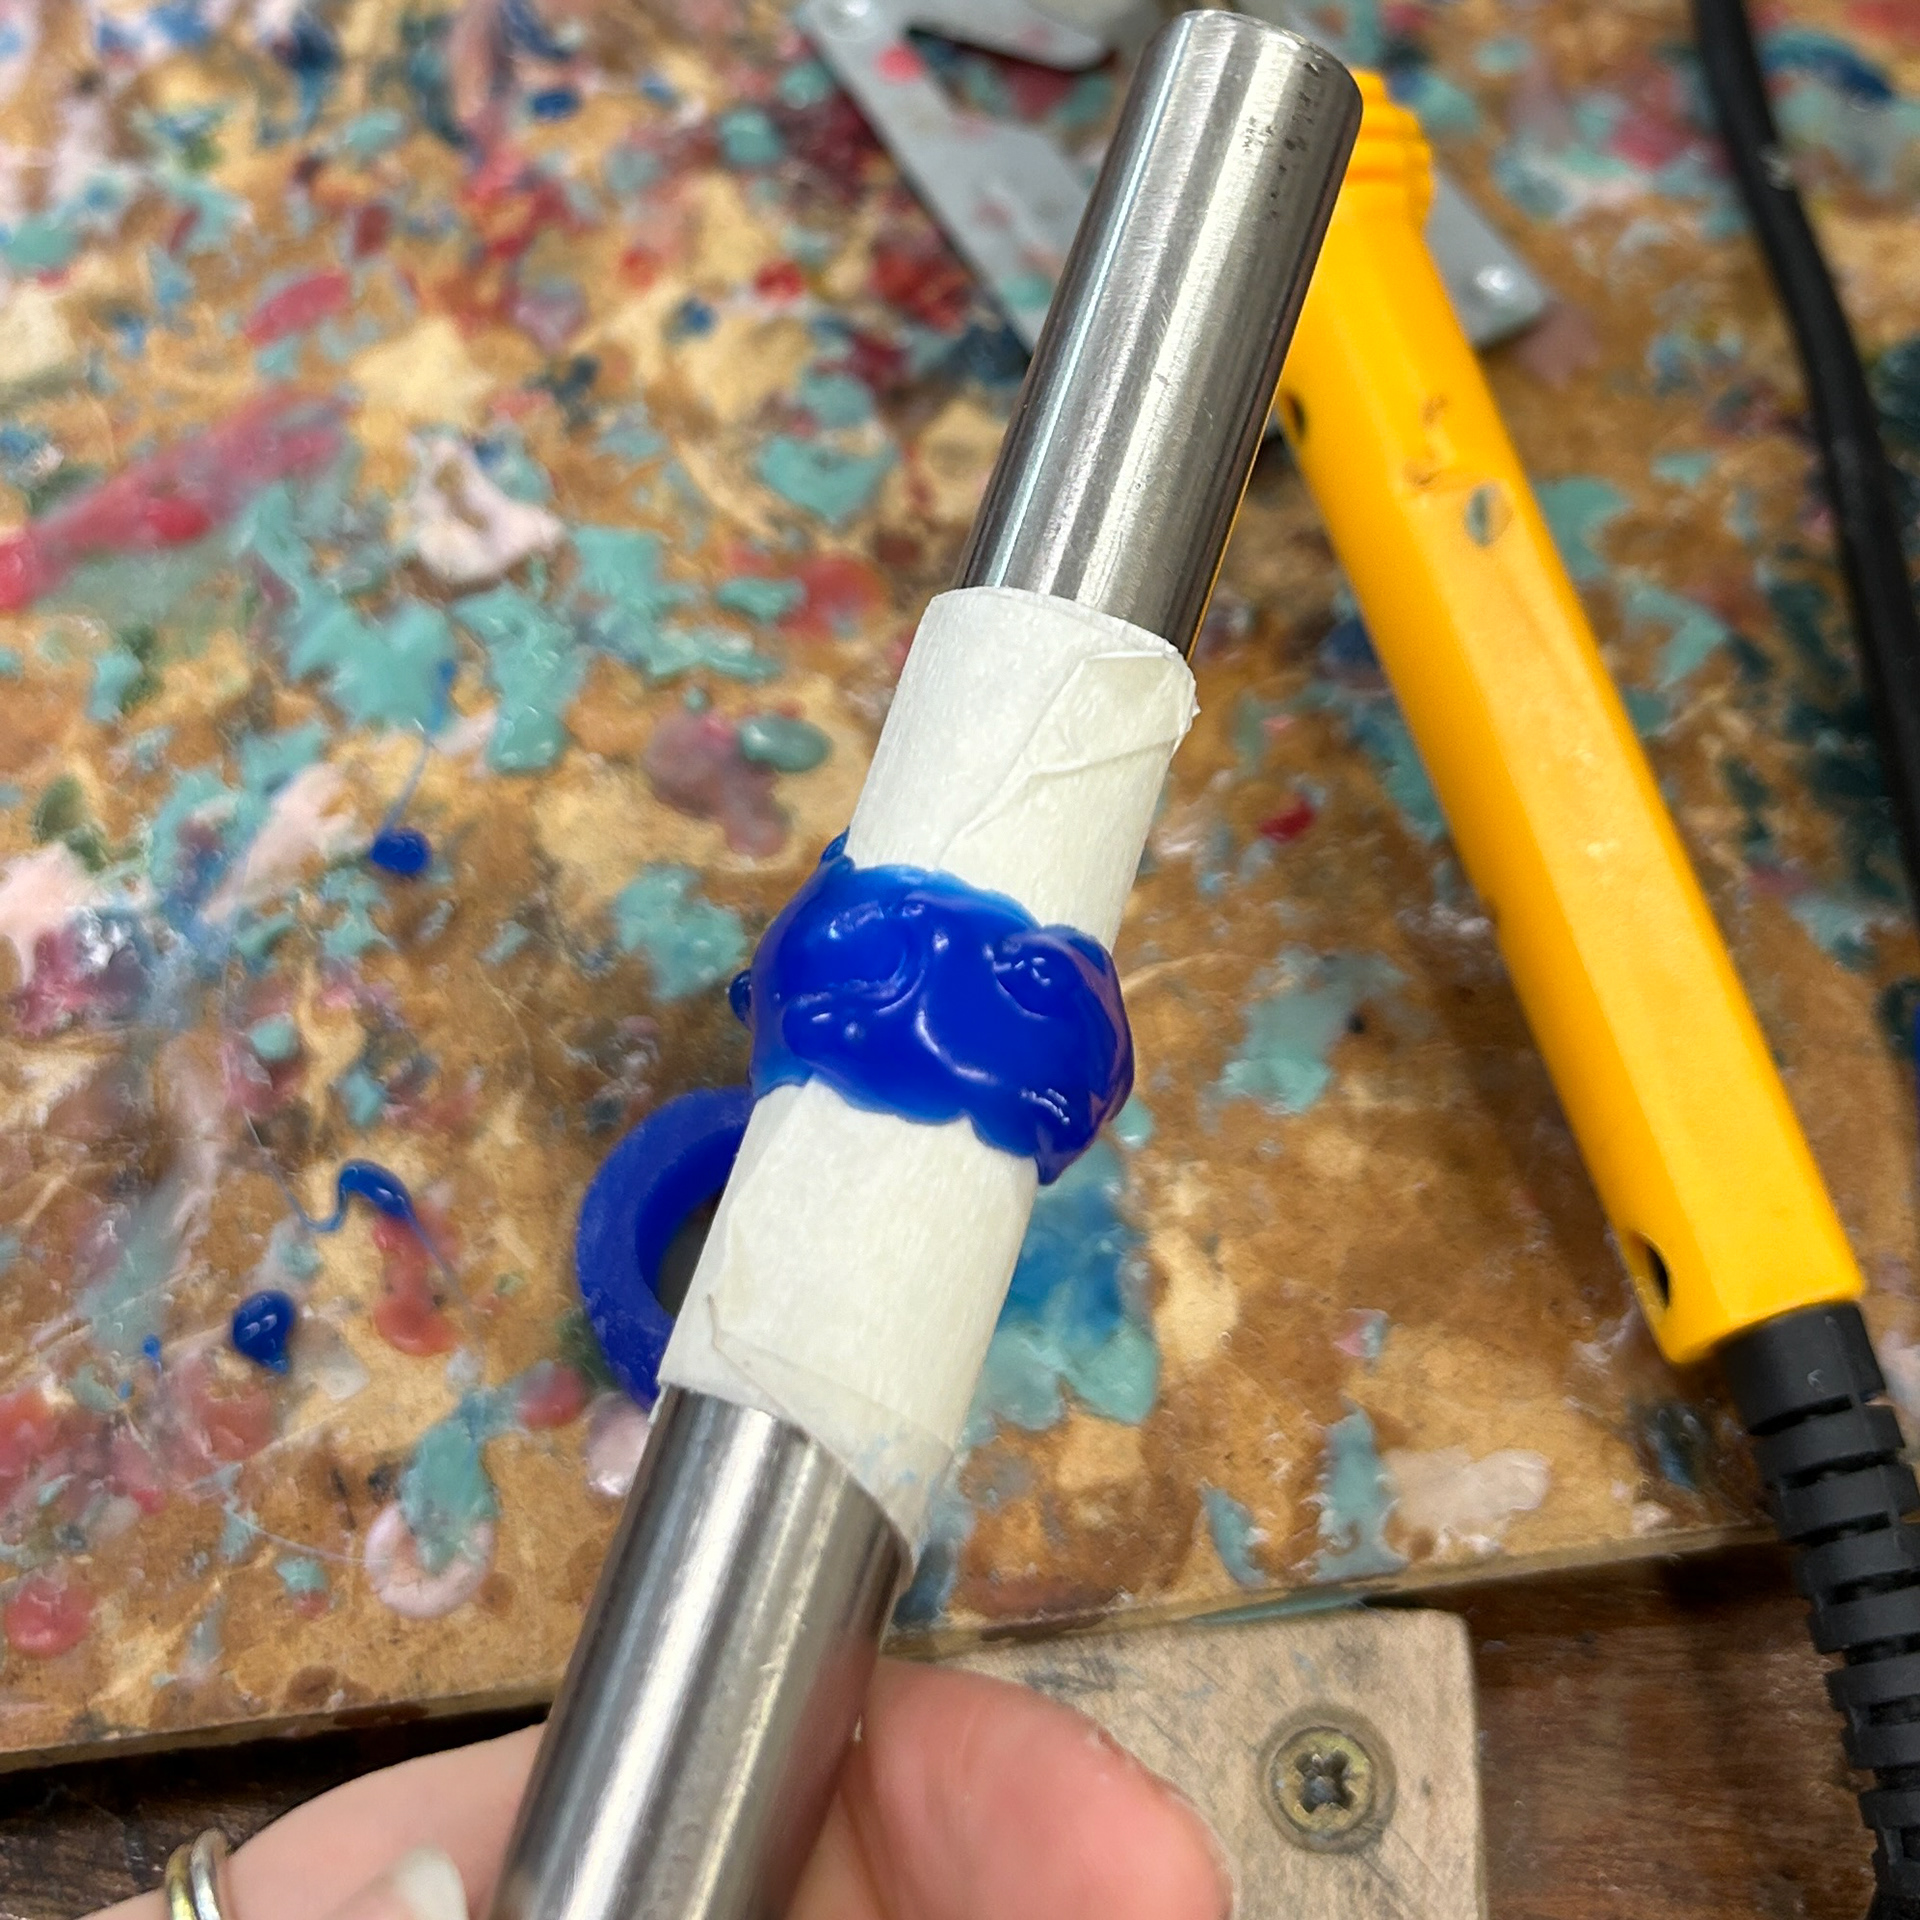

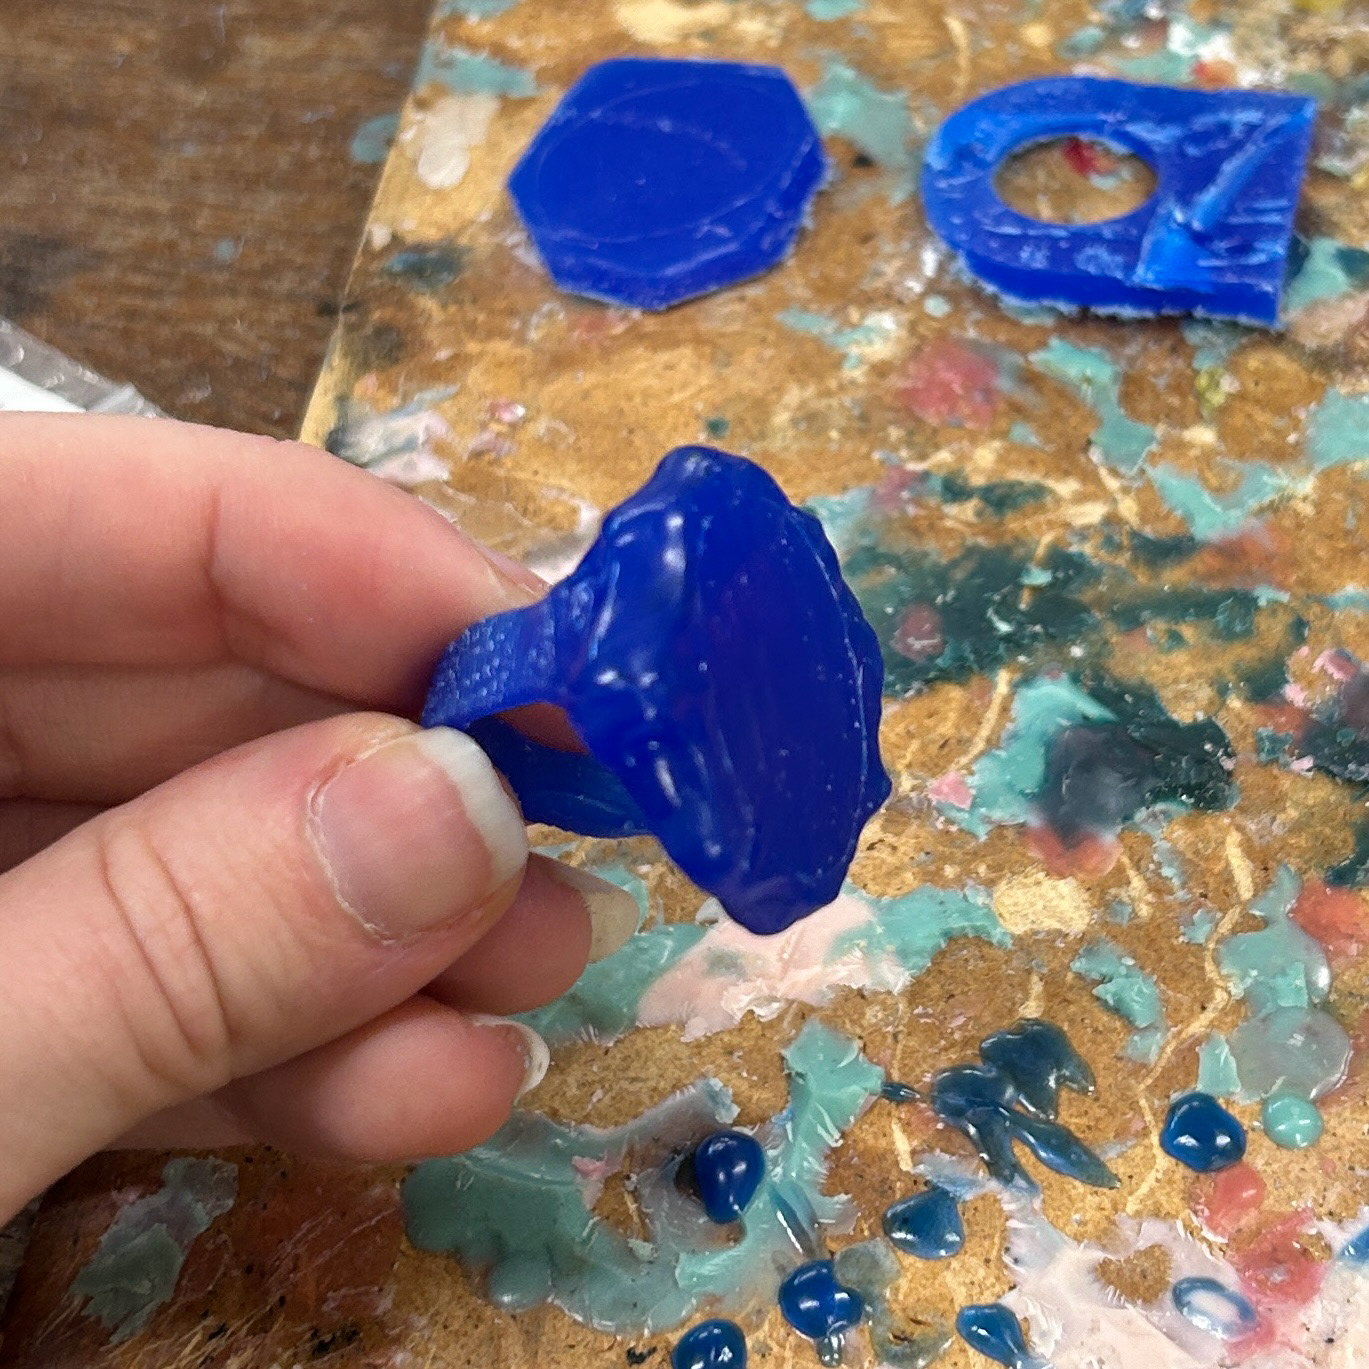
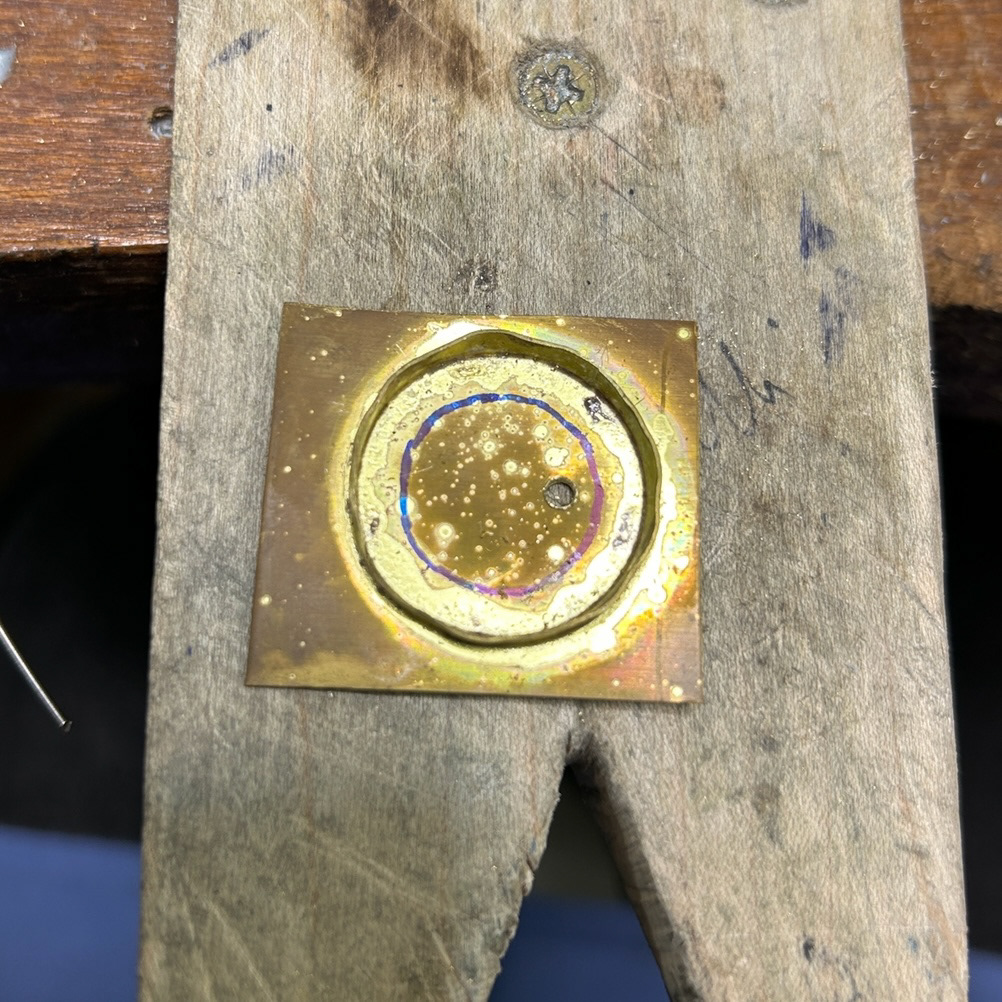
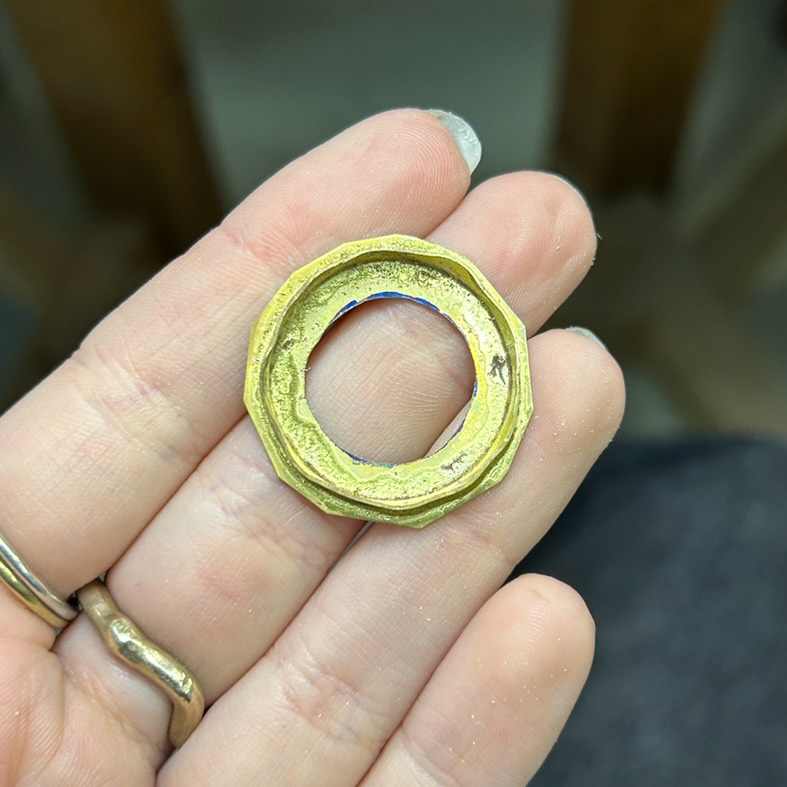
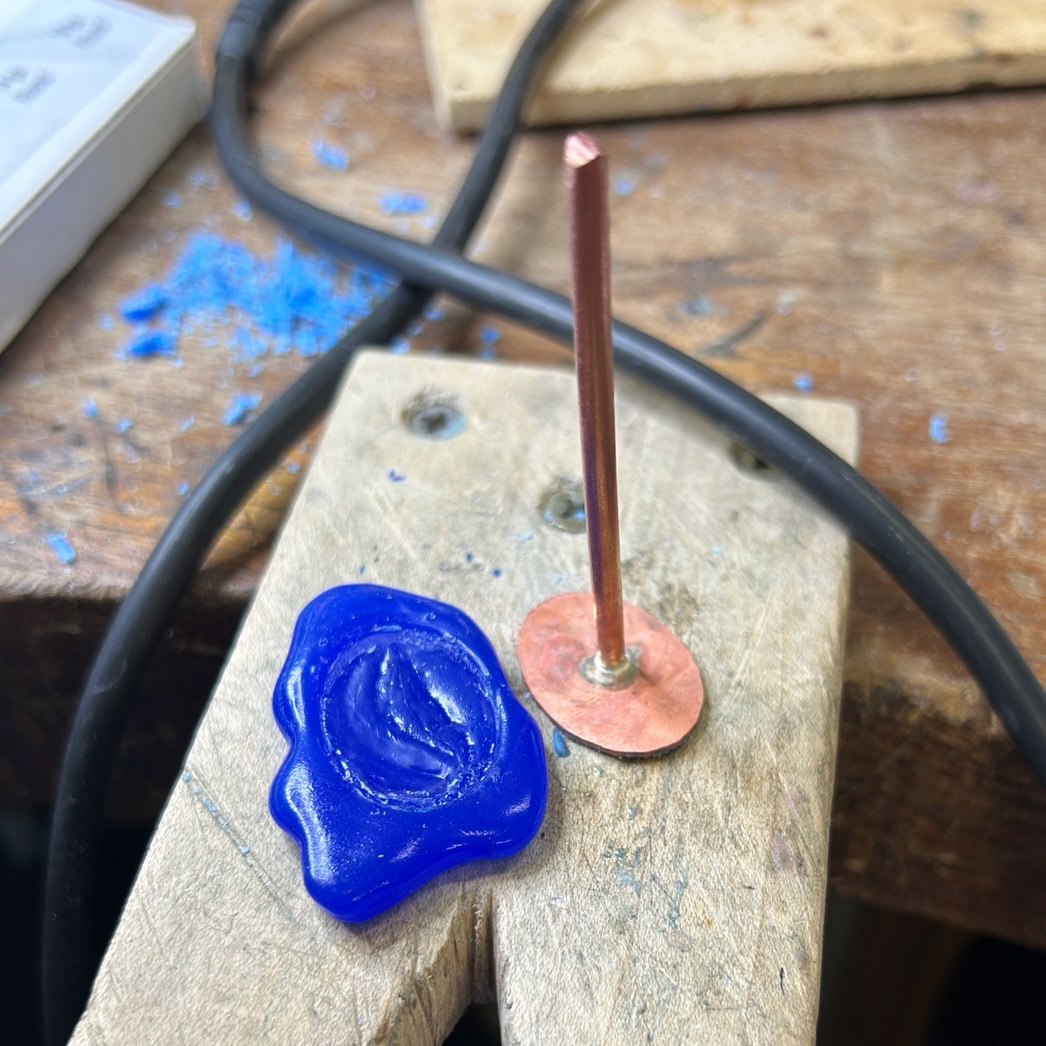
For another ring example, I wanted to do something a bit different to my other designs. I want to explore how other materials can represent the bacteria, as well as the raw bacteria material. As I wanted to improve my enamelling skills, I decided that this was an obvious place to start. Enamelling also has an infinite number of design capabilities, so I could experiment with many different techniques.
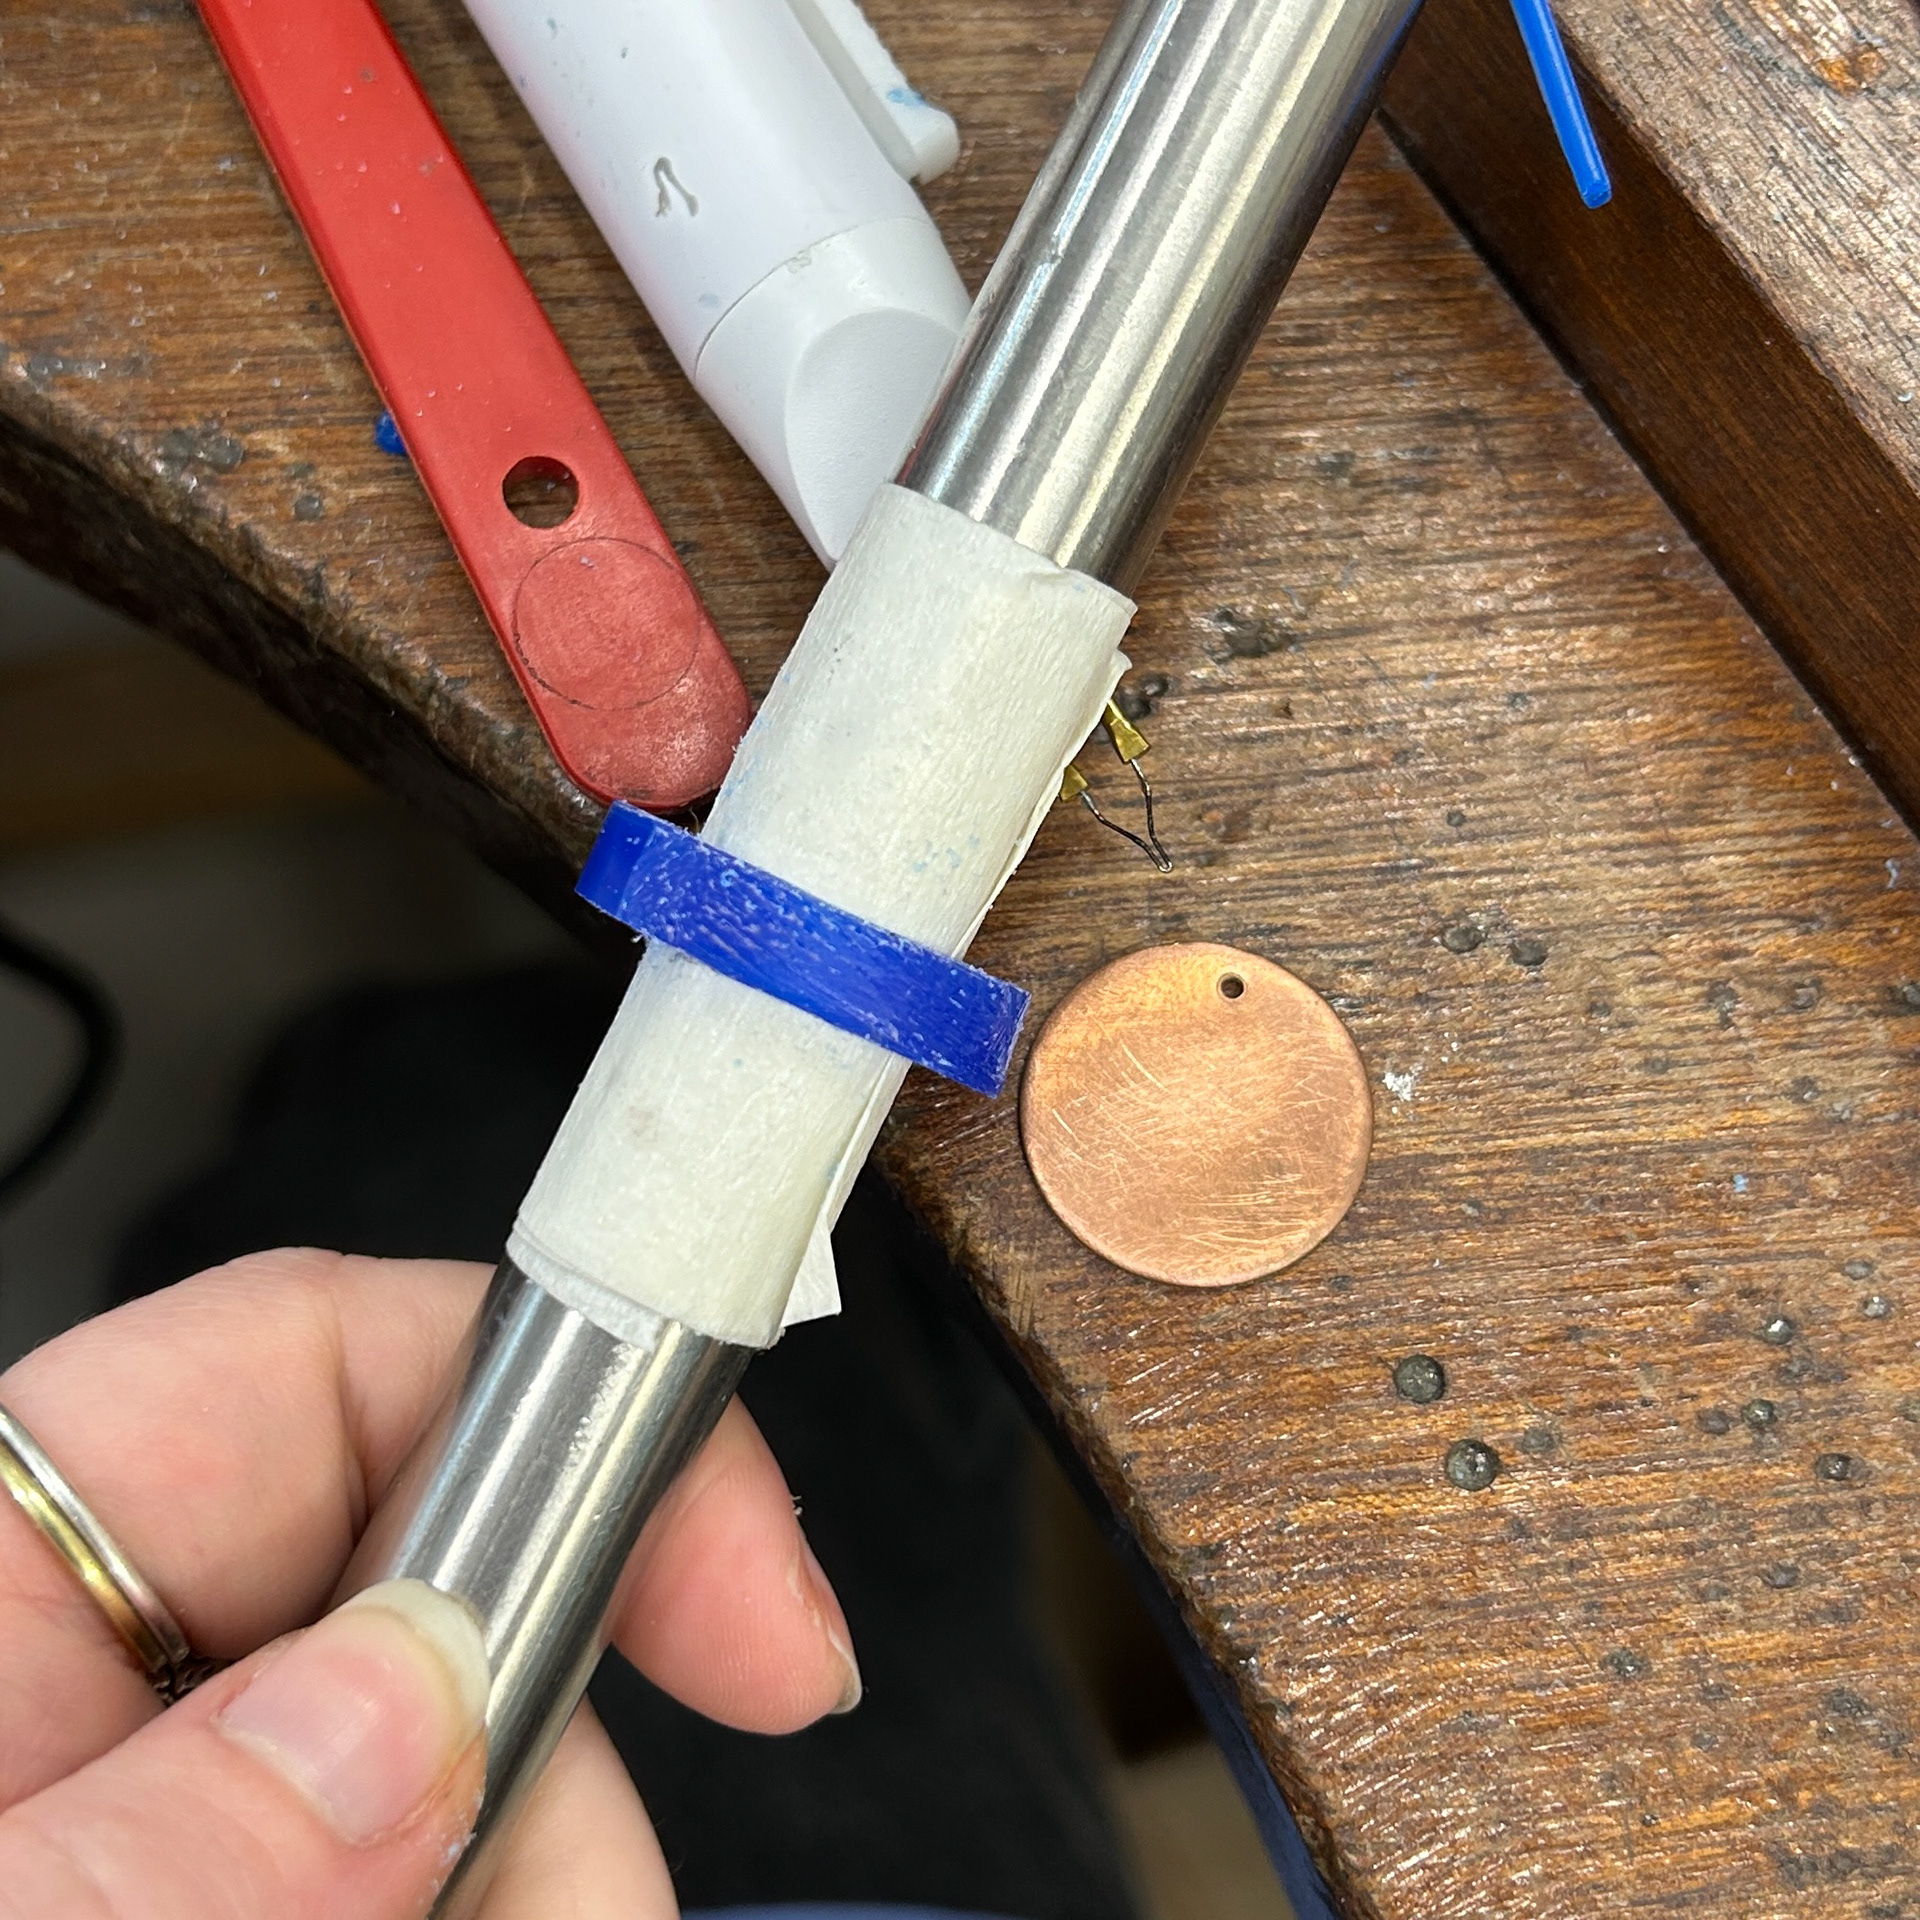
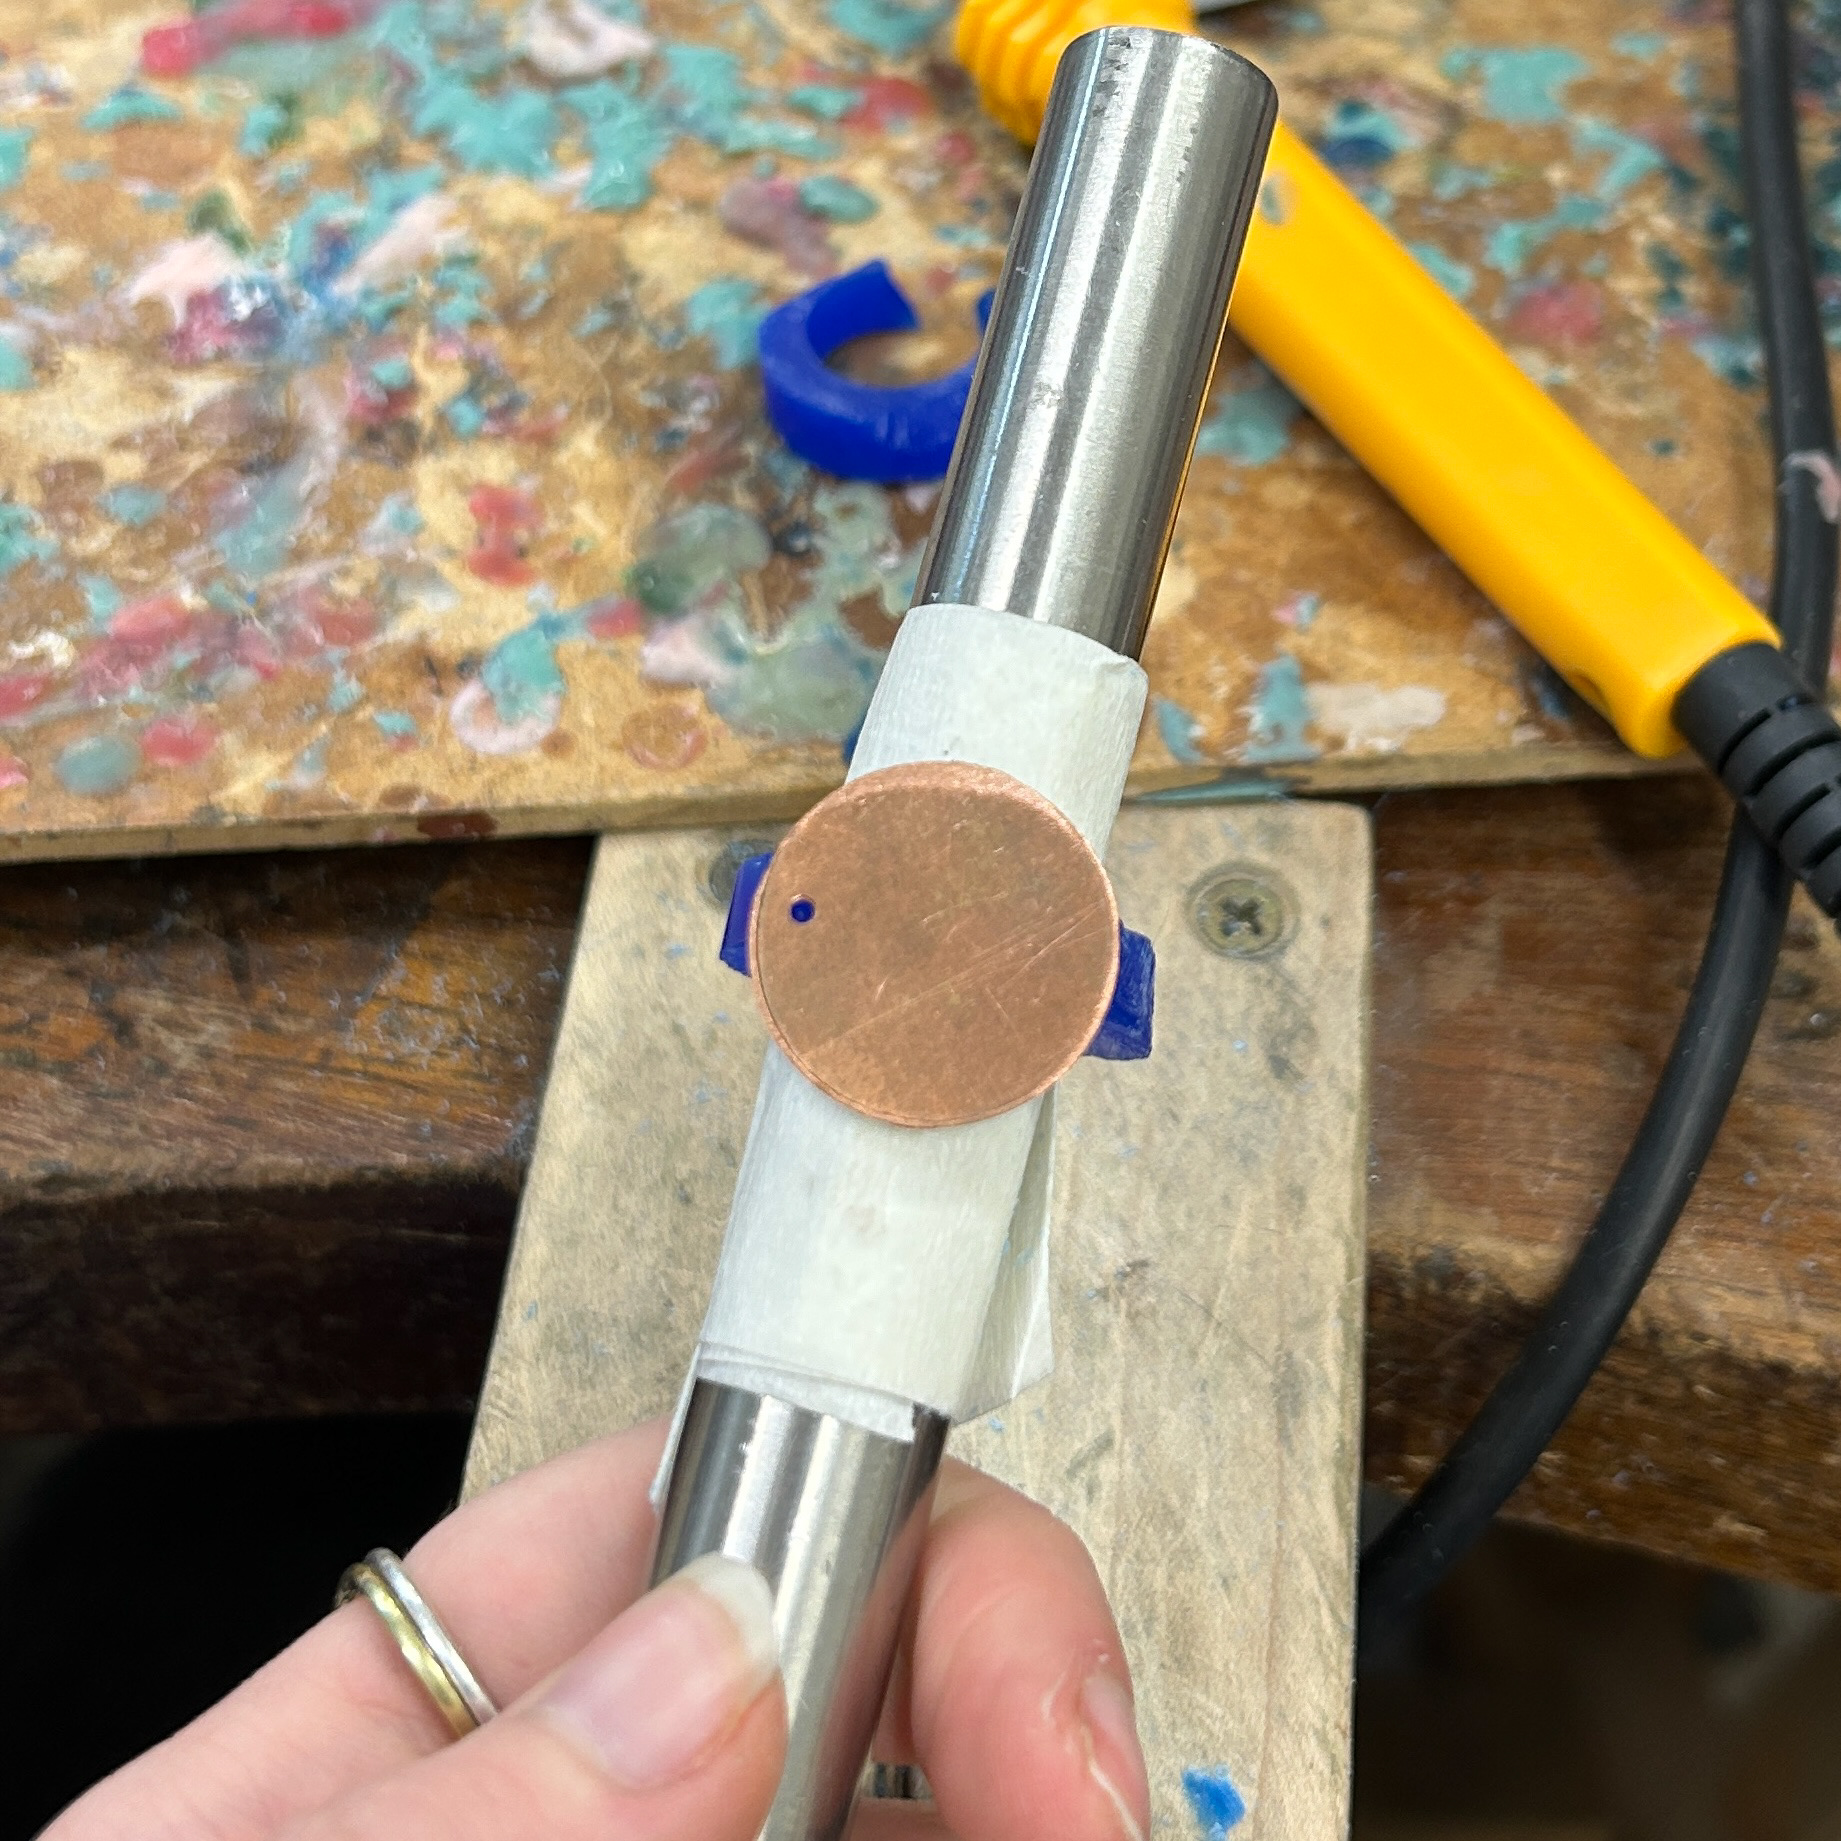
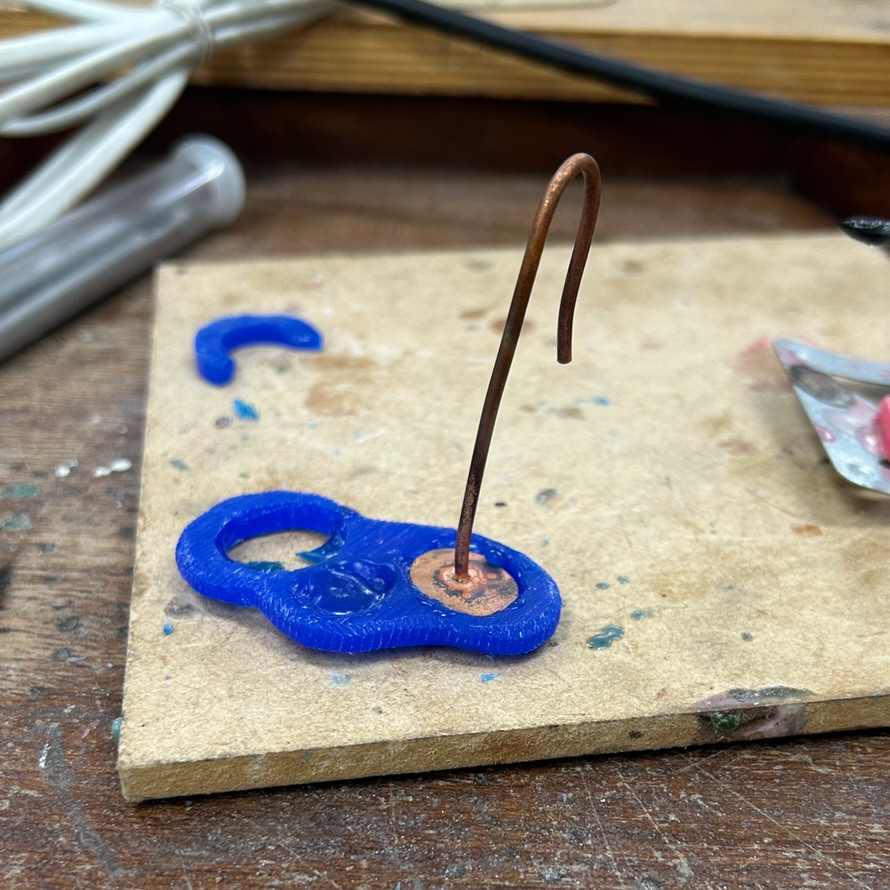
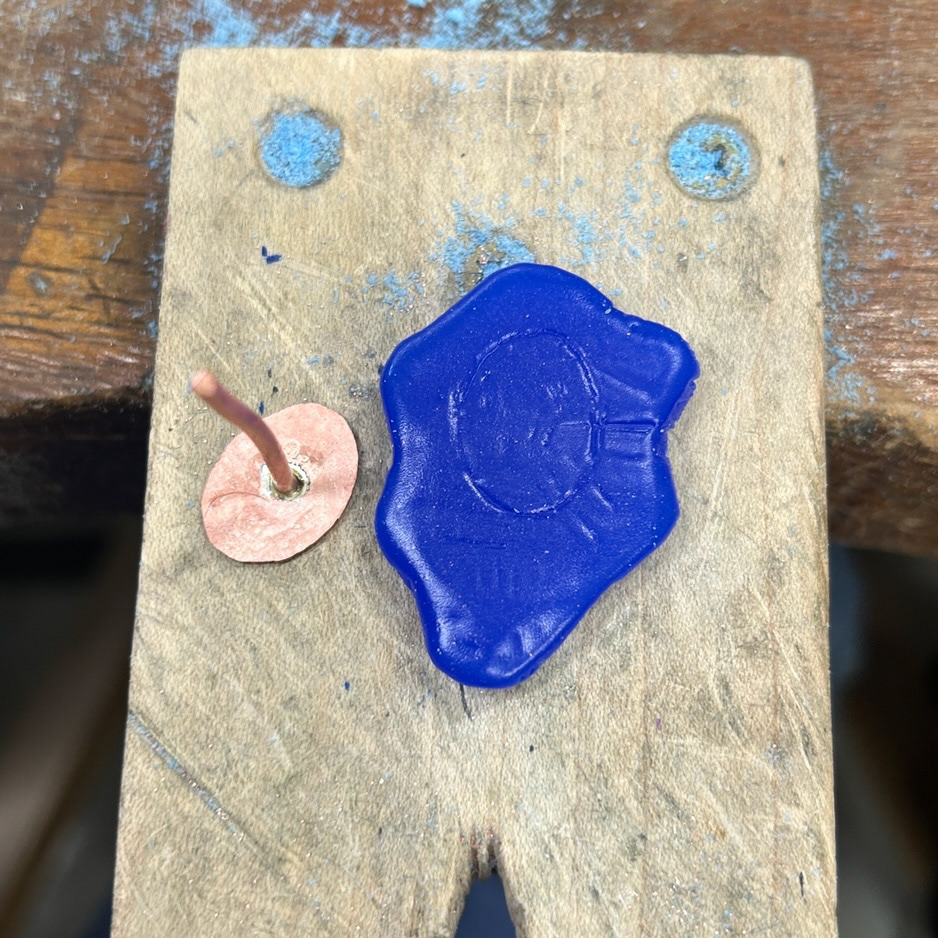
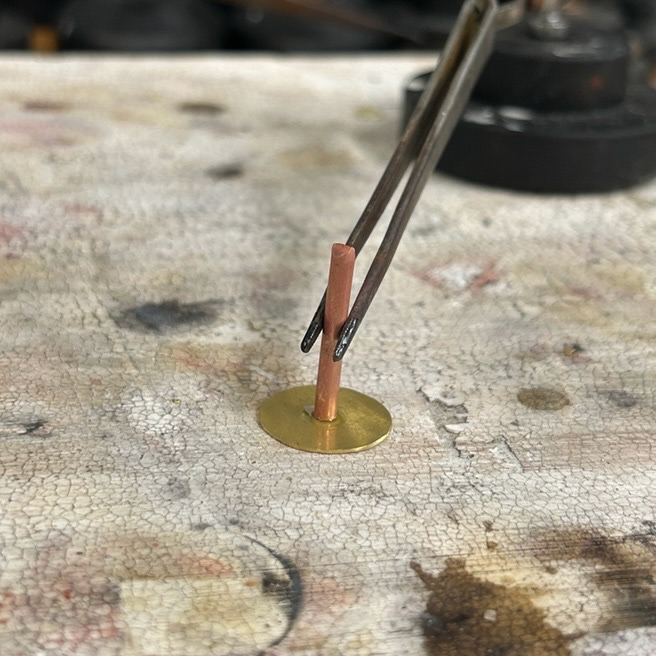
For this design to work, I would need to solder copper to the brass ring, by using solder dust in between the two materials. This meant that I needed to make the brass at the top of the ring quite thin, so the heat could disperse evenly, as well as make a completely flat edge for the copper to have good contact with the brass. I did this by melting the top of the ring and pressing the copper disk into the warm wax. This resulted in a flat edge that would fit the copper disk well.
For the band, I created the molten texture inspired by a picture in one of the biology textbooks I had looked at.
Casting
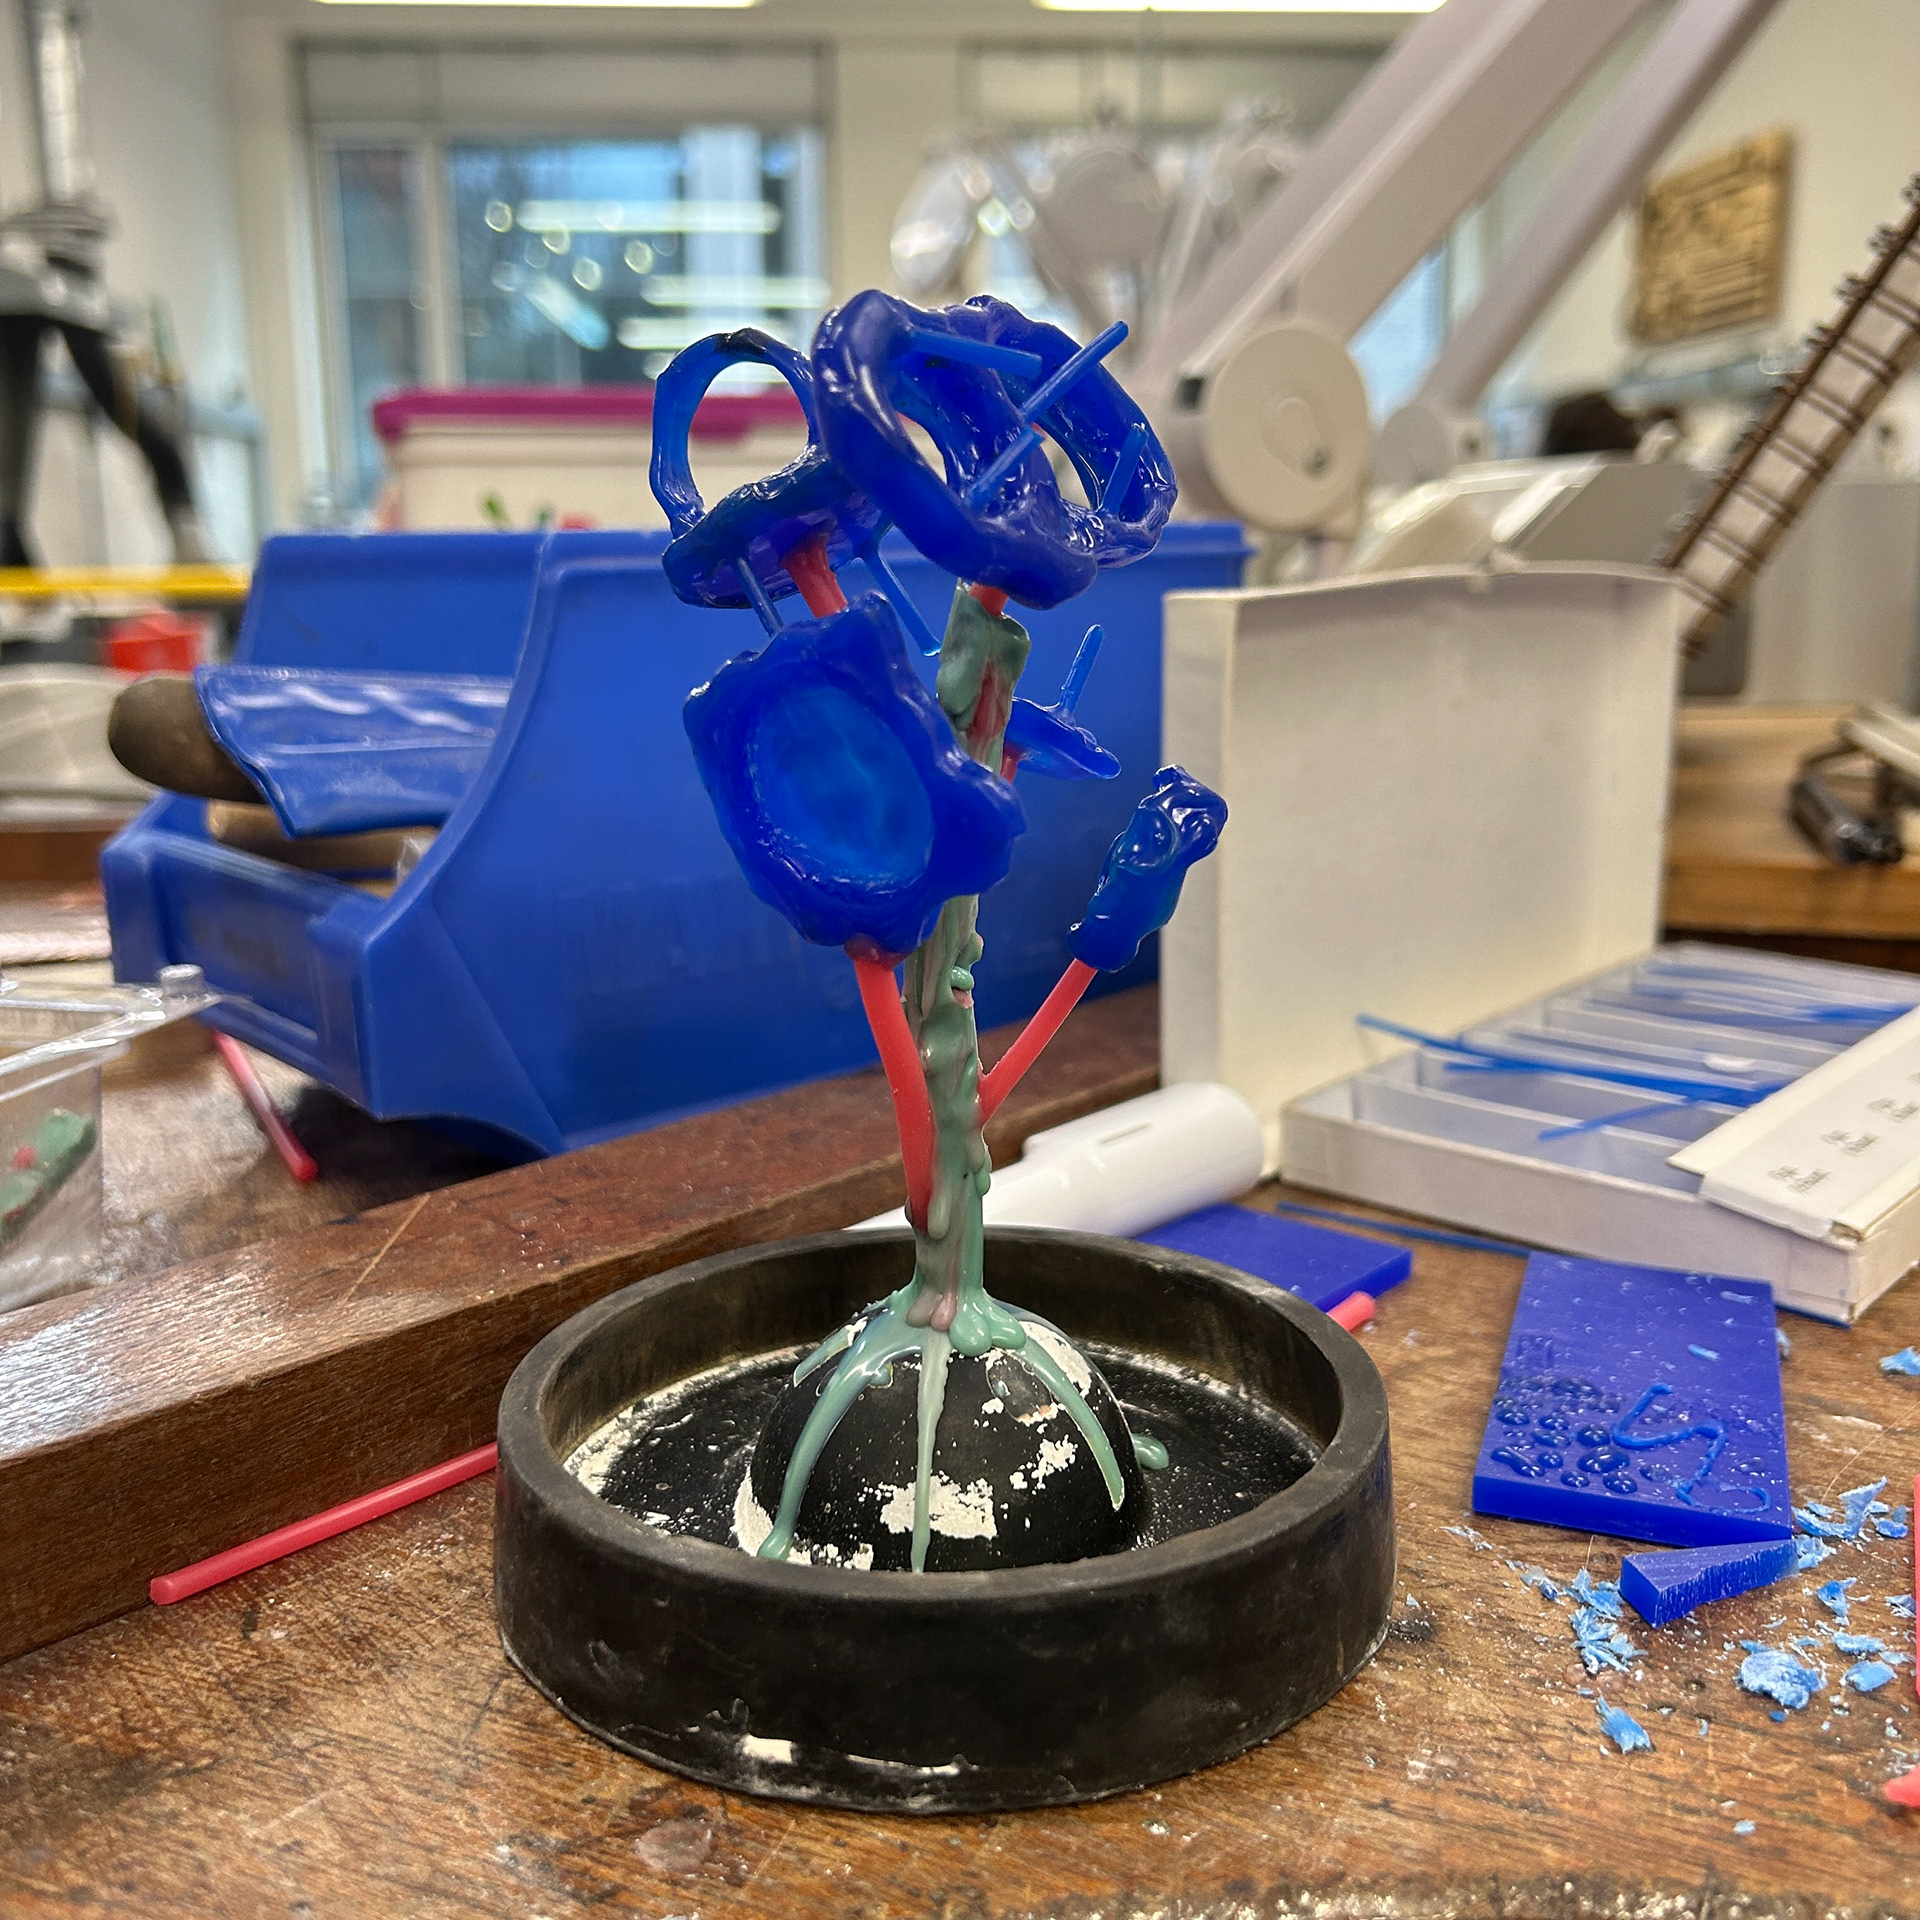

To make my wax designs out of brass, I used the lost wax casting method. This method involves adding the wax pieces to a wax sprue, creating a wax tree. This wax tree is then covered in a plaster, which is then set in the kiln. Before pouring the plaster you have to make sure that the wax tree is at least 1cm from the sides and 2cm from the top. This is to ensure that the hollow plaster mould has enough support to withstand the molten metal which will be poured into it later on. While in the kiln, the crucible is flipped upside down so that the wax can melt and come out of solidified plaster.
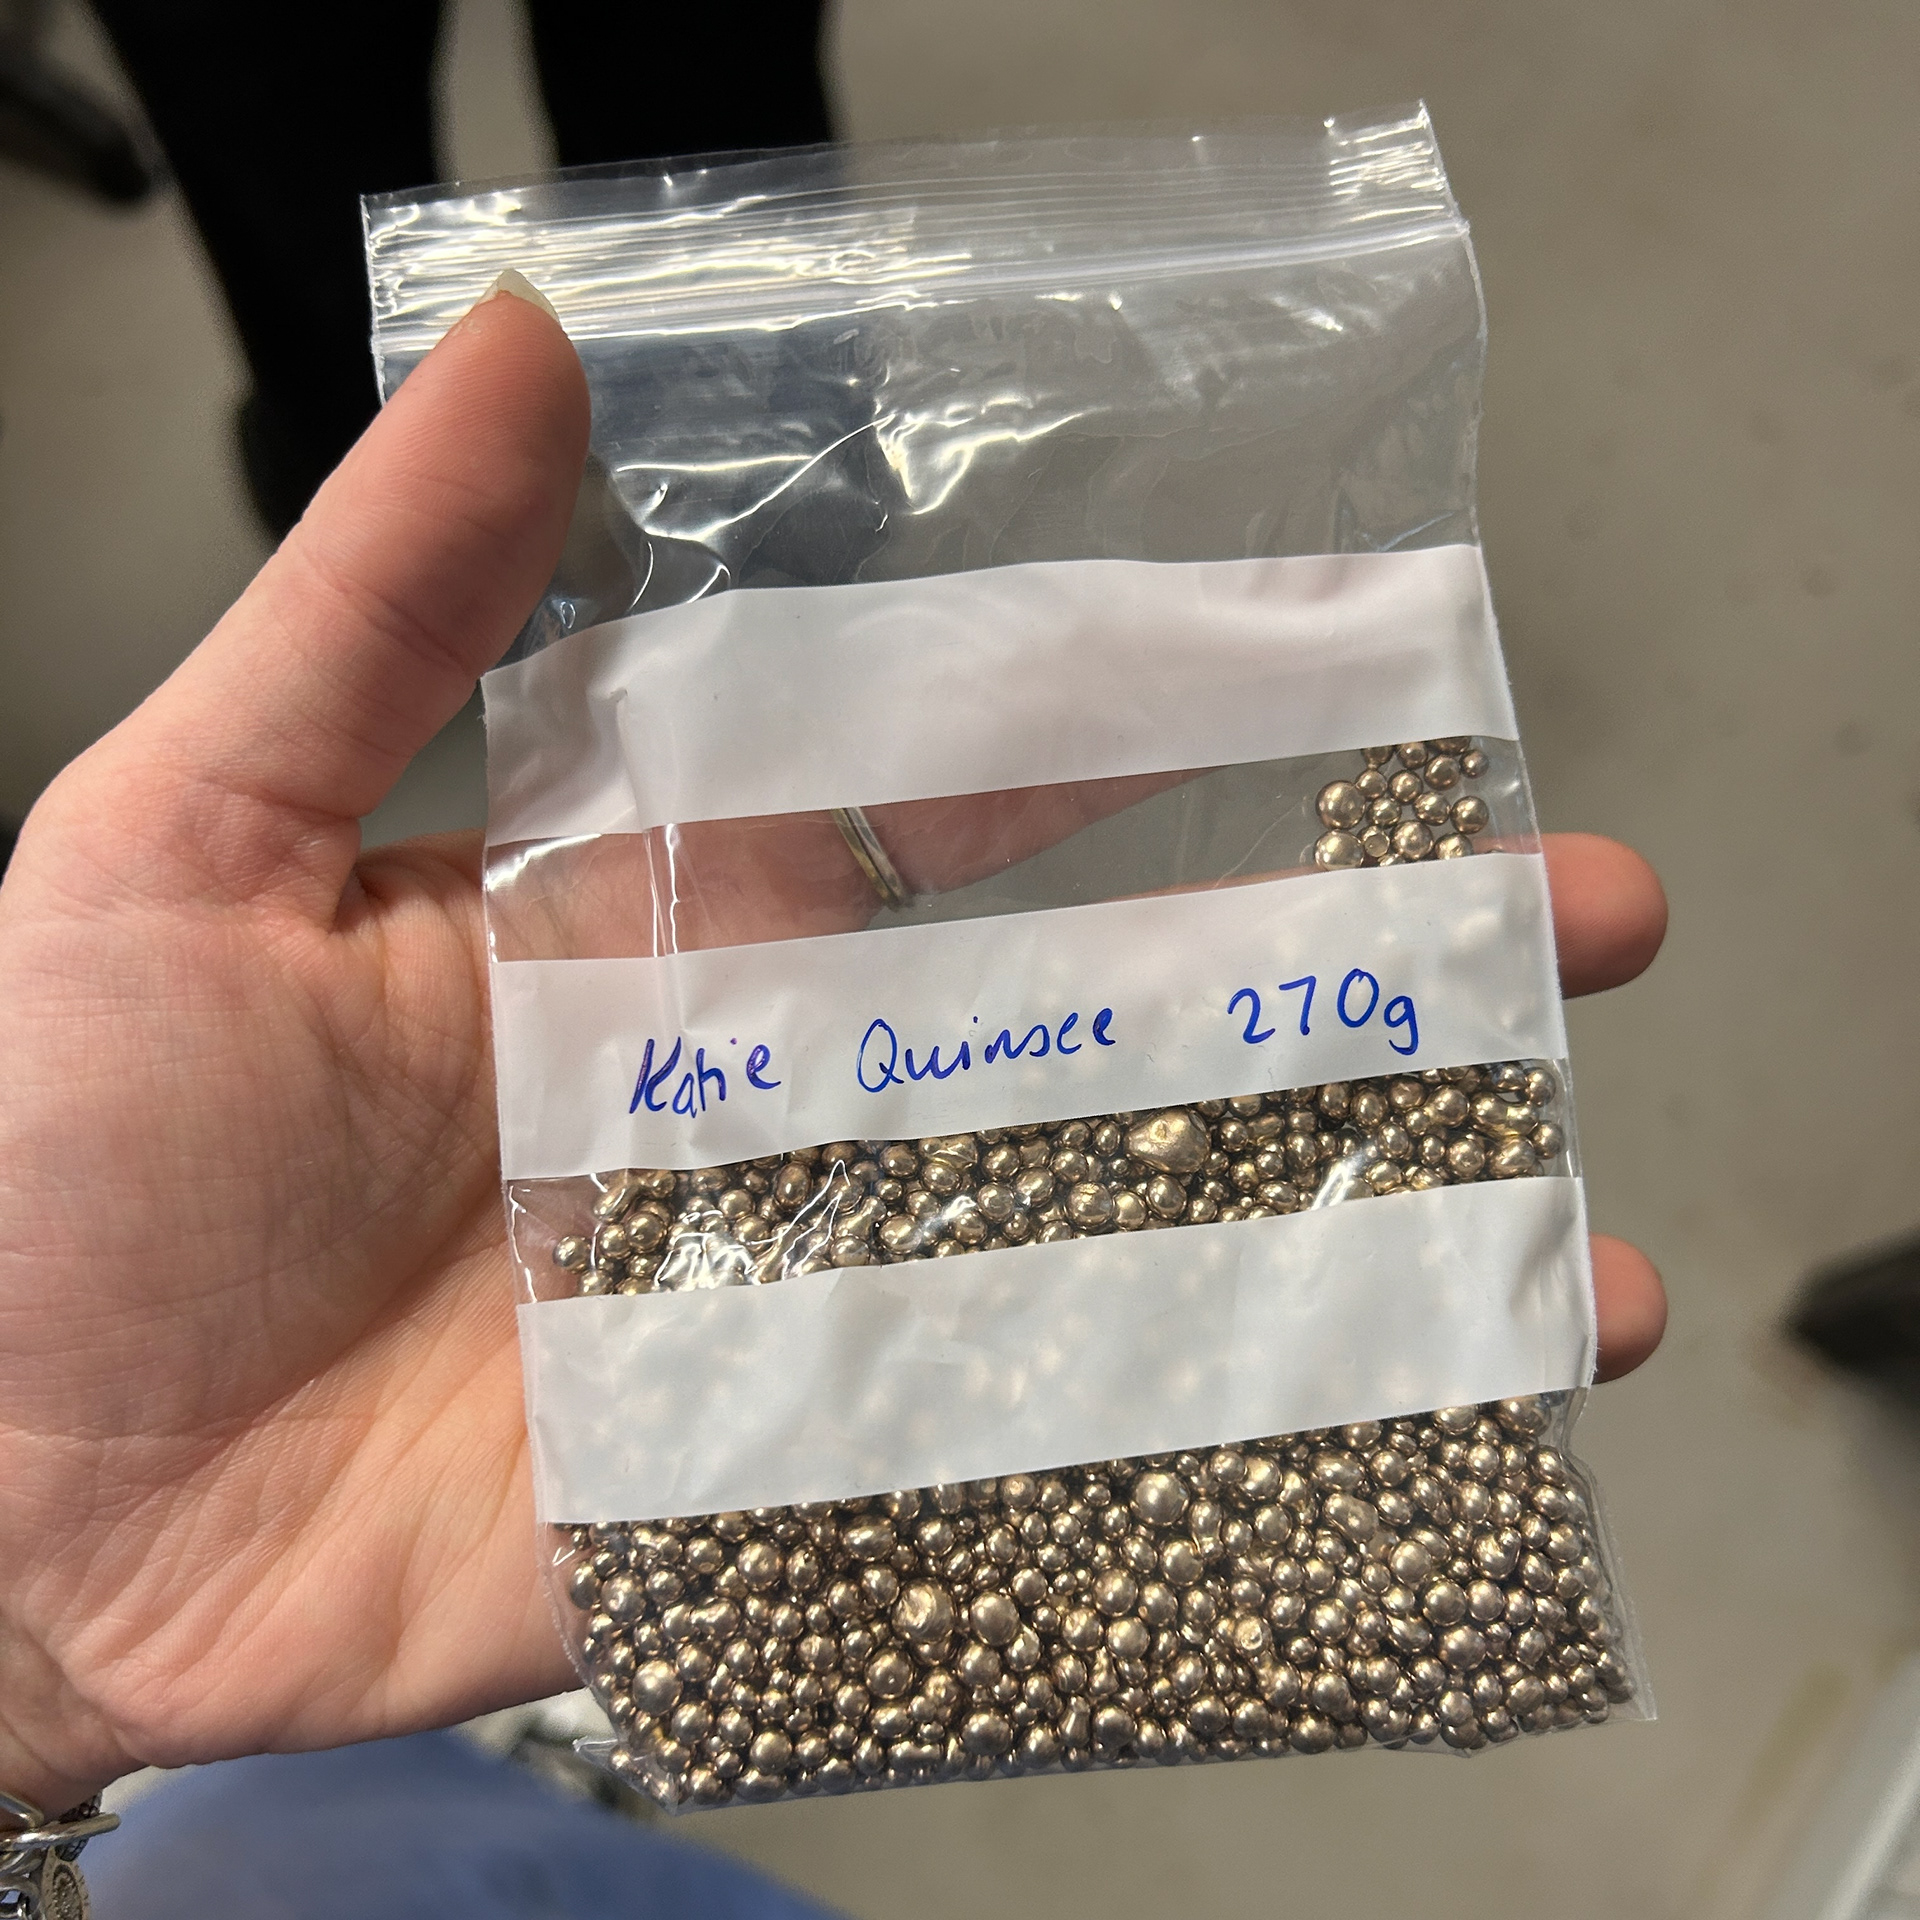
To measure how much brass you need to fully fill the mould, you weigh the wax tree and then multiply by 11.
To remove my brass pieces from the tree, I used a piercing saw and cut as close as possible to the design. Unfortunately, the new plaster in the workshop left lots of bubbles on my pieces, even after using the vacuum to remove the air from the paster. This required using a pendant drill and sanding wheels to remove the excess brass and smooth out the surface, which took quite a long time. To help reduce this risk of having bubbles in my piece, I plan to mix the plaster in smaller batches and then layering the paster. This may result in lines on my piece from where the plaster has been built up, however if this does happen, then I feel as if it would be quicker to remove compared to the bubbles all over the piece.

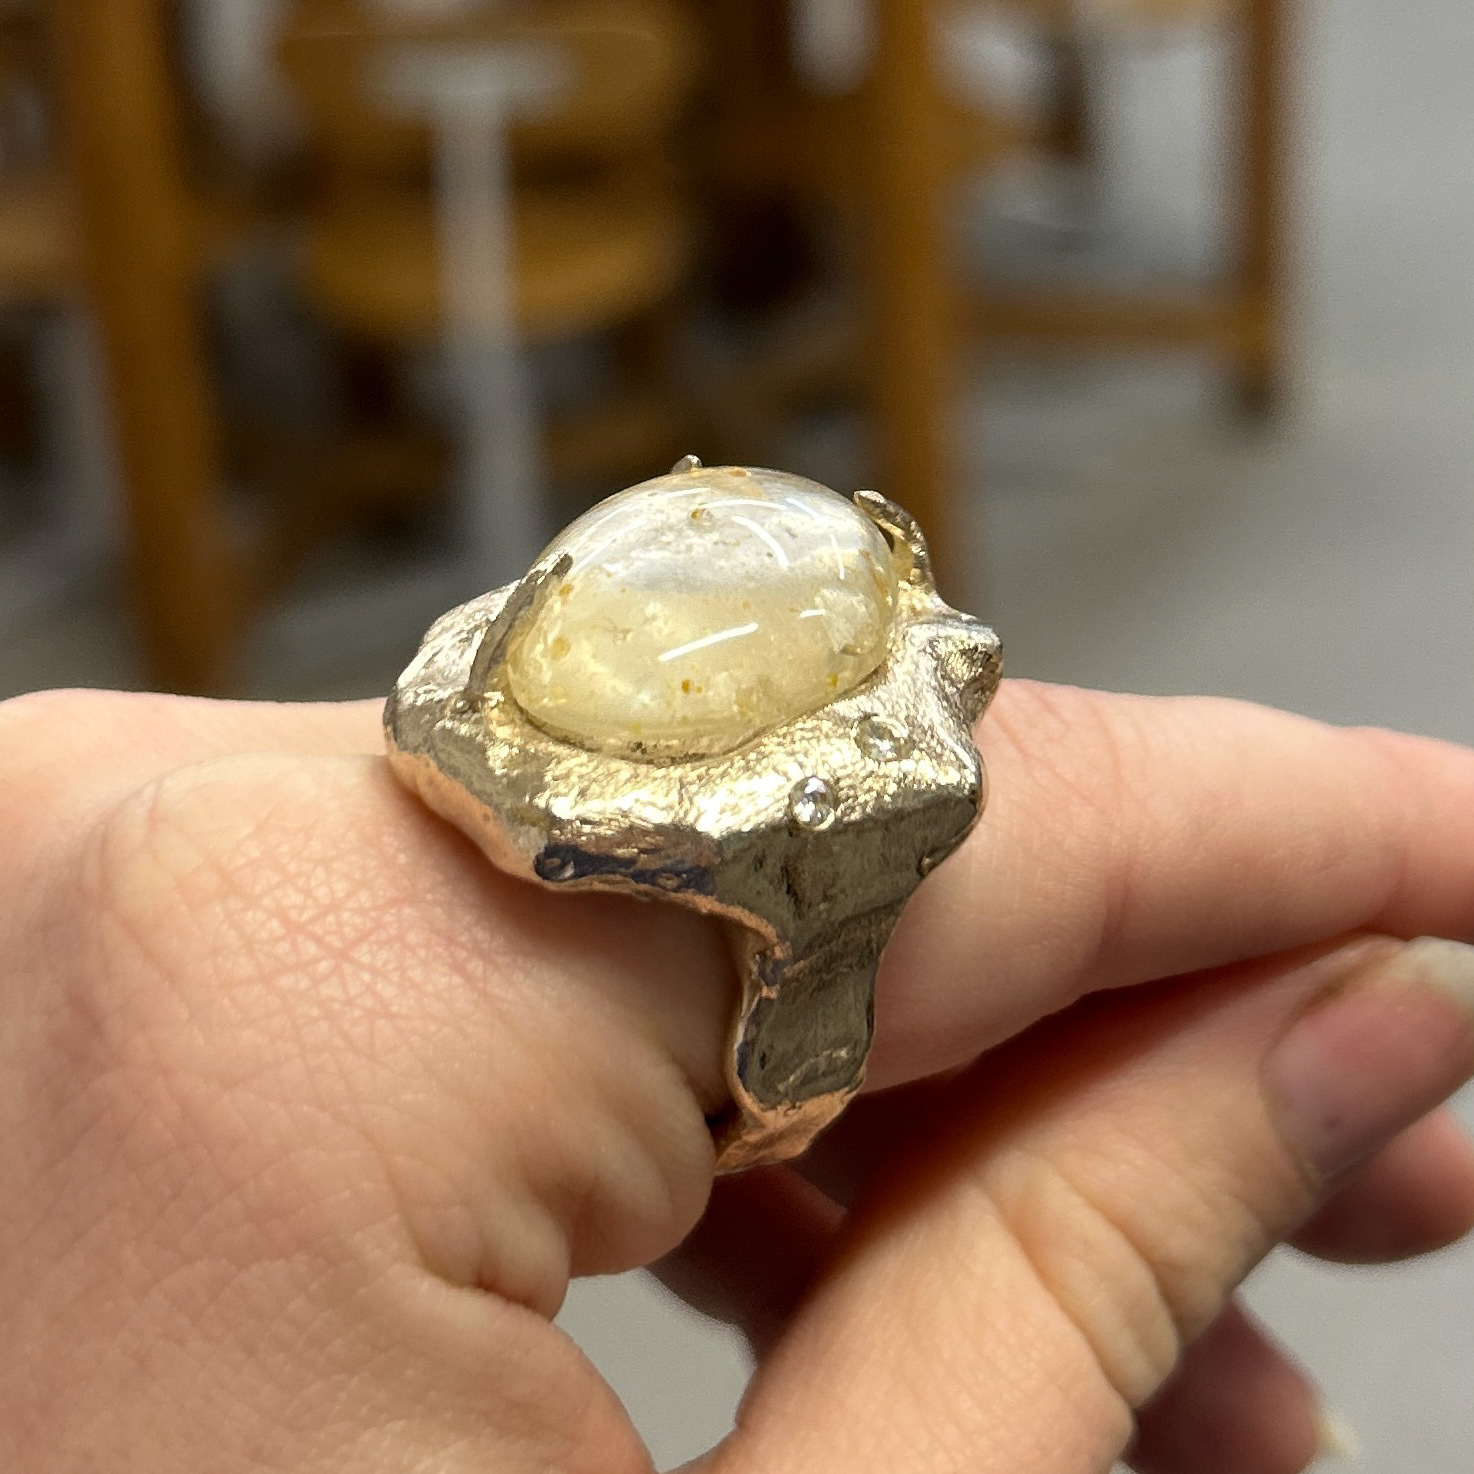
After I had sanded the brass casts, I started setting the stones using the prongs that I made from wax wire. After setting the first stone I realised very quickly that these prongs were too thick and hard to manoeuvre, so needed to be sanded down. I used diamond drill bits to shave down the prongs to create a thinner, pointed shape. This design choice was a lot more effective and overall, resulted in a better finish. I know that I need to work on the placement of these prongs, however, I want to experiment with different prongs, rather than adding 4 simple prongs, and instead use creative ways to use prongs in the settings.
On the ring, I also added 2 x 3mm Cubic Zirconias. I wanted the appearance of the stones to look like they were falling down the ring, or spreading from the central, bacteria stone. I want to experiment with this stone placement further, potentially using different coloured stones, and creating a gradient.
Alternate Setting
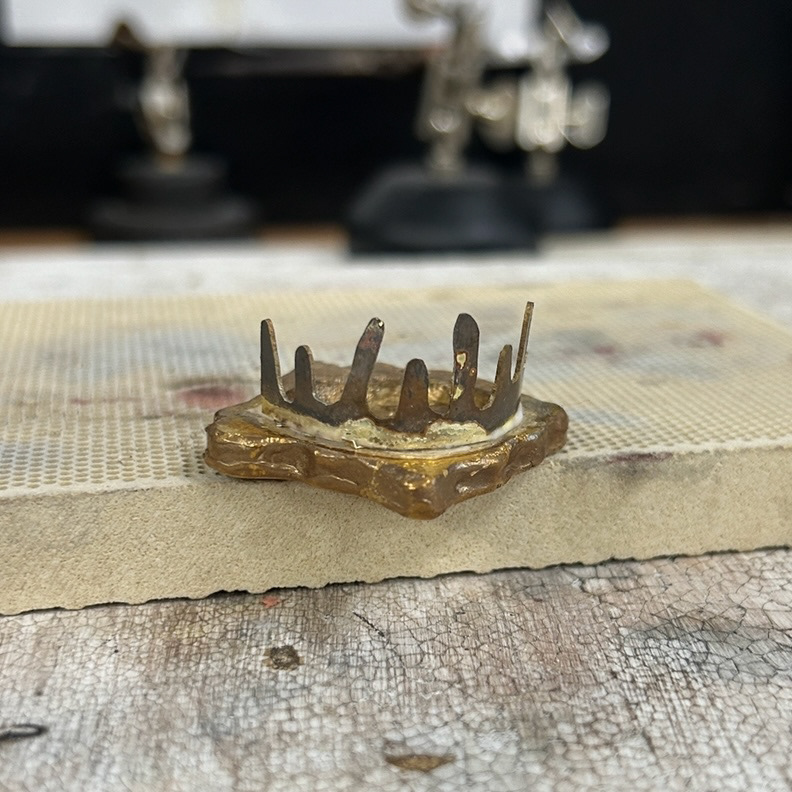
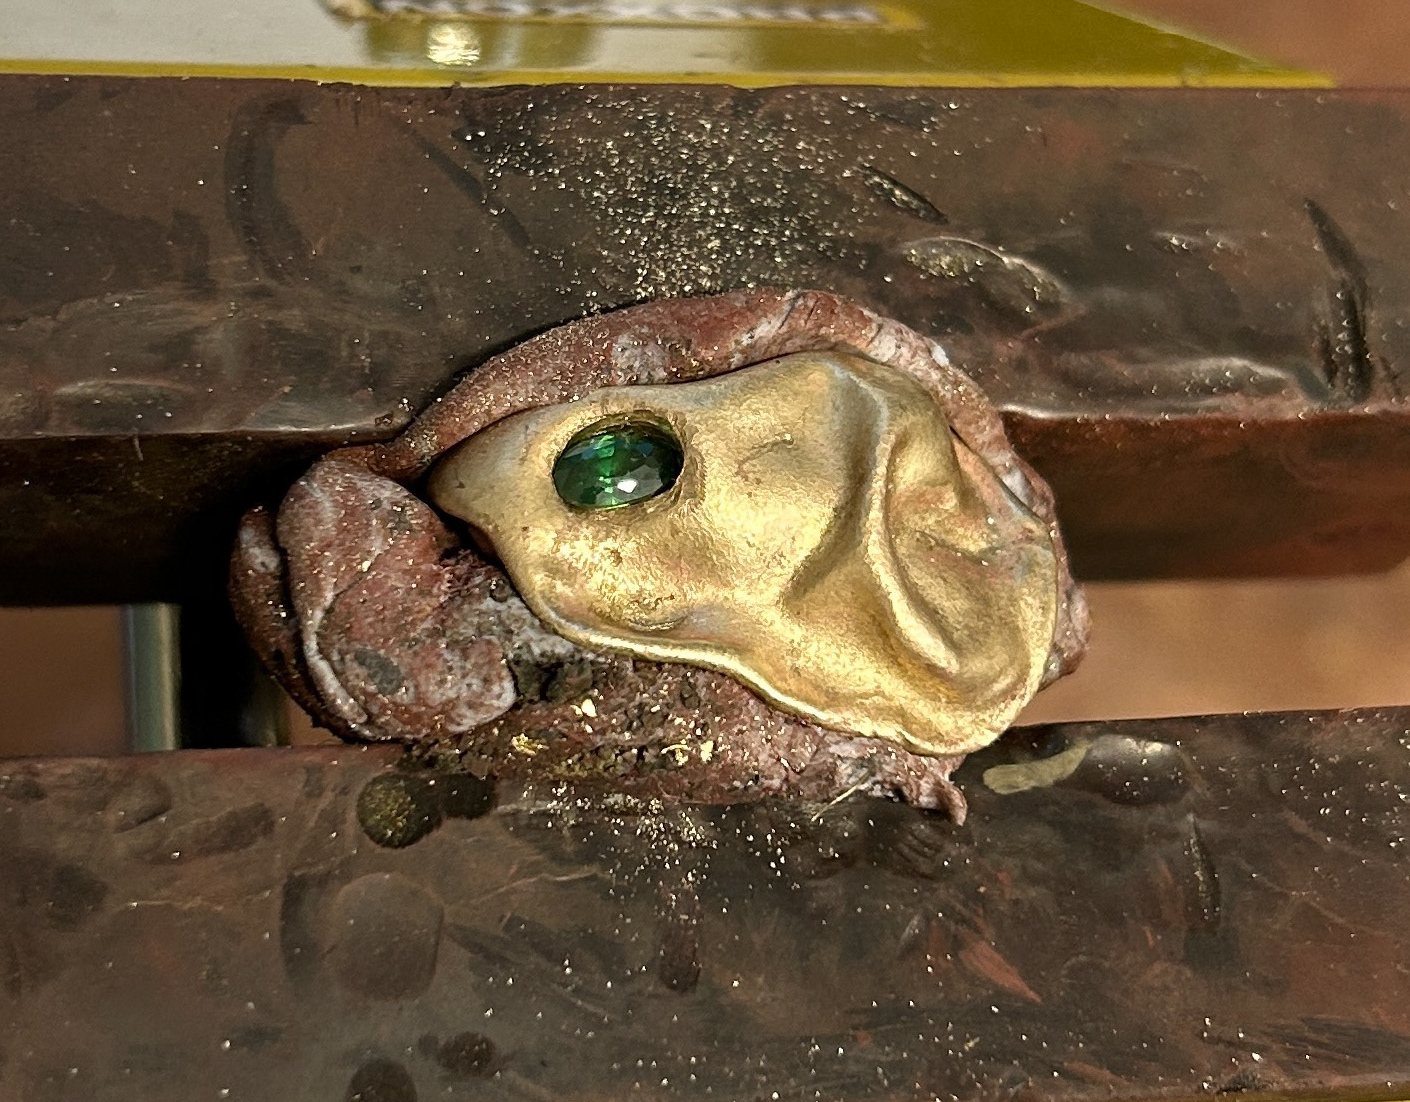
Exploring a different prong design, I tried soldering a bezel directly onto the brass. As I had never attempted soldering onto a brass cast before, I knew that there would be challenges in heating up the solid brass prior to soldering.
The first step before soldering this bezel design, with the design inspired by a shape from a biology textbook, involved sanding down my cast to ensure the brass bezel would sit flush. I then heated up the cast using a microflame, melted the solder, and lastly added the bezel. I used this soldering technique instead of heating both pieces simultaneously, knowing that I risked melting the bezel before the solid brass had heated up to a cherry red colour.
Following the soldering process, I adjusted the "prongs" over the stone, only to find that the bezel disconnected from the solid brass in certain areas due to a lack of surface area holding the pieces together.
After completing the design, I realised that I really didn't like the way it looked. The sanding had removed all of the molten surface texture, and the colour difference between the two types of brass was too noticeable. Consequently, I chose not to pursue this design further. The bezel ended up falling off a couple of weeks later in my toolbox.
Enamelling
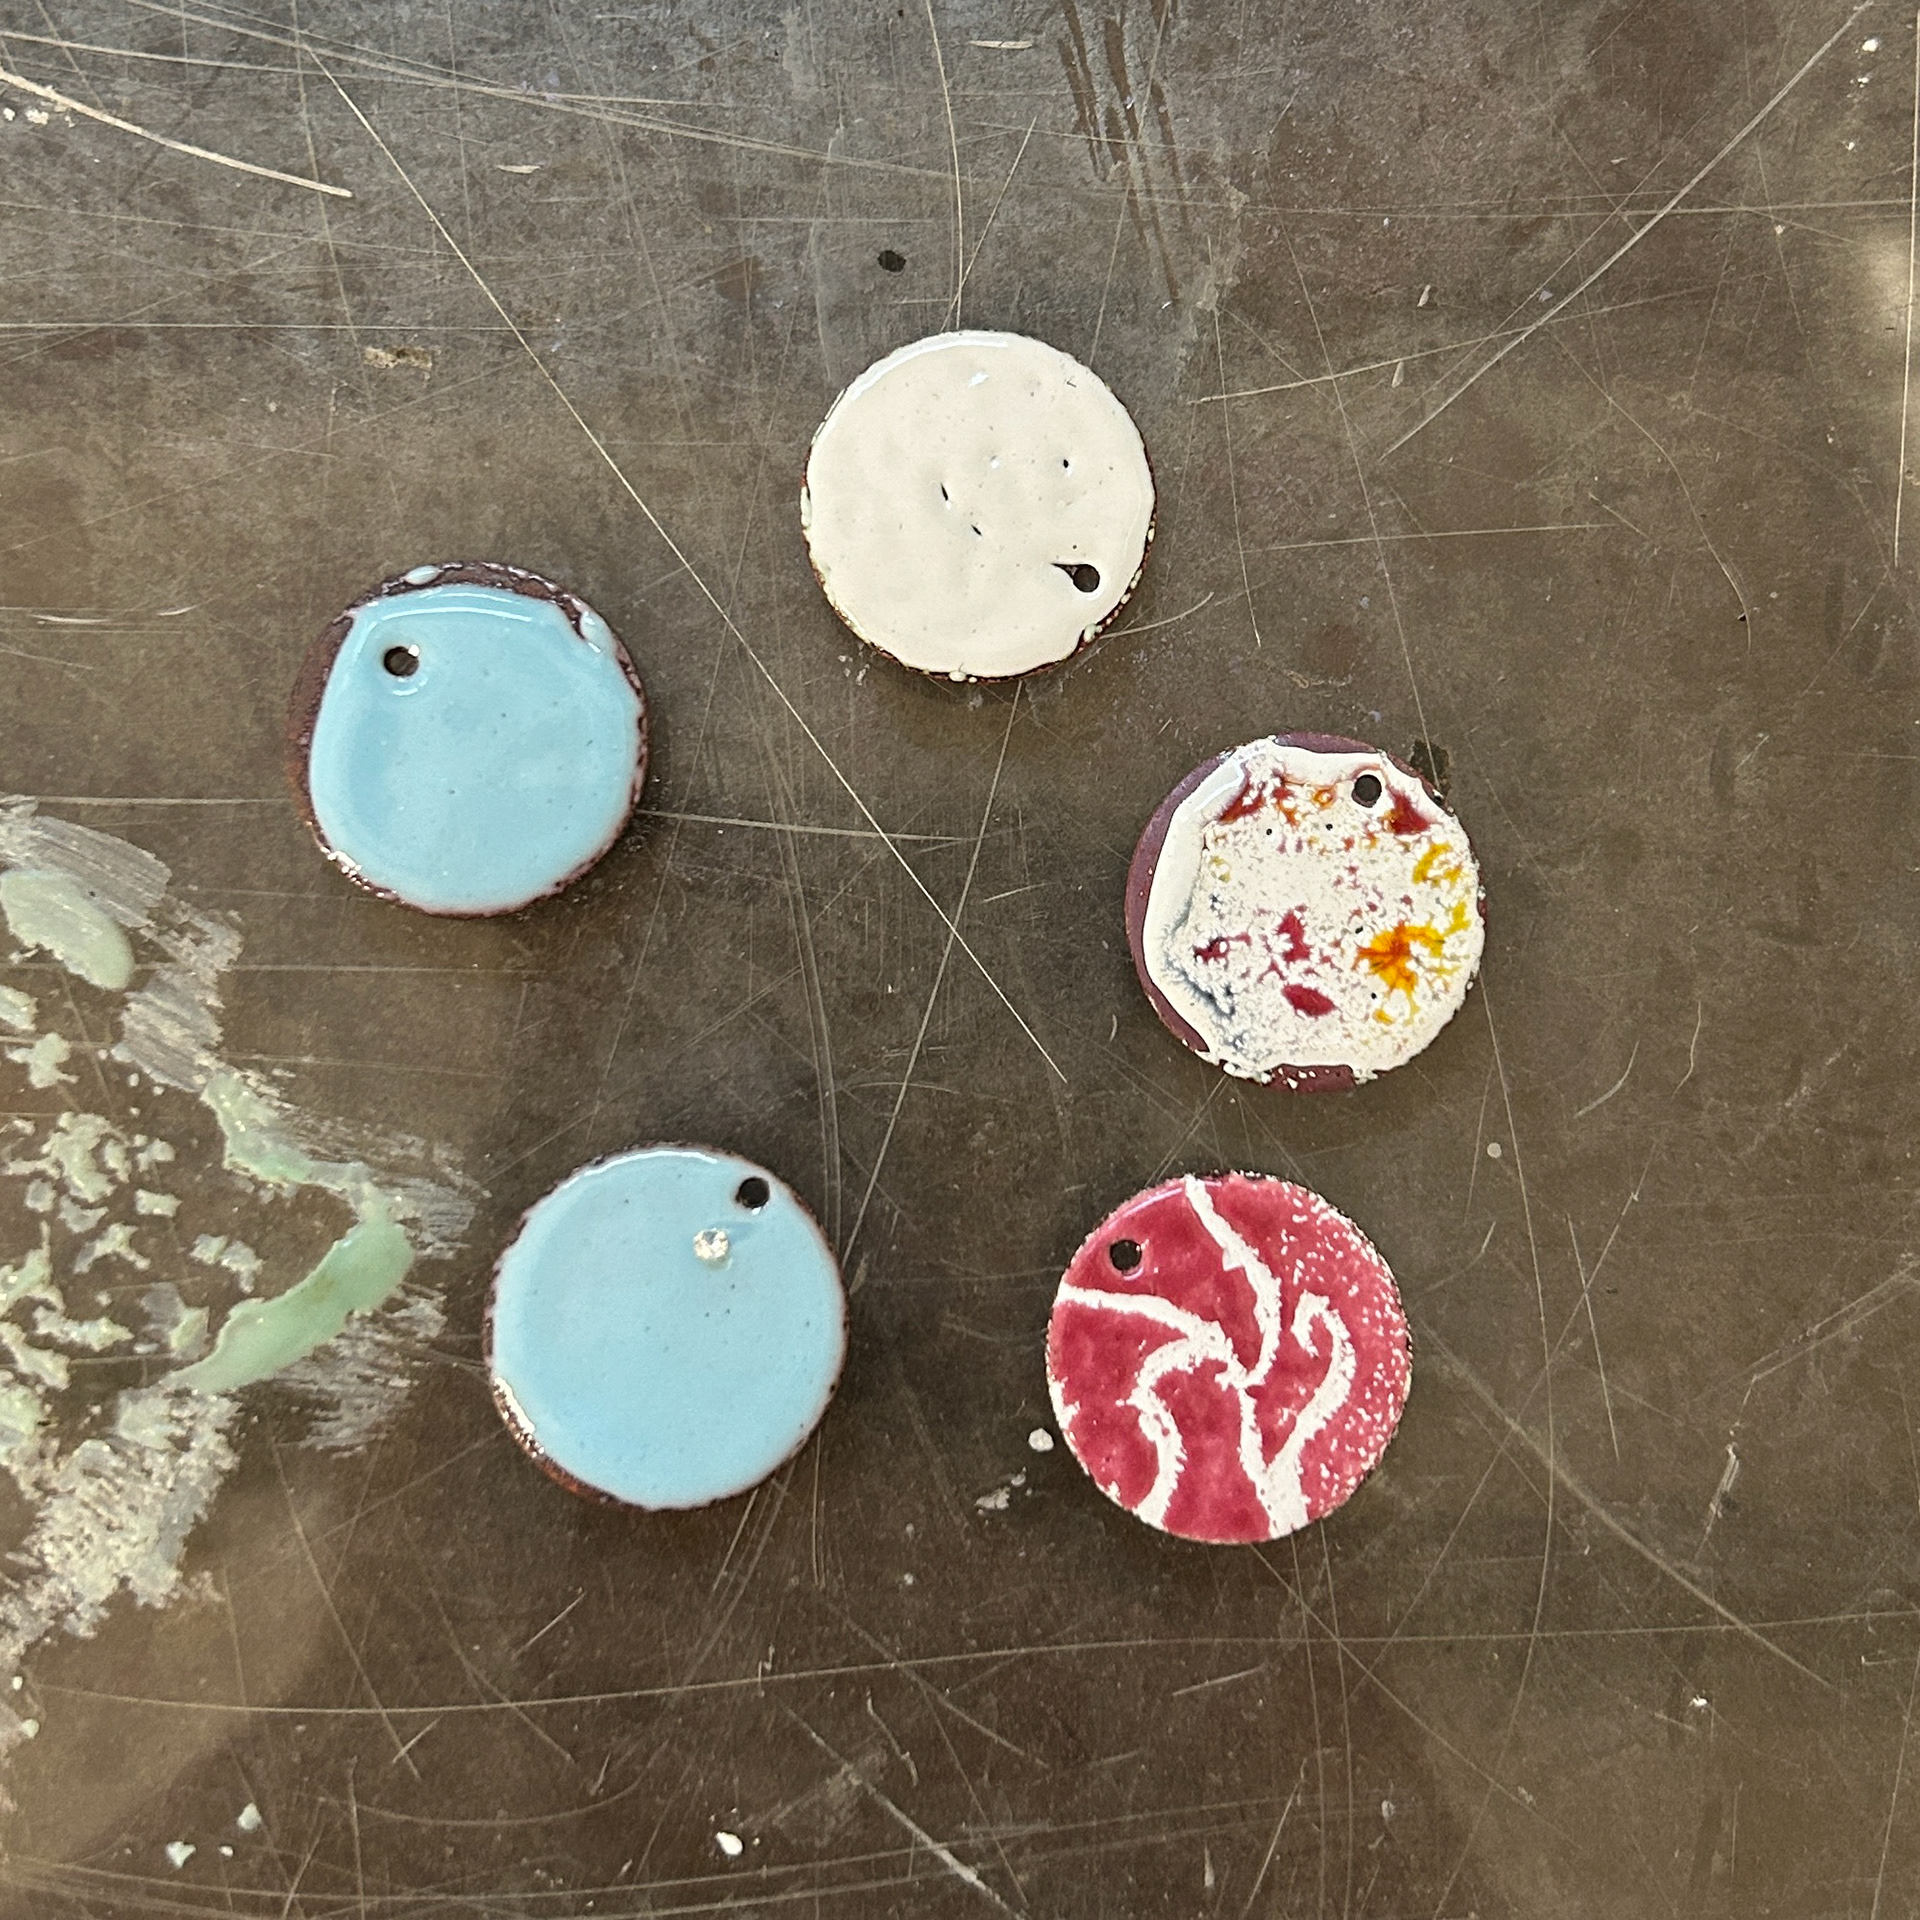
As an experimental piece, I decided that I wanted to test the capabilities of enamel. Last term I accidentally melted one of my enamelled pieces, and I ended up really liking how it looked. I tried to recreate this look with different coloured enamels however it didn't work the way that I wanted it to.
For another experimental piece, I used sgraffito techniques to mimic one of the ways my bacteria grew. While I did enjoy this, I feel as if I can't get the enamel to behave the way I want it to. The design spreads out too much while it is firing, whereas it is the fine, thin designs that I wanted to capture.
Finally, I experimented with setting a cz into fired enamel. I used hot water to heat the stone while the enamel was being fired, and then when I removed the enamel I dropped the stone into place. I hoped that while the enamel was still molten, then it would cool around the cz, resulting in it being held in place. However, this did not happen and ended up falling out a couple of minutes later.
After doing these test with the enamel, I decided that I didn't want to pursue the design idea of enamelling on top of the molten brass designs, so I focused more on my wax carving designs.
Design Development
Pendant
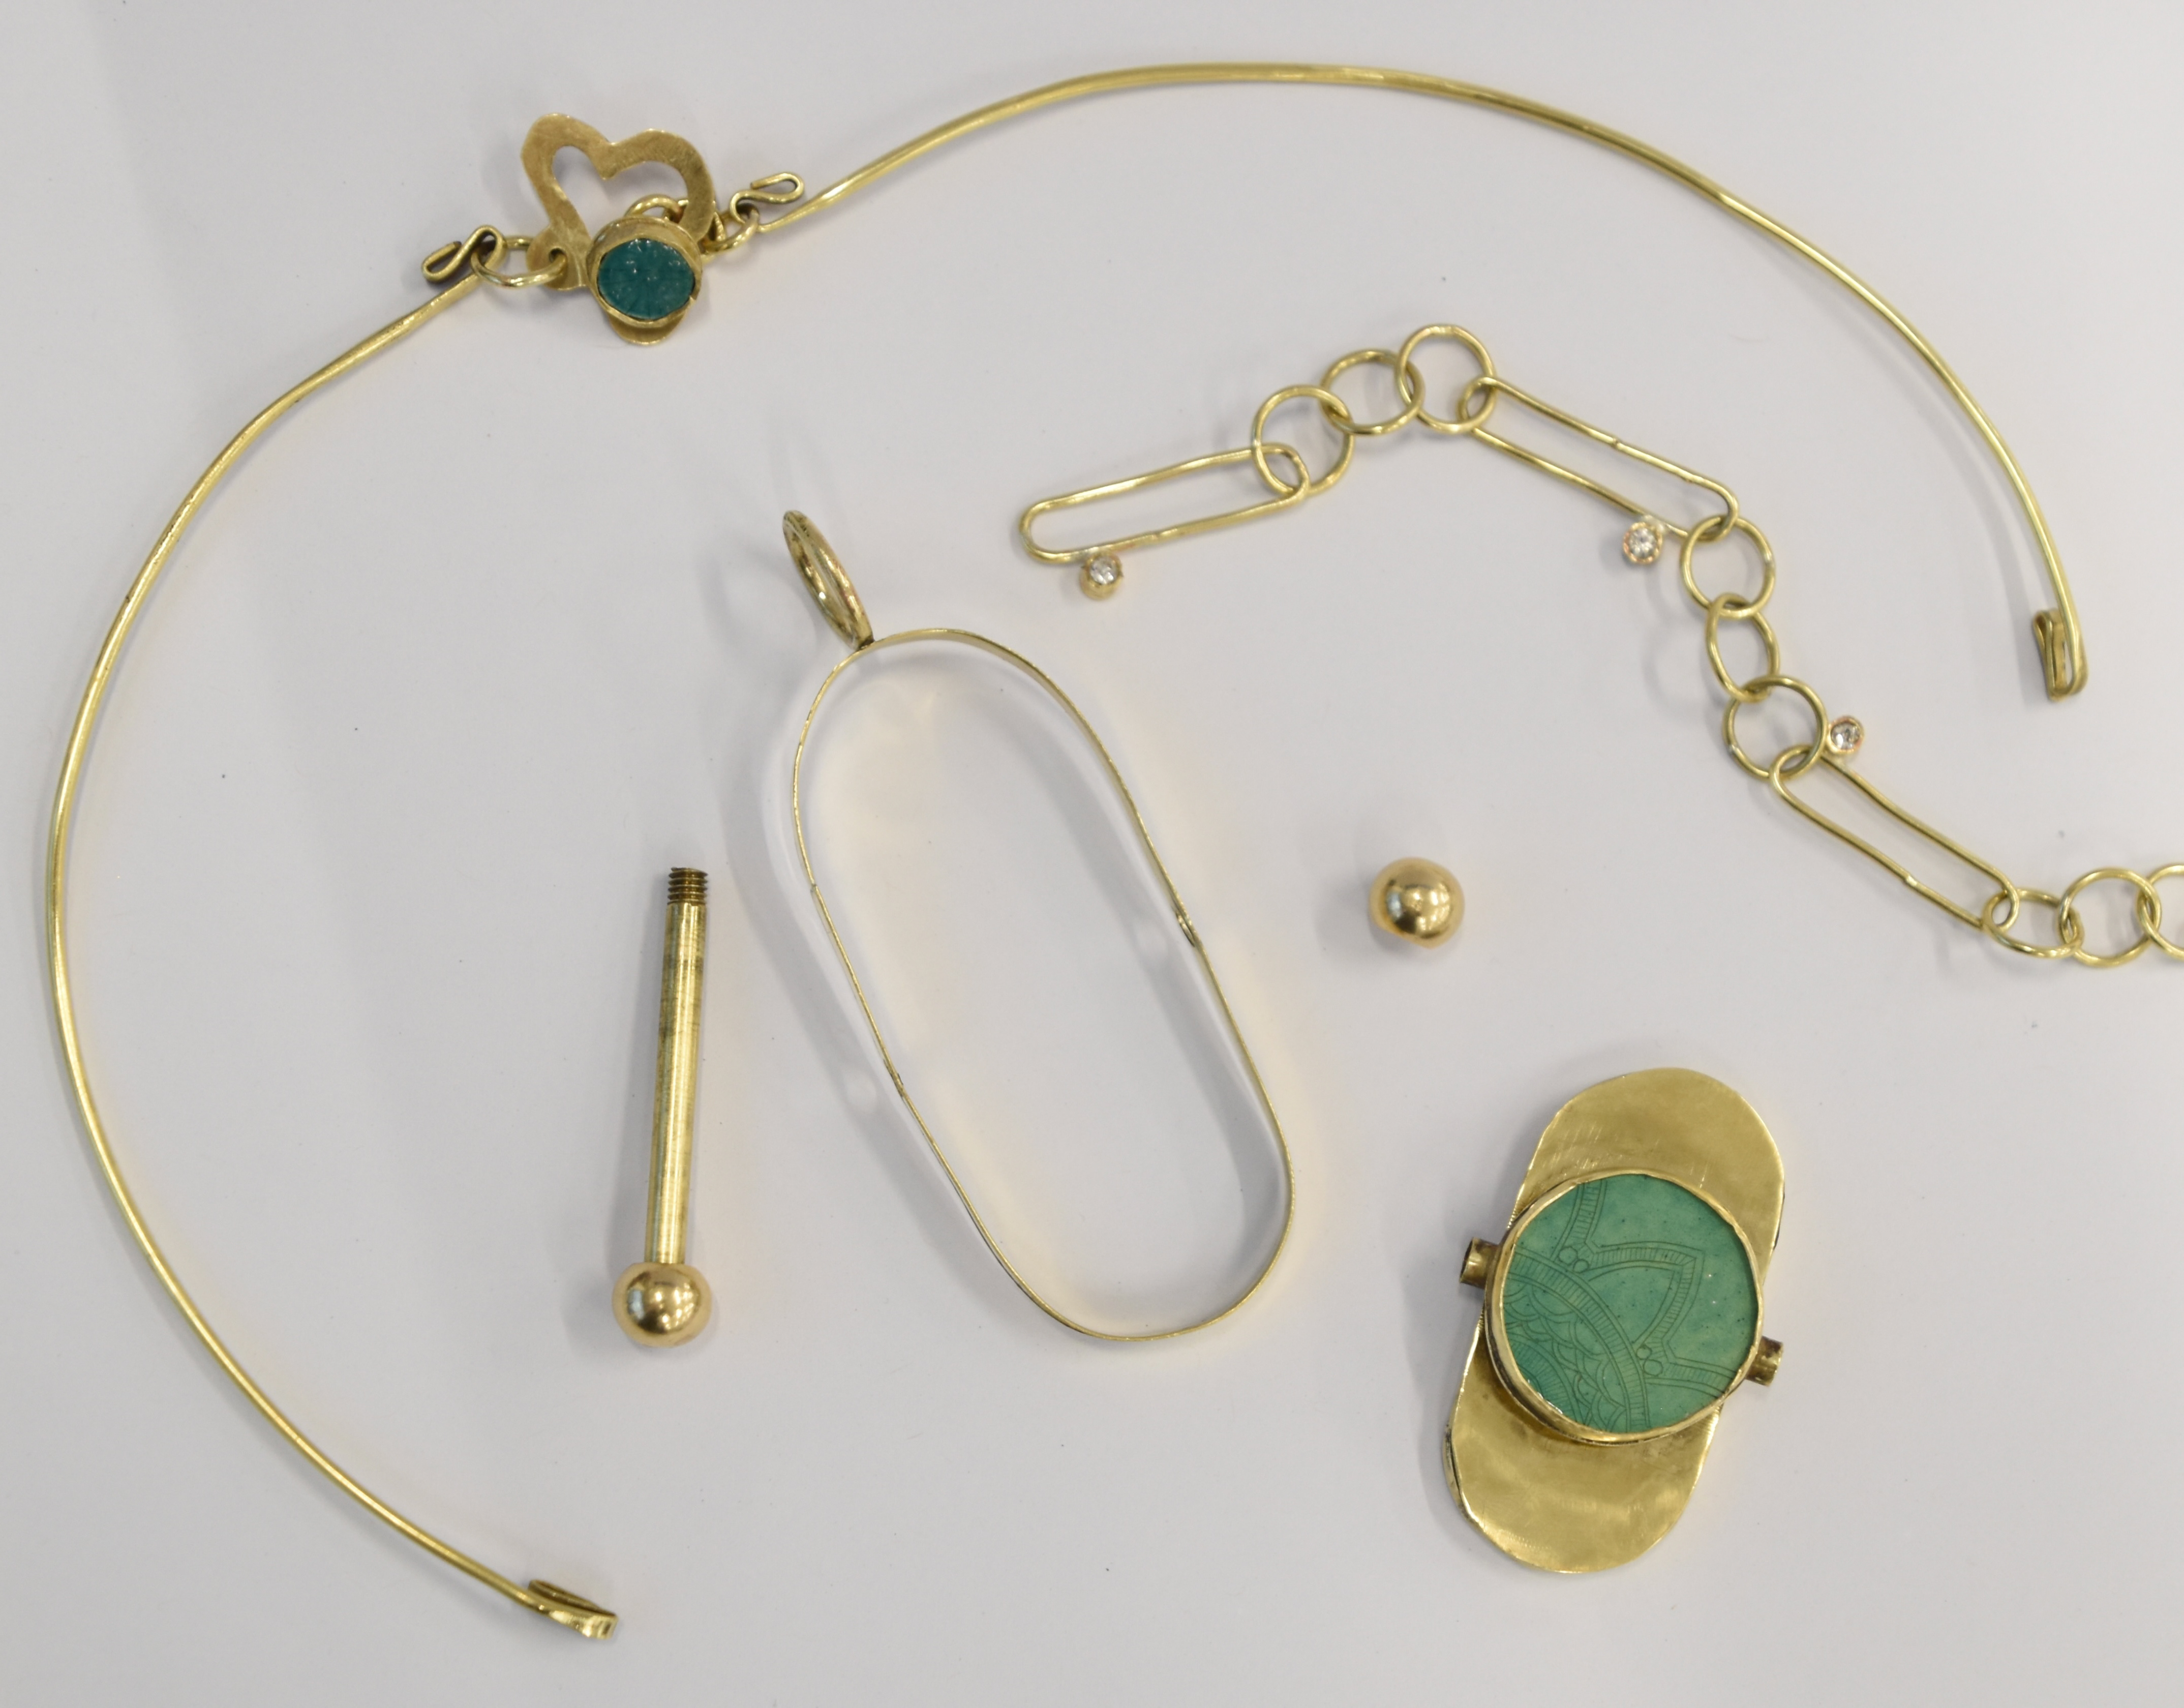
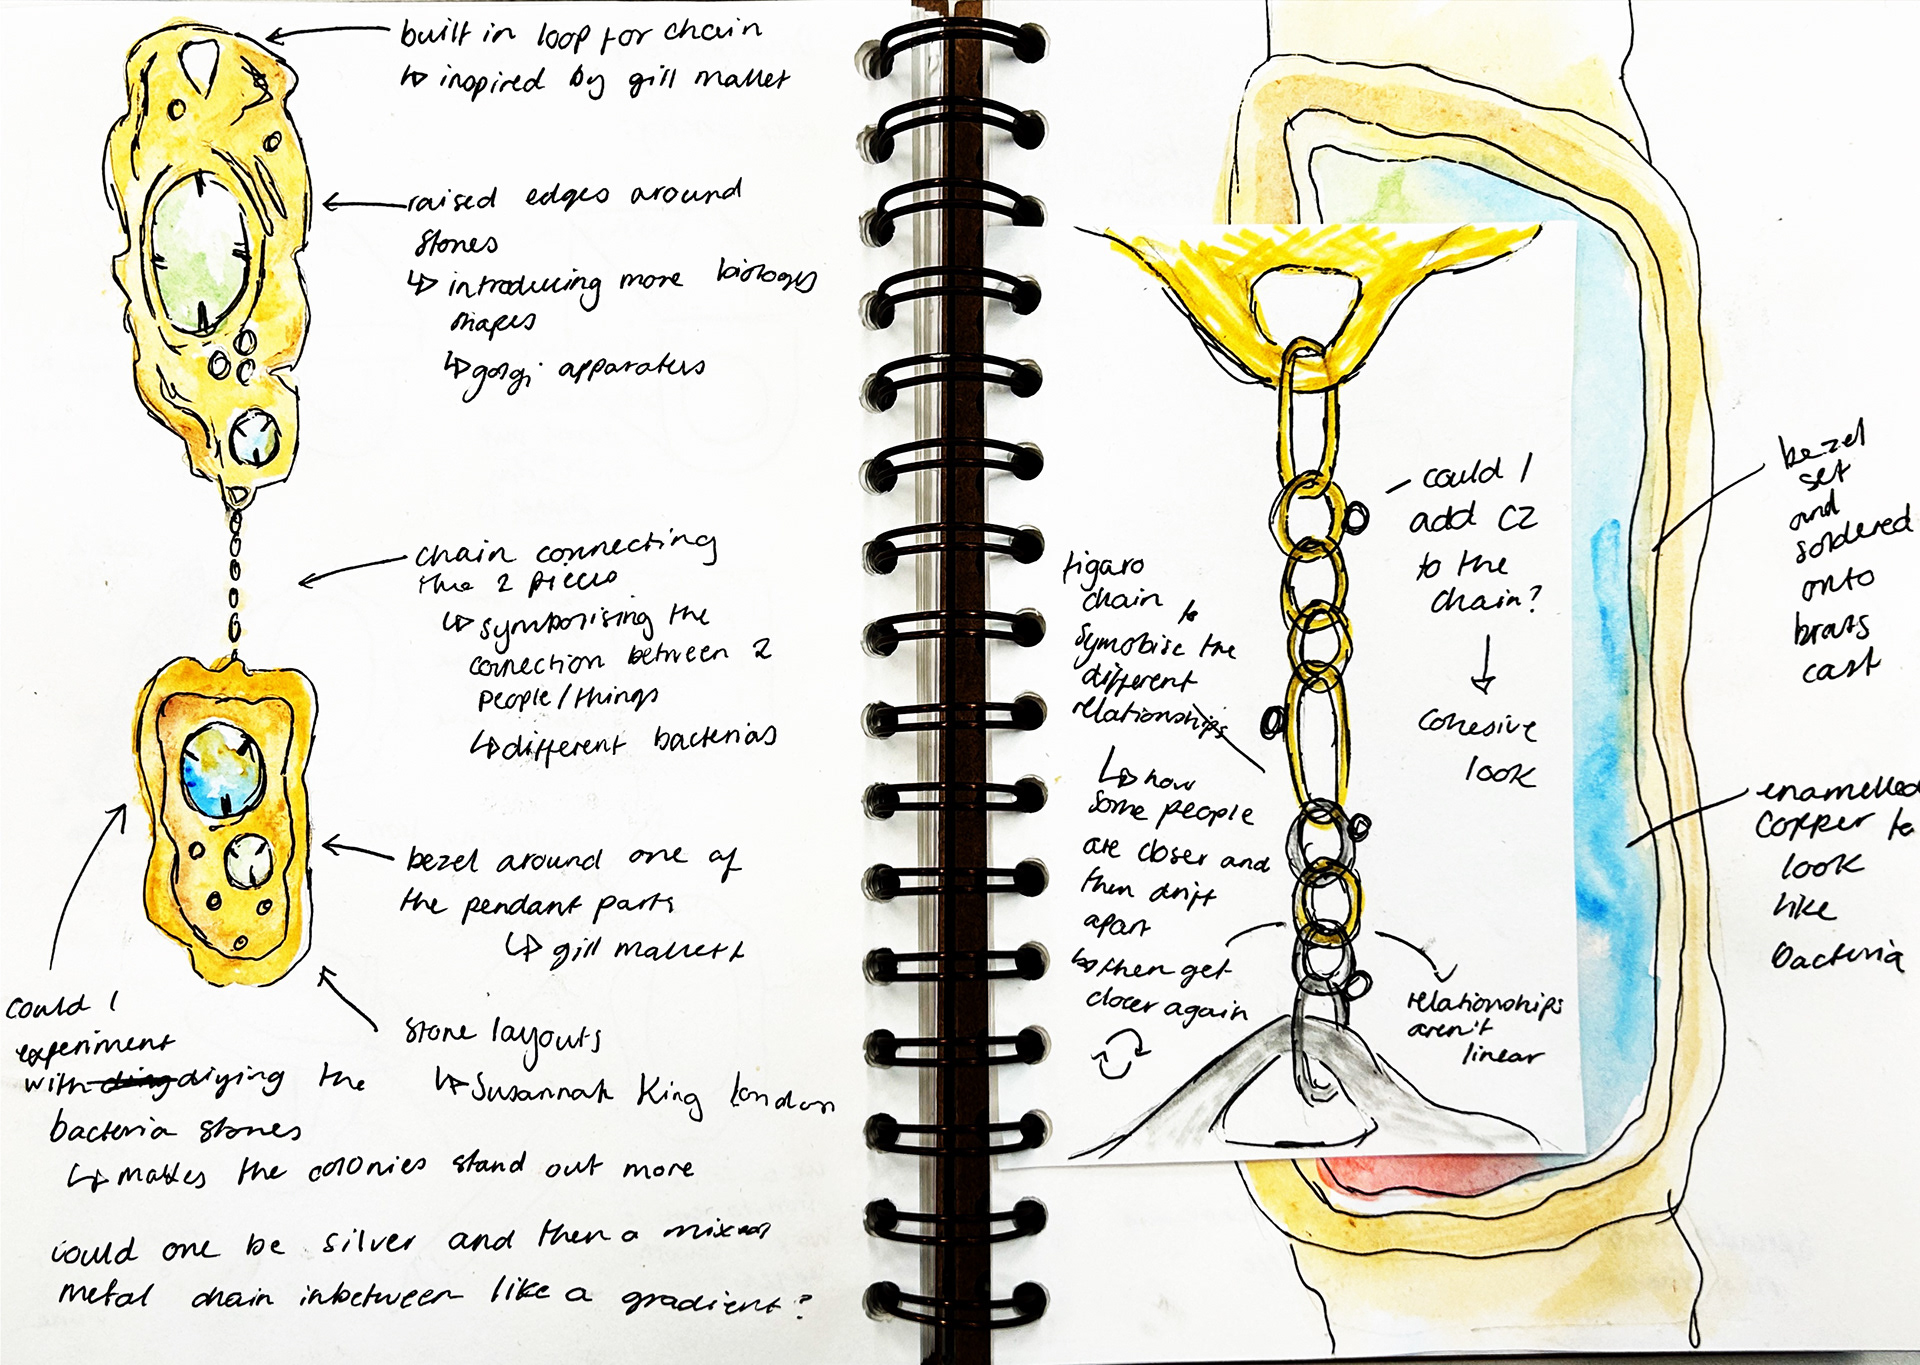
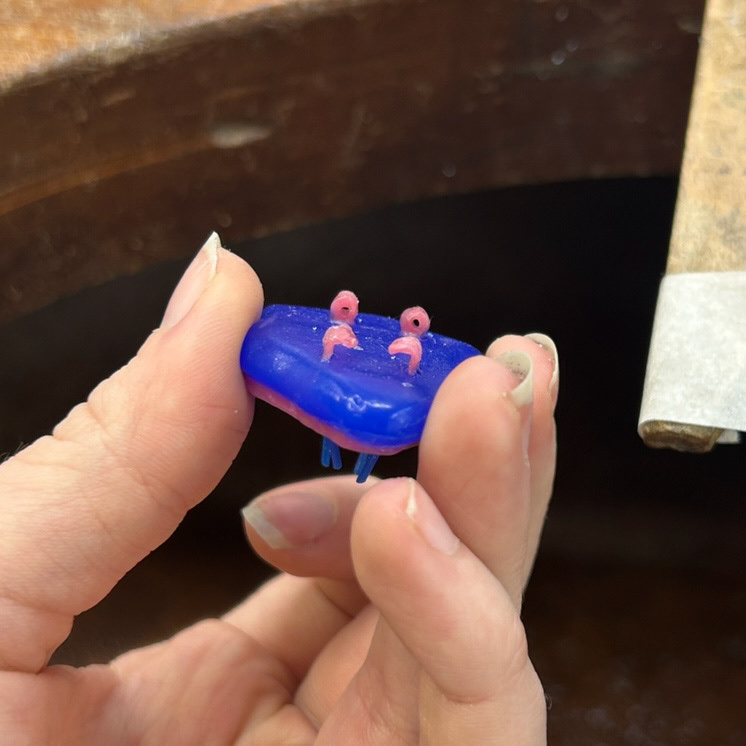
For another design, I created a two-part pendant. I included texture inspired by different organelles, as well as using techniques like flame polishing to result in a smoother, more organic finish.
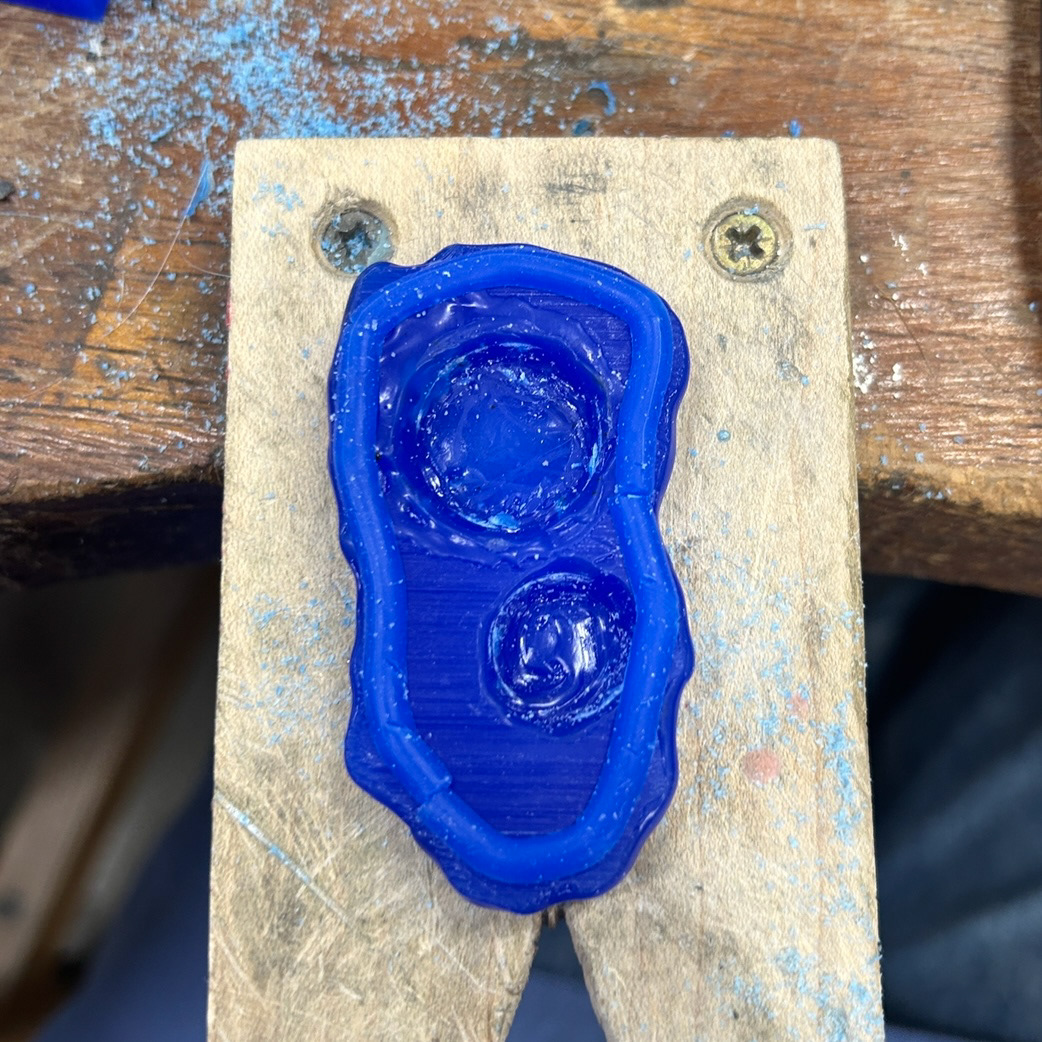
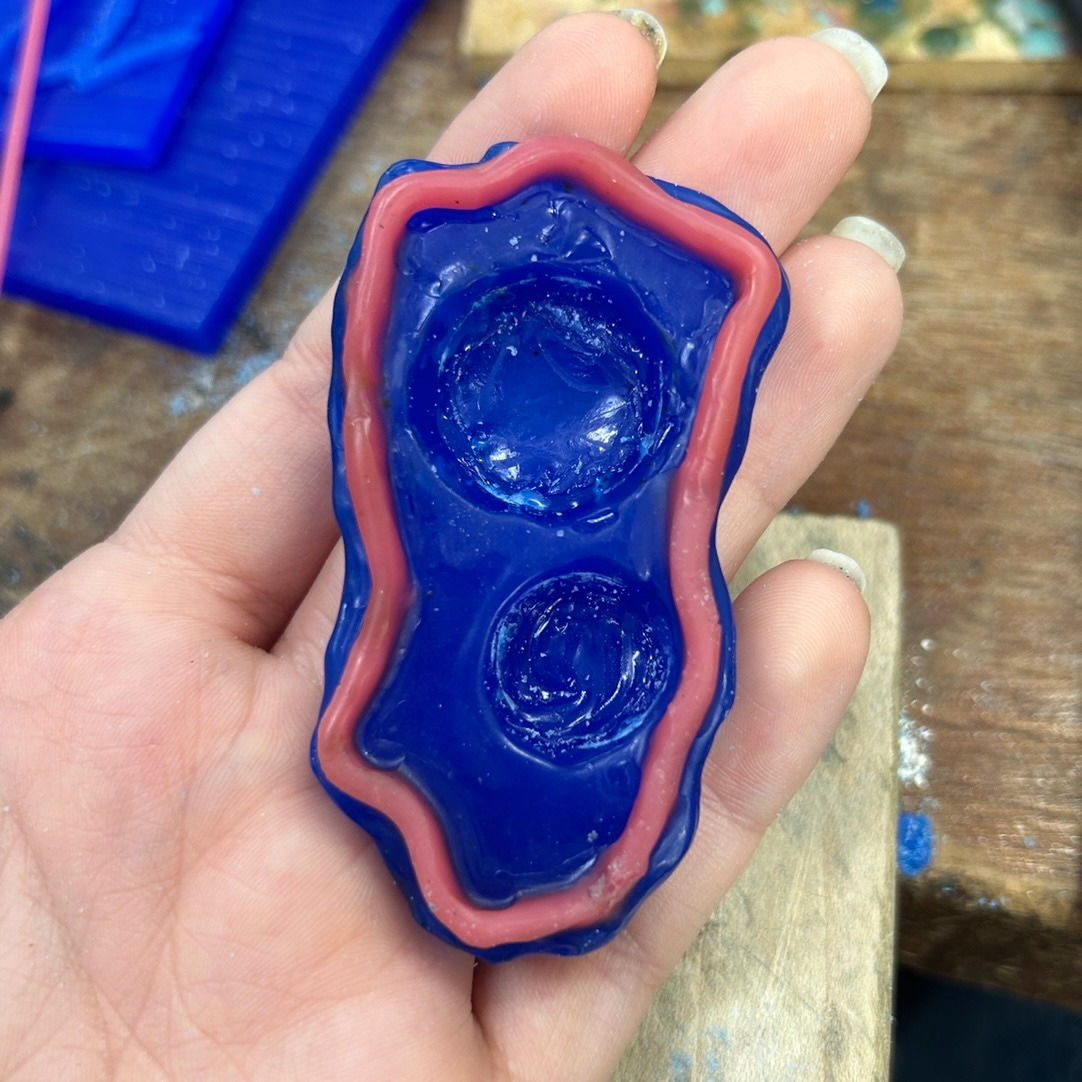
On the bottom pendant, I decided to add a border using wax wire, this was inspired by Jill Mallet's work. The border on her work reminded me of a cell wall, which led me to where my project is now.
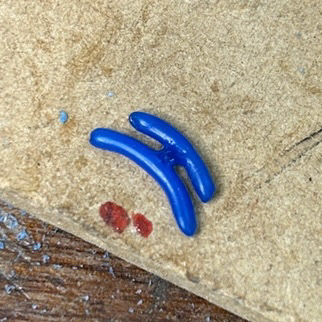
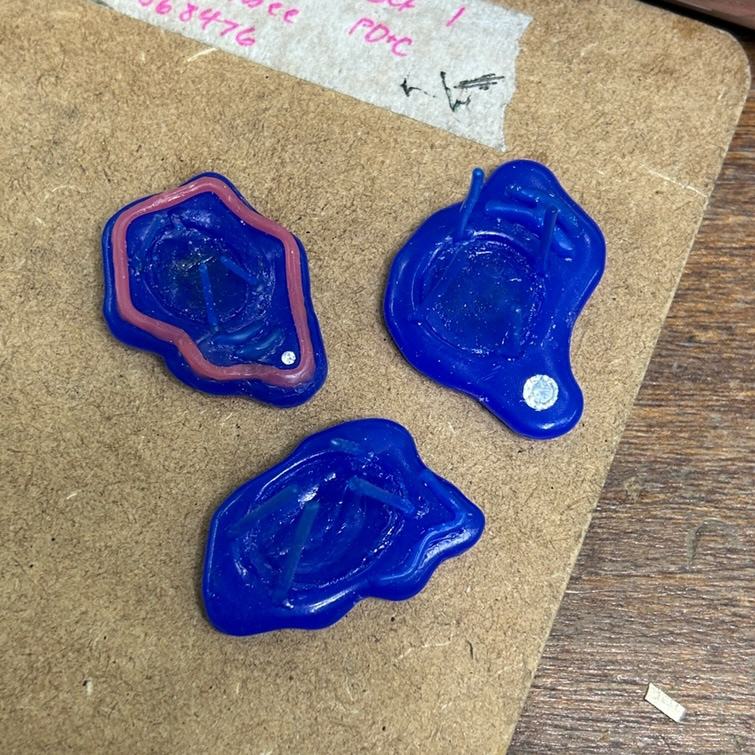
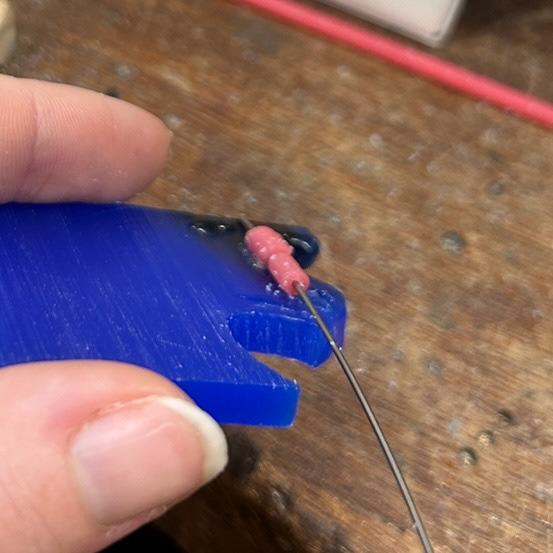
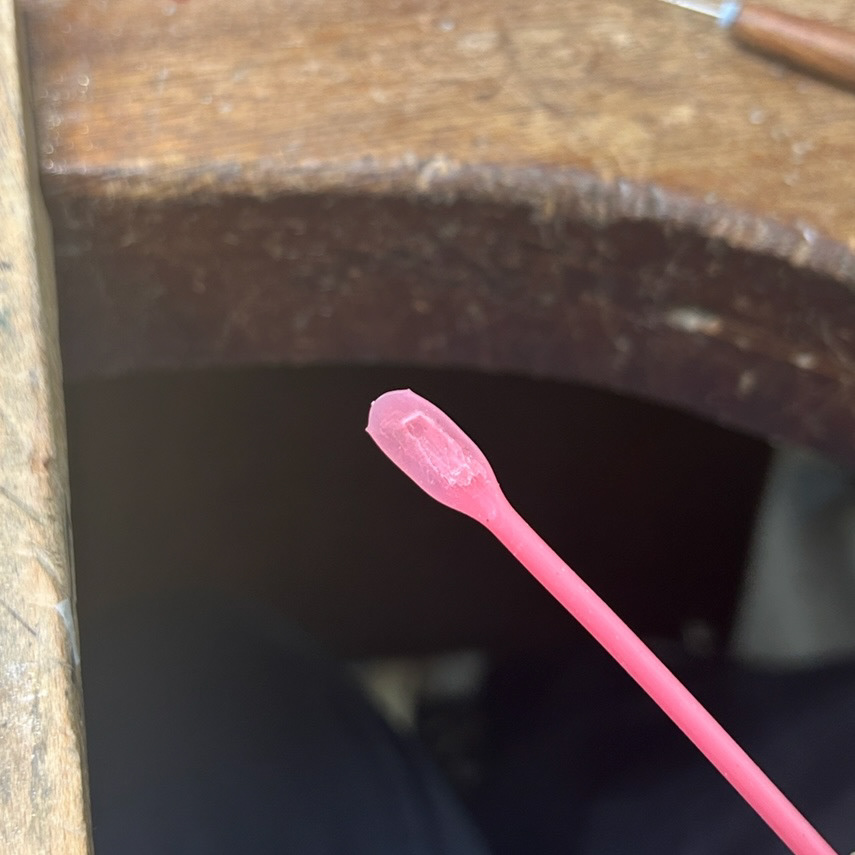
I first tried this with D-shaped blue wax, however it was quite hard to mould around the molten form. This resulted in my switching to pink wax, as I could heat the wax up in my hands and make it much easier to form.
I also decided to carve some bails onto my pieces, as I realised that simply soldering them on may not look as cohesive as I wanted to achieve. As well as that, I wanted to develop my design of the prongs. Previously, I had been casting the whole wax wire and then filling it down after casting. This was very time-consuming and often resulted in the prongs looking quite geometric and harsh. For this design, I chose to use the wax wire again, but this time used a soldering iron and a hot scalpel to make the prongs more molten. I feel as if this resulted in a more complimentary design/feature.

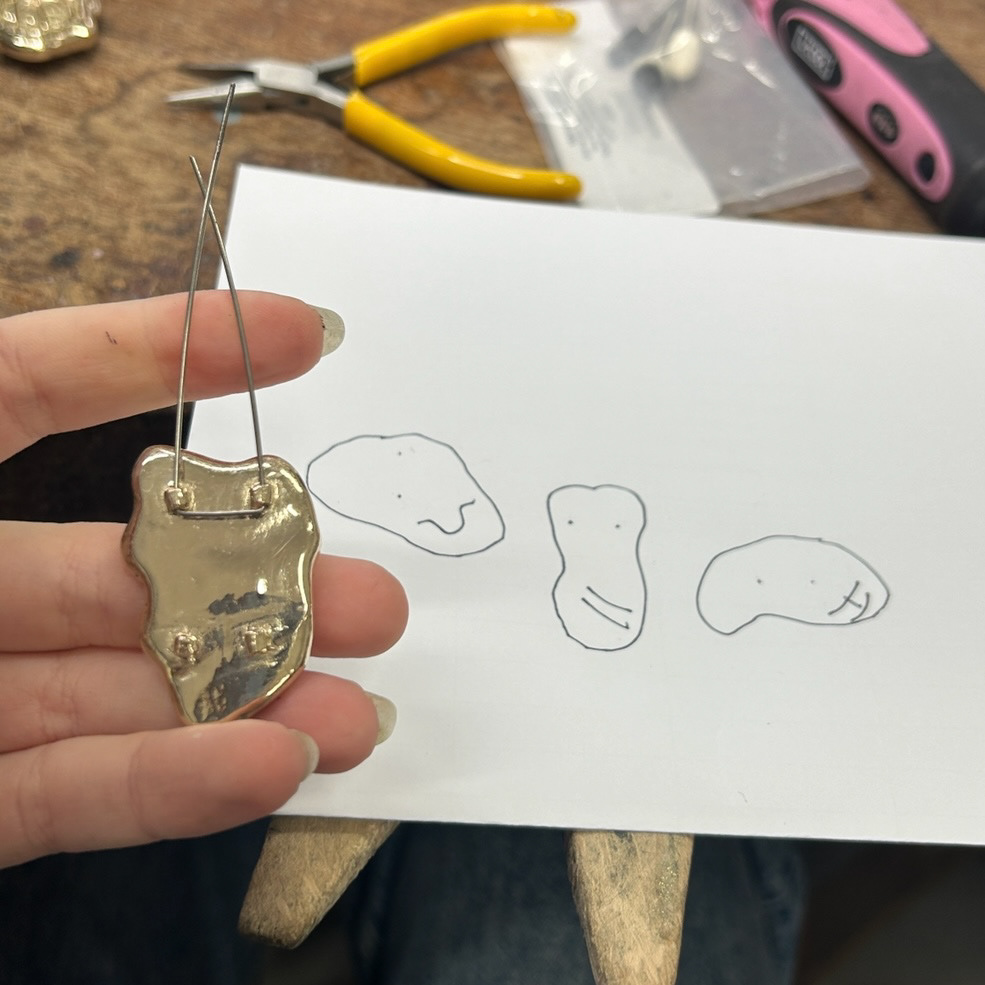
My original sketch compared to the outcome.
After removing the plaster from around the cast, I realised that neither of the pieces had been cast correctly. Even though I had measured out the correct amount of brass, it looked like there was not enough to fill my brass mould. However, I have learnt that adding extra brass to the casting process may need to be a necessary step to ensure that my pieces cast correctly, even though it may cost me slightly more. The workshop had also changed back to the original plaster, which meant that there was no bubbles left on my casts.
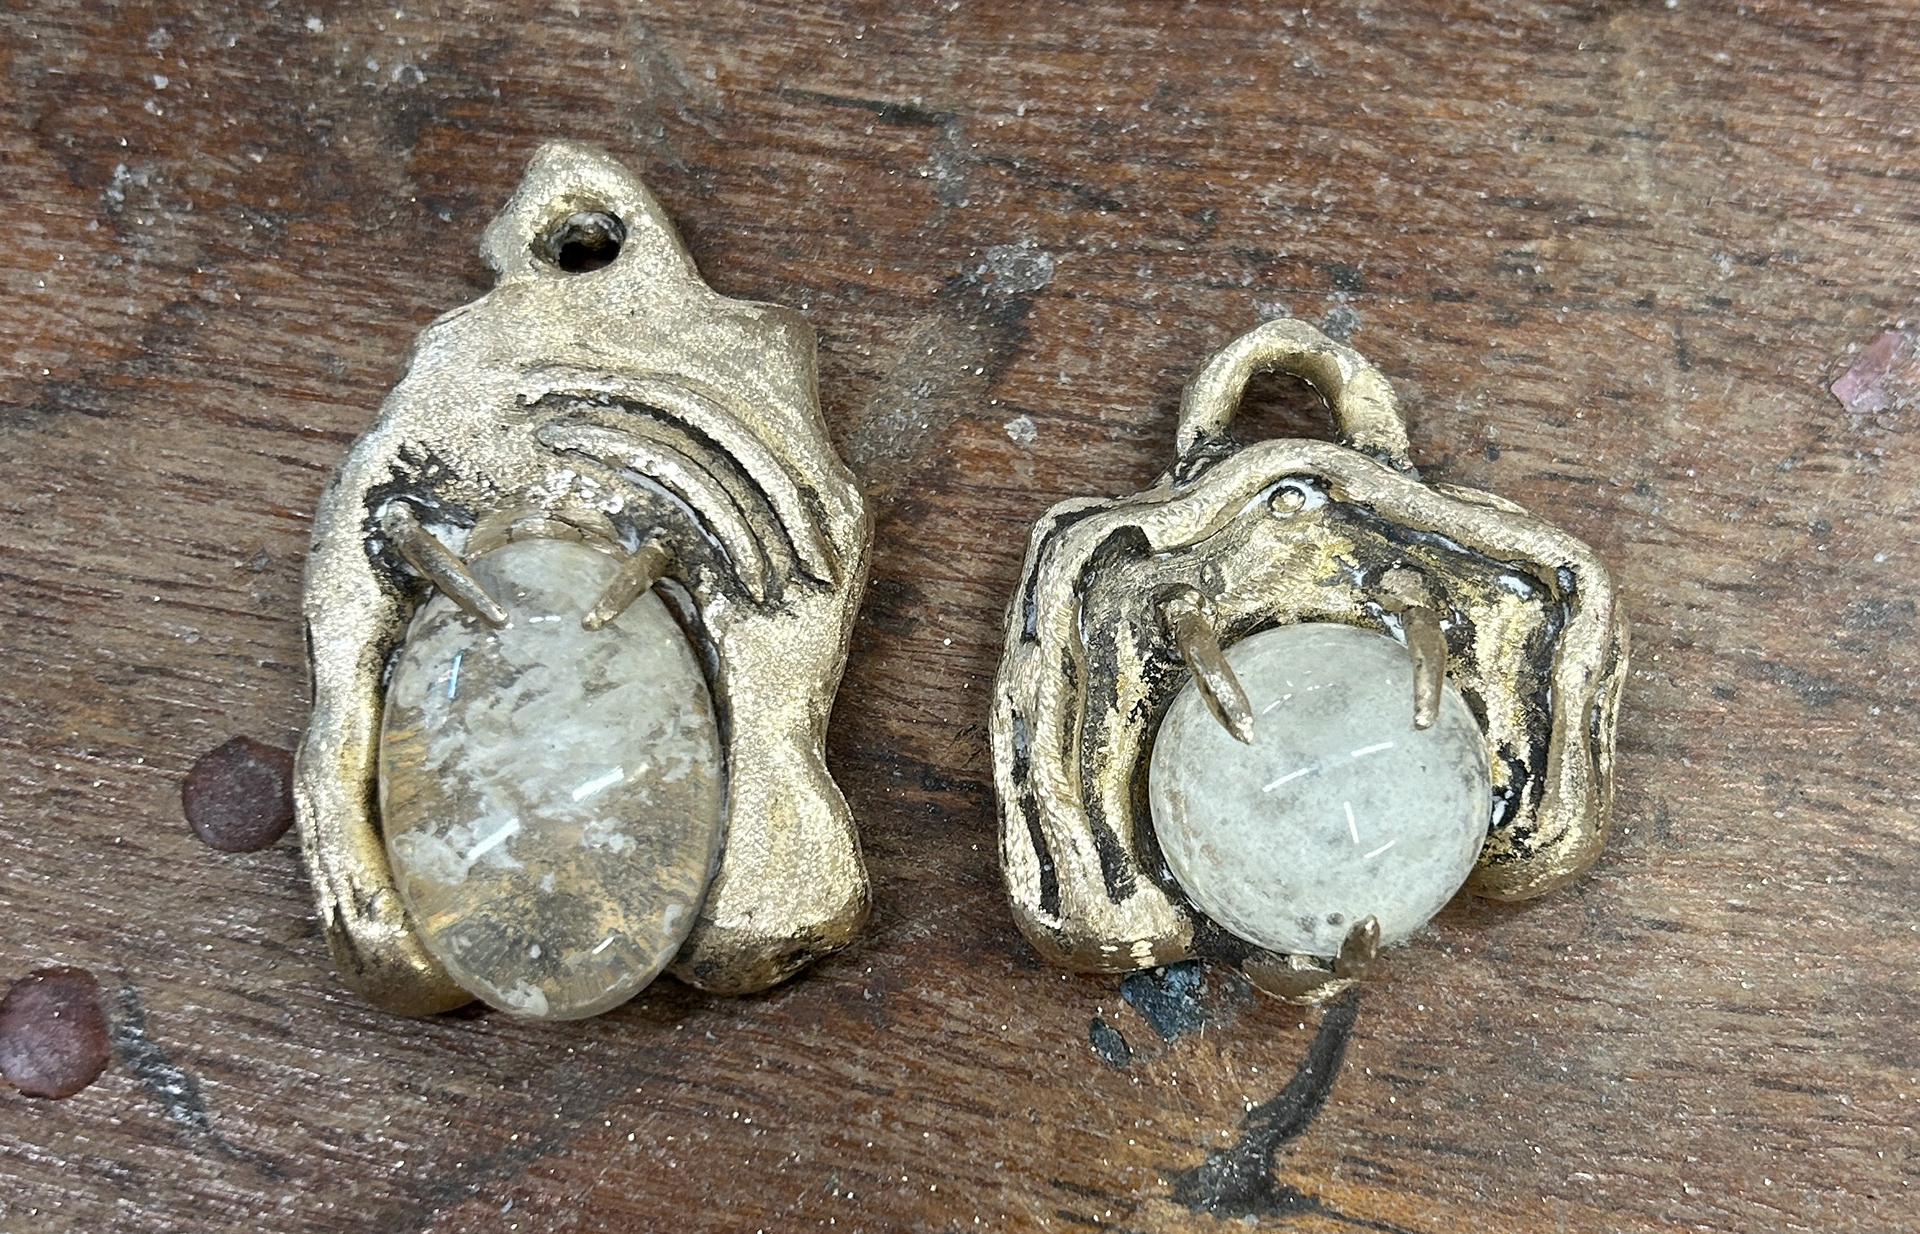
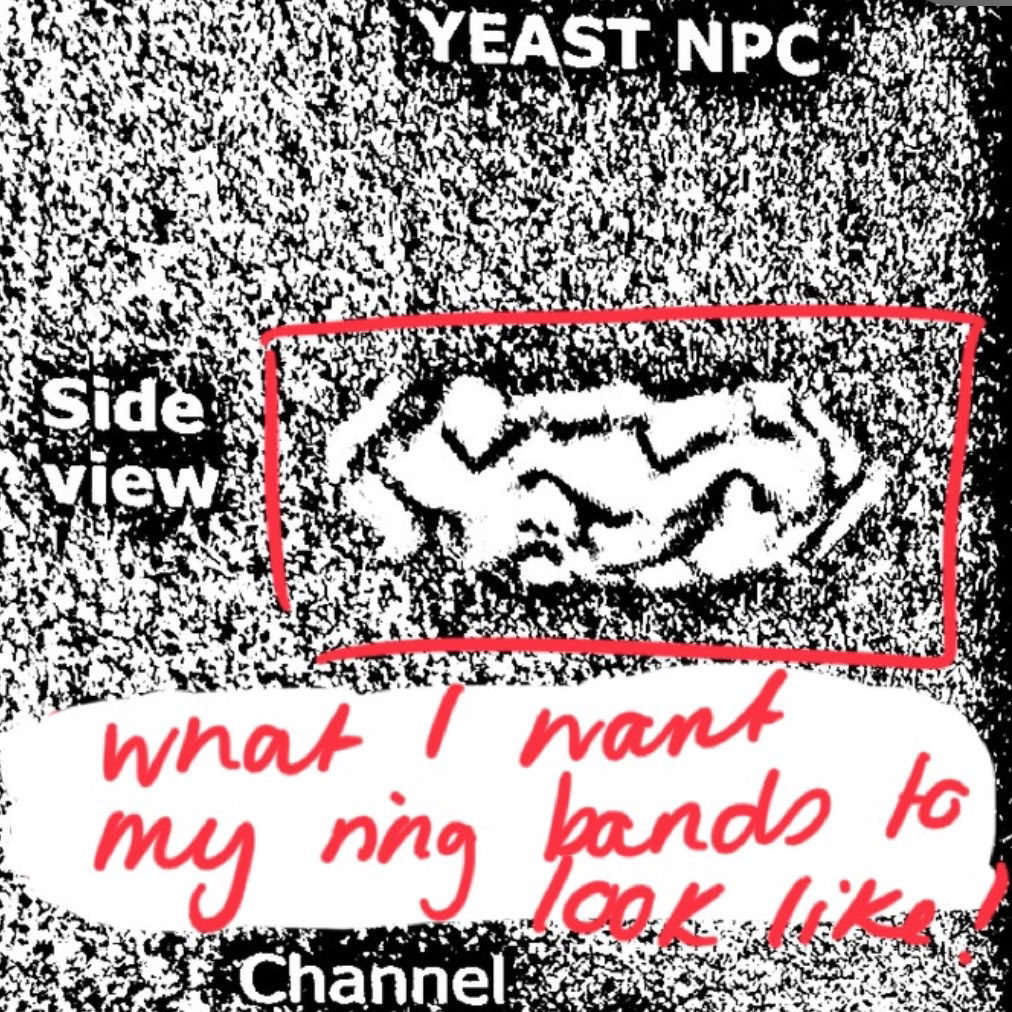
Experimenting with Stone Seats
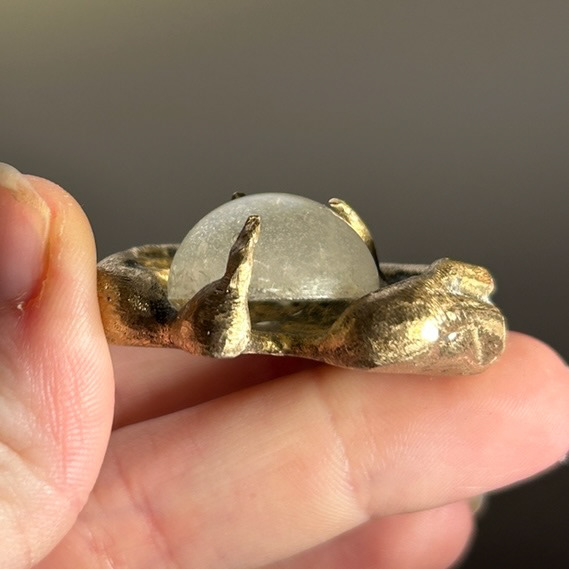
Although my previous casting attempts resulted in only half of my design being successfully cast, it did offer me the opportunity to examine the side-on view of how my stones were positioned within the design. I realised that there was a noticeable gap between the brass and the stone. I thought that this feature made my designs look unrefined and careless. I understood the importance of addressing this issue and made it my top priority before moving on to more designs. While the prongs effectively held the stone securely in place, this gap meant that dirt could potentially become trapped between the stone and the brass, resulting in a poor final product. It became clear that I needed to explore alternative settings for the stones and explore new methods to ensure that the stone sat flush with the brass. From here onwards, I also decided to make brooches as I felt I wanted to technically challenge myself with different mechanisms. I also felt that the wearer would be interactive with these pieces, rather than a pendant.
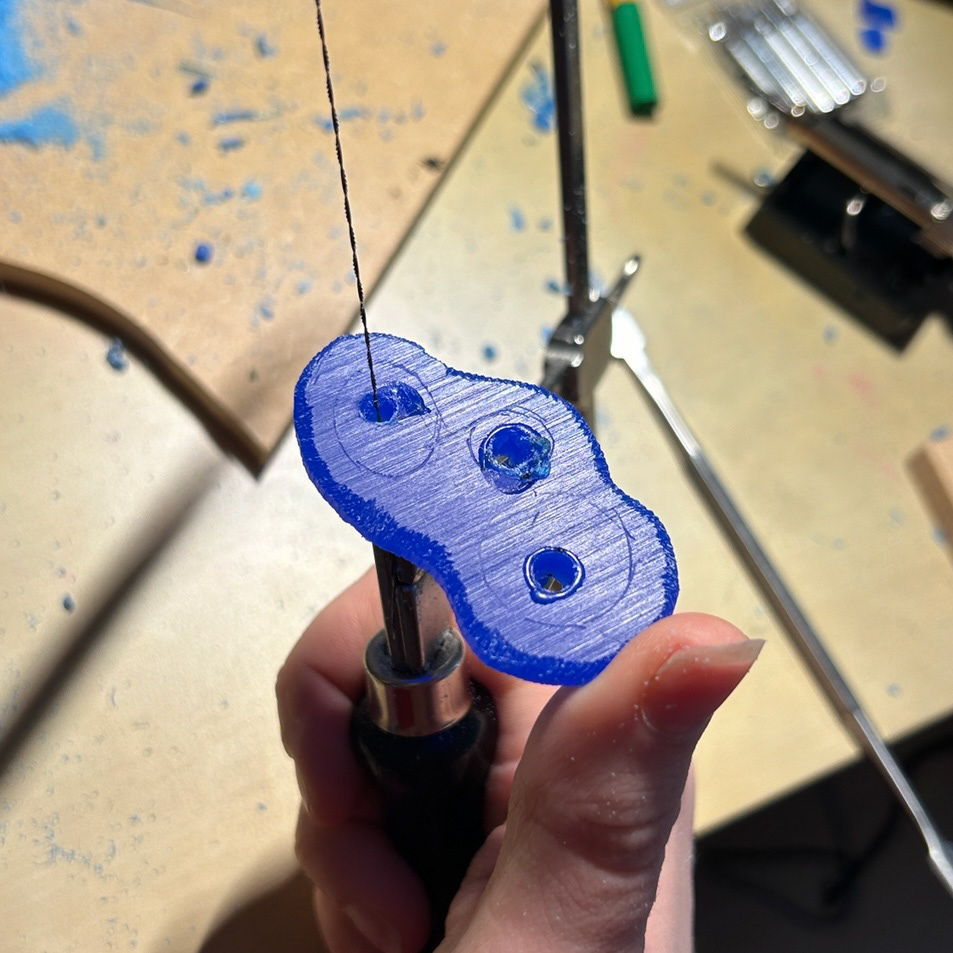
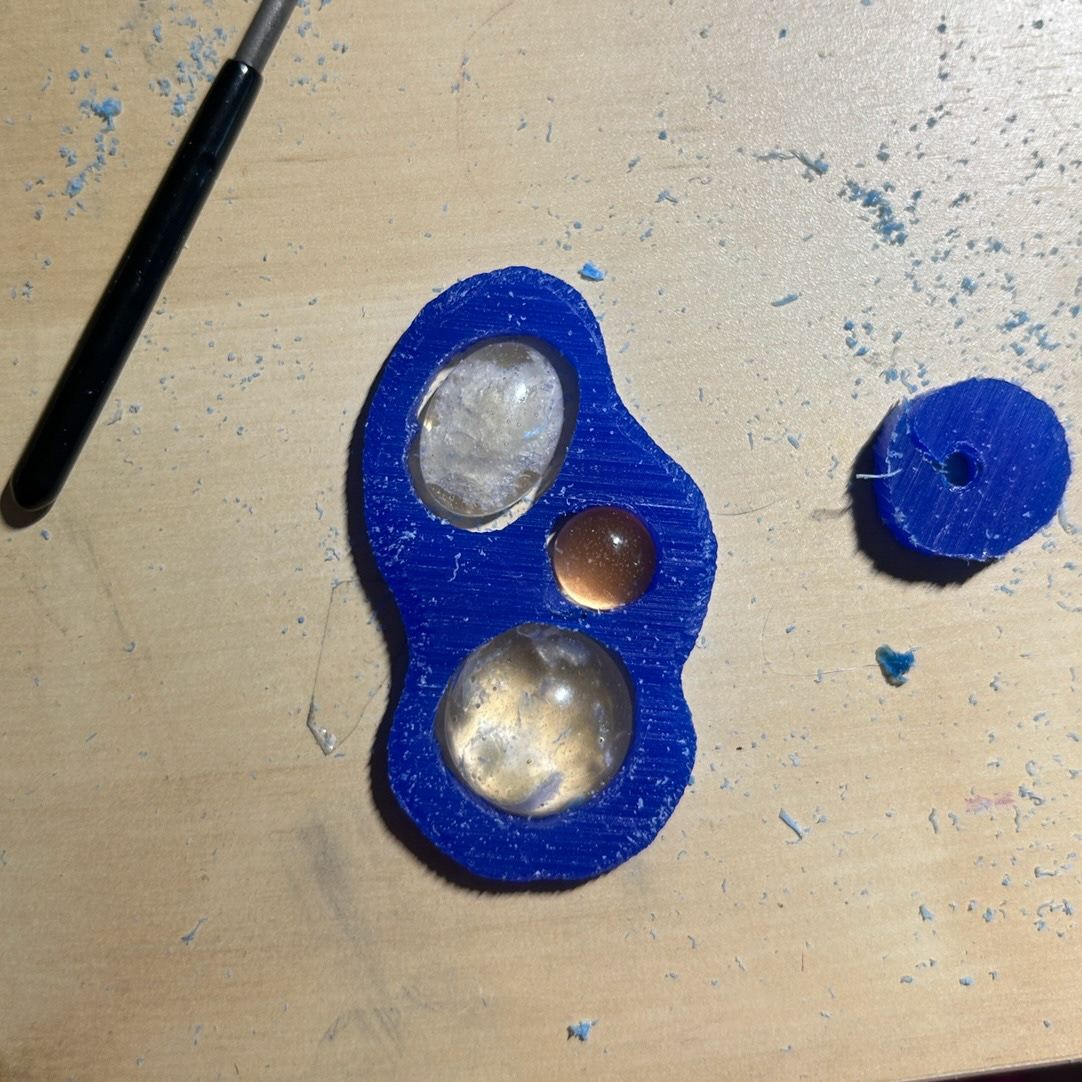
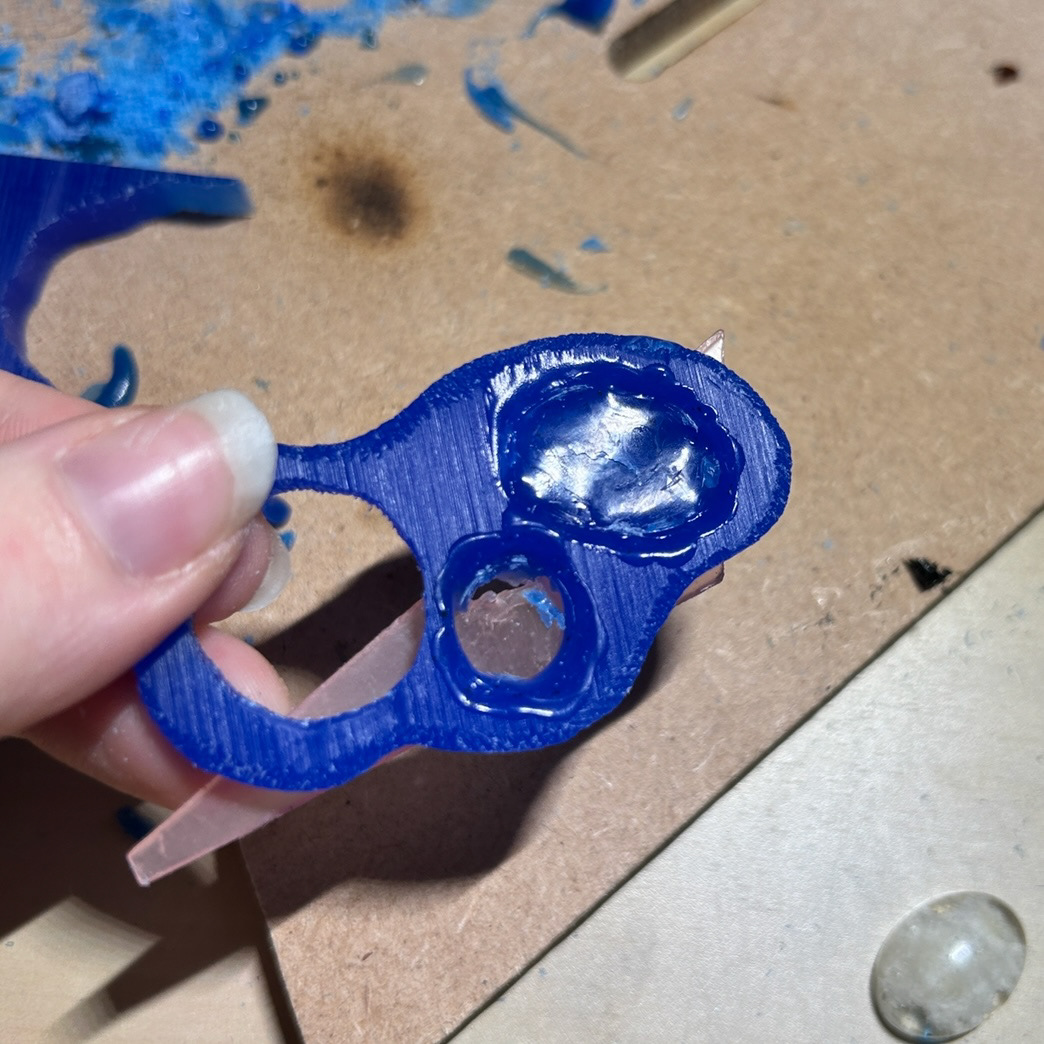
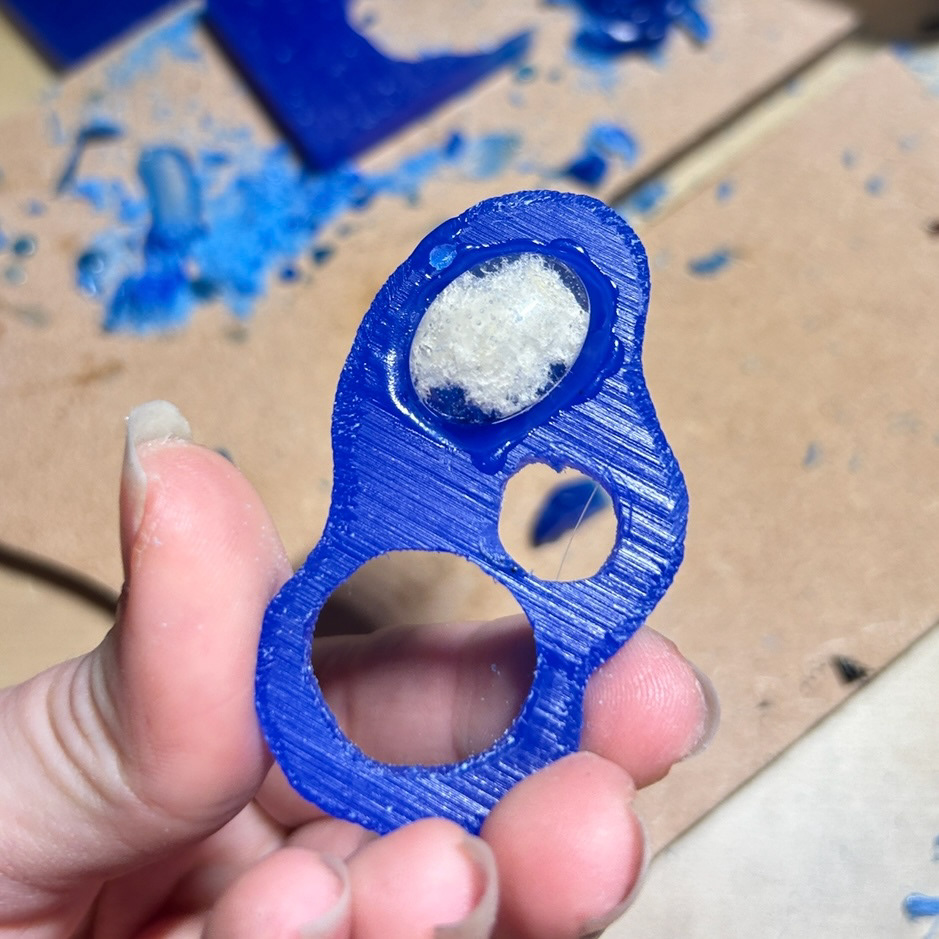
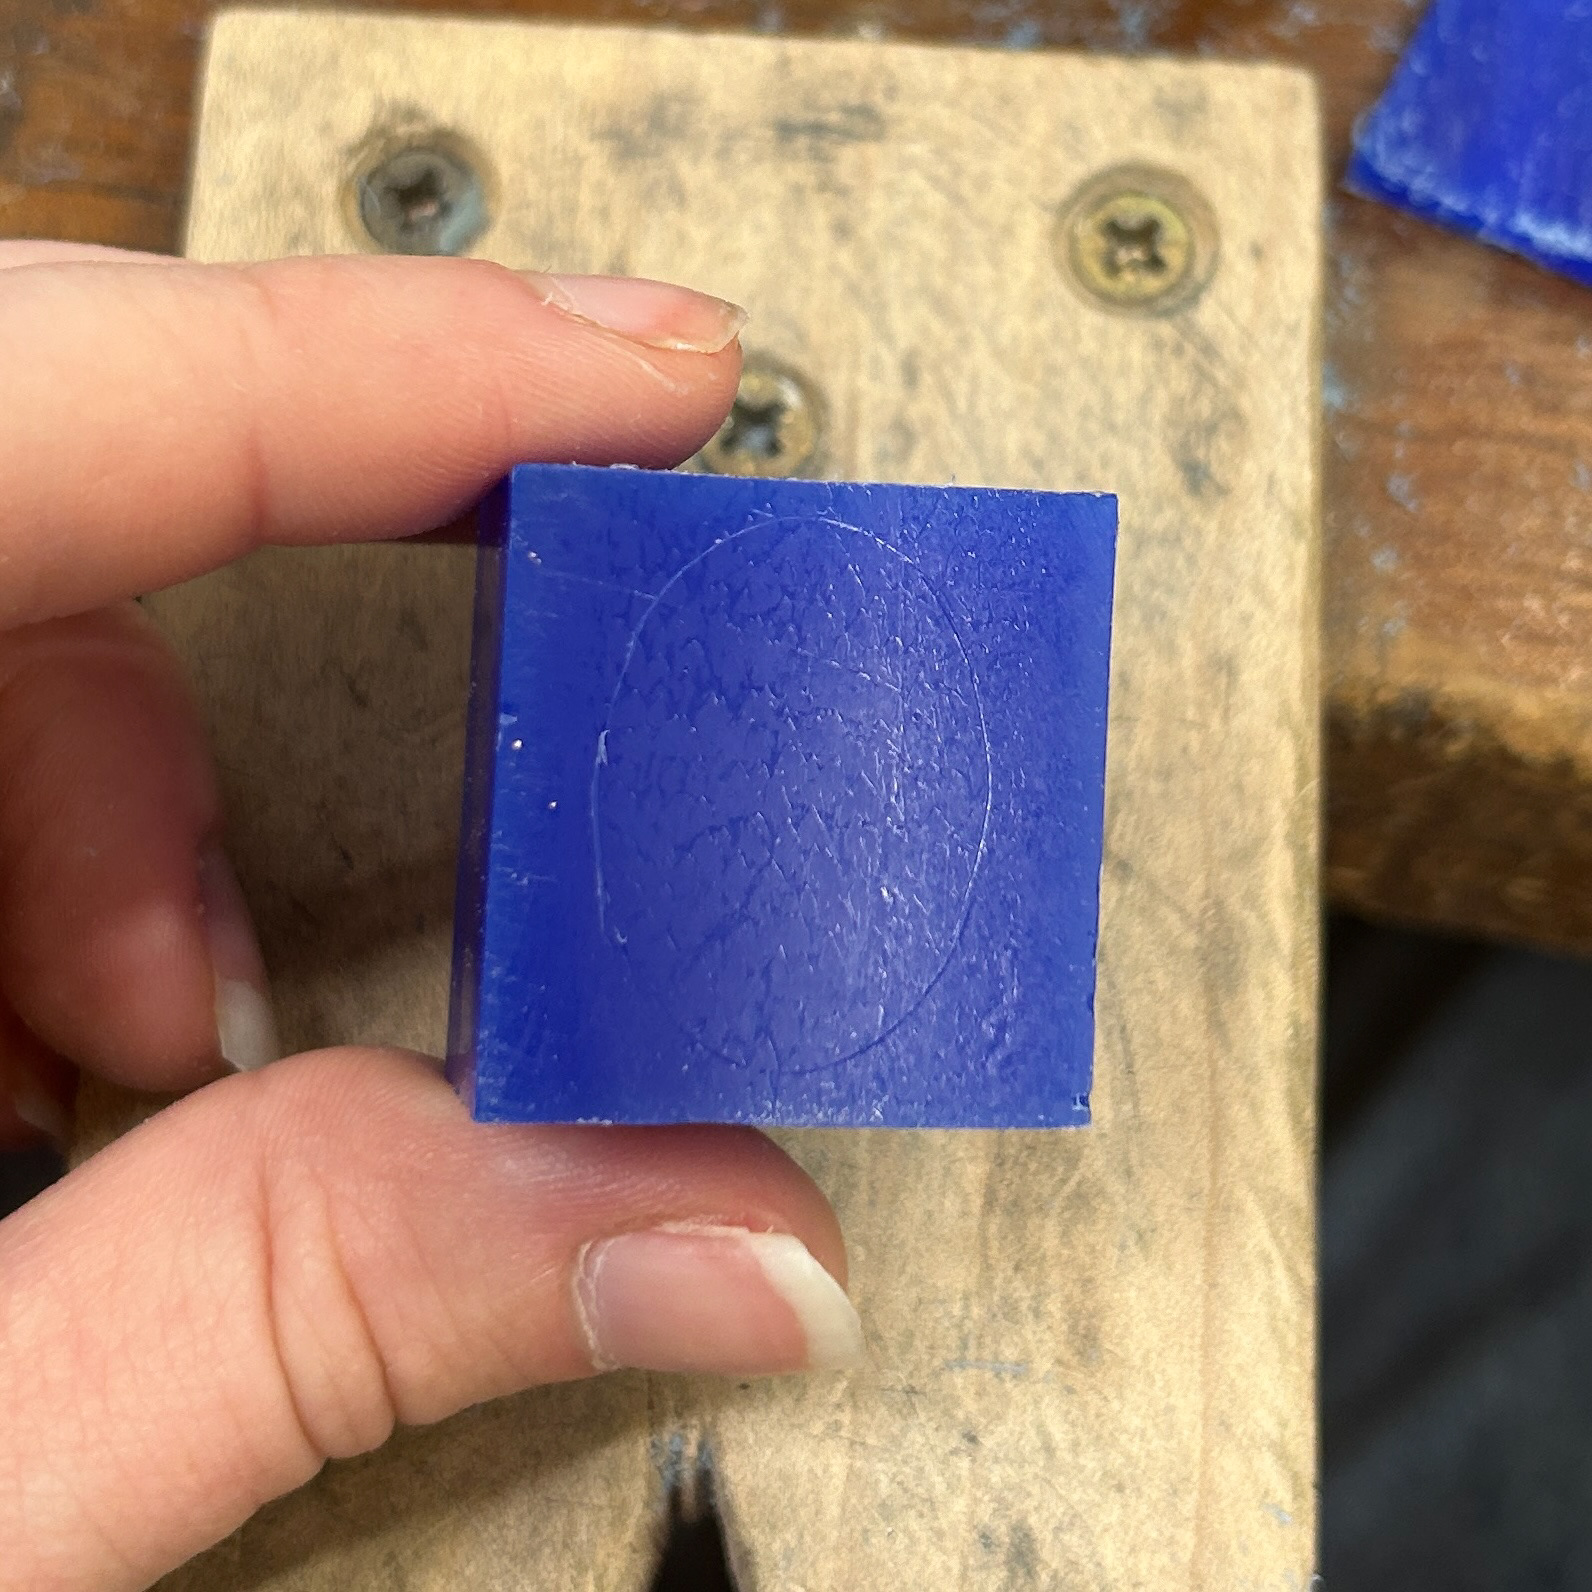
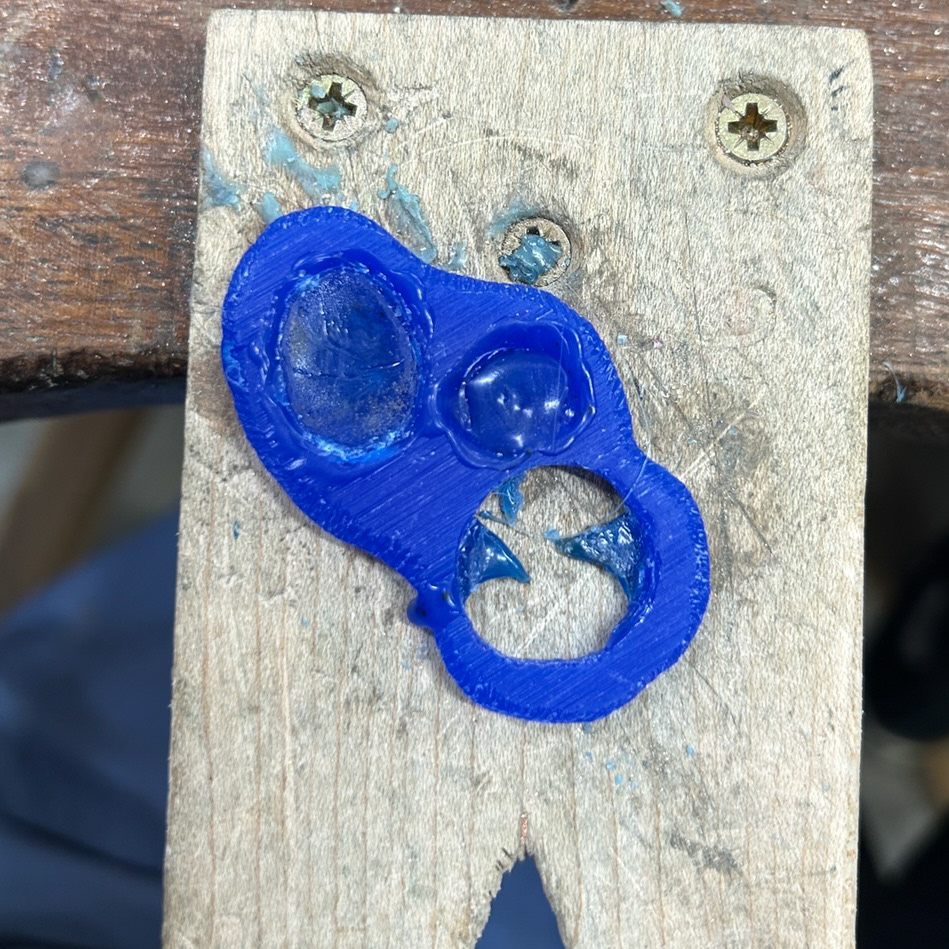
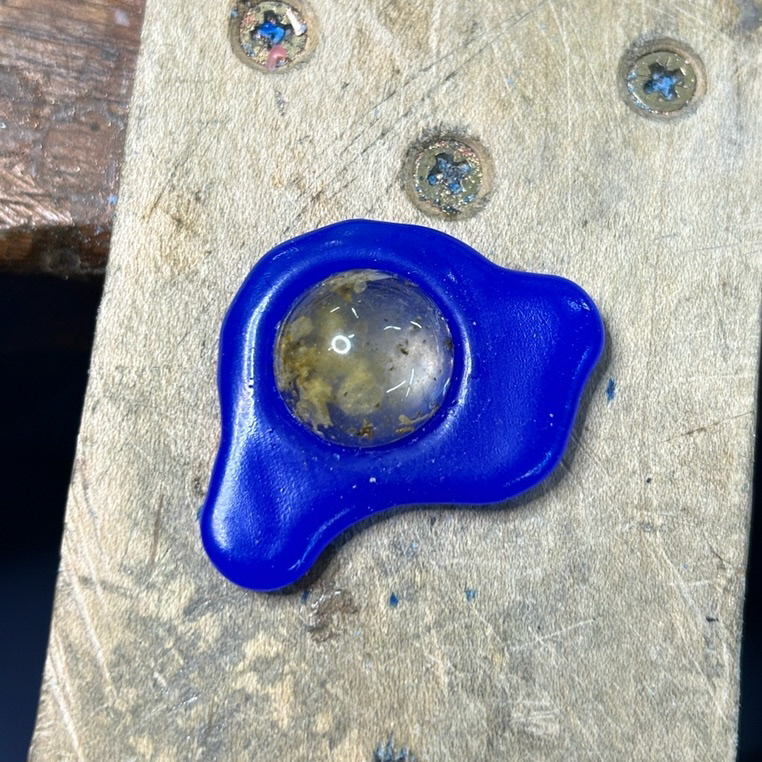
I started by completely removing the space where the bacteria stones would be and building it back up with wax. Exploring wax all throughout this project meant that I had become familiar with the properties of molten wax, and how it levels when it cools down. I hoped that this technique would result in a much flatter base for the stone. I then realised that pushing the stone into the wax while it was still cooling down meant that it would help the wax flatten to the right height.
I decided to leave the smaller stone filled with the molten wax and not pressed down, as a control.
For another example, I tried having an openwork design on the back, so that light would shine through the stone and highlight the bacteria. I started by building up a rough base in wax and then eventually using a hot scalpel to shape the prongs.
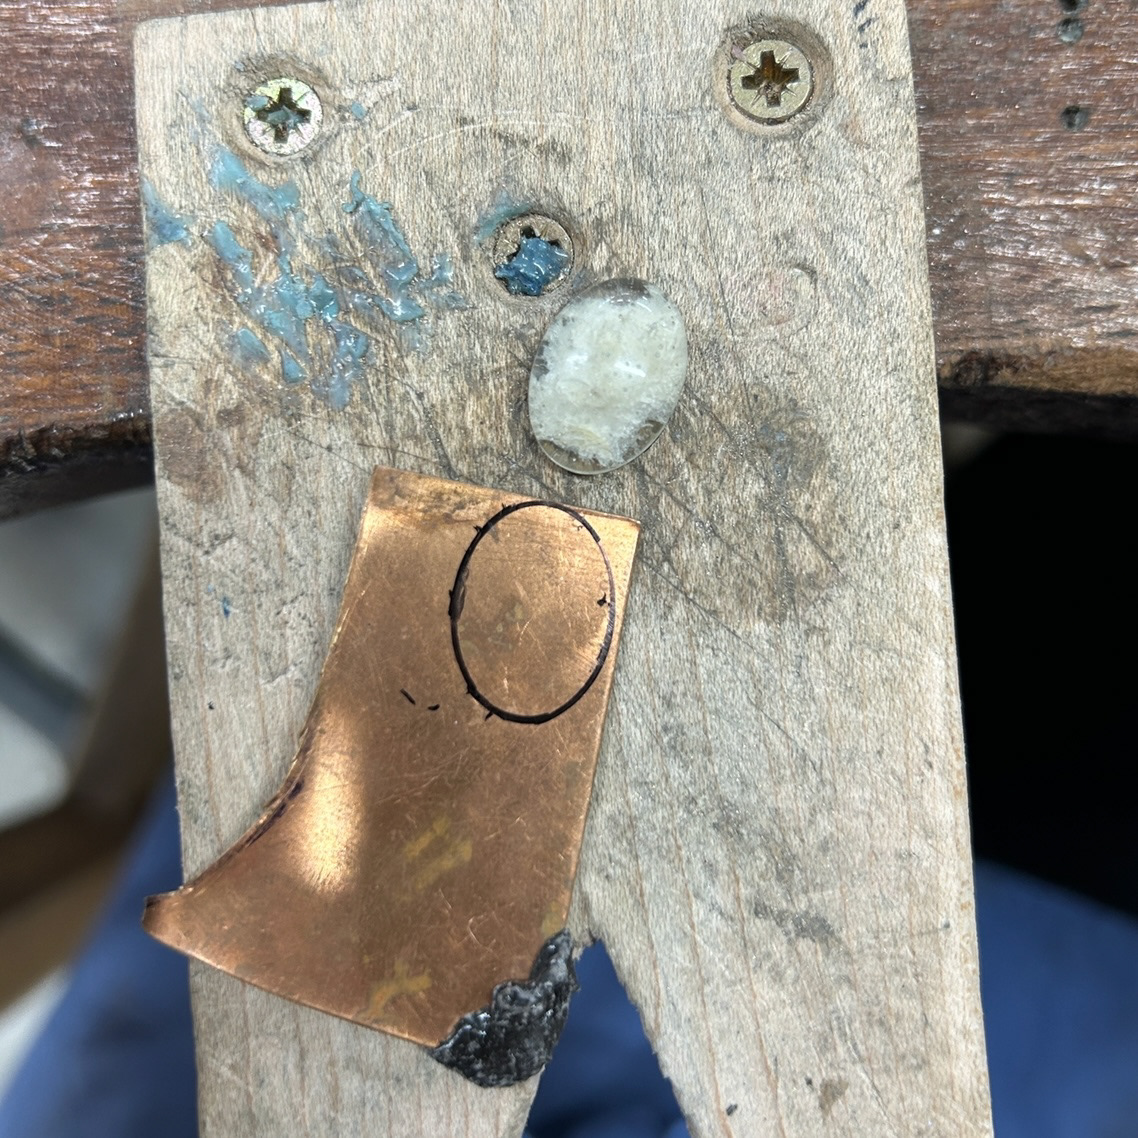

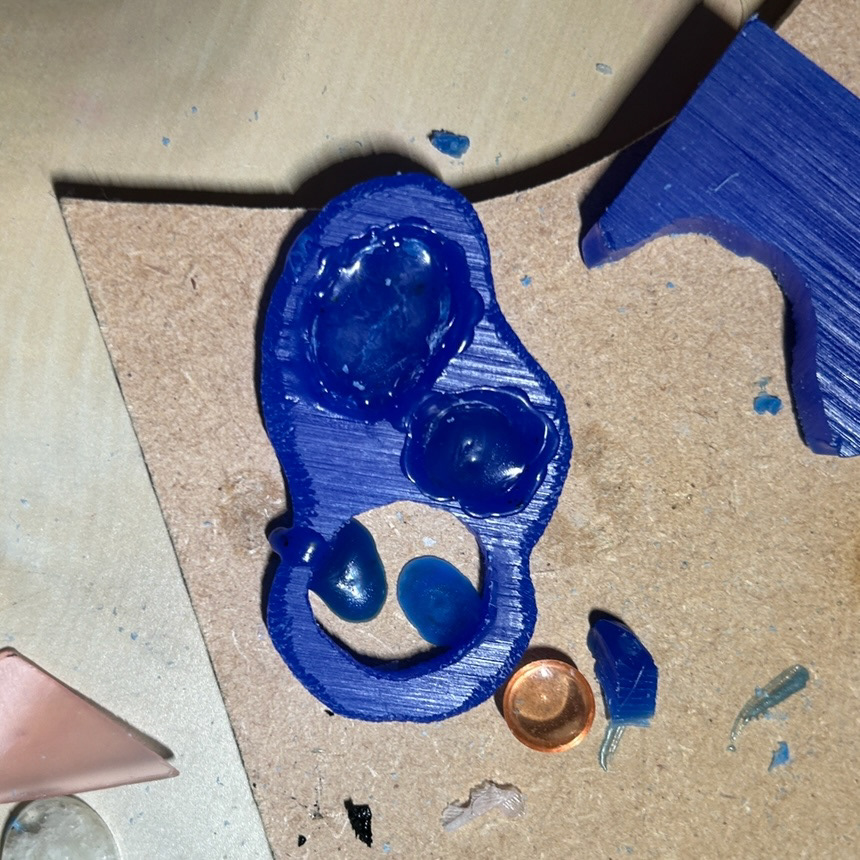
Fascinated by this notion of pressing into my wax while it was still hot, I made a custom stamp for my stone. I knew that this would be the best way to create the flattest backing for the stone to sit on. This worked incredibly well and somehow made me feel more connected to my work, as the seats were then created by a physical force that I was putting on the wax.
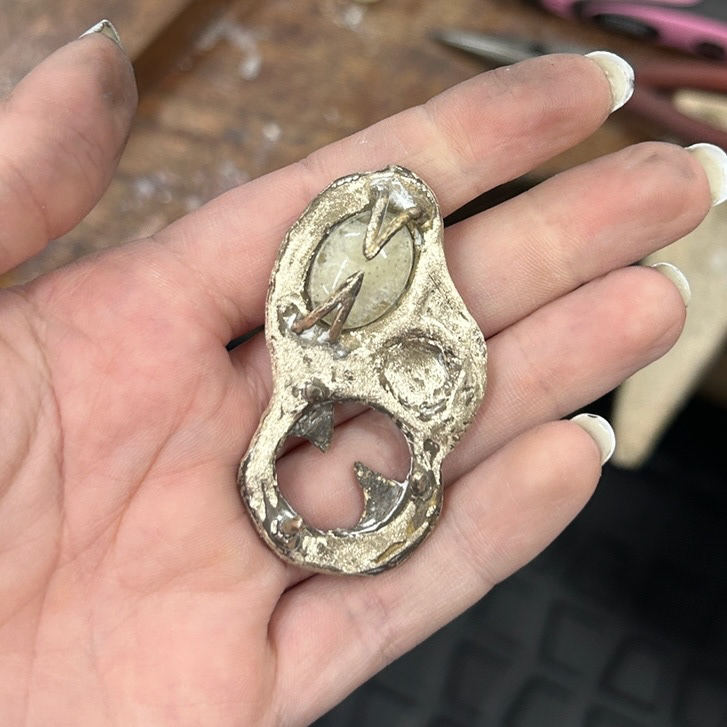
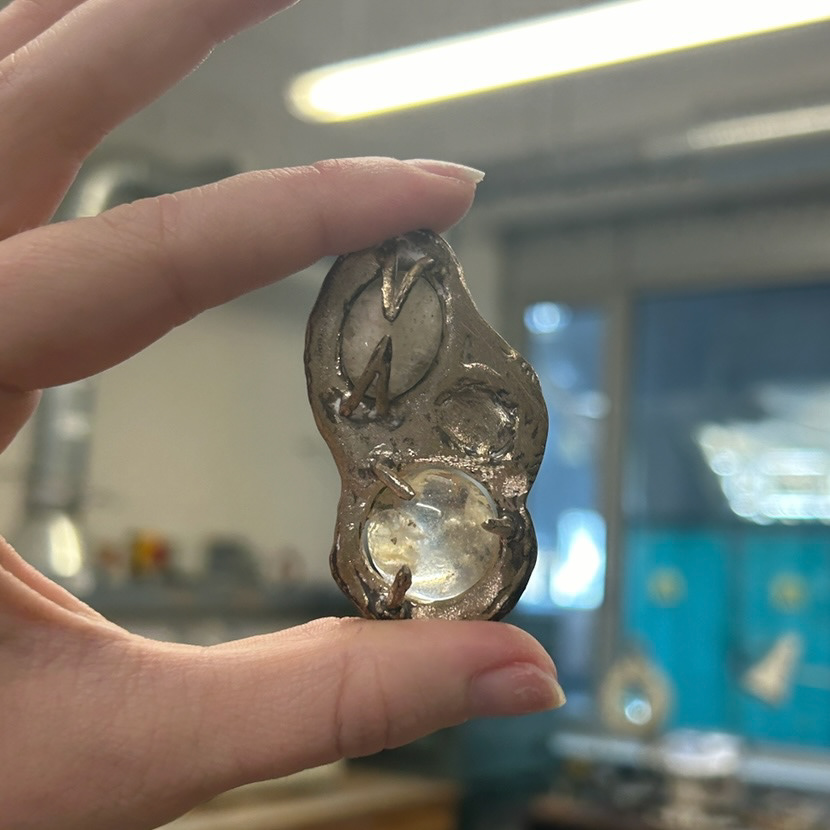
After casting my wax carvings, I set the bacteria stones. I experimented with a different prong design for one of the stones as this initially seemed appealing. However, I ultimately decided that this detracted the focus from the bacteria stones. As a result, I stuck with my more traditional prong design, as I felt it highlighted the stones better. I also tested a small brooch mechanism on the back, however this was not functional.
Bezel Set Brooch Experiment
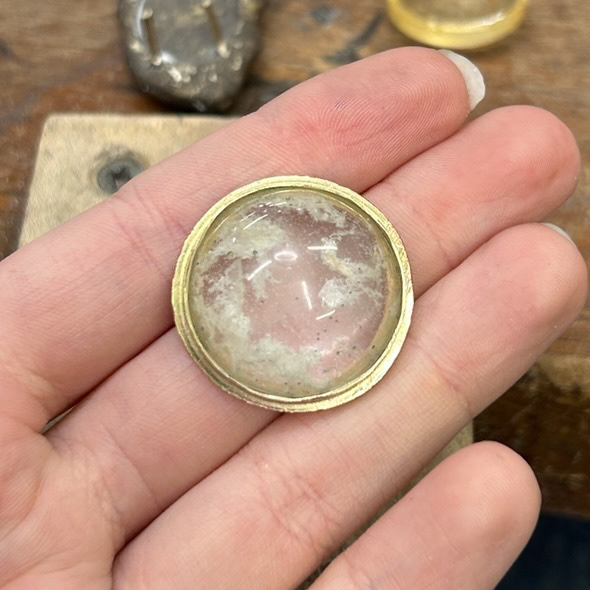
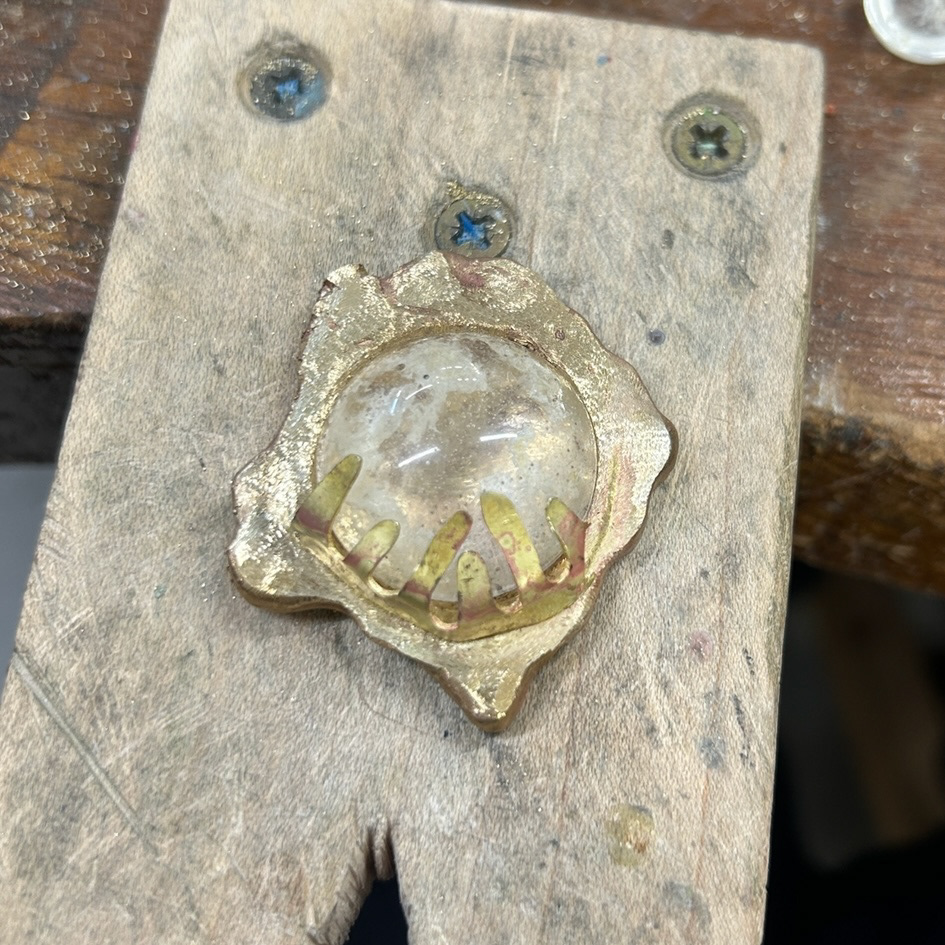
For another design experiment, I decided to make a bezel set design. As I knew that my wax carvings would have solid backings, I wanted to create an option that still had that openwork backing, which I used on my previous cast. This design also reminded me of Petri dishes, which was in keeping with the biology theme of this project.
Though I liked the outcome, I wondered about its compatibility with my final designs. My plan is to compare it with my final piece for evaluation. If it complements the collection well, then I'll consider creating another version with a brooch backing.
Experimenting with Chain
Brooch made by Mark Mcleish
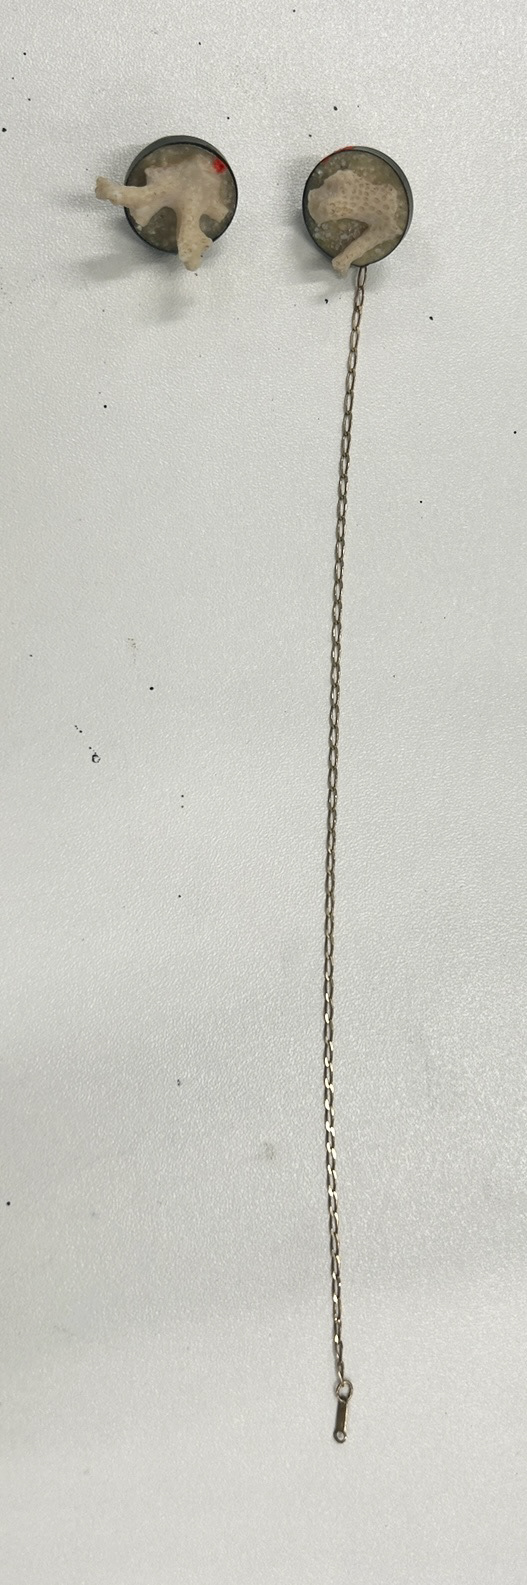
For my final design, I knew that I still wanted to incorporate a chain element that I had designed in my pendant design. The concept of using chains resonated with me, symbolising the connections between individuals, particularly considering the bacterial swaps were taken from different people and places.
During a discussion with CJ, she shared her pin, made by Mark Mcleish, incorporating found coral and a recycled chain. The chain was attached to one of the brooches, featuring a gold 'plate' at the opposite end. This gold plate had a hole meaning that the wearer could attach it to another pin or stack it onto a singular pin, offering versatility in wear.
Inspired by this design, I experimented with a similar design. My plan involved a brass chain with small brass plates at each end, designed to loop onto the pins of my brooch mechanism. This concept further reinforces the notion of connections between individuals.
Brooch made by Mark Mcleish
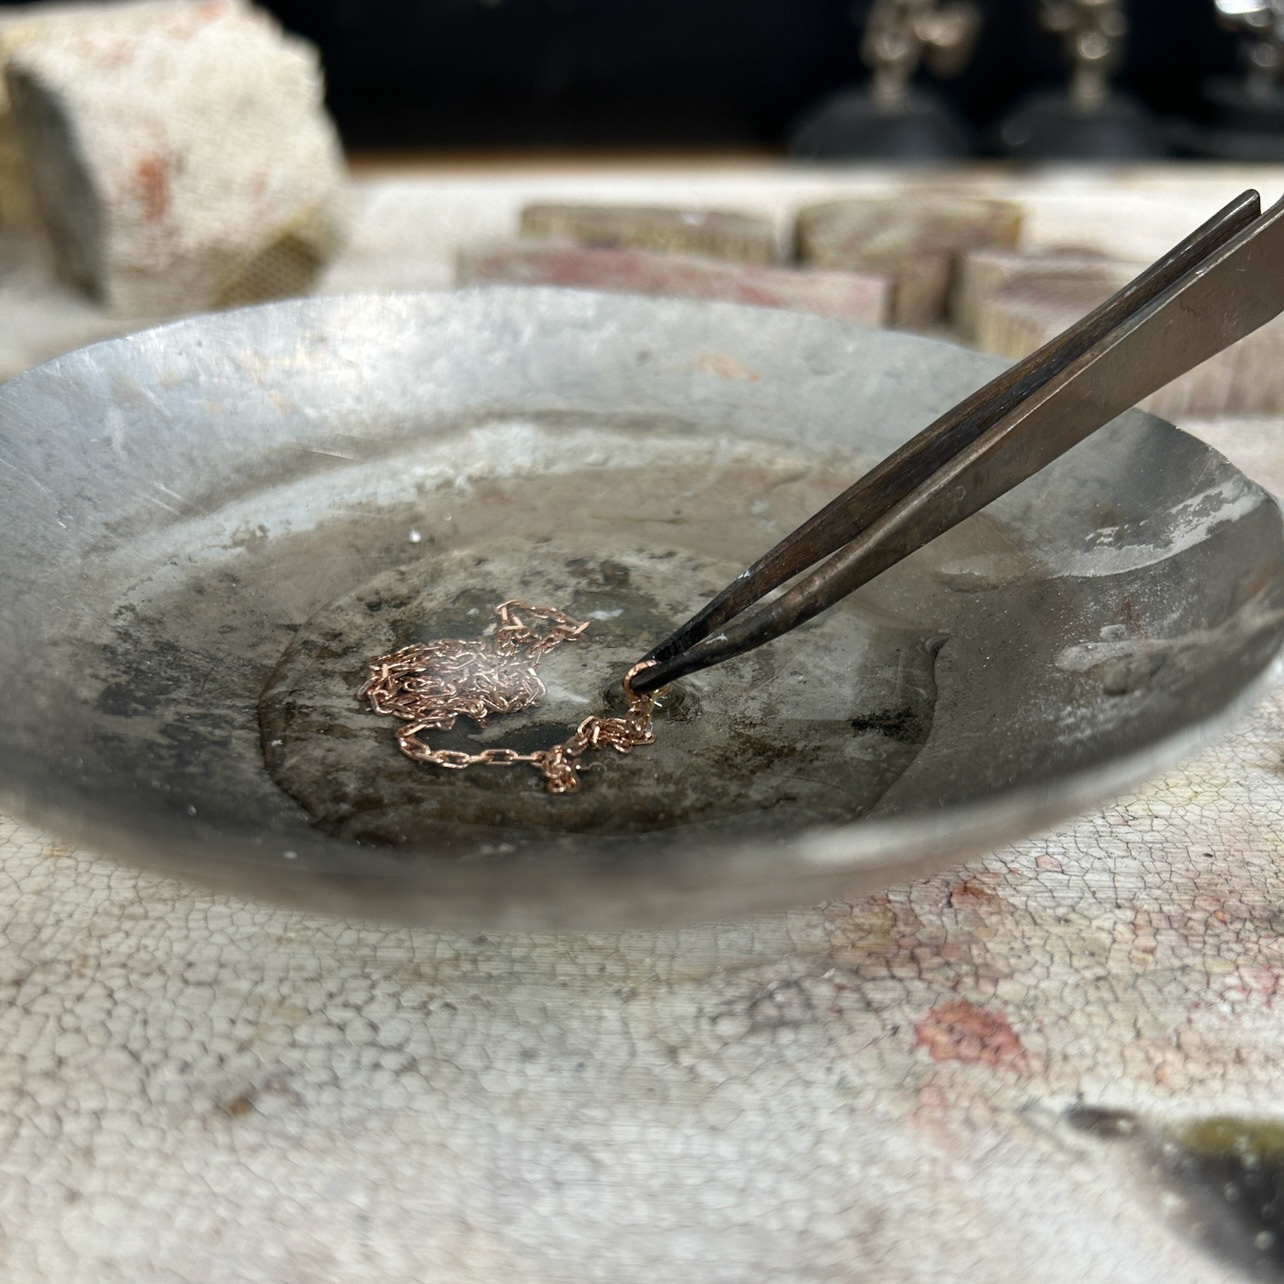
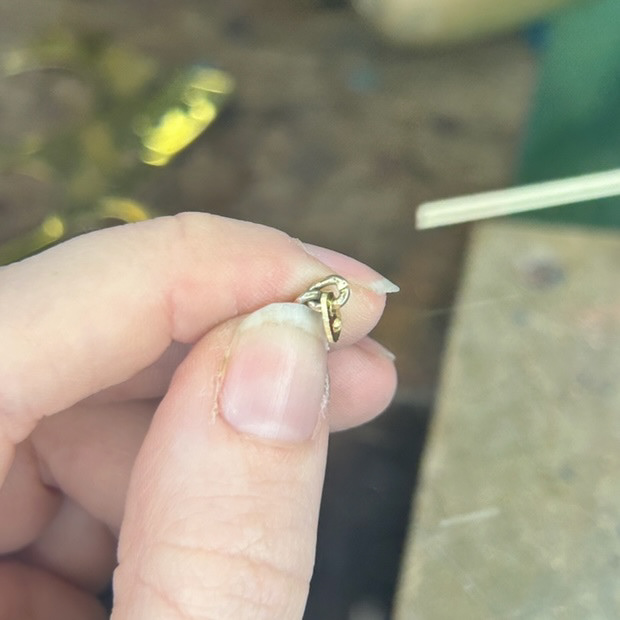
For this design, I used a leftover chain and brass wire, which I made into a small jump ring. As the ring and the chain were both delicate, I had to be very gentle with the heat. I submerged the chain in a bowl of water to prevent it from melting due to the heat of the microflame.
Pleased with the outcome, I've decided to recreate this design using brass chain for my final piece.
Creating Final Piece
My reference drawings
Brooch 1
For my first brooch, I decided to include the border design that I had used in previous casts. This boarder was inspired by Gill Mallet's work, which reminded me of cell walls, and the catalyst for this whole project. I felt as if it was important that I had this design in a least 1 of the brooches.
To create a seamless setting for my bacteria stones, I used the stamping method from earlier casts. This ensured a flush setting, minimising any gaps between the stone and the cast. Given that the stone wouldn't be set as deeply as in my earlier casts, it was crucial for it to be entirely flat to avoid visible gaps.
I used pink wax wire to create the border as it is a softer wax, allowing me to bend and manipulate the shape of the wax in my hands, which removed the need for any tools. This then reduced the risk of creating scratches and harsh lines in the design. I used a hand torch to flame-polished the wax regularly to achieve a soft texture and reduce the amount of polishing required once the piece was cast, as I have previously found this very time-consuming.
After flame polishing I added the texture from the organelles and the prongs. This was using 1mm wax wire for the prongs and 2mm wire for the texture. As these wires are very fine, flame polishing would result in melting the wire and making me start the process over again.
Drawing from past experiences with prong placement, I learned that angling them slightly inward helped with creating a secure setting, reducing the likelihood of gaps between the prongs and the stone. I also found that I preferred having the contrast of the smooth prongs and the molten texture of the wax.
Brooch 2
For the second brooch, I used the same techniques as I had before. This included using a stamping method for the setting and flame polishing regularly.
However, given that the stone and the brooch itself were slightly larger than the previous design, I chose to use slightly thicker wire for the prongs. I used 2mm wax wire for both the prongs and the texture, to ensure that the stone had sufficient support while also complimenting the scale of the brooch.
To attach the texture to the brooch body, I used a wax pen and carefully went around the design and melted the wax where it met the base. To help me do this accurately, I found that bending the wire slightly at the base of my wax pen helped me get into the tight corners, and also prevented my hand from obstructing my view of the wax.
Brooch 3

For my third, and final, brooch, I once again used the same techniques as before. With this organelle texture, however, I needed the piece to be connected. I decided that this would be easier to do before attaching it to the base design. I usually work with a reductive technique when creating wax designs, however, I knew that I needed to build up this base between the wax wire myself. I used the same techniques that I had been using to attach the prongs. This technique involved filing some scrap wax pieces using a cut-2 file, resulting in a fine wax powder. The wax pen can then be easily dipped into this powder and pick up a small amount of wax to then build a bridge between the two pieces. I then attached this piece to the base using the same technique as before, slowly using the wax pen to bind the two pieces of wax together.
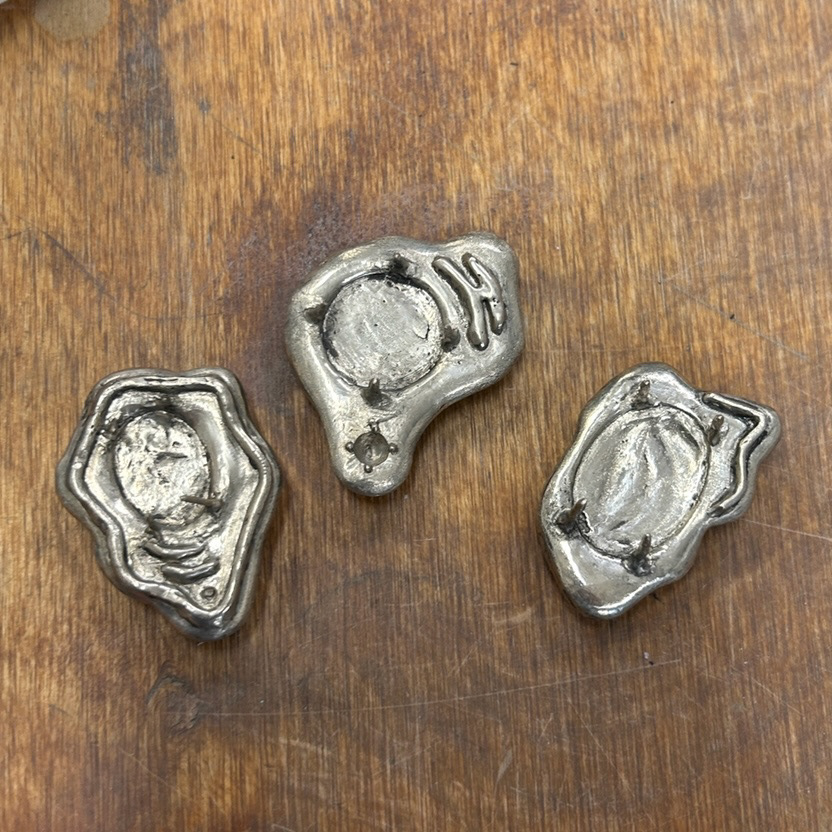
Final Designs
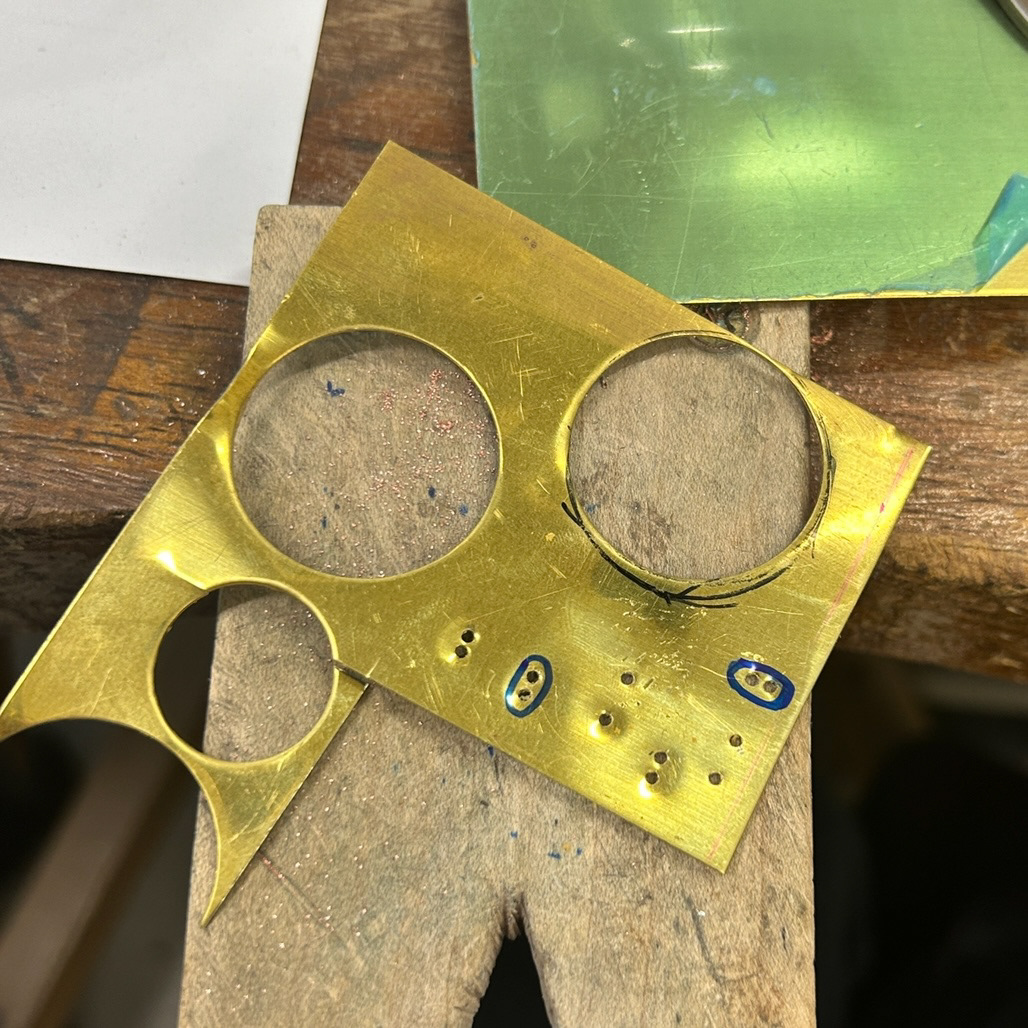
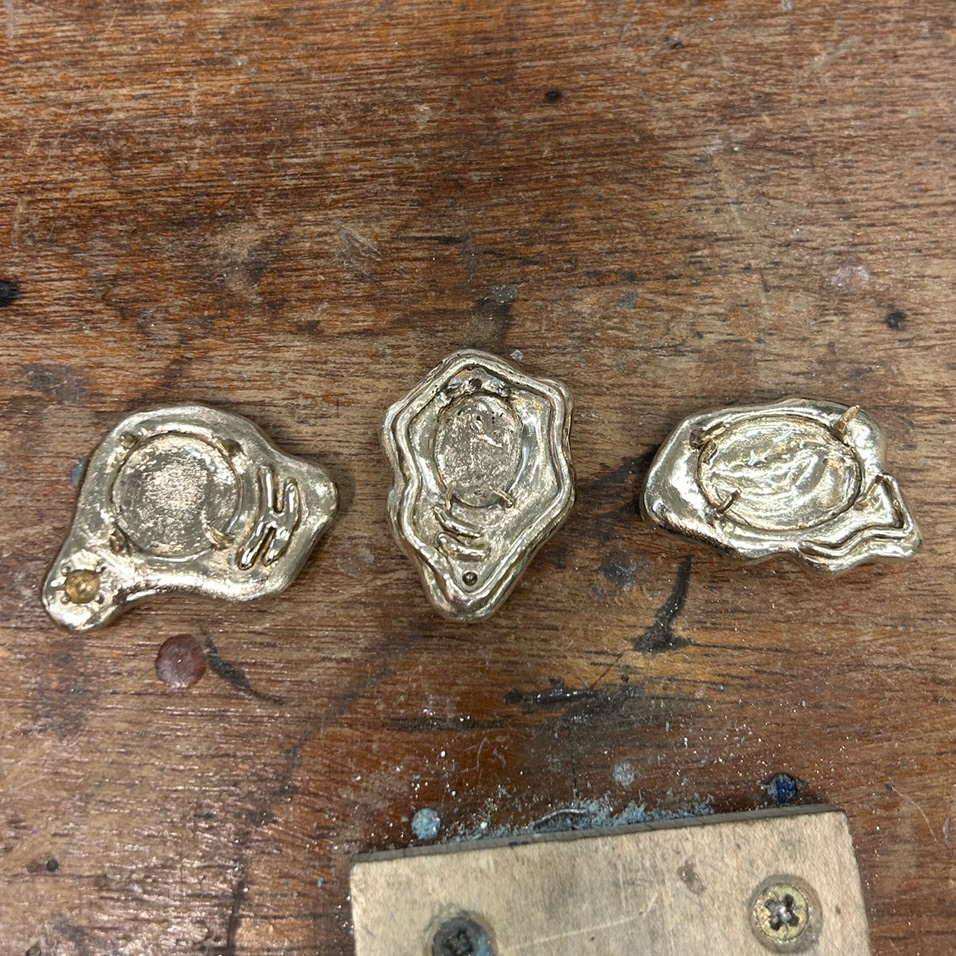
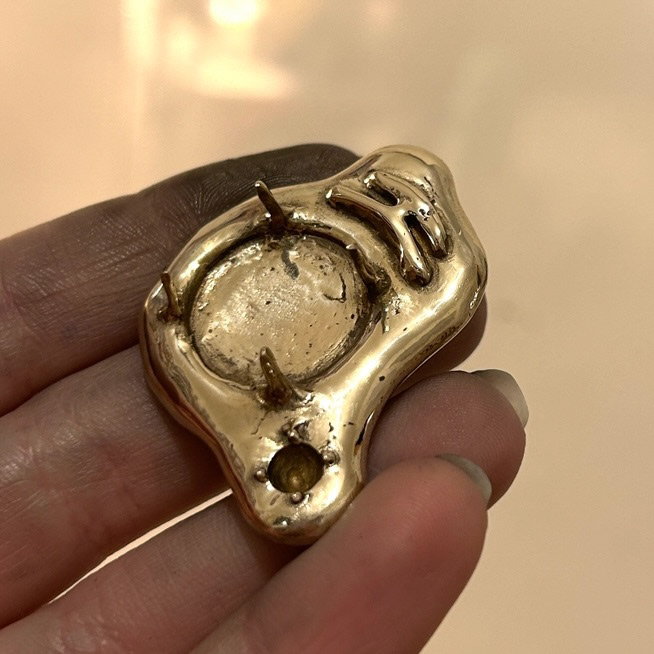
Here are my completed wax carvings. I used burring tools to carve out seats for the stones in the wax before casting. I used this approach because I found drilling into solid brass to be quite time-consuming in the past, and there was also a risk of slipping, resulting in unwanted dents and scratches on my pieces. As well as that, for the larger stone on the left, I chose to add four small dots of wax (not pictured). These will pushed over with grainer tools to secure the stone in place, resulting in a matching stone setting technique to that of the larger bacteria stones
Creating the Brooch Mechanism
Using tubing for both parts of the brooch
After reading 'To The Point' by Daniela Malev, I refined my brooch mechanism (as shown in Understanding Context 2 - Research and Development). This involved using wax to create a tube and hook mechanism, which could then be cast with the brooches. I found this very time-consuming to make, as I hadn't worked with making wax parts this small before. It was also very difficult to add these pieces onto the back because I had already added the prongs. Because I didn't want to remove the prongs and do them again, I had to tape my piece upside down in the bench peg, and hope that there wasn't too much pressure on the side of the prongs. I had to make sure that the tubing would have relatively thick walls, as this would act as the elevation for the brooch, and make room for fabric when the brooch is fastened to clothing.
My first hook design
At first, I tried making the hooks out of tubing, so it would have the same diameter and sizing as the rest of the brooch. However, I found this very difficult to make and attach to the wax base, as there was less surface area to attach to the blue wax. When testing the mechanism I also found it very hard to thread the pin into the hook, confirming my decision for a redesign.
For a different approach, I decided to roll my wax in the rolling mills to flatten it, and then curved this 'sheet' wax into the right shape. I found this method a lot easier to do and felt as if it gave the best results, so I continued to use this design. This design also meant that there was a flat base attached to the brooch, rather than a sliver of the tubing.
Casting my Final Pieces
My wax tree
My completed cast
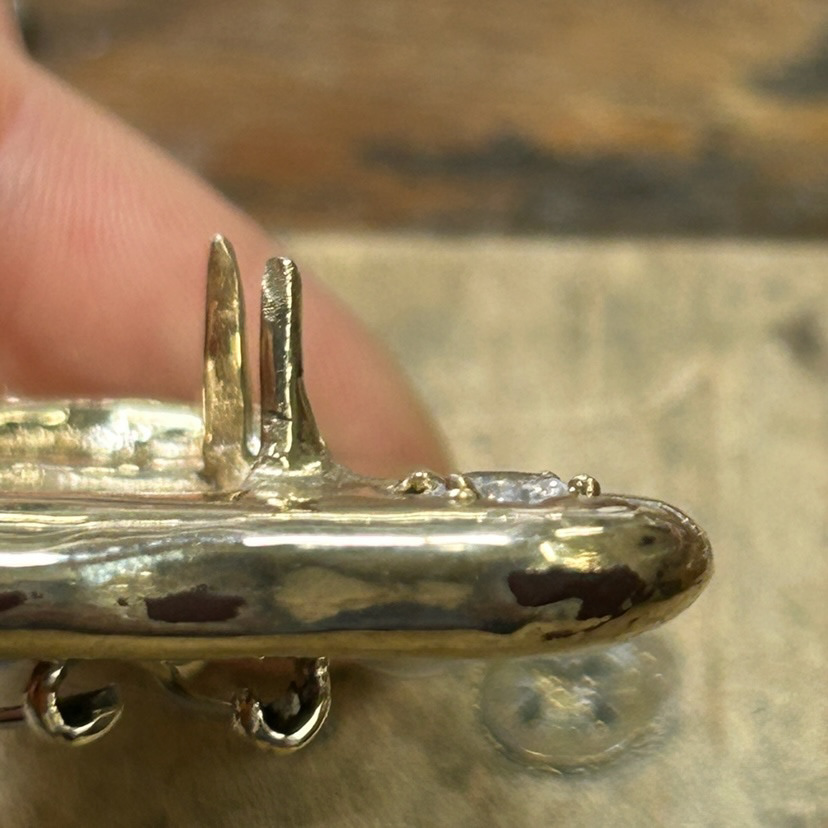
Before Casting I decided to include some additional spare prongs as a precautionary step. This was to minimise any potential issues such as failed casts or damage to the prongs during the filling process. With casting slots very limited after Easter, I wanted to avoid the possibility of having to redo an entire cast due to a snapped prong. Having spare prongs gave me the option to solder on a replacement if needed. Though not an ideal solution, it was a safer alternative compared to the uncertainty of not being able to cast a new piece at all.
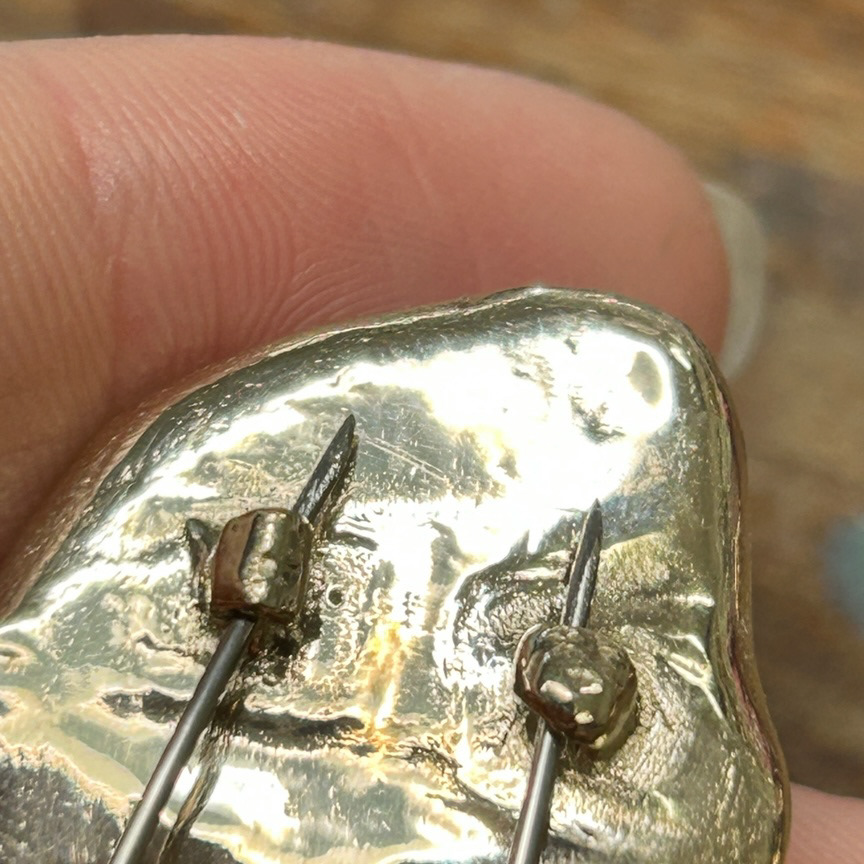
After a rough filling of all of my brooches, I moved on to the prongs. I had purposefully made them longer in the wax as I was told this would increase the chance of them casting well. This meant that each one had to be cut and filled to a pointed shape.
I found the correct height by placing my bacteria stones into the setting and bending over one prong to see where I wanted the length to be cut. I decided to do this with only one prong on each piece as it reduced the risk of one snapping off. Given the uniform shape of the stones, it meant that each prong should all be the same length, I then used callipers to accurately measure out my markings on the rest of the brooch prongs.
Once again, I made the length slightly more than what I wanted them to be. I knew that I could perfect this length with a file, rather than having prongs that were too short after shaping them to a point.
Testing the Brooch Mechanism
I decided that I wanted to test my brooch mechanism while still in the cleanup stage, as this meant that I could go in with my diamond-bit sanding tools and make any adjustments before polishing.
I strengthened the wire using a manual screwdriver and bent the wire with small round nose pliers. To help me bend the wire to the right shape before pushing through the tubes, I used callipers to measure the distance between the holes and marked this on a piece of tape. I then bent the wire, using the tape as a guide. After that, then I bent the wire over the tubes and into the hooks.
I was very pleased with how this turned out and was confident about continuing with the cleanup process. I did notice that some plaster was still left in the tubing and the hooks, so was recommended to use a white vinegar and baking soda reaction to help loosen all the debris. This worked very well and with the help of a wooden toothpick, I was able to get the rest.
Polishing
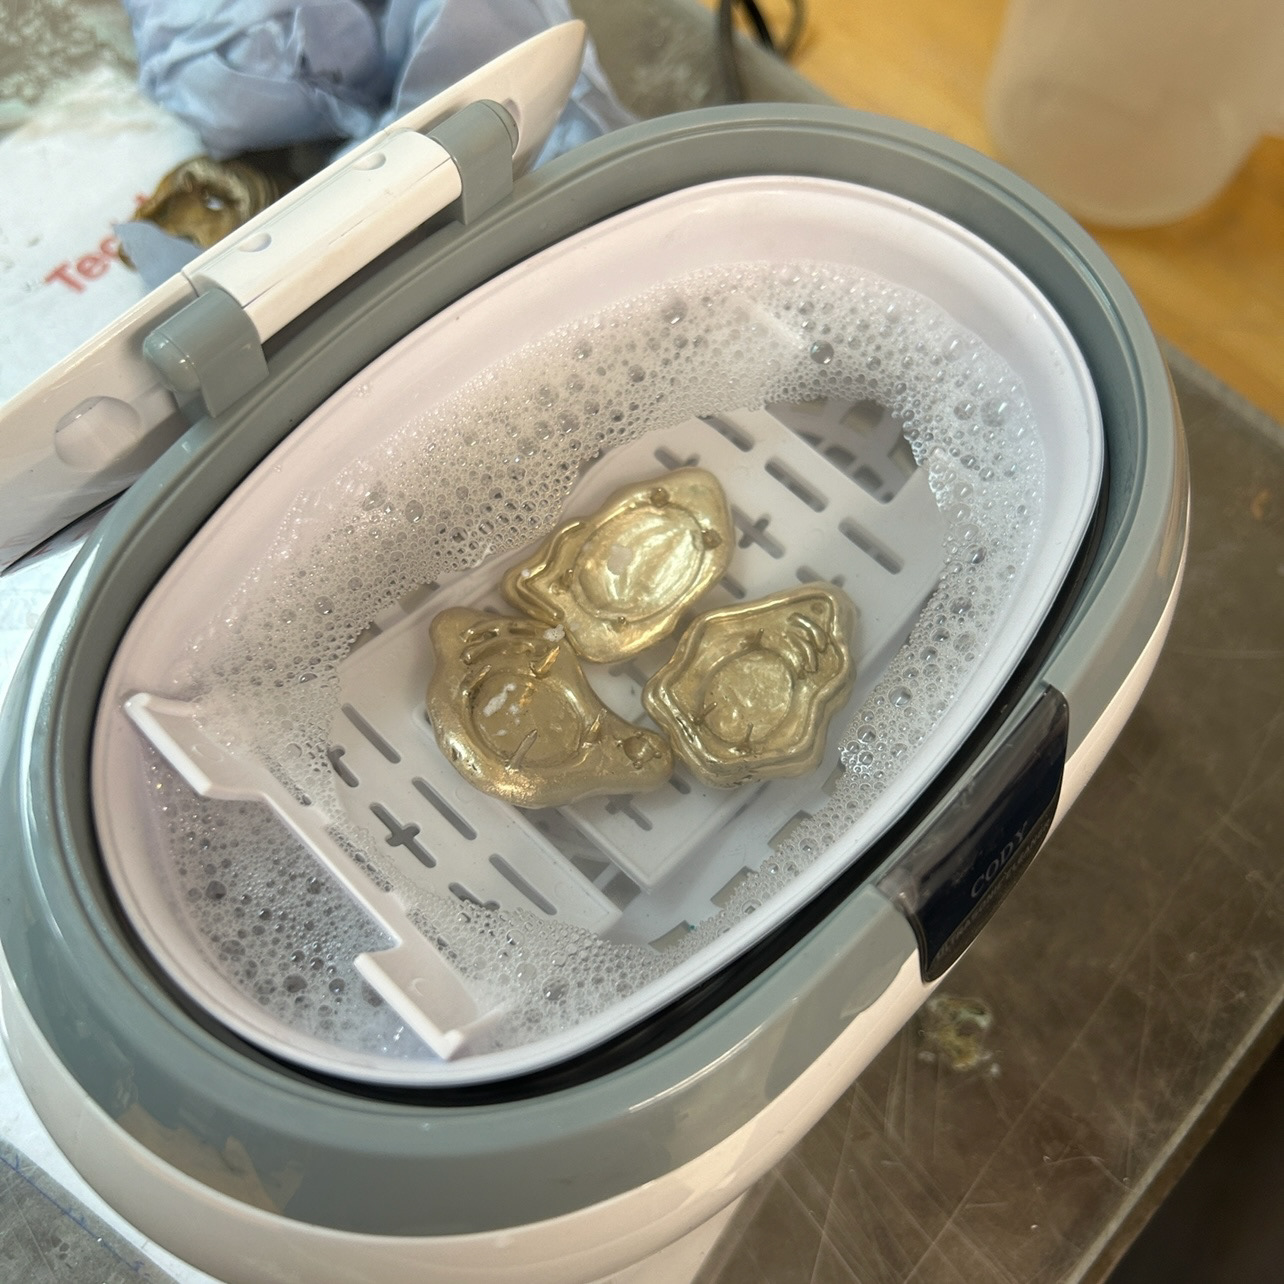

After sanding with the diamond drill bits, I moved on to polishing my pieces. I knew this was going to be challenging as my casts had many small intricacies and textured pieces. After 2 rounds of tripoli, I put my casts into the ultrasonic, to remove any polish that I wasn't able to remove with a toothbrush and warm water.
However, this turned out to add more work for me. The water I added to the ultrasonic was too hot and ended up oxidising my pieces, leaving them with an very strong yellow colour. This meant that I had to use the tripoli again to remove this oxidization.
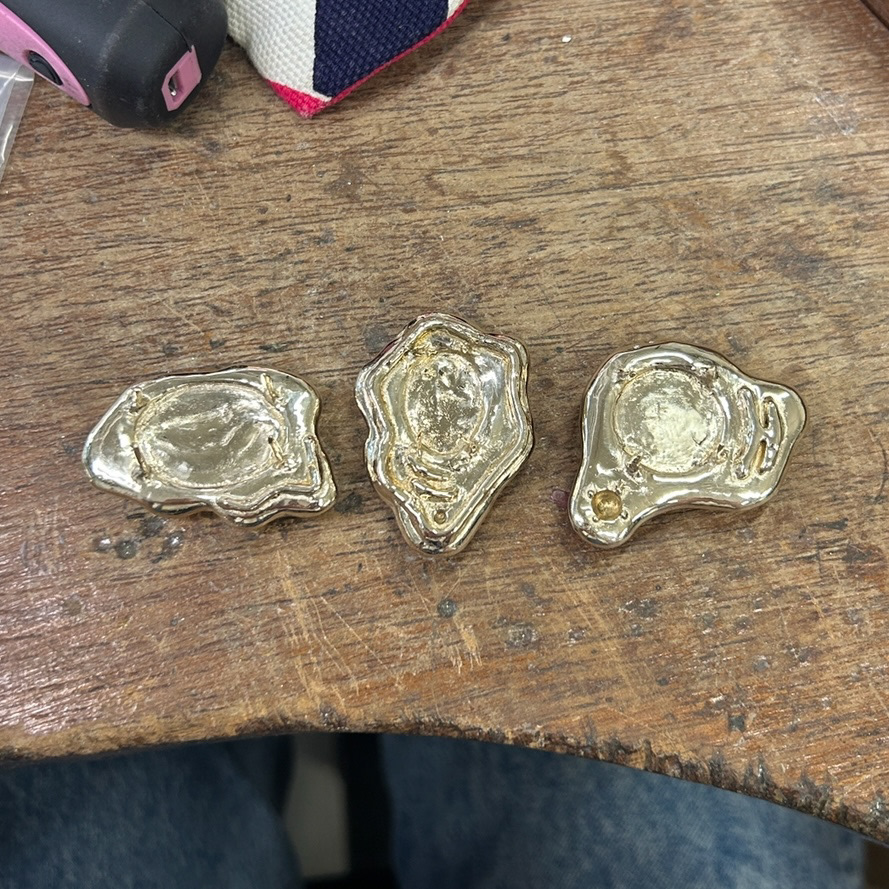
After polishing my pieces with tripoli and rouge, I realised that there was lots of tiny scratches on my design. I realised that this would have been from the diamond drill bits that I used after casting. I knew that the only way to get these out and leave the high-polish finish that I wanted, was to continue with rounds of tripoli. I kept polishing my pieces with the tripoli and after 8 rounds of polishing, I finally got to a point where I was satisfied with the finish.
I found this process incredibly time-consuming, and with any casts I make in the future, I will only use tripoli for cleanup. While it is still time-consuming, this approach is more efficient than repeating the entire polishing process repeatedly.
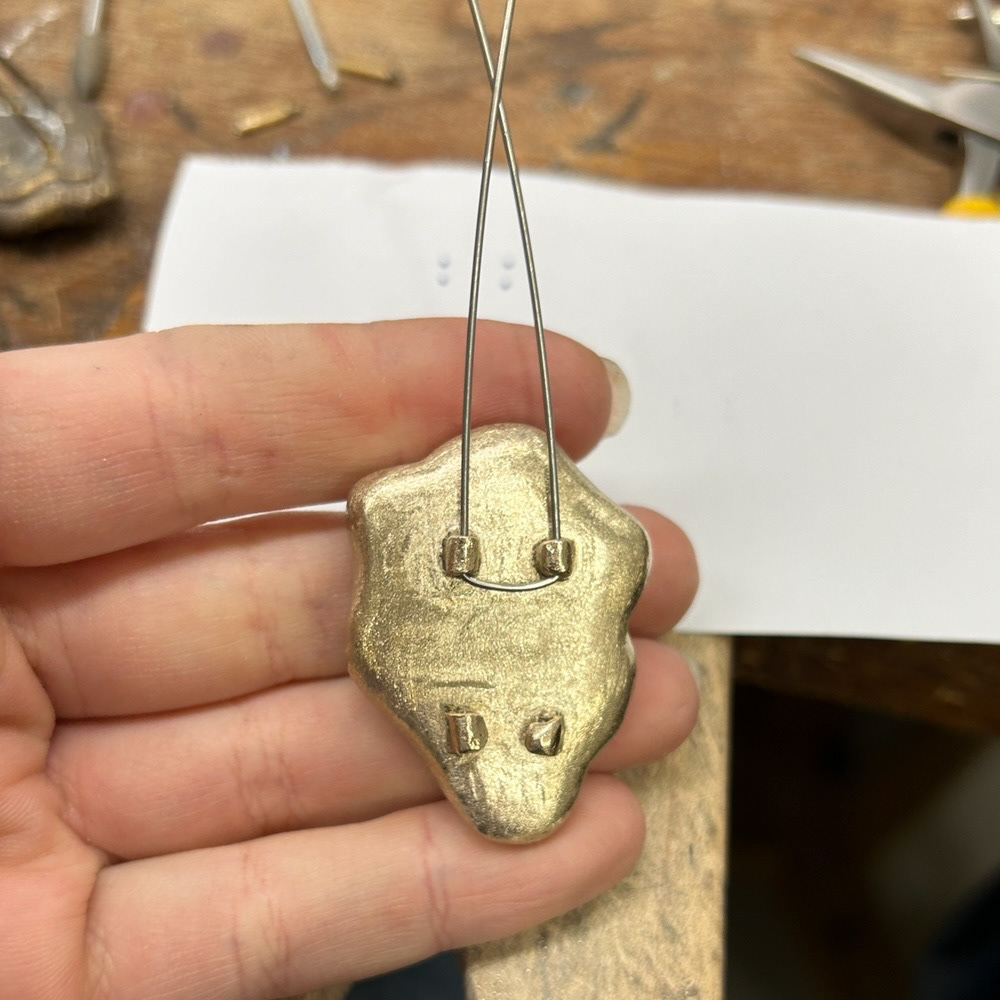
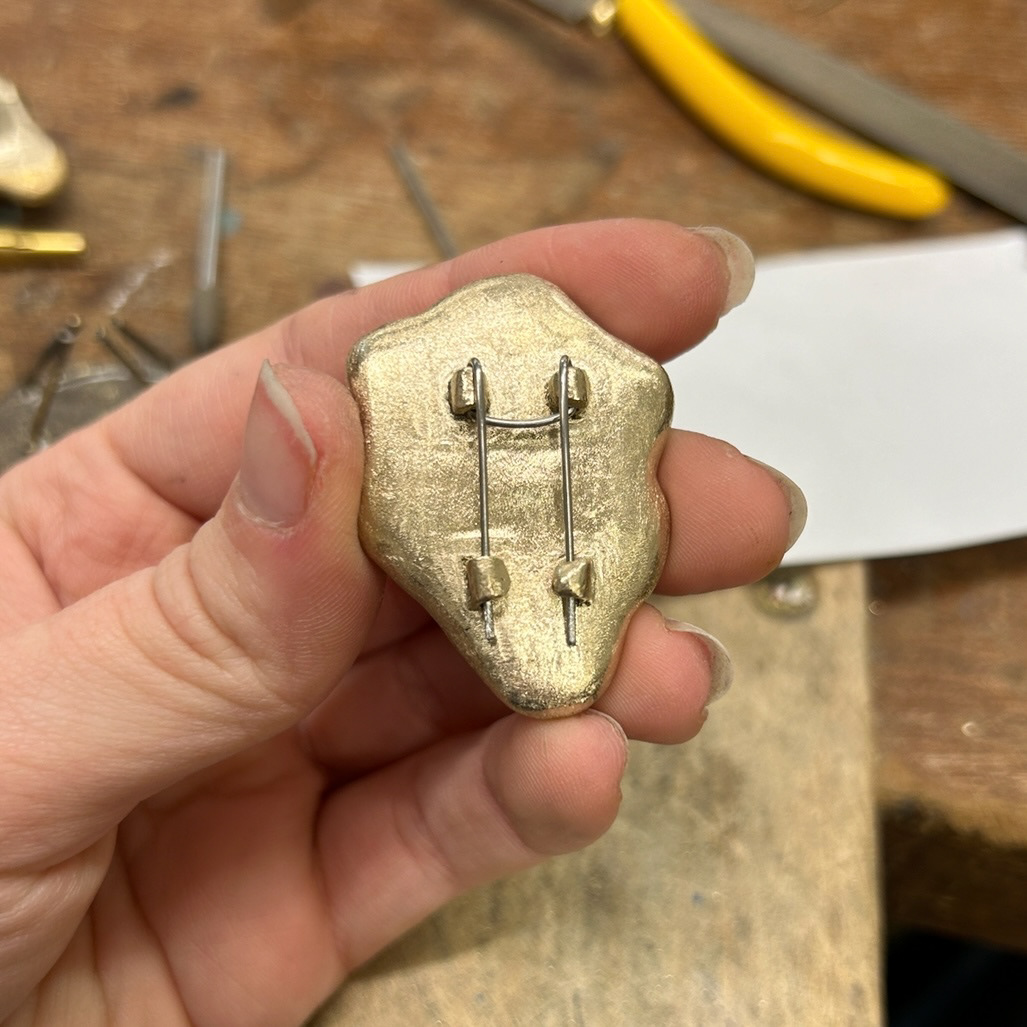
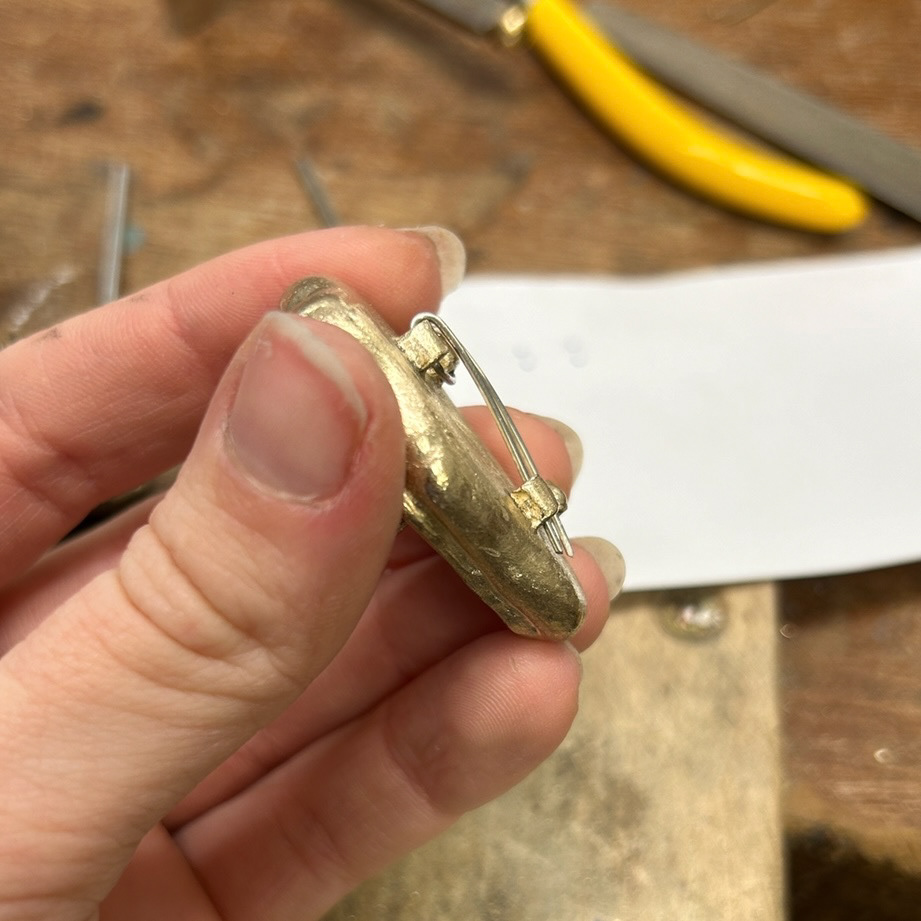
Brooch Pins
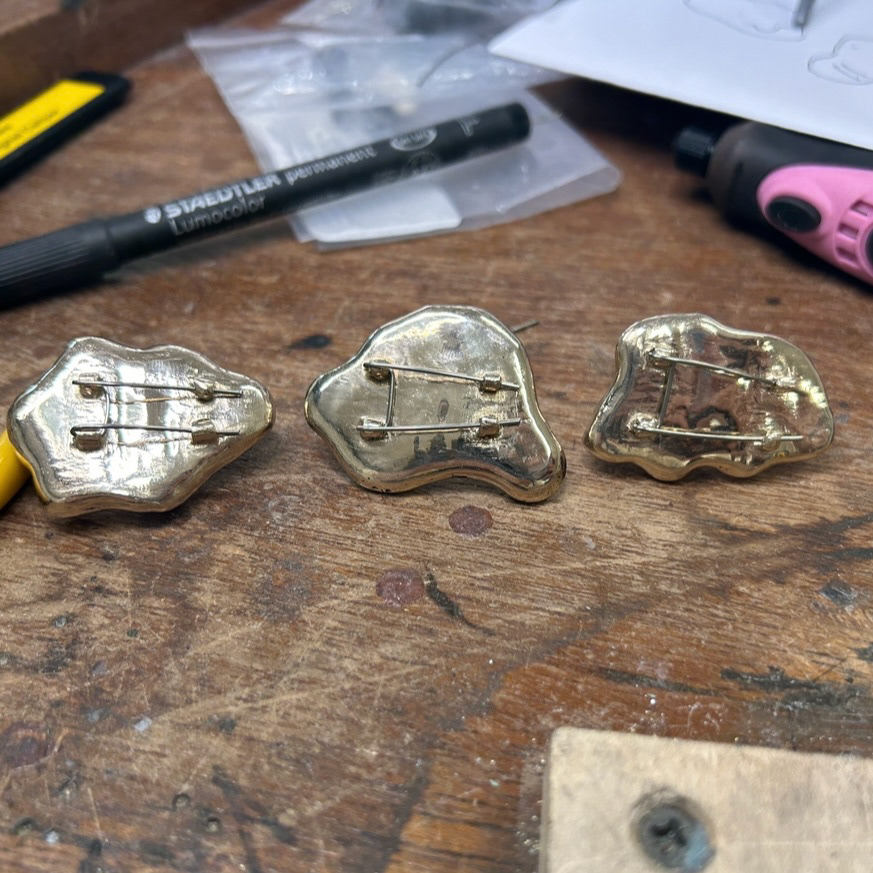
To add the brooch pins to the back of my designs, I first started by marking on a piece of paper where the wire needed to be bent at a 90° angle. I then threaded the 0.8mm wire through and folded it back in itself so it could be tucked under the cast hooks. I then trimmed the excess wire and filed to a point. I repeated these steps for all three brooches.
Stone Setting
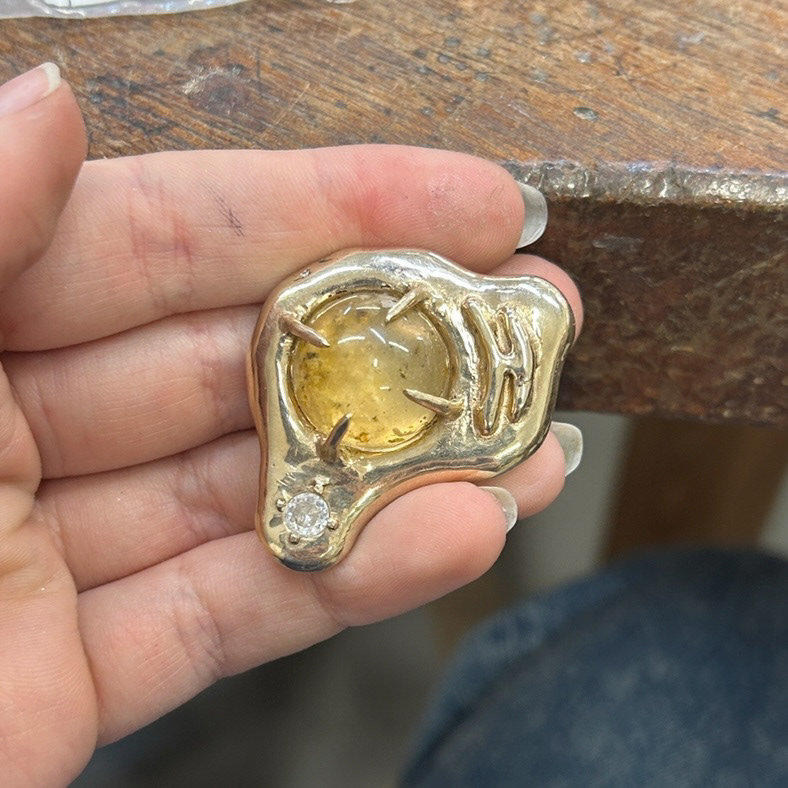
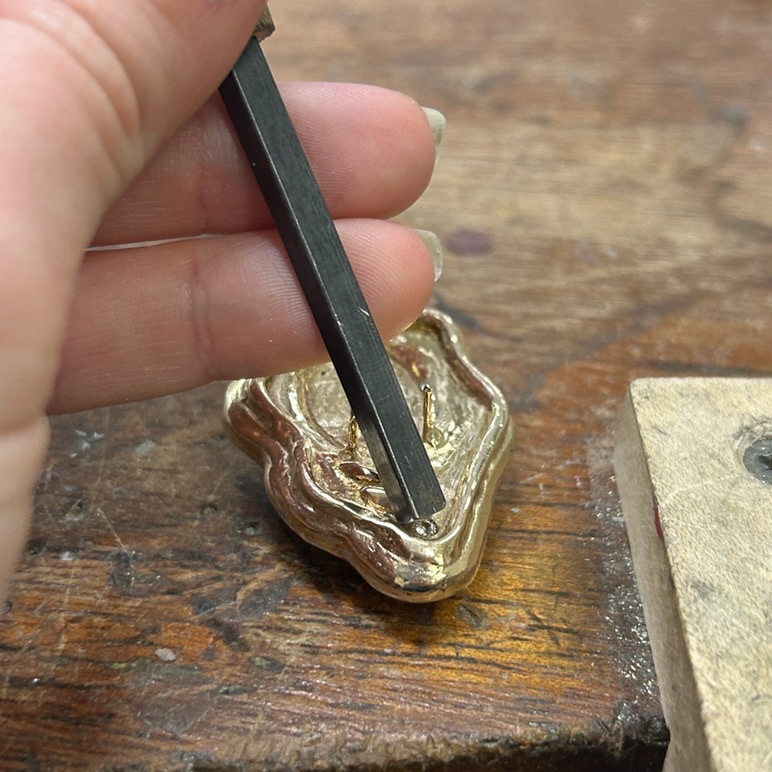
To complete my brooches, I had to set both the bacteria stones and cubic zirconias. For these designs, I decided that clear cubic zirconias would complement the stones best, while still standing out. For the larger, 5mm, cubic zirconia I had cast small dots of wax that I would be able to push over the stone and secure in place. I used a pusher to do this, and flattened the stones slightly using a mini hammer and very little pressure.
For the smaller, 2mm, cubic zirconia, I used a similar method. However, I just used the metal around the stone to secure it into place. I was able to do this because I had previously made the surrounding metal very thin by using a tiny diamond drill bit underneath the surface of the brooch. This made the seat for the stone deeper and made moving the metal possible.
Deciding on Chain
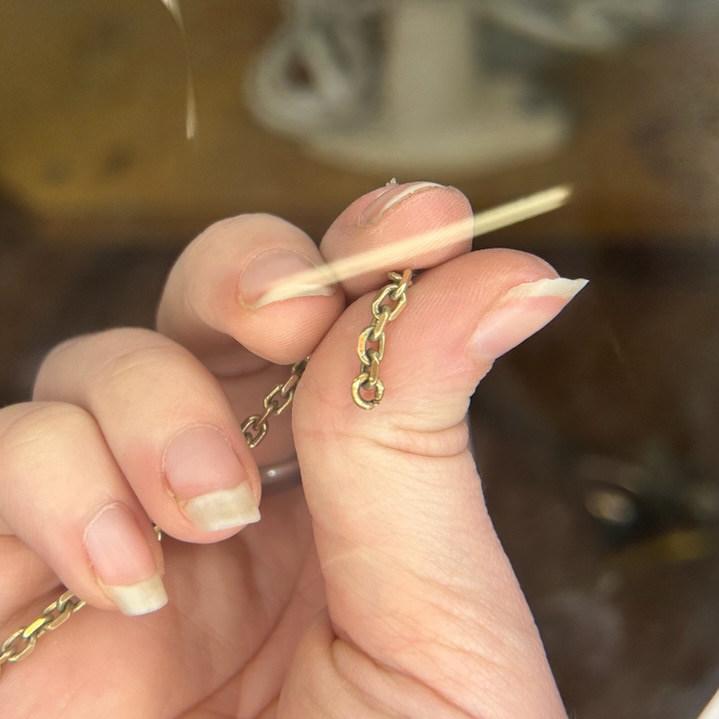
Because of time constraints, and how time-consuming chain is to make, I decided not to handmade my chain. Instead, I ordered different chains from Samuel Findings. As I wasn't sure what thickness would compliment the brooches the best, I ordered 4 different brass chains.
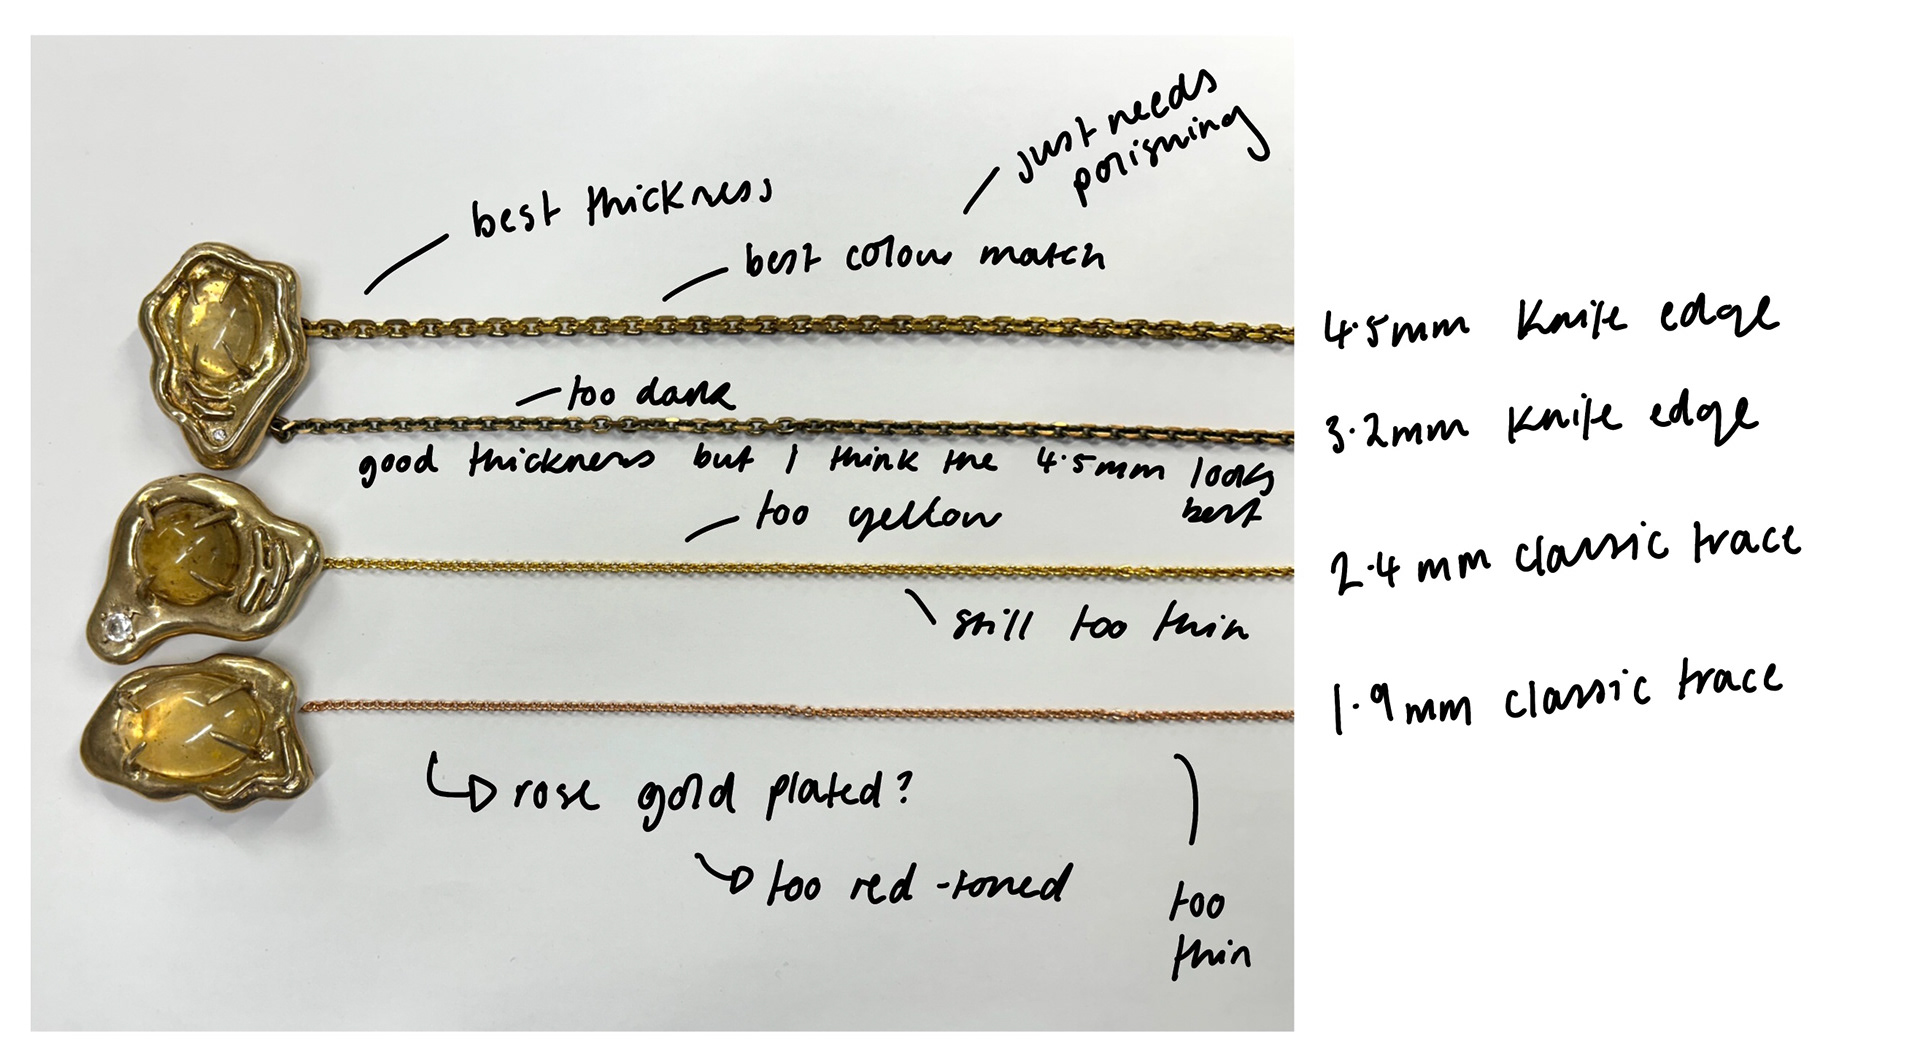
These are the 4 different chains that I ordered. The thinnest chain ended up looking like it was rose gold plated, and so was immediately ruled out. The 1.9mm and the 2.4mm chains were both too thin and so were also disregard for this reason. Both of the knife edge chains were an appropriate colour compared to the casts and had a high polish finish on the edge, which complimented the casts where the light hit the surface. I chose to go with the 4.5mm knife edge chain as I felt the balance between the thickness of the chain and the brooches was the most complimentary.
Making Chain Fixings
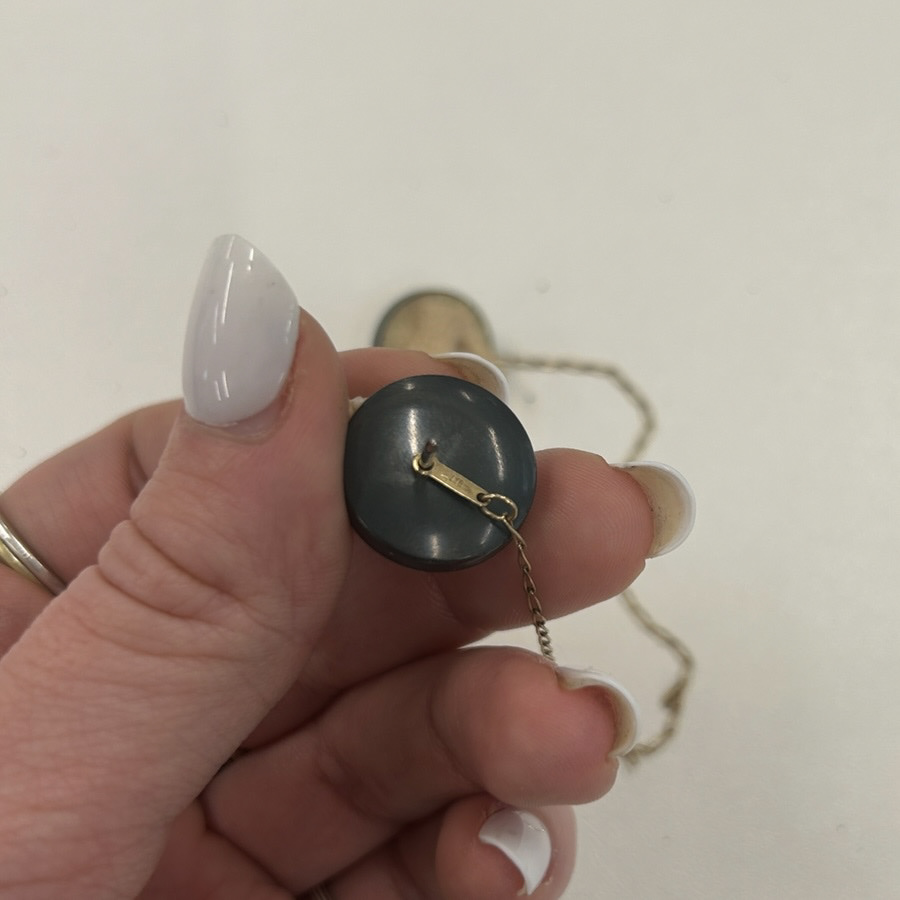
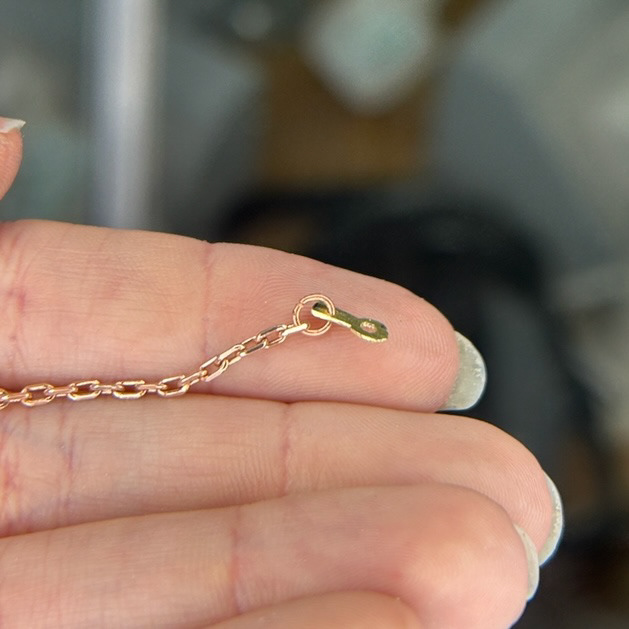
To attach to the end of my chain, I needed to make a small brass plate that would slide through the brooch pins. While the chain I was using fit through the brooch pins, not having anything on the ends made the chain look unrefined. I decided to make a chain fixing similar to one I had made previously.
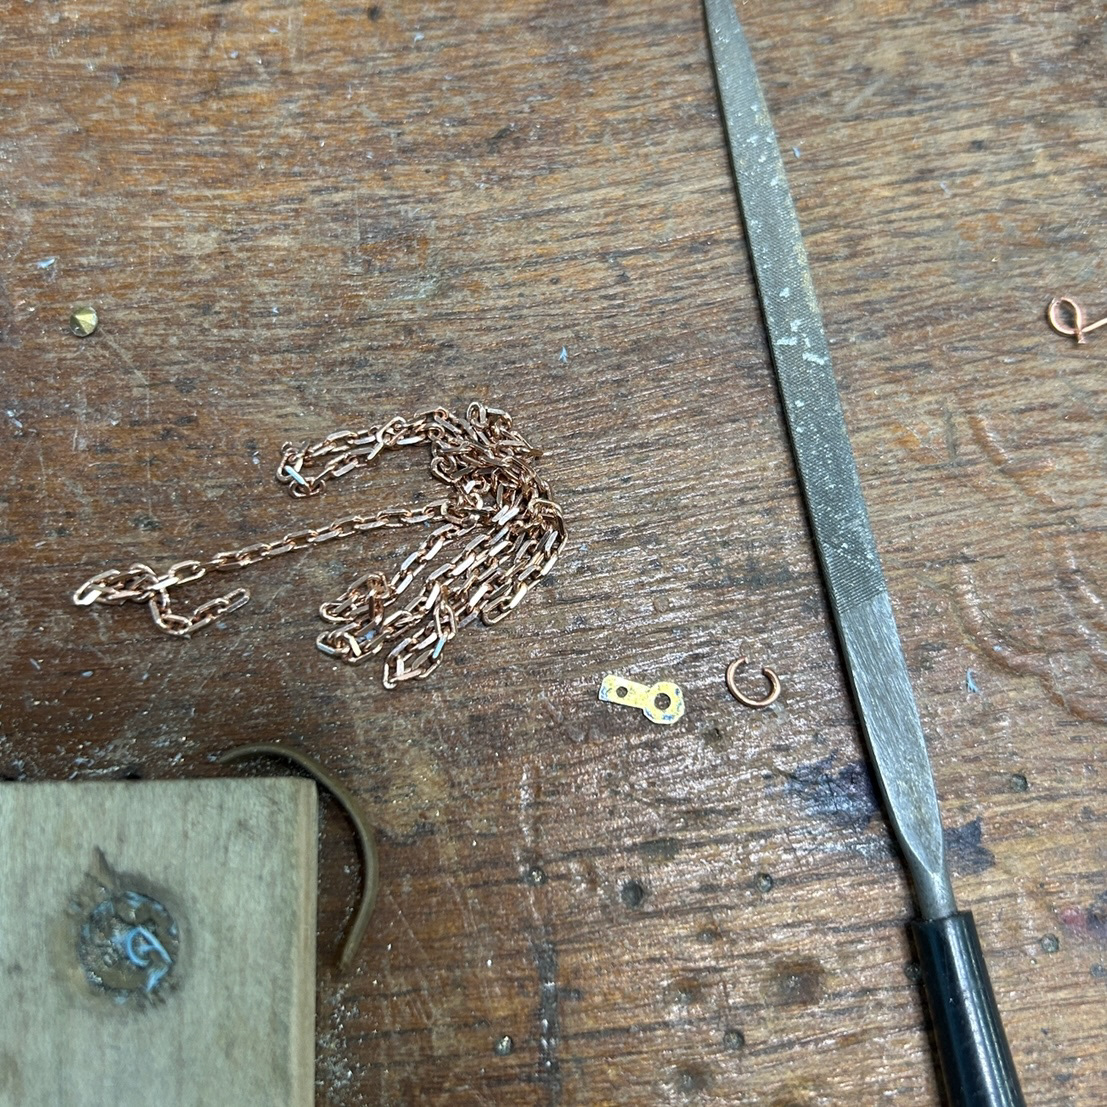
I started by using the pillar drill to make holes of various distances into brass sheet. I then decided on which spacing looked the most balanced compared to the chain. After this, I used a piercing saw to cut out the pieces and cut the chain to slide the brass plate on.
I attempted to solder the chain back together with this brass plate attached, however, this did not work as the chain just melted before the extra easy solder had run completely. I then decided that making a small brass jump ring would be best. This also meant that the colour difference between the chain and the fixing was minimal.